Upcycle Thrift Store Finds for DIY Home Decor Ideas
Budget-friendly DIY decor you can make! Upcycle thrift store finds into beautiful home decor items with our easy ideas.
In this post, I will show you how to upcycle thrifted home decor pieces including an oval framed art piece, a wooden tray, a candlestick, a berry basket, planter pots, and a ceramic bird. You will enjoy these budget-friendly spring home decor projects!
thrift store upcycles
Do you love to shop at your local thrift store? It’s one of my favorite pastimes. Spending the day at the flea market, local garage sales, or an auction is one of my favorite things to do. It’s such a great way to decorate your home without breaking the bank.
Recently, I picked up some great things while out thrift shopping that I knew I could fix up. Let’s take a look at the before images of some of the best thrift store makeovers you’ve ever seen. Stick around to the end of this post and I will share a YouTube video showing all the steps I took to makeover these inexpensive thrift store finds!
The following post may contain affiliate links. That means if you click and then buy something, I will make a small commission at no additional cost to you! Thank you for supporting my blog. full disclosure here.
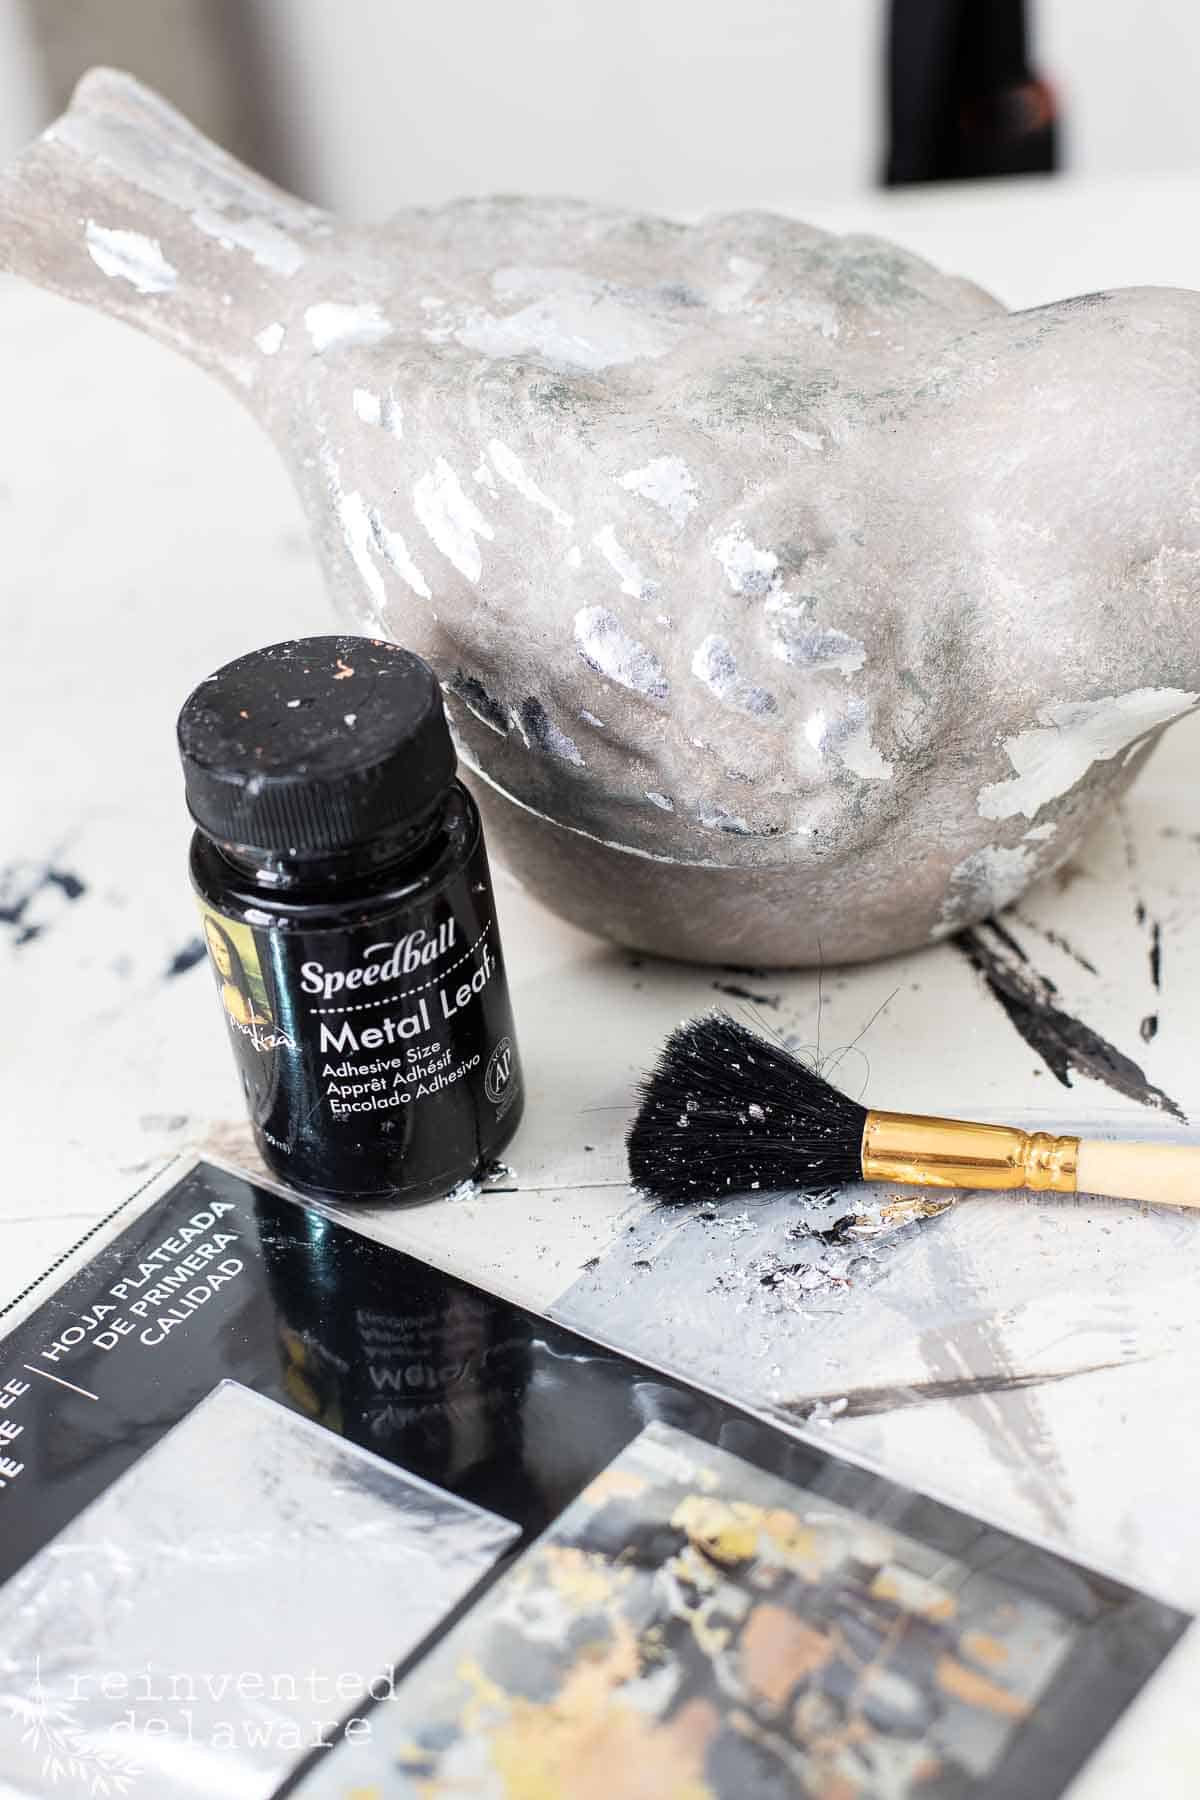
ceramic bird thrifted item
This sweet little ceramic bird was a gift from a friend several years ago. It’s adorable as is but I like to give decor a new look.
While visiting a local thrift shop in town, I came across a smaller bird decor piece. Instantly I thought of the shiny bird I had at home and knew I wanted to make them a pair of sorts. I bought the little bird, brought it home, and then searched for my ceramic bird.
Then I grabbed some chalk paint, of course! The little bird I bought looked like vintage cement with a mossy look and some bits of silver leaf in areas.
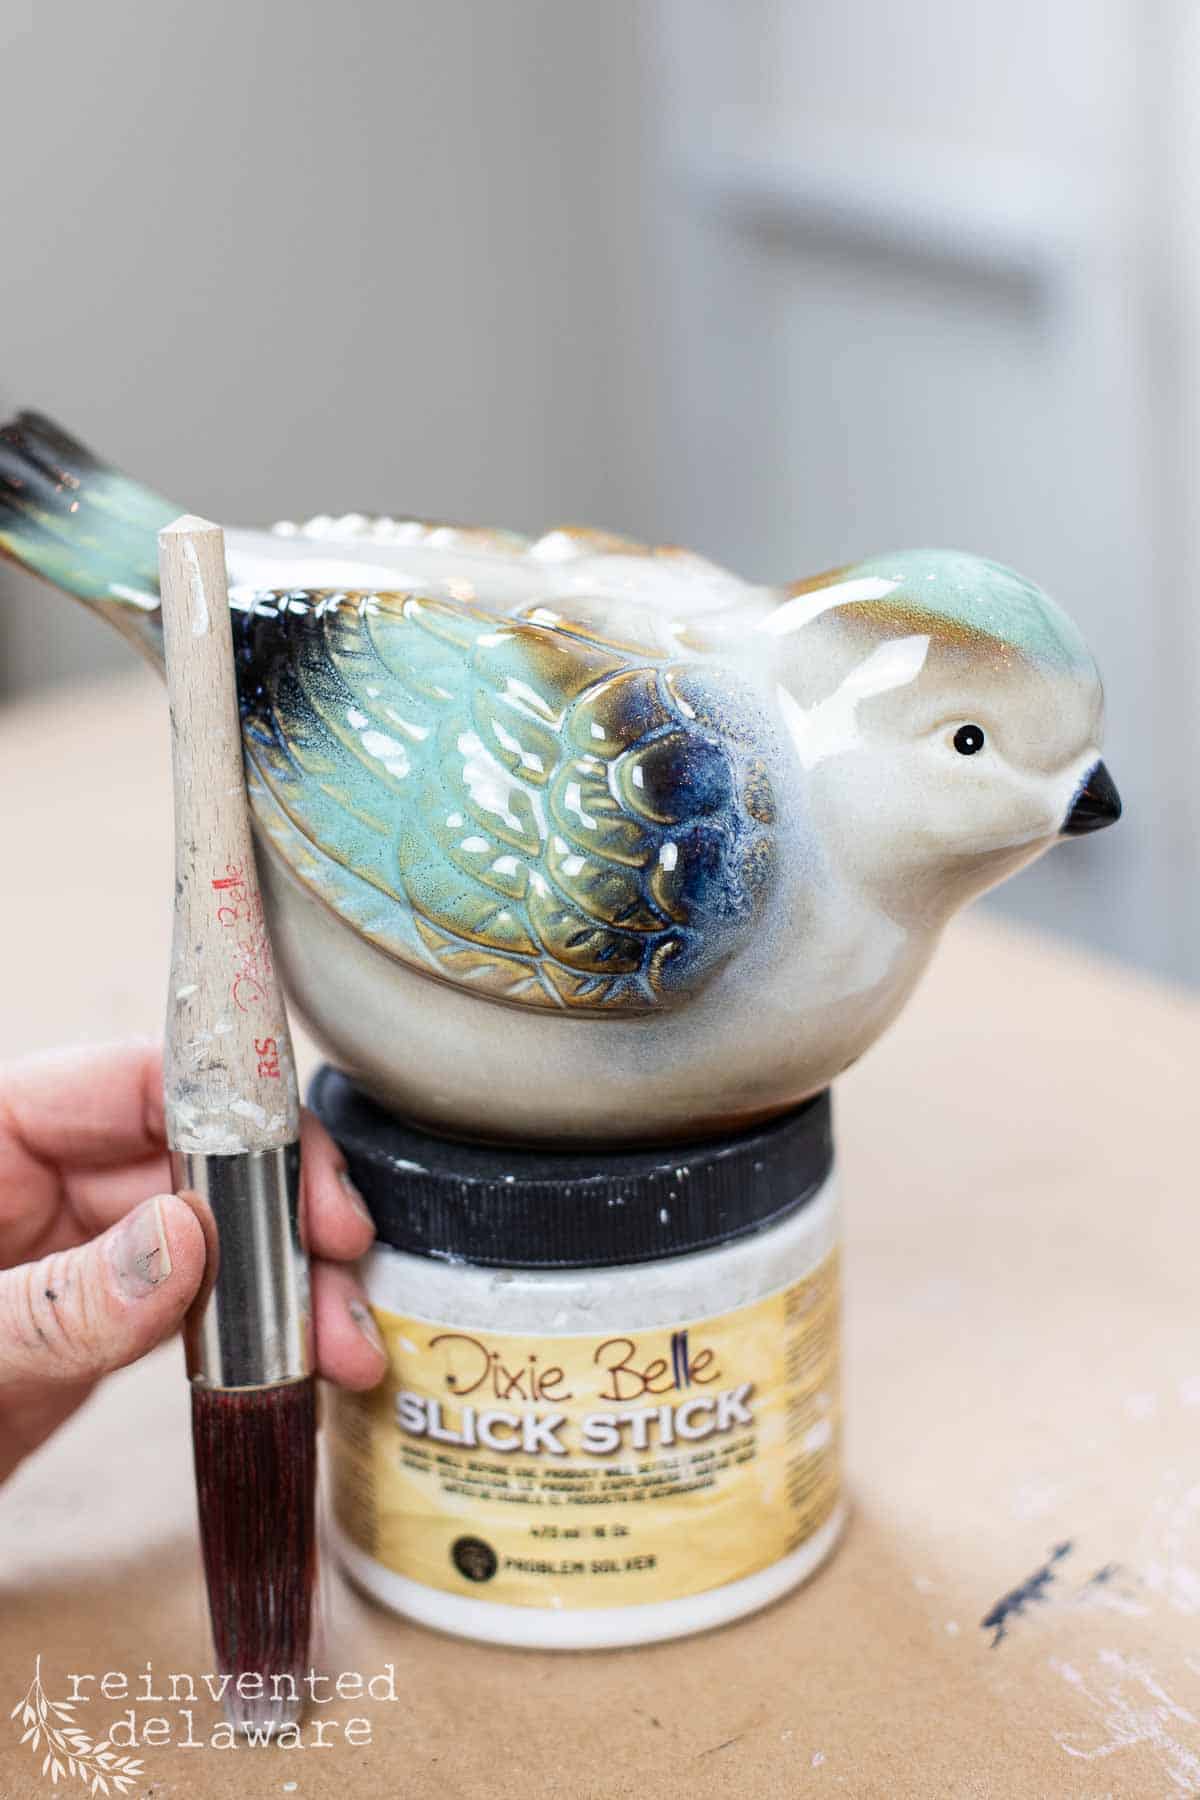
apply heavy-duty primer
First, I painted a coat of a special primer made specifically for shiny surfaces. Slick Stick (renamed to Bonding Boss) will stick to anything and anything will stick to Slick Stick. One coat was all it needed.
apply chalk paint with texture
I dabbed on the paint to give the surface texture. Then I used the same dabbing technique with the other three colors to create a cement look on the surface. It didn’t take much paint to cover the sweet little bird. A little paint goes a long way in this case!
apply silver leaf for vintage details
Once all of the paint was dry, it was time to apply the silver bits to the surface. Using a small artist’s paintbrush, I applied the metal leaf adhesive to the areas I wanted the silver leaf to show. The glue has to dry for about 30 minutes until tacky.
Then it’s as easy as putting pieces of the silver leaf on those areas and smoothing them down. Some spots needed more of the silver leaf so I simply applied more adhesive, allowed it to dry for about 30 minutes, and then applied the silver leaf to those areas.
This was such an easy project. One of the best things about this thrift store makeover is that I have a bunch of the silver leaf left over! It took less than one sheet to create a time-worn look to this ceramic bird. Doesn’t it look vintage to you?
thanks for being here!
I hope you are enjoying this project! Let me know if you have any questions. Or leave me a comment to tell me about your project and ideas!
thanks, Cindy 😀

gold frame wall art
The next project couldn’t be easier especially if you have access to a bandsaw. Fortunately, my hubby looks for an excuse to use his out in the workshop!
This gorgeous frame started out looking pretty rough. The gold was very brassy looking and not in a good way if you know what I mean. It was harsh and plastic-looking in person. The camera doesn’t show it but take my word for it – it looked cheap!

replace the artwork
First, I removed the artwork from the interior of the thrift store frame. That’s when I handed it off to my hubby and politely asked him to use that bandsaw to cut a piece of luan wood.
He used the original artwork as a template and wa-la, we had a new piece! I painted it with two coats of chalk paint and allowed it to dry. By the way, I could have used spray paint, but I like to use a paintbrush and already had this color in my paint stash.
If you don’t have a bandsaw, cut a piece of foam core with an Xacto knife to fit instead of cutting a piece of luan wood with a bandsaw.
add decoupage paper
Next, I applied decoupage paper to the oval-shaped luan wood. This beautiful rice paper is so easy to use and it’s a great way to breathe new life into out-of-date wall decor from thrift store items like this frame.
Before applying it to the newly cut wood, I cut the paper in an oval shape smaller than the wood insert. Then, I used a clear top coat as the glue.
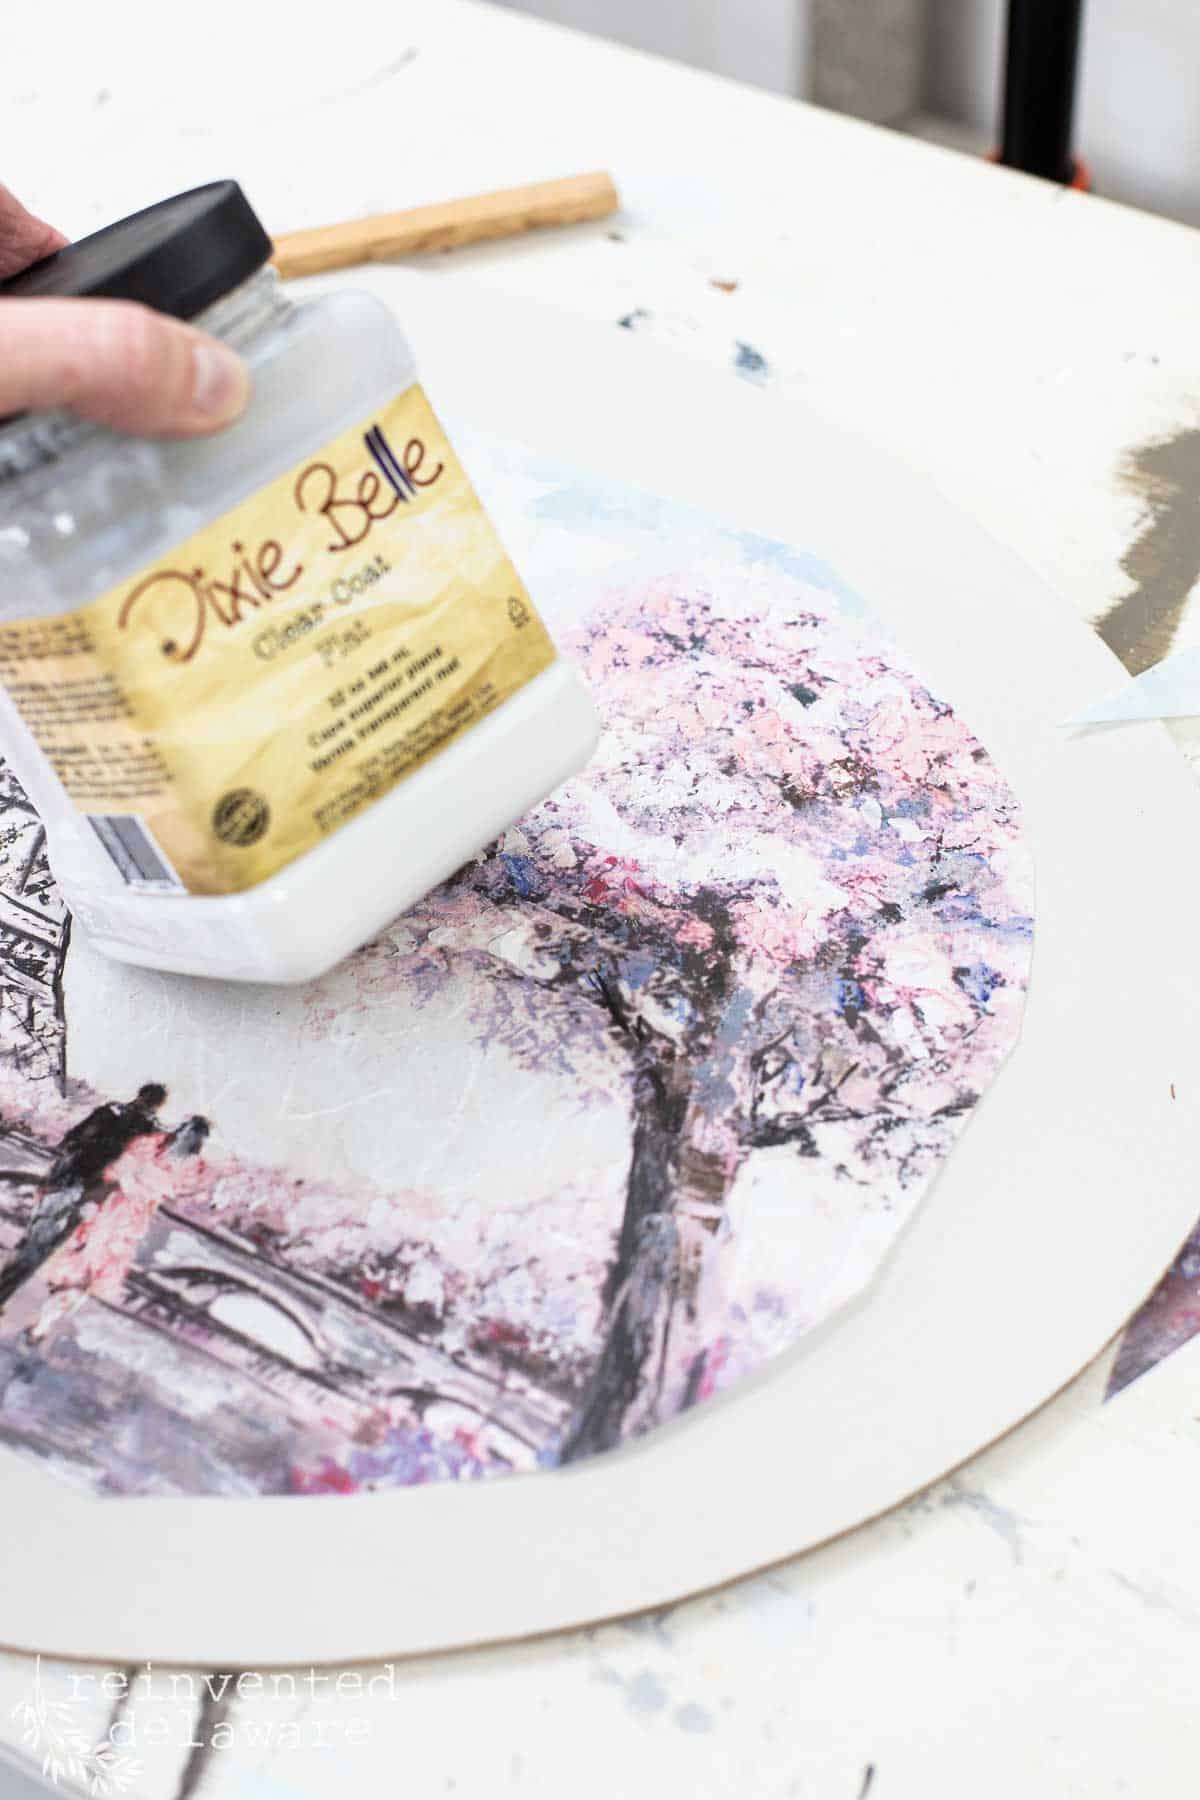
This is an easy way to apply decoupage paper. Paint a thin layer of the clear coat and lay down the rice paper while it is still wet. Smooth out any wrinkles carefully with your fingers. The paper is pretty strong and I have never had it tear. Next, apply a thin layer of the same clear coat to seal it.
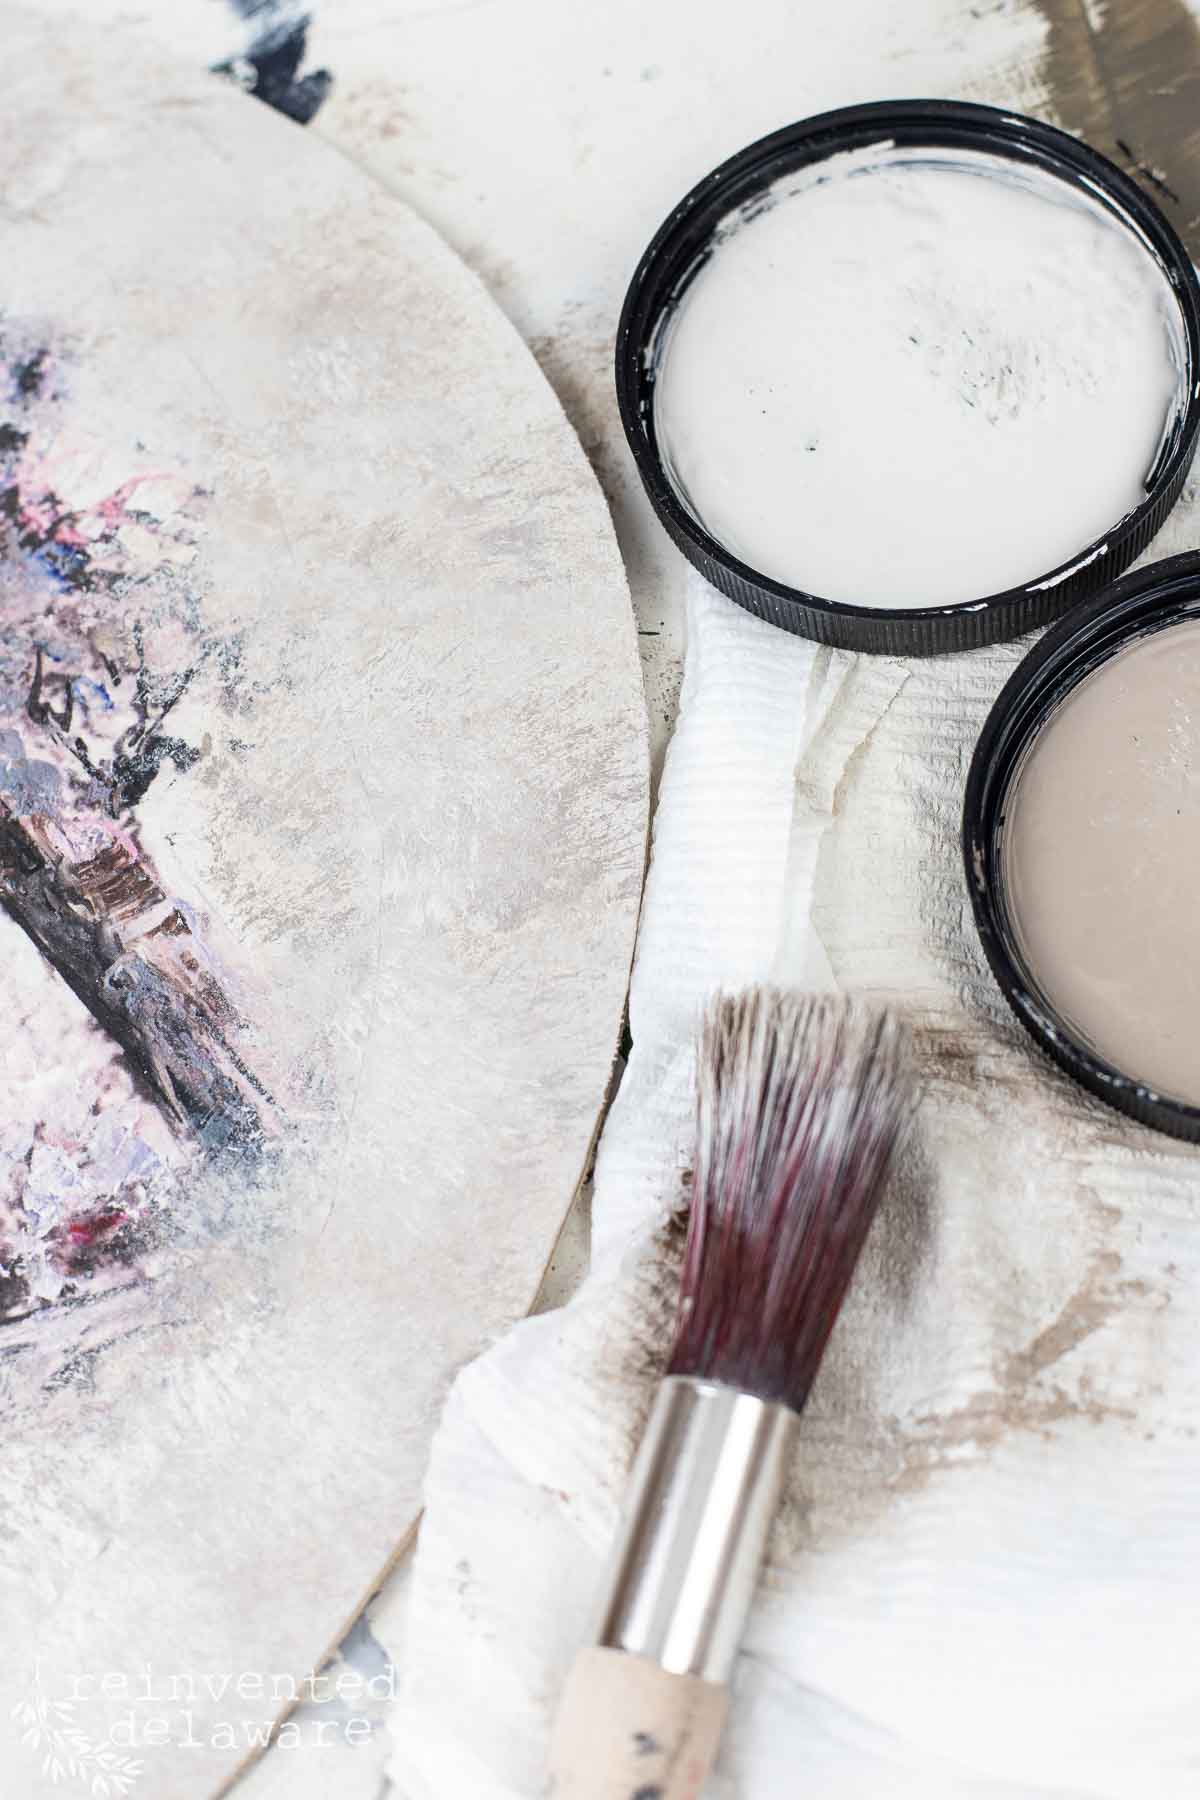
The hard edge needed to be covered. I used the same chalk paint and dabbing technique that I used on the ceramic bird around the perimeter of the paper and wood to cover the edge. After several trips around the oval and the dabbing-paint method, you couldn’t see the hard edge! It blended in with the wood background perfectly!
upcycled vintage frame look
To give the frame a vintage look, I first painted two coats of black chalk paint and allowed it to dry completely. Once it was dry, I applied gold gilding wax to the high places. This created the perfect aged look for this frame.
You can use this method on ugly plastic frames, outdated light fixtures, and other unique items to create gorgeous decor from thrift store treasures. One person’s trash is another person’s treasure and this frame is one of those unique pieces you won’t find at your local big box store!


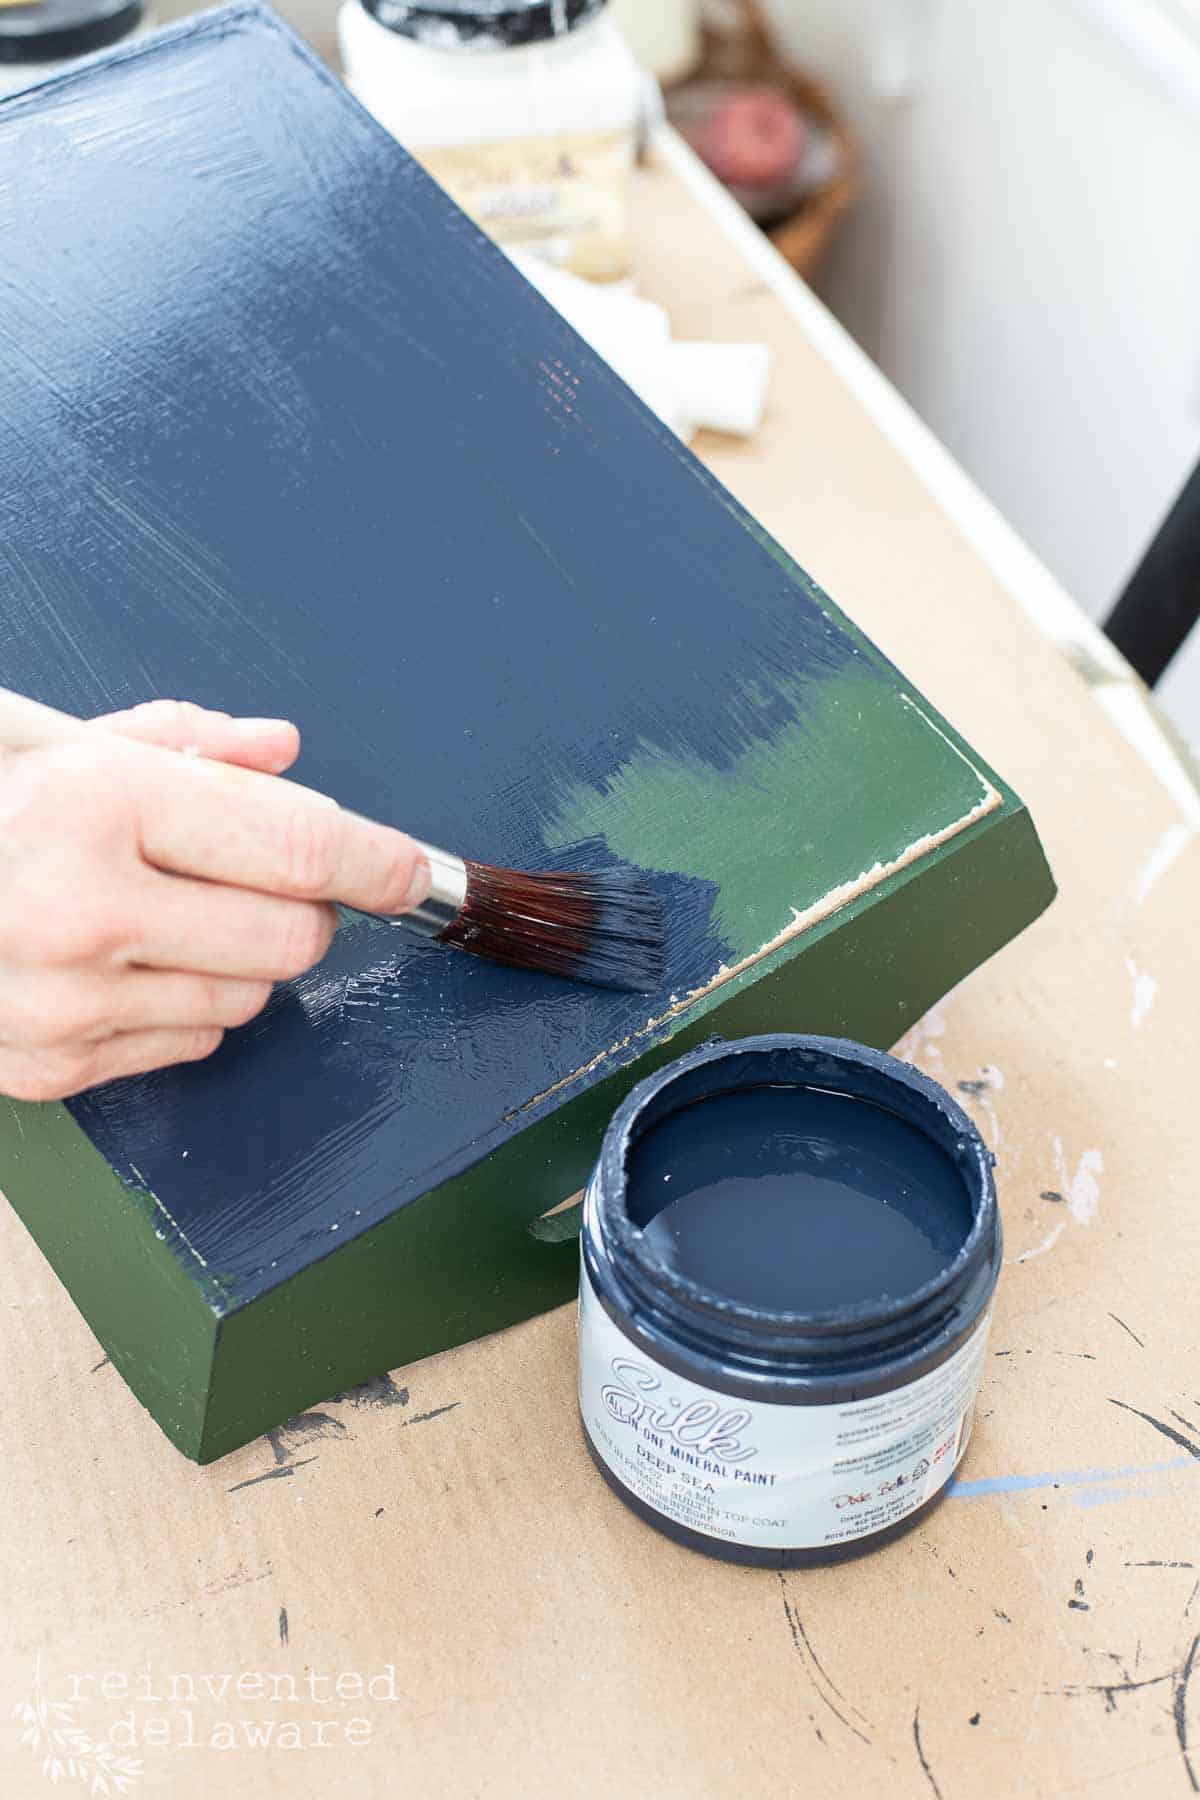
flower pots from the second-hand store
Have you seen these flower pots in thrift stores? I run into them all of the time and they are usually ugly. The larger one I recently bought but the smaller one I’ve had in my stash since last year.
They needed a fresh coat of paint so I used the same method as I did on the ceramic bird. Three different colors of chalk paint and boom, I had concrete-looking flower pots!
I shared this project on my YouTube channel and a viewer said it was called an urn. Let’s go with that!
Do you like the new look? Do you have a method to create a concrete look? Please share it with me in the comments so others can learn and benefit!


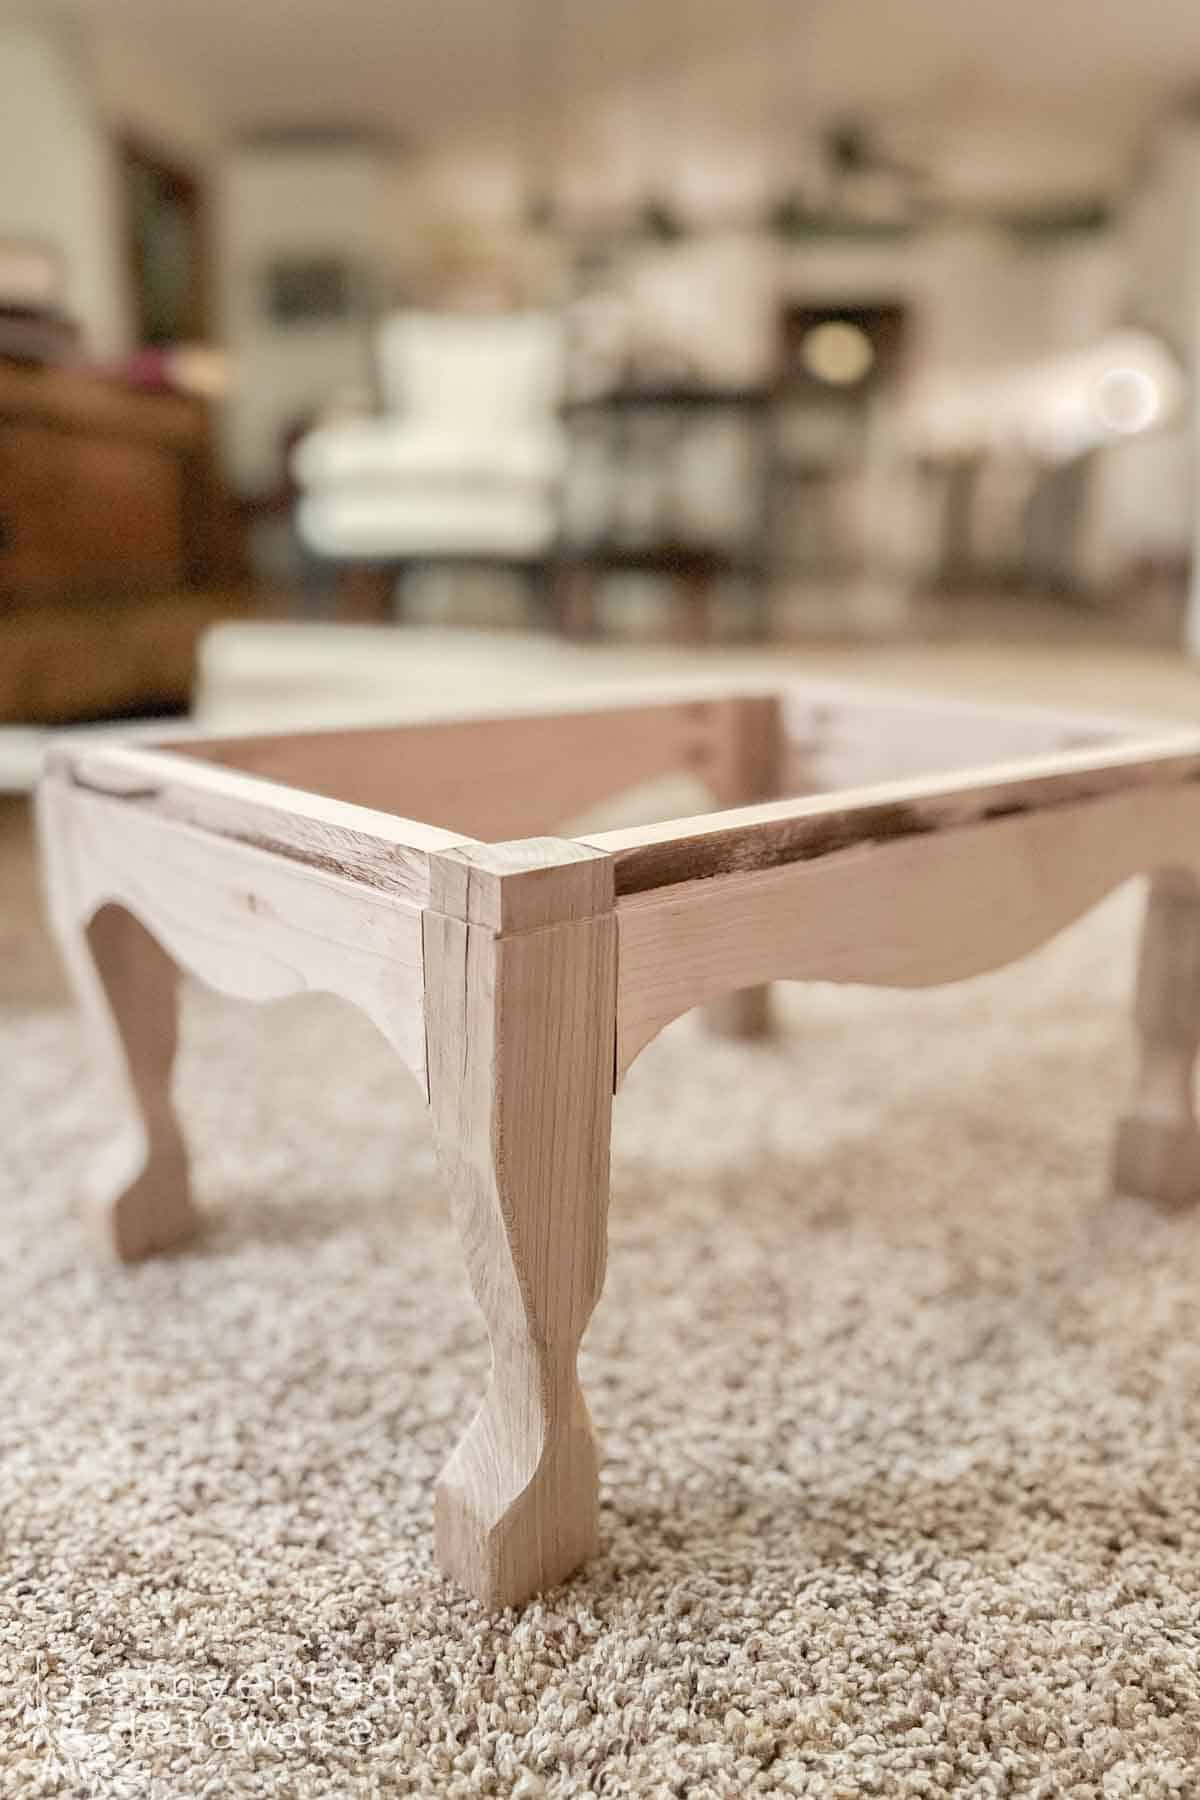
footstool makeover
This sweet little footstool has been in the back of my stash for a long time. We bought is for about $1 at an auction. Auctions are a great place to find all sorts of old stuff like this footstool.
Even though it looked so sad, it’s one of those furniture pieces that I can’t turn my back on.
Until today.
I started to remove the old upholstery tacks and staples, but they were so rusted, they wouldn’t budge. I asked my hubby to remove the legs and throw out the rest of the footstool. The next I knew, he brought in a completely new footstool frame! The legs were in worse shape than either of us thought, so he decided to use it as a template.
After cutting the pieces using his band saw and some hand-carving tools, he assembled it and brought it in. Now all that’s left is to reupholster this footstool.! I’ve shared a couple of footstool reupholstery projects here. I will be recovering this one during a YouTube video. Be sure to subscribe to my channel so you don’t miss it!
By the way, I didn’t grab a before shot of this pathetic little stool before he rebuilt the whole thing but you will be able to see it in the YouTube video I made for you! I will link that video later in this post!
easy thrift store tray project
These adorable thrift store trays are easy to find when you are out thrift shopping. I see at least one every time I’m at a thrift store! These secondhand items can look completely different with a little imagination.
First, I painted on one coat of regular primer to cover the original snowman design. Then, I painted two coats of paint that has a built-in primer and sealer. Hindsight, I didn’t need the additional coat of primer. Two coats of this type of paint would have been plenty.
Once the paint was completely dry, I added peel-and-stick wallpaper. This snowflake design will carry me through the winter. I have some other peel-and-stick paper that I could change as the seasons change.
Peel and stick paper is a great supply to have on hand for thrift store DIY projects. Especially if you sell your items in a vendor booth. These trays always sold well for us when we had our vendor booth at a local vintage shop.


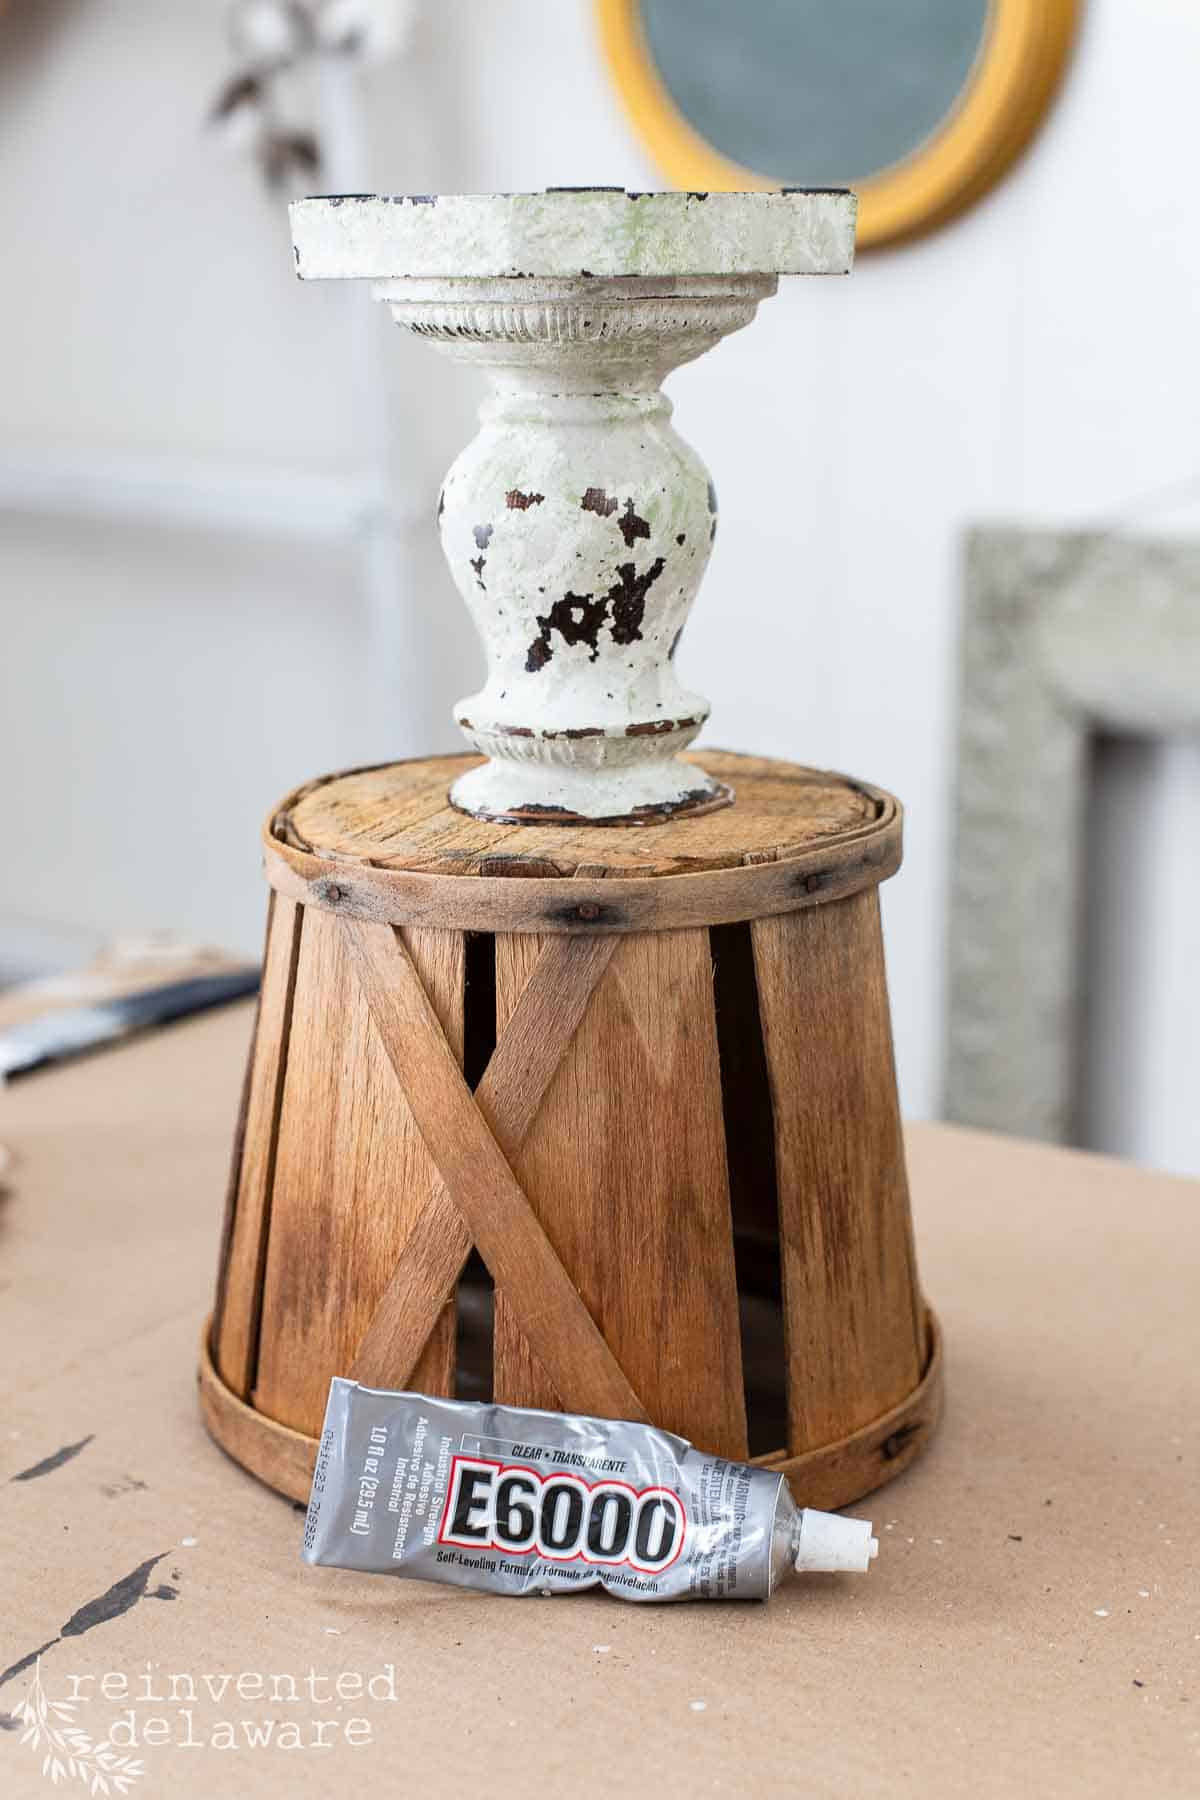
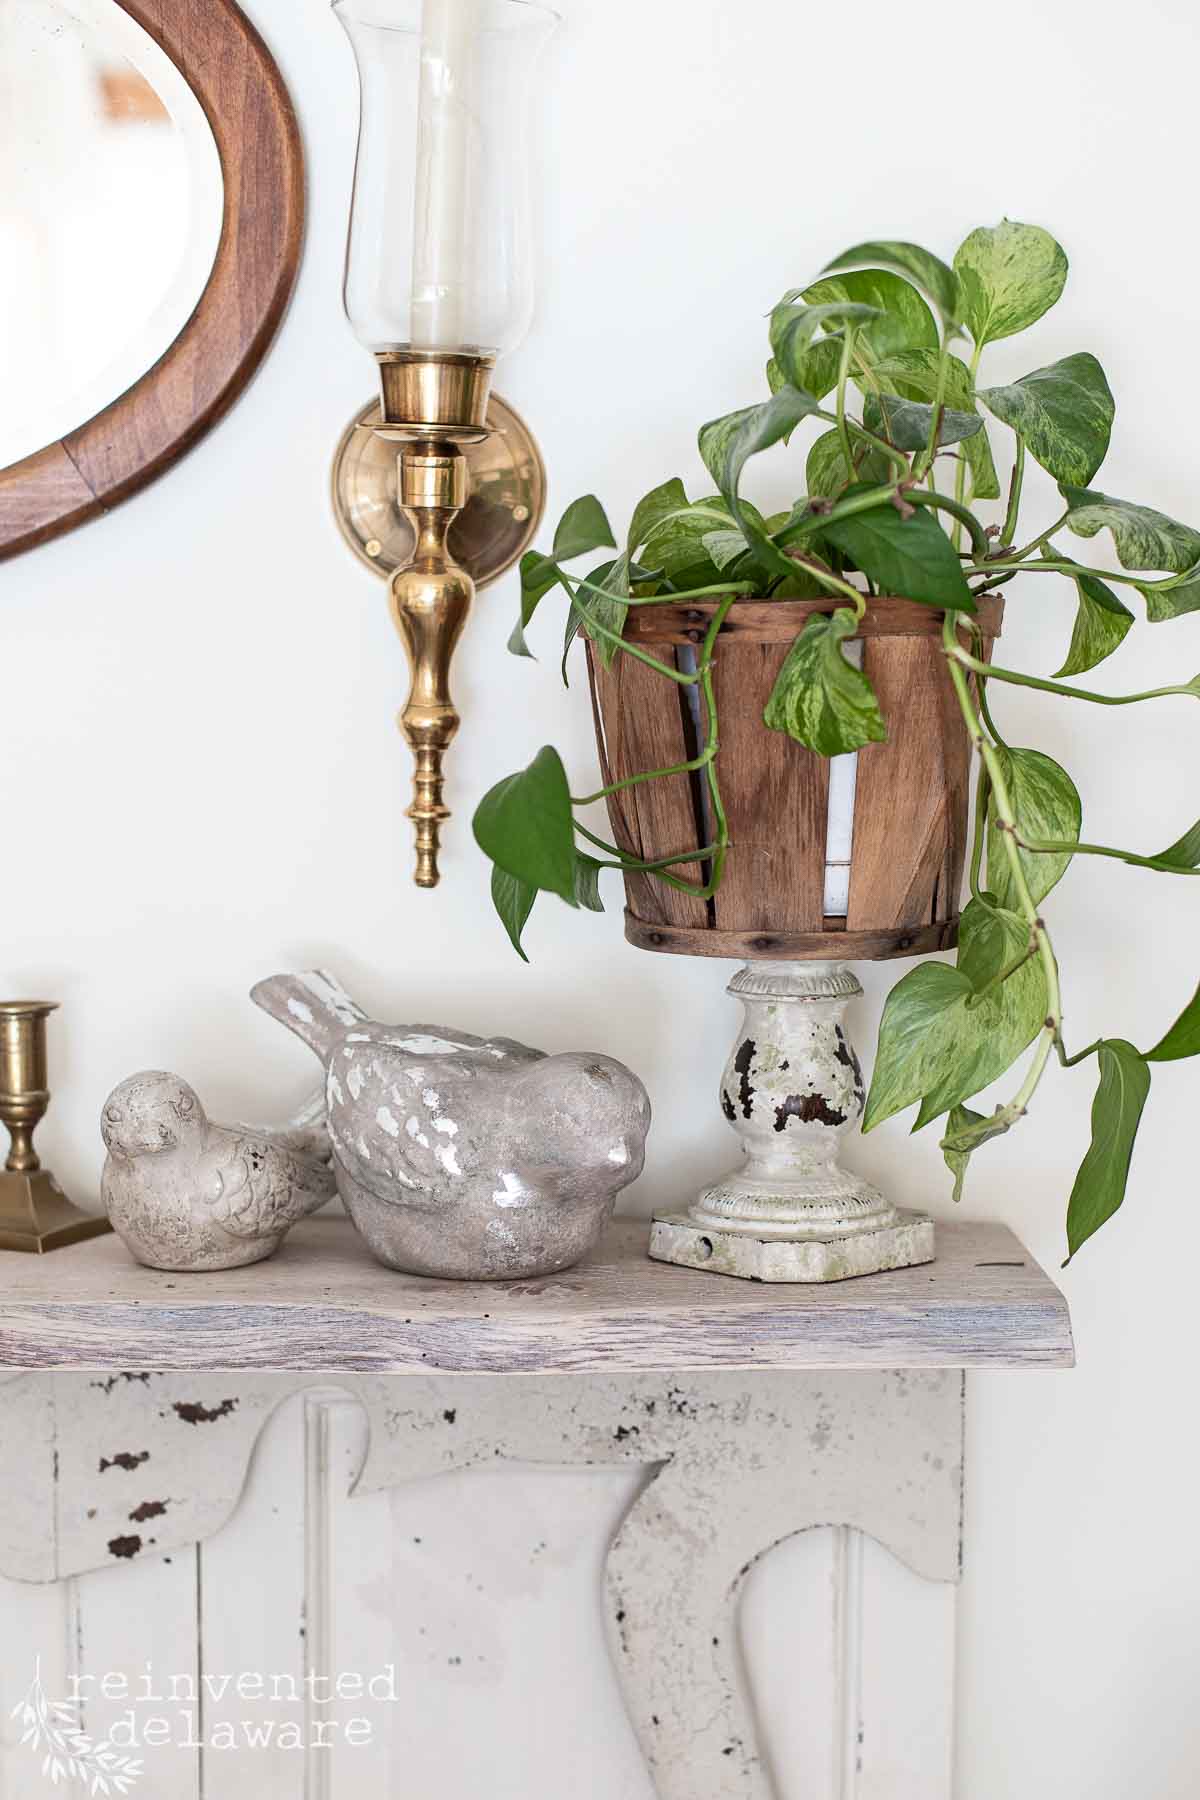
common thrift store finds
Have you seen a single candle holder at thrift stores? I’m sure you have seen many many baskets too! Let’s take these pieces and give them different purposes! Paint the candle holder any way you like.
Use a coat of spray paint or a paintbrush with any method you like to paint the candle holder. Clean the basket with bleach water and allow it to dry. Glue the two pieces together using E6000 and allow the glue to set overnight.
The next day, you have yourself a unique plant holder!
YouTube video
Tap to watch the YouTube video I made for you! I will take you step by step through each DIY project!

supplies
- Badlands Chalk Paint (dark tan)
- Glacier (off-white)
- Acadia (green)
- Anchor (black)
- Deep Sea (navy)
- top coat
- Paris Decoupage Paper
- Slick Stick (New Name: Bonding Boss)
- synthetic paintbrush
- Gilding Wax
- Metal Leaf Adhesive
- Silver Leaf Sheets
repurposed thrift store makeovers
I’ve gathered more upcycle projects for you! I’m sure you will enjoy each one and will be inspired to repurpose flea market finds for your home! Decorating on a budget with a spark of creativity to boot! That sounds like a great way to spend the day!
Here are the projects!


Thanks for joining our journey!
Thanks so much for joining us for this post! Join our journey so you don’t miss any of the fun projects, tutorials, and inspiration that we share with you each week! You can follow us on Instagram, Facebook, and YouTube. We share even more inspiration on Pinterest!
click below to purchase supplies!
Visit my Amazon Storefront!
Click the button below and head over to our online shop on Amazon!


Cindy Rust
Cindy has been decorating her home with thrift store finds for 40 years. She is an avid thrift store shopper who loves to makeover the items she finds into vintage-inspired home decor and furniture. When she isn’t thrift shopping or painting a piece of furniture, you can find her making homemade butter, working in her garden, or painting with watercolors.