
19+ Brilliant Upcycled Planter Ideas
Give your plants a stylish and sustainable home without breaking the bank! This collection of 19 upcycled planter ideas will inspire you to see everyday items in a whole new light. From repurposing household containers to breathing new life into forgotten finds, get ready to unleash your creativity and add a unique touch to your indoor and outdoor spaces with these fantastic DIY projects.
In this post, I will share where to find planters to upcycle, supplies you need for the DIY project and tips to repair any damage to the container! As a bonus, I have a tip for you that will make this planter easy to move around once it is filled with dirt and plants!
I will also share creative ways to upcycle and repurpose unique items into outdoor containers for plants! As a bonus, I have included a video tour of our backyard patio area!
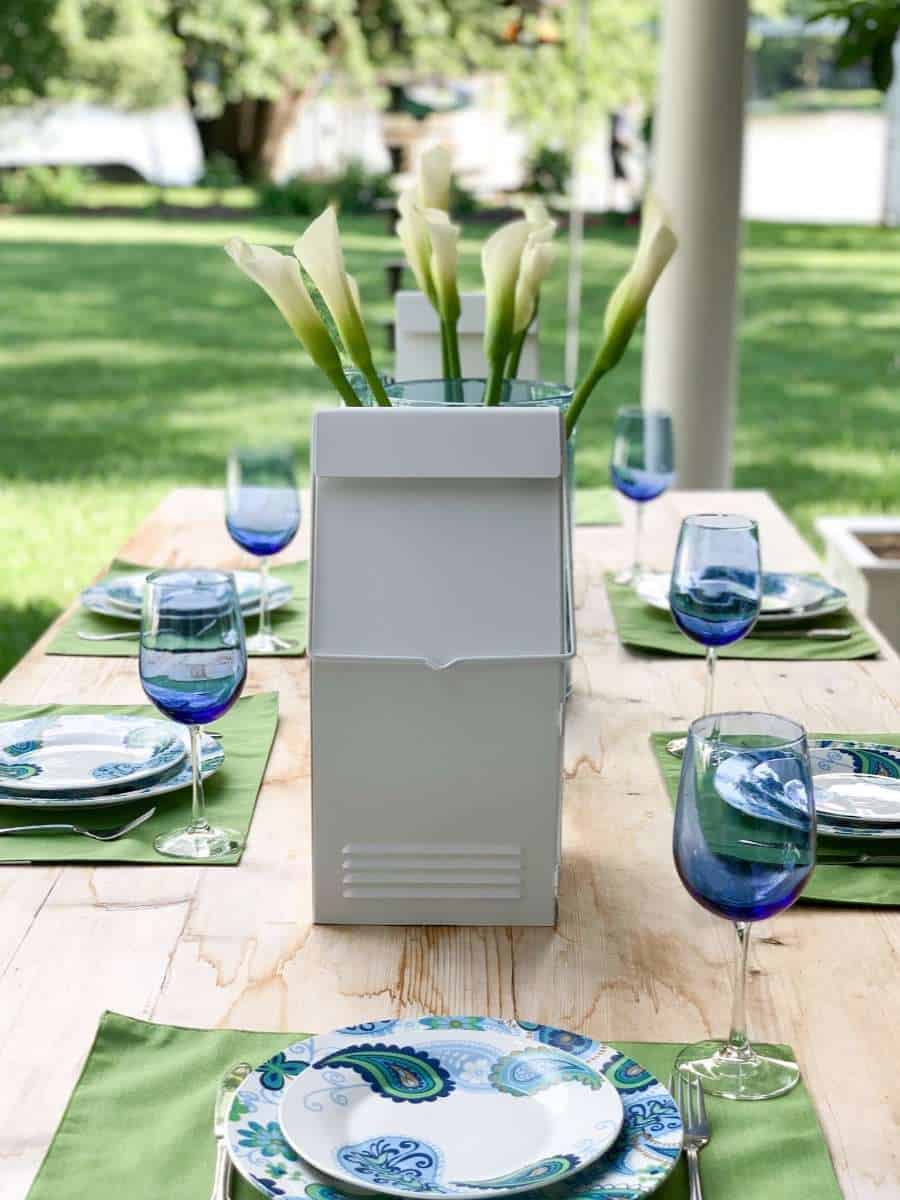
create beautiful outdoor spaces with upcycled planters
Our back patio has needed an update and that includes new planters. Or in my case, old planters that have been given new life. We avoid paying full price for new items. They are too expensive!
You can find outdoor planters at yard sales, flea markets and auctions. People get tired of looking at their own and want new so they get rid of the old plant containers! It is so easy to make them look new again!
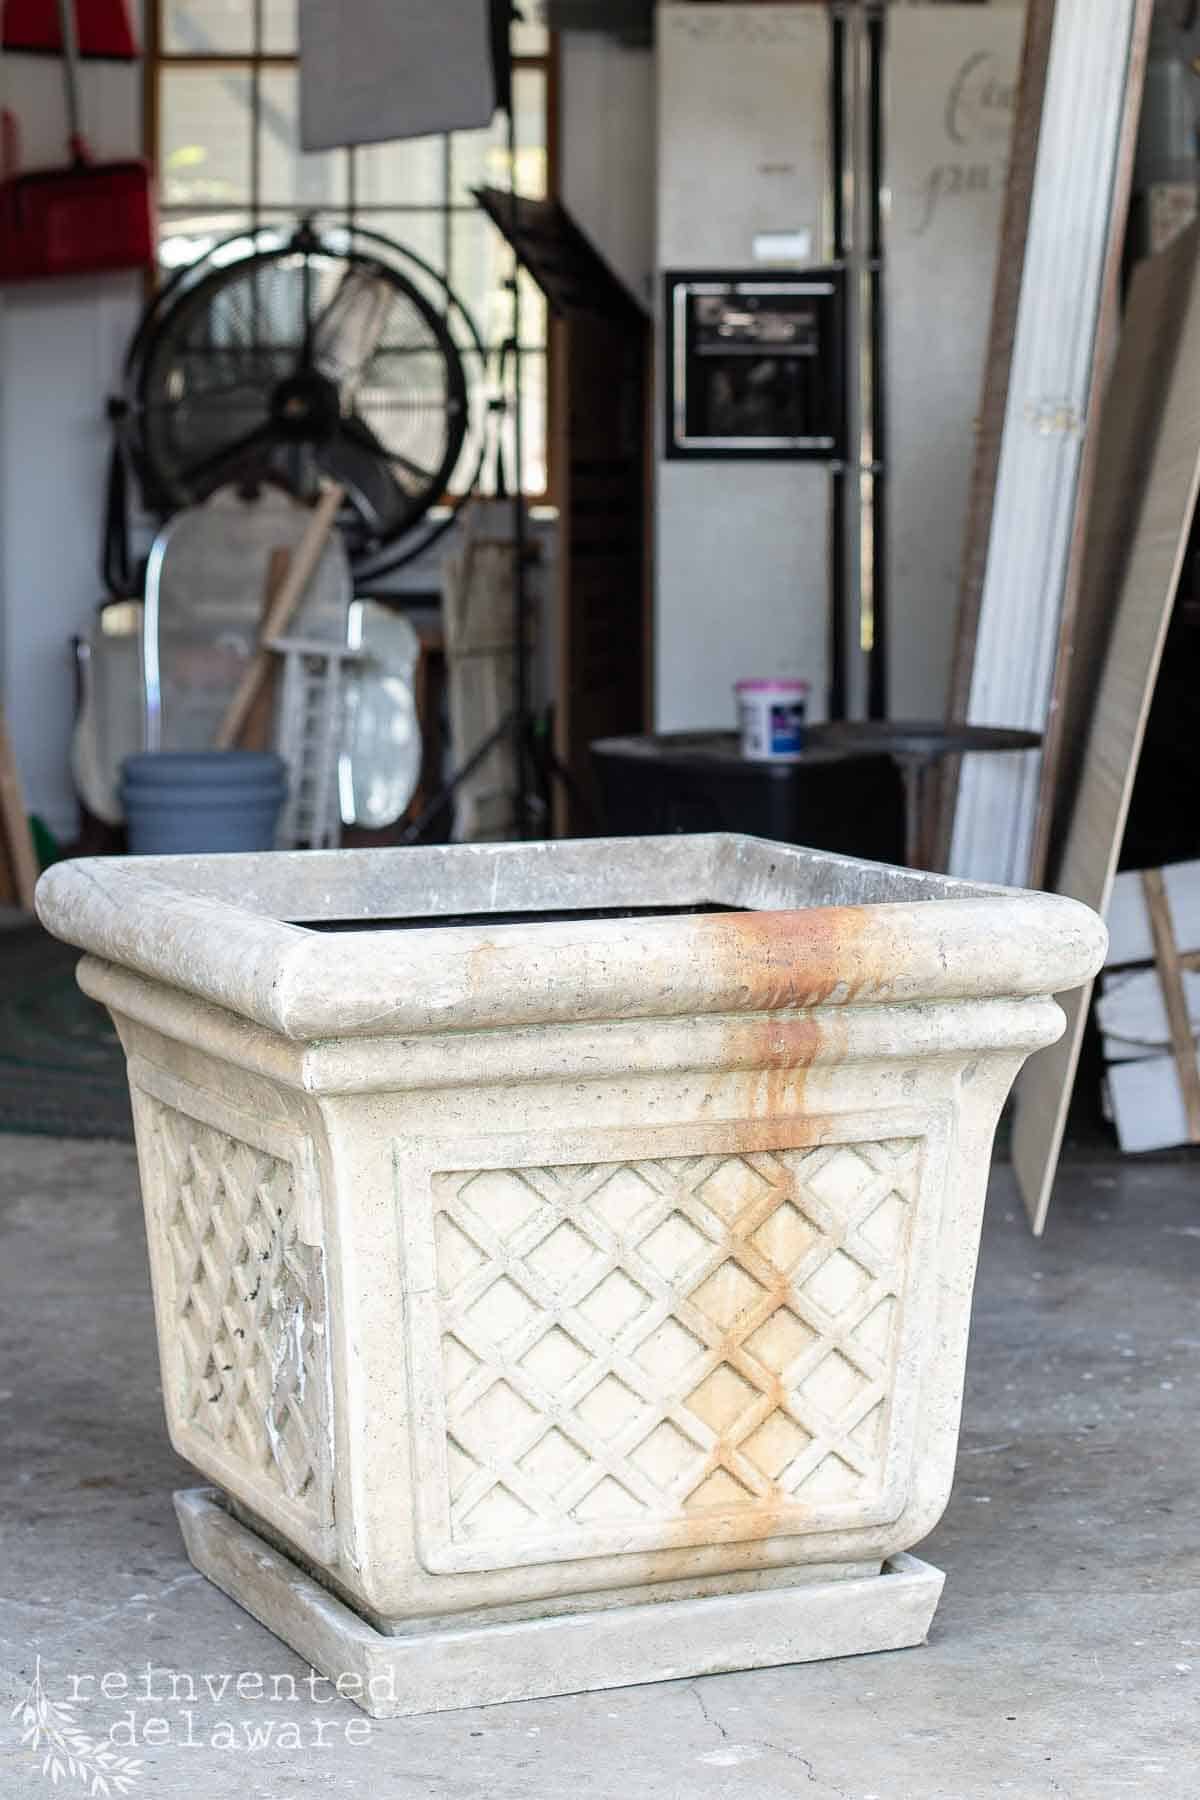
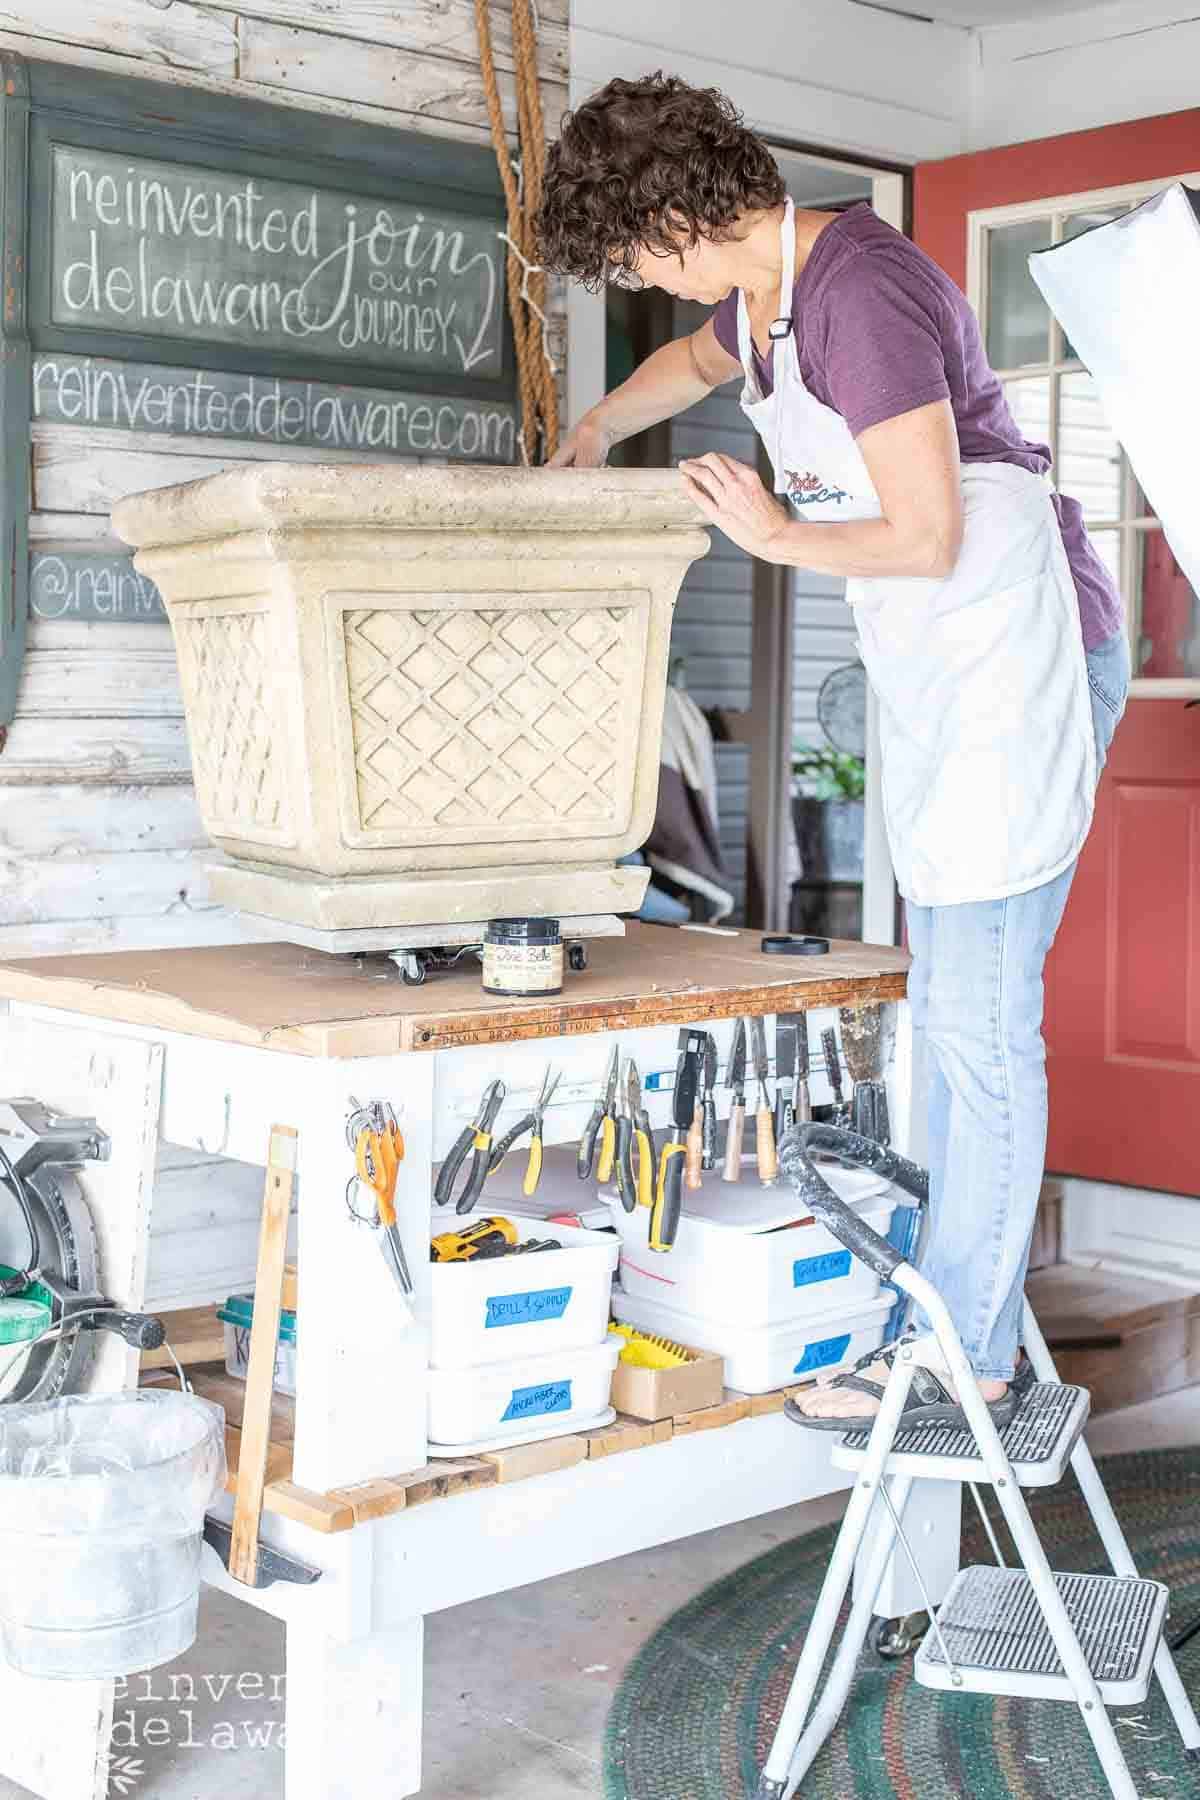
I’ve been talking about it all winter so when my hubby went to the auction on his own a couple of weeks ago and saw so many old items, including this outdoor planter, he knew he should bring it home! Especially when he won the bid at only $2!
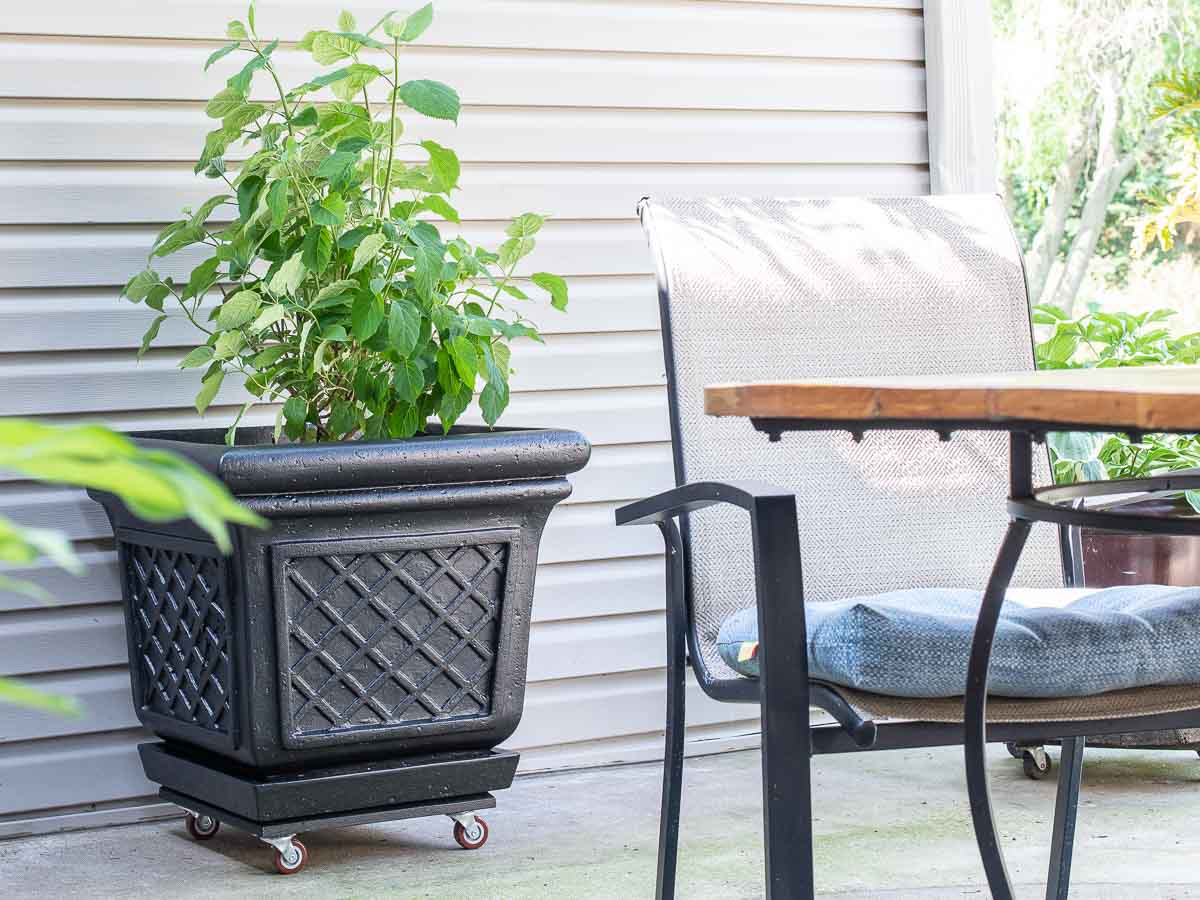
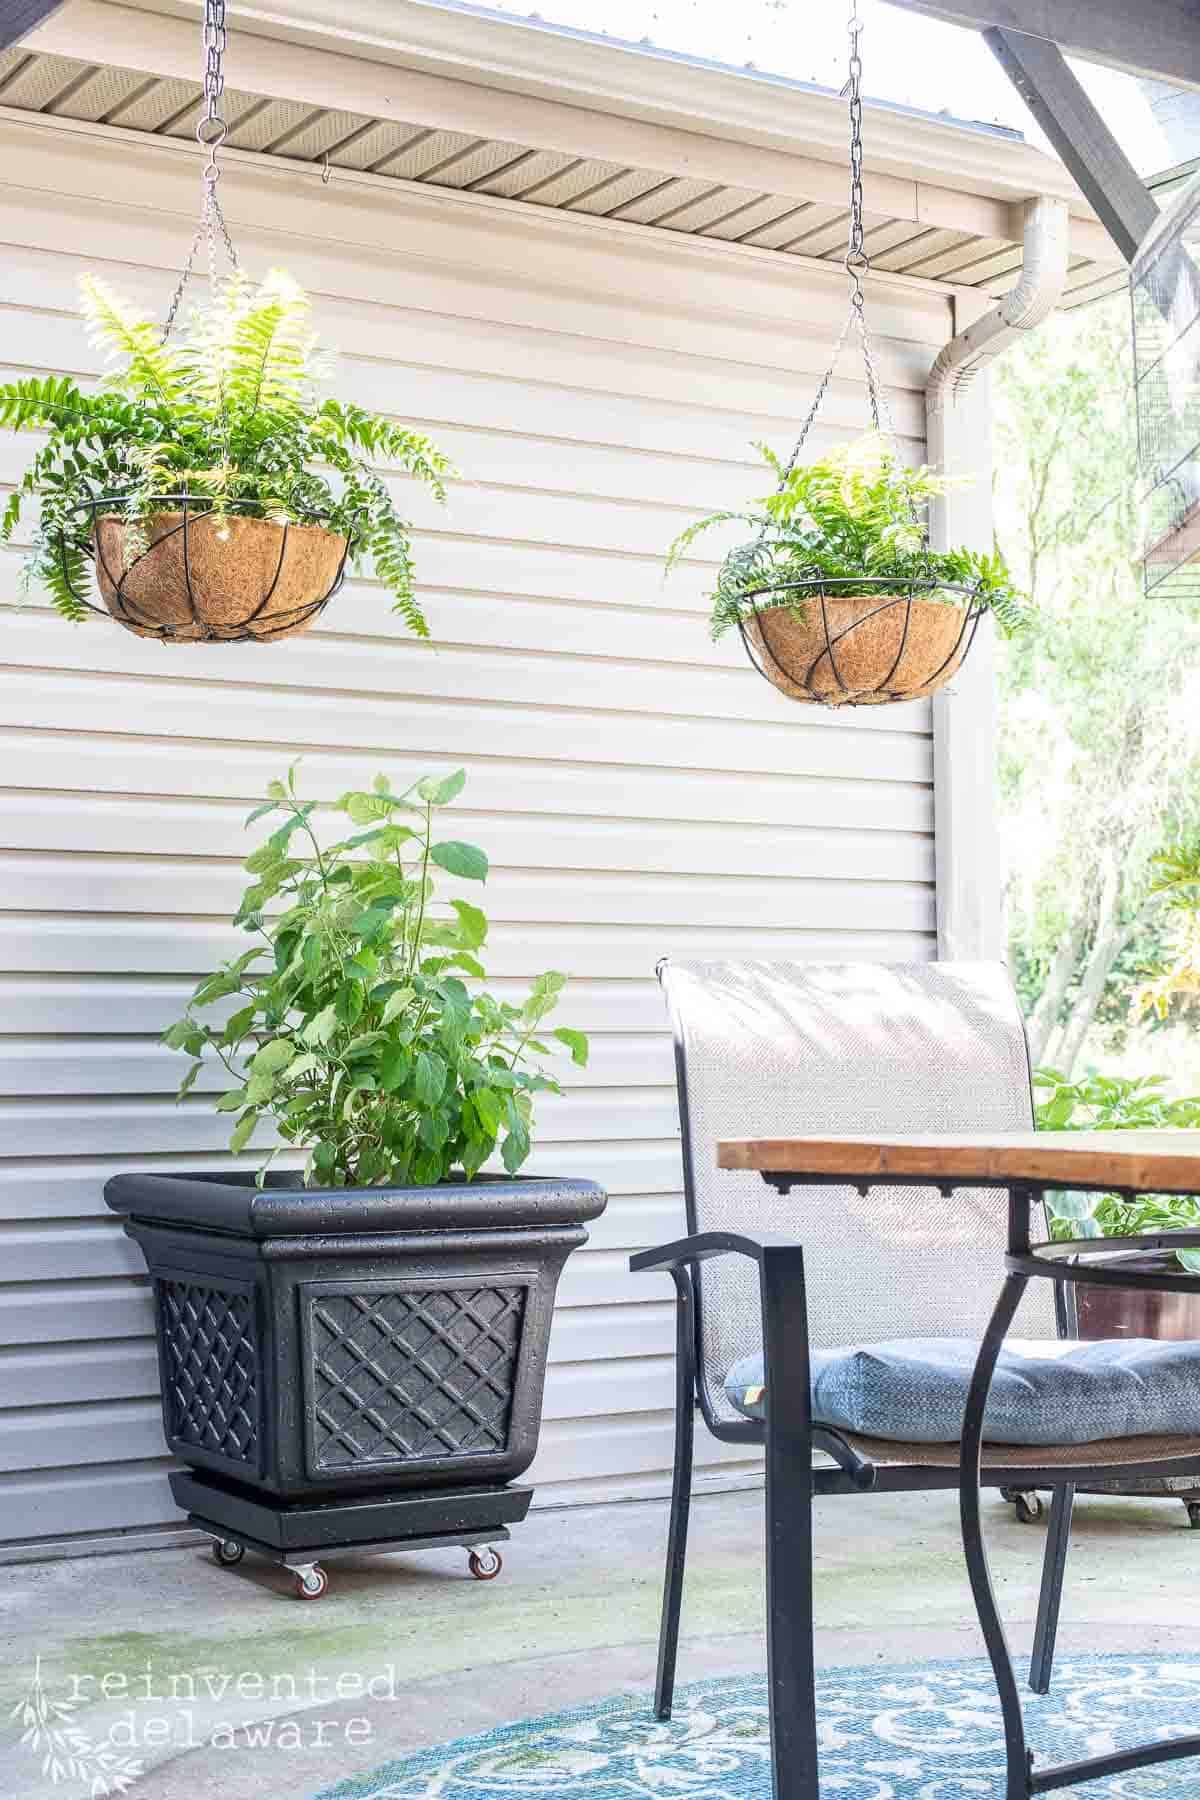
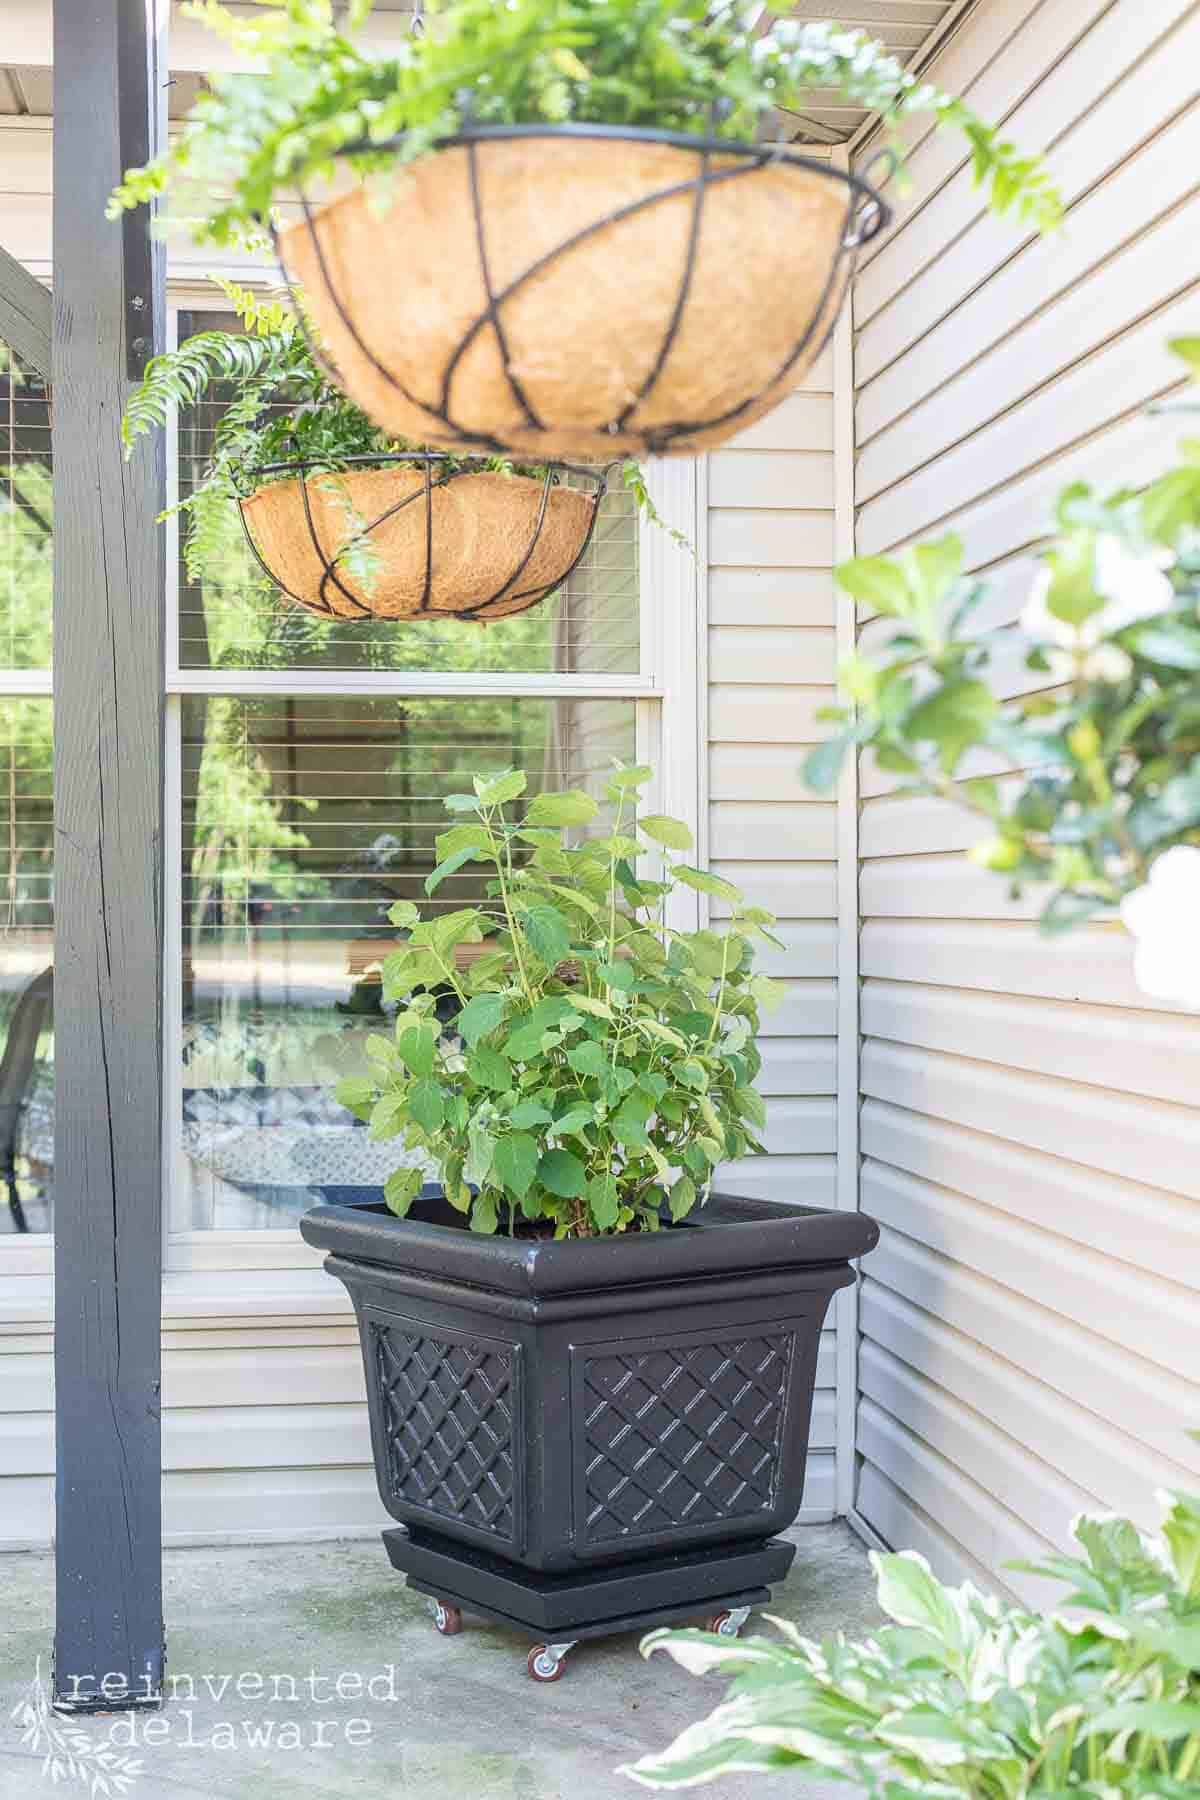
Our back patio would be a great place for this planter – it is pretty large measuring about 24″ all the way around. I know just what I will plant in it! And the planter is the perfect size for our back patio!
diy upcycled auction find planter box
The resin outdoor planter had a big crack in the side but I wasn’t worried about that. We don’t mind repairing pieces when we upcycle and repurpose items we find at yard sales, auctions, and flea markets. These large planters go for big bucks brand new so a few repairs don’t bother me!
Gorilla Duct Tape on the crack is the perfect way to seal the damage. This tape is really amazing and adheres to surfaces great. This large planter has plenty of drainage holes and doesn’t need any more!
The resin container was pretty dirty and it had a big rust stain on it. I’m not sure how a rust stain got on this piece since it is made of resin but nonetheless, there it was! That was the least of my worries.
afforable upcycled mobile planters
The first concern I had with this unique planter was its weight once it was filled with garden soil and the plant that I want to add to it. There would be times in the year when this huge planter would have to be moved.
Here is an easy project idea for a large planter like this one: add casters. Yep, it’s that simple. Adding casters is a great idea for heavy planters like this one.
In fact, I would put casters on just about anything including a coffee table we made from a dining room table!
Attaching them before adding soil and plants is an excellent way to move this planter around your patio when you want to change your patio decor and furnishings around!
This easy DIY project will save you so much frustration in the future!
supplies
The following post may contain affiliate links. That means if you click and then buy something, I will make a small commission at no additional cost to you! Thank you for supporting my blog. full disclosure here.
step one: add a new base to outdoor planters
Here are the steps I used to add casters to this large planter:
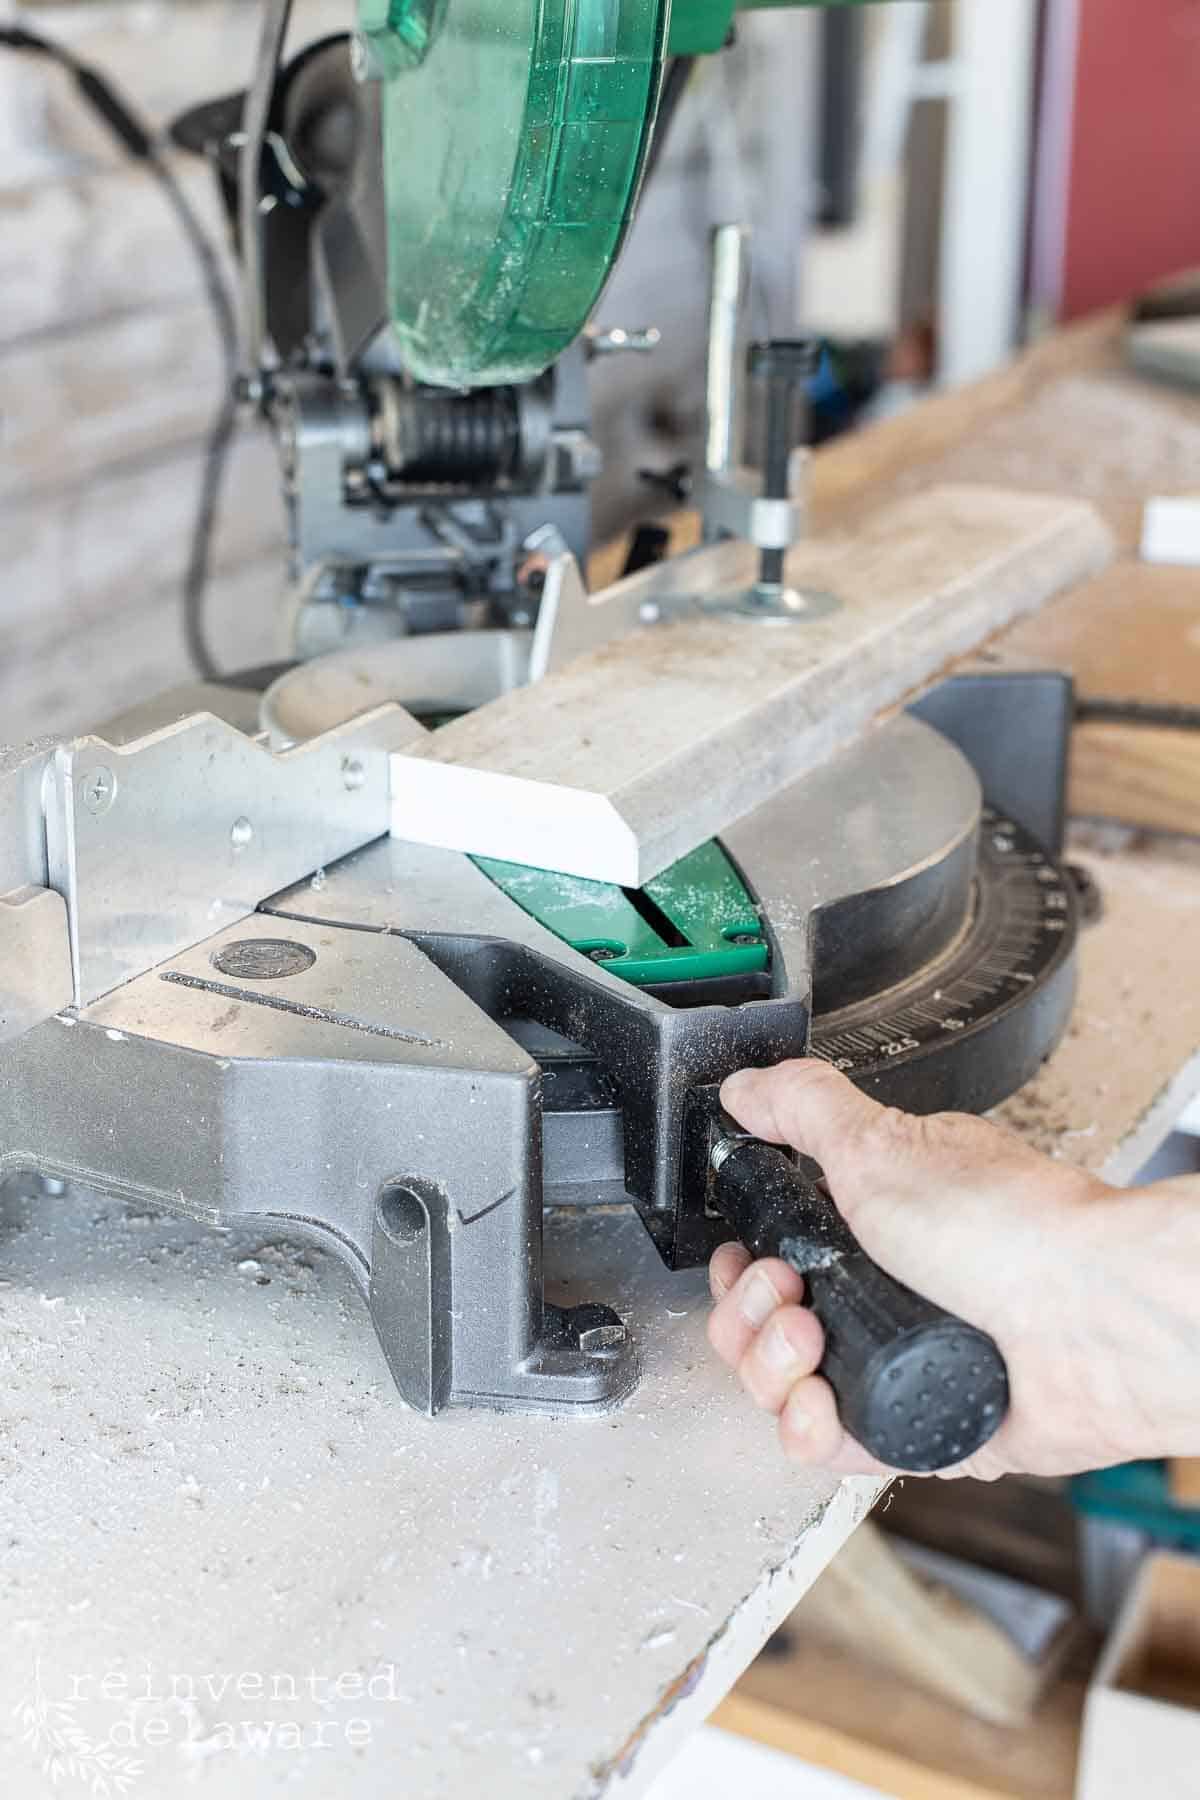
1. Cut reclaimed composite decking material into the lengths needed on the bottom of the planter (someone gave us a couple of composite decking boards left over from their DIY deck project but you can also purchase a board at your local box lumber store.)
2. The boards can be cut to create a butt joint. These cuts are simple and will serve the purpose. I wanted to try my hand at mitered corners so that is how I cut my boards! My chop saw swings from one side to the next, making cutting these 45* angles easy. BTW, I didn’t take actual measurements. Instead, I put the board in the area where I wanted it to be and then marked it.

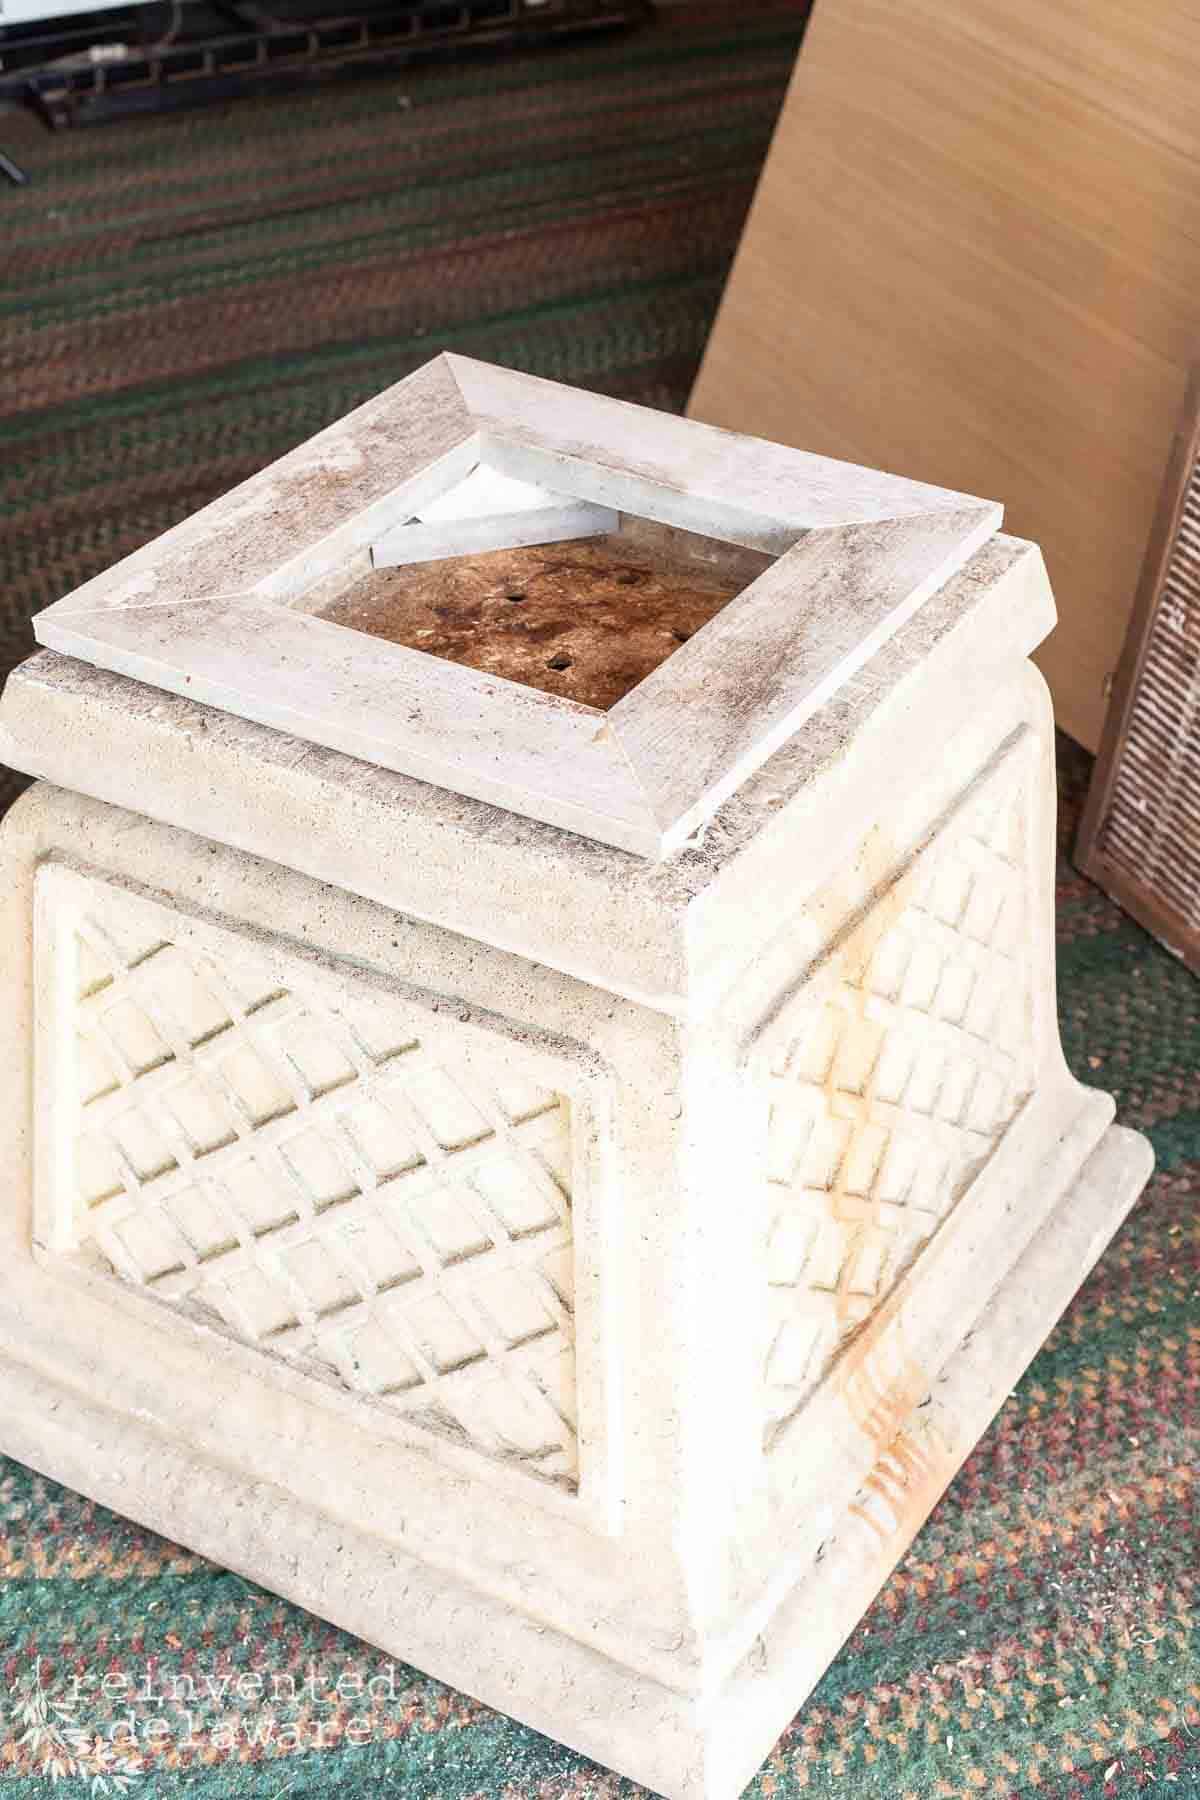
3. Use scraps of wood to support the new boards in the recessed areas. My planter did not have a flat bottom so I had to compensate by placing little pieces of the composite boards in the corners. Let me mention, I wanted to leave the underside area fairly open so that excess water can drain properly. Plants should never sit in water!
If you have a wooden planter box, you will not need to add a base to it as I did for this resin planter! Simply attach the casters directly to the wooden bottom!
4. Hubby came home just as I was at this point in this upcycled planter project so he lent me a hand. We glued the four miter-cut pieces to form a square and then clamped it while we had dinner. After dinner, we headed back out to my small garage workspace and used the same glue to attach the new frame to the underside of the planter. We placed something heavy on top and allowed it to dry overnight.
step two: paint the old planter box
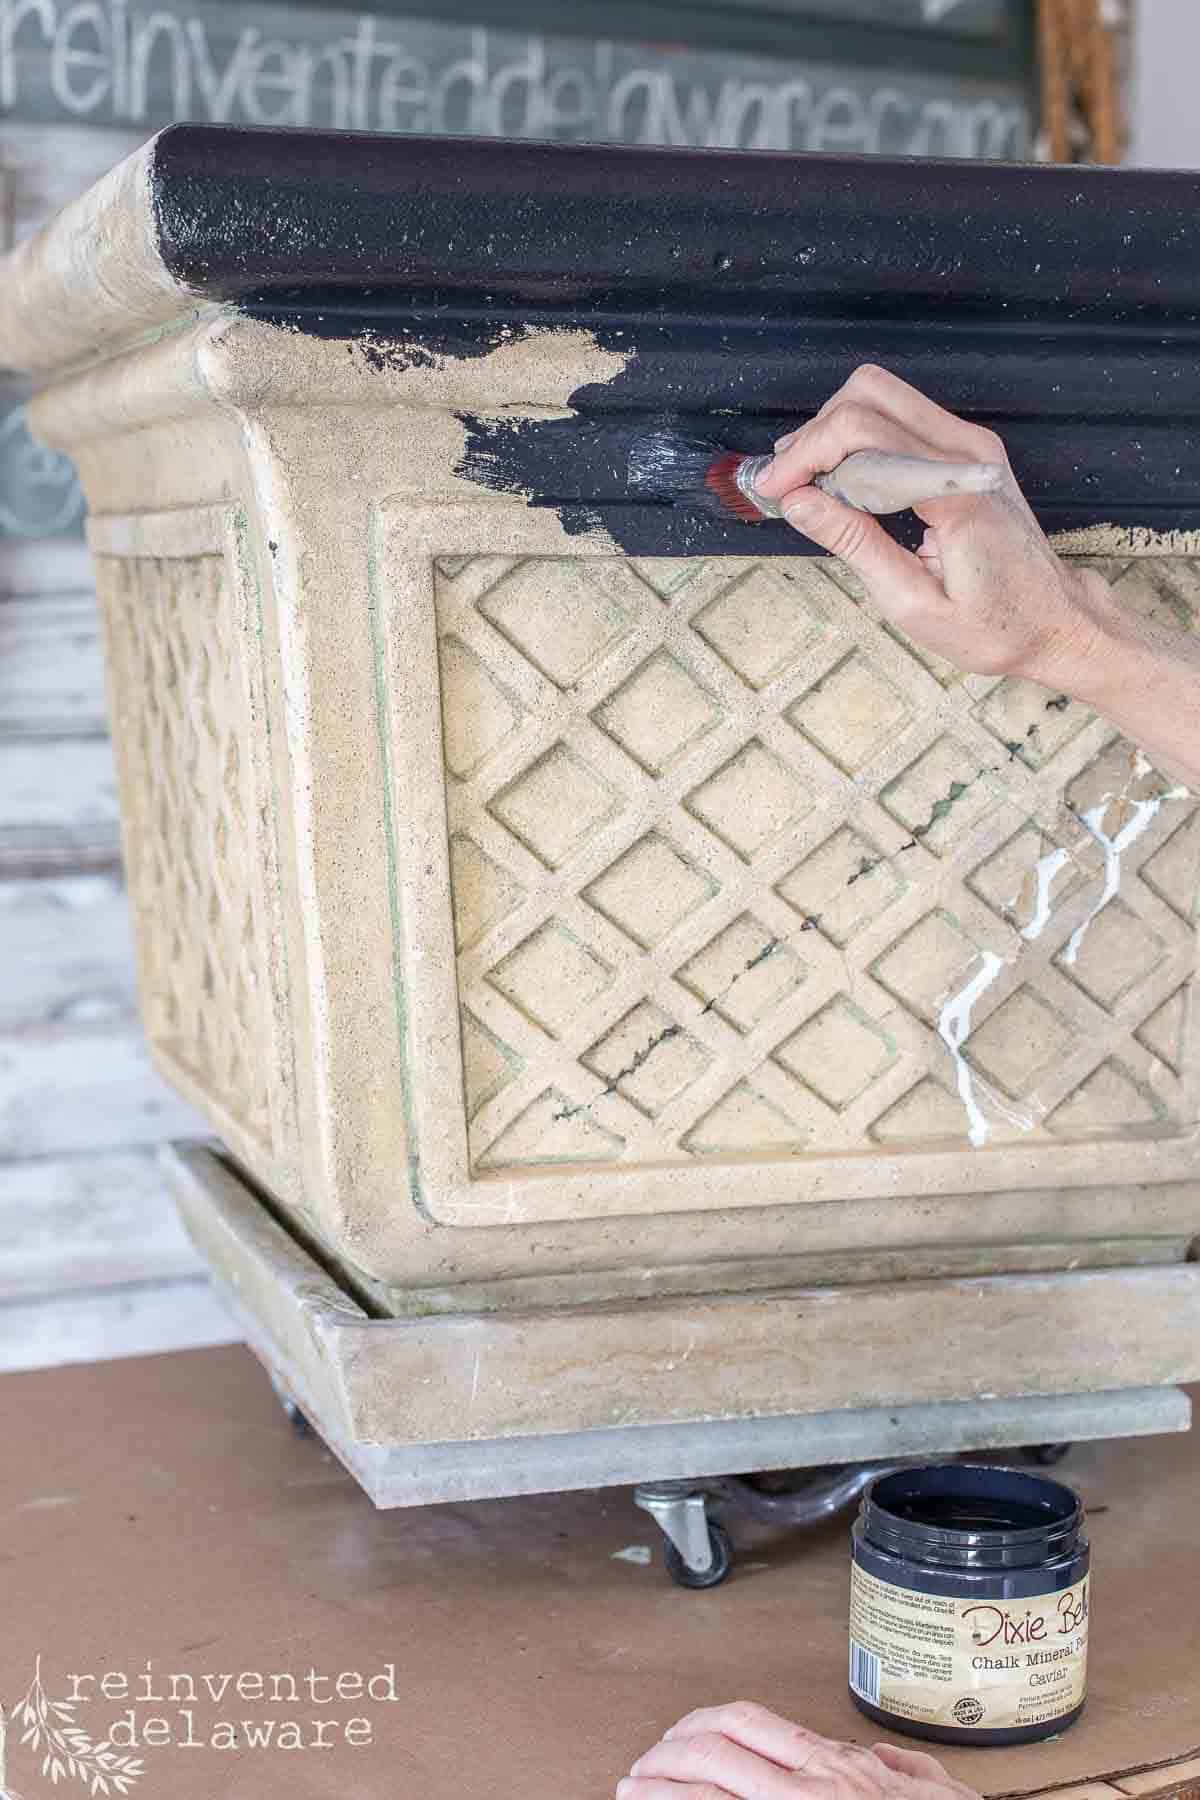
The next day I started the fun part – painting. That’s always the fun part in my opinion but my arthritic hands don’t necessarily agree! My goal for all of my repurposed planters on the back patio is to paint them black.
This is a fun way and an easy way to make different styles of planters look cohesive. Believe me, if all of your plant pots are the same color, they will take on a new lease of life and will elevate your outdoor space.
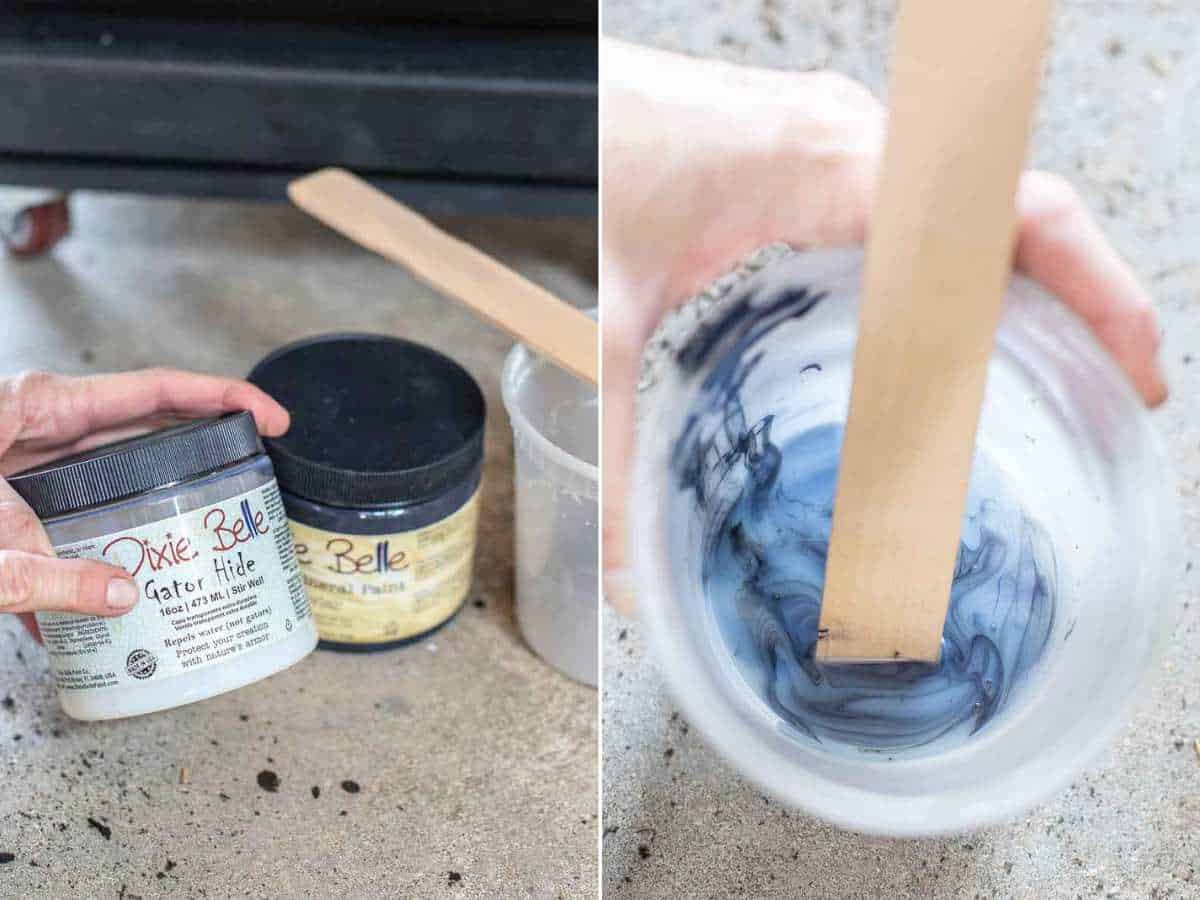
Using supplies I already have on hand and leftovers from other DIY projects like giving old furniture a makeover help to make this a budget-friendly outdoor project. This paint (Dixie Belle’s Caviar) was leftover from painting an old dresser black for one of my grandsons. I knew the color was exactly what I wanted!
chalk paint for outdoor projects
Chalk paint adheres to anything. And the coverage is amazing. I applied one heavy coat with my small flat brush. This brush was perfect for getting into the lattice design on the sides of the planter.
When the first coat was dry, all I needed to do was check for any spots where the original color was coming through. A dabbing motion helped to create a cement look for this resin planter. It also eliminated brush marks.
You will also notice that I painted the inside rim of the planter. The dirt will not come all the way to the top and I didn’t want the old color to show. Check your planter and make sure you paint all of the exposed areas.
step three: add mobility to the heavy planter box
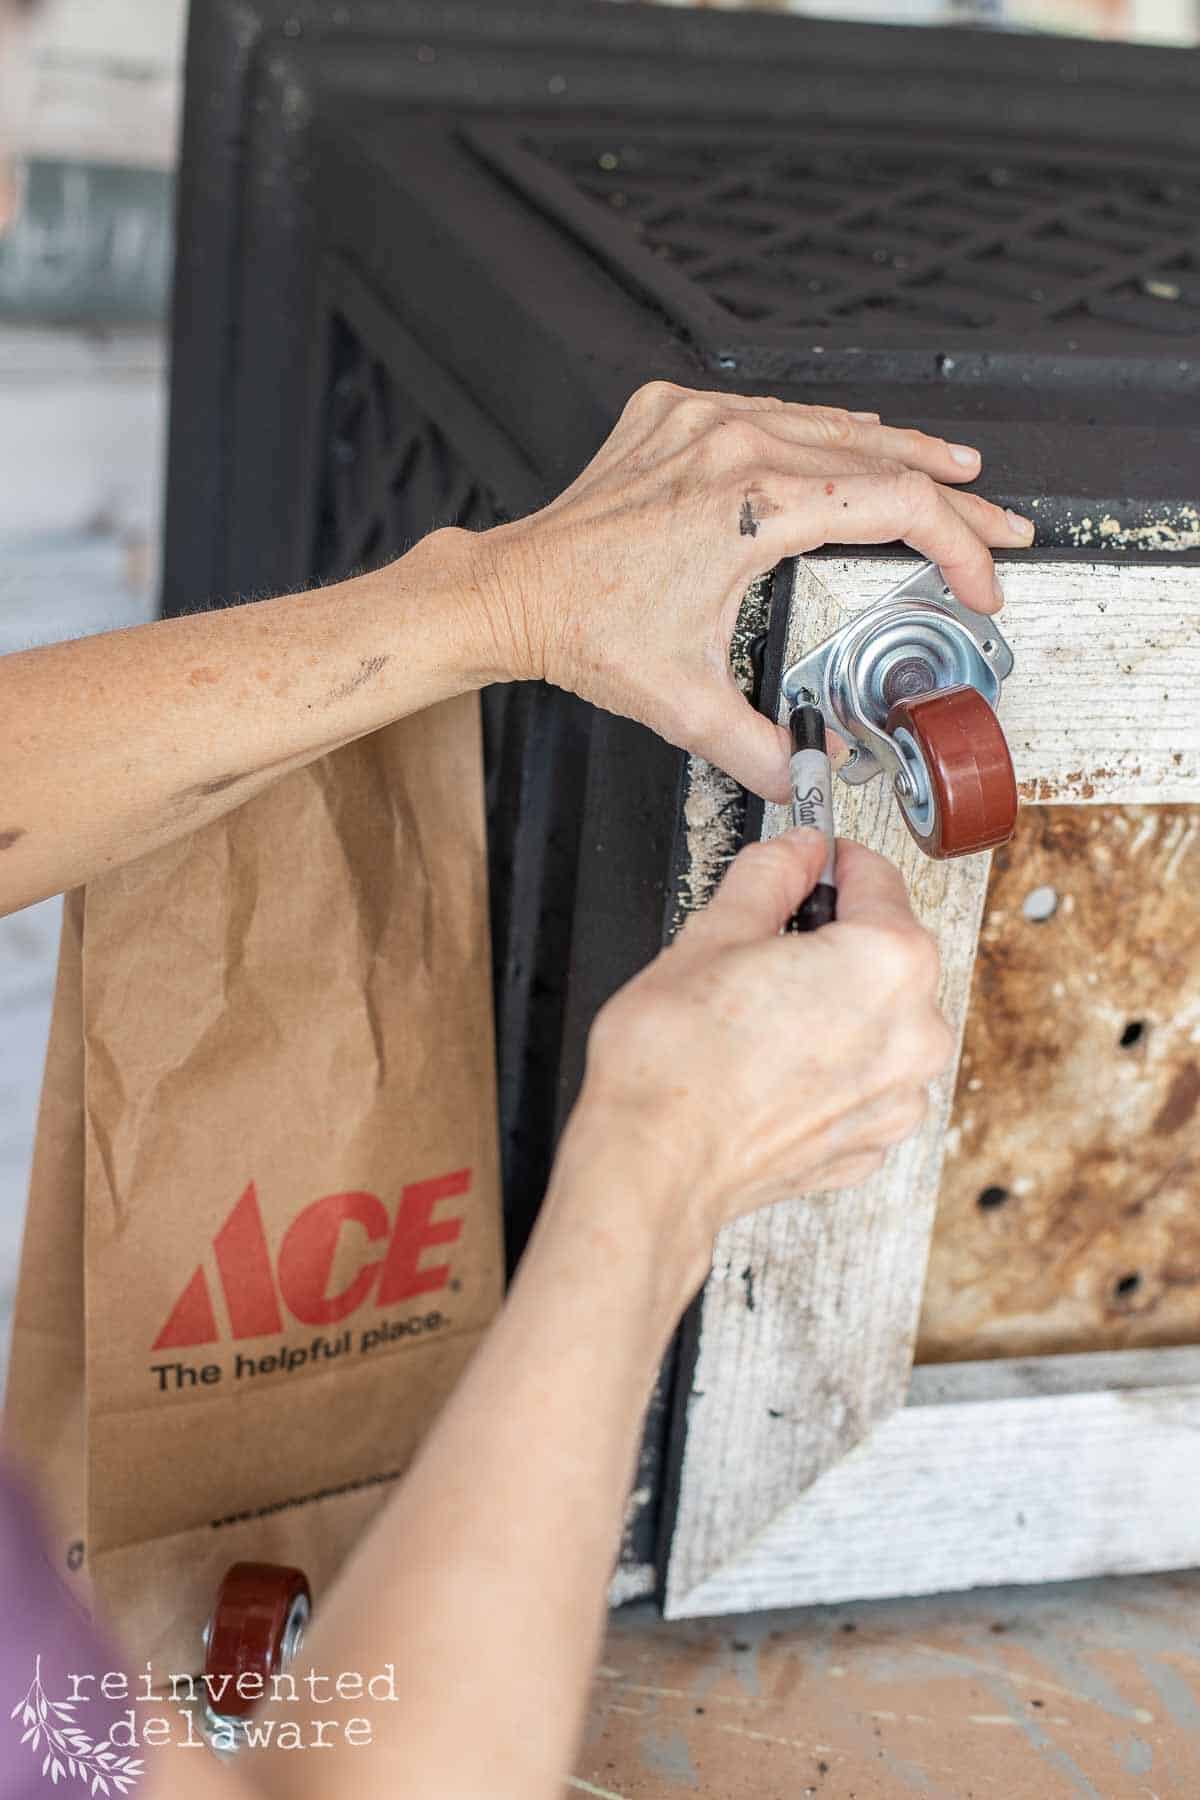
Now it’s time to add mobility to this heavy container garden! Casters will be attached to the base we just added to the bottom of this resin plant container.
While the paint was drying, I went to our local hardware store. I could have ordered the casters online, but I forgot! Plus I needed to get fresh soil for this planter.
Here is a shopping tip for casters: Don’t assume the local farm supply store will have the best price. I did that at first. Our local box farm store (aka Tractor Supply) had 2″ casters for $9.99 each.
Agh. I needed four!
I came pretty close to ordering them while I was still in the aisle of the store and then waiting for them to get here. But I never claimed to be patient! So I hopped over to our local hardware store – Ace Hardware. They had a 2″ caster with a swivel base for only $3.99 each! Can you believe the difference in price?
The Helpful Hardware Man also helped me to find the right screws for the casters. I told him that I would be attaching the casters to the composite material and he guided me to the correct type of screw! I love local stores even when they are a chain!
E6000 glue works on resin!
While I was attaching the casters, I noticed that the glue we had used was not holding the composite boards. Agh!! No worries, I took the pieces apart so that I could use E6000 to hold the pieces together.
I also used a couple of long screws that would go all the way through the composite boards and into the resin. If you do this, be sure to predrill to avoid cracking the resin.
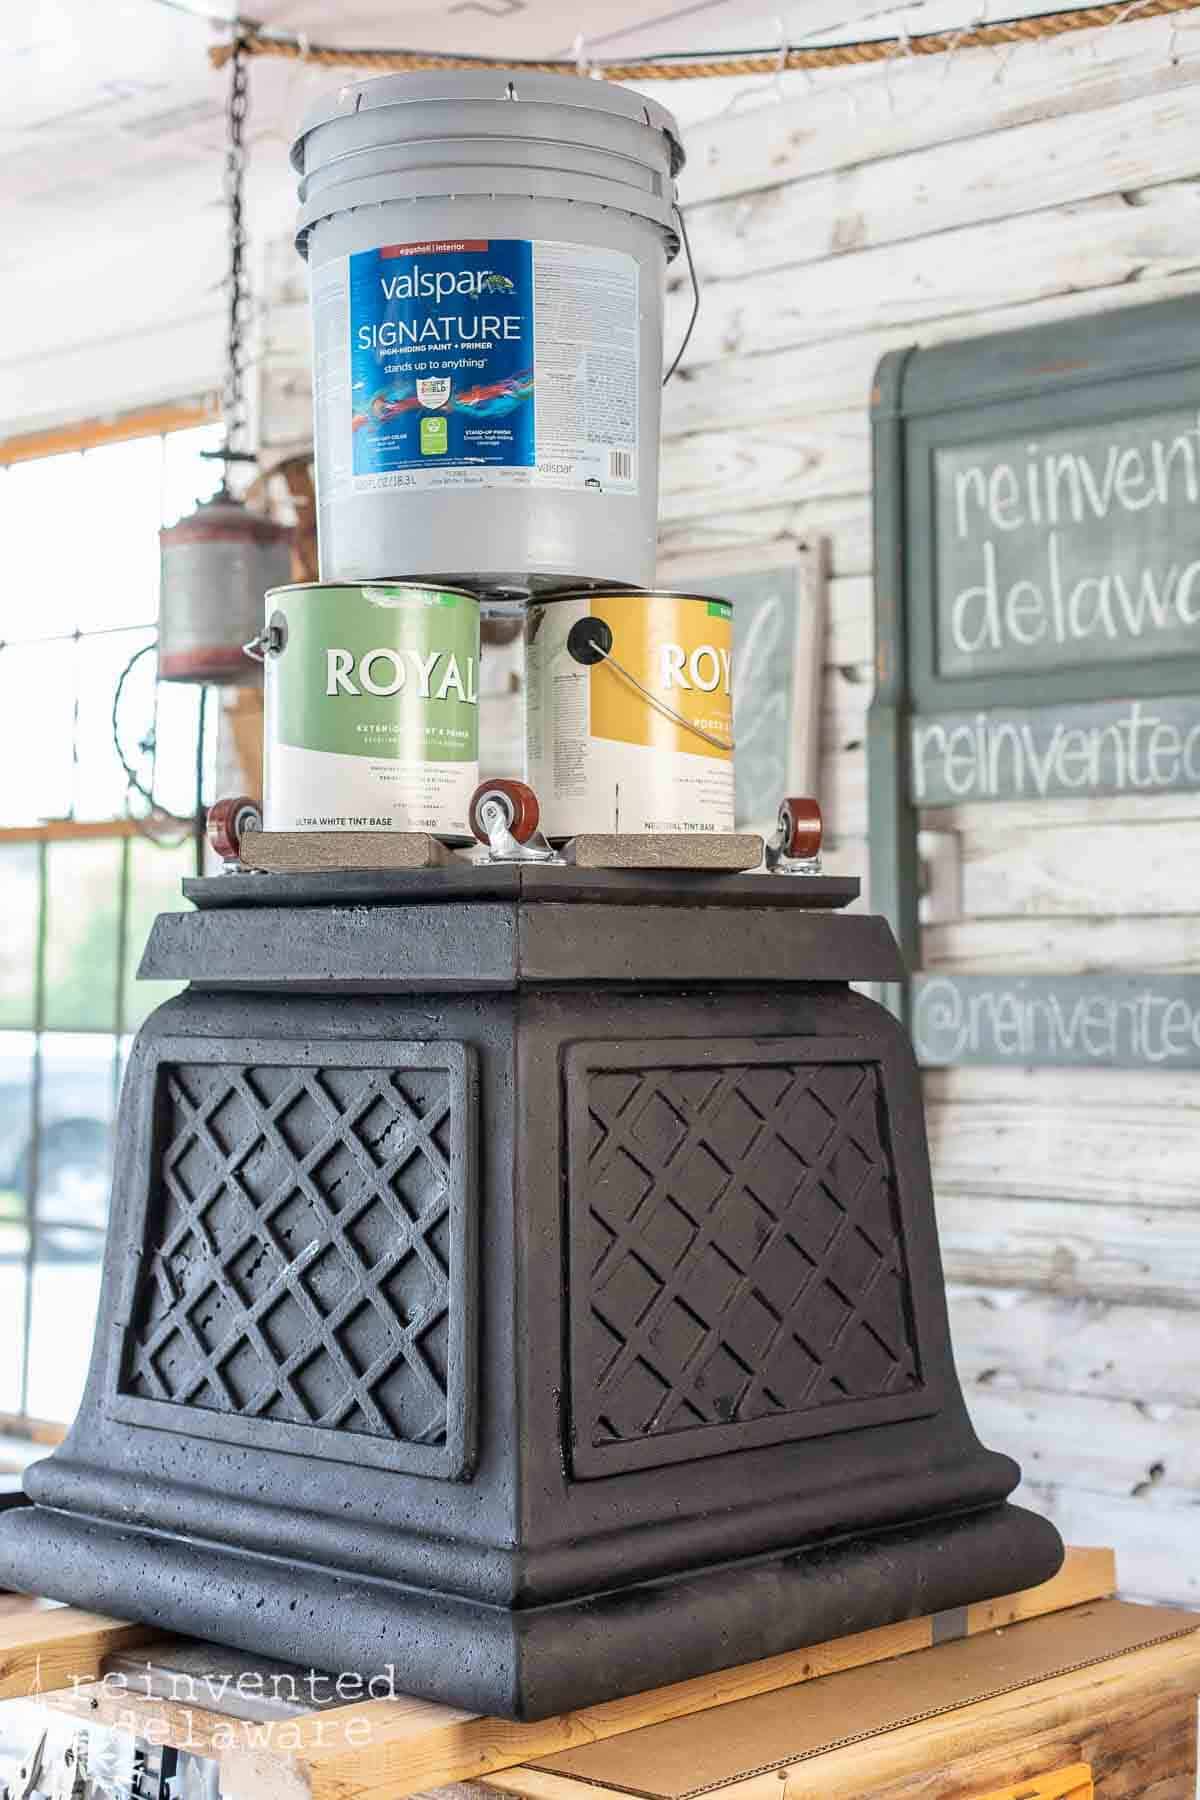
I stacked several old paint cans including a 5-gallon can on top of the whole thing and allowed it to dry overnight. I asked hubby about the original glue that didn’t work and he was kinda perplexed that it didn’t hold. Our guess is that the glue was old. Anyway, the E6000, and plenty of it, is holding just fine!
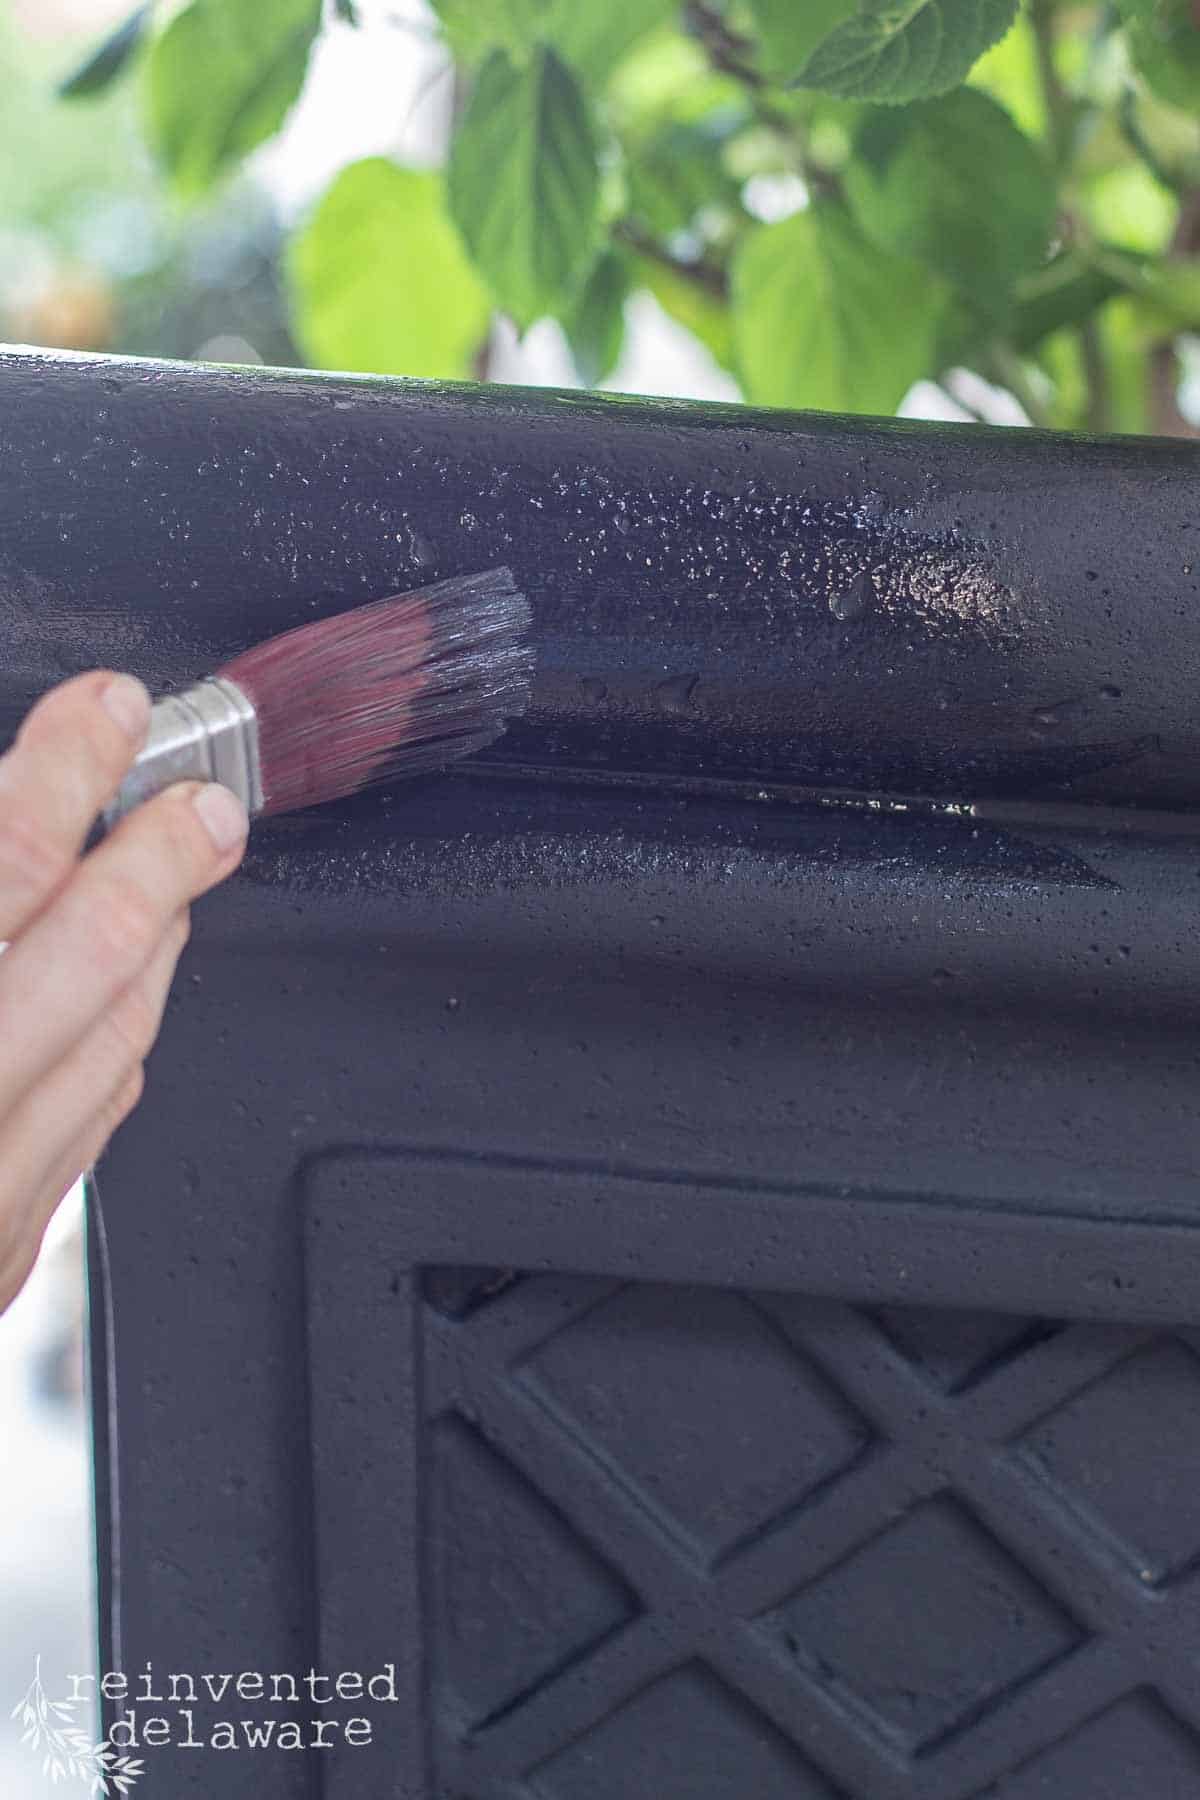
step four: seal chalk paint for outdoors
The last step in this DIY container garden project is to seal the paint. Dixie Belle Gator Hide is rated for outdoors so I knew it was the perfect choice to seal this chalk paint. Two coats will give years of protection.
When you are clear-coating black paint, it is best to mix a bit of the black paint into the clear sealer. This will prevent a whiteish haze that can happen with dark colors. It only took a couple of drops of paint and a good stirring.
Now, I had to be careful sealing the inside of the planter – it was pretty close to the dirt. I simply packed the dirt down and was careful to not get too close with my paintbrush. I used the same dabbing motion to eliminate brush marks and create a textured stone effect on the surface of the large planter.
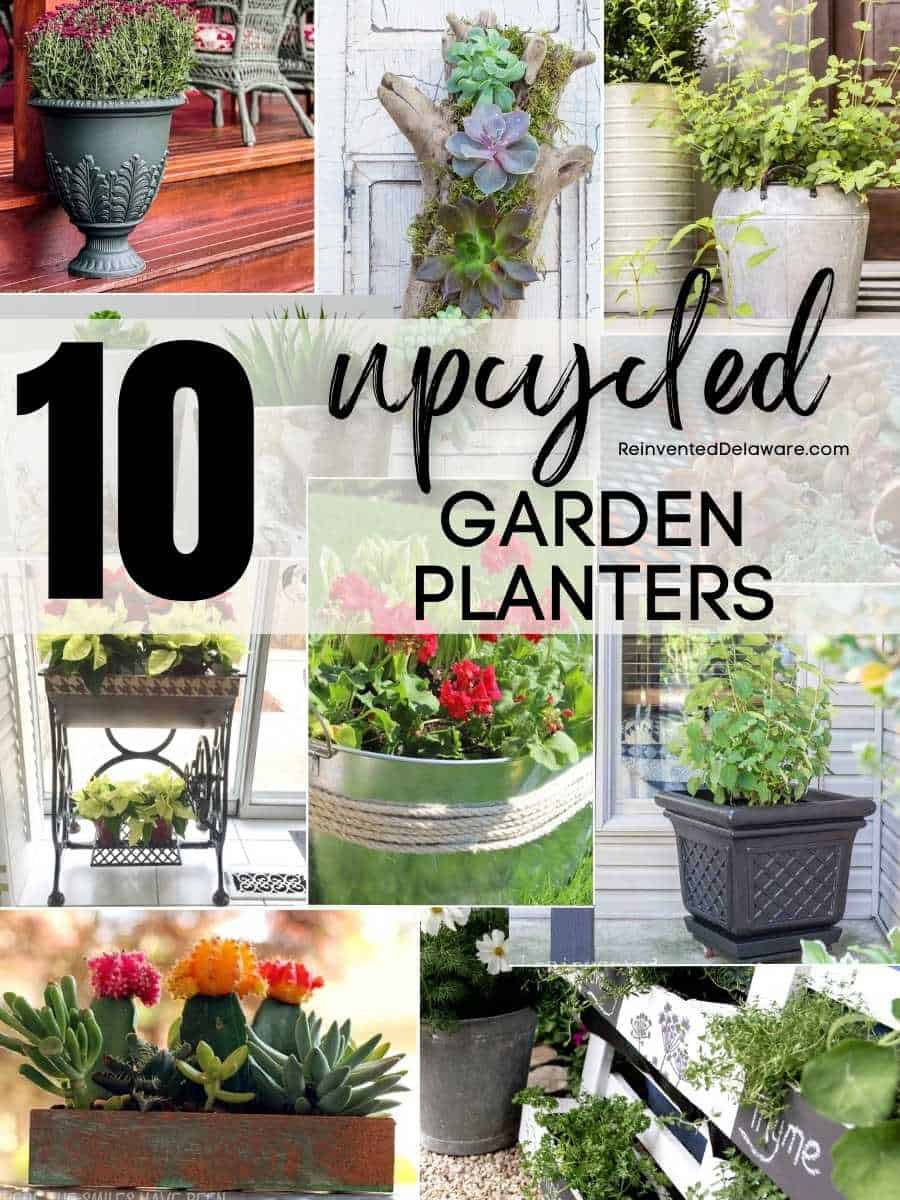
more cheap garden planter ideas
I’ve gathered some other ideas for upcycled planters that I am sure you will enjoy. Think outside of the box when looking at ordinary pieces that could become outdoor planters! Let your imagination run wild!
- Old wood pallets can be disassembled and repurposed as planter boxes.
- Painted tin cans used for small plants; use a chain to connect several of them and create a unique vertical planter.
- Scrap wood can be used to build rectangle planter boxes.
- Cedar fence boards make the perfect window boxes!
- Grab an old colander and line it with coconut liners, fill with flowers for an outdoor table centerpiece.
- Use old boots in the garden bed and fill with potting soil and petunias to create unique planters: these would be so cute on steps!
- Galvanized vintage chicken feeders repurposed into hanging baskets for a front porch make charming hanging planters.
- Purchase an old seeder spreader fill it with annuals to create a unique DIY planter container. Find an old seed spreader at auctions and estate sales.
- An old bucket could be painted to look like a tin pail using varying shades of gray paint. Be sure to add holes in the bottom for proper drainage.
- Old tires used in the flower beds to create individual raised planters.
- Create a hanging planter using vintage chicken feeders. Drill holes in the bottom if needed before planting.
- Make a boot planter from worn out old leather boots. Group several together for a unqiue look near a back door entrance. Plant vine growing plants like petunias for a whimsical look!
- Use a hanging shoe organizer (the kind made from canvas) to plant herbs for a unqiue herb garden. Place in a sunny area and water daily for healthy herbs! What a charming planter that would be!
- Thrifted tea cups make great planters to give as gifts. Choose small growers like pansies for these teacups. Also, add a layer of pea gravel in the bottom for proper drainage.
tips for planting in your upcycled planters
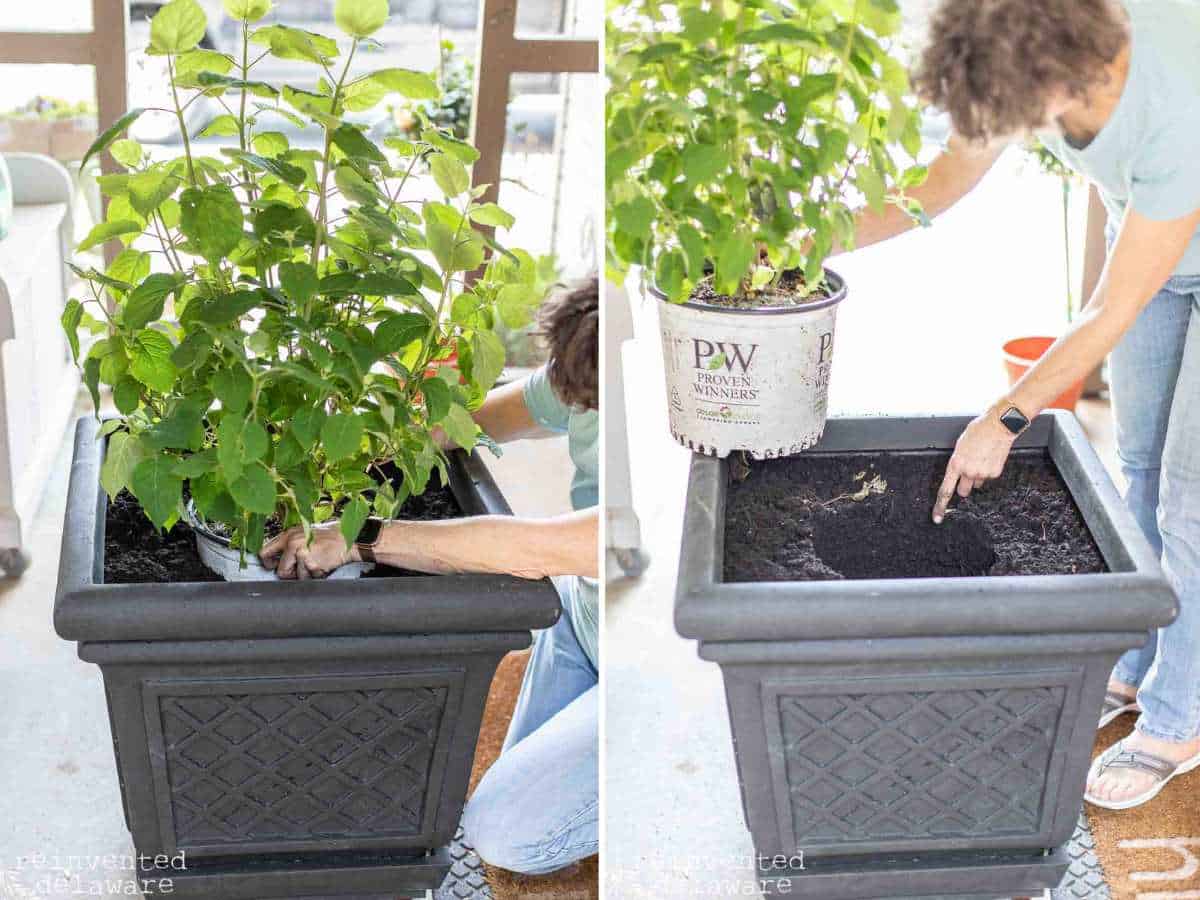
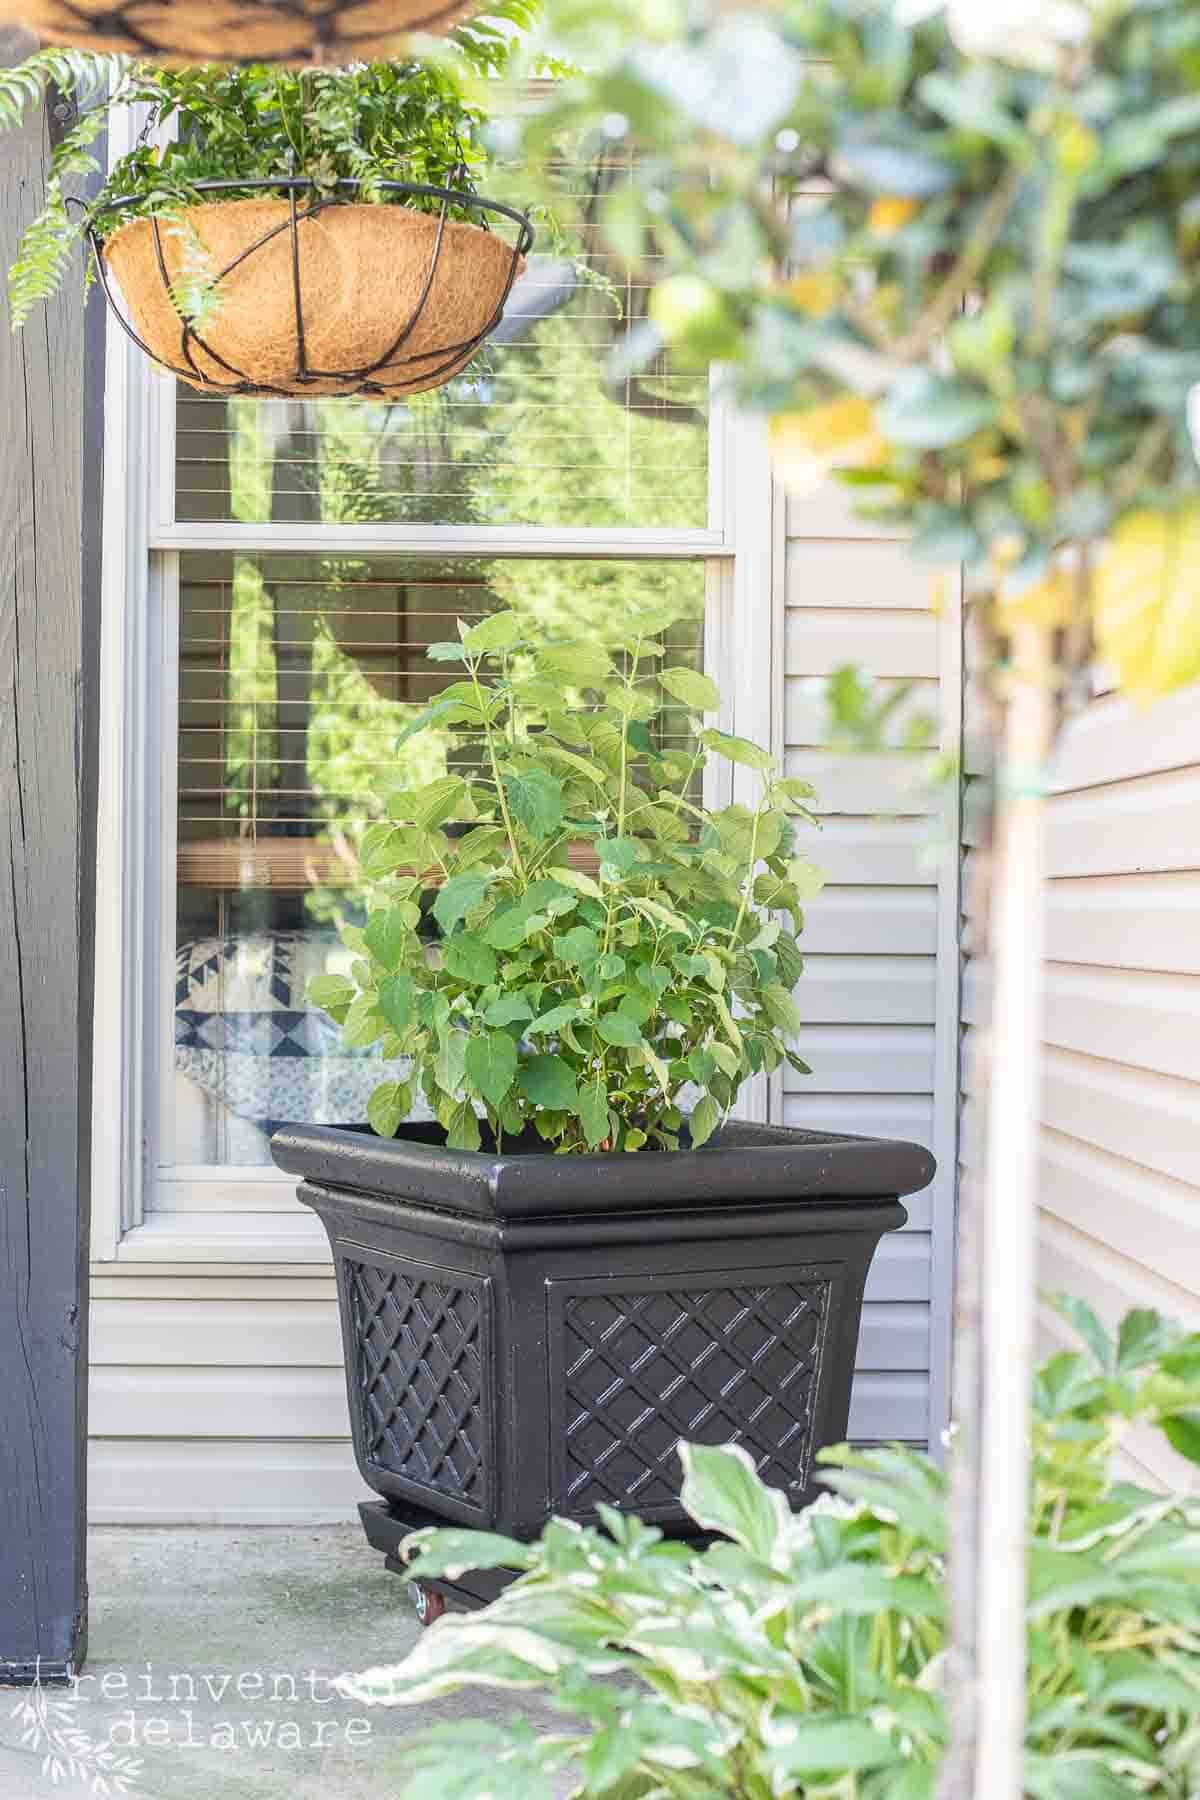
The project got a bit discombobulated at this point. Admittedly, I should have completely painted and sealed the planter before I added the soil and the plant. But I was so excited to get this gorgeous Incrediball Hydrangea in the planter that I just went for it! The best part is the casters were on the bottom of the outdoor planter so it would be easy to move!
Let’s chat about planting such a large planter. I have a couple of tips that will be helpful for you.
- Leave the bags of soil in the back of your vehicle until you are ready for them. I left the bags in the back of our truck until I was ready to open them. This saved my back from moving them too many times. Plus it was easy to slide the bag towards me on the tailgate of the truck and carry most of the weight on my hip instead of using my arms in front of my body. That would have pulled on my back and at my age (haha, did I really just say that??) well, I just want to be careful.
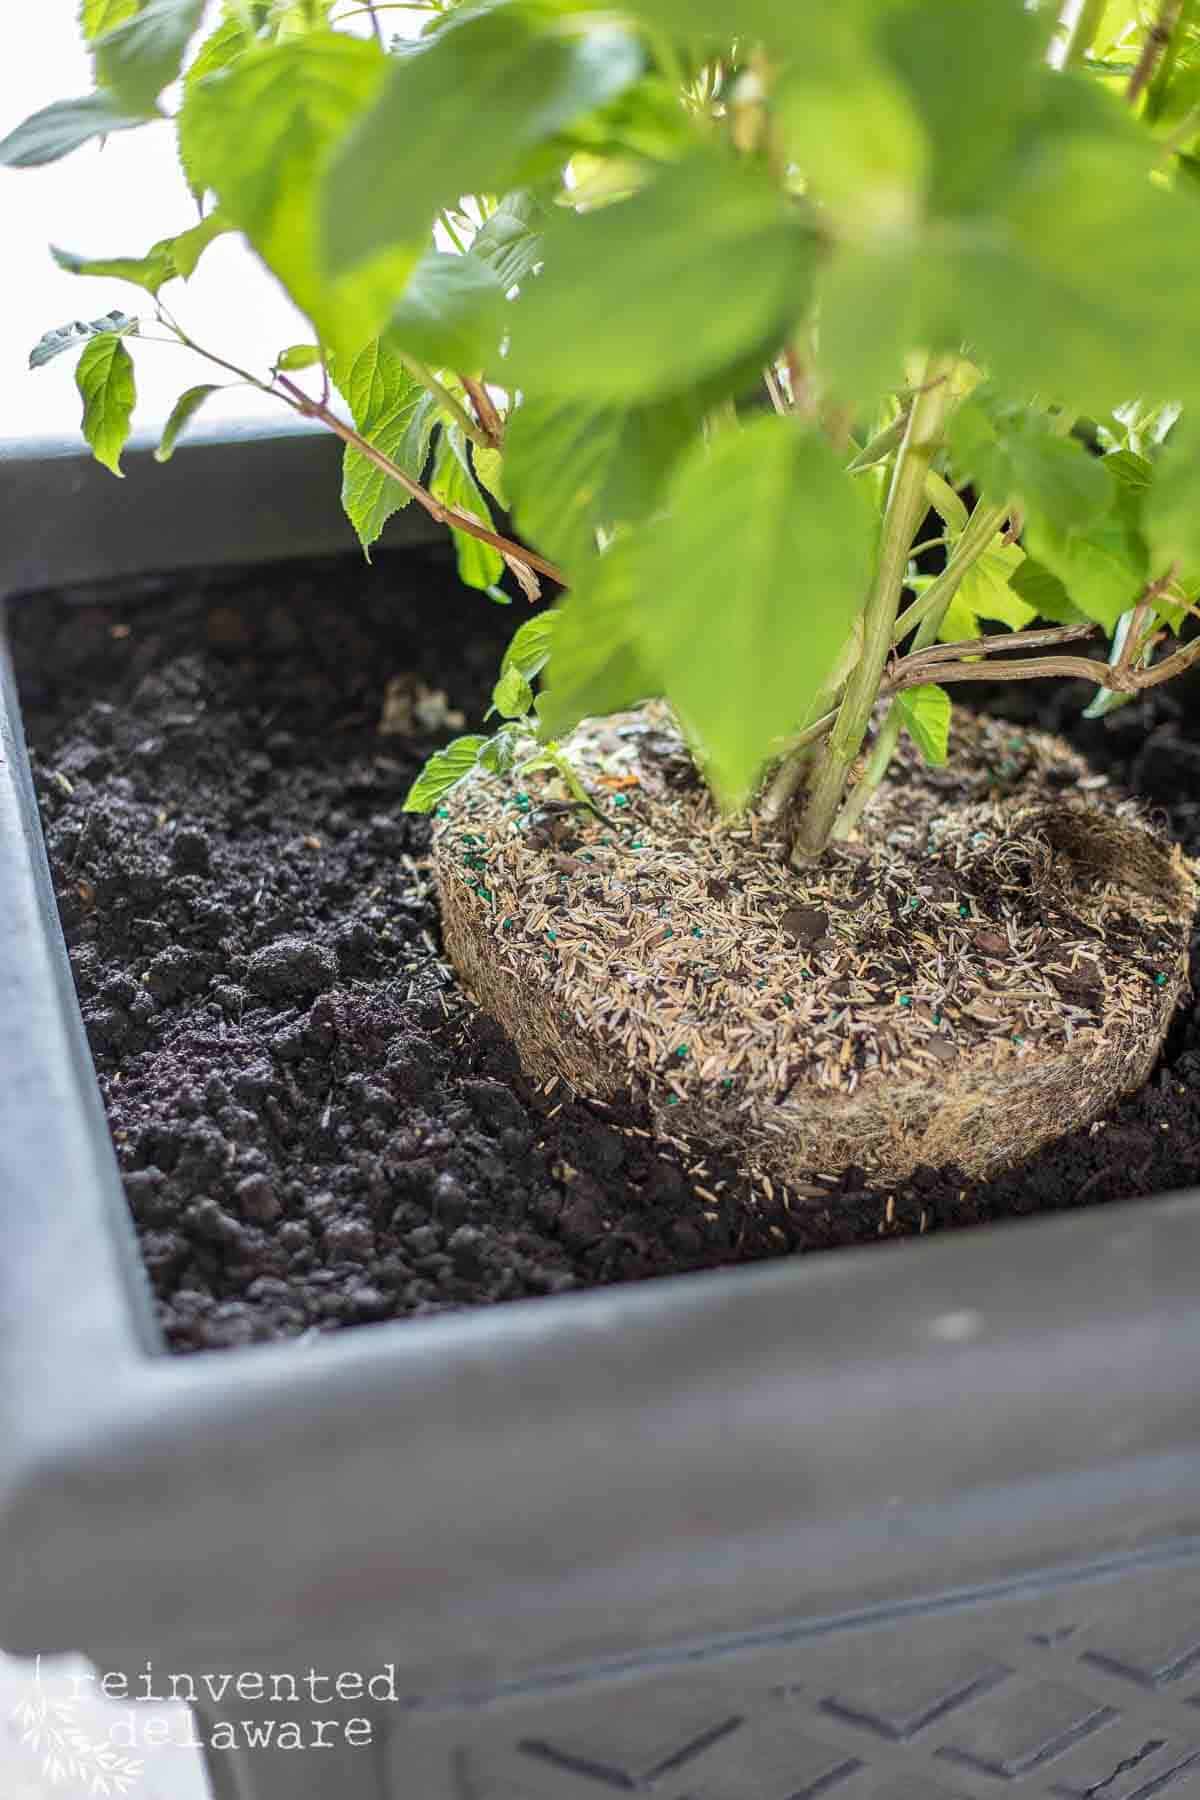
- Have the planter as close to the doorway or area without the need to move the planter up steps once the soil is in it. We have a breezeway with two steps next to our driveway where our truck was parked close to the doorway. I could walk just a few feet to the spot in our breezeway where I had the planter and drop the bag inside the planter. Also, I had already cut a piece of cardboard for the bottom of the planter to help hold in the moisture.
- Open the bag of soil at the bottom so that you can grab the top of the bag and pull it off of the dirt instead of dumping the bag of dirt into the container.
- My planter needed two bags of dirt to fill it up enough for the size of the 3-gallon hydrangea root ball so that the root ball will be high enough in my planter. Do some testing for your own planter.
- Place the plastic container the plant comes in directly on top of the soil. Then add the next bag of soil working around the plastic container.
- Pack the dirt around the container then pull the container out. This will leave the perfect size hole for the root ball of the plant. BTW, this works for small plants, medium plants, and large plants. It’s such a great tip I learned from The Garden Answer on YouTube!
- Finish adding enough dirt around the root ball so that the new dirt is level with the top of the root ball. Do not add dirt above the original root ball! This will suffocate the plant and it won’t last long! Ask me how I know! Before I started to develop a green thumb, I killed a lot of plants this way! Agh!
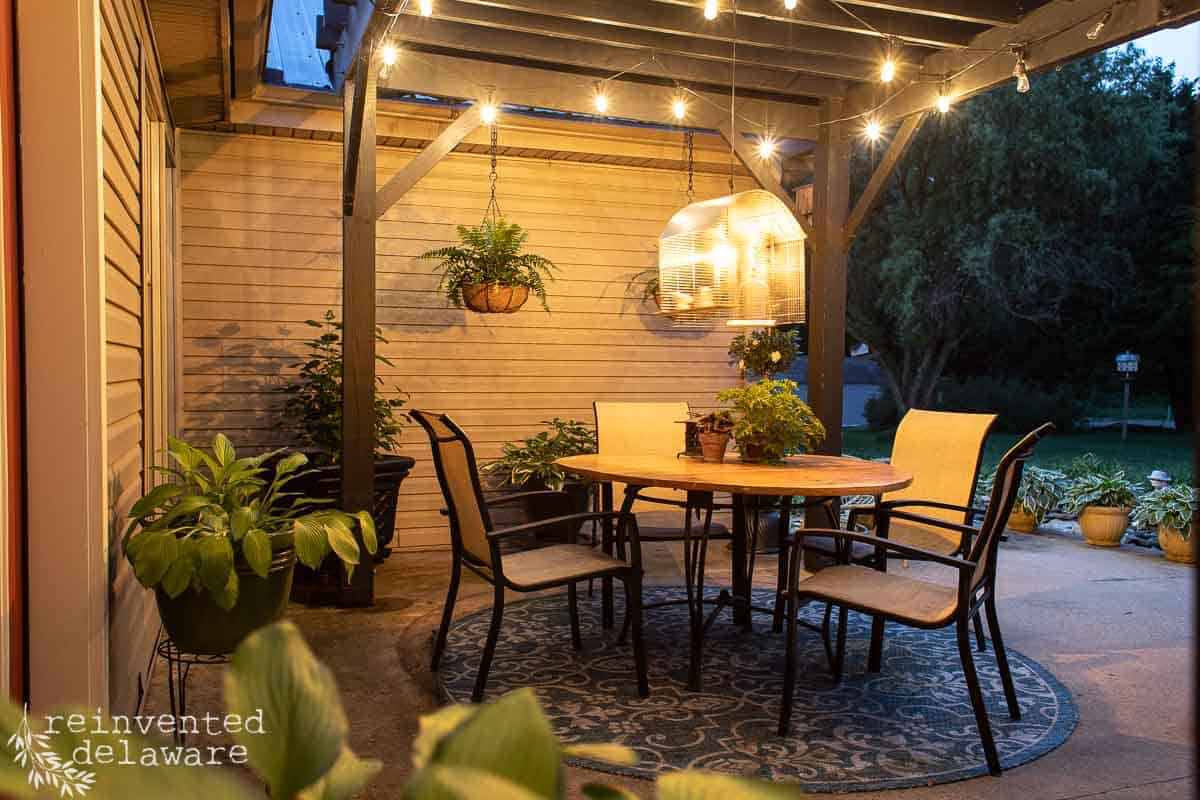
outdoor spaces with upcycled planters
That wasn’t too much hard work, was it? The hardest part was deciding what plant to purchase! Our back patio is a backyard oasis for my hubby and me. We like to have dinner out here in the evenings and breakfast on the weekends.
We also spend a good amount of time on our front porch.
Adding some of my favorite plants on our patio helps to create an inviting space. This large planter will be a focal point for the dining area on our patio. I’m still not sure where I will put this upcycled container garden and I would love to hear from you about where to place it!
This planter can go in either of two places: in the corner near the cedar posts of the pergola or between each of the hanging planters that have ferns growing in them.
What do you think? I like both spots but I am leaning toward my original idea of placing it in the corner of our patio.
Recently, one of my daughters gave me a Gardenia topiary for Mother’s Day. I’m thinking that it will balance out the Incrediball Hydrangea on the other side of the pergola. What is your thought about placement? I would love to know!
YouTube Video Tour
I recently gave our backyard patio a refresh. This video includes the planter we upcycled today along with other DIY projects you will enjoy! You will especially love the repurposed stair railing we used on our concrete patio!
Be sure to click below to watch and be inspired to update containers for your outdoor spaces!
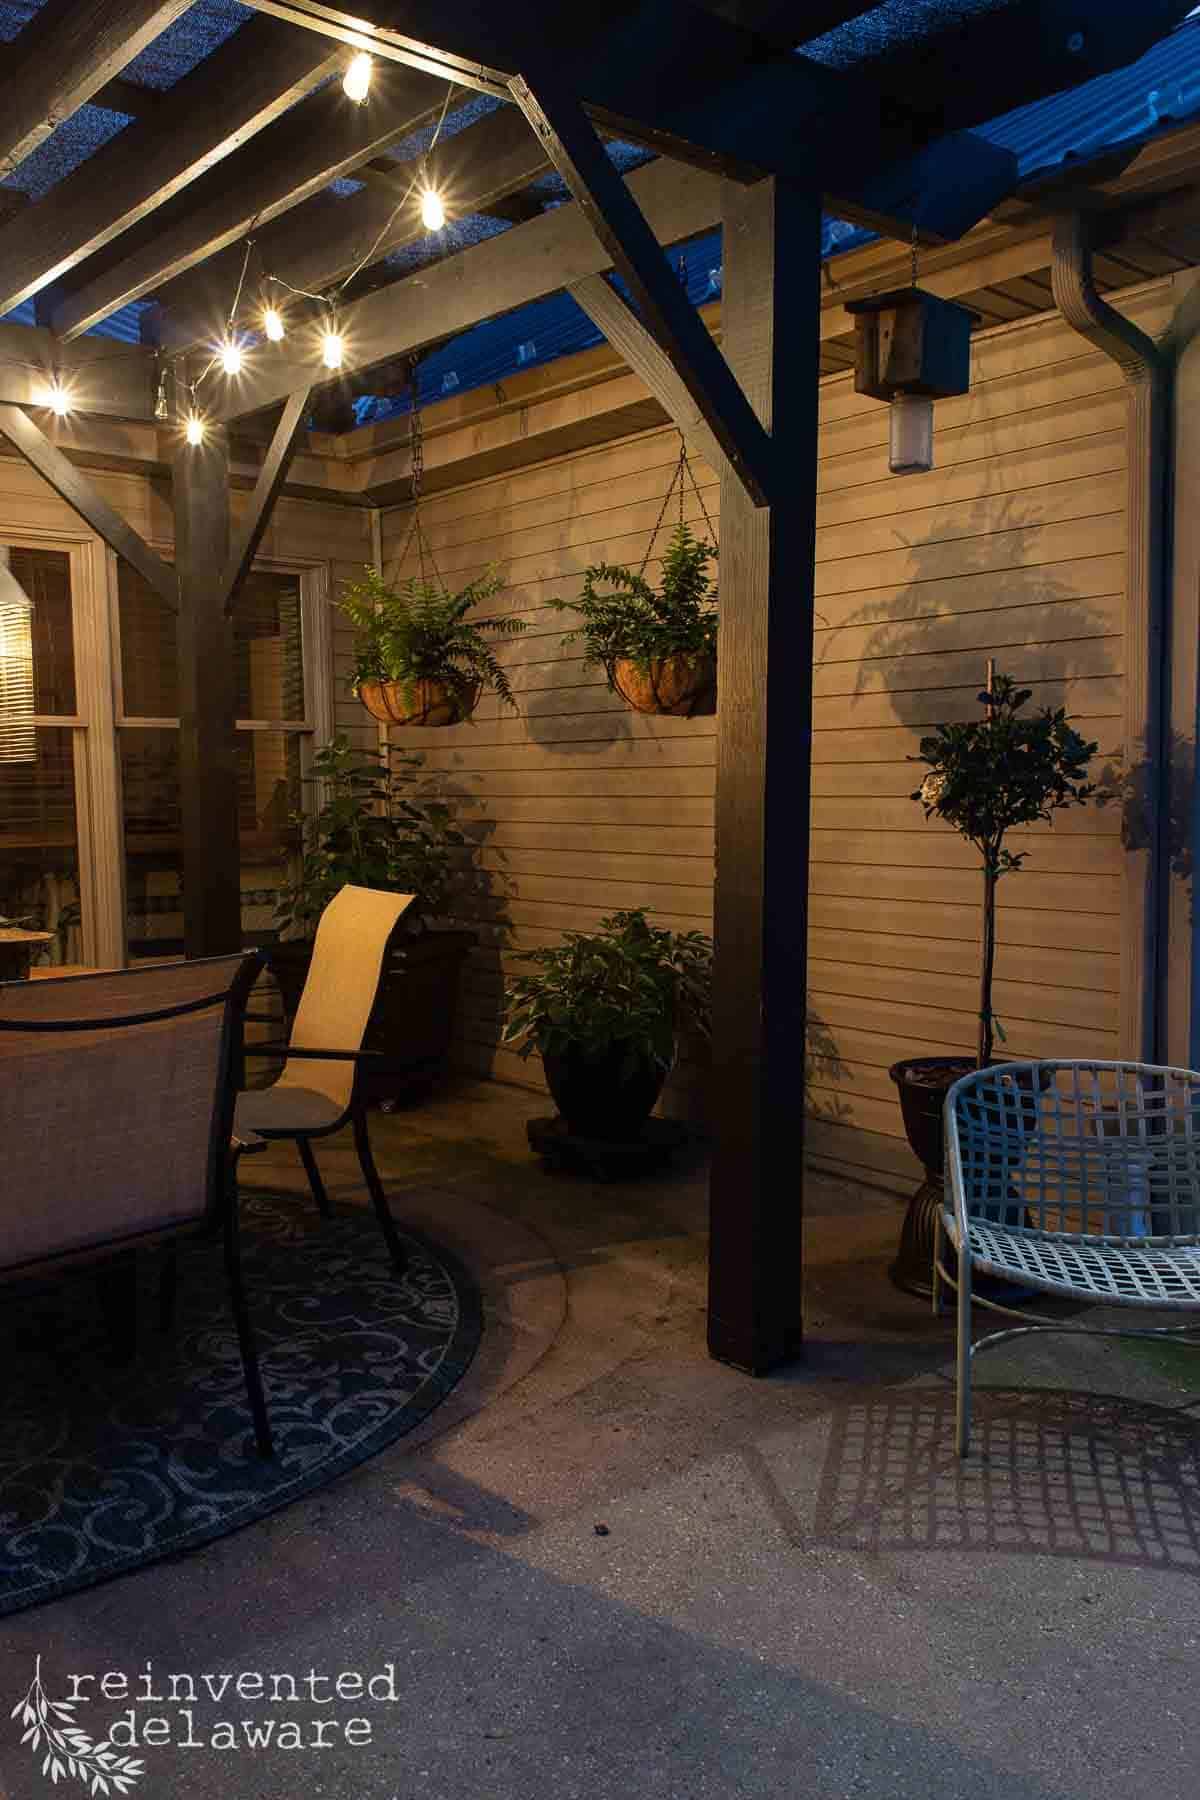
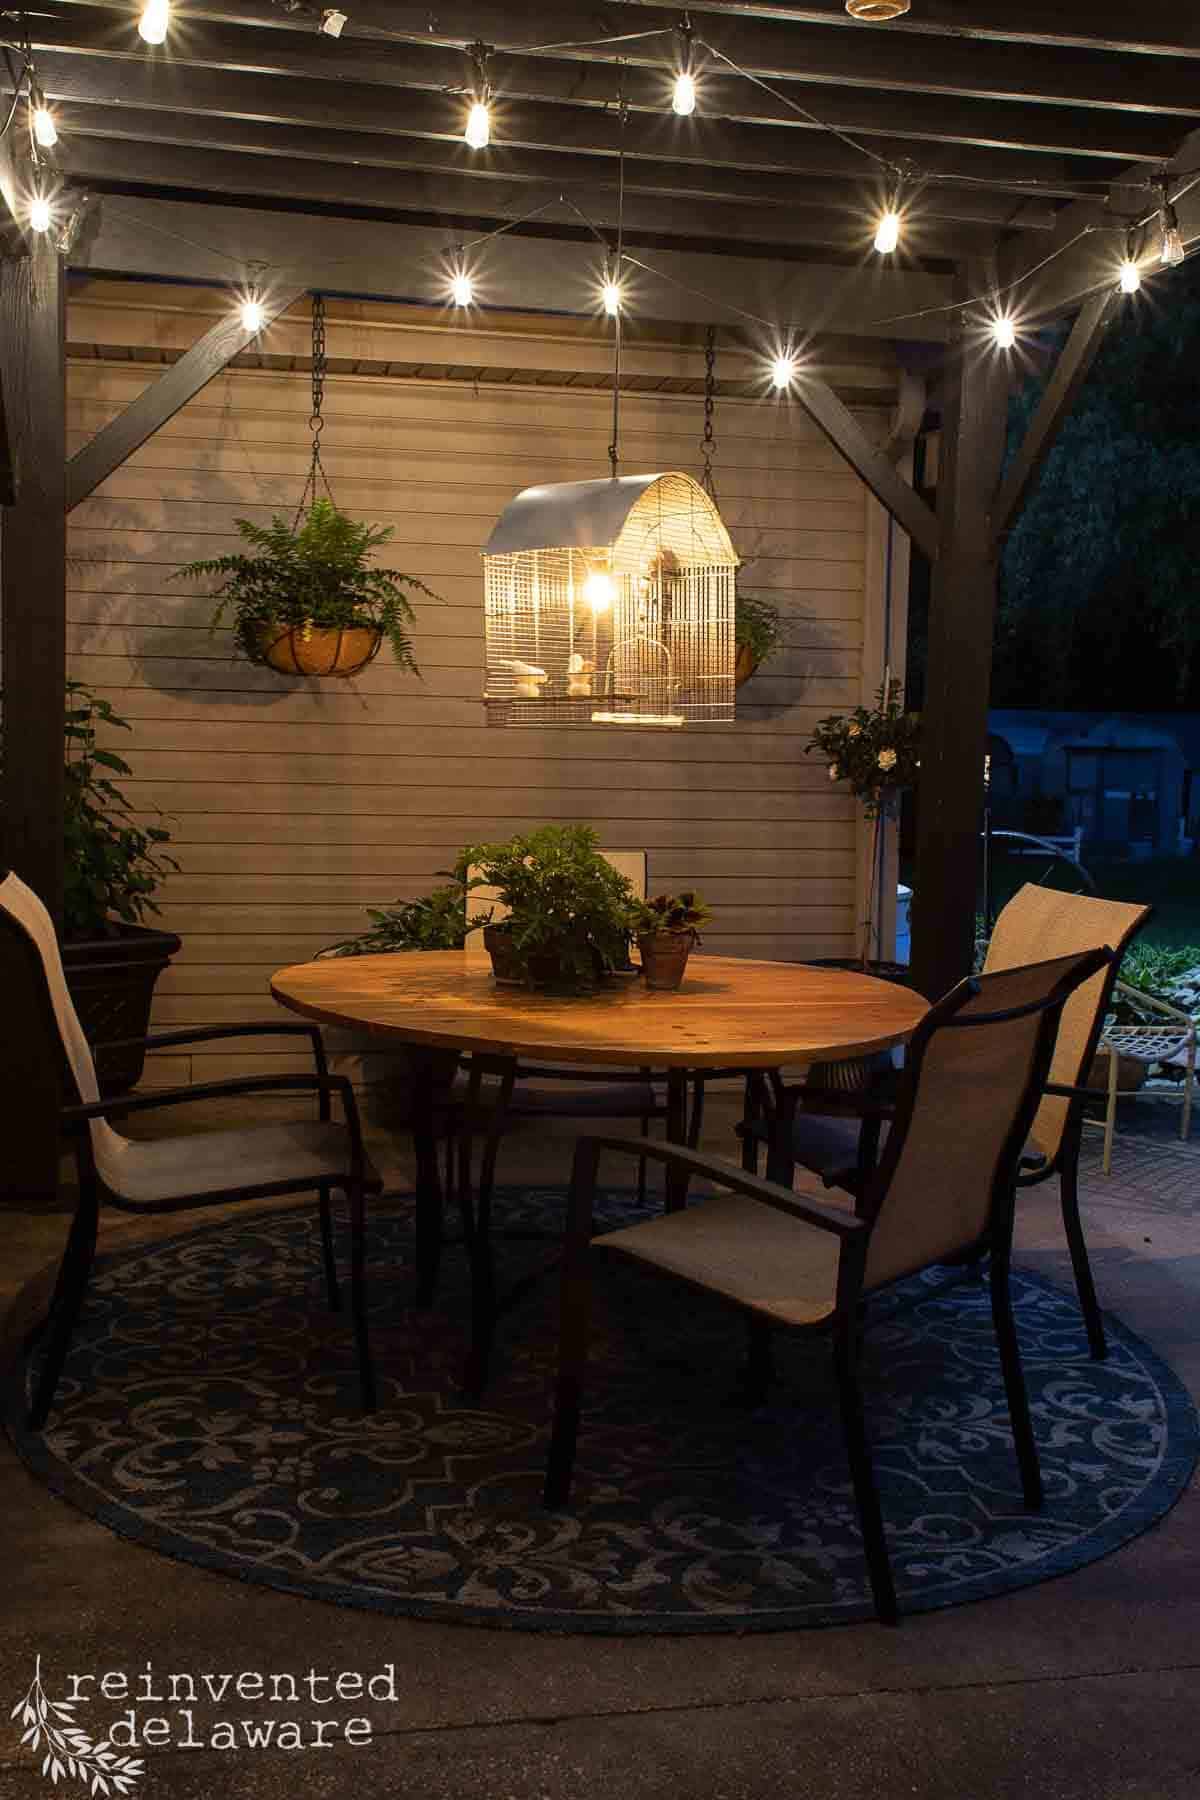
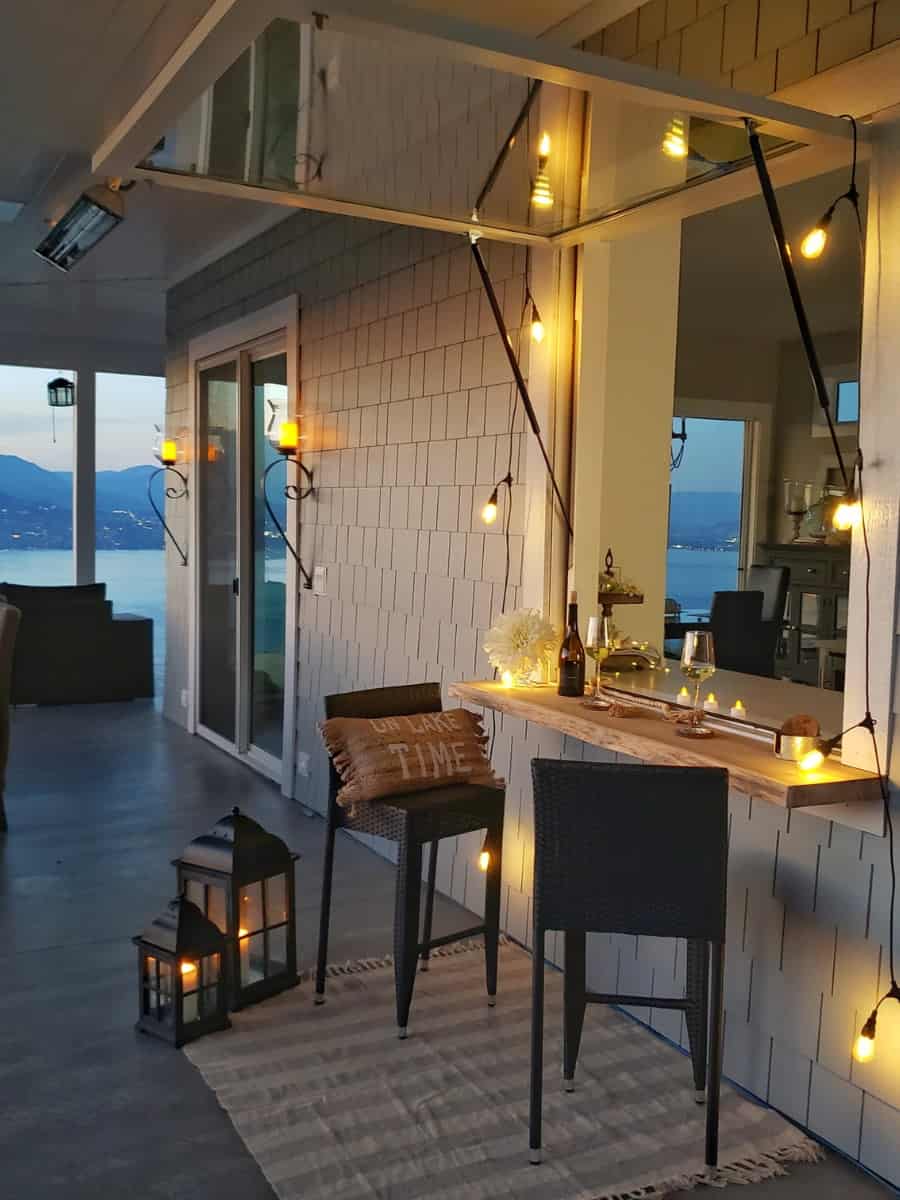
nighttime patio with diy planters
Here are a couple of images of our patio in the evenings. I hope you enjoy and are inspired to light up your outdoor spaces!
9 additional upcycled planter ideas to inspire you
Some of my blogging friends have shared different ways they have upcycled pieces for patio planters. You’ll see ideas to upcycle jars, plastic containers, and tin planters! This is such a cheap way to give your outdoor spaces a little makeover!
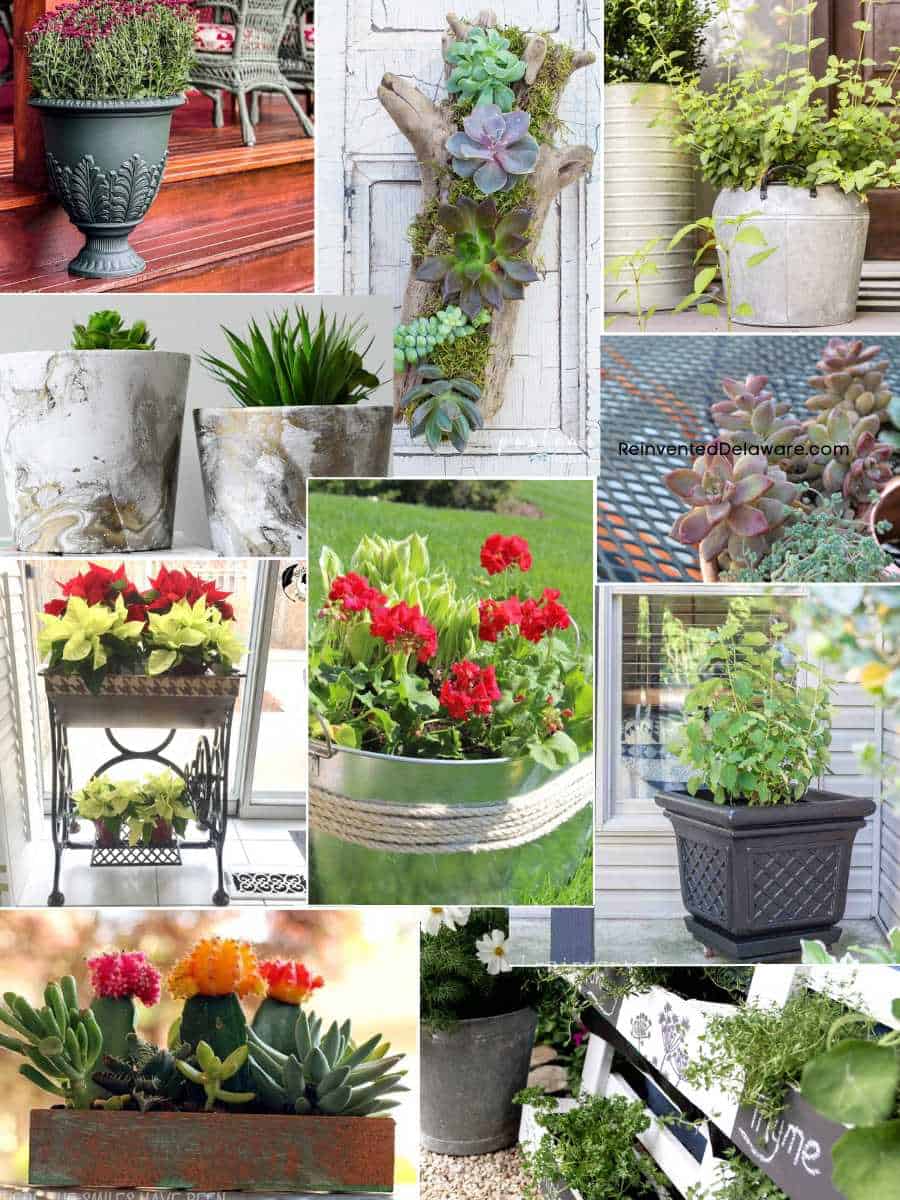
- How to Easily Upcycle Plastic Urns
- How to Make a Driftwood Succulent Planter
- Repurpose Metal Containers for a Small Space Garden
- How to Make DIY Marbled Pots
- DIY Umbrella Planter from a Copper Jello Mold
- Tiered Plant Stand
- Galvanized Tub Planter
- Upcycle a Broken Planter found at an Auction (that’s this post!)
- How to Make an Upcycled Faux Copper Succulent Planter
- How to Make a Pretty Pallet Planter

Virtual Book Club
I was inspired to upcycle this outdoor planter based on a book about a group of friends who enjoyed lunch outdoors on a patio filled with gorgeous plants. My blogging friends were also inspired to write a blog post inspired by the same book. Be sure to check out their posts!
Lynn from Living Large in a Small House
Erin from Erin Evolving
Crystal from Sweet Valley Acres

Thanks for joining our journey!
Thanks so much for joining us for this post! Join our journey so you don’t miss any of the fun projects, tutorials, and inspiration that we share with you each week! You can follow us on Instagram, Facebook, and YouTube. We share even more inspiration on Pinterest!
click below to purchase supplies!
Visit my Amazon Storefront!
Click the button below and head over to our online shop on Amazon!


Cindy Rust
Cindy has been decorating her home with thrift store finds for 40 years. She is an avid thrift store shopper who loves to makeover the items she finds into vintage-inspired home decor and furniture. When she isn’t thrift shopping or painting a piece of furniture, you can find her making homemade butter, working in her garden, or painting with watercolors.
Giveaway Winner!
And the winner is….David S! Thanks to everyone for entering this giveaway!
David S, I’ll be in touch via email about claiming your prize! Congratulations!
Easy DIY Upcycled Patio Planters
Instructions
- Purchase an old outdoor planter container from yard sales, thrift stores, or flea market.
- Clean the container with soap and water and check for any needed repairs like cracks or unnecessary holes as you clean it.
- Repair any cracks with Gorilla Duct Tape on the inside of the container. Make sure to use enough tape for a strong hole. Fill unnecessary holes with epoxy filler.
- Add casters to the bottom of large containers for mobility. Use scrap wood to create a base to attach the casters if needed.
- Paint the exterior of the outdoor garden container in the desired color. Seal the paint with an outdoor-rated clear coat.
- Plant the desired plants in the planter and enjoy in your outdoor space all season!


Absolutely love your upcycled planter, Cindy! What a great idea to add some casters to the bottom. Big pots can be so heavy to move around and now you can easily move that pot around your patio if you need to. Thanks so much for sharing my pallet planter too, I really appreciate it. Happy summer decorating to you!
Thanks Jayne! Casters are a girls best friend 😉 Happy Summer decorating to you too!
Cindy, what a great post! I love all of your tips regarding the dirt.
And boy does your patio look fantastic now. I hope you get to enjoy some time on this patio.
Thanks Wendy – coming from you, the dirt expert, that means alot! We are enjoying our back patio each day!
Lots of great tips and your planters looks elegant now. Thanks for passing on that tip about packing dirt around the container; I love Garden Answer but must’ve missed that one! Thanks also for including our tiered plant stand 🙂
Laura from the Garden Answer is amazing. Her tip has helped me with many plants!
What a great transformation Cindy! Love that you put wheels on it!
Those wheels are invaluable on a heavy plant container like this one!
Love how this planter turned out. It looks gorgeous and I also love to stick wheels on just about everything, so its a winner all the way.xx
Wheels are a girl’s best friend!
I just painted 2 concrete planters my grandson was throwing away(nothing beats free Lol.) They turned out so good. We now have them at the end of our garage with petunias and a spike. They really add interest to that end of the house!!! They are buggers to move as they are so heavy, but once we got them there–they are staying!!!
This planter is so pretty. I love the castors on it. Hugs to you.
It turned out amazing Cindy! Such a great makeover!
You have such a knack for making the old look new again. The casters are genius. I need to do that with some of my posts.
What a fantastic way to upcycle pots and planters, Cindy! I can’t wait to send these ideas to my parents and all my aunts too. I never thought about adding casters to our container gardens but oh my word it would be a HUGE help! Thanks for these fabulous ideas lady – CoCo
Casters are a game changer on so many projects – especially heavy ones like planters! Have a great day CoCo!