
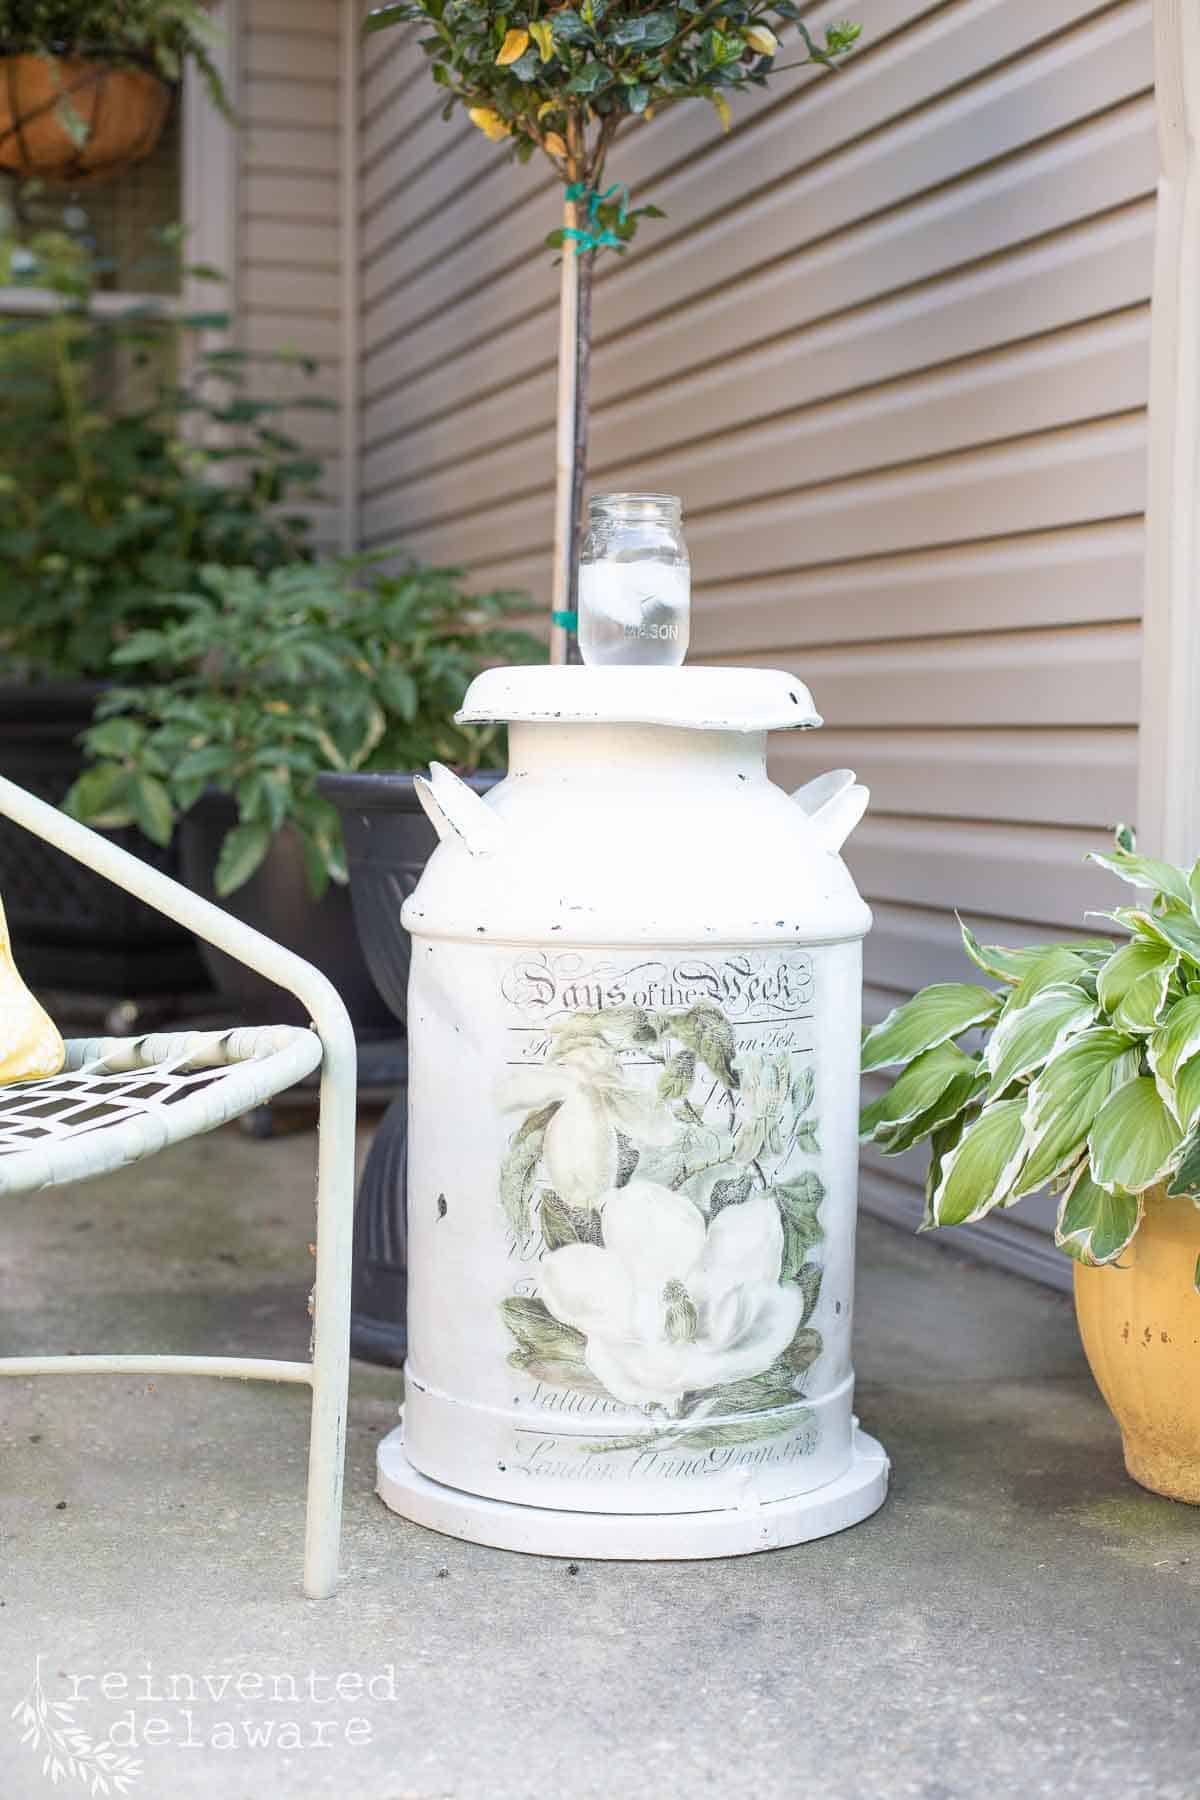
DIY Repurposed Old Milk Can with Magnolia Transfer
Repurpose old milk cans into stylish home decor with chalk paint and transfers. Upcycling old milk cans as home decor will bring a farmhouse touch to your home!
Antique milk cans can be found at various shops. We have seen them at our area’s flea market, auctions, and antique stores. They can be a great addition to create a farmhouse look for any space.
My hubby’s good friend, Harry, gave us this vintage milk jug. He had cleaned out his father-in-law’s home who had just passed and knew we would love to makeover one of these old dairy cans.
The following post may contain affiliate links. That means if you click and then buy something, I will make a small commission at no additional cost to you! Thank you for supporting my blog. full disclosure here.
This post is sponsored by Dixie Belle. All opinions are my own.

Vintage milk cans look amazing in a farmhouse or country-style home decor setting. Using them as a decorative piece is a great way to bring a little bit of the past and preserve some of our American history.
supplies and tools
Let’s get to the project! Here are the supplies I used for this vintage milk can makeover!
- scrap PVC boards
- hardware like screws and metal strapping
- clear spray top coat
- BOSS stain blocker
- chalk paint in Fluff
- magnolia transfer (here are several transfers to choose from)
- outdoor rated clear coat sealer
Tools:
step by step instructions
Here are the simple steps I took to give this old milk can a new look and purpose!
step one: clean the vintage milk jug
I used a shop vac to remove the loose dust and cobwebs. It was covered in cobwebs! The shop vac also removed the loose rust.
Then I used soapy water and my garden hose along with an old piece of sandpaper. The sandpaper softened with the water and I used it to scrub any rust away.
I left the milk can in the sunshine to dry completely.
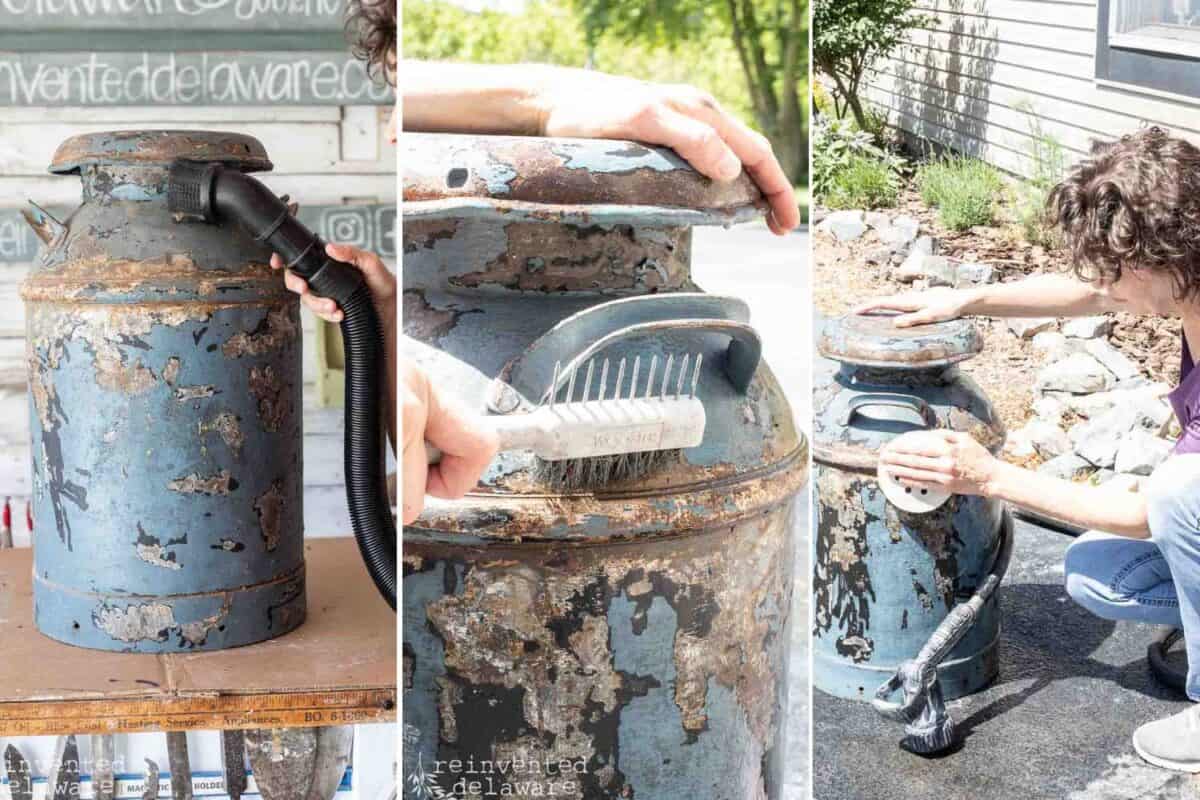
step two: sand the old milk can
A wire brush helped to get rid of the rust that I missed while scrubbing. I wasn’t planning on removing every bit of the old paint and damage on this rusty milk can, but I wanted to eliminate as much of the rust as I could. A microfiber cloth over the whole piece removed the dust I created with the wire brush.
step three: build the base
The bottom of this antique milk can was pretty rusted and I knew I didn’t want to spend the time to restore the metal on the underside of the can. Plus, I want to use this milk can in an outdoor space for our home.

So, I decided to build a round base to keep the bottom of the can from coming in contact with the cement surface of our outdoor back patio. Hubby had some PVC boards left over from a project and I knew they would be perfect. It’s probably easier to watch the steps in a video so I created a recording of this process for you. You can watch the full video later in this post.
Basically, I joined two PVC boards together so that they would be wide enough for my circle base. Then I drew a circle on the boards large enough to have approximately 1″ larger than the base of the milk can.


I used metal strapping to create my own brackets and attached the round base to the milk can in the existing holes on the base of the milk can.
Be sure to watch the process in the video later in this post! It was relatively simple to make this base. If you don’t have PVC boards to make your own circular base, you could also place your milk can on a round plant stand that is used to raise a plant off of the floor.
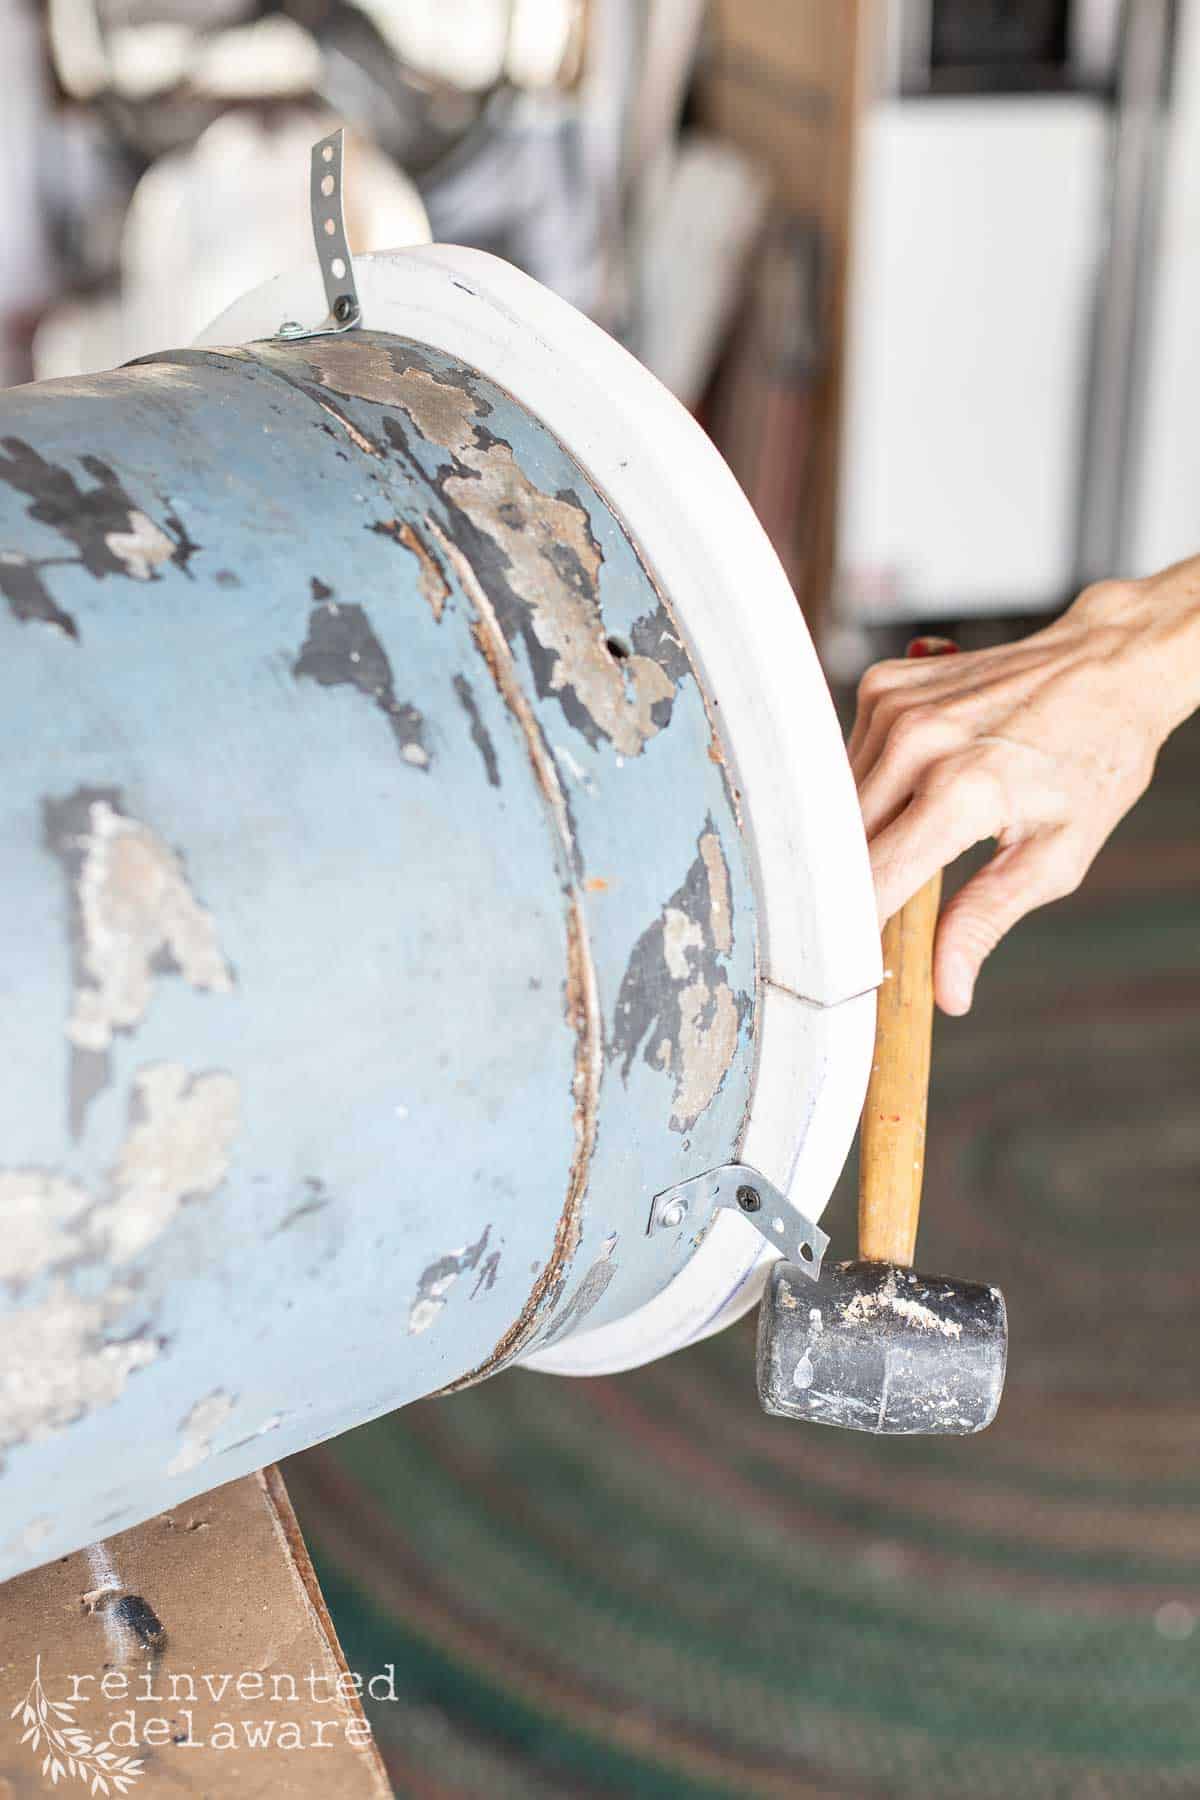
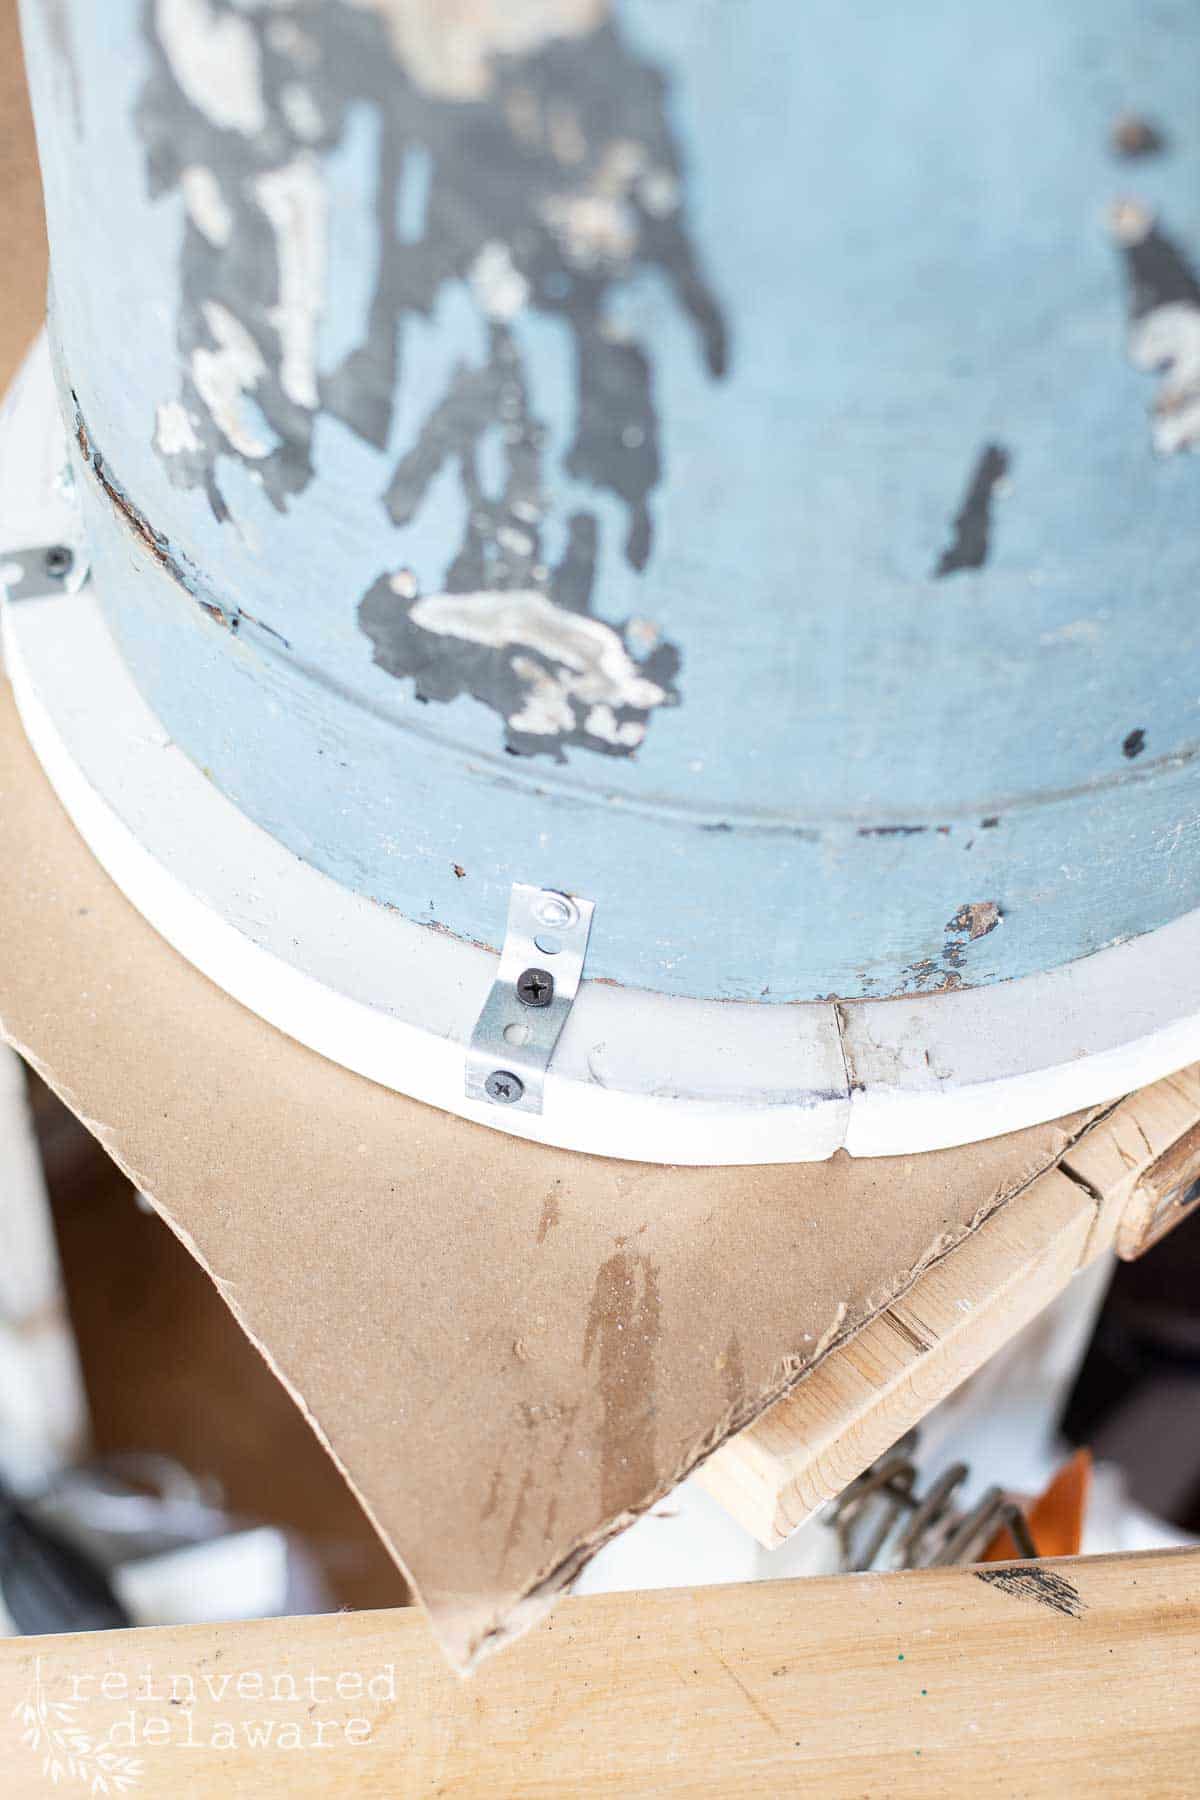
The most important thing is to prevent the milk can from sitting in water that could collect under it after it rains. You don’t want the bottom of the milk can to rust out!
Of course, you can also use these vintage treasures in an area that will not get wet like a covered porch or even indoors in your living space.
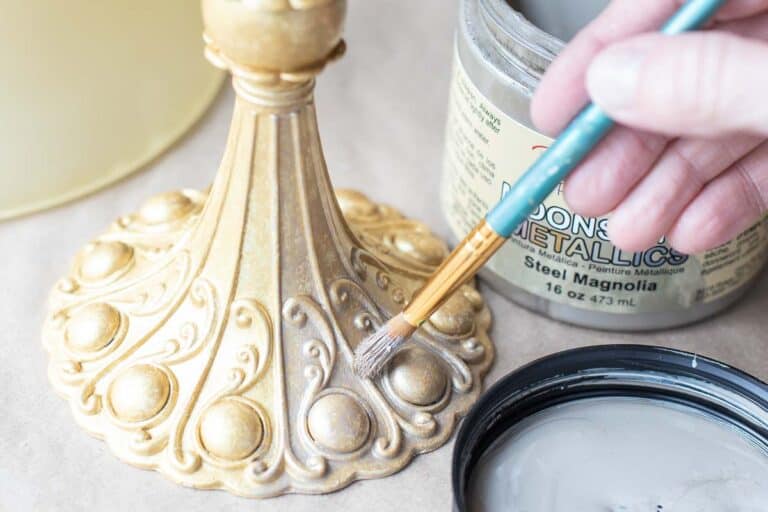
step four: apply the chalk paint
Before I applied the color that I wanted to use, I first sprayed the entire milk can with a clear coat. I gave the can two coats of clear allowing it to dry between coats. This is the best way to prevent rust on metal containers of any sort.
Then I applied two coats of BOSS, allowing drying time between coats. BOSS is a stain and bleedthrough blocker that will prevent dark paint colors (and stains!) from coming through.
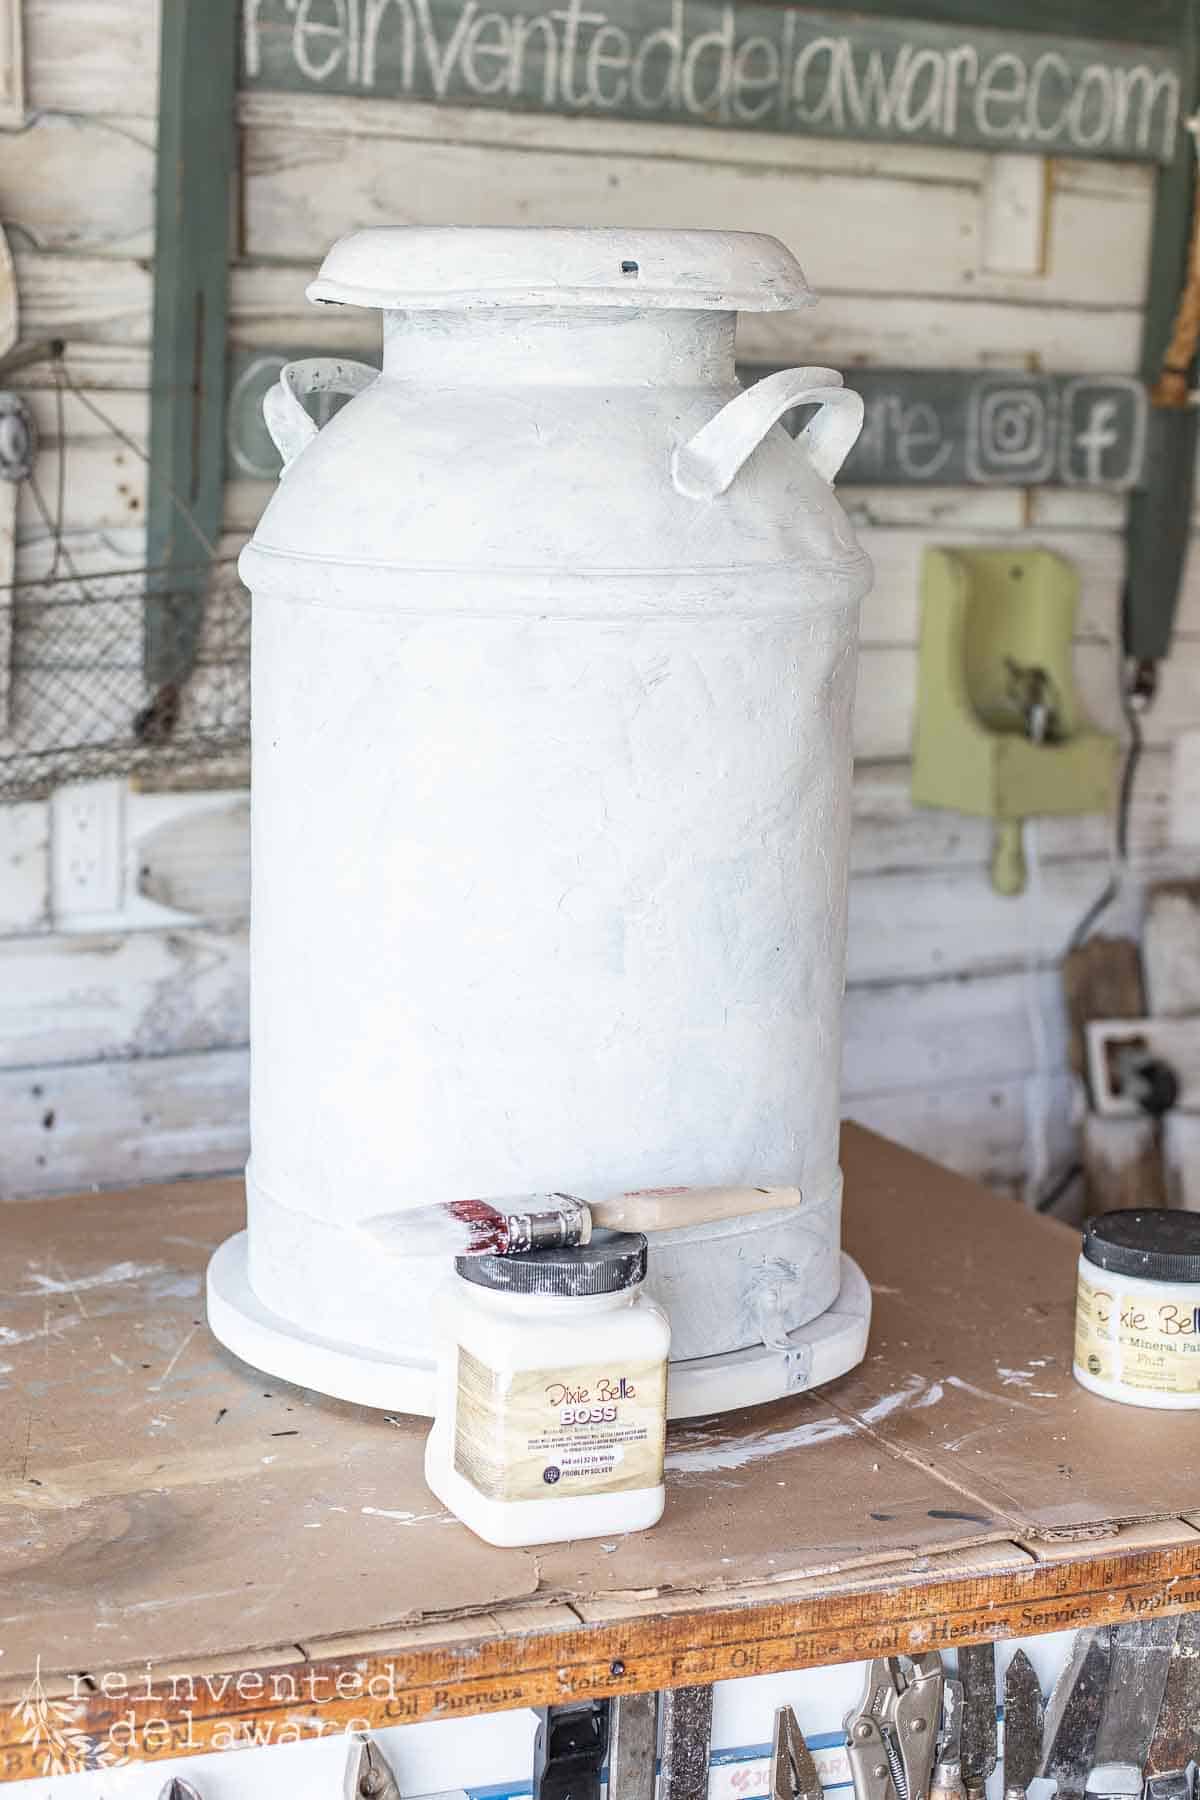

Then I applied two coats of chalk paint in the color Fluff. It’s a soft white that would look perfect with my transfer. It’s the perfect kind of paint for this project because I could apply a heavy coat with my paintbrush in a crisis cross fashion that would leave obvious brush strokes.
This metal milk can already had layers of paint that created texture. The random brush strokes add to the farmhouse look that is perfect for these older milk cans!
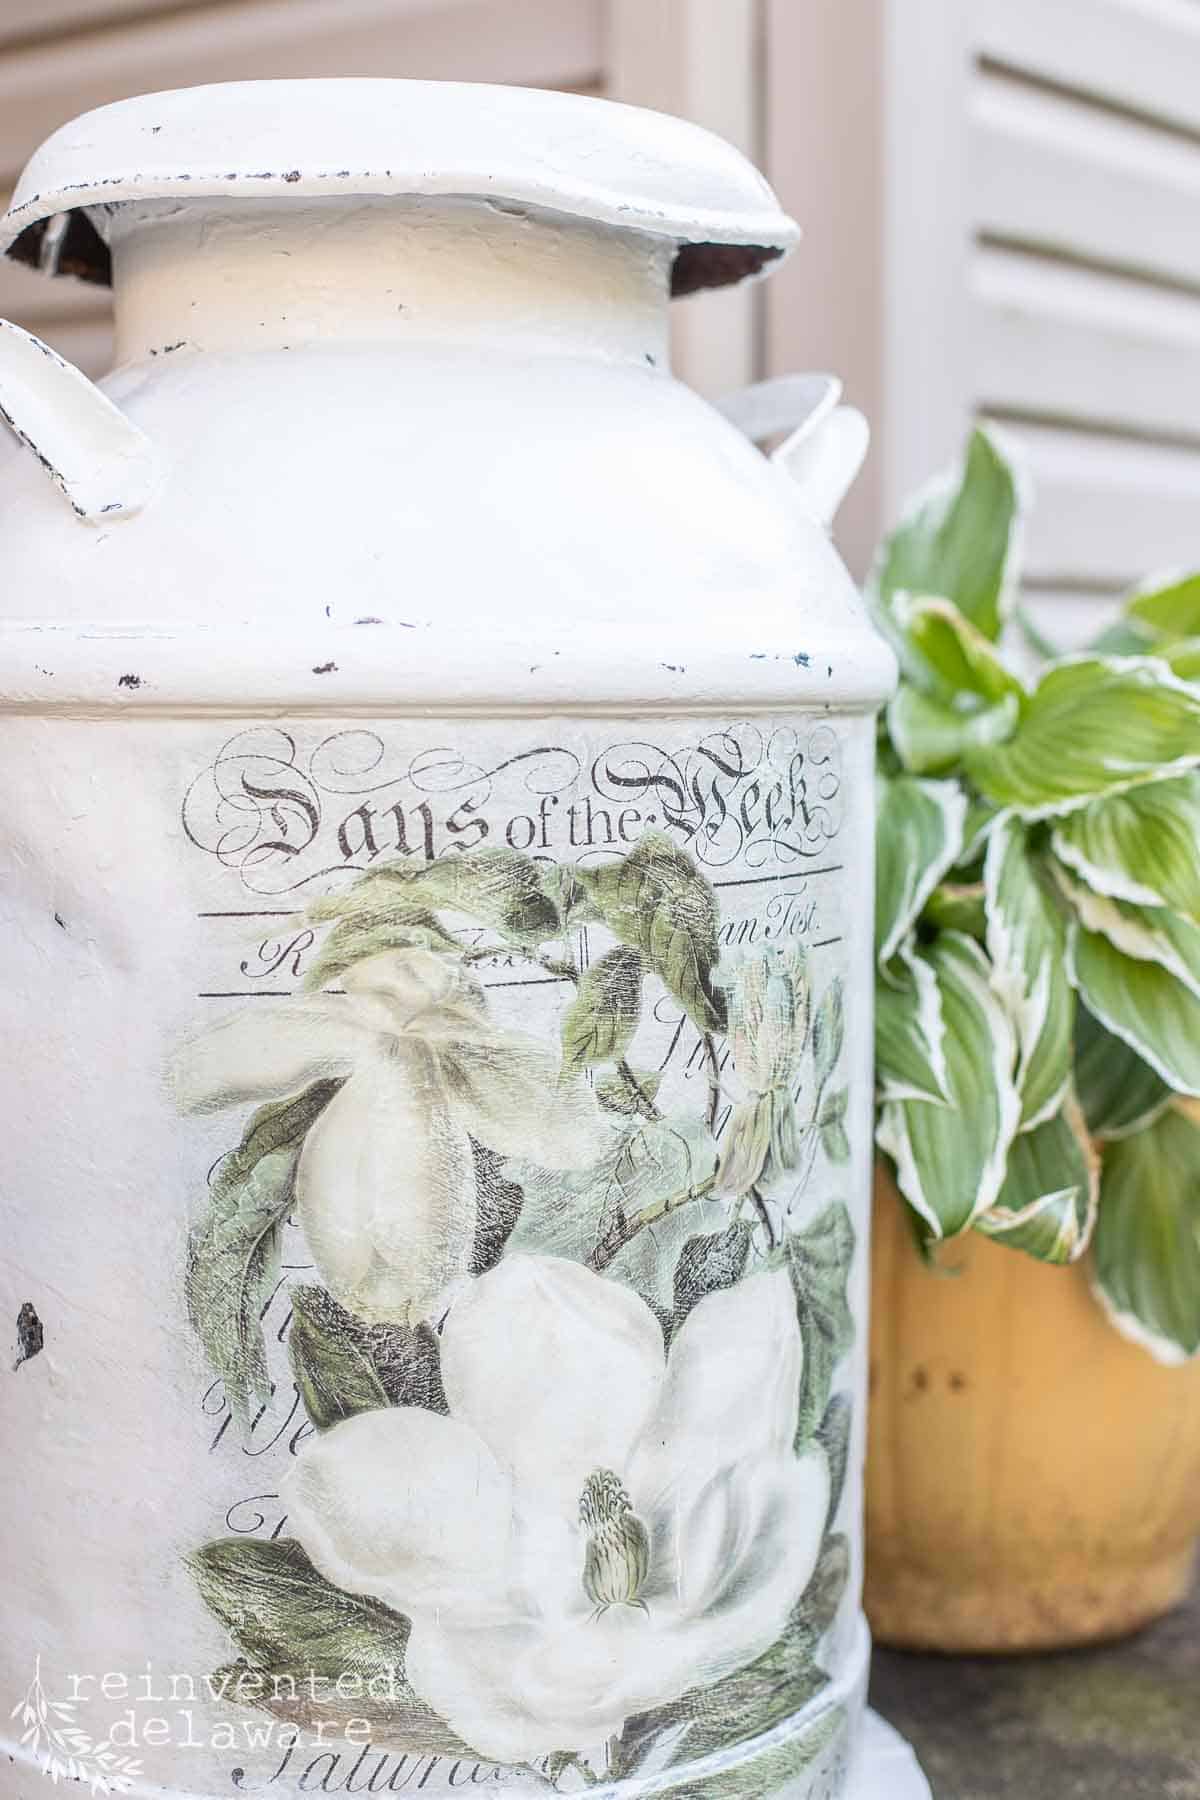
step five: apply the transfer
Have you used transfers on any of your projects? They are so much fun to work with and they are a great way to add a decorative element to many thrift store pieces. I used this magnolia transfer in a previous project when I demonstrated how to use rub-on transfers on furniture.
This full sheet was leftover from a gorgeous piece of furniture just waiting for the next project!
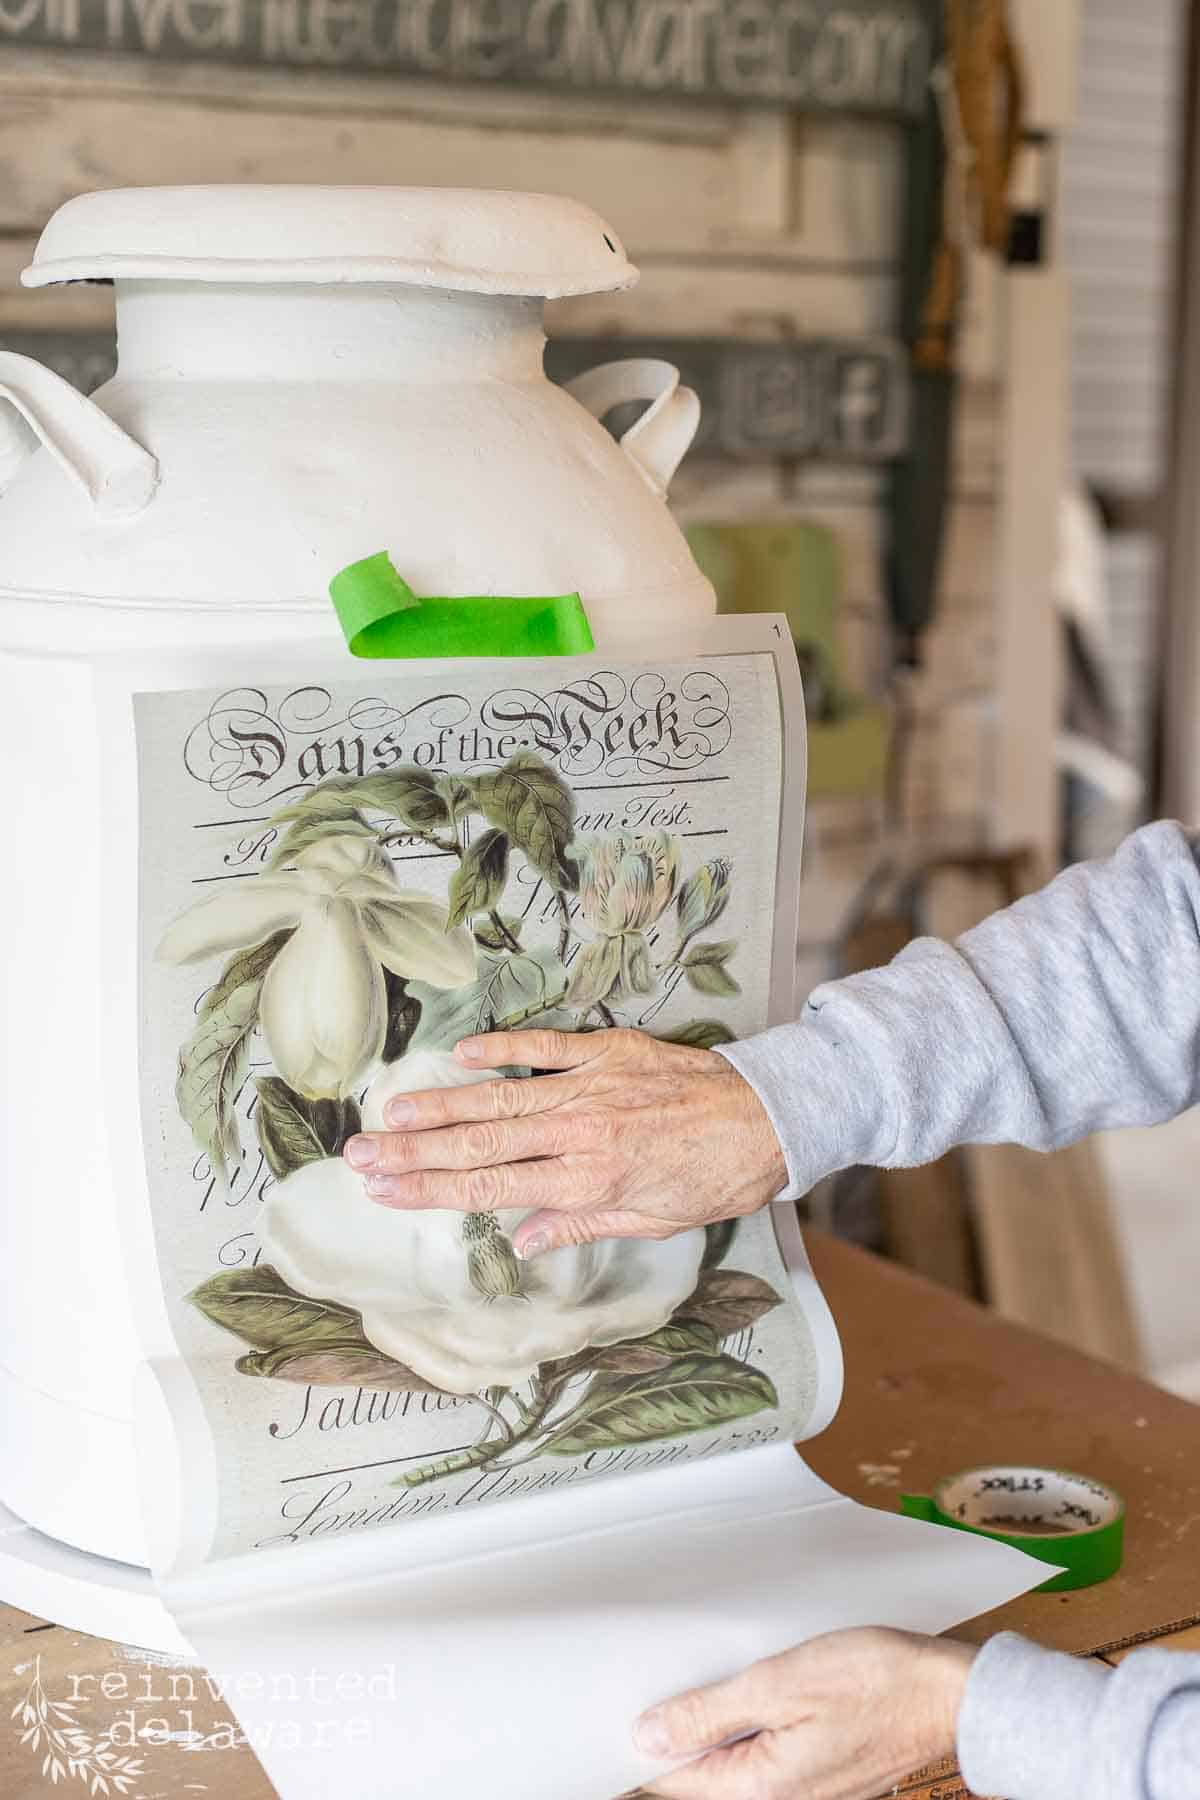
step one: decide on placement
The first step when applying for a transfer is to decide on the placement. The transfers come with a backing sheet that prevents the transfer from coming off prematurely. The transfer I am using is one full sheet so placement was simple!
If your transfer has several components, cut the sections out and decide how you want them laid out on your piece. It’s best to have a plan before you start to apply the transfer!
step two: remove the backing
Next, pull the backing sheet away from the transfer sheet and stick it in place. Blue painter’s tape is helpful when holding it in place. Once the transfer has made contact with the surface, it is next to impossible to remove it without damaging the transfer designs. Be sure of placement before making contact with the surface!
step three: rub on transfer
Use the tool that comes with each transfer rub on top of the transfer sheet over the design. This will press the design onto the surface. Take your time and go over the entire design of the transfer. You will see the color of the change of the transfer, or maybe I should say lighten, as the transfer makes good contact with the surface.
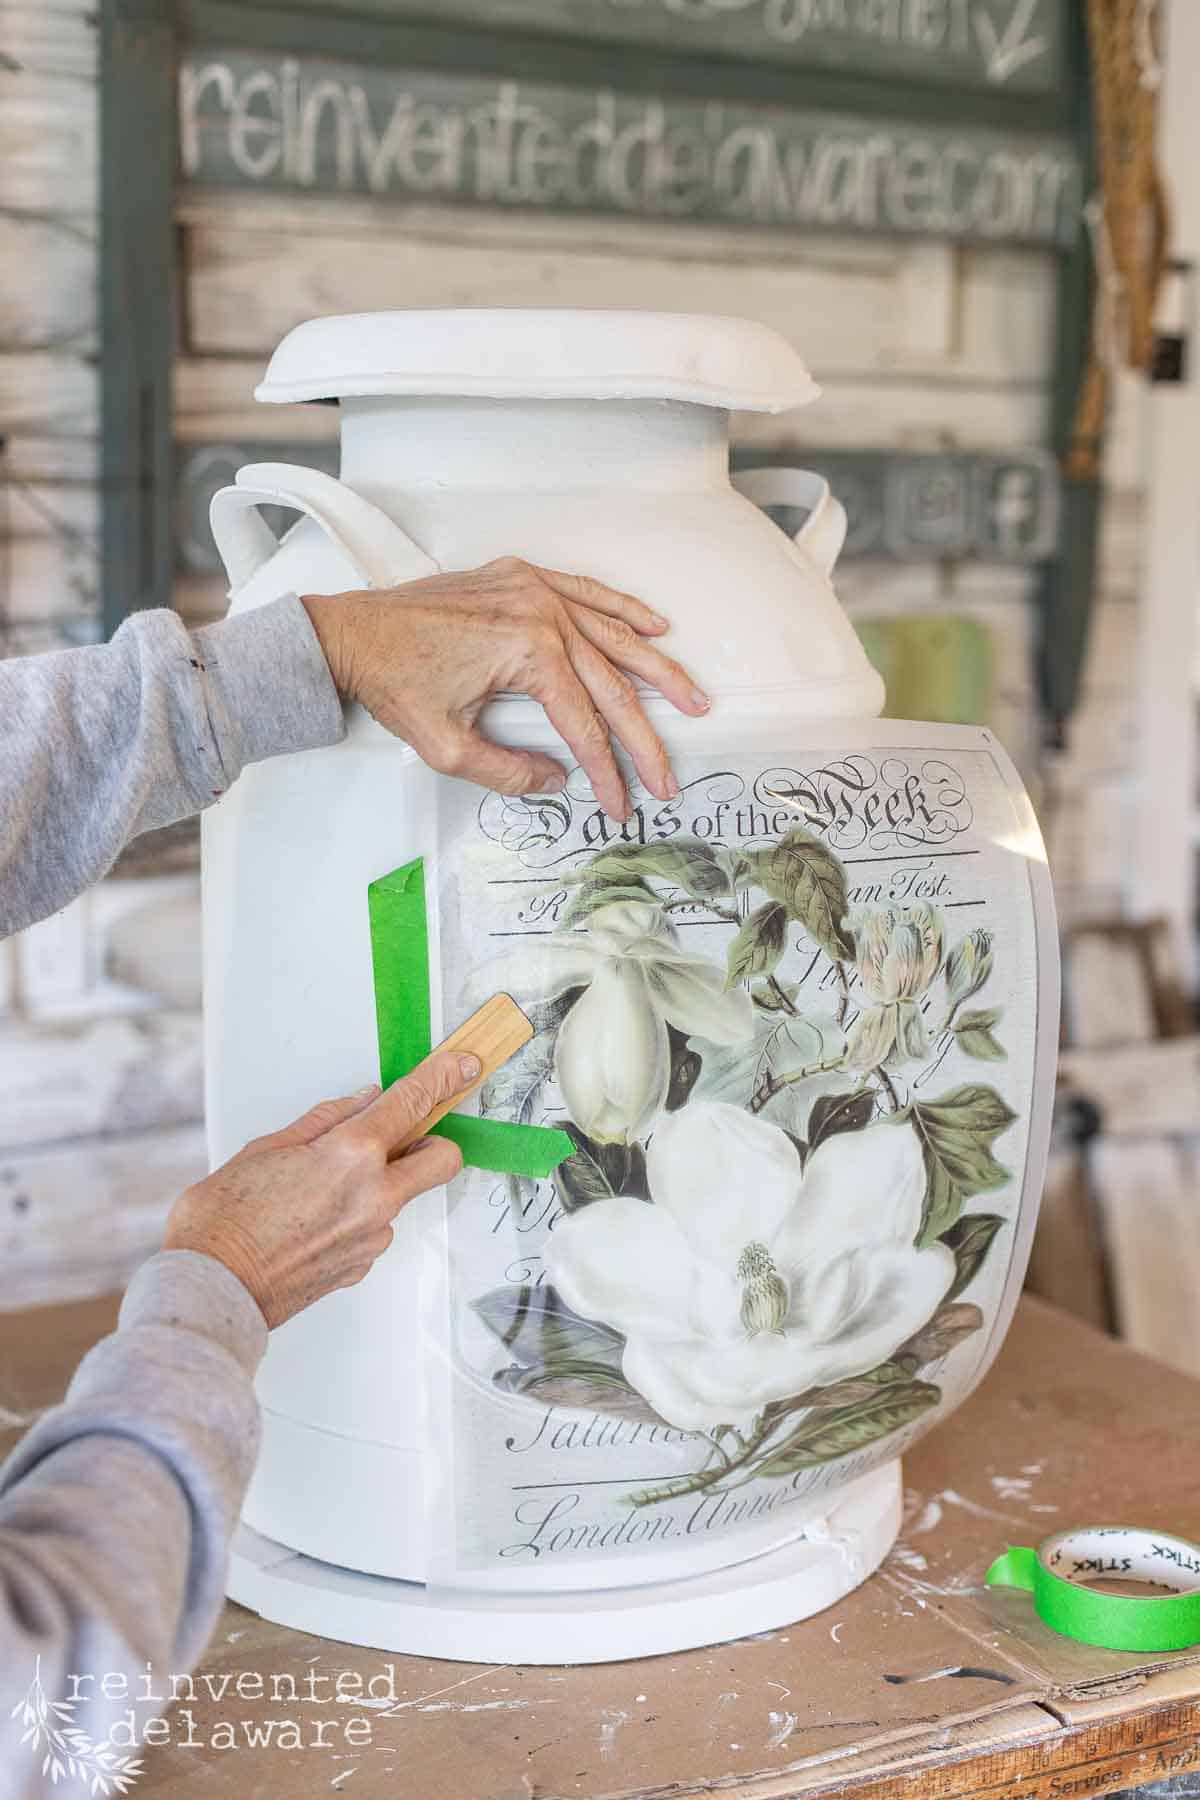
step four: smooth the transfer
Once the transfer is completely on the surface of the milk can, use the shiny side of the transfer sheet to smooth out the transfer. I have also used my fingers to do this without any problems. You just want to be sure all of the transfer has made good contact with the surface, especially the edges of the transfer!

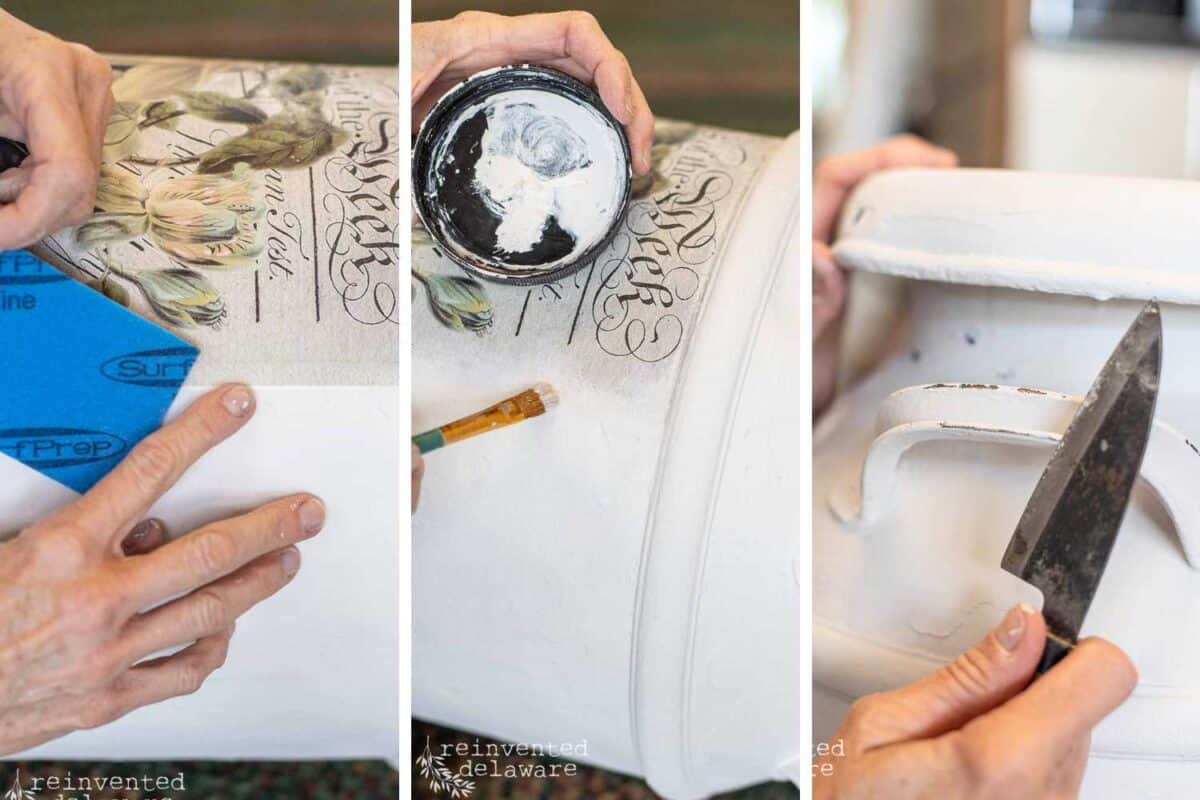
step five: create a vintage appearance
Speaking of the edges of the transfer, they were a little too perfect for my liking. So I used a fine flexible sanding sponge and softened the edges to give it a time-worn look. A little bit of paint on the end of a small artist’s paintbrush helped to soften the edge even more. I also did a little knife distressing to add another layer of age!
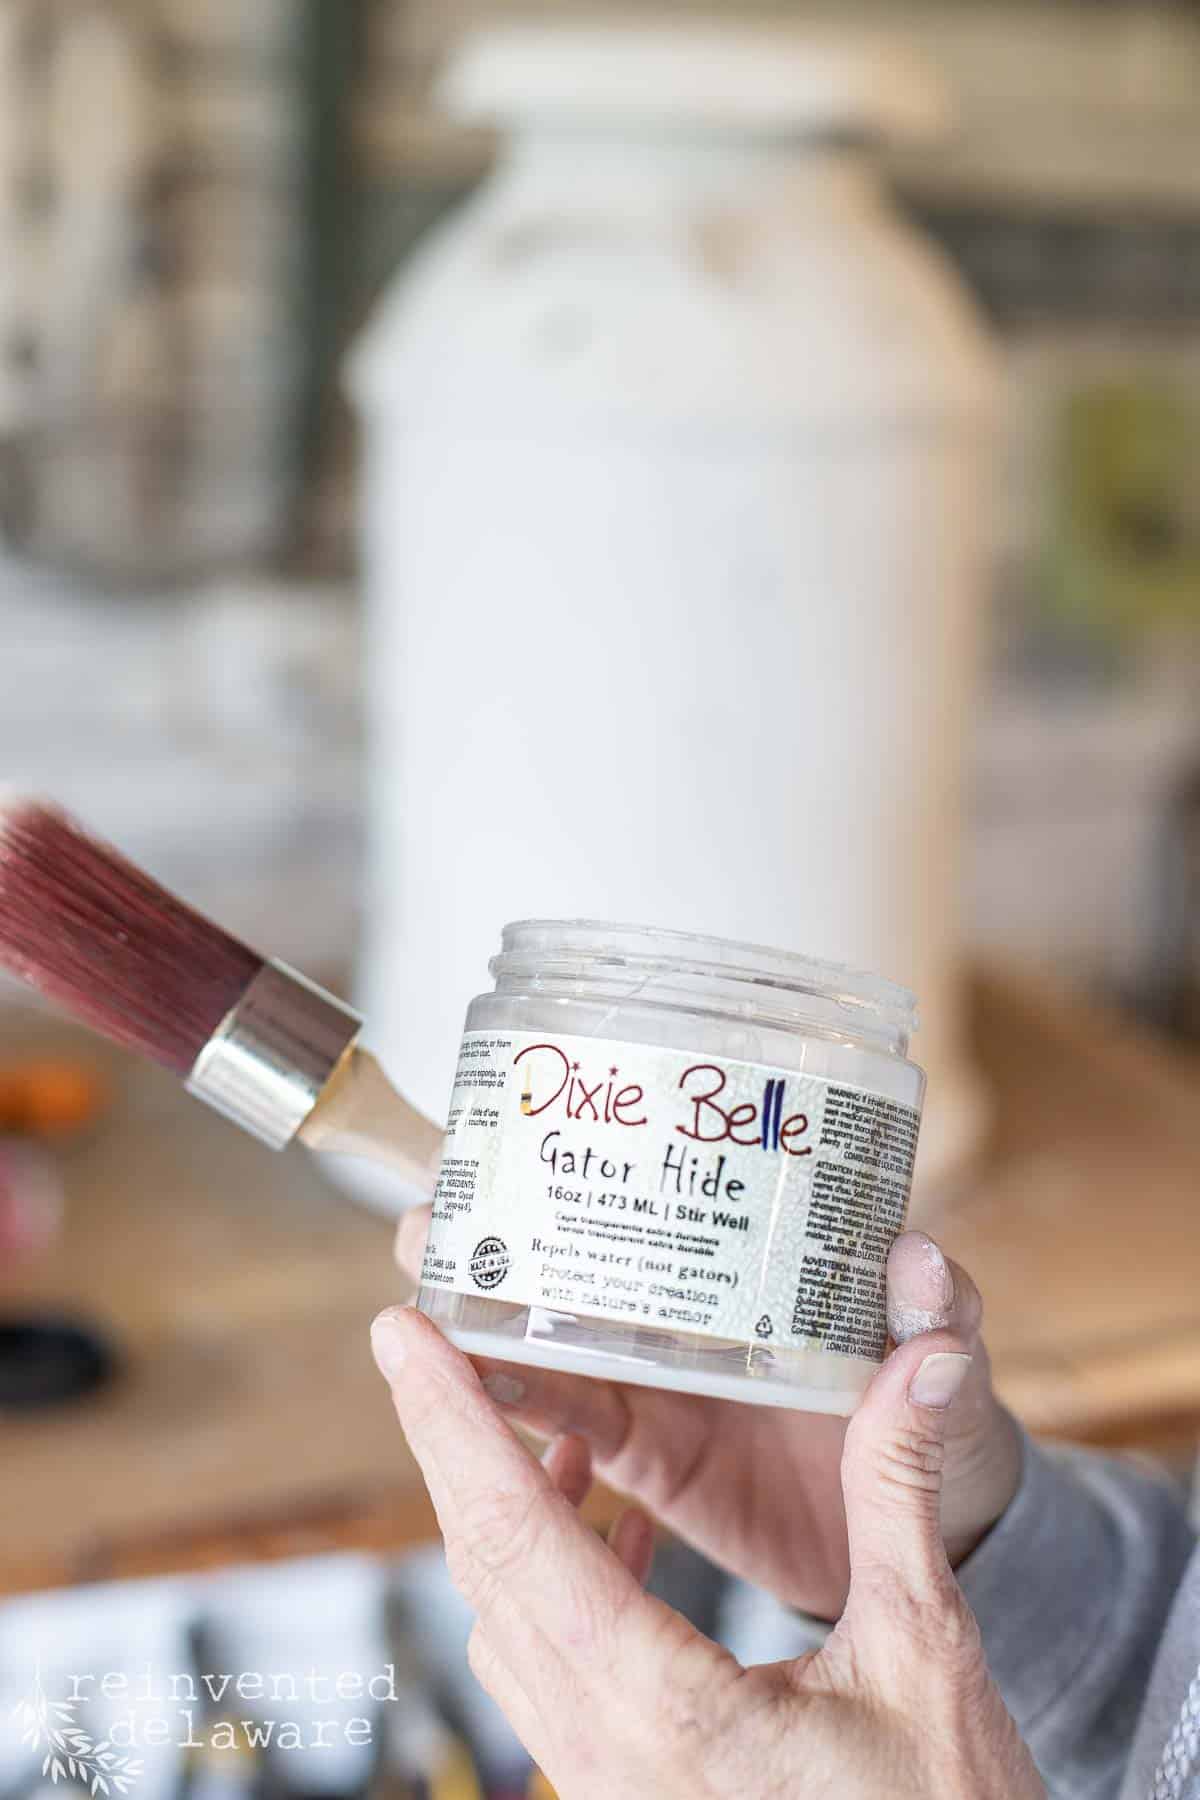
step six: seal the painted surface
The next step is crucial to preserving all of your work! Chalk paint needs to be sealed and the perfect solution to seal this freshly painted old milk can is to use Gator Hide. This product is rated for outdoor use, is non-yellowing, and is so durable!
We have used it on our outdoor oak table top and it holds up wonderfully through all sorts of weather!
I applied the first coat and then allowed it to dry for two hours, then applied a second coat and allowed it to dry completely overnight.
decorating ideas with an old milk can
- stencil your house number on the can for a unique piece on your front porch
- create little side tables by attaching a wooden round top
- leave the lid off and use it as an umbrella stand
- use these classic pieces as plant stands (protect the surface with a plant saucer!)
another upcycled old milk can idea
A few years back, my hubby and I stumbled upon a milk can in good condition at a yard sale. He had a cool idea to add a stylish wood top to it, making it an amazing side table for our front porch.
He had also used black spray paint on it to preserve the metal. Then a couple of summers ago, I gave the milk can table a fresh coat of paint. We just can’t stop making things over around here!
Seriously, what is wrong with me!! Do you like change as much as I do??

FAQs and interesting facts about old milk cans
- milk cans started being used in the US in the 19th century
- vintage milk cans are also called milk churns
- milk cans were used to transport fresh milk from the dairy farm to their customers
- customers would meet at the location set up by the dairy farmer with a container in hand ready to purchase their supply of milk
- milk cans come in various sizes including 5, 8, 10 & 25 gallons (10-gallon sizes are still used by the Amish today!)
- the 4-digit number, as well as the 5-7 digit number phone numbers on the can can help you to date your milk can
milk can history
Here are a couple of articles with more information on these classic pieces of our history:
Celebrate Milk Cans as Collectibles
Let me know if you have come across an old milk can in your thrifting and auctions shopping adventures! This one is making a beautiful addition to our back patio. It is the perfect new side table to set my hot coffee on in the mornings this summer! Maybe I’ll even have a tall glass of milk in the mornings and set it on this sweet little table!

more awesome thrift store makeovers
Each month I join several other bloggers who love to do fun projects, simple thrift store makeovers, and their great ideas for upcycled projects.
I’m sure you will find so much creative inspiration as you go through each of their posts! Just click the links below and be ready to get creative!
Our monthly edition
Thrift Store Decor Team
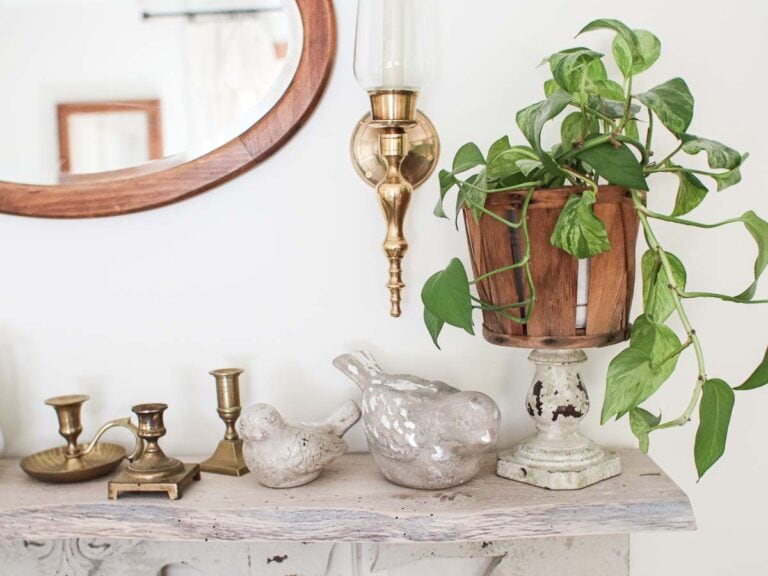
- My Repurposed Life – Planter Shelf Garden Chair
- Petticoat Junktion – Paint Plastic Furniture to Look Like Real Wood
- Sadie Seasongoods – Closet Organizer for Accessories
- Shop at Blue – Updated Metal Garden Decor Table
- Organized Clutter – Vintage Potatoe Planter Flower Pot
- Our Southern Home – Thrift Store Plant Stand into a Drink Table
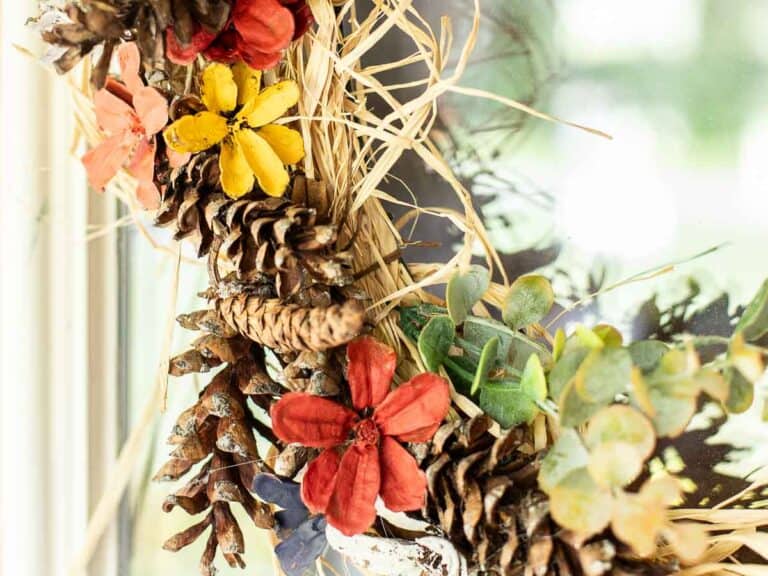
- My Uncommon Slice of Suburbia – Boho Wreath using an Embroidery Hoop
- Domestically Speaking – Coastal Seahorse Basket
- Reinvented Delaware – that’s me! Hope you enjoyed all of the projects!
more from the thrift store decor team
No posts

Pin the image below to your home decor and furniture boards! Just click the pin button at the top left corner!

thanks for joining our journey!
Thanks so much for joining us for this post! Join our journey so you don’t miss any of the fun projects, tutorials, and inspiration that we share with you each week! You can follow us on Instagram, Facebook, and YouTube. We share even more inspiration on Pinterest!
click below to purchase supplies!
Visit my Amazon Storefront!
Click the button below and head over to our online shop on Amazon!

What a beautiful and unique piece, I just love the way it turned out!
Thanks Kristin! I’m pretty pleased with it too 🙂
Just gorgeous Cindy! Awesome job.
Thanks Carlene! I’m loving the milk can too!
I adore these old milk cans, Cindy. I’ve had several over the years. Before long there will be no more. Thank you for saving this one. The transfer you chose was the perfect addition to update it.
xo 😘 pinned
I love them too! We have two and I plan on hanging on to them both til the cows come home!
Love this make over Cindy. It sure makes for an adorable side table.
I think so too Wendy! Thanks for stopping by 🙂
Cindy, I love old milk cans! Maybe it comes from growing up on a farm in the old days…think the 1950’s through the ’60’s when they still used milk cans. I have been trying to find one to buy for ages but they can sometimes be fairly pricey so haven’t found one I could afford. I love what you did with yours, though. It wasn’t what I was envisioning at all when you started, but turned out to be an elegant surprise! Thanks for the tutorial and sharing your milk can makeover! (P.S. Just signed up for your blog posts.)
I’m so glad you enjoyed the milk can project Naomi! I hope you find a milk can for your home – keep hunting! Thanks for joining us here – I hope you enjoy the freebie library too!
This turned out so cute Cindy! Thanks for sharing!
So glad you enjoyed the project Michele!
Cindy,
I love how you added the round base to the bottom of the antique milk can. I did a couple last year, and I wish I had thought to do that.
The transfer is perfect!
pinned
gail
Wow, Cindy! This is such a great transformation! I can’t believe it’s the same milk can! That transfer is wonderful! Such a fabulous upcycle!
Wish I still had my old milk can. I love what you did with this one. It turned out beautiful.