
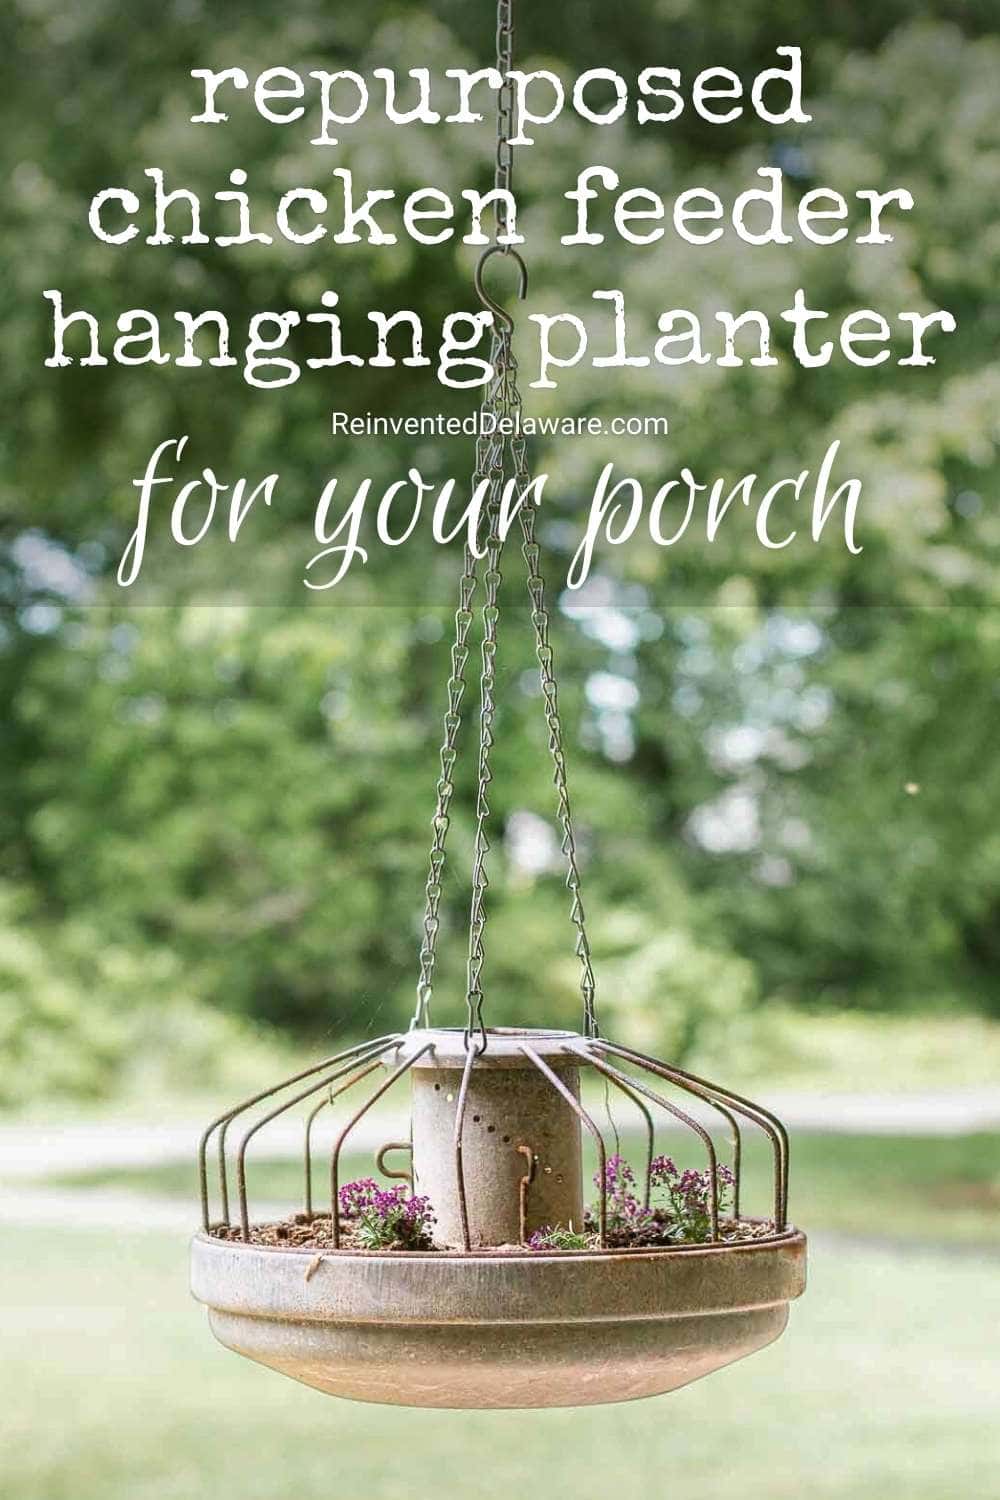
DIY Hanging Planter: Chicken Feeder Makeover
This diy hanging planter made from a vintage galvanized chicken feeder is perfect for spring and summer gardening!

diy hanging planter
Hi friend! I’m so glad you joined me on this upcycled garden decor idea! Today we are taking vintage chicken feeders and turning them into diy hanging planters for my front porch.
This is what I started with – a pile of chicken feeders we bought at an auction for $2 each. Nothing says farmhouse style like a real chicken feeder! Especially when is made from galvanized metal!

farmhouse style hanging planter
When I see a vintage piece like this at auctions and farm sales, I try to look at differently than it’s intended use. I held these chicken feeder upside down and immediately saw a hanging light fixture. Wouldn’t that be cute??
Then I turned them right side up and invisioned a rustice outdoor hanging planter. Sometimes you have to think outside of the box!
When you see items out in the wild like at a thrift store or an auction, try to see it outside of it’s original use. You will be surprised what you can create!
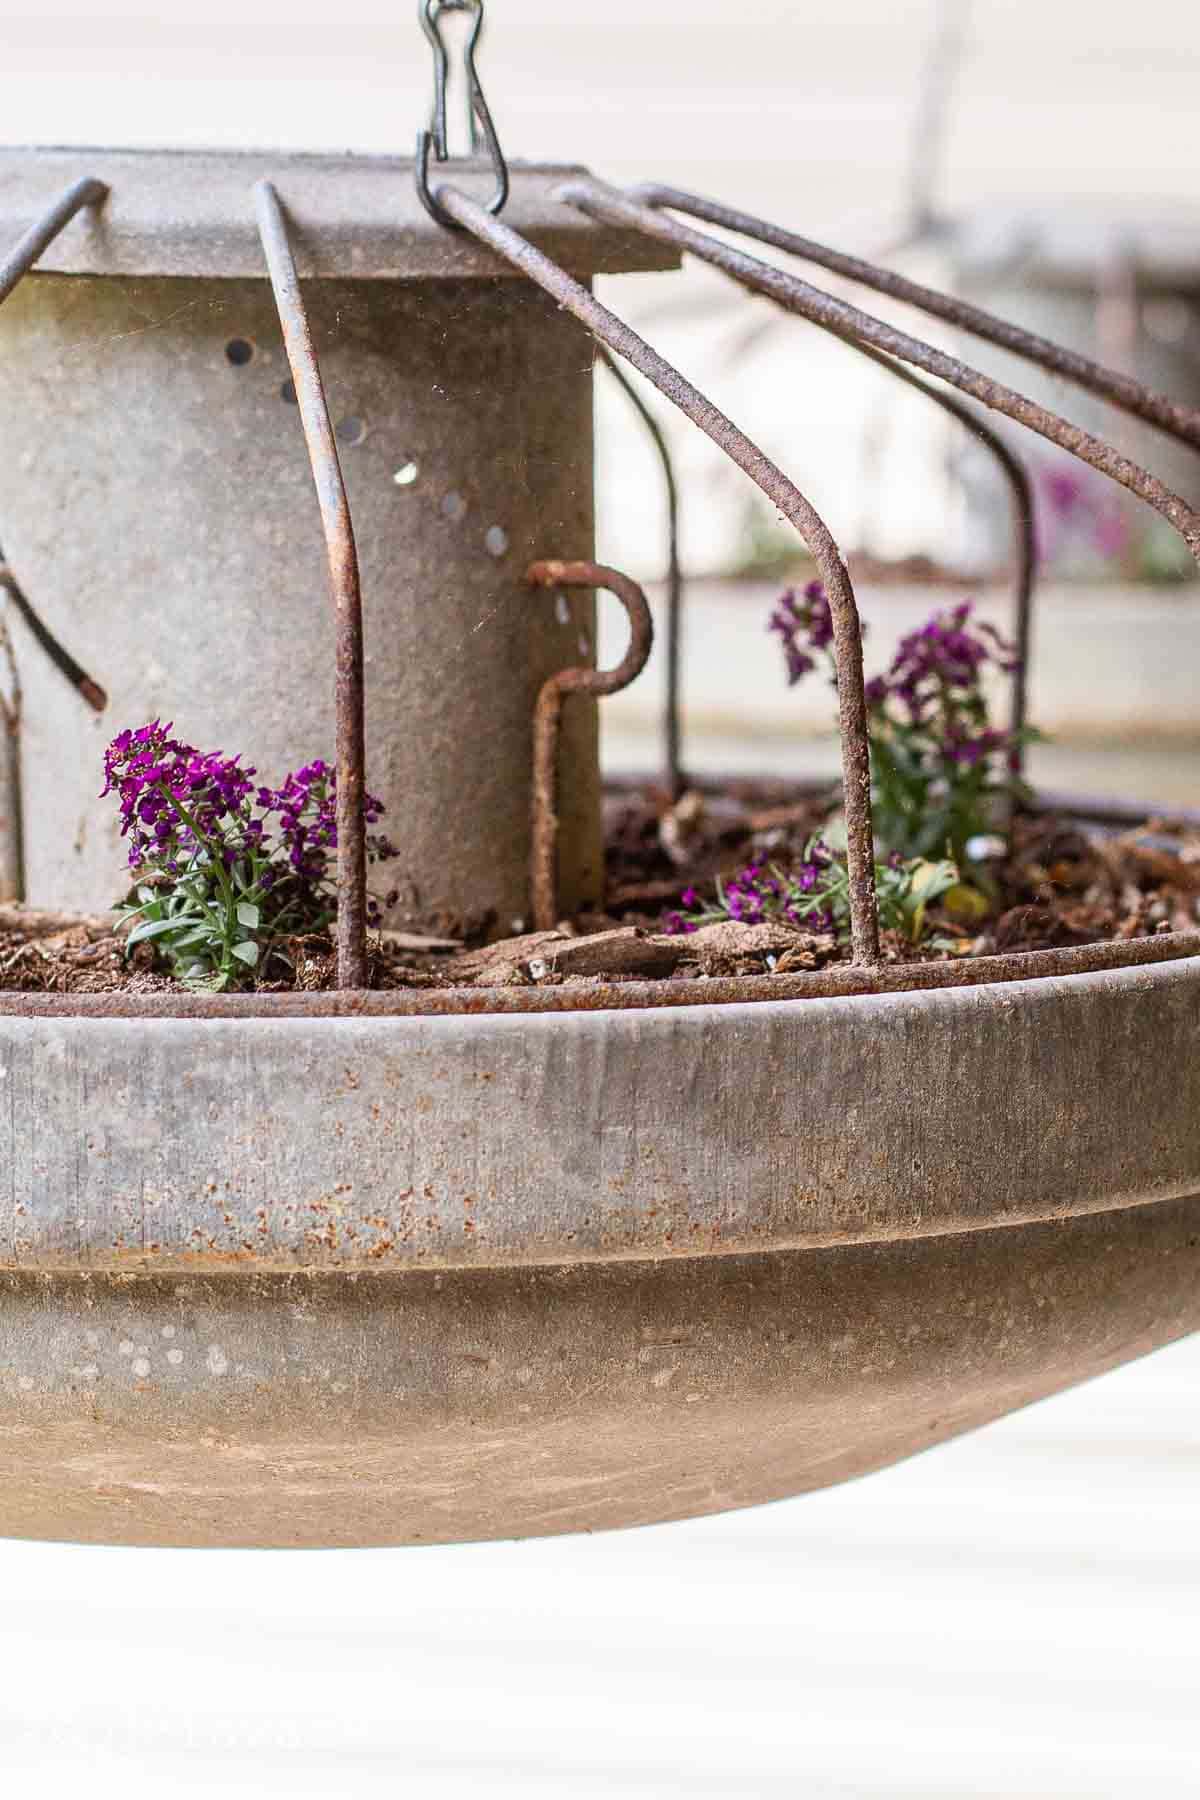
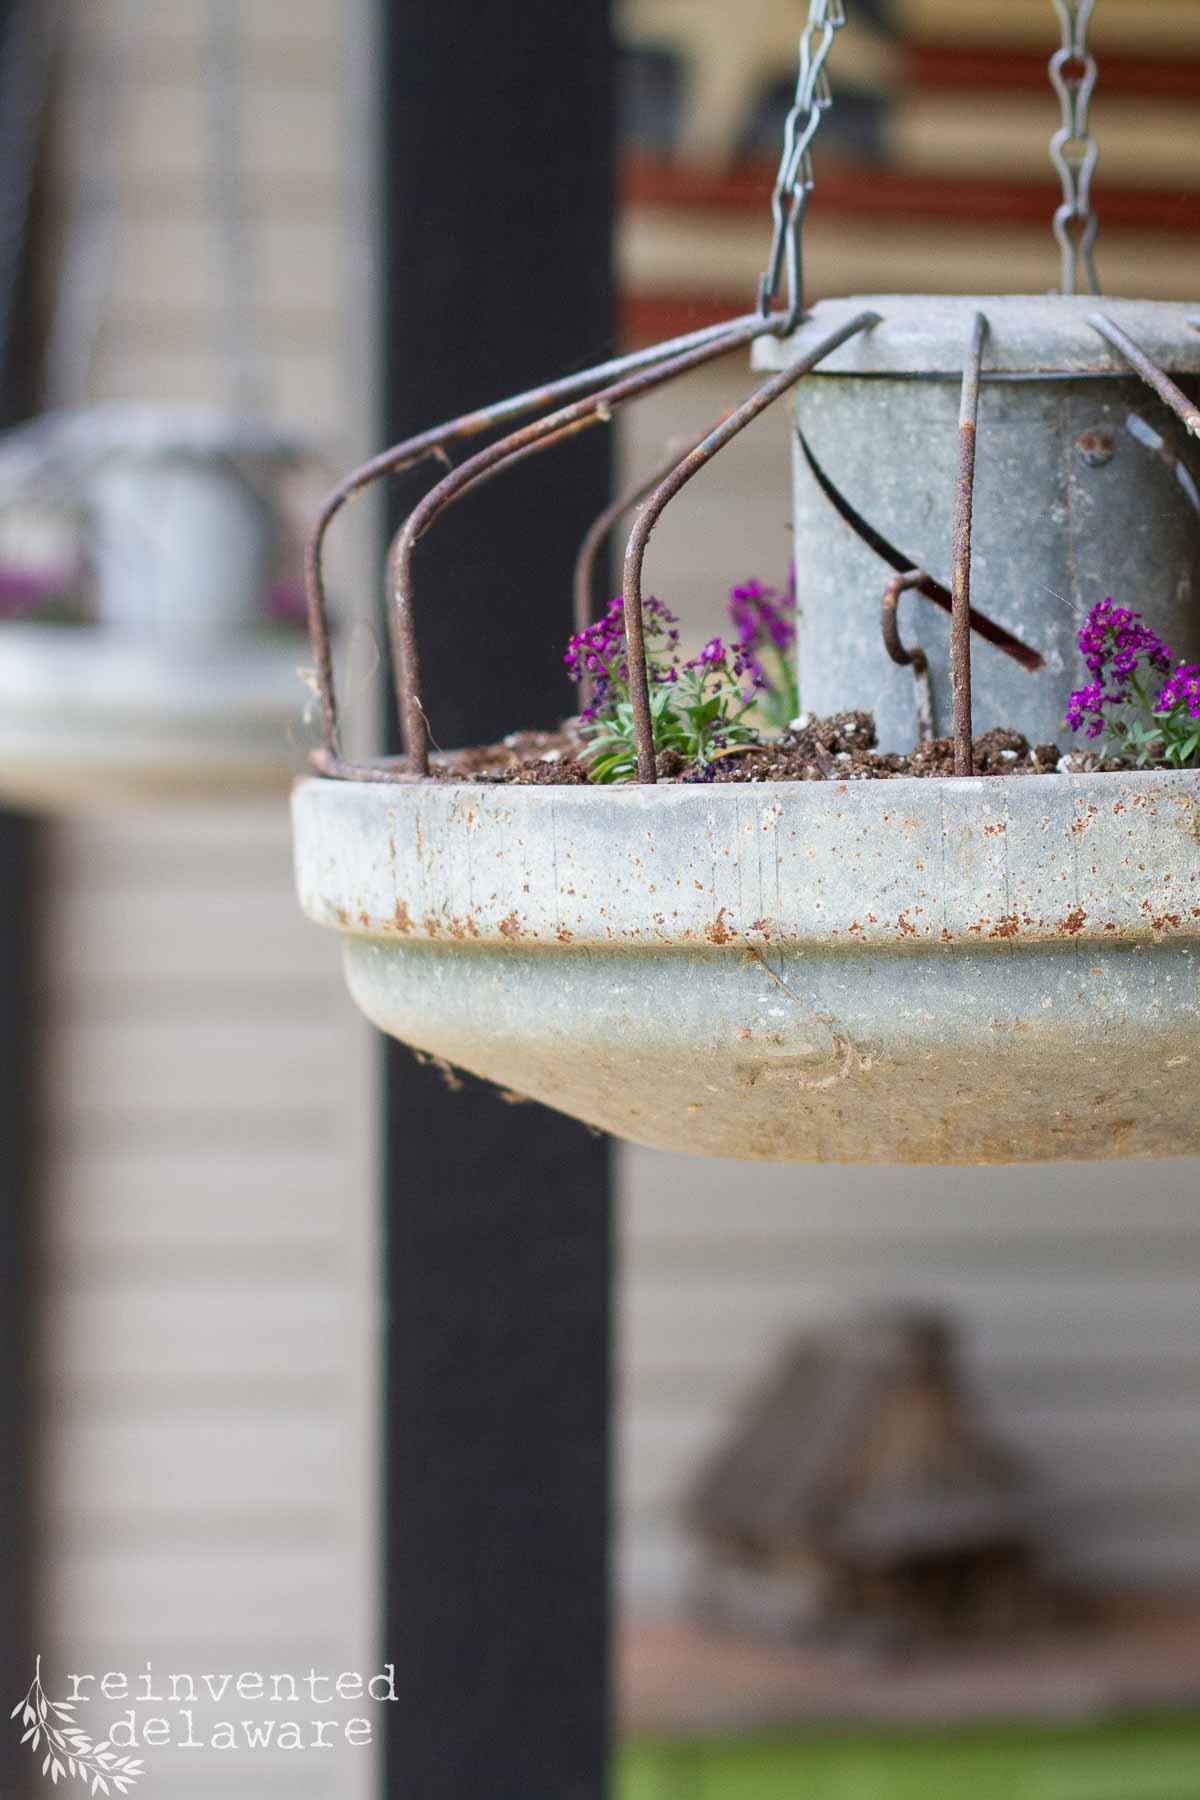
repurposed chicken feeder hanging planter
Let’s go over the easy steps I took to upcycle this galvanized piece of farm equipment into an adorable hanging planter.
step one: dissassemble the feeder
First I removed the cage section of the feeder from the base. I wore gloves since this vintage chicken feeder is a bit rusty. I squeezed the cage pieces together near the opening between the cage sections. You can see that clearly in the image below
You can see in the image below that the center bar is missing. Squeeze the area and the cage section will come out.
You may have to use some WD-40 if it is very rusted. The WD-40 will loosen it. Work gloves help to get a good grip on the galvanized metal.

step two: remove the center section
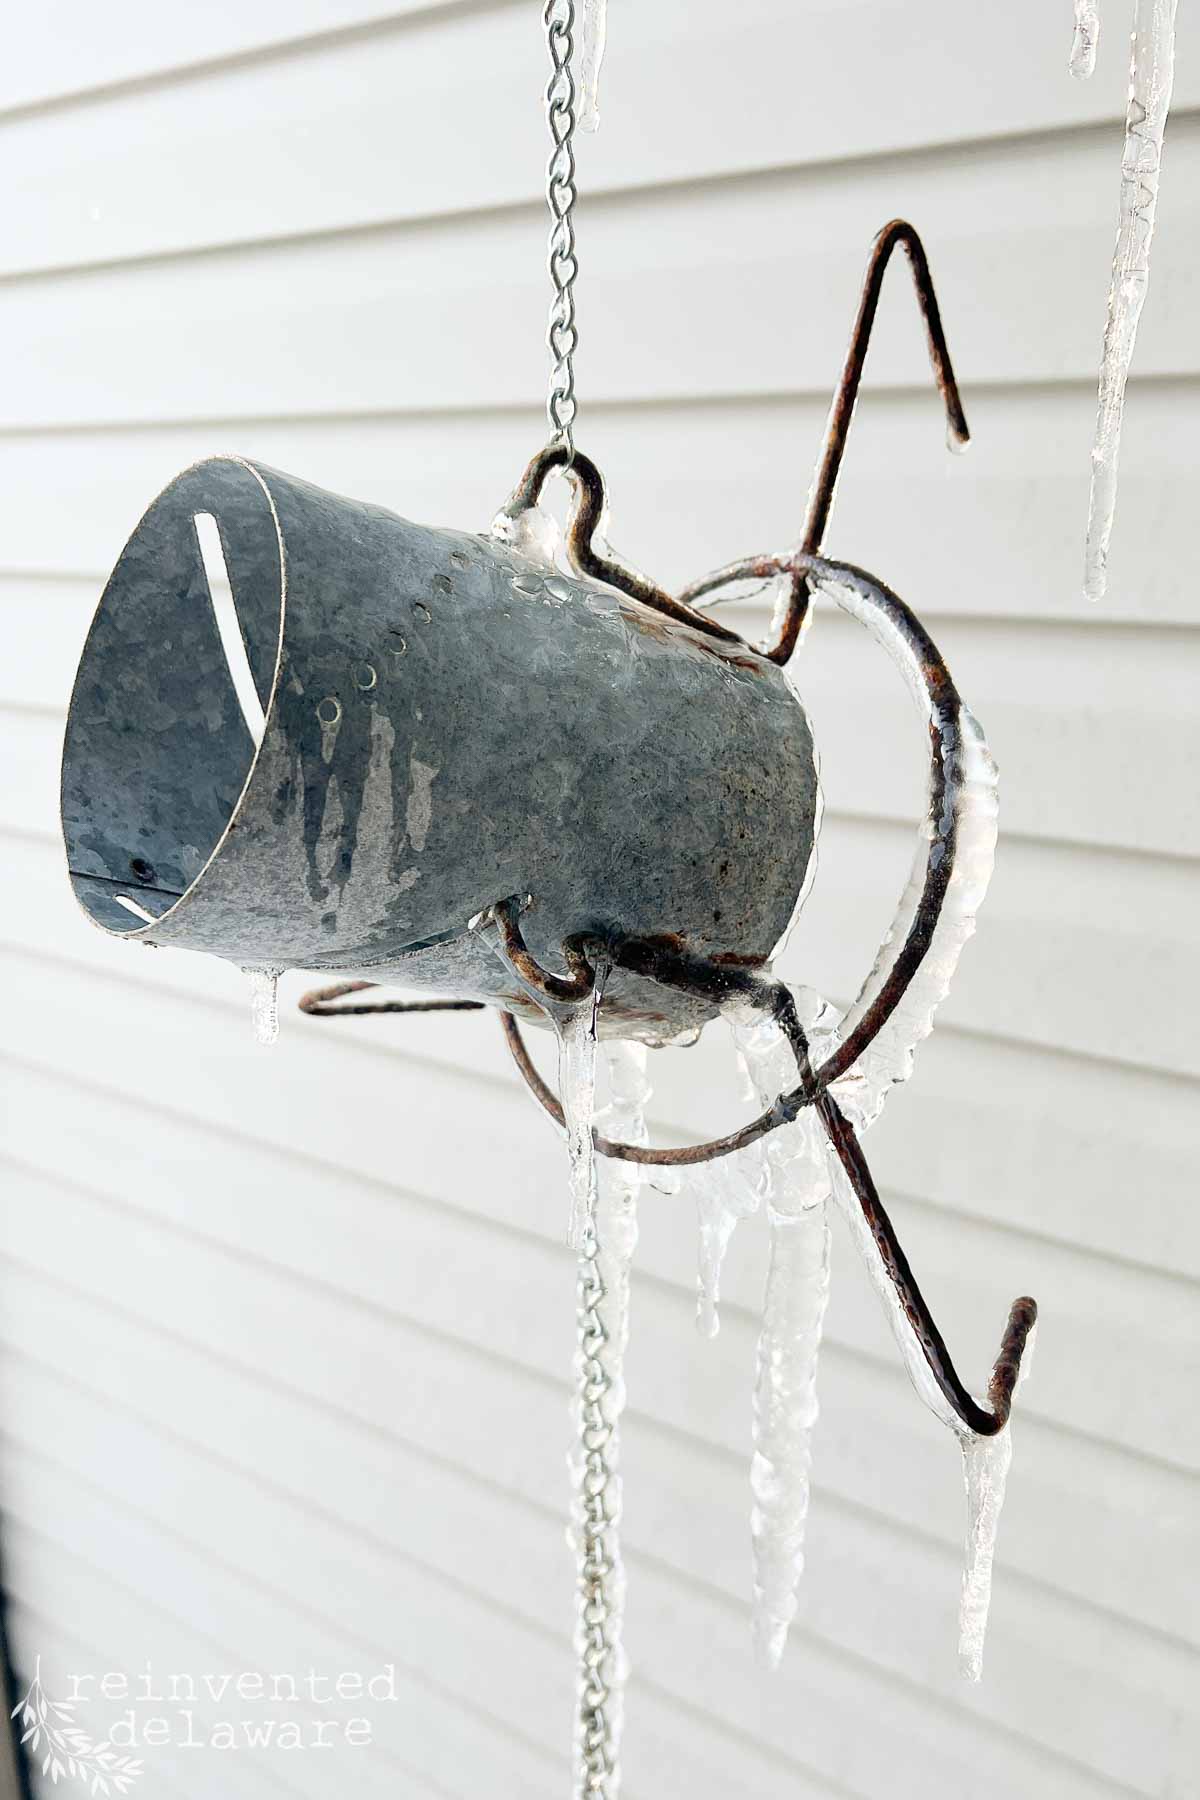
This step is optional! I kept the center section in the hanging planter for years! Then I had another idea to reuse the center section so I removed them from the hanging planters. This project will work great with either choice you make!
Let me first say, don’t mind the icey image you see below! I forgot to take the photo of the center section when I made this diy hanging planter so I grabbed a photo in the middle of winter! I will show you what I did with those center sections when the temps warm up outside! You will love that project!
Back to the project! Once the cage section is removed, the center section will pop off. It’s not permanently attached but it could be rusted together a little bit. Use more WD-40 if you need to loosen the section.
Next I removed the red plasic piece that was in the center of the chicken feeder. It was very dry rotted since these chicken feeder are at least 50 years old.
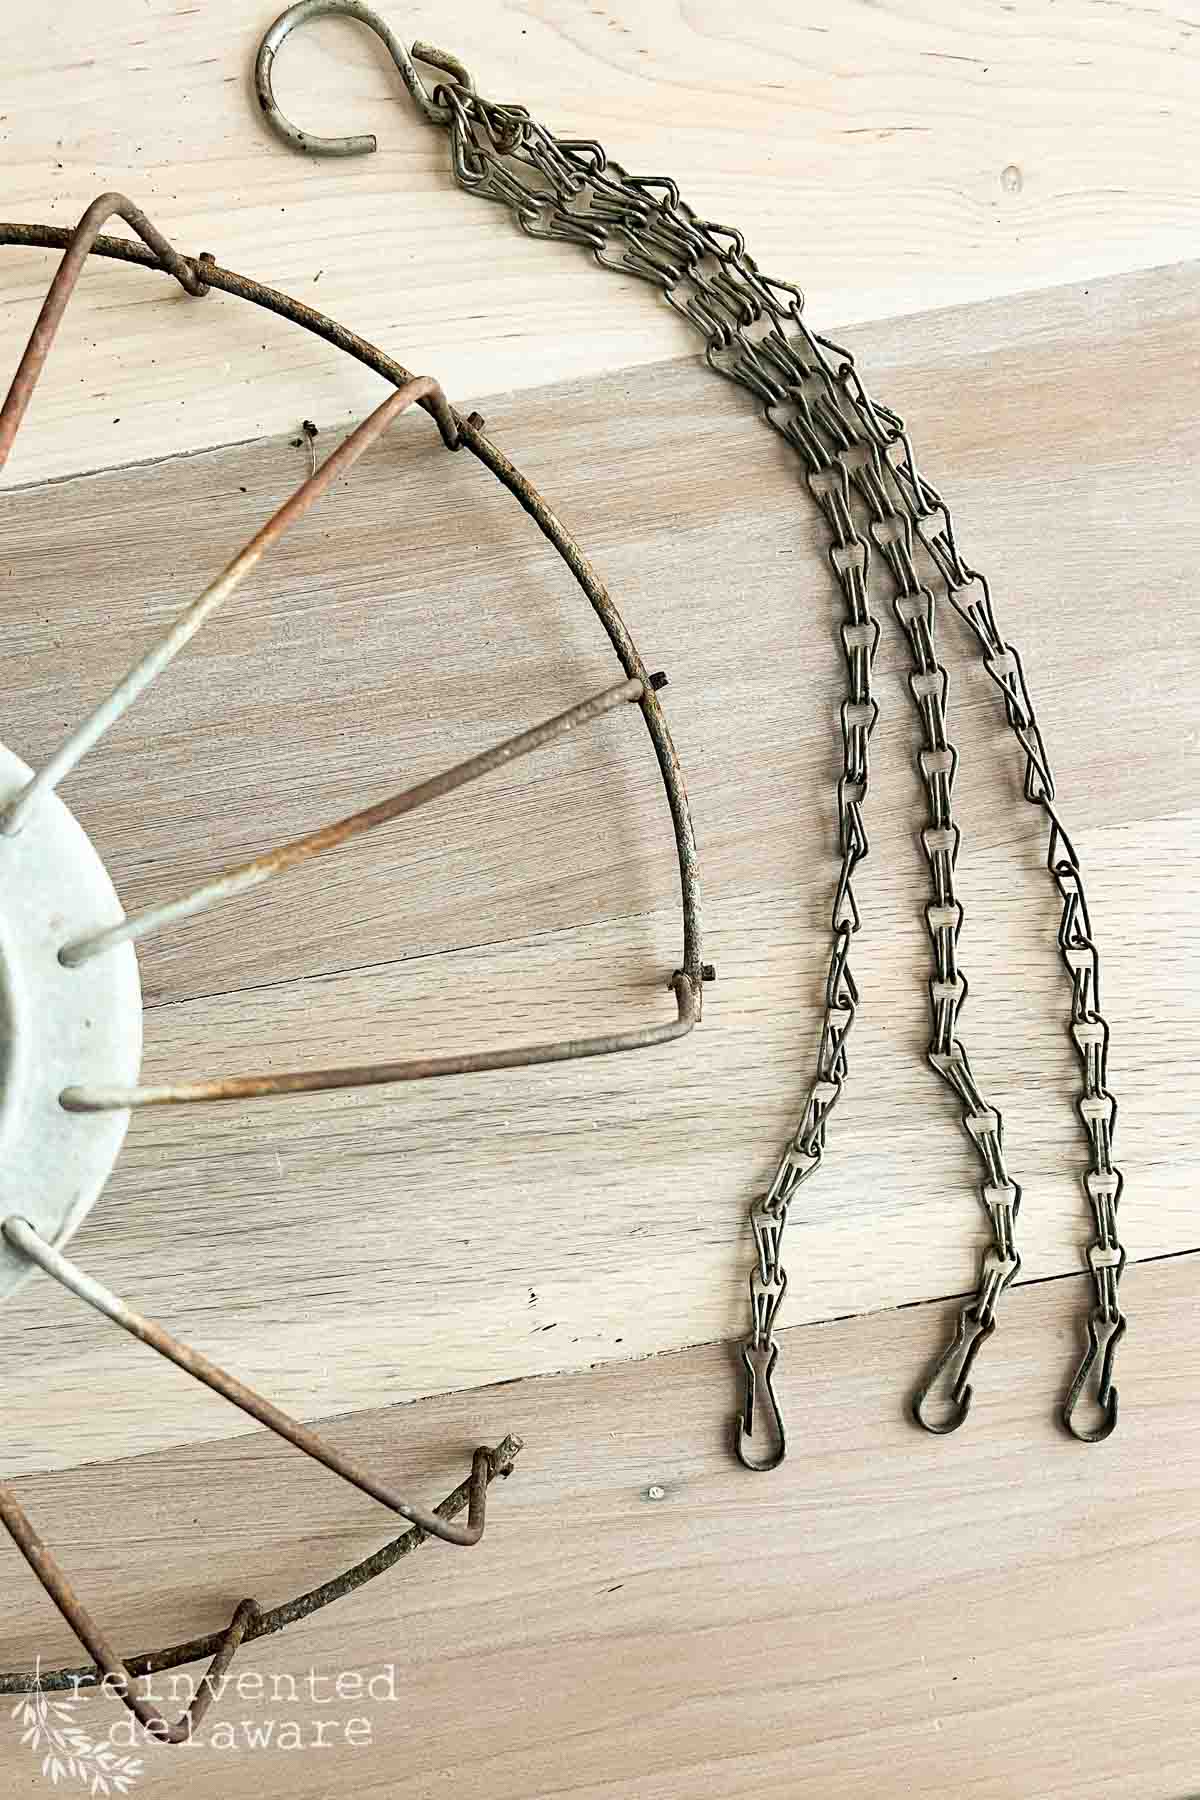
step three: add the hanging chain
Our front porch already had hanging baskets so I used the chains from them and hooked them onto the diy hanging planters. The metal was already aged so it looked like the vintage galvanized metal on the chicken feeders.
I spaced out the hooks evenly around the middle circle of feeder with the hooks that the previous hanging basket had. If you don’t have these hooks, check out your local hardware store for chain and clip style hooks. You will also need a large S shaped hook for the top.
step four: add soil and plants
Before I added plants, I drilled a couple of holes in the bottom to allow for drainage. If you do this, wear safety goggles to protect your eyes from flying metal! Also, we good work gloves so you don’t cut yourself!
I also sprayed clear Rustoleum Top Coat to protect the interior of the metal. This area will stay damp so it’s a good idea to do this with the beginning of each new season. Flex Seal Heavy Duty Sealer would work great too!
Next, I added potting mix along with the plants I chose, allysum, in a pretty purple color. Only add 2-3 small plants so that the hanging planter doesn’t become root bound too quickly. If the plant you choose is a fast grower, I would advise you plant only one in each hanging planter.
It was early in the season when I made this repurposed hanging planter so my plants are still small. They filled out nicely over the spring and summer!

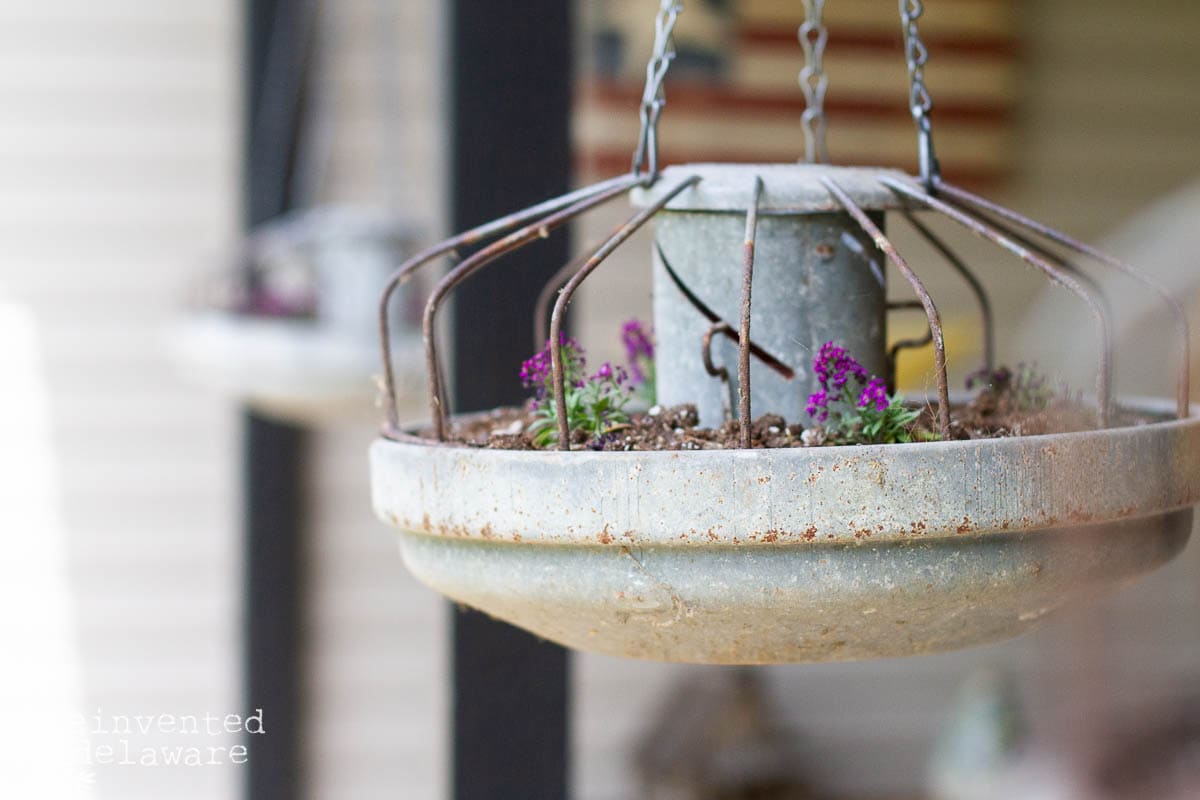
step five: reassemble and hang the planter
When you have the the soil and plants in the container, reassemble the planter. Simple squeeze the cage section the same way you removed it and insert it into the base.
You will notice in the image below that I do not have the entire cage section nestled into the base. Be sure that it is completley in the base section. This planter can get heavy as you add water and you don’t want the bottom to drop out!
thanks for being here!
I hope you are enjoying this project! Let me know if you have any questions. Or leave me a comment to tell me about your project and ideas!
thanks, Cindy 😀

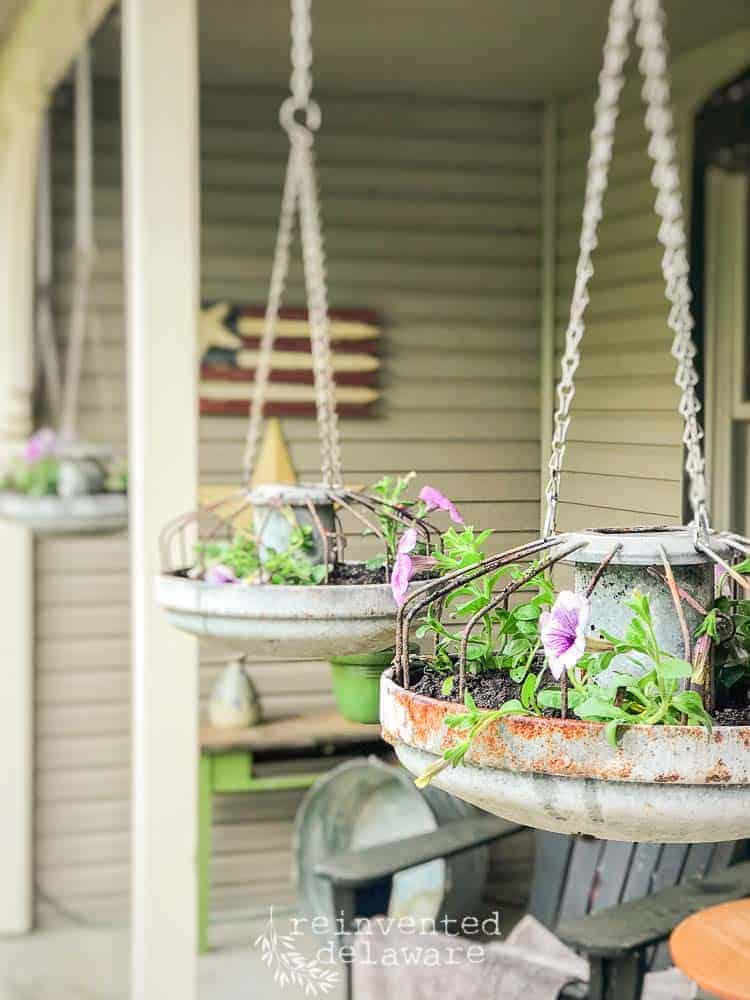
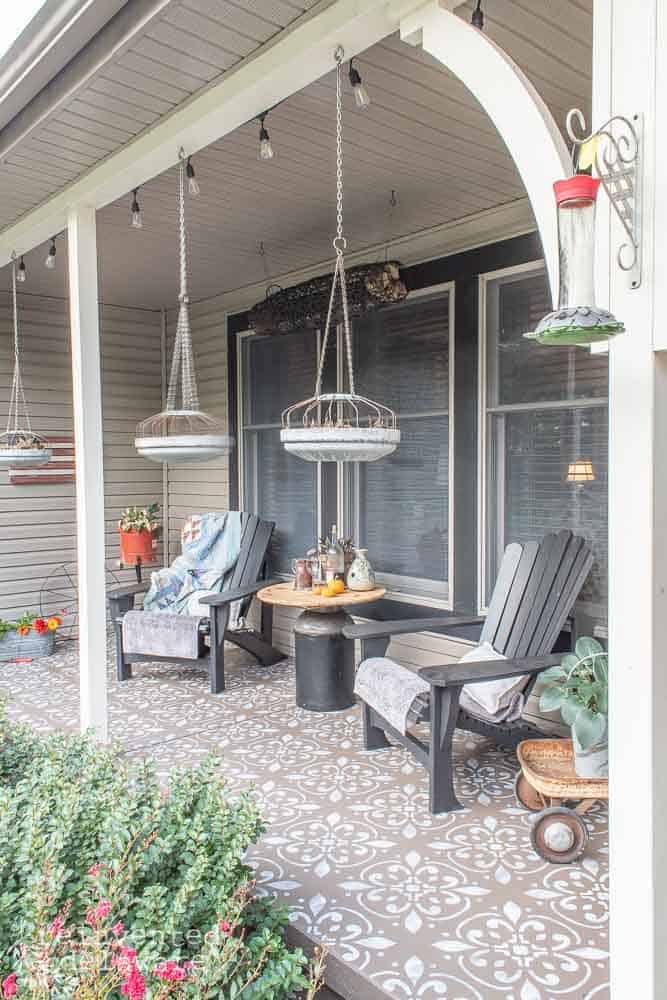
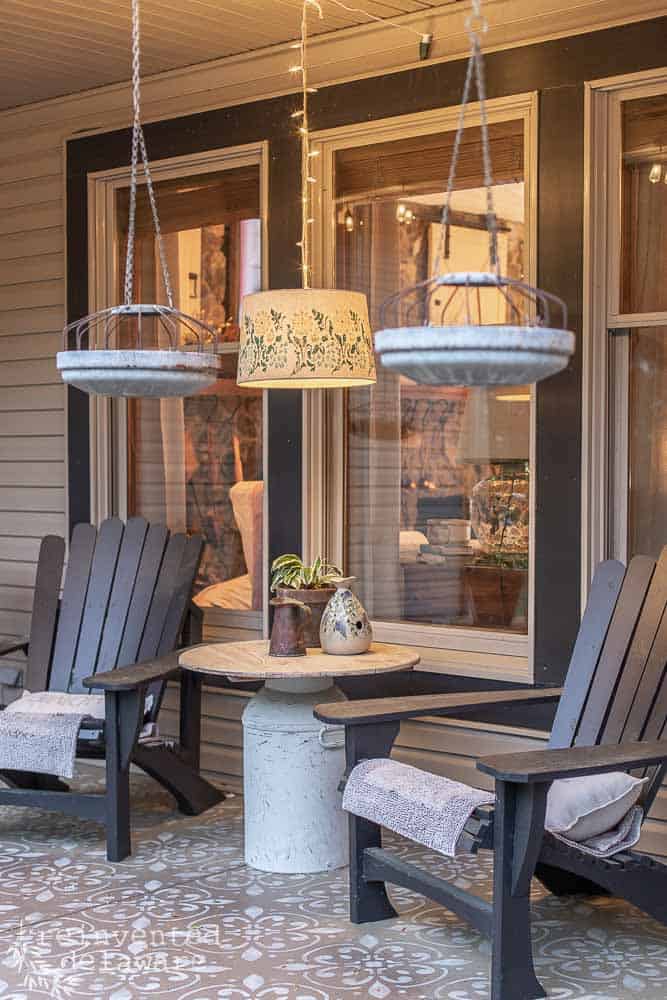
our cozy front porch
Below you can see the pretty country garden planters hanging on our front porch. I’ve planted petunias, sweet potatoe vine and vinca in the planter. I’ve even added a small gourd to the top of the center section in the fall!
You will also see that the image on the right doesn’t have any flowers in the repurposed farmhouse planters at all! I didn’t do a great job of keeping them watered that summer!
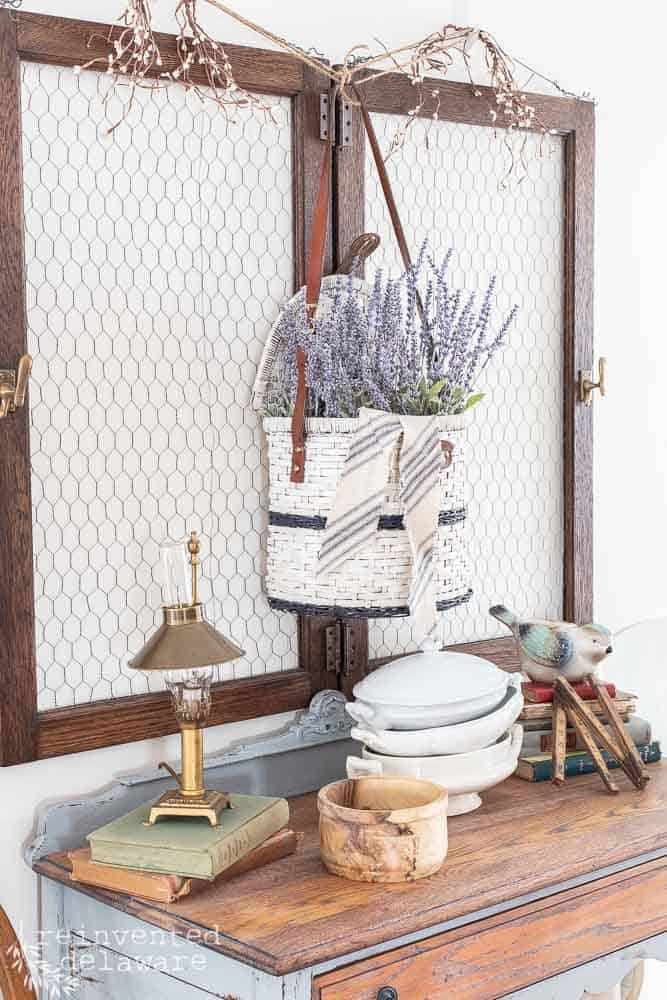
more diy garden inspiration
I’ve gathered a couple of more fun repurposing projects for you to enjoy!
thanks for joining our journey!
Thanks so much for joining me for this post! Join my journey so you don’t miss any of the fun projects, tutorials, and inspiration that I share with you each week! You can follow me on Instagram, Facebook, and YouTube.


Cindy Rust
Cindy has been decorating her home with thrift store finds for 40 years. She is an avid thrift store shopper who loves to makeover the items she finds into vintage-inspired home decor and furniture. When she isn’t thrift shopping or painting a piece of furniture, you can find her making homemade butter, working in her garden, or painting with watercolors.

Hi Cindy!
Goodness! It might be a simple tutorial, but it is FULL of cuteness! These are adorable indeed! And they are so much more interesting than plain ole plant hangers. I do the same thing when I’m pickin’ at salvage shops and go to auctions – turn things every which way to see if a new idea pops in my head. These are so much more interesting than plain ole plant hangers.
Thanks for joining in and sharing at Homestyle Gathering!
>>>Kim
Isn’t it so fun to think outside of the box? Thanks for stopping by!!
I need me one of these! So pretty and smart!
Thanks Julie! We came across a ton of these gems at an auction for next to nothing!