
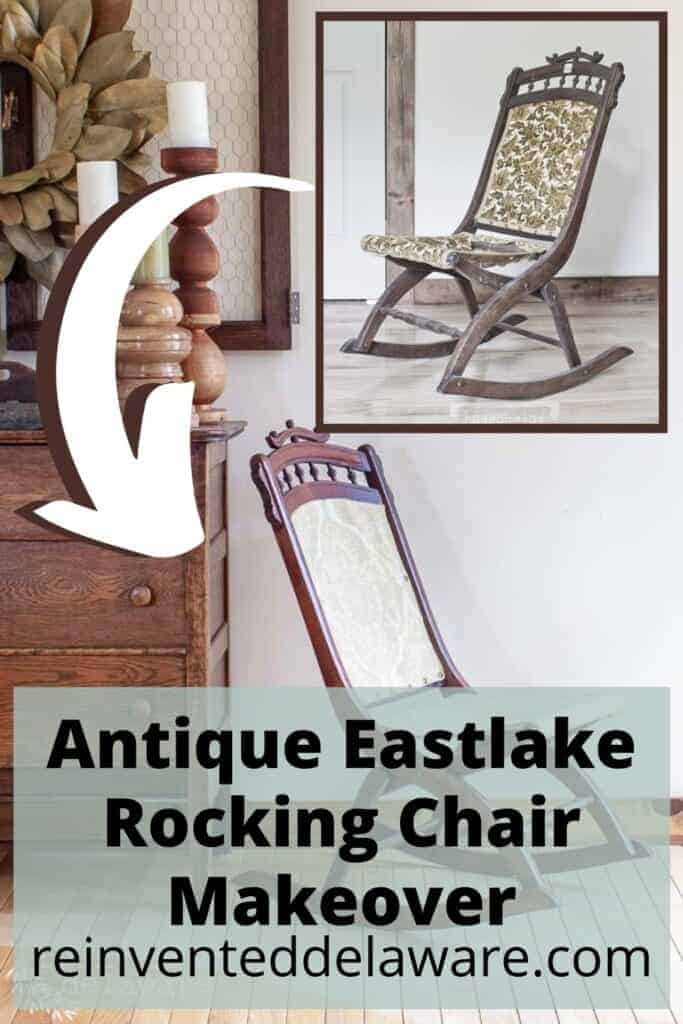
Rocking Chair DIY Upholstery Eastlake Rocker
Are you curious about how to reupholster an antique Eastlake rocking chair? In this article, I will guide you through the process step-by-step to reupholster a rocking chair.
Welcome to this step-by-step guide on rocking chair upholstery! I’m excited to share my knowledge and experience with you. Throughout this tutorial, we’ll cover the steps and materials needed to reupholster a rocking chair.
The following post may contain affiliate links. That means if you click and then buy something, I will make a small commission at no additional cost to you! Thank you for supporting my blog. full disclosure here.
Winner Giveaway Announcement!
I’m excited to let you know the winner of the amazing giveaway in our recent post has been selected! You can see the lucky winner later in this post!
Amazing Deal
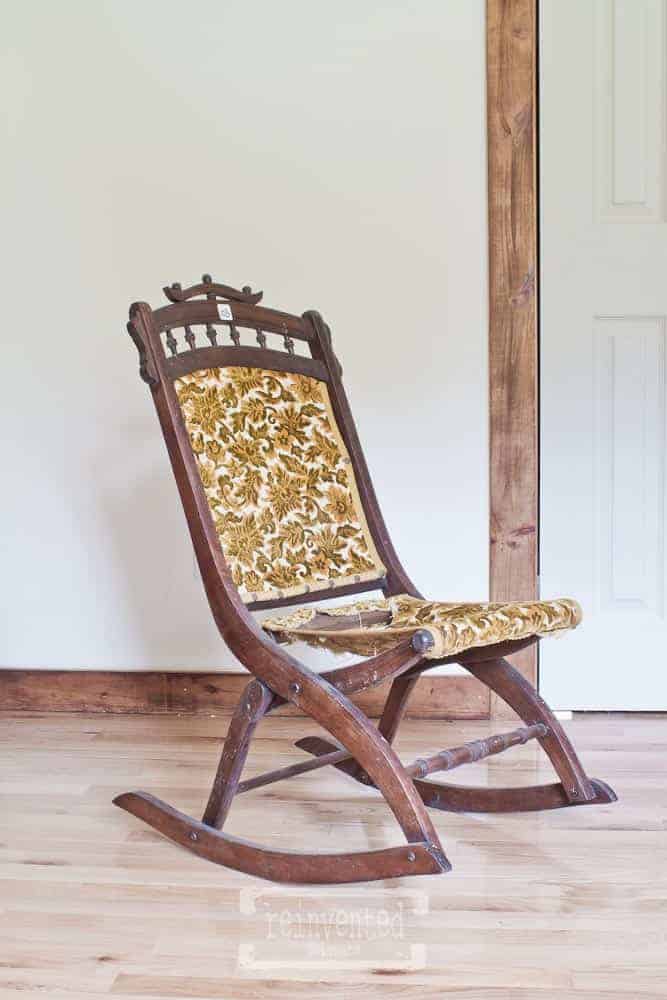
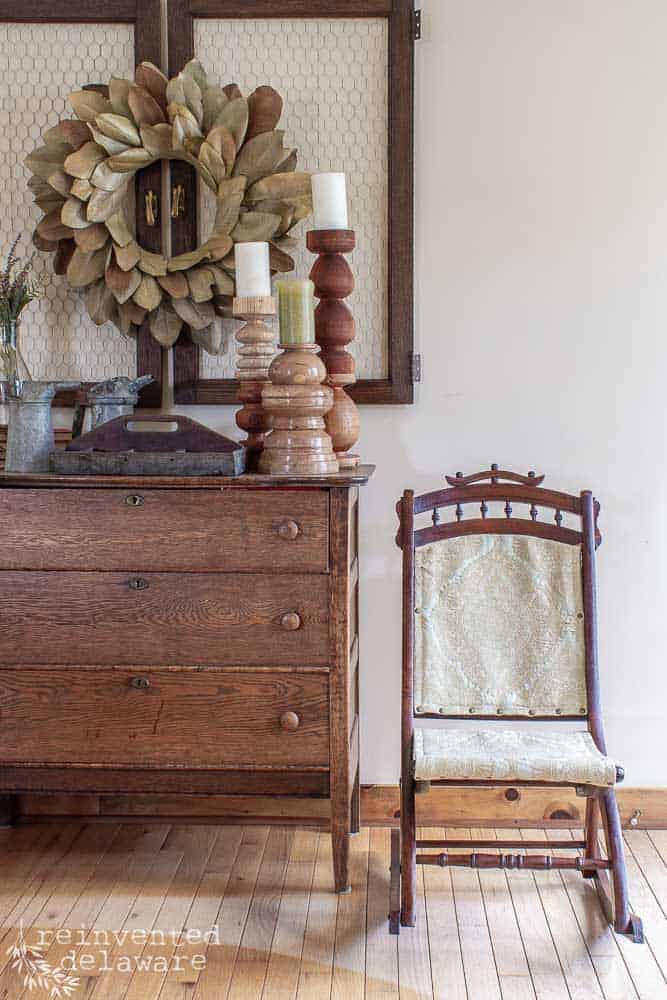
I recently came across an incredible deal that I couldn’t resist. Although I didn’t necessarily need a rocking chair for our home decor I knew that I could flip this pair of antique Eastlake rocking chairs. The price was too good to pass up. It’s always satisfying to find a bargain.
How Much Did You Say??
I couldn’t believe my ears when I heard the price of this stunning pair of antique Eastlake folding rockers. The pair was only $10! Without hesitation, I brought them home and got to work removing the old upholstery with my trusty tack and staple remover. It’s amazing what treasures you can find at such a great price. Older pieces of furniture really tug at my heartstrings. And these rocking chairs were in such good shape I could hardly believe the price!
I have worked on many upholstery projects over the years and I knew these gorgeous chairs would be easy to reupholster with new fabric.
How to Reupholster – Antique Rocking Chair
Let’s go over each step of this reupholstery chair project. Read through each step and refer back to this article as you work on your upholstery project.
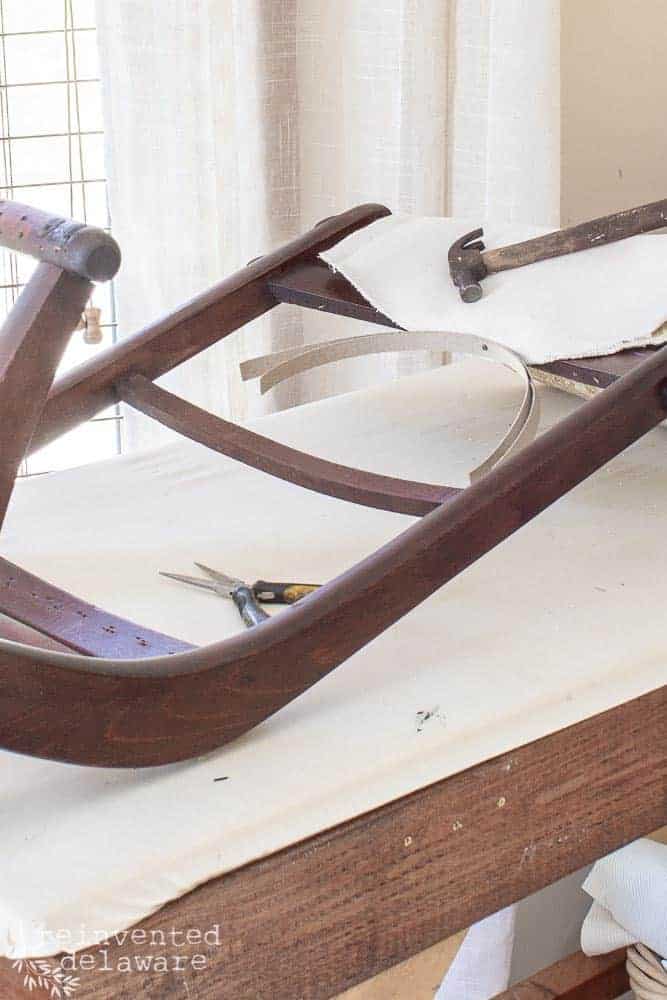
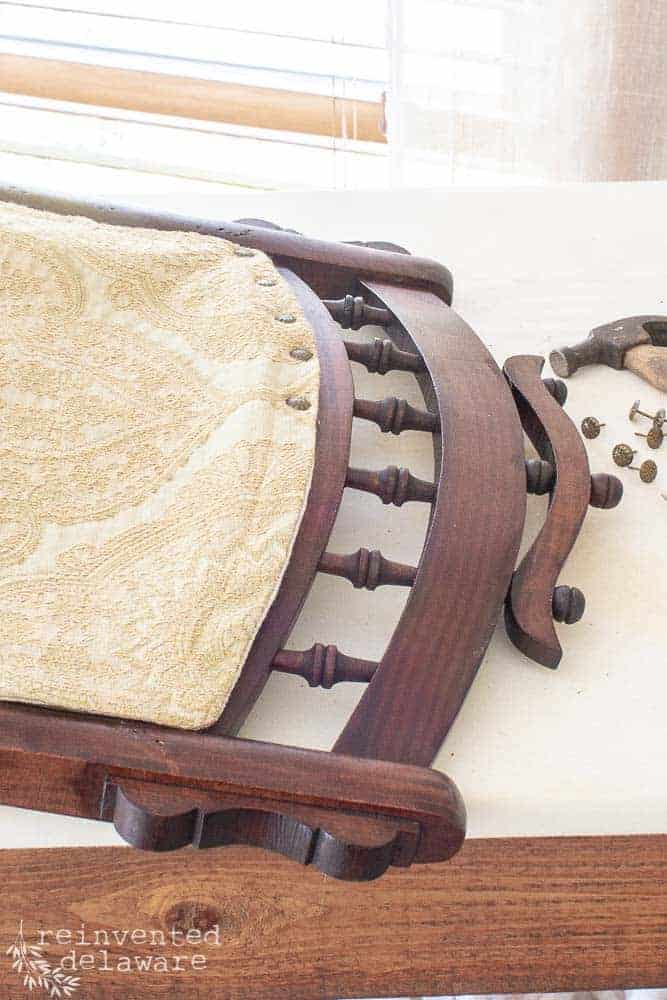
Step One Deconstruct and Prep
I grabbed all of my upholstery tools and got to work. Let’s take a look at the supplies I used for the upholstery project:
- needle nose pliers
- upholstery tack remover
- Simple Green cleaner & soft cloth
- heavy-duty Scotch scrub pad
- tack hammer
- squeeze clamps
- fabric scissors
- new upholstery tacks
- small tack nails
- fabric of your choice
- cardboard tack strip
- hemp oil or wood conditioner
- blue shop towels
- chip brush
- steam iron

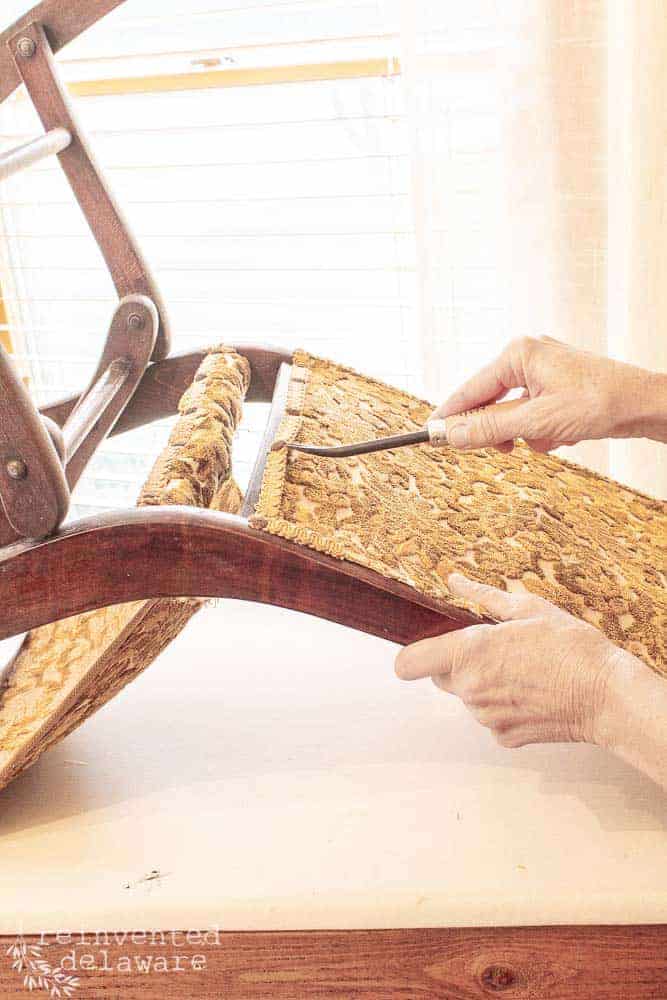
I carefully removed the fabric panels from the chairs, paying close attention to how they were constructed and attached. This information will be valuable when it comes to reconstructing the upholstered rockers.
After removing the fabric, I gave both chairs a thorough cleaning using Simple Green and warm water solution with a heavy-duty Scotch pad and soft cloth. I completed this step outside on a sunny day and allowed the chairs to dry in the sun.
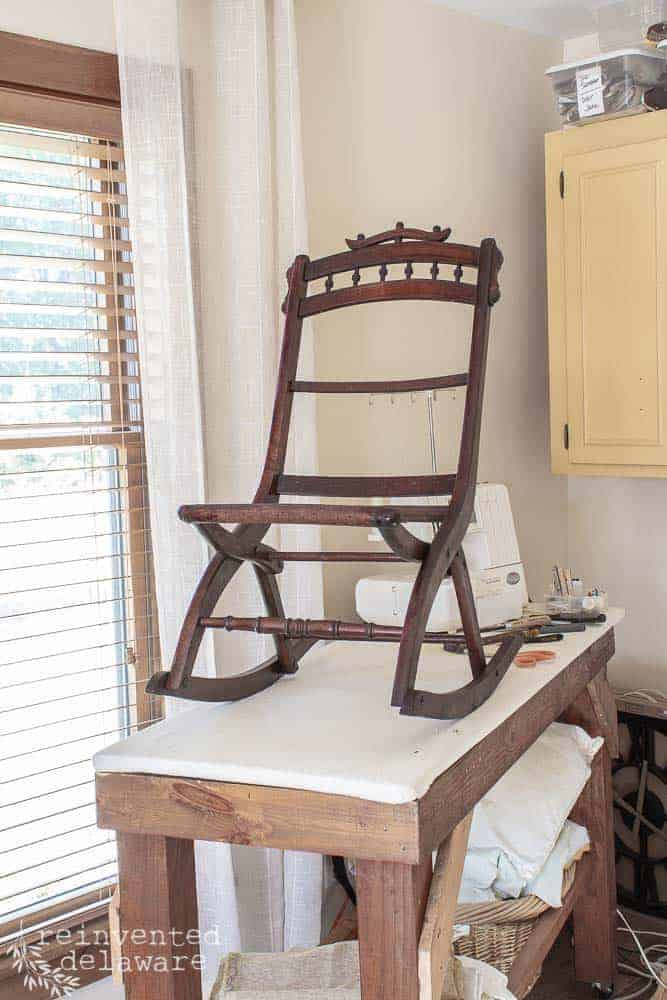
Step Two Enhance the Wood Rocking Chair Frame
To enhance the natural beauty of the wood, I decided to apply Miss Mustard Seed Hemp Oil to the chairs. Using a chip brush, I applied the oil and then wiped off any excess with a blue shop towel.
The hemp oil penetrates the wood and provides a protective finish that is both water-resistant and durable. While the hemp oil cured, I focused on stitching the fabric panels needed for each rocker in the upholstery project.
It’s recommended to wait 2-3 weeks after applying hemp oil to allow for curing time. This will prevent the oil from leaching into the fabric if it hasn’t been cured long enough.
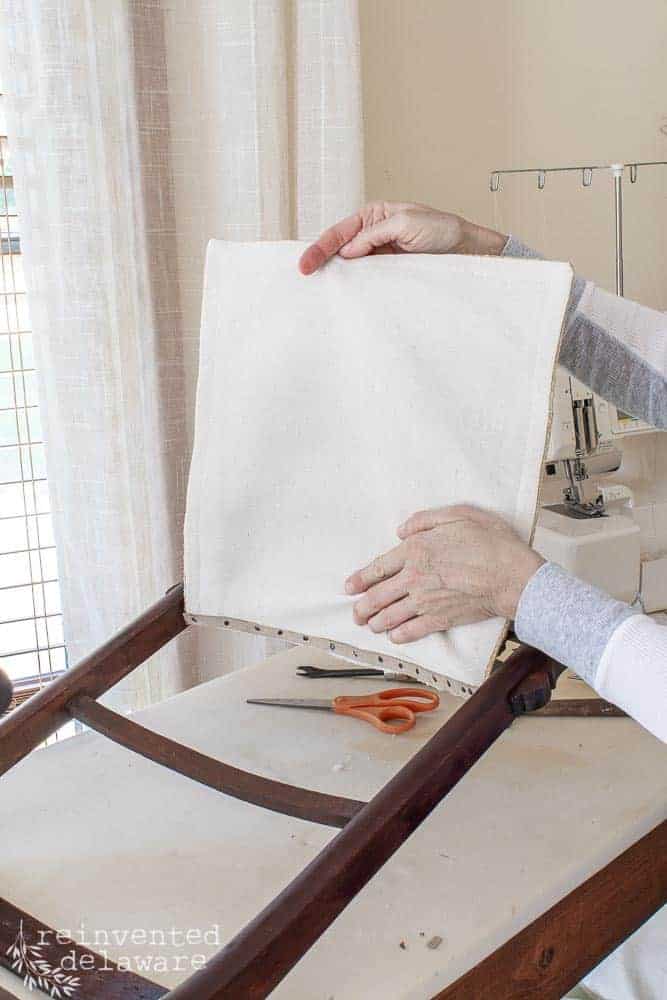
Step Three Stitch the Panels
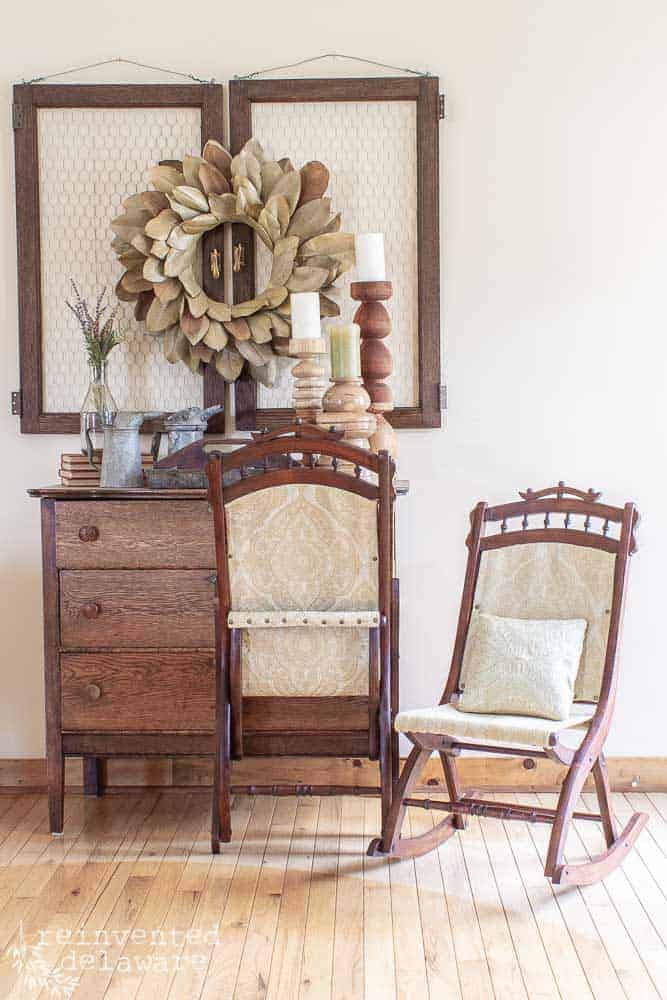
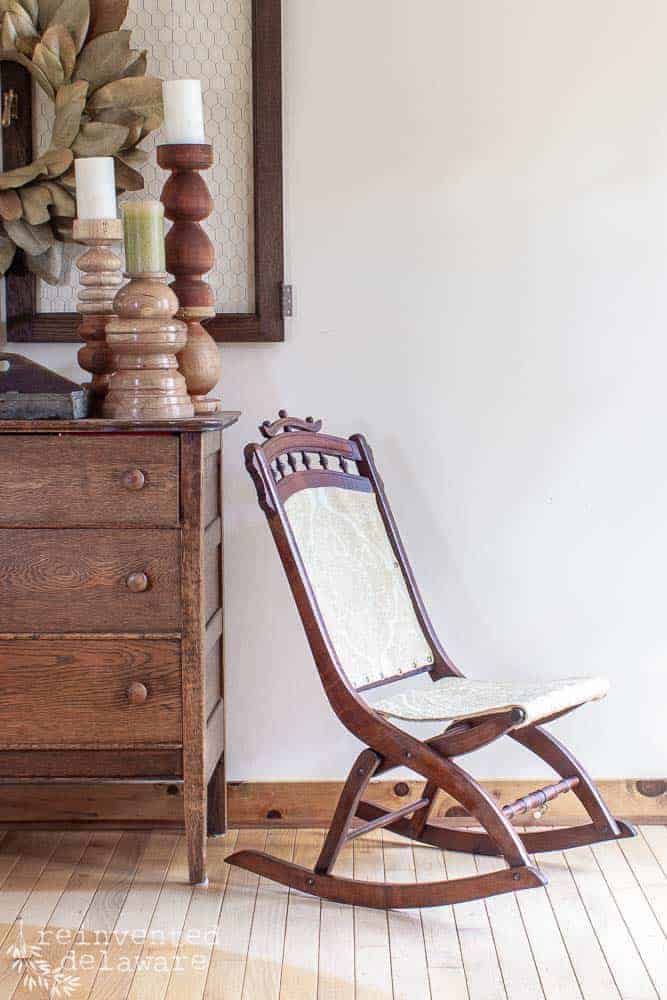
To reupholster a rocking chair seat, I needed to cut three panels for each rocker: one for the inside back, one for the outside back, and one for the seat. The original seat base did not have a seat cushion so I didn’t need to use new foam or batting. I kept the seats and the back as original as I could.
The two panels for the back of the rocker were lined with a neutral lining. Using the old fabric as a pattern, I cut the new upholstery fabric, making sure to include a seam allowance. Then, I cut the same pattern in the neutral lining. After that, I stitched the decorative fabric to the lining fabric, leaving an opening for turning.
After turning them right side out, I ironed them flat and hand-stitched the opening closed. Then I top stitched around the edges with a 3/8″ seam.
Rocking chairs of this size didn’t require much fabric. The fabric I used was leftover and is not longer available. Check the remnants at your local fabric store and grab a yard of fabric for each rocking chair.
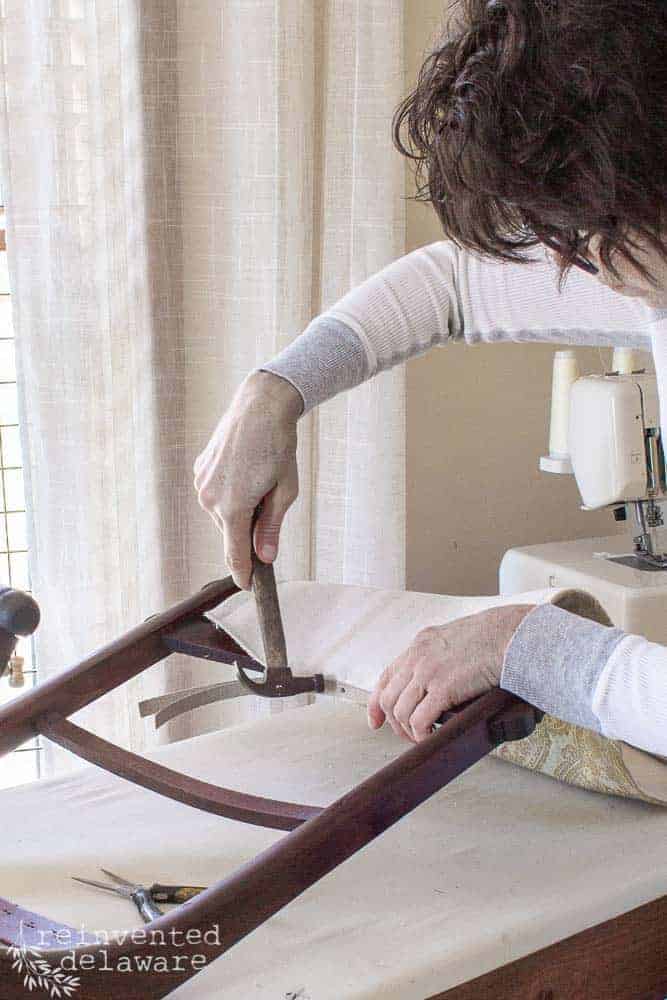
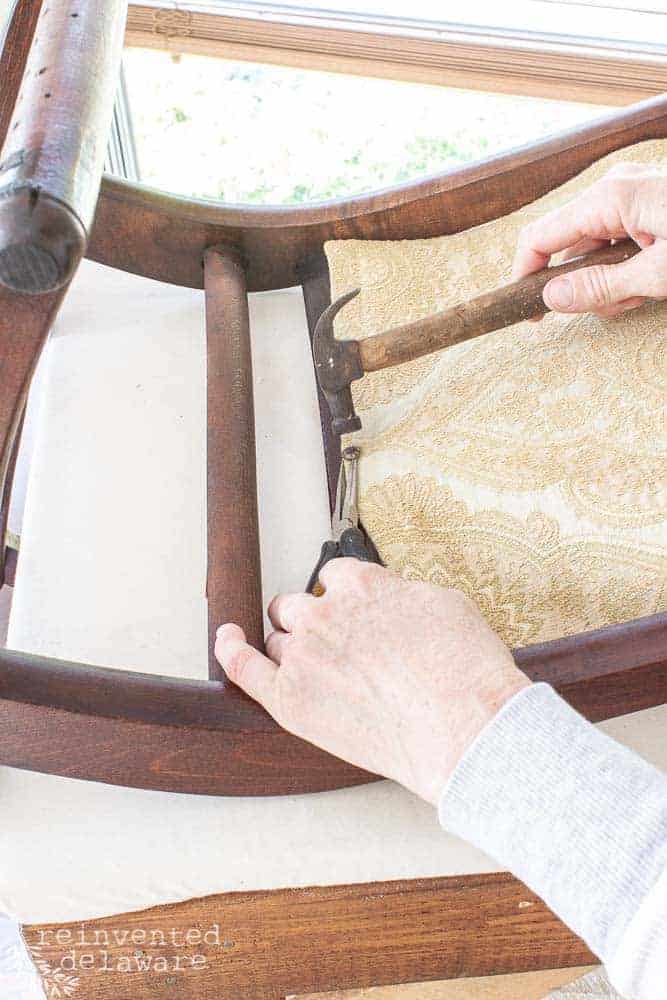
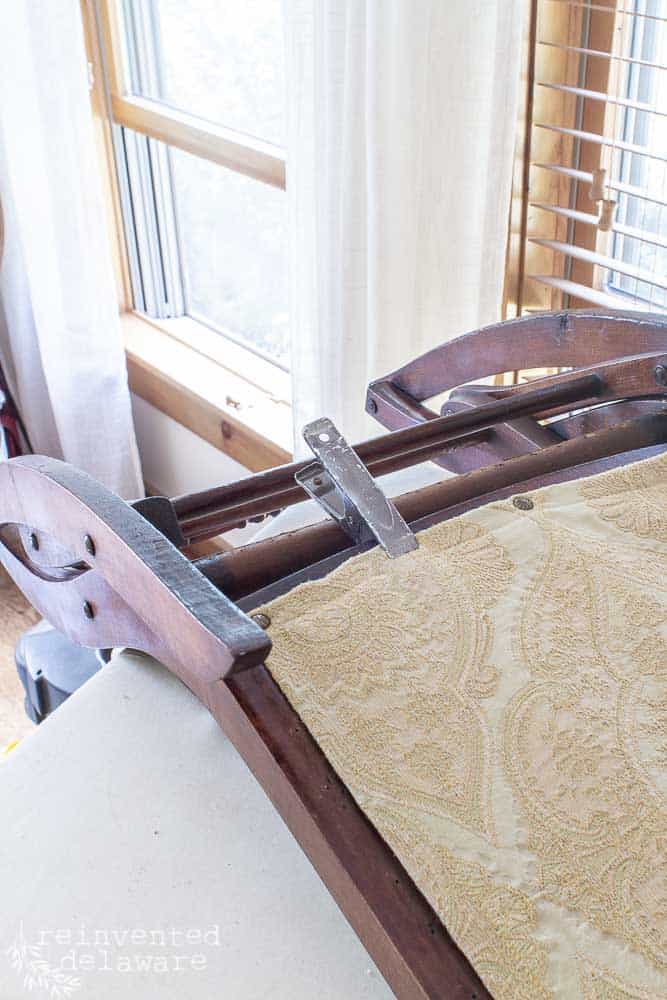
Step Four Attach the Panels to the Frame
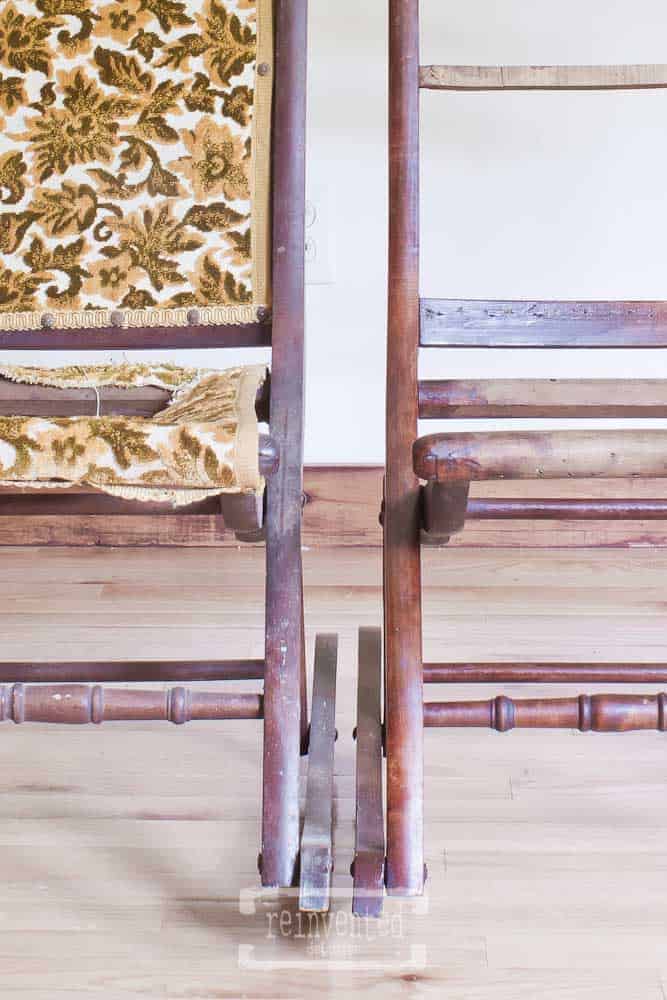
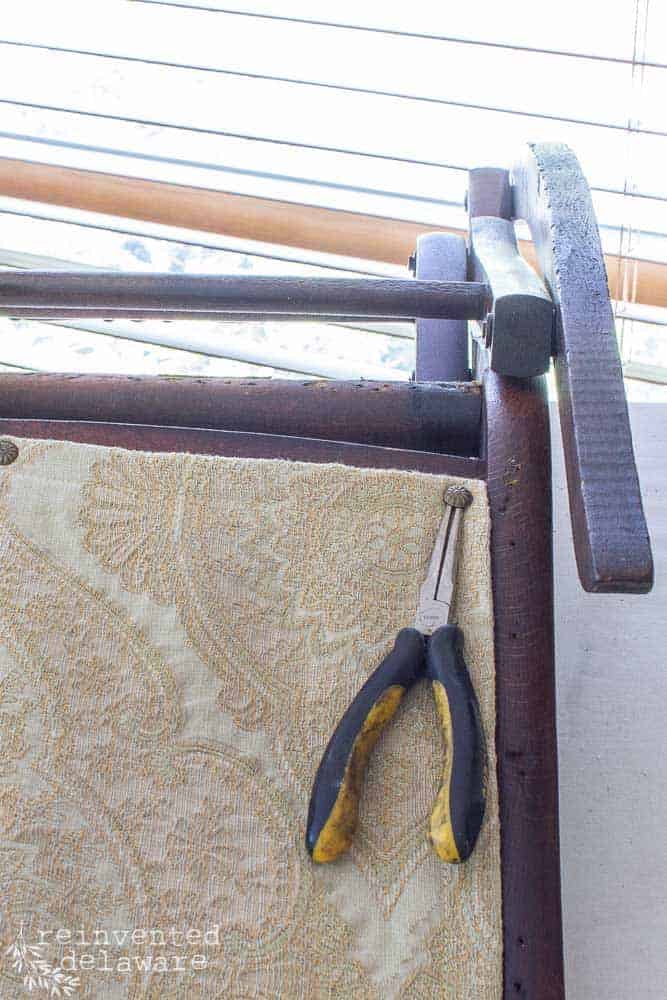
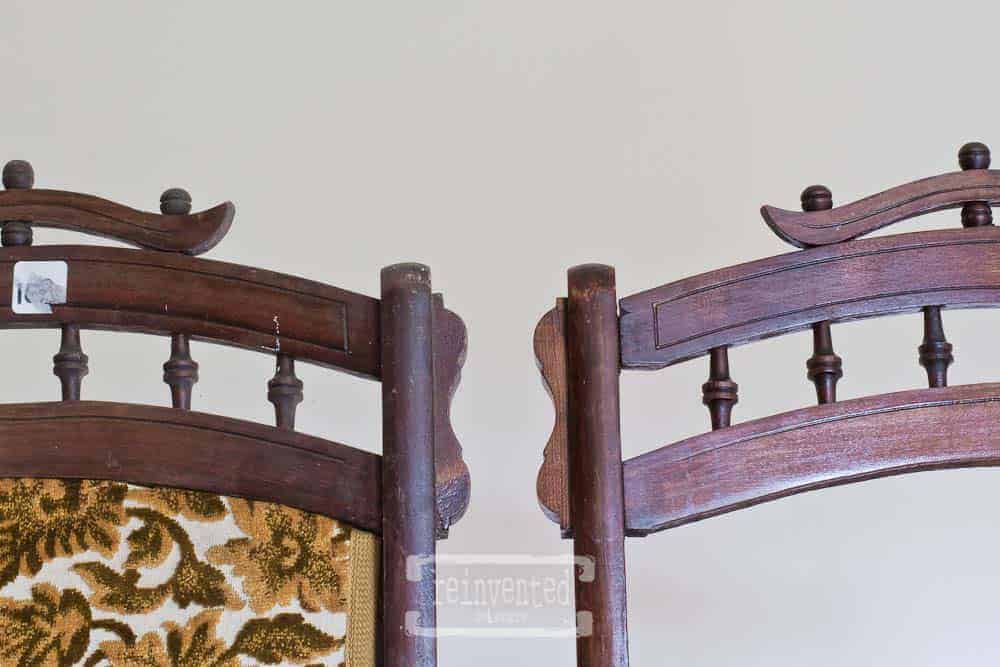
To attach the panels to the rockers, I opted for the traditional method instead of using a pneumatic staple gun. This method involved using small tacks nails to attach the panels to the narrow area of the chair frame. I found this to be the easiest way to keep everything under control.
Before attaching the panels, I paid close attention to where the previous tack holes had been for the original fabric. I used those holes to secure the tacks. That way I knew the wood wouldn’t split. The new upholstery tacks I was using were a tad bigger than the old original tacks. They would provide a tight fit.
To keep the fabric flat on the right side, I used cardboard tack strips. This helped to prevent any bunching or puckering of the fabric.
You might be wondering why I didn’t pull out my upholstery tools like I did when I reupholstered an antique Victorian settee. I wanted to show you that you do not need a pneumatic staple gun and air compressor to reupholster a simple project like this set of Eastlake rockers. This DIY upholstery project is doable for anyone who knows how to sew a straight stitch and use a hammer!
Using the old-fashioned method may take a bit more time and effort, but it can produce a beautiful and long-lasting result.
When it comes to upholstery work, using needle-nose pliers can be a game-changer. Holding onto small upholstery tacks and decorative tacks can be difficult with just your fingers, but pliers make it much easier.
With one hand holding the pliers and the other holding the tack hammer, you’ll quickly get the hang of it. Plus, using pliers can prevent decorative tacks from bending, ensuring a clean and professional finish to your project.
When adding decorative tacks to a piece of furniture, it is important to find the center of the area to ensure that the design is balanced and visually appealing. Find the center using a tape measure of the area. Then add the first decorative tack directly in the center, followed by tapping a tack at each corner of the area.
Then, find the center between the main center point and one of the corners and tap a tack in that new center point. Repeat this process until the entire area is covered with tacks.
It is important to note that the perfect look is not necessarily the goal when adding decorative tacks. Instead, the aim is to create a handmade and unique look. However, if you prefer a more precise approach, you can certainly measure and mark the spots for the tacks.
To make the process easier, a squeeze clamp can come in handy, especially if you do not have a third hand.
By following these steps, you can easily create a beautiful design with decorative tacks.
thanks for being here!
I hope you are enjoying this project! Let me know if you have any questions. Or leave me a comment to tell me about your project and ideas!
thanks, Cindy 😀

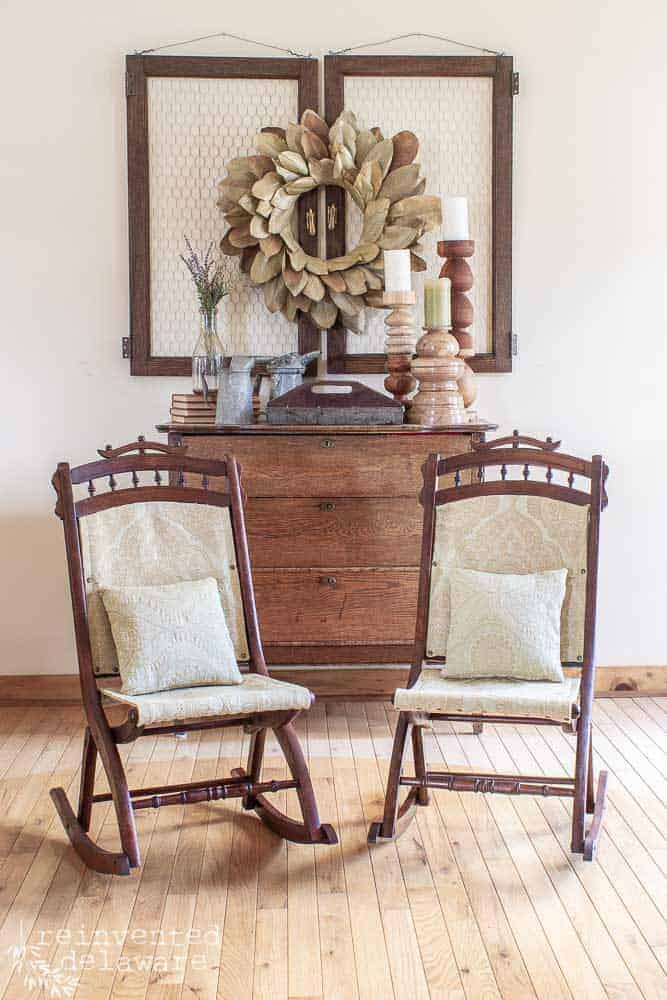
Add decorative pillows
I created small pillows for the rockers, which were simple to sew. They are simple squares cut to size and stuffed with poly fill. How easy is that? You could also add store-bought pillows in a coordinating fabric.
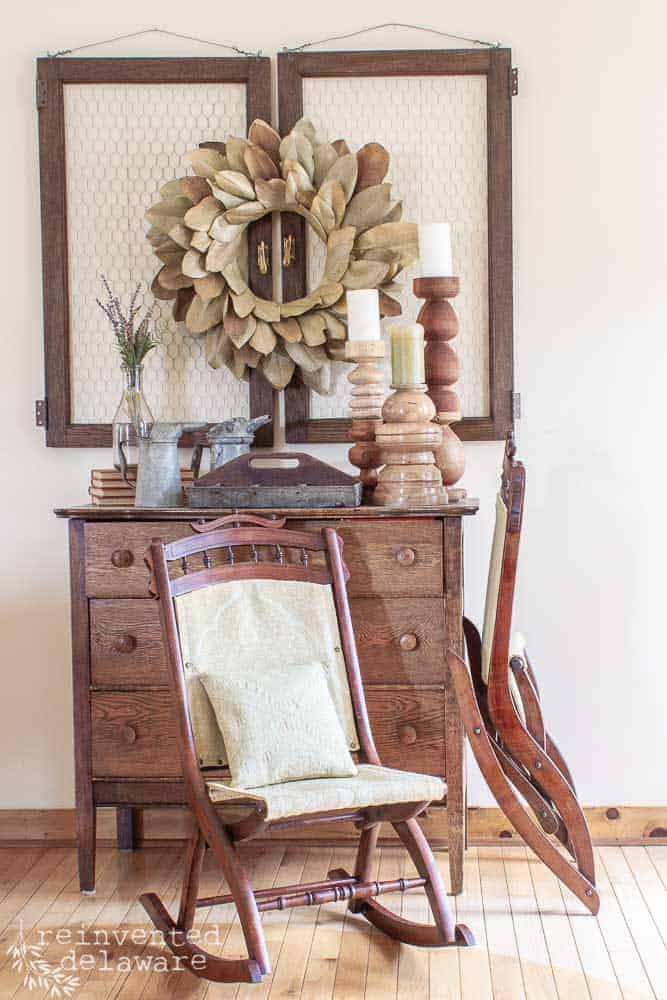
Foldable Rocking Chairs
I love the feature of foldable rockers for easy storage. Even 100 years ago, furniture makers recognized the importance of storage. Eastlake rockers were used outdoors. This style of the old rocking chair was also called a lawn rocker. I can just imagine ladies in the late 1800s finery sitting under a shade tree in one of these rocking chairs!
When I came across a pair of rockers that date back to the late 1800s and early 1900s I knew I had a treasure. These are true antiques with a rich history and unique design. The craftsmanship and materials used in creating these rockers are of exceptional quality, making them a valuable addition to any antique collection.
Unconventional Wall Decor Idea
These antique folding rocking chairs would make unique wall decor and would be a great addition to any home. It involves repurposing old rocking chairs and turning them into wall hangings.
To create this look, simply hang the rockers side by side on a wide wall, or vertically if the space is narrow. I suggest using a heavy-duty decorative metal bracket that has been secured to a stud in the wall for added safety. You could even use twine to secure the moving parts on the rocker and add an extra touch of charm.
It’s important to note that these rockers might not hold excessive weight, so use caution when using them. However, I think this unconventional wall decor idea is not only interesting but also useful. Plus, it adds a touch of vintage charm to any space.
Additional Tips and Tricks
Here are a few more tips about this rocking chair upholstery project:
- Wait 2-3 weeks after applying hemp oil to allow for a curing time. Oil could leach into the fabric if it hasn’t cured long enough.
- Basic sewing skills are needed for this project.
- Make any necessary repairs to the wood from before applying the finish.
- Use the old fabric panels as rough patterns, allowing for 1/2″ seam allowance all the way around.
- Use caution when using these rockers, they might not hold excessive weight.
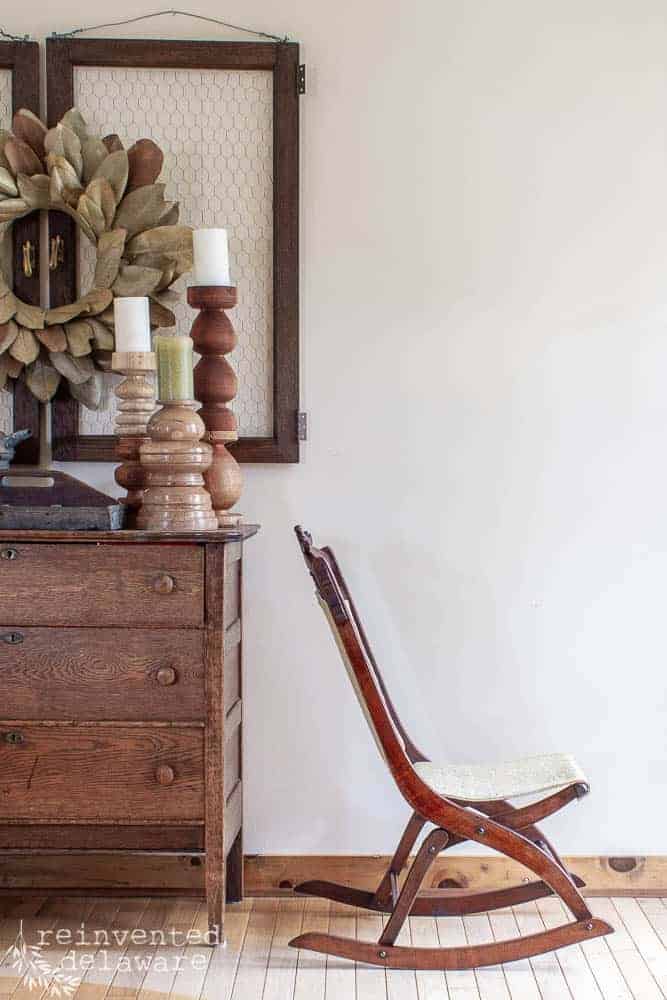
Before and After Reupholstered Rocking Chair
Check out the before and after photos of the wood finish. The rocker on the left was dirty and dry, while the one on the right had been cleaned and scuffed with a Scotch pad and finished with a hemp oil finish.
The difference is amazing. Just a good cleaning and then applying an oil finish is all this old wood needs.
These antique rocking chairs needed a new life and we gave them one! They will be enjoyed for years to come.
YouTube Video Upholstery Series
If you are interested in learning more about how to reupholster, I have a full video series on my YouTube channel showing you step-by-step how to reupholster an antique chair. It is a comprehensive tutorial that will show you techniques for your next upholstery project.
Click the button below for the full playlist in the series.
Thanks for joining our journey!
Thanks so much for joining us for this post! Join our journey so you don’t miss any of the fun projects, tutorials, and inspiration that we share with you each week! You can follow us on Instagram, Facebook, and YouTube. We share even more inspiration on Pinterest!
Giveaway Winner!
And the winner is….. Martha T! Thanks to everyone for entering this amazing Dixie Belle Giveaway!
Martha, I’ll be in touch via email about claiming your $200 shopping spree! Congratulations!
Until next time…


Cindy Rust
Cindy has been decorating her home with thrift store finds for 40 years. She is an avid thrift store shopper who loves to makeover the items she finds into vintage-inspired home decor and furniture. When she isn’t thrift shopping or painting a piece of furniture, you can find her making homemade butter, working in her garden, or painting with watercolors.
Visit my Amazon Storefront!
Click the button below and head over to our online shop on Amazon!
enjoyed your video showing the fabric work done on the Eastlake foldable rocker.
I have an Eastlake style wooden foldable rocker that needs the center spindle that holds the seat fabric replaced. This work along with some work on the hinges will require the chair be disassembled.
Can you offer some tips on how to get this chair apart. It does not appear to have screws or dowel joints that are visible to me.
Thanks
Glad you enjoyed the post. My best advice is to use a mallet and a protective cloth. Gently tap to loosen it if you can. Don’t force it. Best of luck to you!
I absolutely love how your chairs turned out, Cindy! And congrats to Martha T!! 🙂
Thanks Donna. Those chairs were one of my easiest upholstery projects.😊
AWESOME deal and remake! Love it
Thanks Melinda! Our customer loved them too!
wow, Cindy! What a find and what a wonderful job you did on restoring them to a beautiful treasure. Thanks for sharing!
We love preserving history her! So glad you enjoyed the makeover
I absolutely love those chairs and it is really nice to see preserving the original finish. Great job and great inspiration.
Thanks Renee! They were in fabulous shape!
This is such a great video and tutorial! I’ve never seen this type of rocker before; so beautiful! There something about antique furniture: I’ve always said, ‘the stories this piece of furniture could tell’— this is true of this rocker, too. I’m sure there were babies rocked to sleep in these rockers. I’m also sure there were many blankets crocheted / knitted in them, too🙂. There’s something very calming about rocking and crocheting! Great blog today, Cindy. Congratulations to Martha for winning the drawing!
I agree with you Patti! Old furniture is rich in history and stories. I bet manay blankets were stitched while rocking in one of the antique rockers 🥰
Another great makeover, Cindy! You always do a great job seeing the creative possibilities in vintage pieces.
Thanks Crissy. We love restoring vintage pieces. It’s a labor of love🥰
Great score! They turned out awesome!
Thanks Cheryl! I’m pretty pleased with them too.😊