
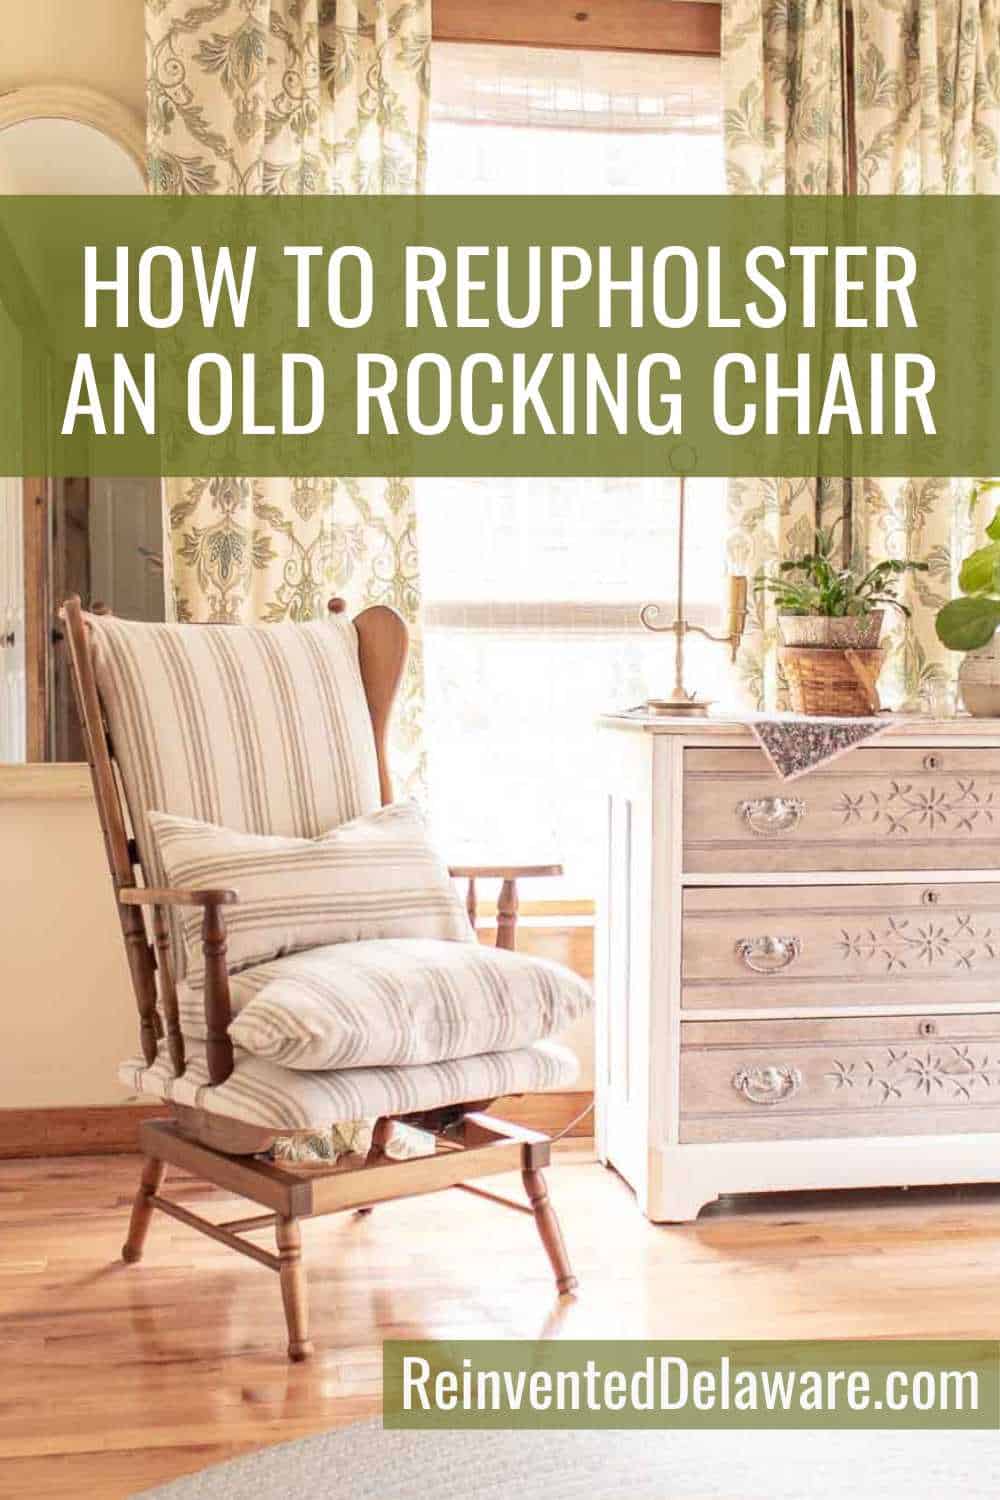
Reupholster an Old Rocking Chair – Easy Upholstery
Learn how to reupholster an old chair that is also a rocker using new fabric. This is an easy beginner-friendly upholstery project!


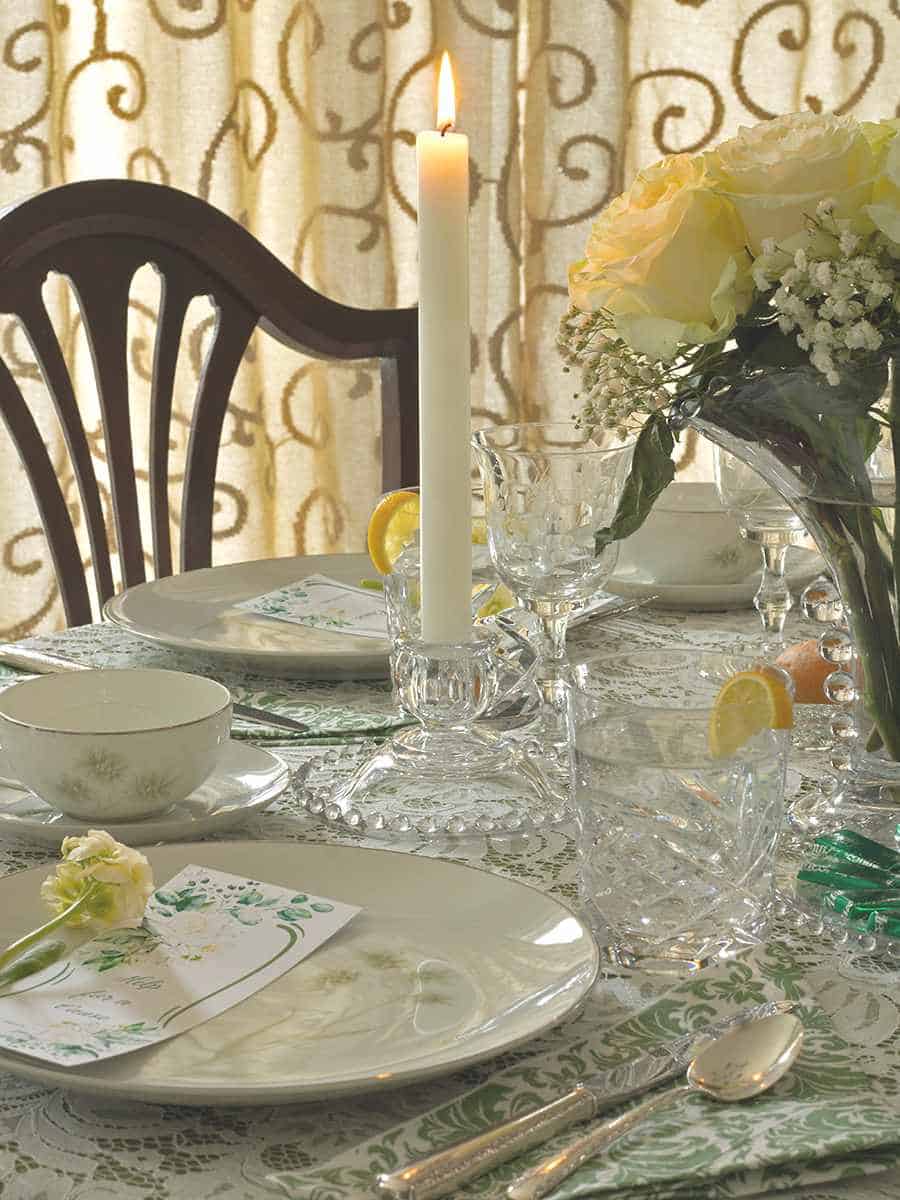
Virtual Book Club
Welcome to this edition of the Virtual Book Club. Three of my blogging friends and I will share our interpretation of a different book on the fourth week of each month! You will see their ideas and inspiration at the bottom of this post.
Here are some of the books we will be using as inspiration. Click the arrows to scroll through our book choices. Tap to get your own copy 🙂
The following post may contain affiliate links. That means if you click and then buy something, I will make a small commission at no additional cost to you! Thank you for supporting my blog. full disclosure here.

Maybe you would rather listen to the audio version of these books! Join Audible and you can enjoy books on the go from your phone! This is a great way to read lots of books!
Or maybe you are a movie watcher, like me! Join Amazon Prime and get access to thousands of movies!
On the last Thursday of each month, we will share something home decor-related, and a culinary treat on the following Saturday inspired by our book of the month.
We hope you join us in this reading adventure and grab a copy of the books so you can be inspired along with us!
how to reupholster a rocking chair
It’s time for our Virtual Book Club and we are reading The Help this month. The audiobook is done so well – the reader changes her tone of voice, and the accent she speaks adds so much to the storyline.
I also watched the movie. While watching the movie, I spotted an old chair that looked like a rocker we had when our children were babies. The rocker was in Minnie’s house. Then I remembered that the same piece of furniture was up in our attic!
Needless to say, that old chair was going to get some new fabric on it! Hubby pulled it down from the attic and I was thrilled to see that old rocking chair again! It brought back so many memories of rocking my own babies.
Our rocker is a little different from the big cushy glider style that you see on Marketplace. Ours does not have a gliding ottoman like many that are popular today.
easy beginner upholstery project
As I thought about the characters in the story of The Help, I also thought about how many of those women rocked babies in chairs that were similar to mine.
Some stories are meant to be told. And I love it when old stories intertwine with my own, even if in some small way.
We’ll dive more into that thought in a bit. For now, let’s begin to make this old rocking chair look better with some new fabric!
remove the old fabric
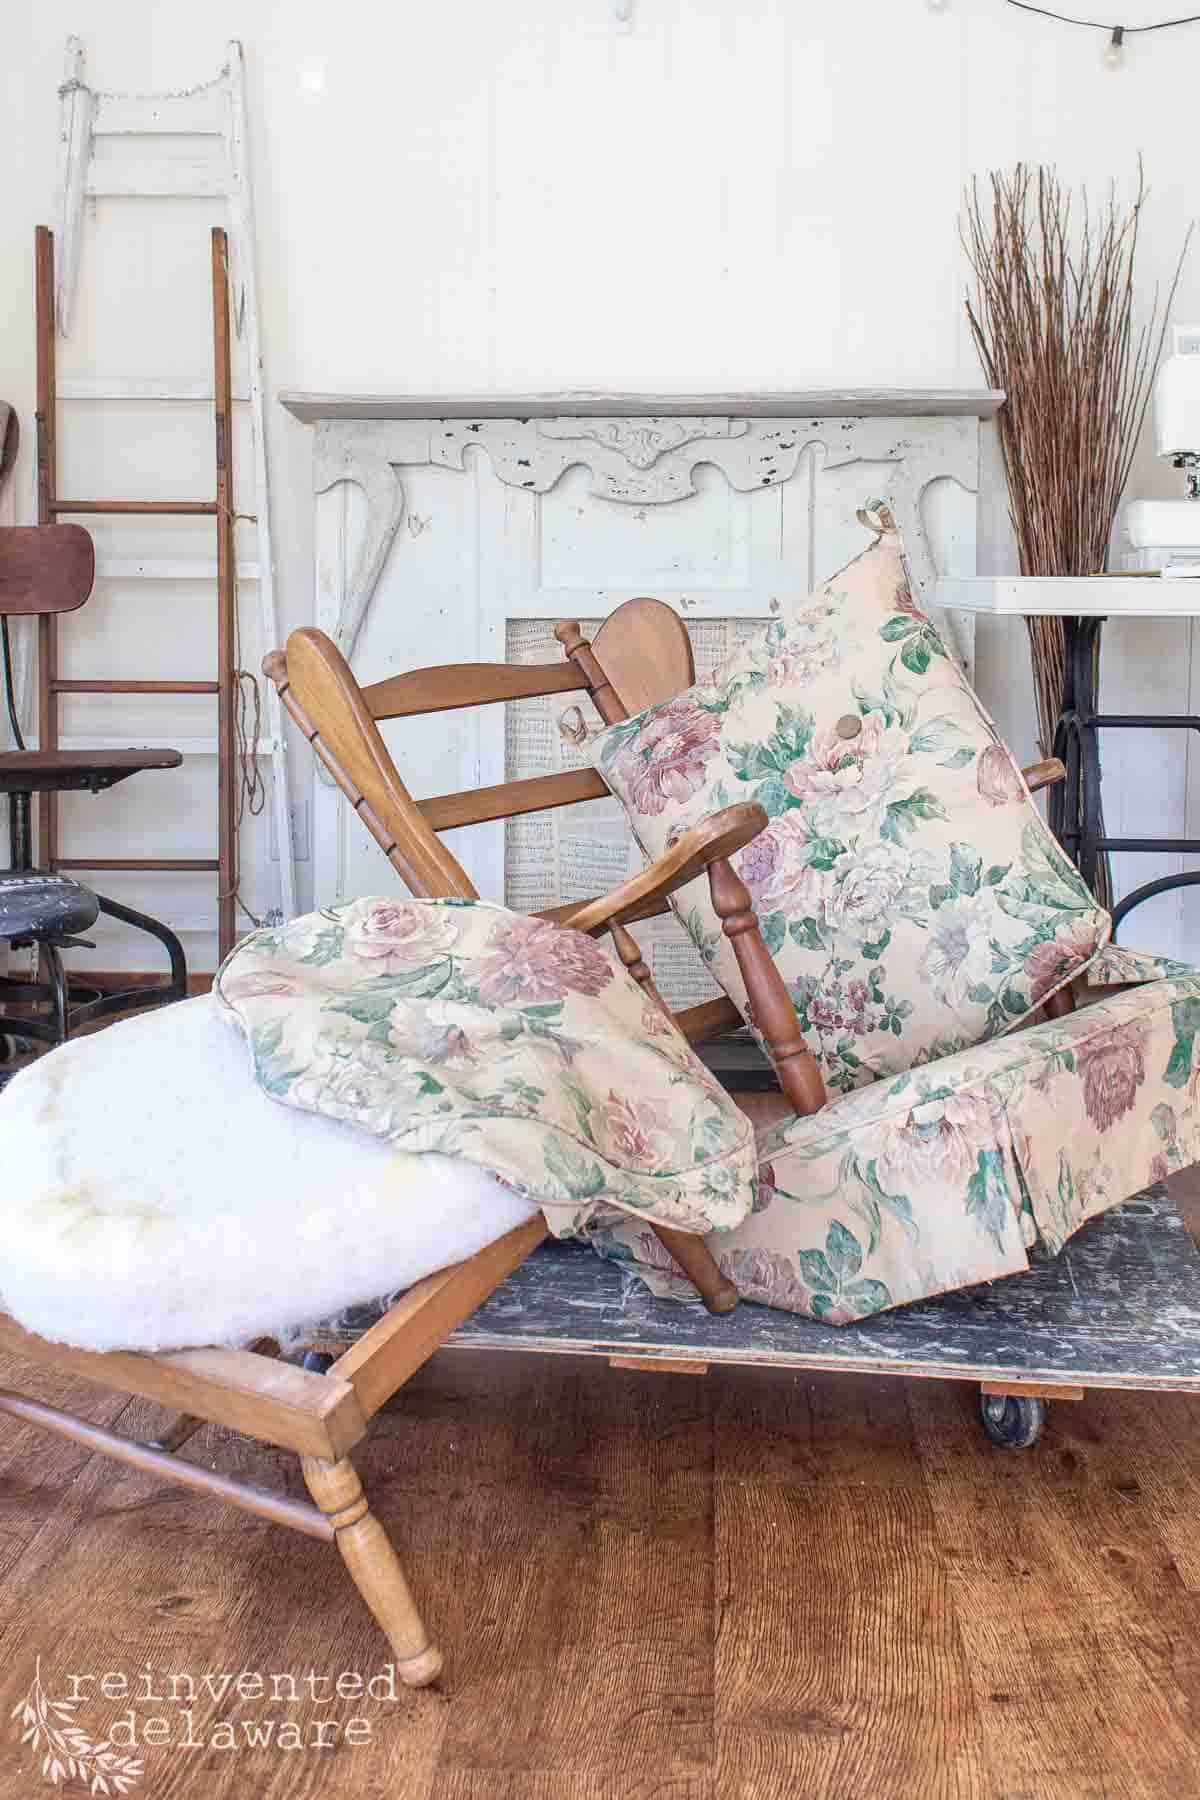
The first step is to remove the old upholstery. Omgoodness, I’m getting ahead of myself like I always do! Do you see that the chair has been taken apart? We had to do that when we put the rocking chair in the attic years ago. It wouldn’t fit otherwise!
Having the back of the chair detached from the chair seat is the easiest way to begin the repairs anyway! The rocking chair was in relatively good shape except for one broken spindle and some loose parts. All in all this entire chair has good bones.
This old rocker has seen several makeovers in its 40 years in our family. In fact, this rocker was in my hubby’s family. We are not sure for how long but he remembers the rocker from his childhood.
When my father-in-law gave us the rocking chair for our babies, it was a tweed plaid fabric. I reupholstered it the first time but I can’t remember what the old fabric looked like. Then I reupholstered this old furniture piece with a blue and maroon plaid fabric.
When we built the home we live in now, I reupholstered this rocking chair yet again! The fabric was what you see in the image above. It might not be the trend today but in the 90’s this style of floral chintz fabric was pretty popular. I loved it!
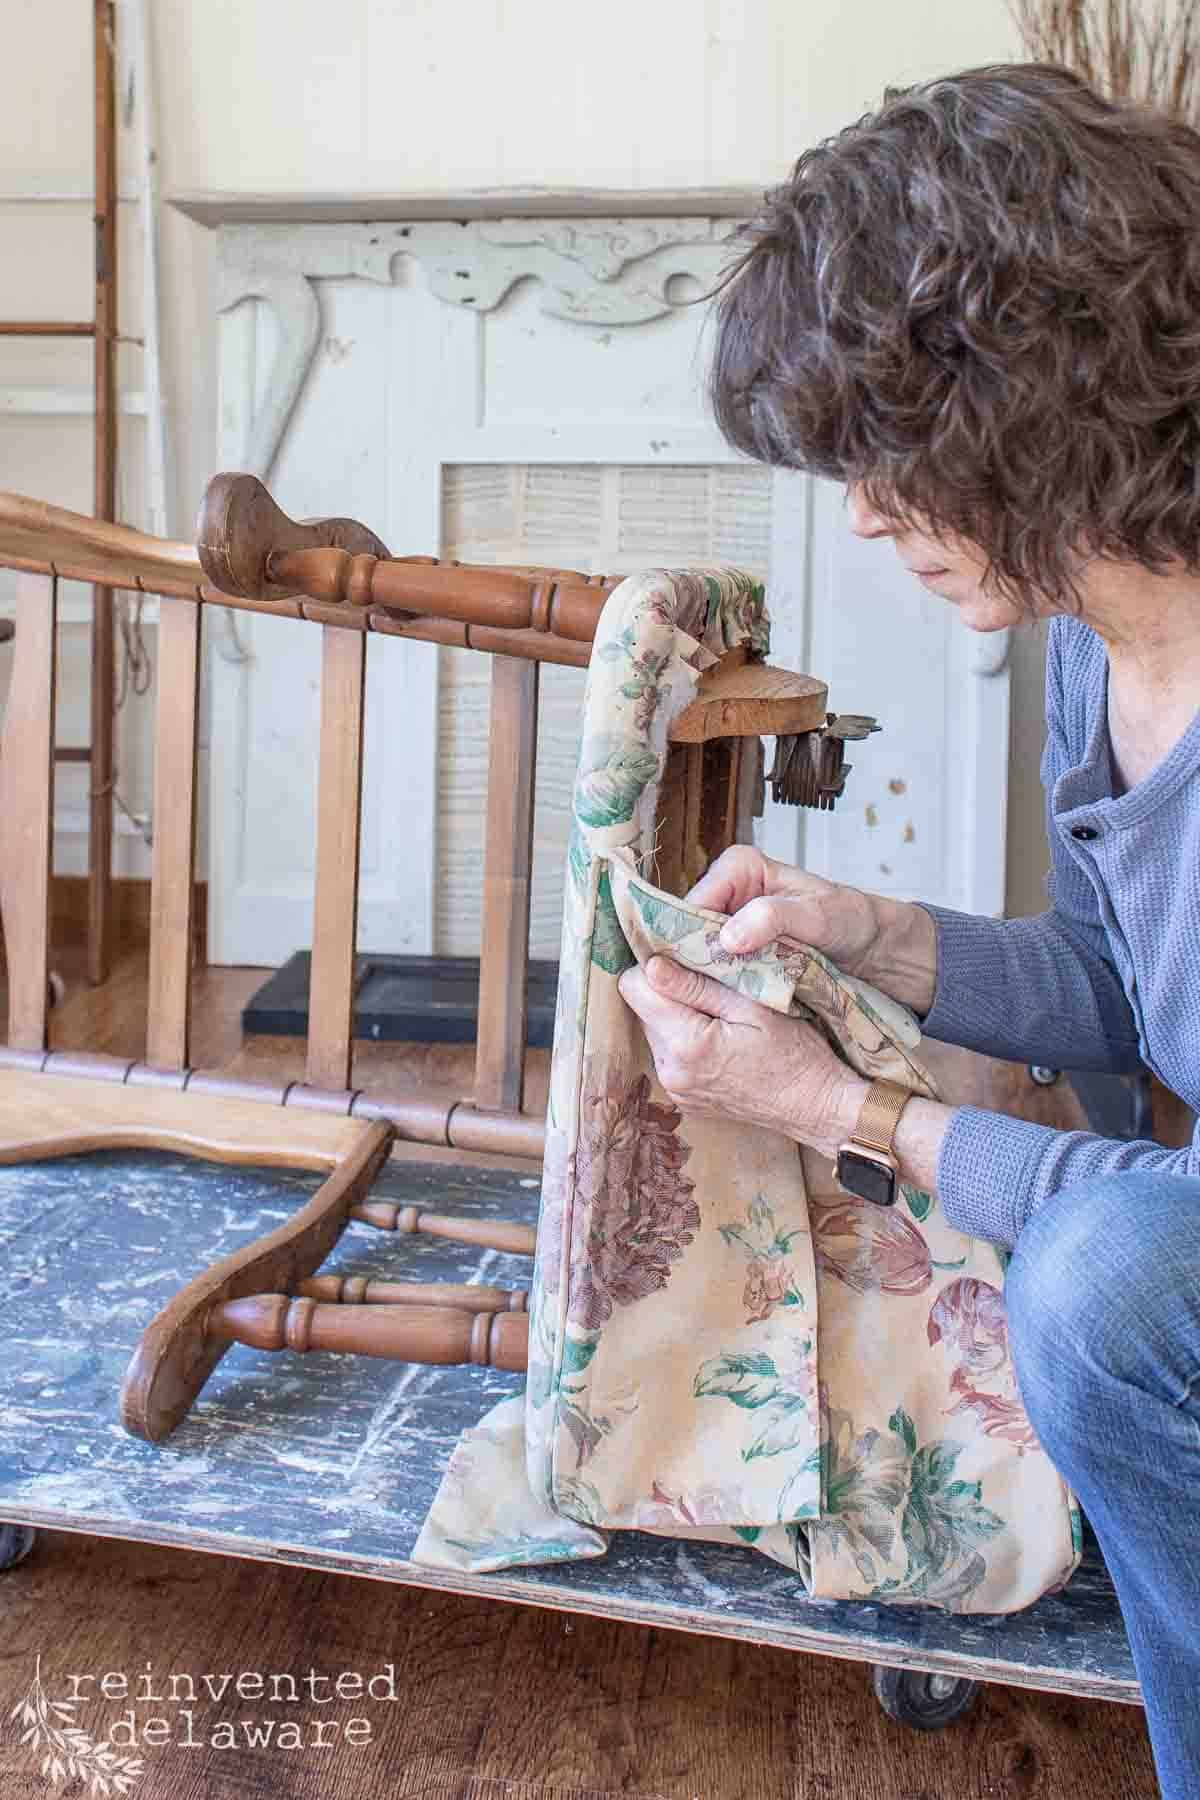
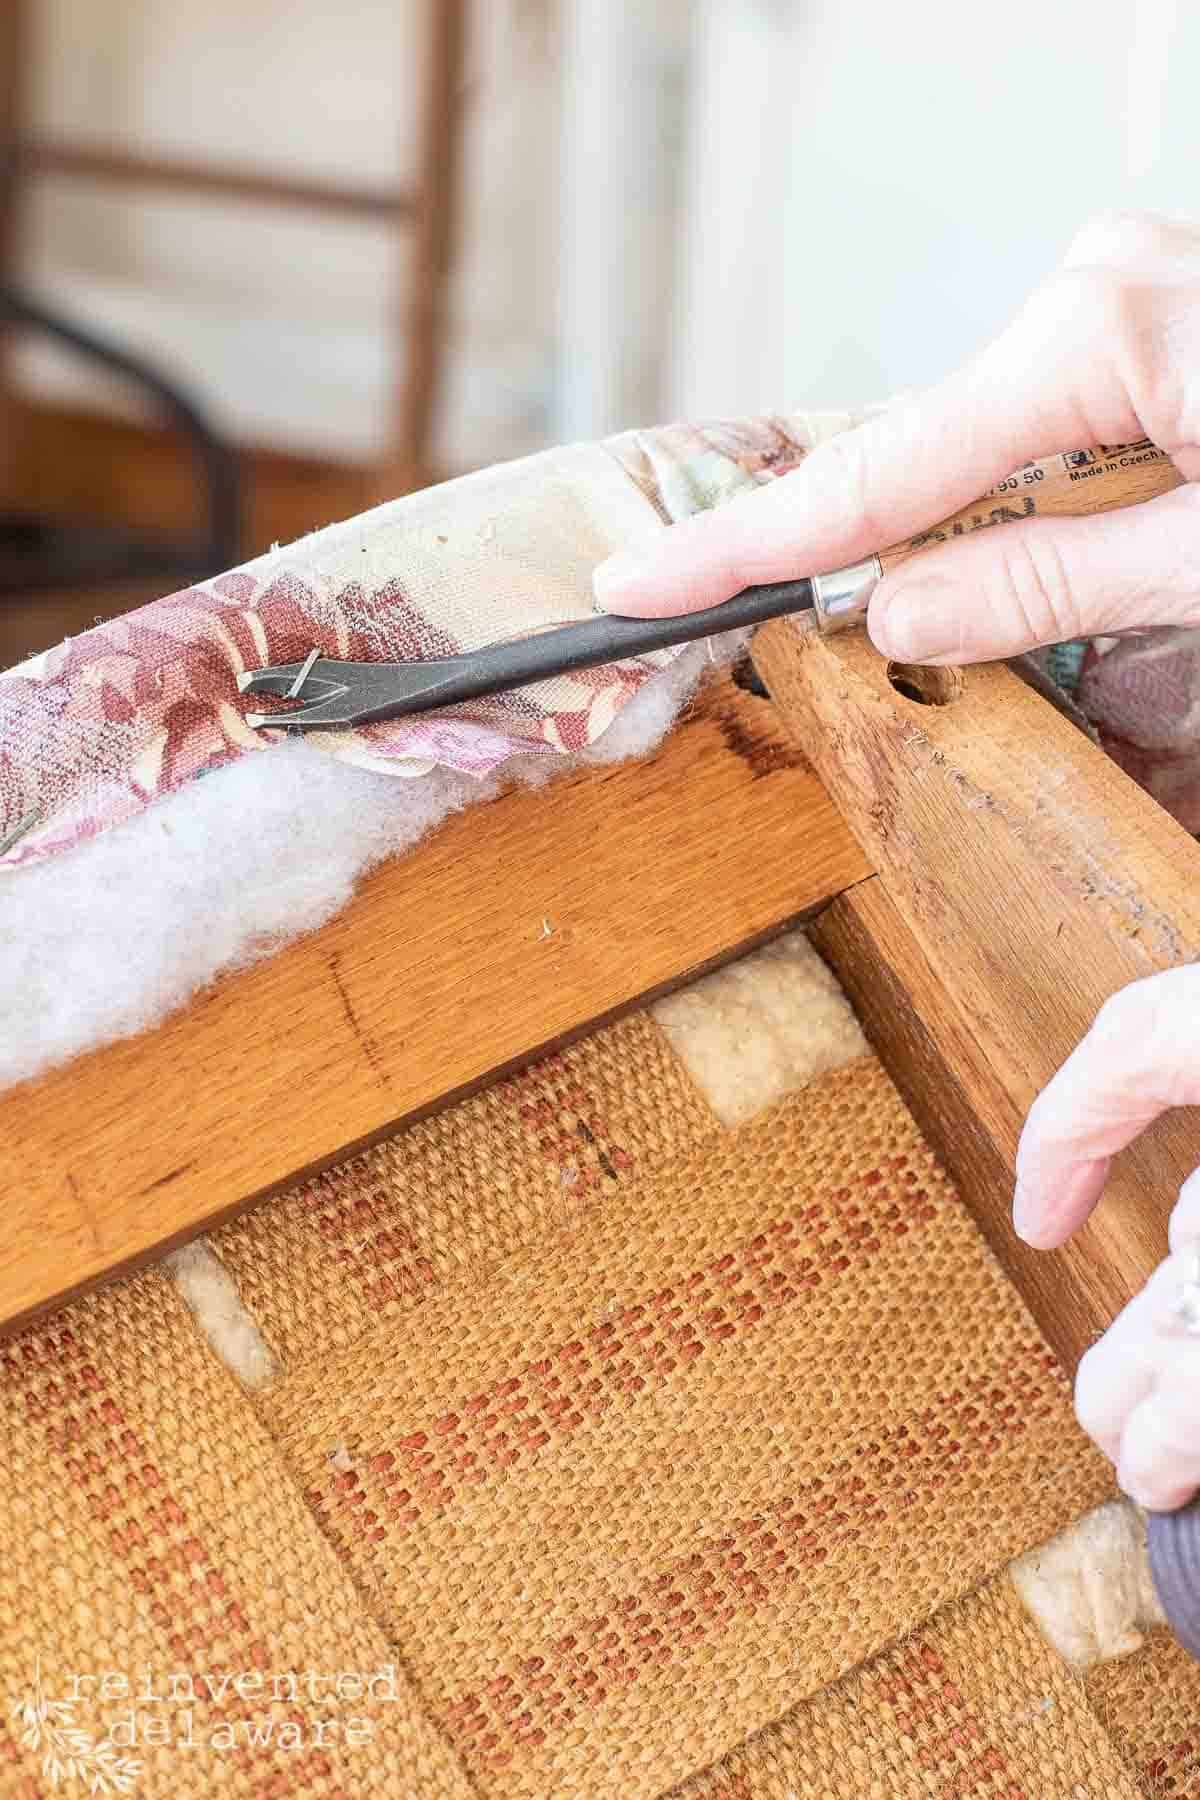
With any chair reupholstery project, the first step is to remove the old fabric pieces. Using tools like a staple remover, an upholstery tack lifter, and needle-nose pliers will be helpful in removing the staples and upholstery tacks that might be on the wooden frame of the rocking chair.
repair the piece of furniture
The next step is the make any necessary furniture repairs. This old rocker needed only minor repairs: gluing and clamping a broken spindle and then regluing several of the spindles that were loose in various places on the sides of the chair that attached to the seat base.
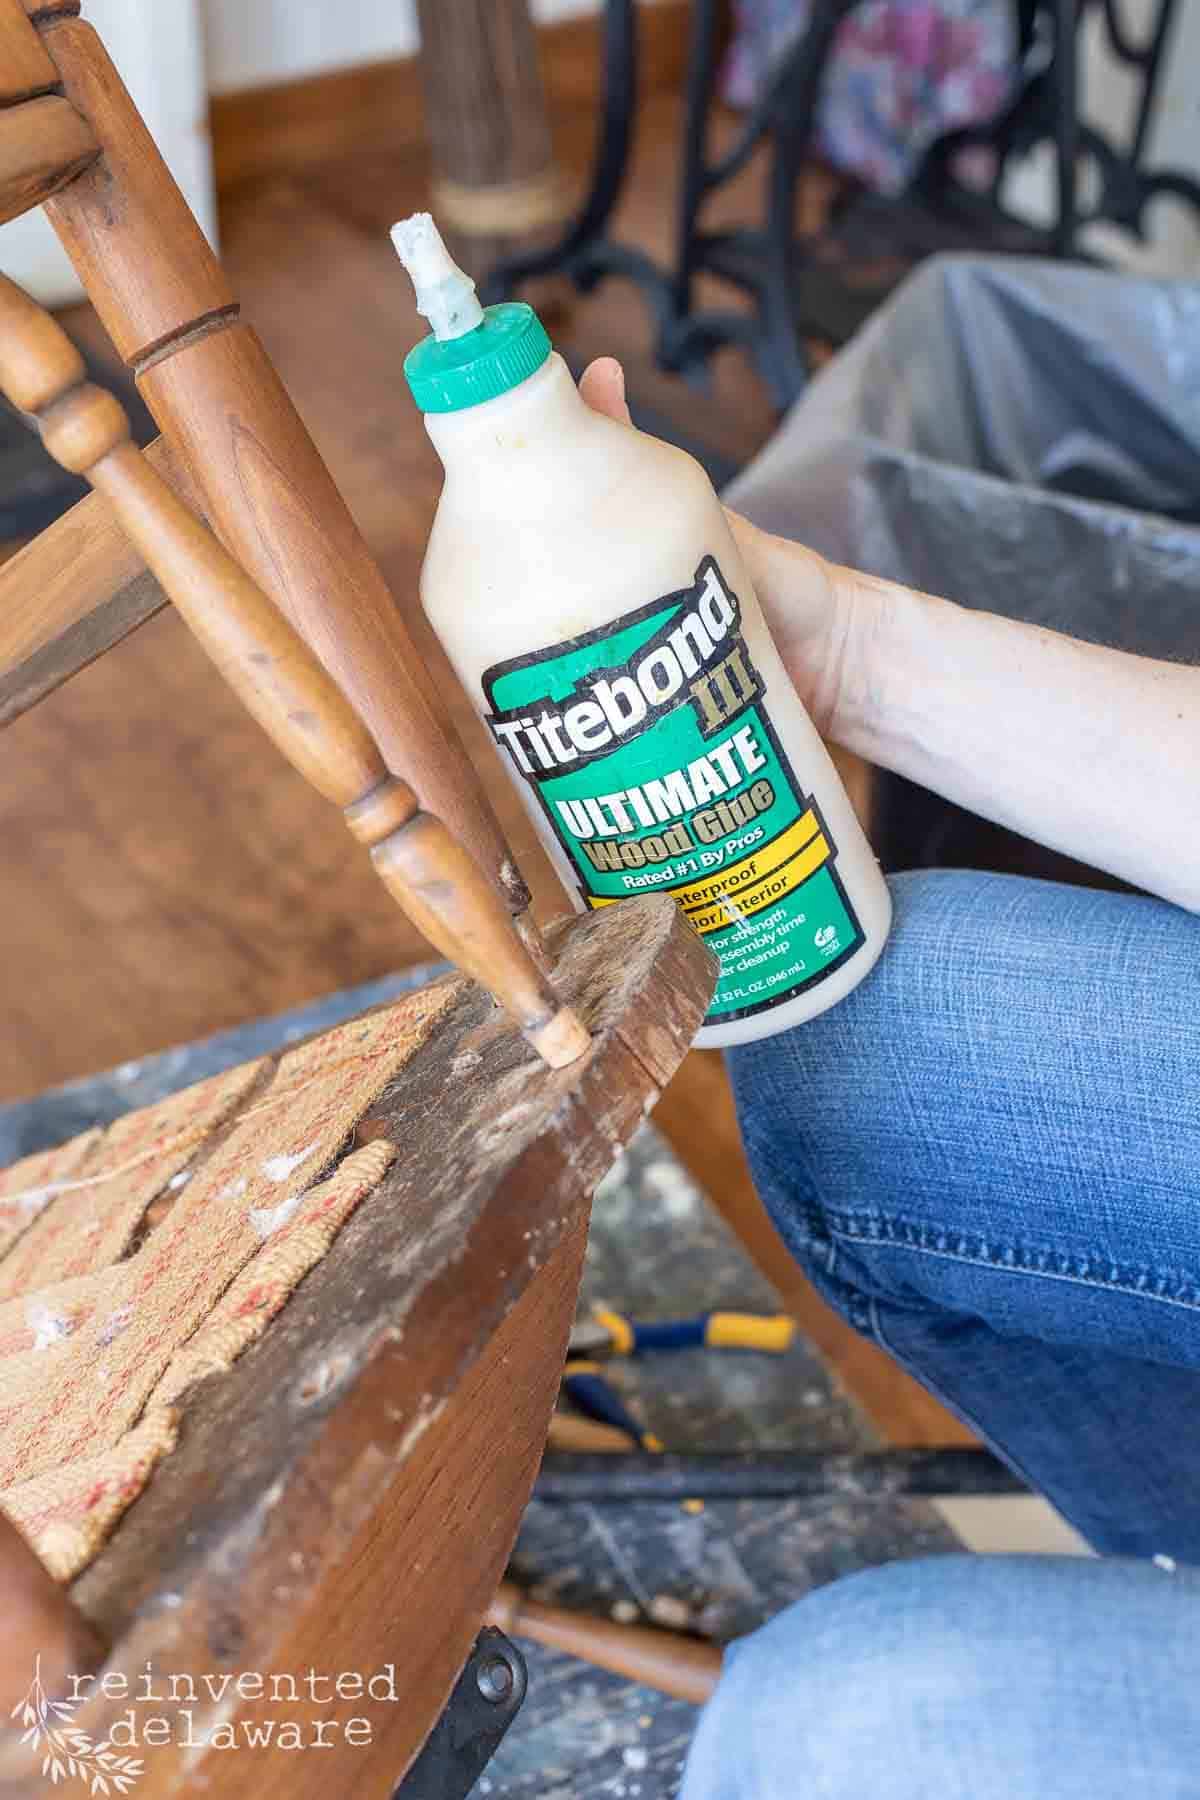
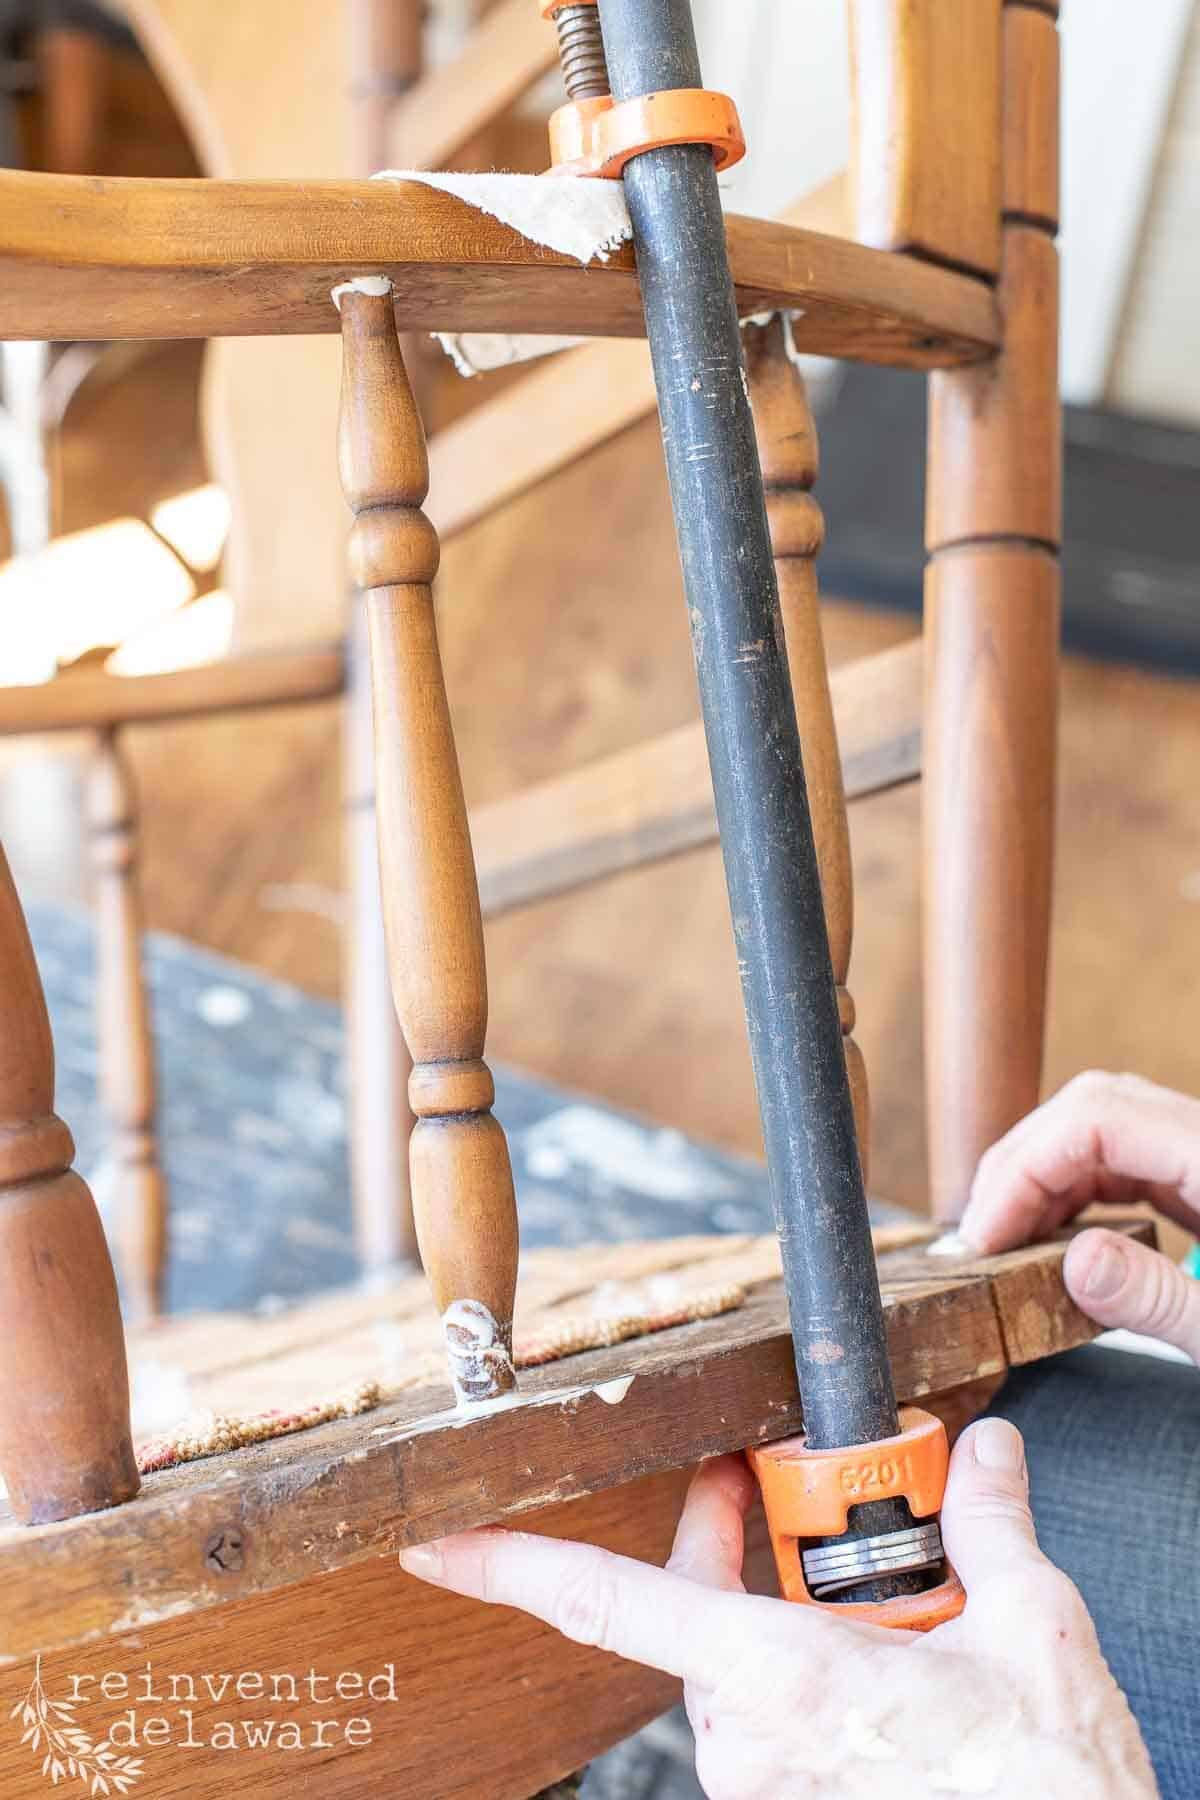
It’s best to use good quality wood glue and bar clamps to tighten down and hold all the parts in place while they dry and set up. Be sure to protect the wood where the metal bar clamp comes in contact with it.
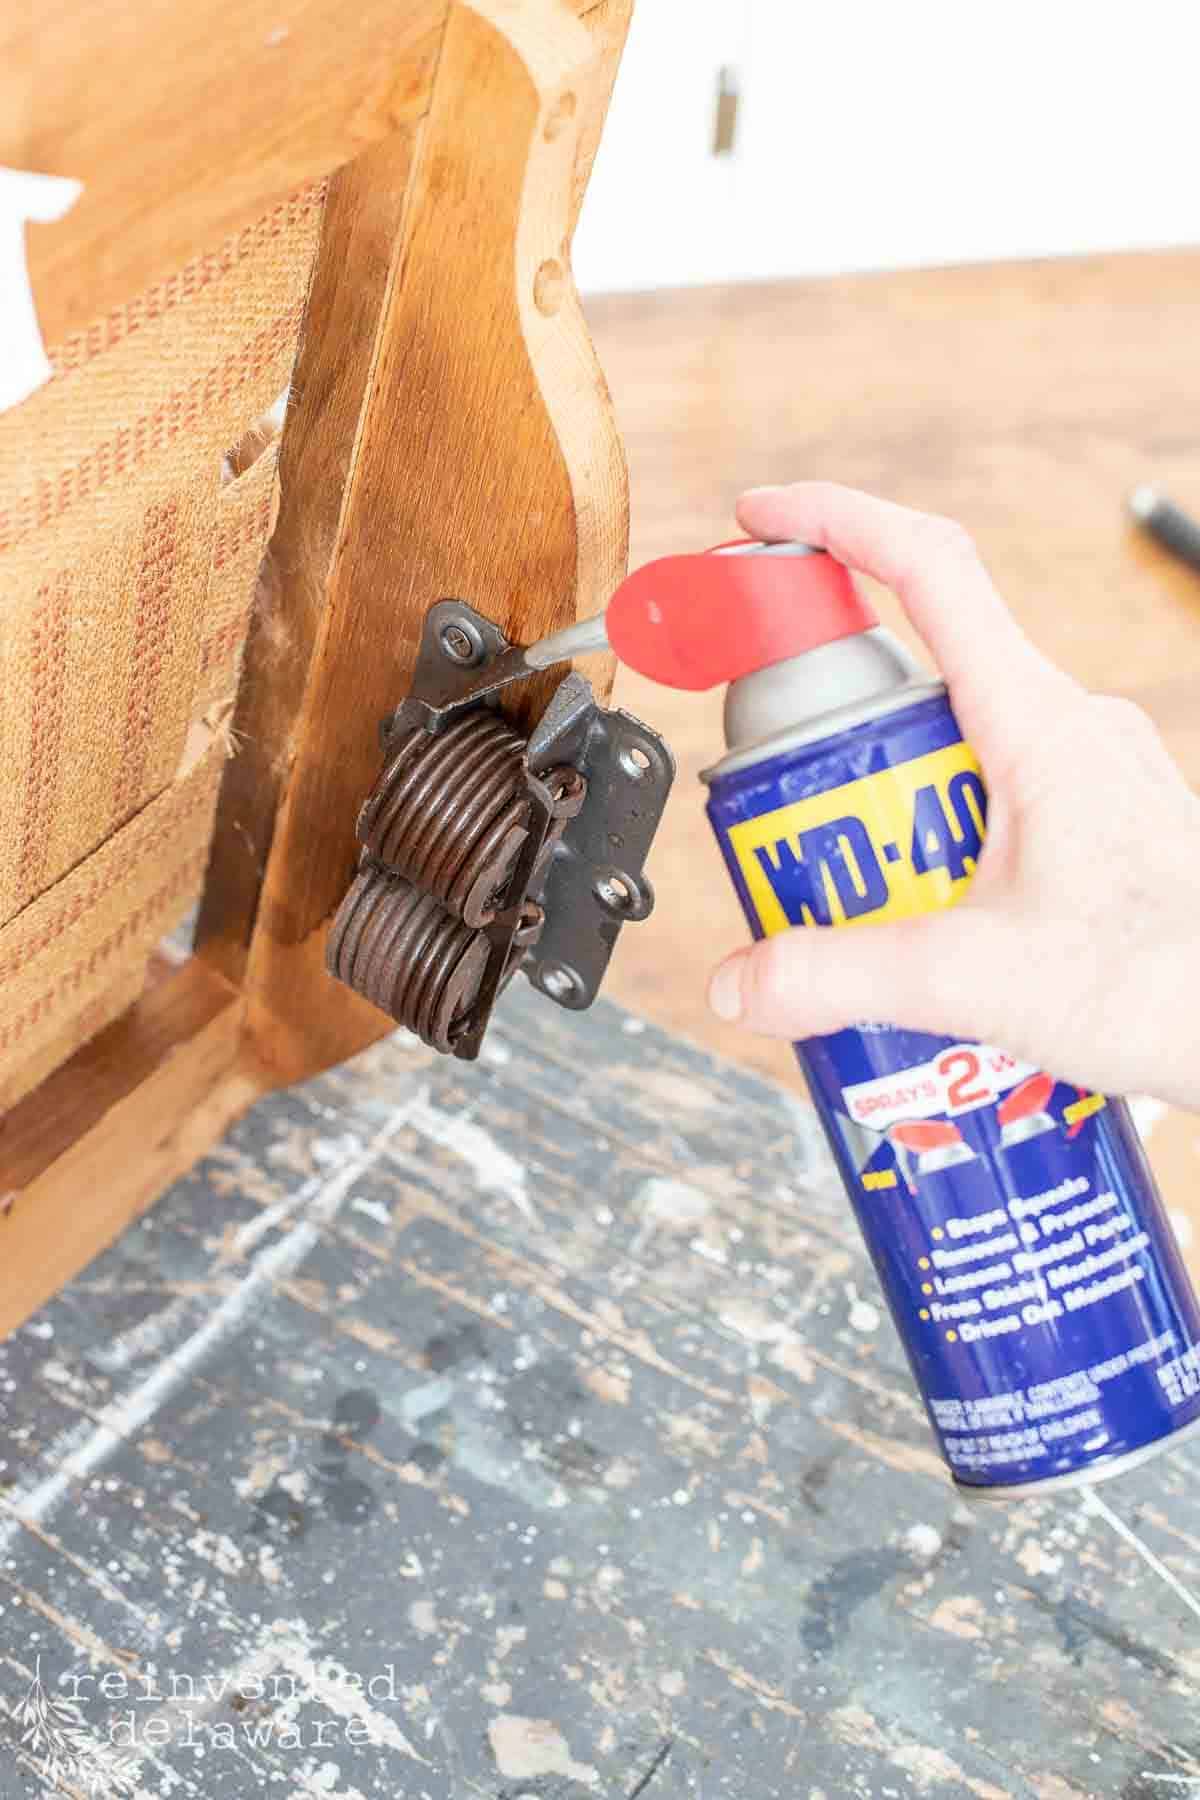
This rocker glider-style of chair has springs to create a rocking motion. Fortunately, the old springs did not have to be replaced with new springs!
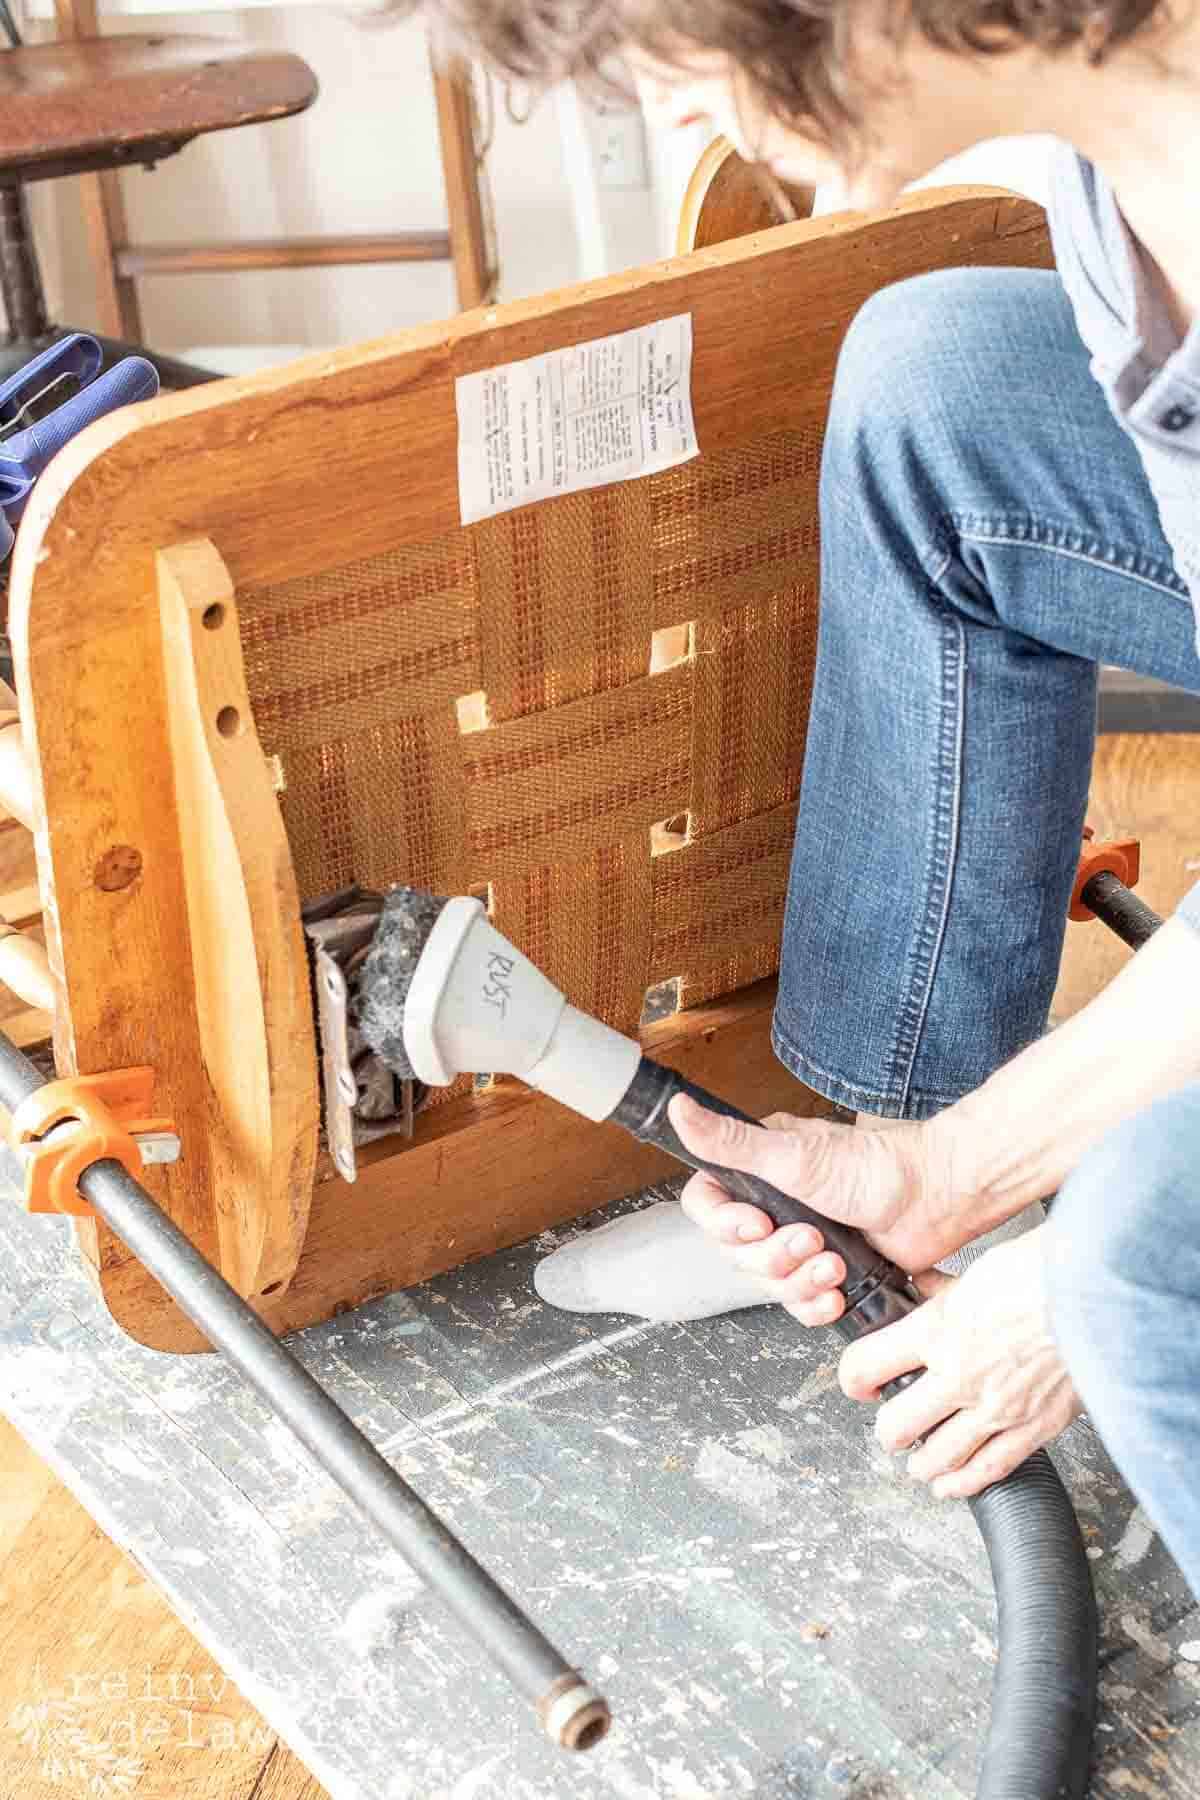
clean & prep the wooden frame
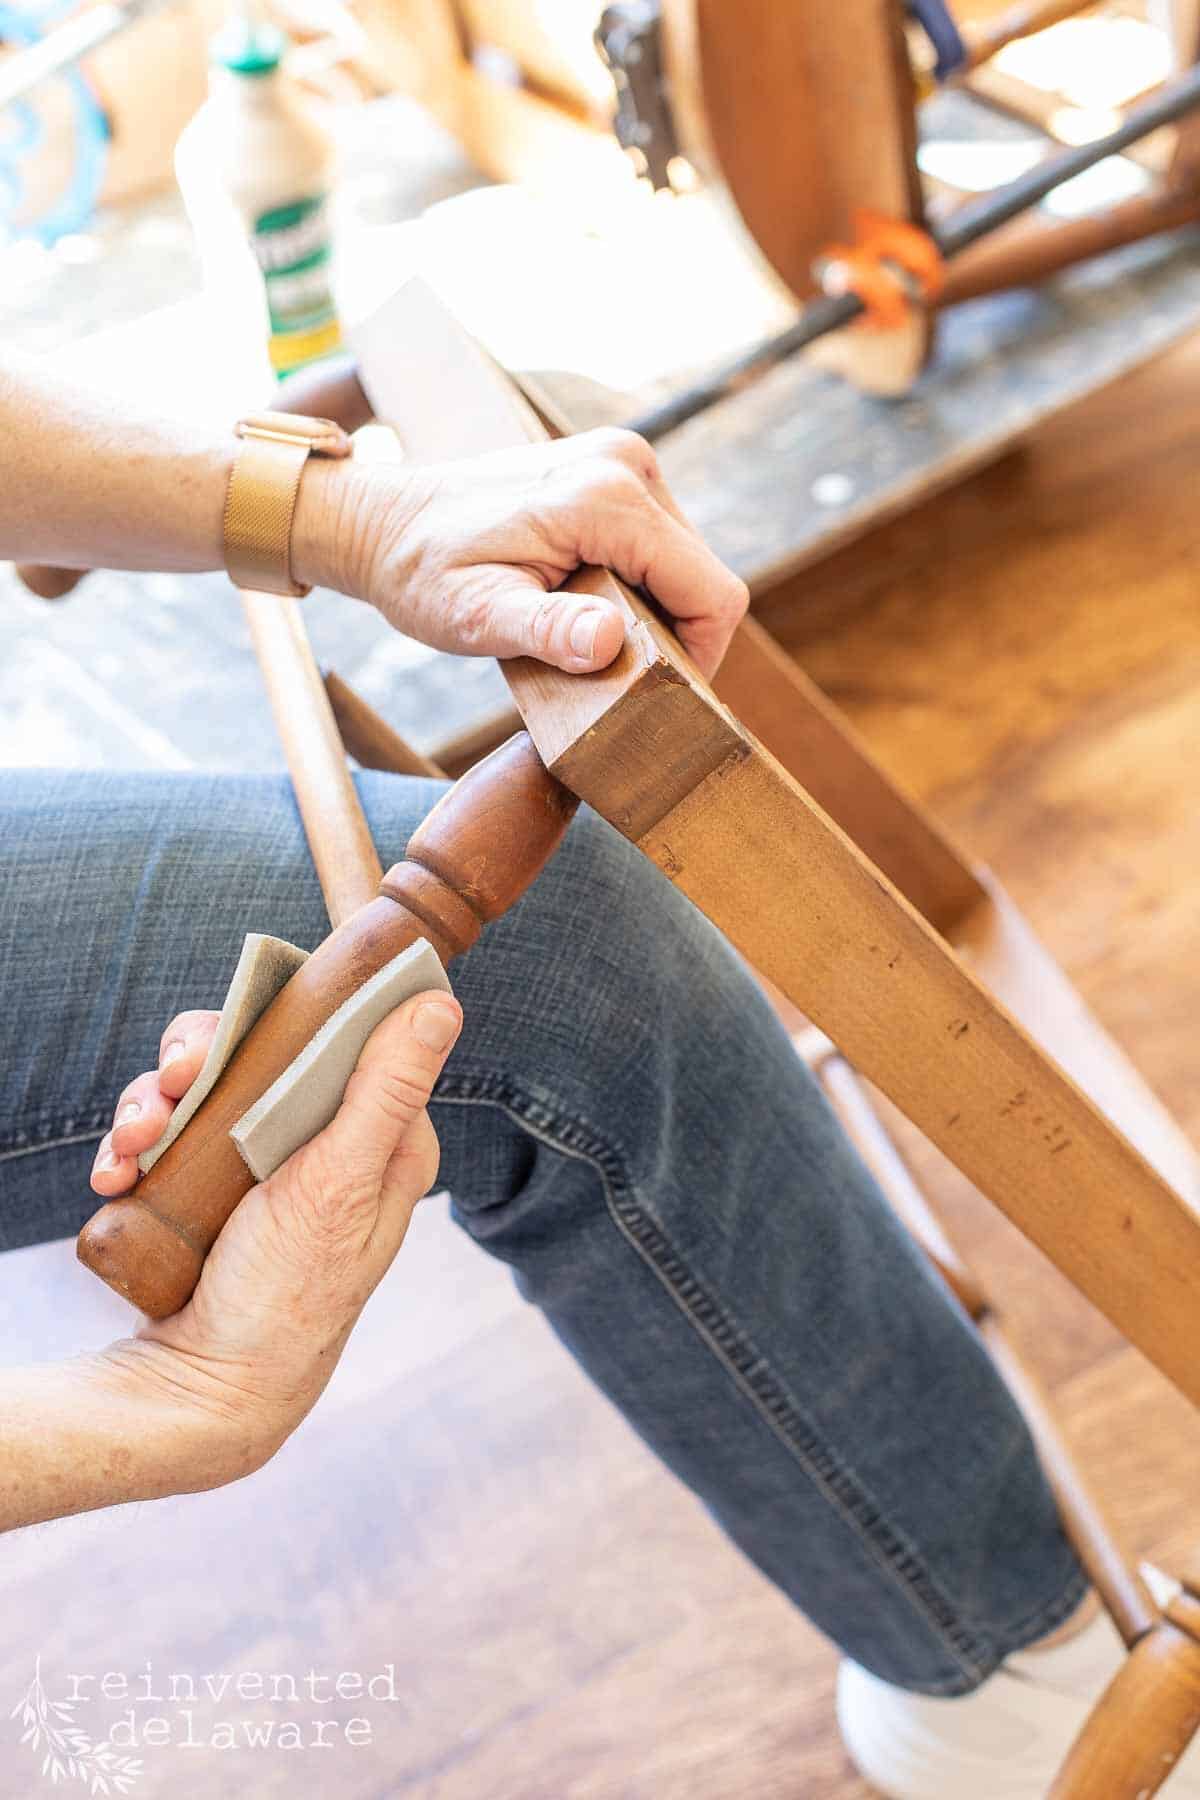
In order to refinish the wood on the frame of the rocking chair, I gave the wood a good cleaning with TSP cleaner and a microfiber cloth. This removed years of furniture polish and oils built up from regular use. Especially where someone’s hand would rest while rocking all those babies!
Then I lightly sanded it all down. RAD pads are flexible sanding pads that I use all the time in my furniture makeovers. They make sanding spindles so easy! I removed the dust with a dry microfiber cloth and the wood was ready to finish!
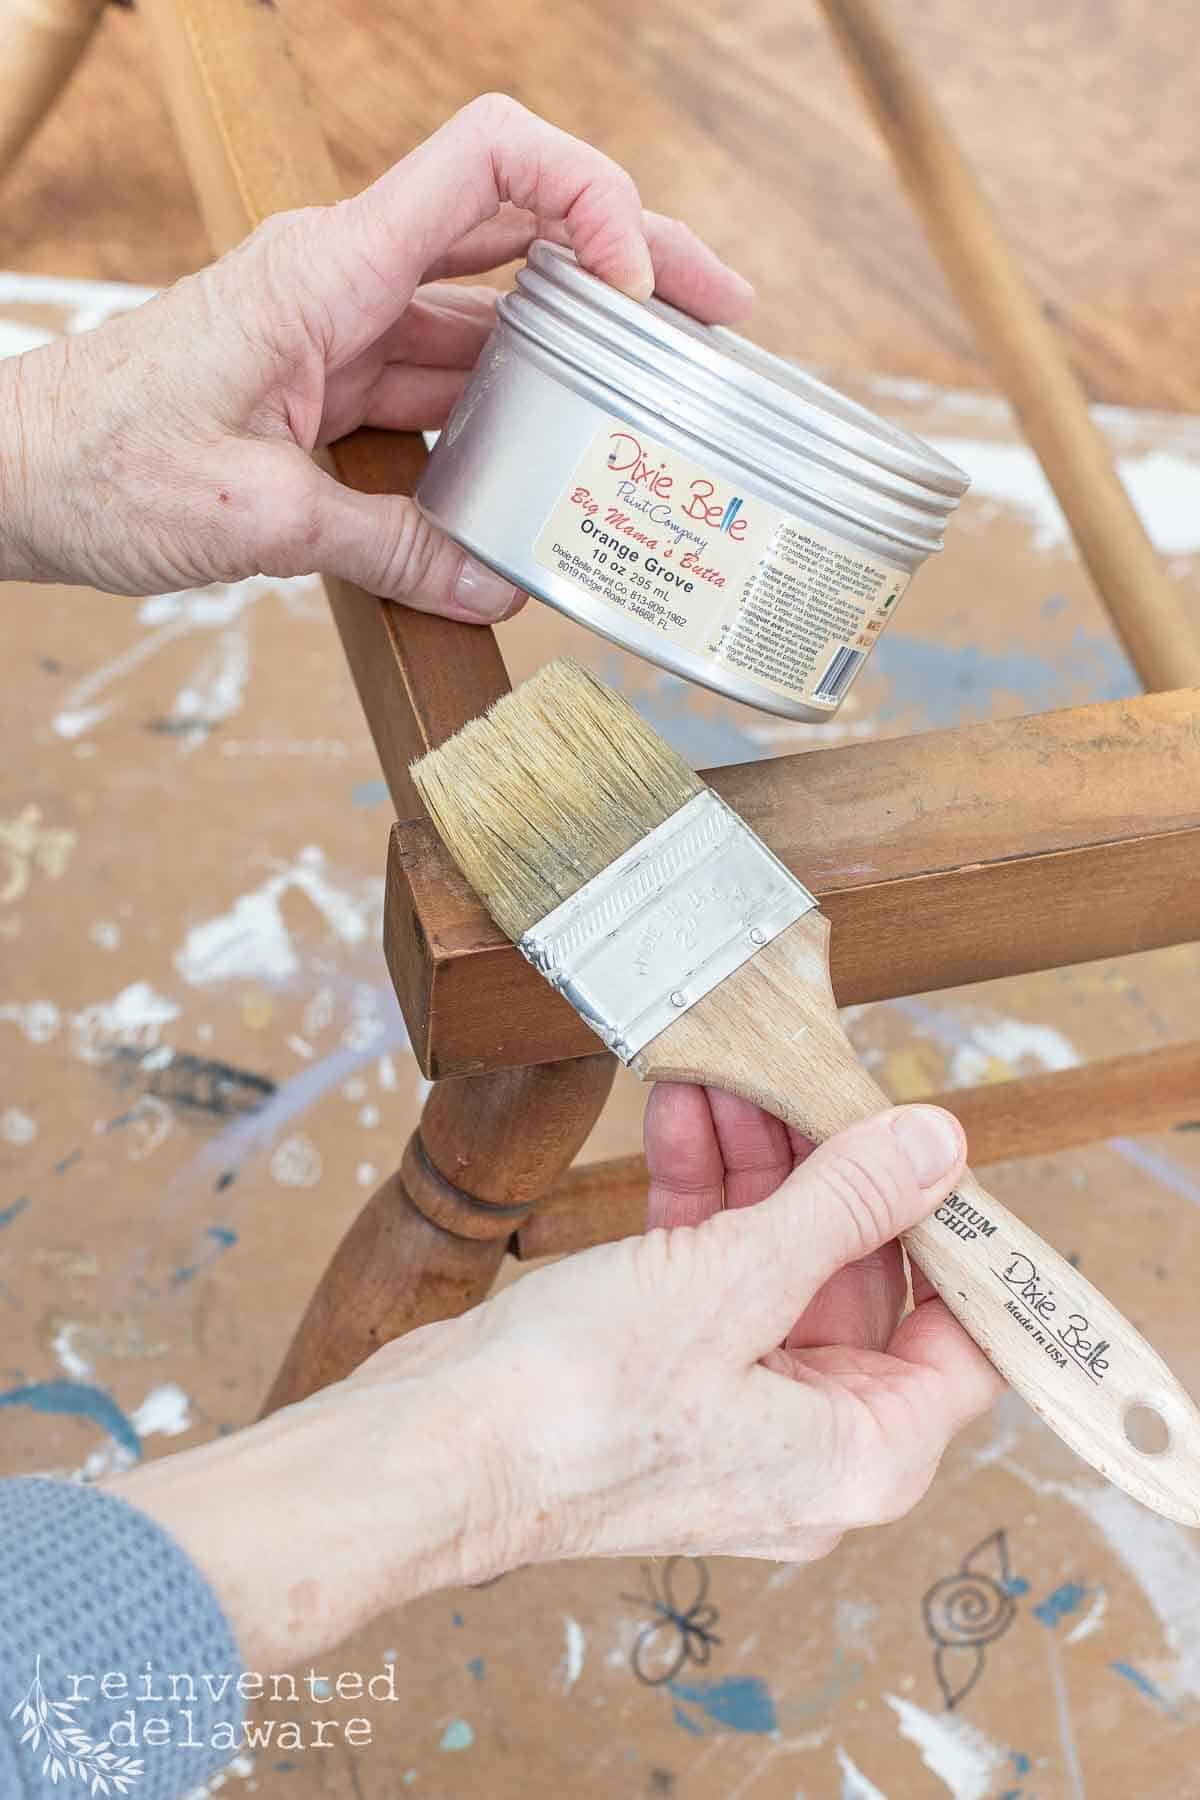
Since the rocker had spent years in our attic, I knew it would be dried out and parched. The best way to revitalize wood on old pieces like this rocker is to use a natural oil-based product that the wood will soak up.
Big Mama’s Butta is by far one of the best I have ever used on wood furniture makeovers. Plus it smells amazing! Apply it with a chip brush and then wipe off the excess. Allow it to soak in for several hours and apply a second coat if the wood needs it!
supplies
- upholstery tack lifter
- needle nose pliers
- Titebond wood glue
- bar clamps
- WD-40
- upholstery batting
- scissors
- pneumatic staple gun
- air compressor
- staples
- grainsack fabric (there are many colors to choose from!)
- variable size zipper tape
- flexible sanding pads
- Big Mamas Butta Wood Conditioner
step-by-step instructions – chair upholstery
Now it’s time to tackle the chair upholstery part of this furniture makeover! Do you love fabric as much as I do? I found this reproduction grain sack fabric on Etsy a few years ago and have used it in so many other reupholstery projects.
t’s heavy and durable and inexpensive compared to many other upholstery-weight fabrics. The fabric does not have a right side or a wrong side because it is woven. It really looks like a grain sack!
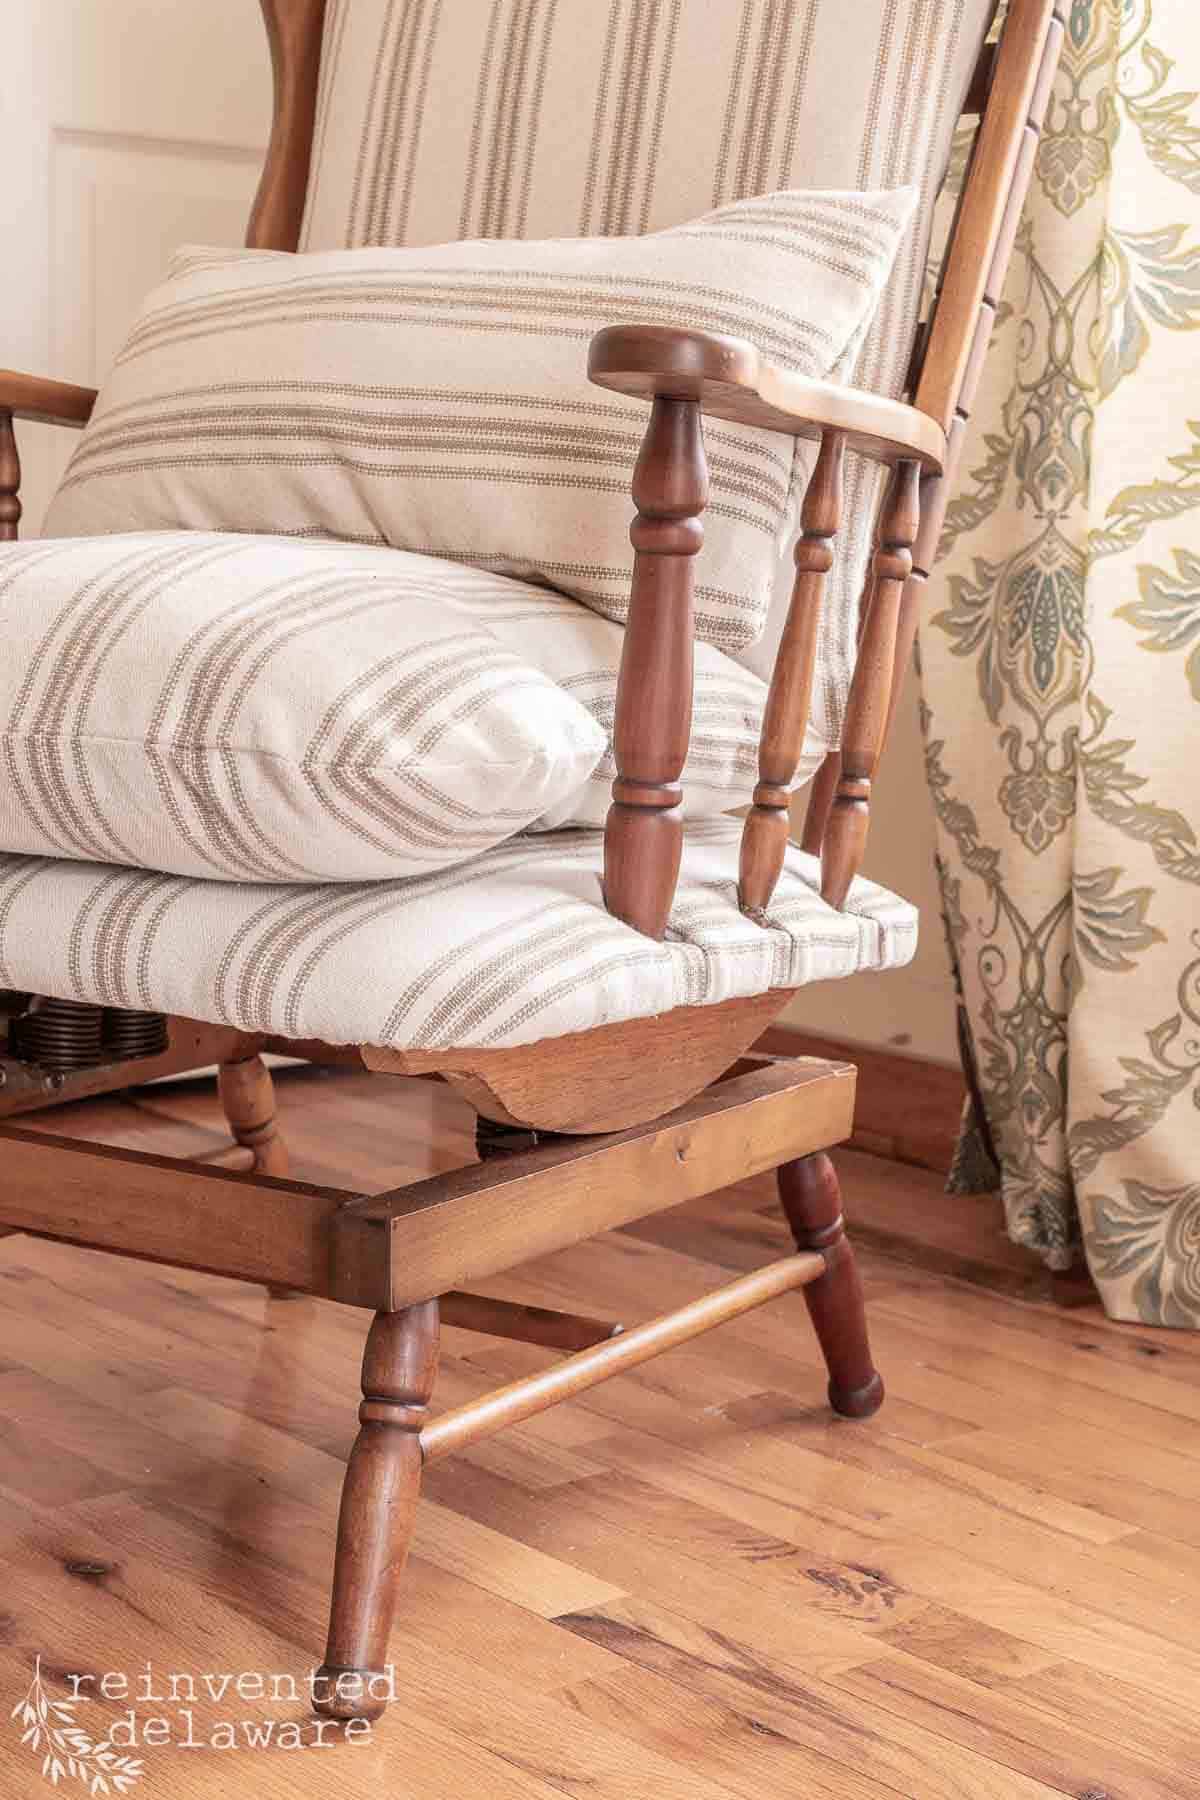
You will notice that this rocker has an area near the base of the spindles that needed to be covered before we attach the fabric to the area where the seat cushion will be.
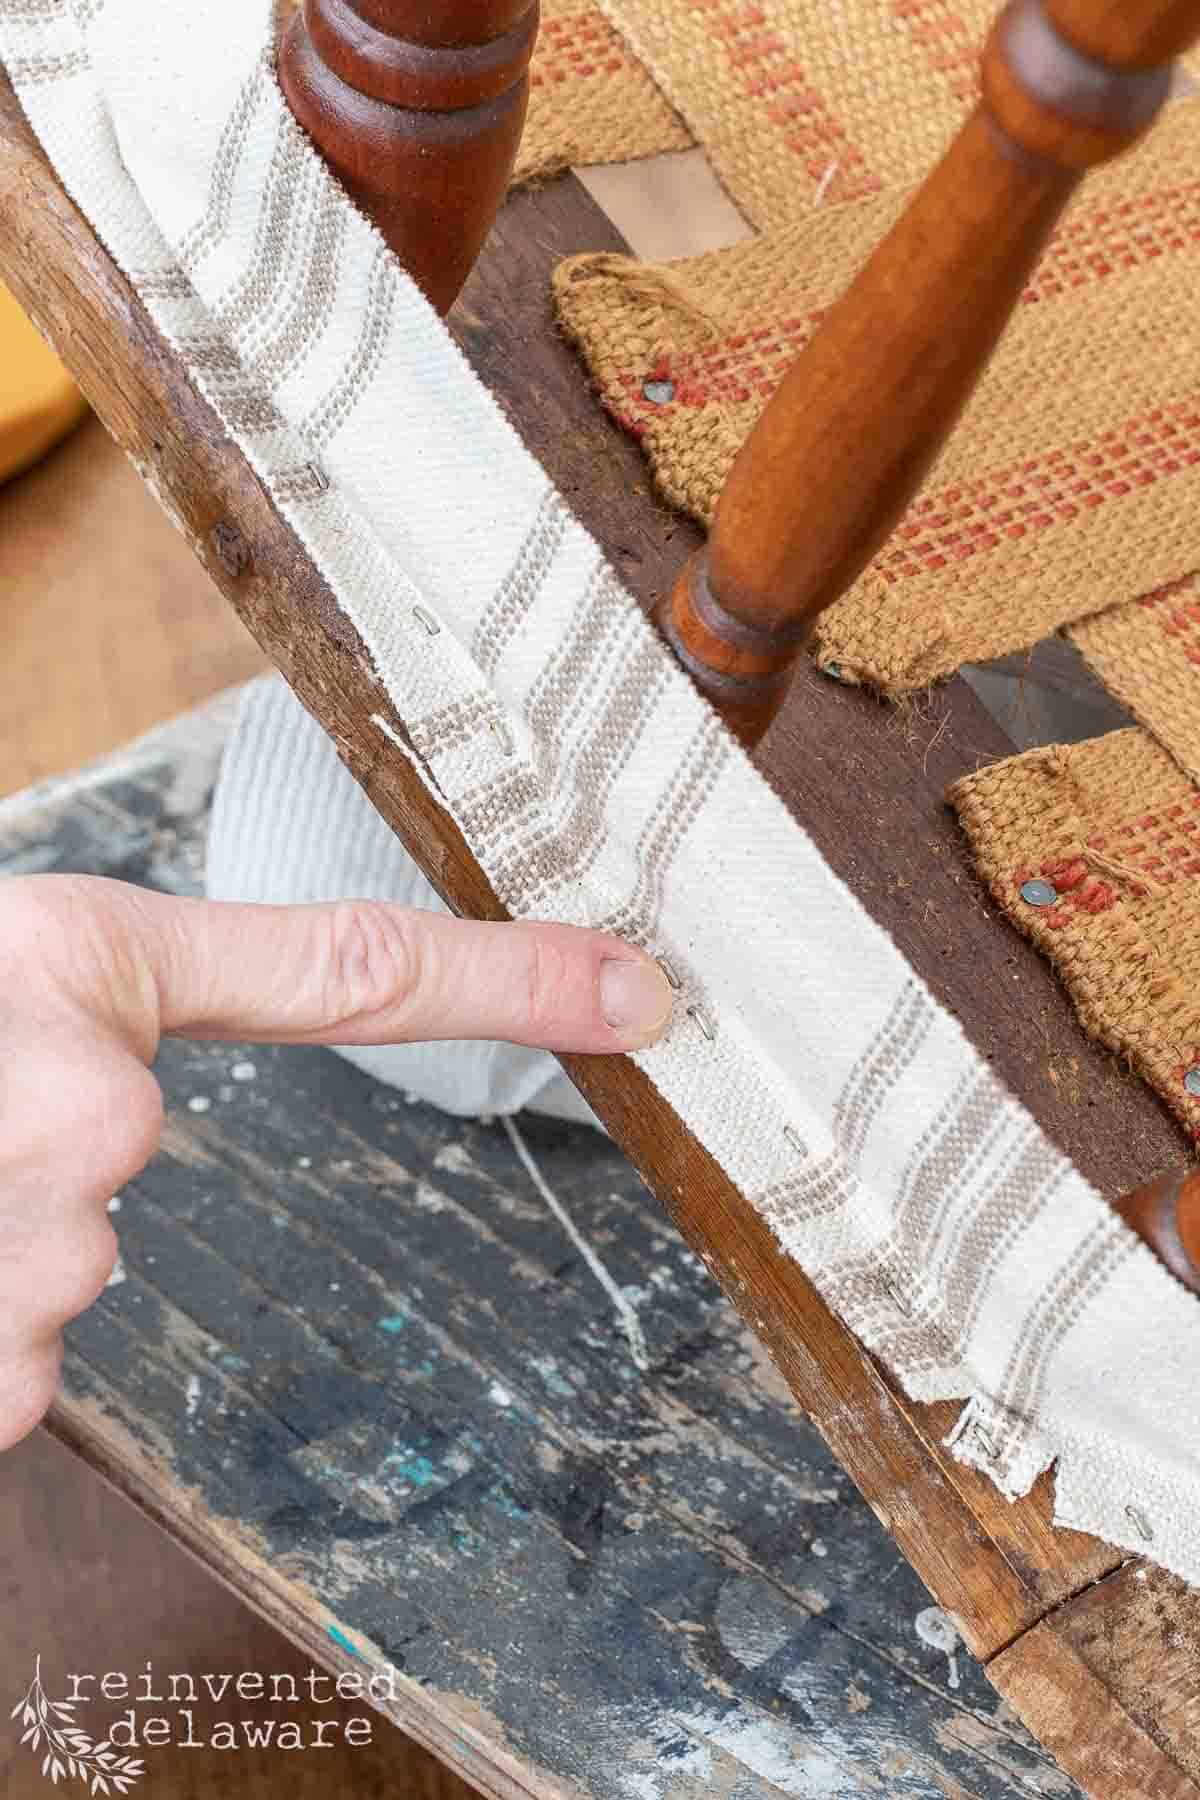
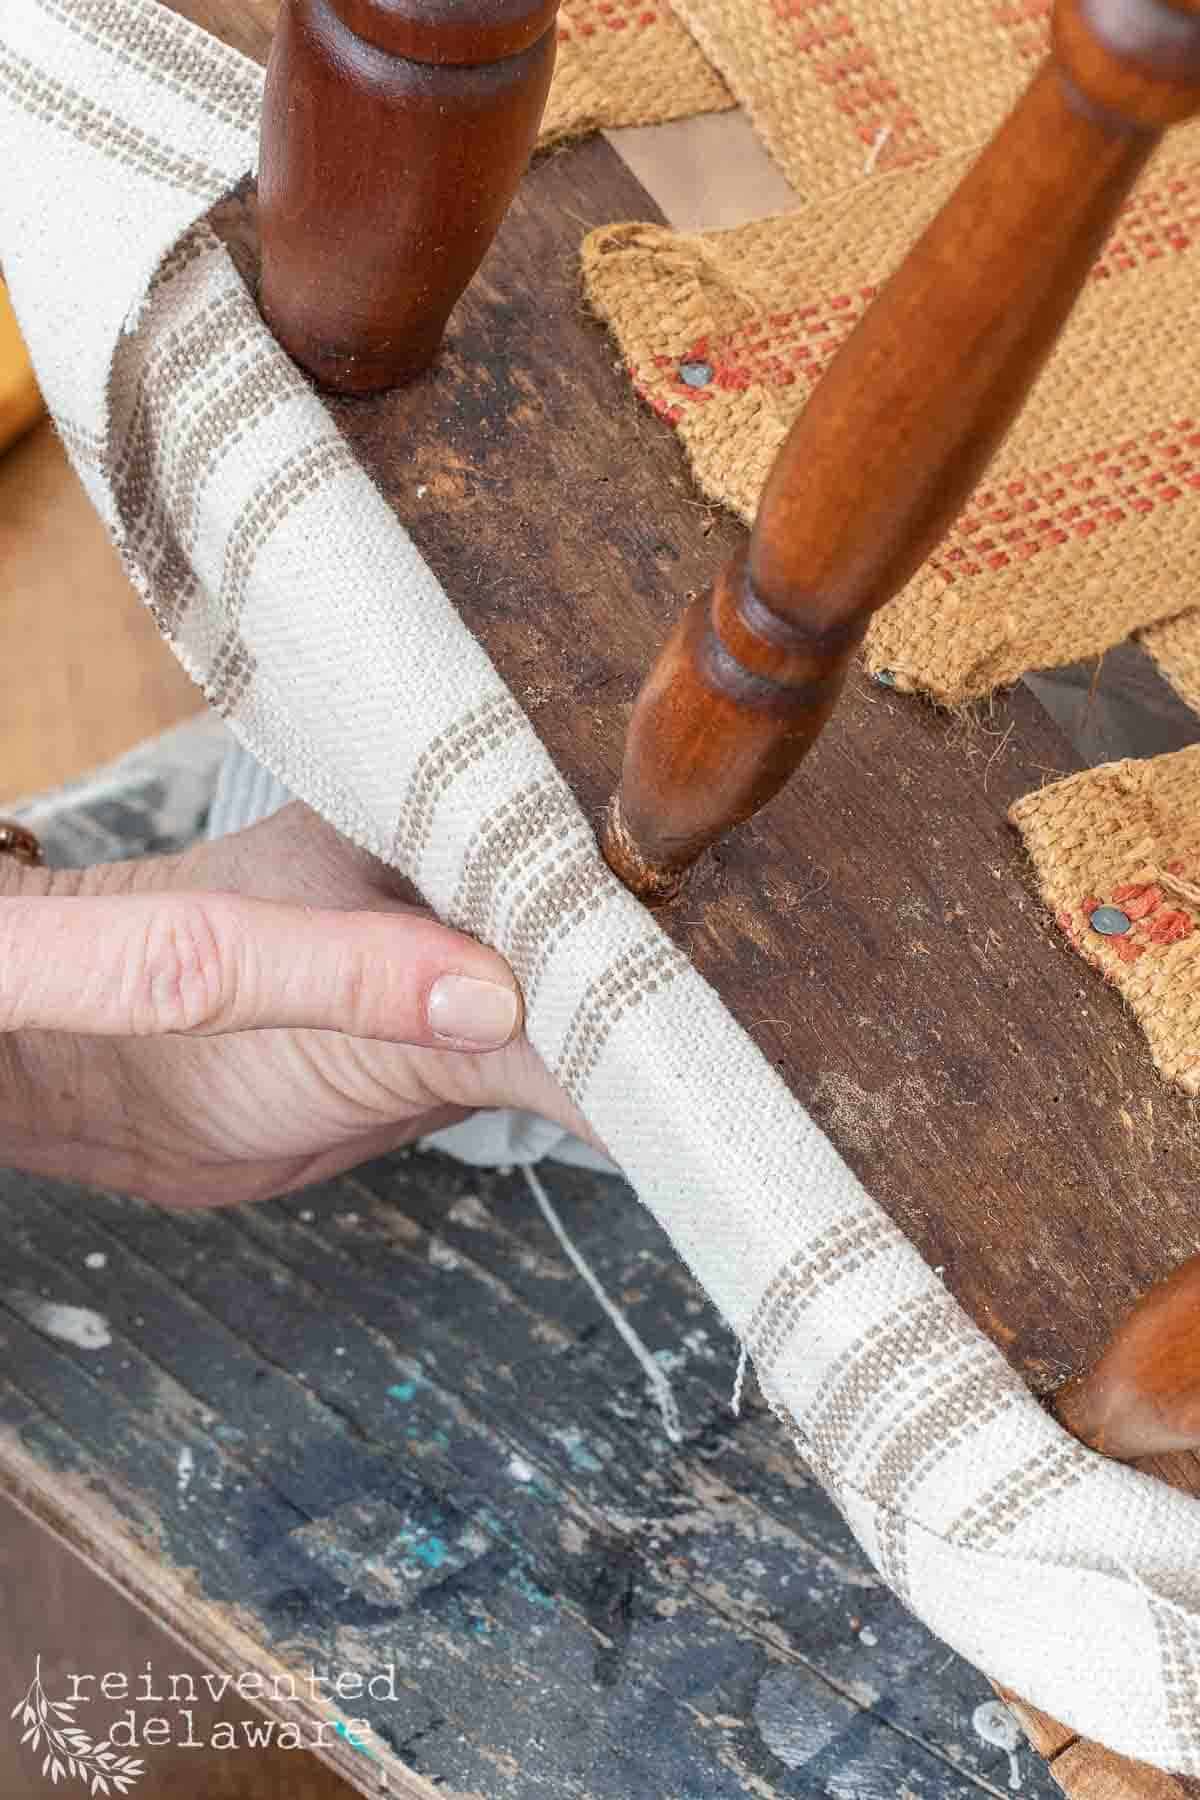
cover the wooden frame
- use a piece of fabric large enough to cover the area, fold it in half, and then open up the fold
- staple the fabric to secure it to the base
- when it was secured, fold the fabric back down, and the staples will be hidden
- wrap the fabric to the underside and use the pneumatice staple gun to attach it to the frame
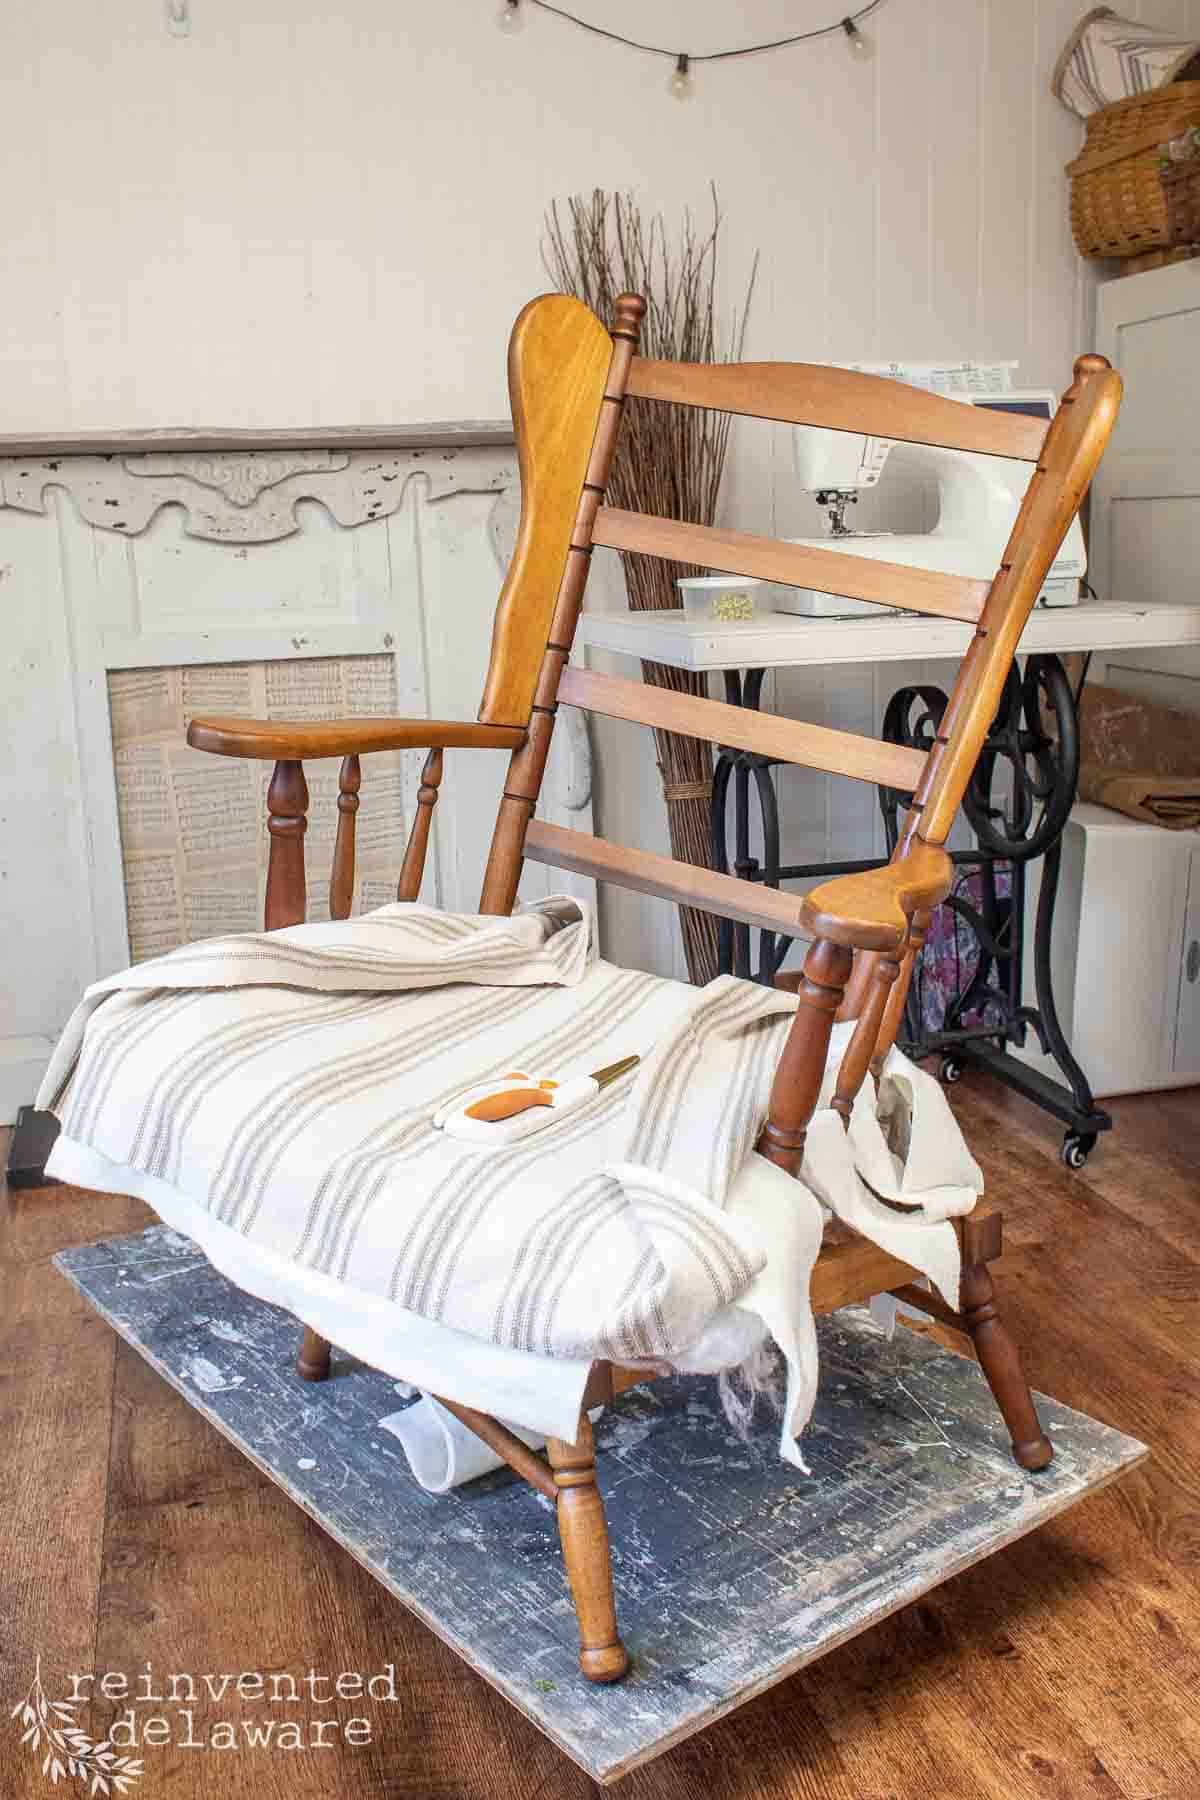
cover the deck of the old chair
Next, cut a large enough piece of fabric to cover the deck of the chair. The deck is the area where the seat cushion will sit. Again, cut enough so that you can wrap it to the underside of the wooden frame. Allow for plenty of excess fabric!
I don’t have images of the deck before adding the fabric but I did add additional upholstery weight batting and some stuffing to the deck to beef it up a bit.
Ok, let’s tackle working the fabric around all of those spindles! It’s easier than you think. If you are concerned about how this works, I encourage you to watch my chair upholstery series on YouTube. I will show you exactly how to make the cuts I am about to explain.
You can also use scrap fabric like dropcloth or muslin to practice before using your good upholstery fabric. Work in one area at a time. Don’t try to make all of the cuts at once.
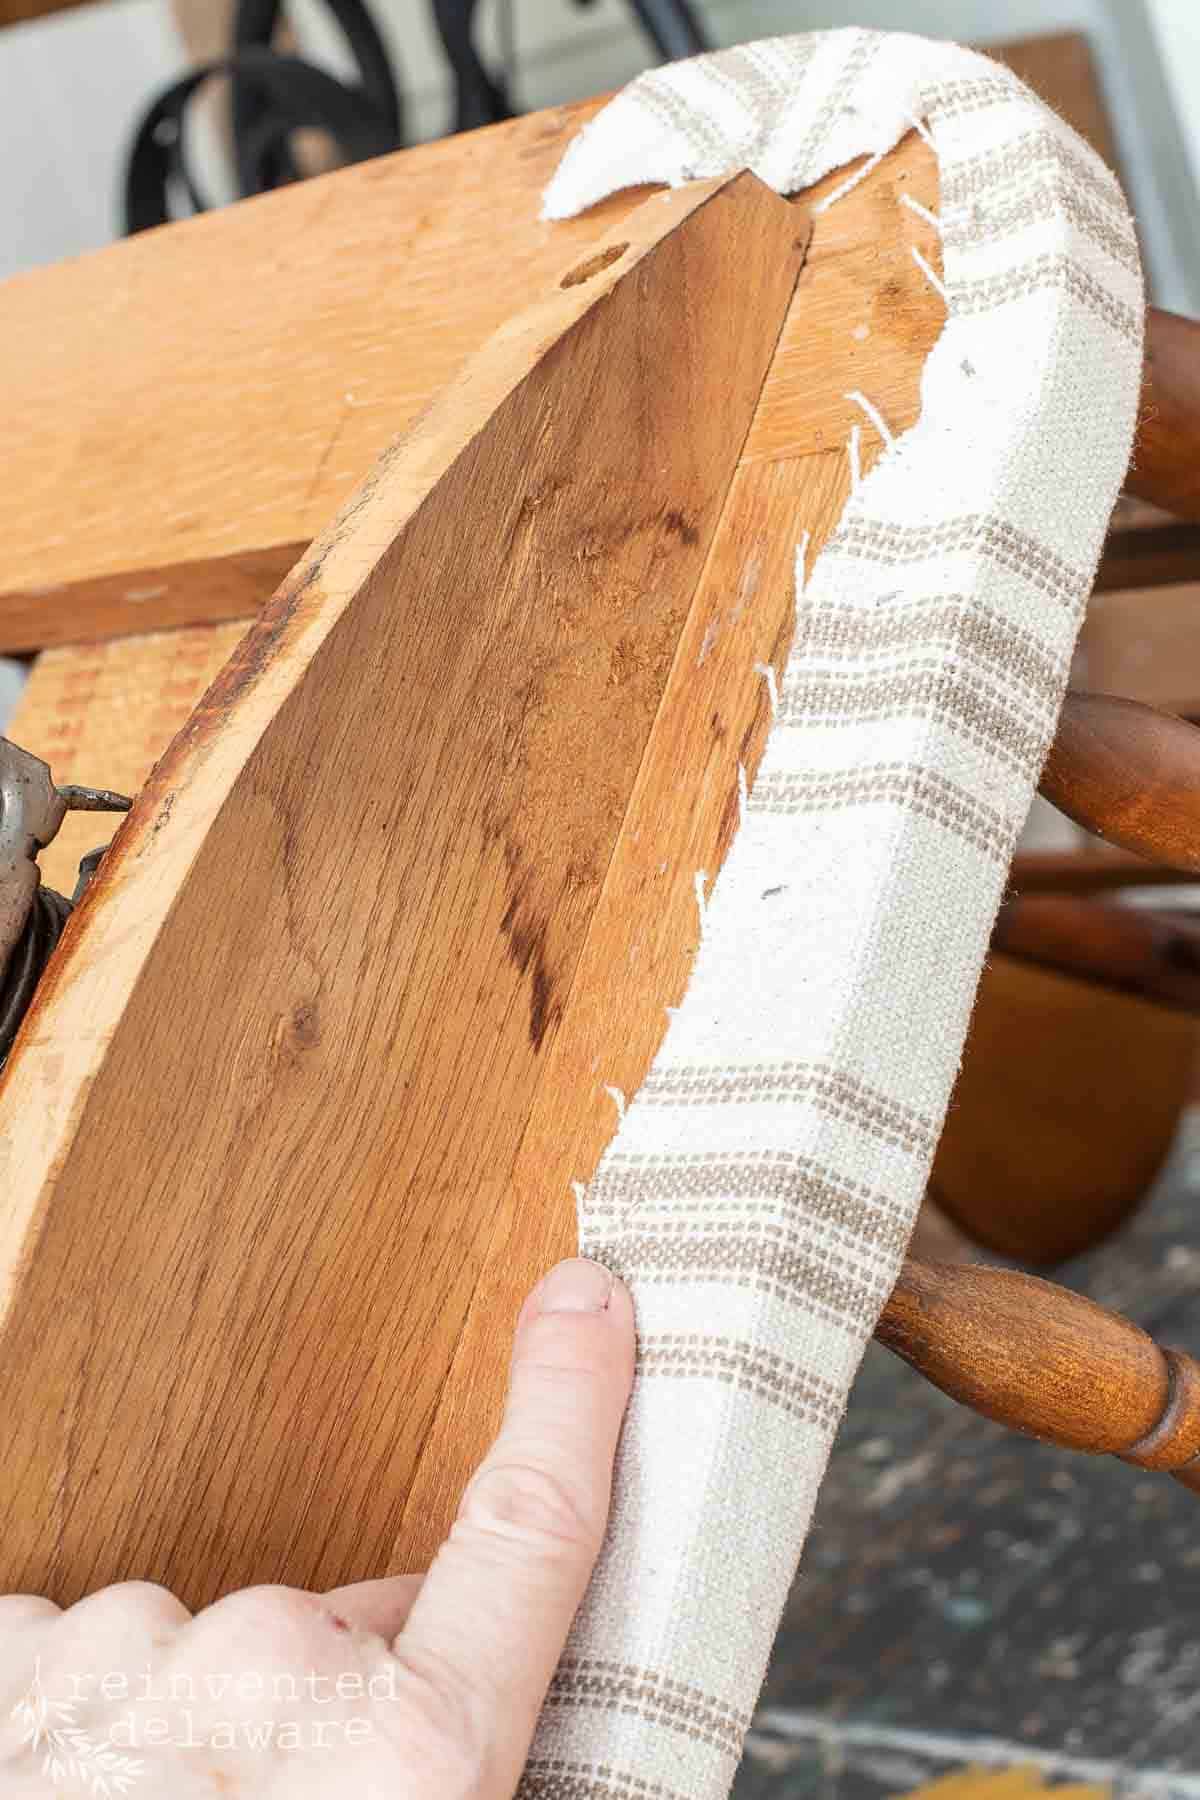
upholster around the spindles
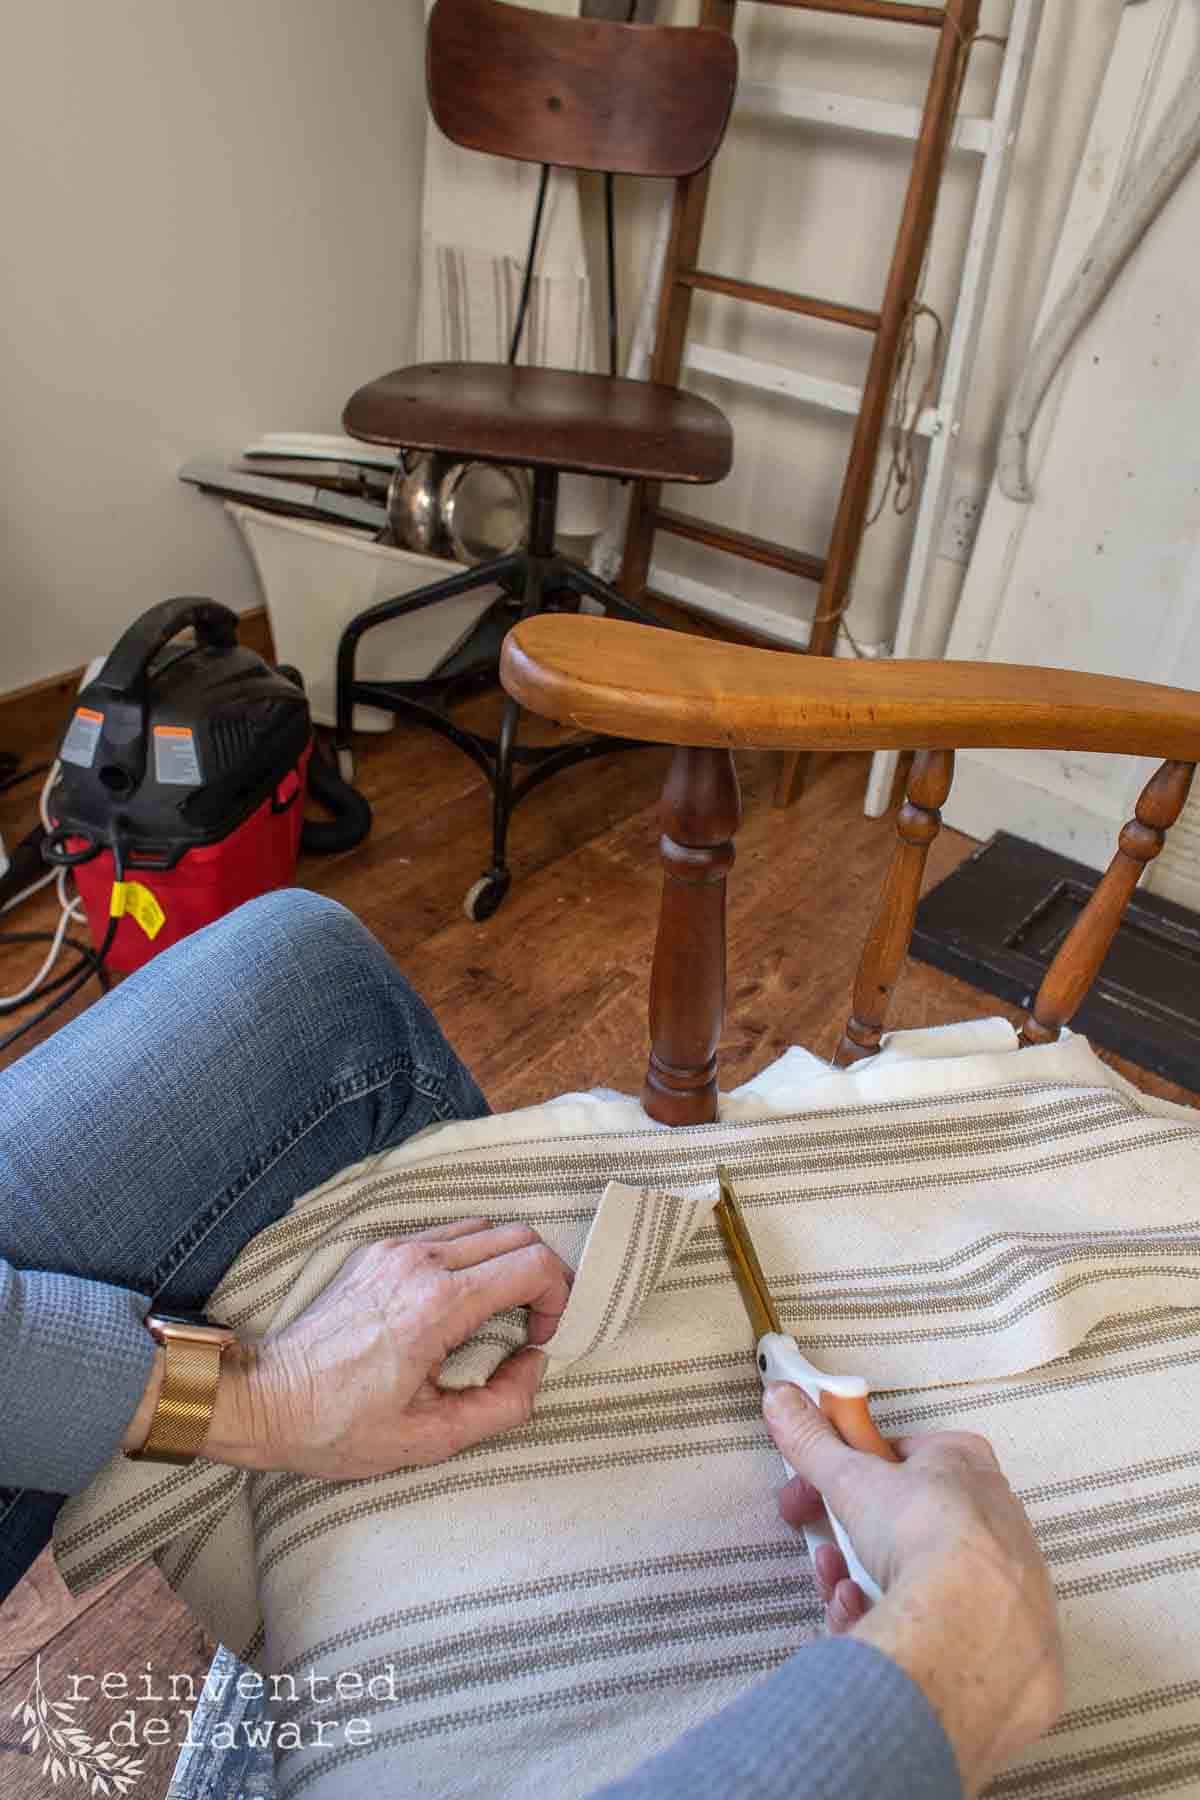
- Center the piece of fabric from side to side and front to back. Next, wrap the fabric on the front of the chair on the underside of the wooden frame and staple about three staples in the center. Do the same at the back pulling the fabric until it is taut but not so tight that the fabric gets ripples. Doing this will hold the fabric in place while you fit the fabric around the spindles on the side of the rocking chair.
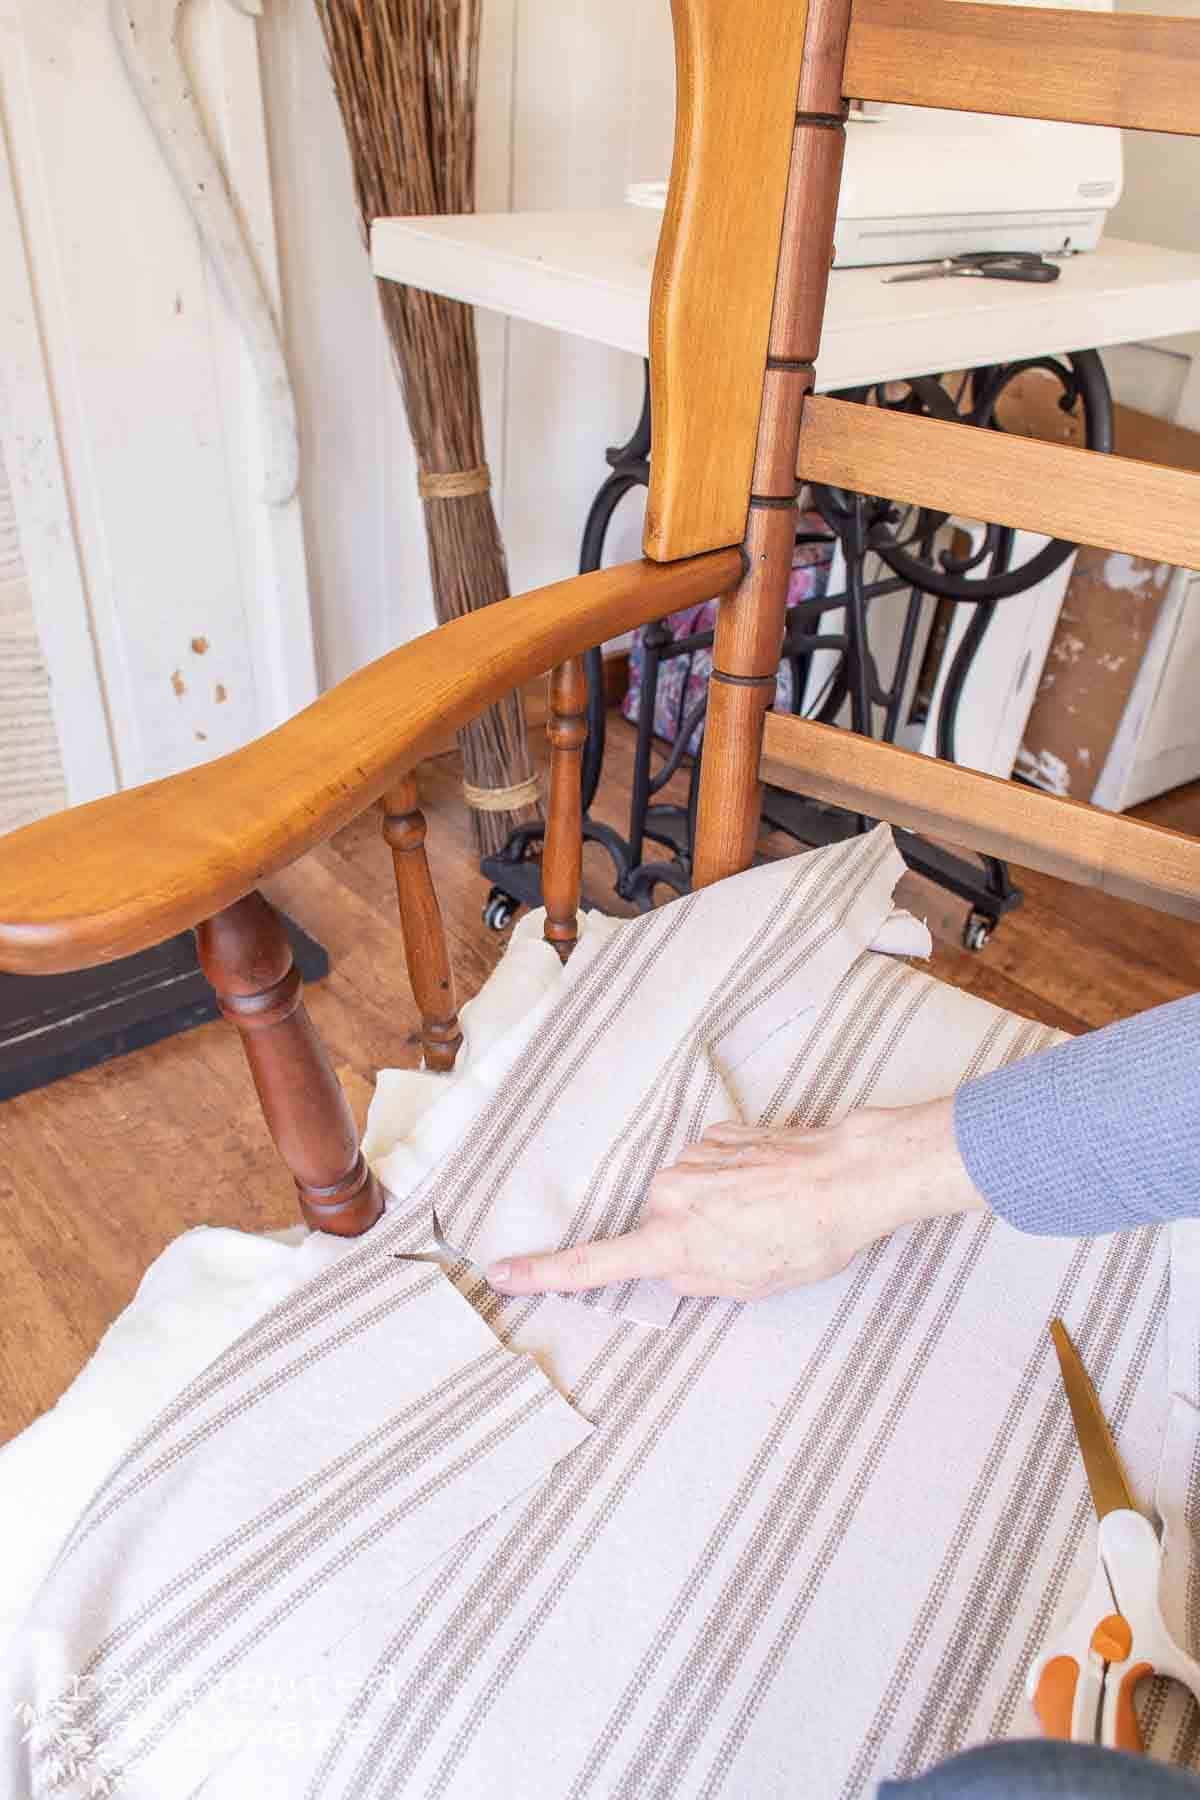
- Fold the fabric back as you see in the images and make a straight cut in the direction of the first spindle. Don’t cut all the way to the spindle – stay at least 1-1.5” away from the spindle.
- Then cut a V at the end of that first cut. These V cuts should only be about 1” long. All three cuts will be in the shape of a Y. Cutting this Y shape will help you to fold the fabric around the spindle.
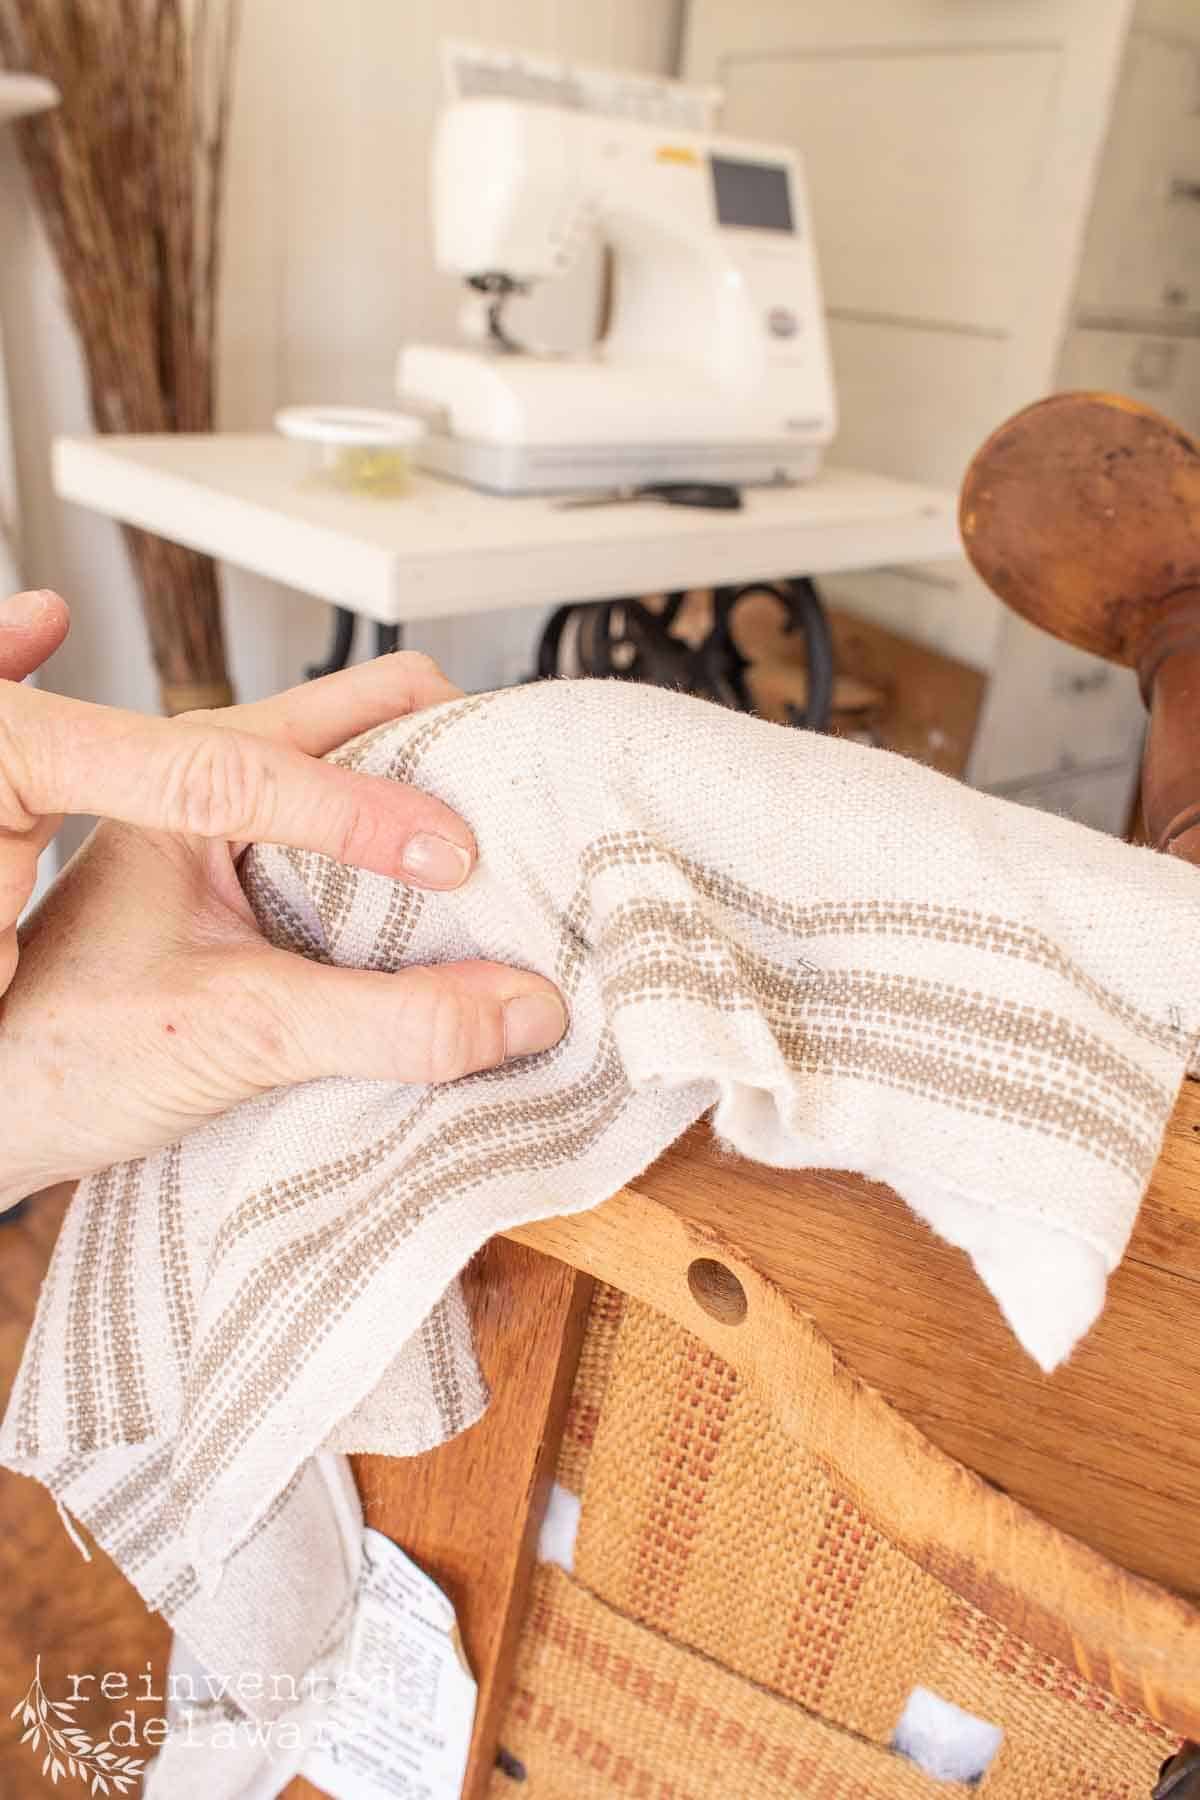
- After the making, the Y cuts, move the fabric around the spindle, and fold the edges under to hide the raw edge. You won’t be able to completely fold the fabric around the first spindle until you have made the Y cuts in the next spindle. But I recommend you test each Y cut before moving on to the next one.
- Once all of the Y cuts are made, fit the fabric around each spindle, folding under the edges as you go. Use the pneumatic staple gun to attach the fabric to the underside of the wooden frame of the rocking chair.

Repeat the same steps on the other side of the chair and on the back section of the rocking chair. Take your time and think through each step! Remember, you can always practice the Y cuts on scrap fabric to get a feel for how this will work.
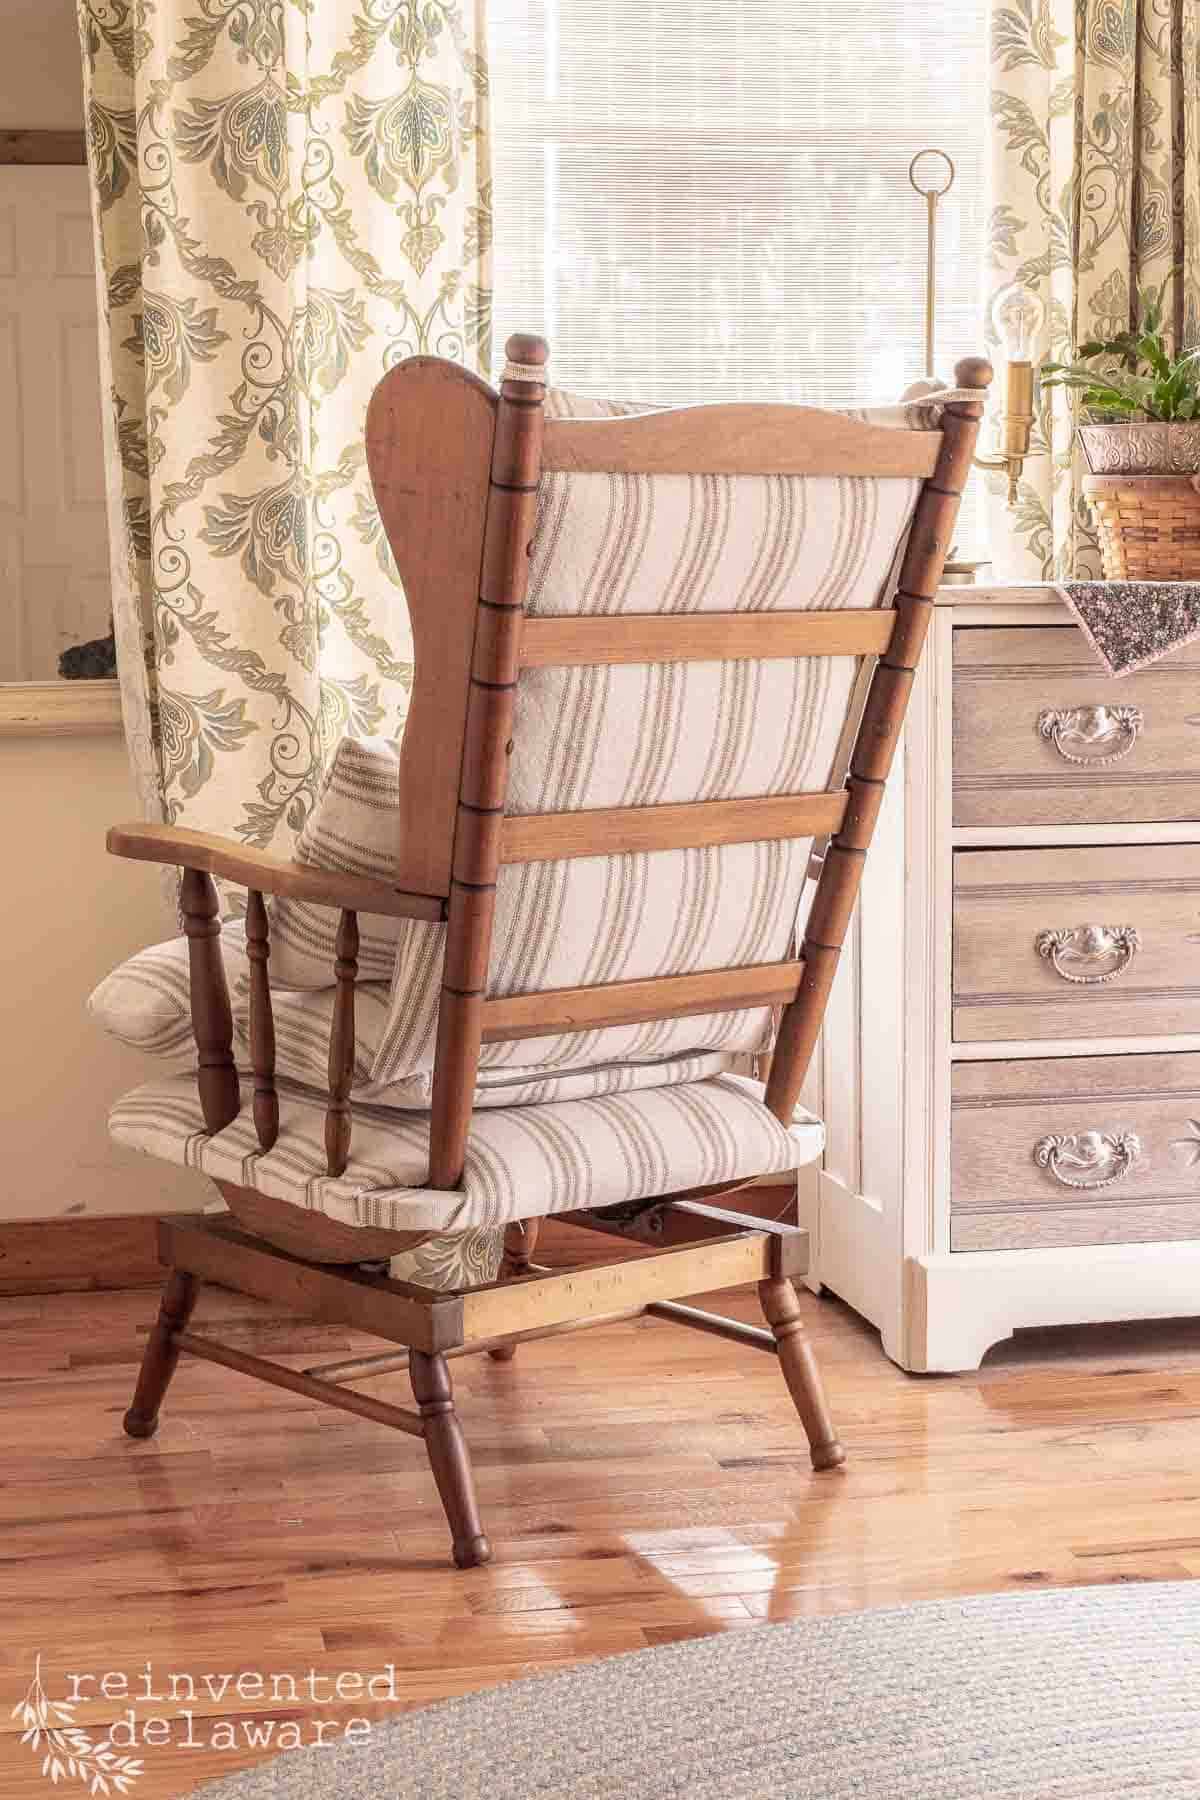
finish attaching the deck
Once all of the spindles are upholstered and you have attached the front and back, it is time to work on the rounded corners. Begin by pulling the fabric taut in the center of the rounded corner and staple it on the underside.
Then on either side of the first staple in the corner, divide the area in two and staple again. Then divide those areas in two and staple them.
Continue doing this until the fabric is securely attached to the corner. As you move around the corners, pull the fabric taut and try to avoid any puckers. The fabric will be on a bias and will have lots of give
Once all of the corners, sides, back, and front are attached to the underside of the wooden frame, trim away any excess fabric to make things tidy!
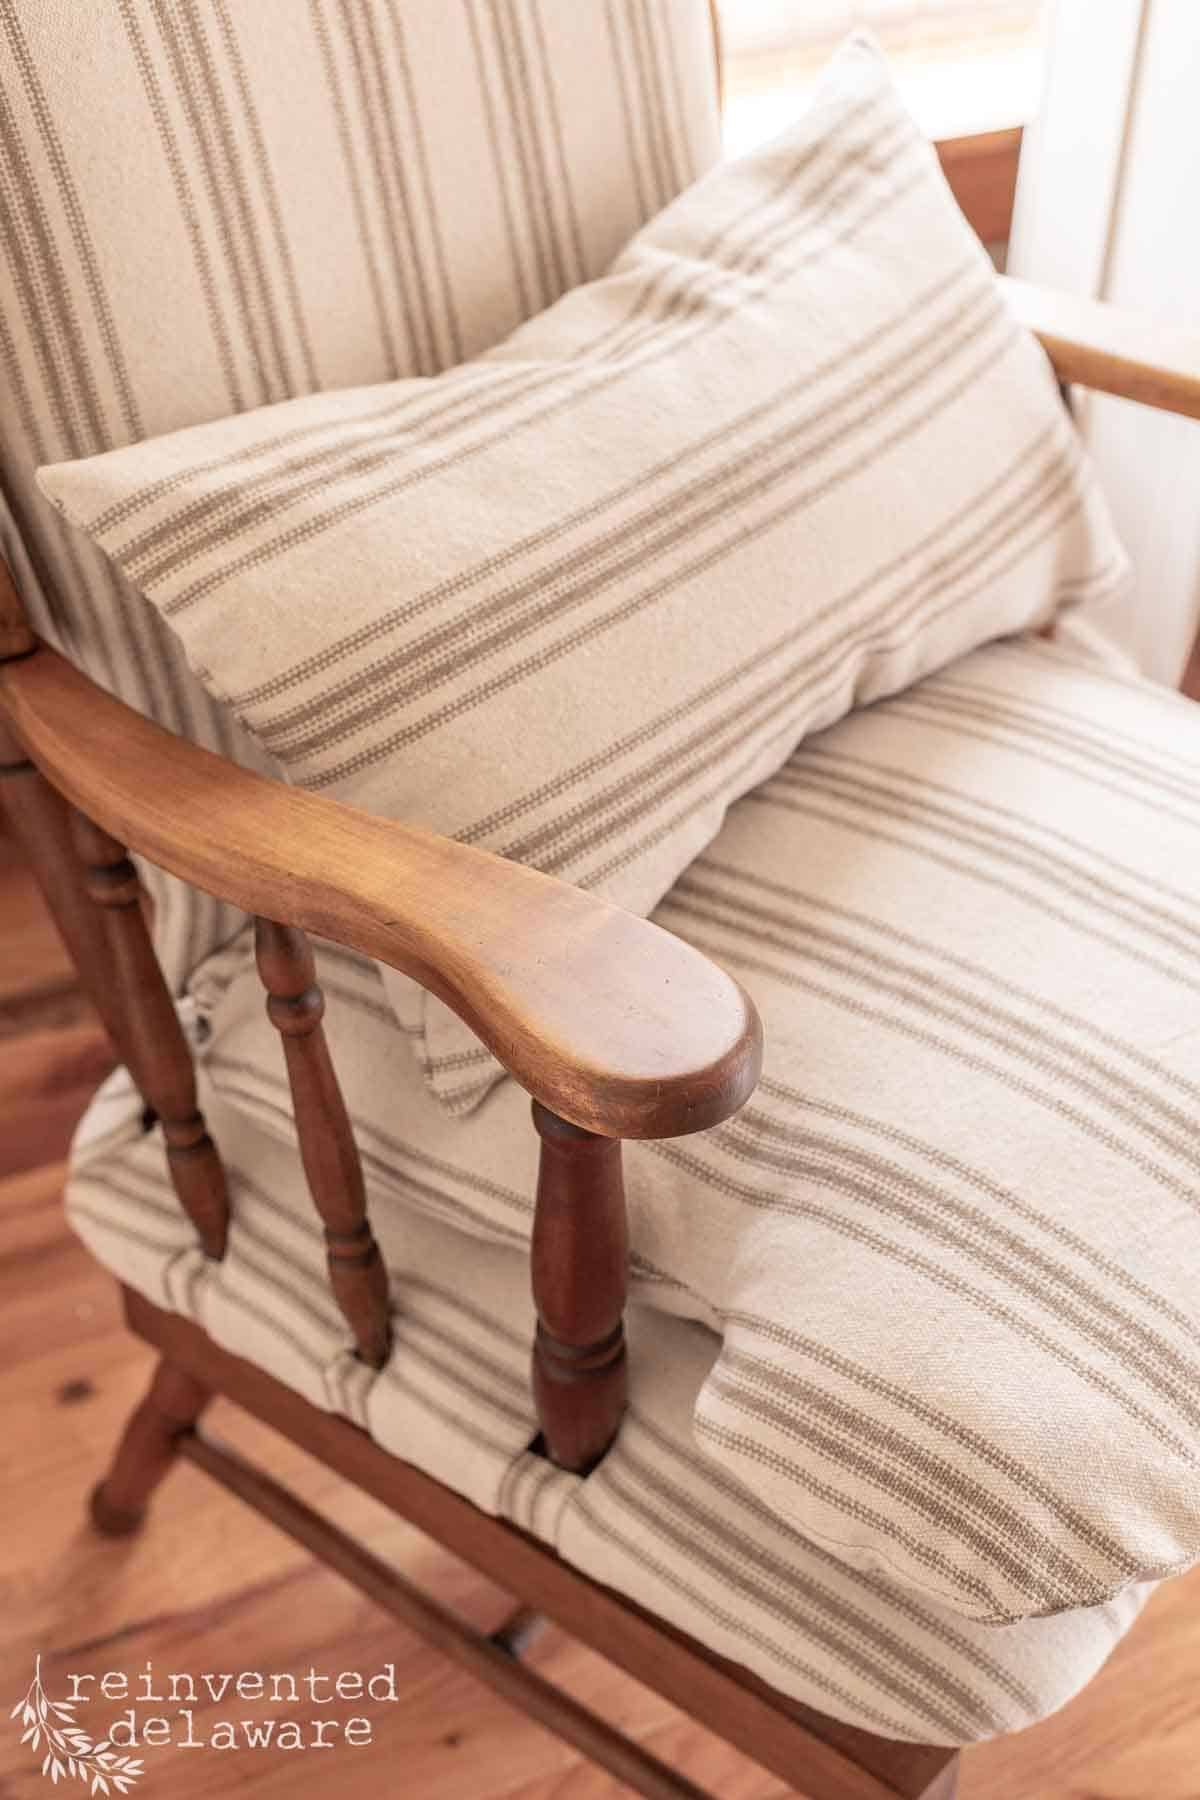
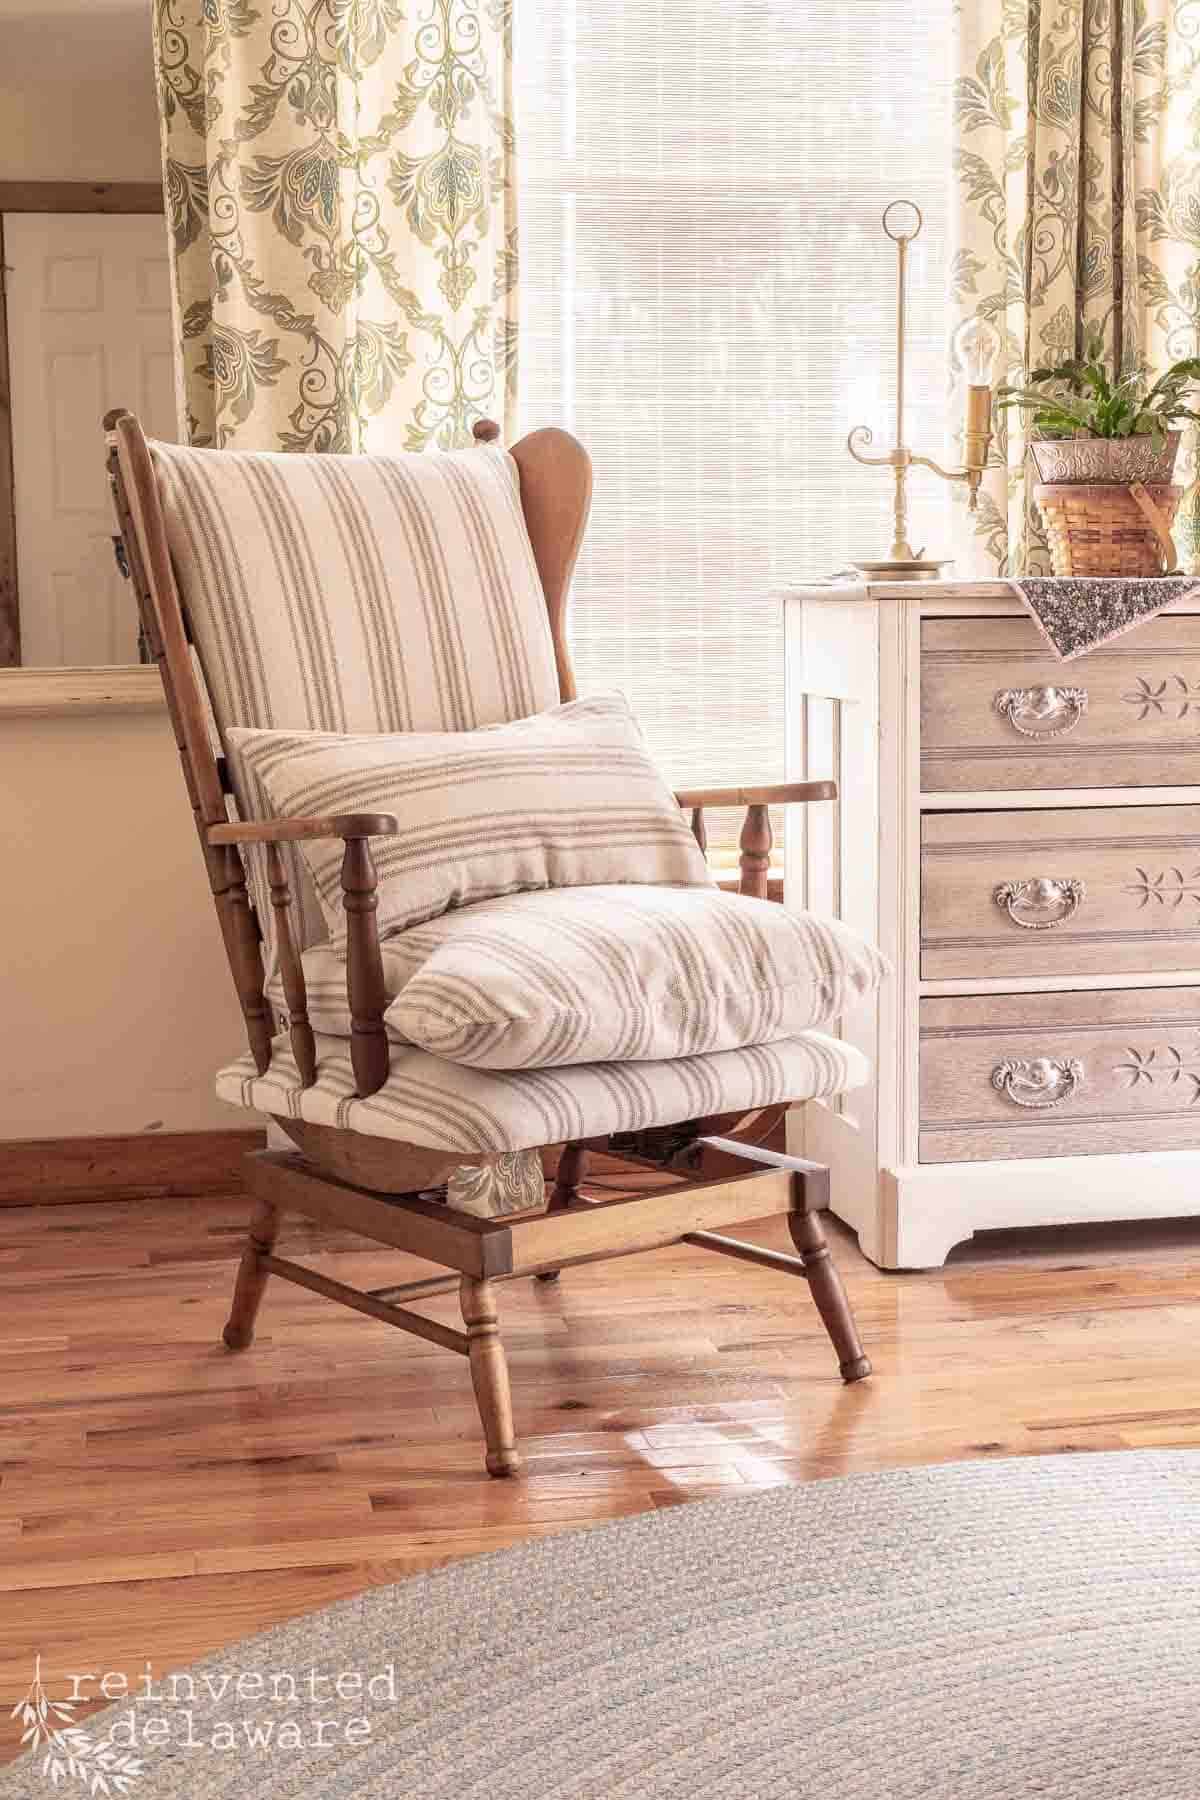
My rocker came with a foam insert but it was pretty old. It would have also created a formal look that I didn’t want. So I made a pillow-style cushion. I also made a zippered cover for it so it could be laundered. I made a similar cushion for the back of the rocking chair but I didn’t add a zipper to it.
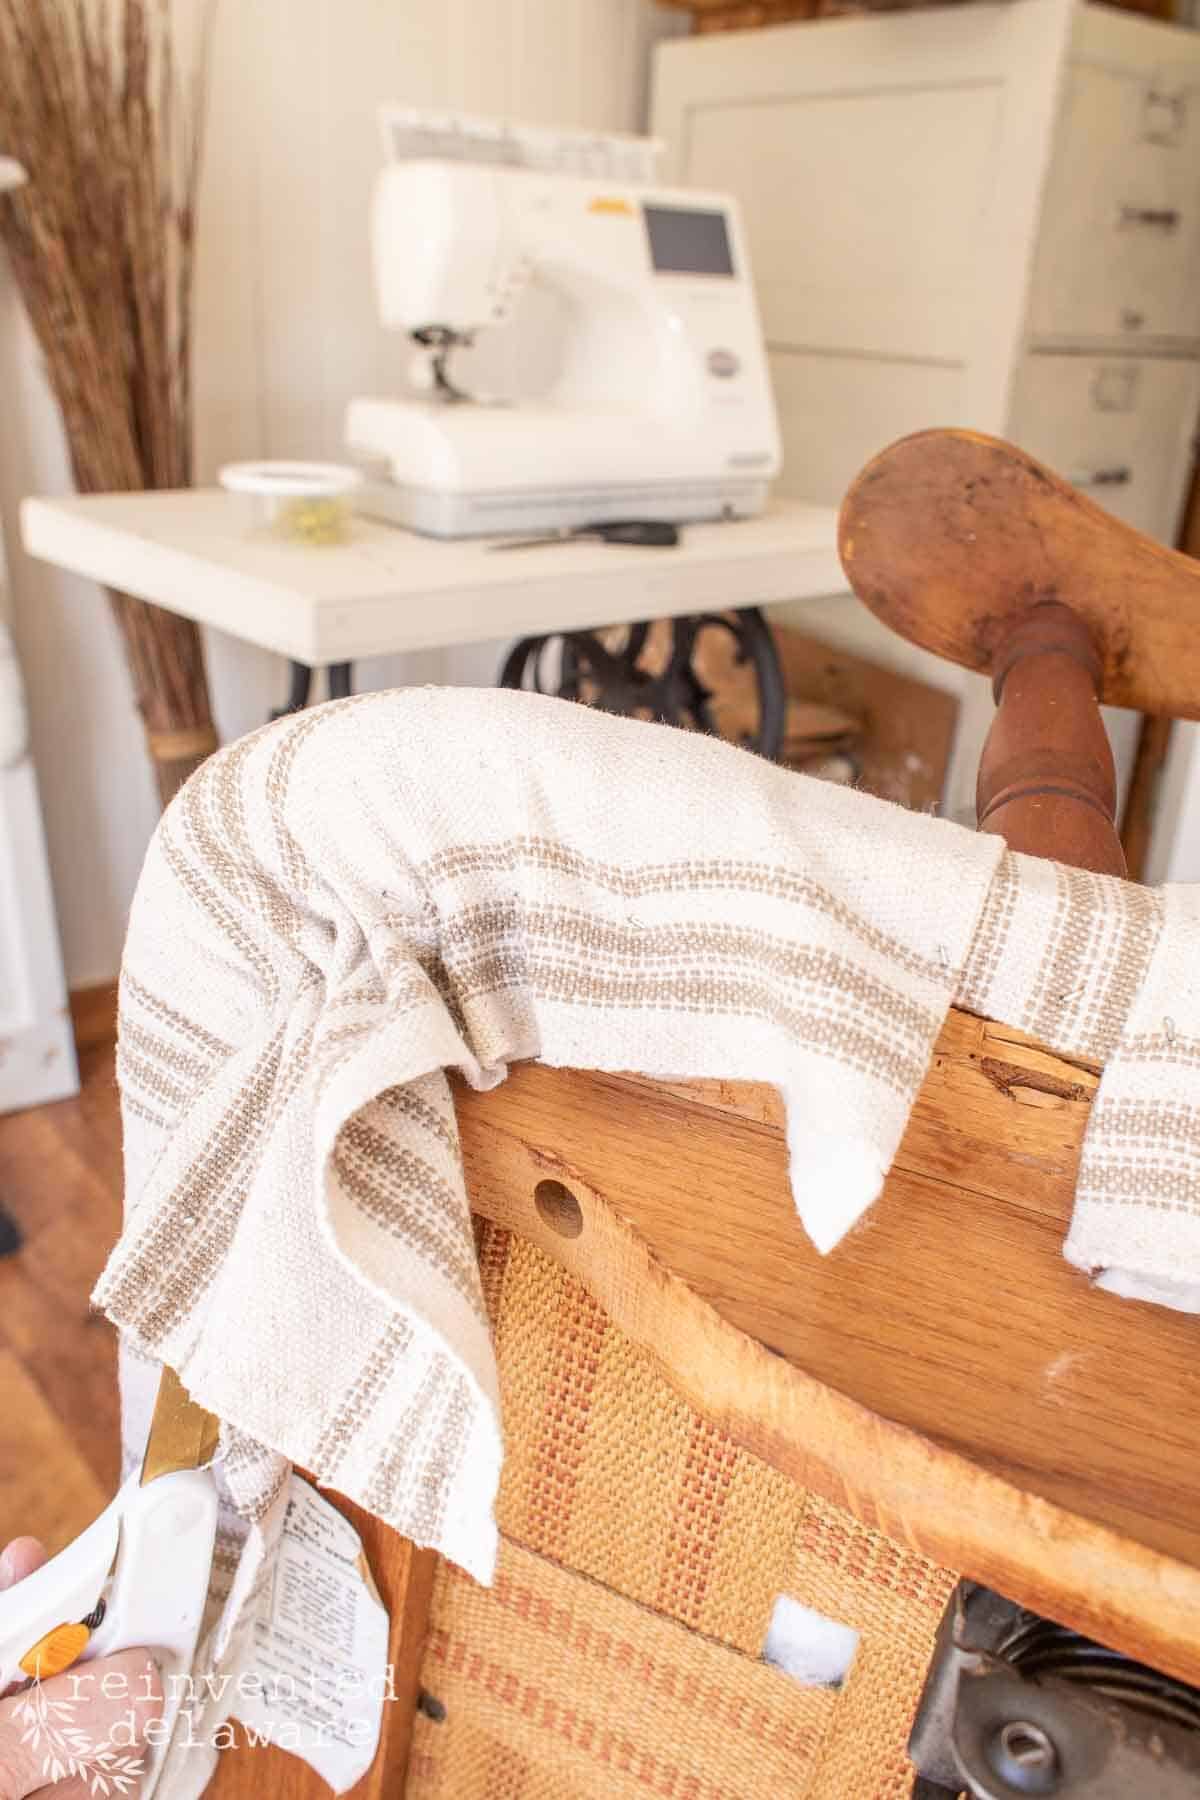
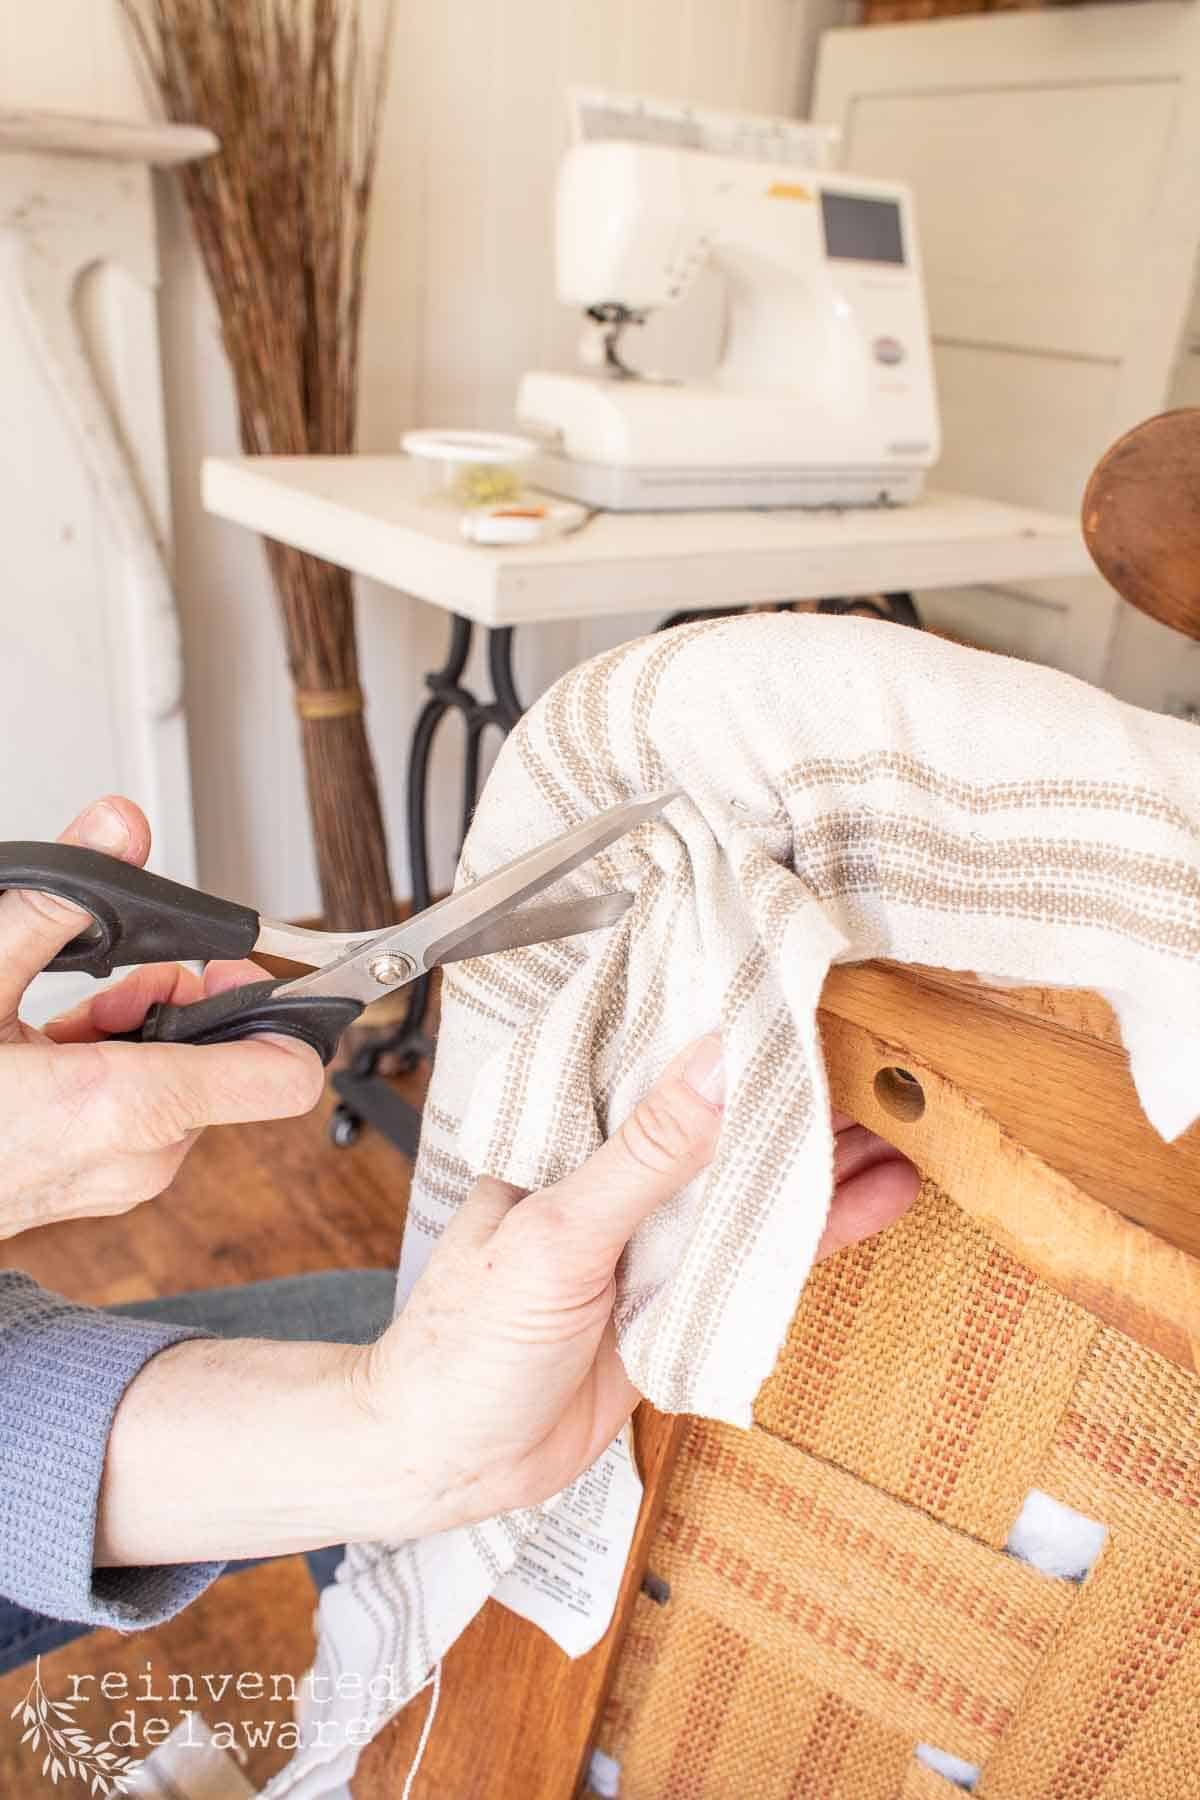
make a new bottom cushion
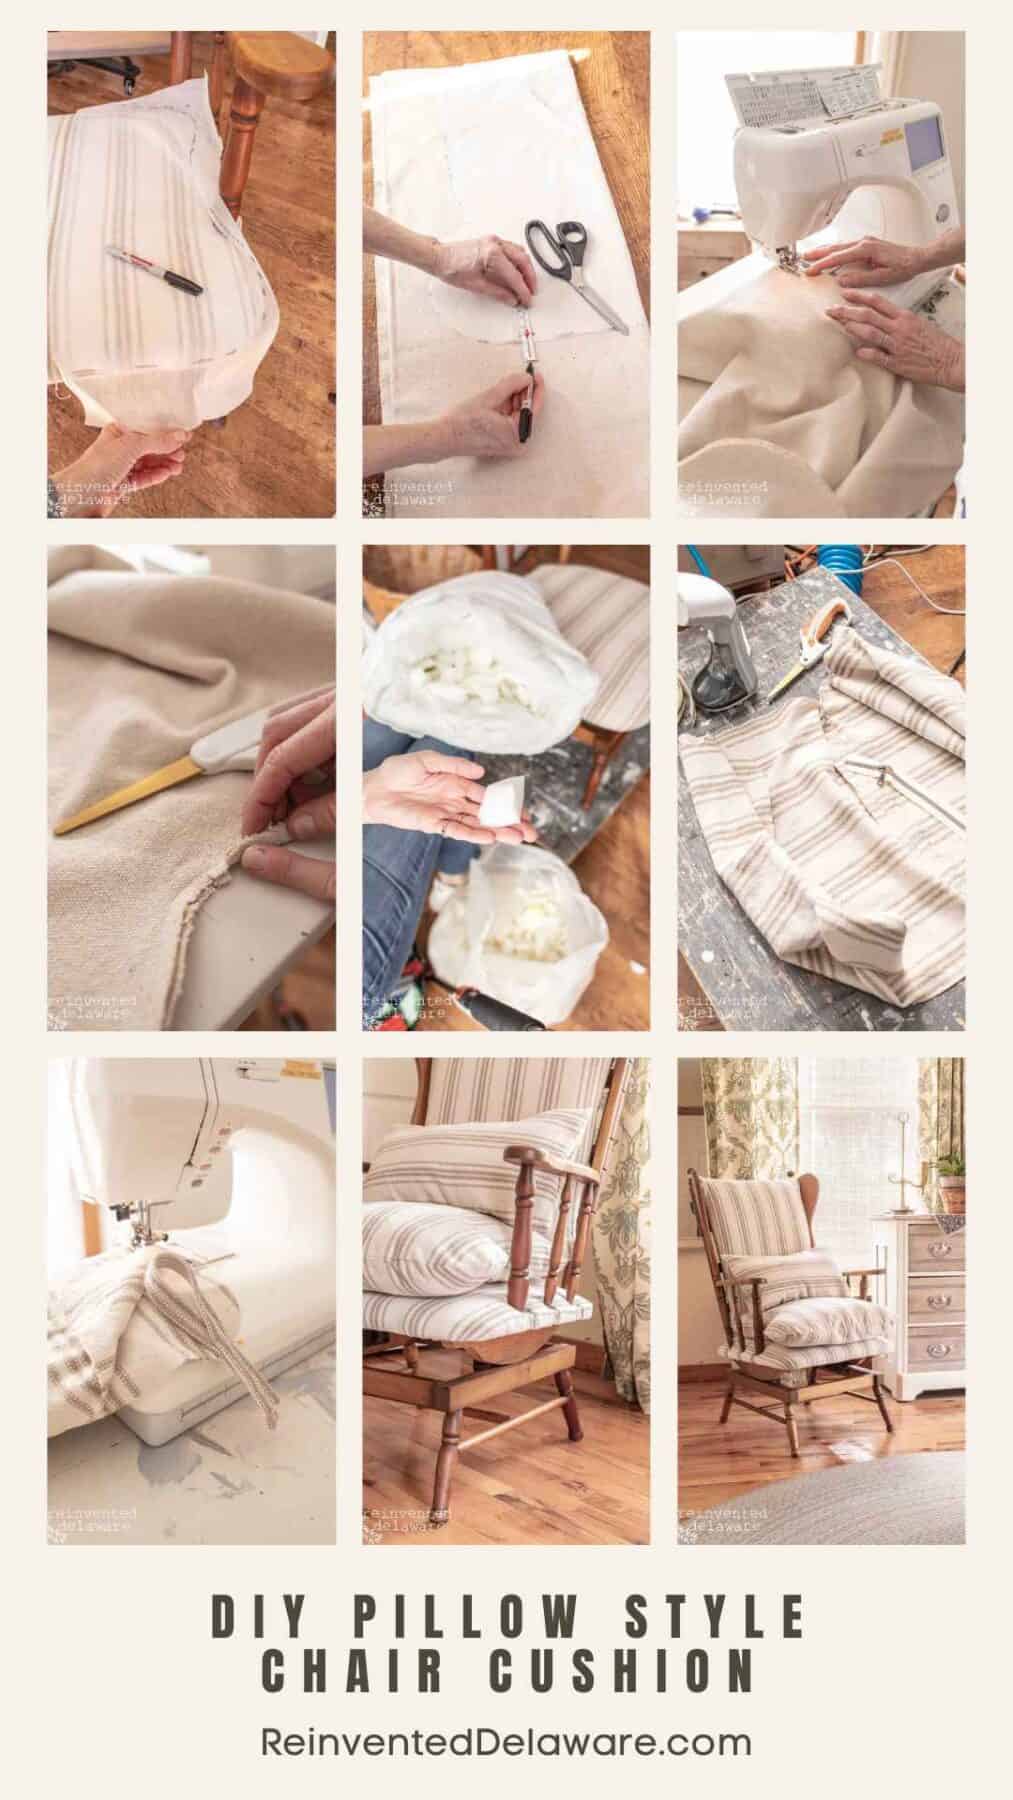
Here is a brief summary of how I made the custom cushion and cushion cover for this rocker using my sewing machine and simple sewing supplies. This is an easy sewing project that I’m sure you can figure out just by the images!
Two things I will mention about the cushion: use a deep seam allowance, about 1”, and make the cushion larger than you think you need. The stuffing will take up some space and make the cushion seem smaller than it actually is.
I made two separate covers: one is stuffed with a combination of poy-fil & small pieces of cut foam, and the other is the decorative cushion cover that has a zipper for easy washing.
The back cushion does not have a zipper but I did add fabric loops to keep the cushion attached to the back of the rocking chair.
Maybe I should write a separate post on making this style of cushion. Let me know in the comments if you are interested in that type of post!
inspiration from The Help
Let’s get back to the book, The Help, and how it impacted me. The ladies who impacted me the most in this book were the maids, or as they were also called The Help.
If you are not familiar with the story let me fill you in briefly. The era was the early 1960s when the civil rights movement was taking shape. Many of the financially well-off families had hired help. The hired help would cook, clean, and take care of the babies.
the importance of domestic tasks
When our children were babies, I did much of the same kind of work that these women did for others. That’s one of the ways I felt connected to these women who were maids. Of course, the biggest difference was that I took care of my children and the maids cared for other women’s children. I certainly don’t intend to glaze over that truth.
Domestic responsibilities can be looked down on in our current era. But it’s such an important job. One of the main characters, Aibileen, chose to impart her belief in the value of human life to the children she took care of. She told stories to the little ones that centered around the worth of a human.
Isn’t that what moms do? We try to teach our little ones how to be kind, how to work hard, and how to be all-around good people. I realize that is a simplified version of what parents and caretakers do. There is so much more to raising little ones.
I also connected to the day-to-day chores of homemaking. Preparing meals, washing dishes, keeping the house tidy, gardening, and doing the laundry. These tasks can all seem mundane at times. But without these tasks being done our lives would be in chaos!
The homemaking tasks that the maids did for the families they worked for were important and essential. It’s work that shouldn’t be looked down on.
learning to serve others
One last thought about how I connected with this book and the maids that the story is written about.
For 18 years, I cared for an elderly woman before she passed away. She was very wealthy and the family could afford to hire me to be her companion during the day.
I helped her tidy up her home, and grocery shop, ironed her clothes (including handkerchiefs!), and drove her to visit her friends and to the post office, We went clothes shopping together and took trips to the dry cleaners.
We had lunch together daily and I took her to her doctor’s appointments. I cleaned the white carpet in her bedroom when she accidentally spilled her chocolate Ensure as well as the times she had a nosebleed.
I helped her to fix her hair when she was too ill to go to the beauty parlor and I assured her when she worried about what the back of her hair looked like. I helped her to put self-tanner on so that her legs wouldn’t look too pale when they moved to their beach home each summer.
It was my responsibility to fuel her car and to keep it clean.
you is kind, you is smart, you is important
She taught me so many life lessons in the 18 years I spent with her and I miss her dearly. She treated me with dignity and never in a way that made me feel less than others.
Learning to serve another person is one of the best life lessons. I’m thankful for the opportunity to learn with her.
Sorry if all of that sounded braggadocious on my part. I only wanted to express that the menial task that workers like the maids did for those families was far more important than we give credit for.
I want to leave you with a quote from The Help that Aibileen said,
“You is kind. You is smart. You is important.”
Aibileen, The Help
Wouldn’t the world be a different place if we all treated each other with that kind of consideration? Who can you tell today that they are kind, smart, and important? Is there someone in your life that might have a ‘trivial’ job? Let them know how you value them and the work they do.
A little acknowledgment can go a long way.
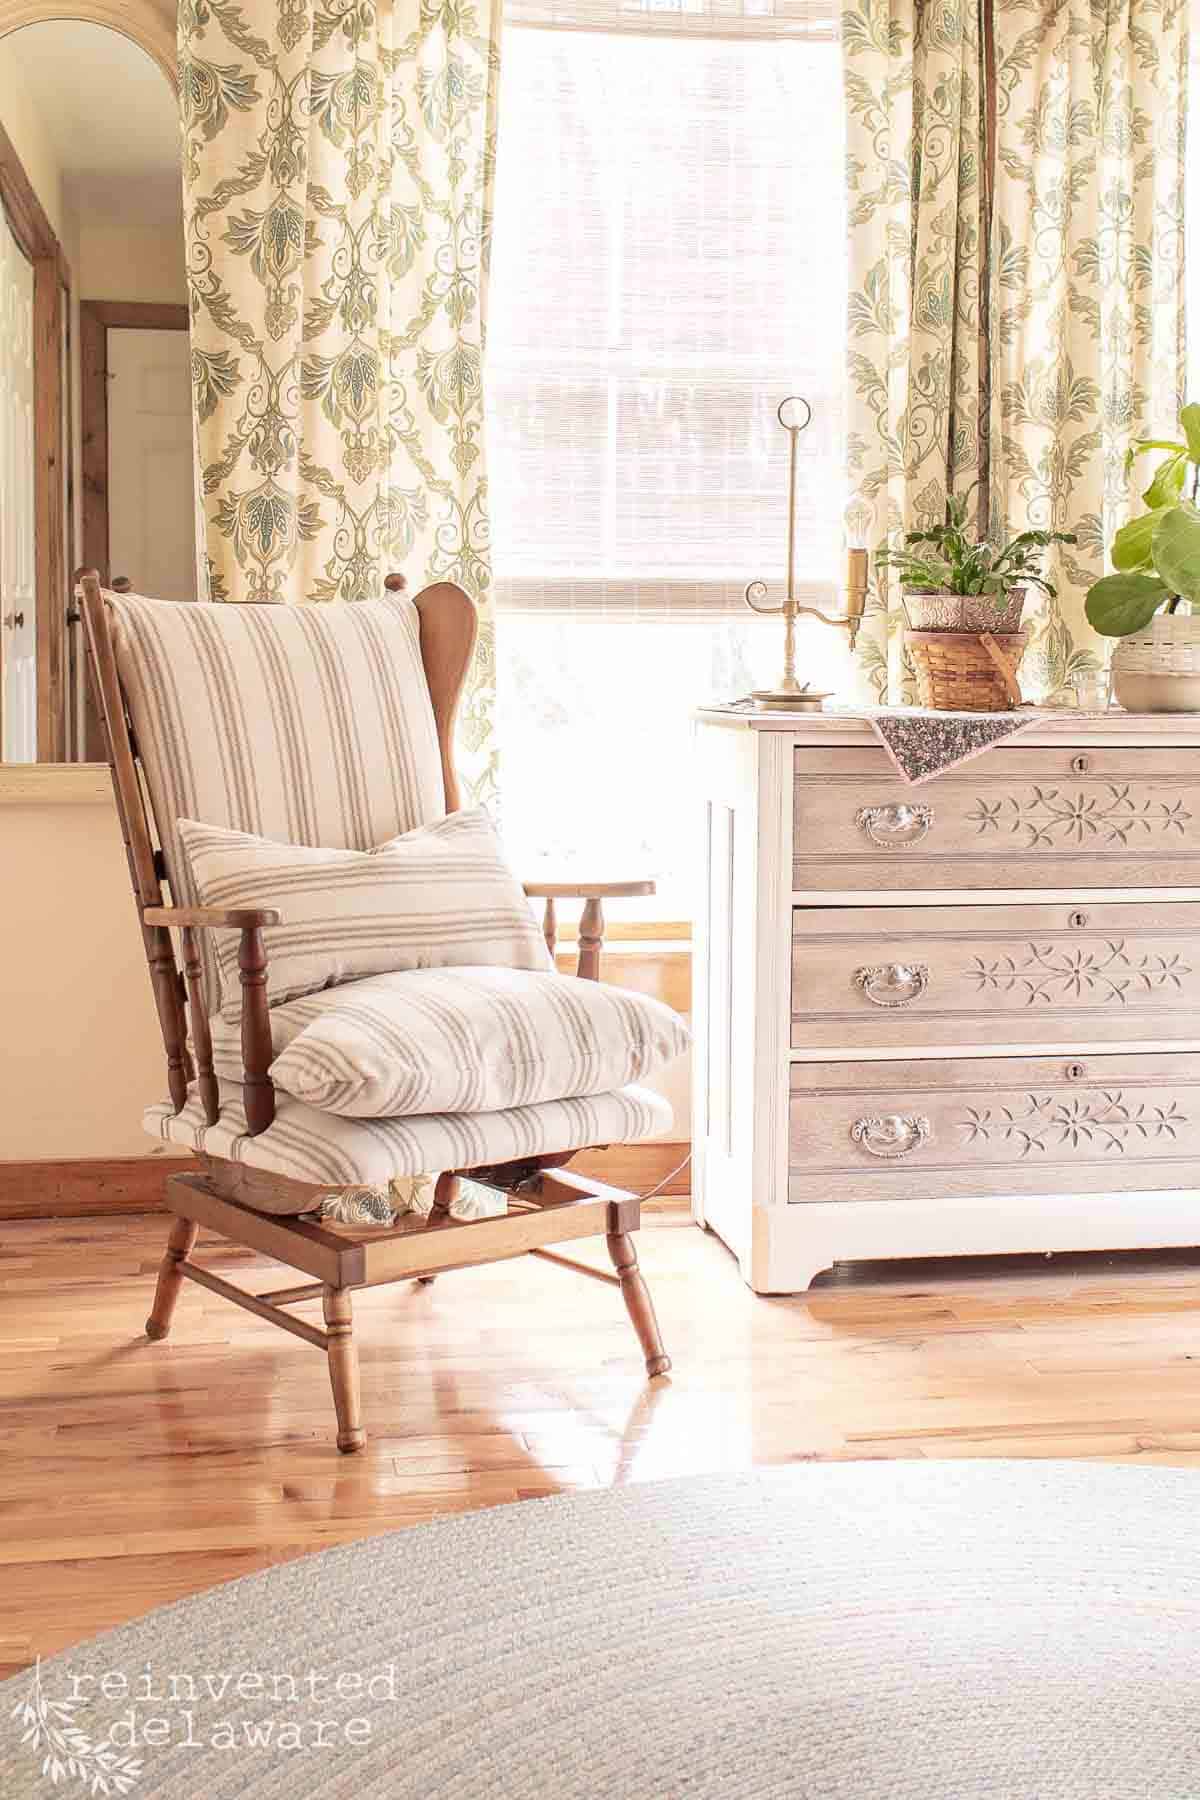
One last thing before we head over to my friend’s inspiration from this amazing book.
My babies were all three rocked in this very chair. They were told over and over that they were loved, and that they had worth and value. We read stories to them about being kind to others and honoring God in all they do.
I plan on doing the same with my grandbabies. Lord willing. 🥰


I hope you enjoyed this post and the inspiration from The Help. Be sure to read the posts my blogging friends were inspired to write.
Join us next month when we will be reading Anne of Green Gables!
Lynn from Living Large in a Small House
Erin from Erin Evolving
Crystal from Sweet Valley Acres


Thanks for joining our journey!
Thanks so much for joining us for this post! Join our journey so you don’t miss any of the fun projects, tutorials, and inspiration that we share with you each week! You can follow us on Instagram, Facebook, and YouTube. We share even more inspiration on Pinterest!
click below to purchase supplies!
Visit my Amazon Storefront!
Click the button below and head over to our online shop on Amazon!


Lovely post Cindy. I loved reading about the woman you took care of. She was very blessed to have you. Great details on reupholstering. I have a few old pieces that I would like to breathe new life into. Funny how we both liked the same quote.
Thanks, Crystal. She was such a lovely woman and I miss her 🙂 That quote is a special one for sure!
Cindy, You did such an amazing job with this rocking chair. I love the new fabric and thanks for the great tutorial too. I think it is so sweet it’s the same chair you rocked your kids in. Thanks for sharing those beautiful memories. -Meagan
This is such a lovely post, Cindy. What a beautiful way to update a family heirloom, while sharing your memories. Yes, everyone needs to know that they are kind, smart, and important.