
DIY Upcycled Tote Bag with Vintage Transfer
Learn how to create a stunning DIY upcycled tote bag from a thrift store find. Transform an old bag with a vintage transfer design and give it new style.
Do you love to shop at thrift shops? We do! Hubby and I could spend every weekend at our local thrift shop. Recently we ventured out of our town and visited a thrift store in an area about 45 minutes away. It’s fast becoming a favorite thrift store!
The following post may contain affiliate links. That means if you click and then buy something, I will make a small commission at no additional cost to you! Thank you for supporting my blog. full disclosure here.
This post is sponsored by Dixie Belle. All opinions are my own!
thrift store finds
That’s where I came across several old tote bags. One, in particular, stood out to me because of the color and the fact that it was one of those heavy canvas bags.
It wasn’t exactly my look since it was striped red and white but I knew I could turn it into a stylish tote bag. I thought I could even turn it into a tote bag to use as a purse!
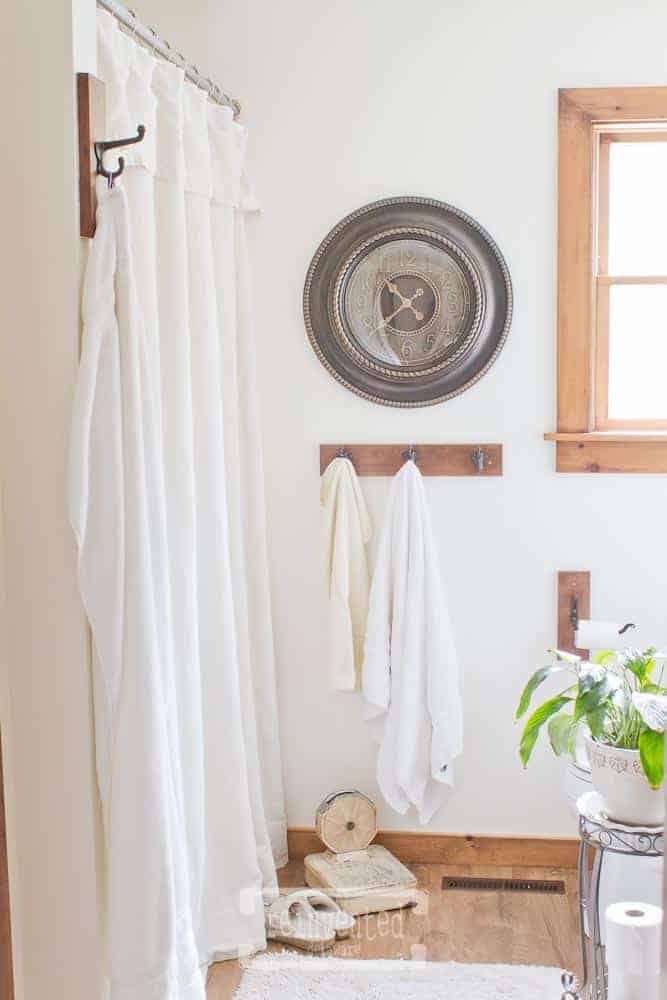
The first thing that had to go was the red and white stripes on the right sides of the bag. This might sound weird, but I wanted this bag to look good if I was going to hang it on our coat hook in the laundry room and those red stripes were not going to go with my decor!
Supplies for this upcycled tote bag are listed at the end of the post!

reusable shopping bags
There is a possibility that I will use this upcycled tote bag as one of my grocery shopping bags. I keep several of these reusable bags near our back door in our laundry room so they are ready to use instead of bringing more plastic bags home from the grocery store.
Have your tried to paint fabric before? This is not the first project that I have painted fabric. I’ve done over a few pieces of upholstered furniture pieces with paint (I sold those pieces at our vendor booth before I shut it down and didn’t grab any pictures! Sorry!) so I knew that this canvas fabric tote bag would be a perfect candidate for paint.
step by step instructions
step one: apply primer to the fabric tote bag
Did you know you can paint fabric! The first step is to make sure the bag is clean. I wiped the bag down with a cloth and no visible dirt came off. The bag was in such good shape that I think it was barely even used. Did I mention I only paid $3 for it at a local thrift store?
There are specific fabric paints for a sustainable tote bag project like this one, but I knew I could use chalk paint as well.
The fabric needed to be prepped after cleaning so I applied a coat of sealing primer called B.O.S.S. I sprayed the surface of the fabric tote bag with a misting of water then I painted on one layer of the primer.
Let me mention that I placed an Amazon box inside of the tote bag to hold its shape and to also allow me to turn the bag upside down so I could paint the bag so the bottom of the bag could dry before it touched my table surface. The primer dried for several hours.
step two: sew a lining piece
While it dried, I worked on creating a lining piece for the interior. The bag was bright red on the inside and well, that just had to go!
Making a bag lining is super easy especially if you have a sewing machine, some simple craft supplies, and scrap fabric. If you can sew a straight line then you’ve got this!
I roughly figured out the size of the lining by placing a scrap of reproduction grain sack fabric inside and forming it around the inside of the bag.
If you use this not-so-precise method of making a new liner for your bag, make sure the fabric scrap goes all the way to the bottom of your bag and the top edge of your bag. You don’t want to cut yourself short on the liner!

I also made some rough estimates for pockets on this liner. My phone was close by so I grabbed it and cut a piece of fabric around it to create a pocket to hold the phone inside the bag. I also cut another small scrap to create a second pocket on the opposite side of the lining.
As a side note, if you don’t have a scrap of fabric for the liner, you could use a non-terry cloth tea towel. This is a great way to use one of these durable towels that might have a stain that you can’t remove. Or maybe you will come across tea towels at yard sales or thrift shops.
Later in this post, I am sharing a YouTube video with this project and more thrift store upcycles!
After figuring out where I wanted to place the pockets on the bag liner, I ironed the four sides of each pocket and stitched the top edge down. Then I pinned the pockets to the liner and stitched around the three edges to secure it to the bag.


The next step is to stitch the two side seams after putting the right sides together. My thrifted tote bag has a boxed bottom so I wanted my liner to have the same fitted bottom. A boxed edge is simple to make!
After stitching the two side seams, iron a crease along the folded edge of the bag. Next, fold the bag so that the side seam lines up with the crease and flatten them together. Stitch across the short edge perpendicular to the longer side seam.
This stitching line should be the same measurement as the interior of the existing boxed seam of the tote bag. Don’t worry if it isn’t perfect – just make it as close as possible.
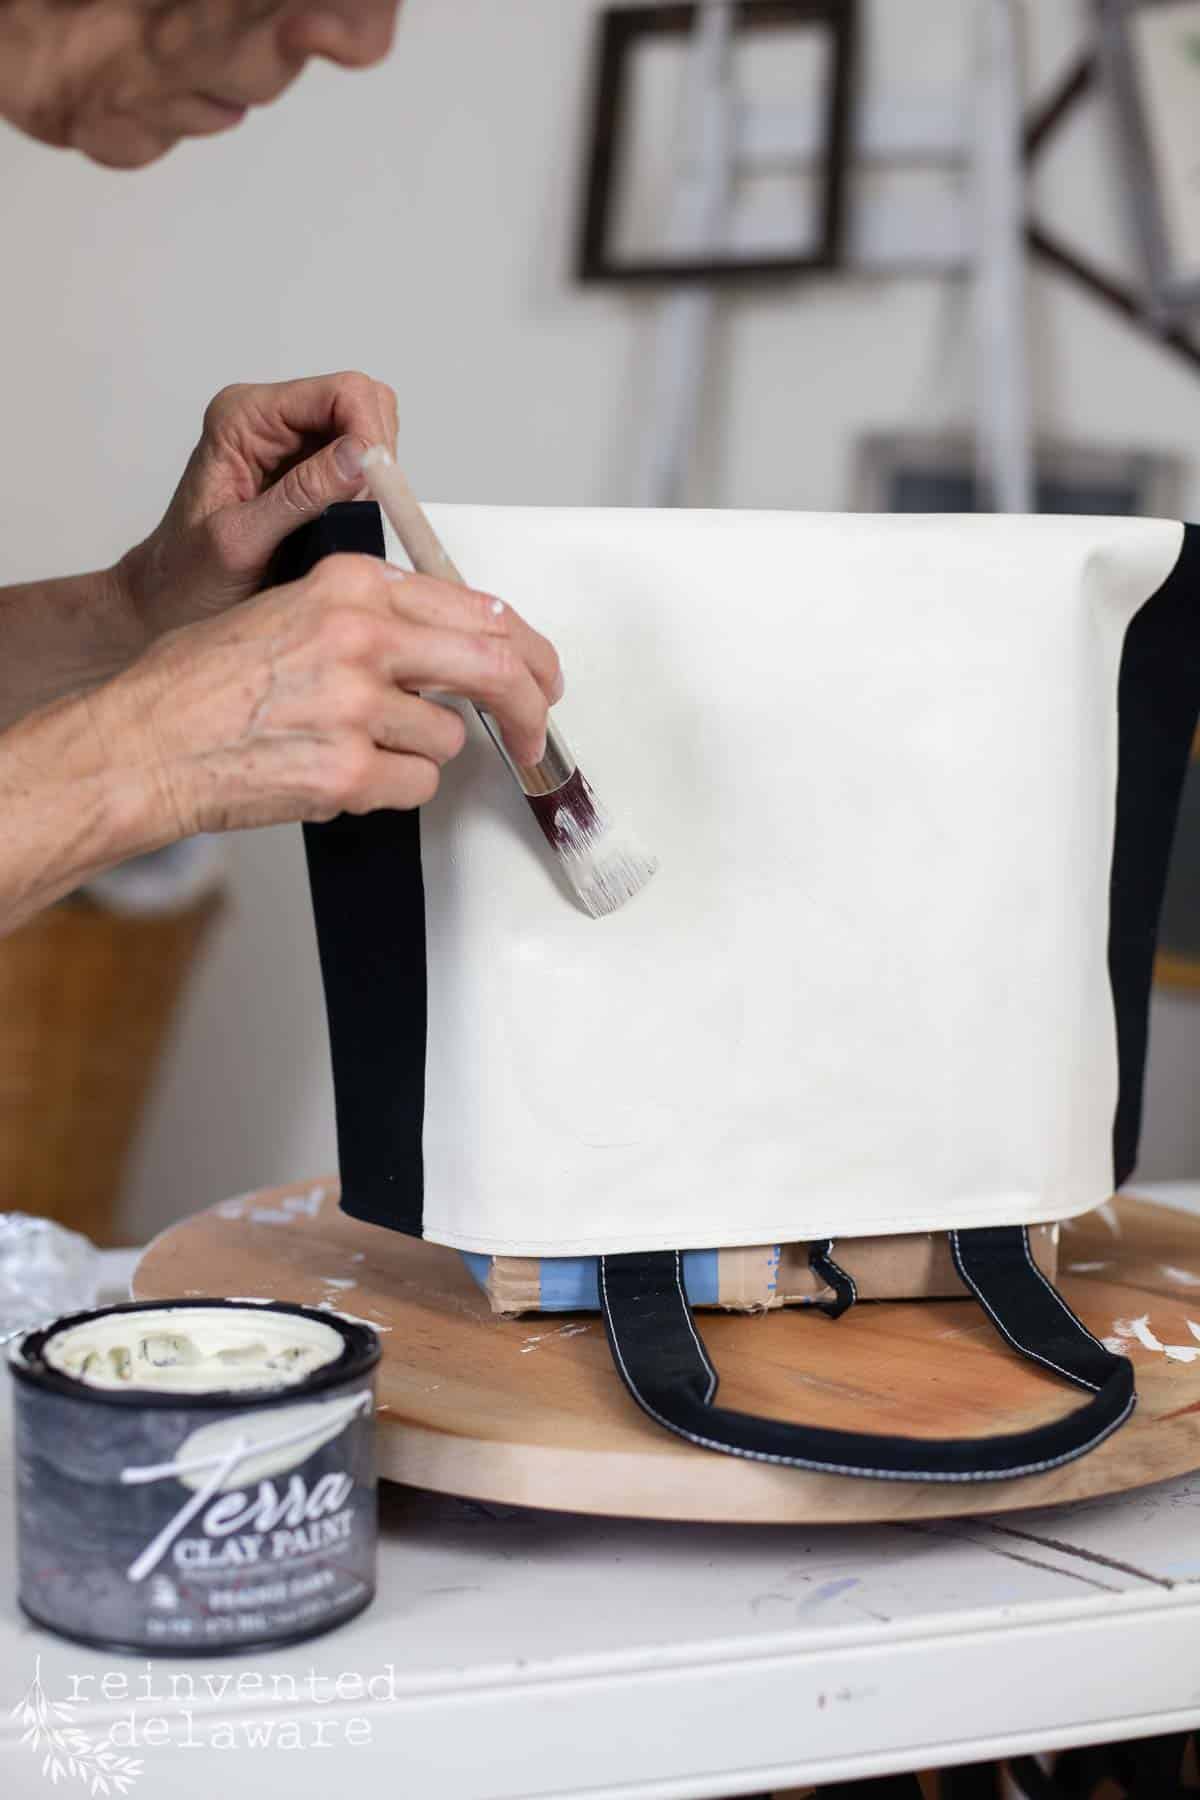
step three: paint the canvas tote bag
Before adding the finished liner to the upcycled tote bag, let’s add some finishing touches to the outside of this ‘new bag.’ When the liner was finished, I applied one coat of clay-based paint in the same way I applied the primer. I misted the surface with water and then carefully painted one coat of paint over the primer.
A second coat of paint wasn’t necessary because the coverage was amazing. I couldn’t see any of the red stripes coming through! I also added texture to the painted surface by brushing back and forth in short strokes in different directions. This created a painted canvas texture that adds to the vintage look that I adore!
I did not paint the sides or the straps of this tote bag since it would coordinate with the finished look.
step four: use a decorative transfer on fabric
Now for the pièce de résistance. Look at me getting all fancy! It seems appropriate to use French words since the transfer I chose has a vintage French look to it!
Yep, you read that right! I’m applying a transfer to this upcycled designer bag! This is an experiment since I haven’t applied a transfer to a usable fabric project like old bags. But I’m up for the challenge!
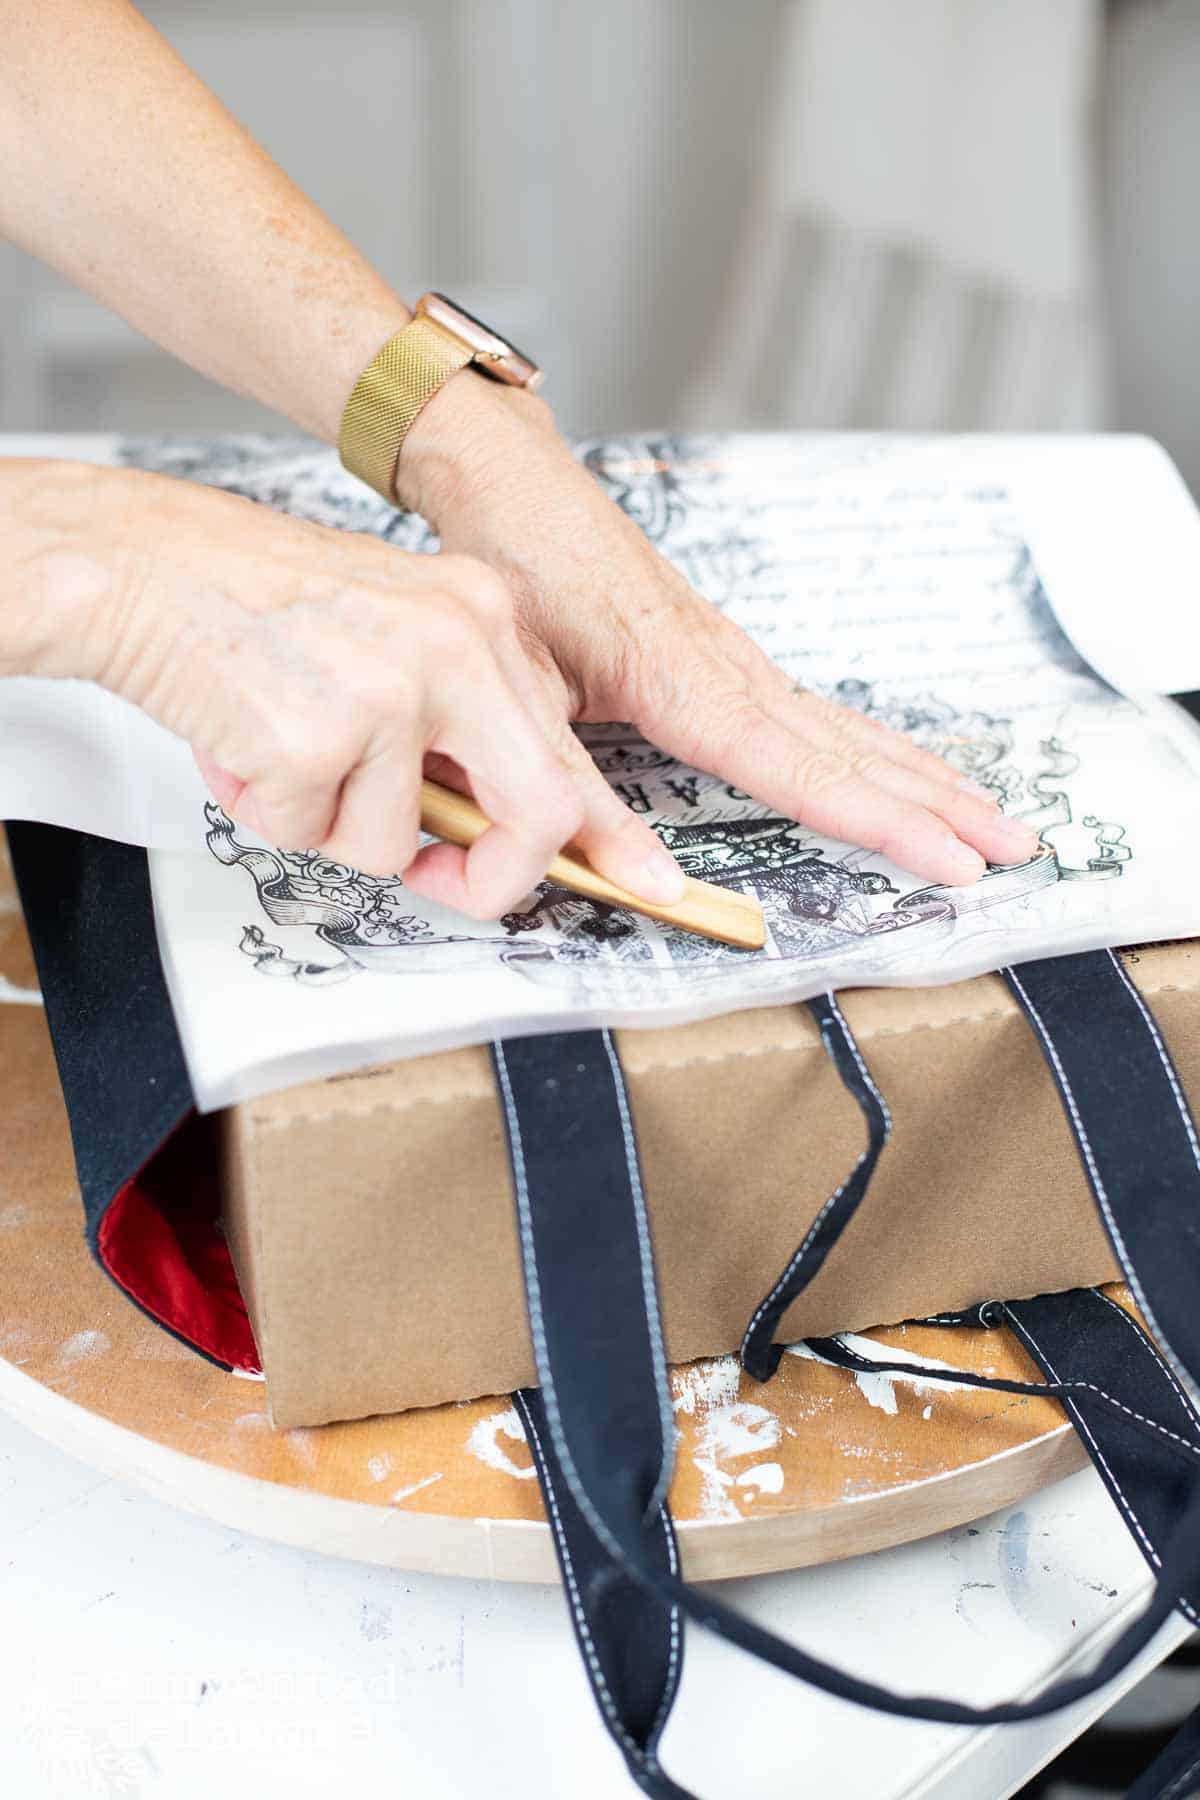
step five: apply a transfer to fabric
The transfer went on perfectly! You can watch the step-by-step process in the YouTube video I made for you later in this post but here are the simple steps:
- Choose a transfer that will fit in the area you want to cover. Trim the transfer if needed to fit the piece.
- Carefully position the transfer onto the surface after removing the backing sheet.
- Use the application stick to rub over the clear sheet, releasing the transfer onto the surface of the piece.
- Lift the clear sheet slowly making sure the transfer is adhering to the surface completely.
- Lay the clear sheet back down and go over any areas that have not been attached to the surface.
- Once the transfer is fully adhered to the surface, remove the clear sheet and use it to gently rub over the transfer, smoothing out any areas that are not yet attached.
Going around the bottom curved edge of the bag was a challenge but I took my time and worked carefully. I had to cut away some of the extra transfer on the bottom. Then I applied another transfer from the package on the other side of the tote bag.
The two sections met in the middle on the bottom and won’t show so I wasn’t too worried about perfection.
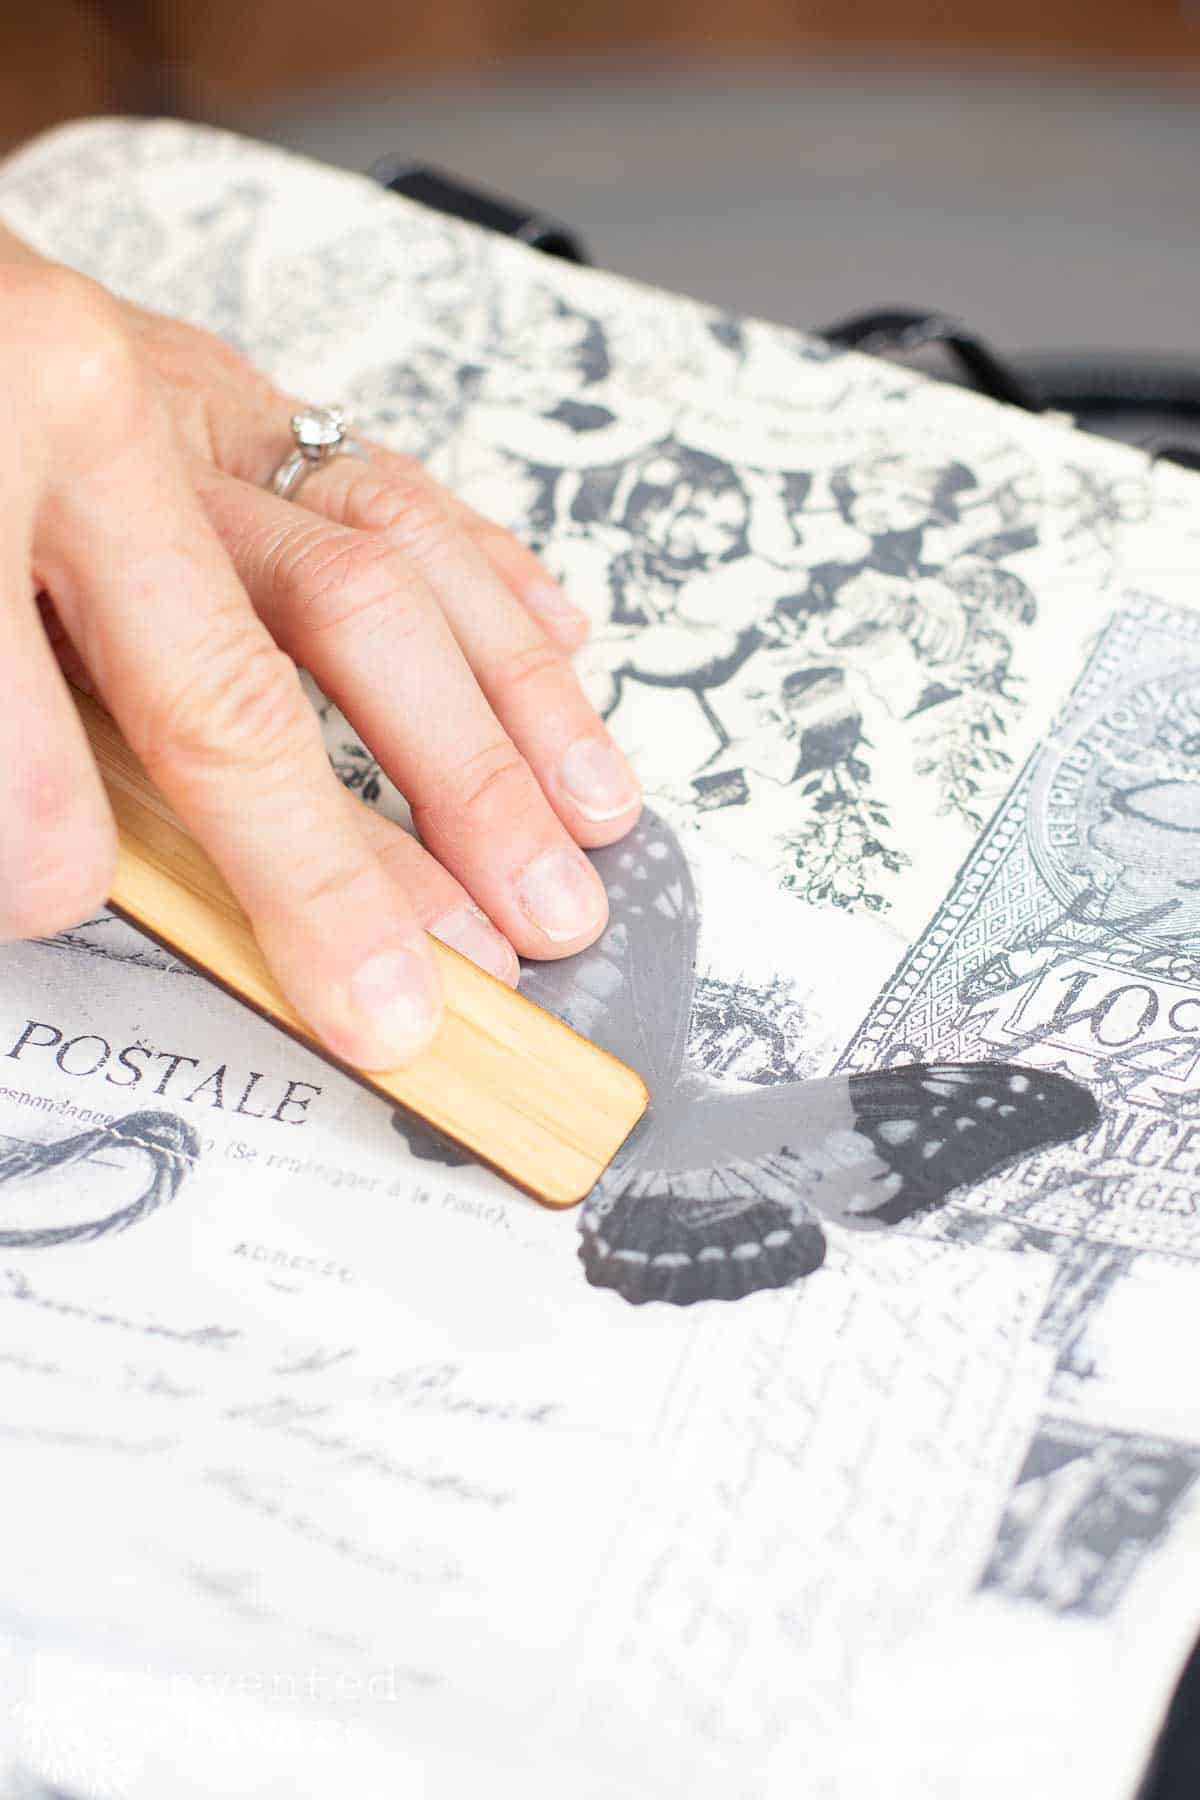
This particular transfer had a beautiful butterfly on the excess part that I cut from the main design. So I cut around the butterfly and applied it over top of the transfer to add to the design of this bag.
step six: seal the clay-based paint
Once the transfer was completely applied to both sides, I sealed the painted and transfer areas with a sealer made specifically for this clay-based paint. I applied two coats of sealer and I plan on applying another coat before it’s all said and done.
Handy Tip: Before adding the lining, paint the inside top area if it will show after the lining has been attached.

step seven: attach the lining piece
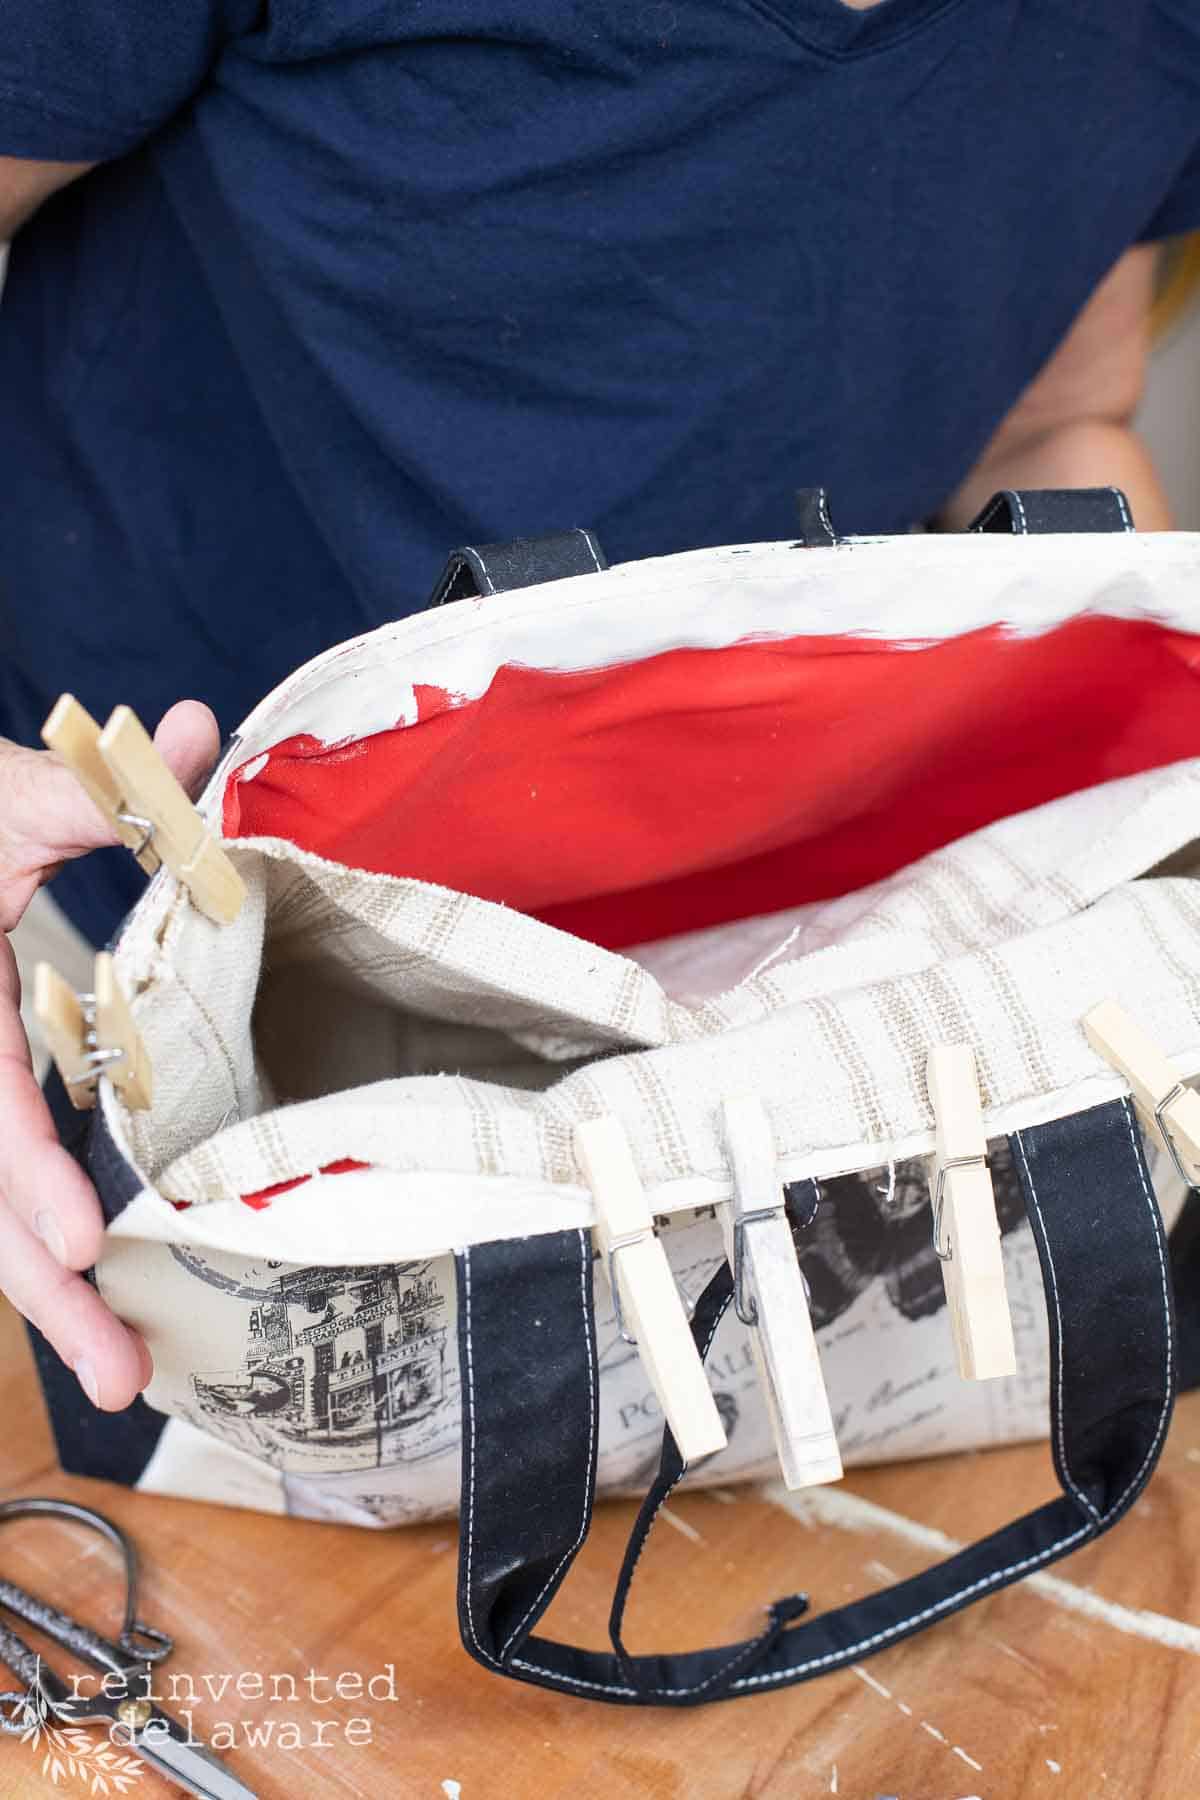
Now let’s attach the lining that we made. The wrong side of the lining will go next to the right side of the existing tote bag lining. I placed the new lining inside and along the top of the bag and held it in place with clothespins. I used E6000 glue around the top edge of the bag to secure the lining of the bag.
You might be wondering why I didn’t use my sewing machine to stitch the new lining into the bag. The thrift store tote bag is pretty sturdy and the fabric is thick.
I wasn’t sure my sewing machine would successfully go through all of the layers plus I didn’t have a heavy-duty needle on hand.
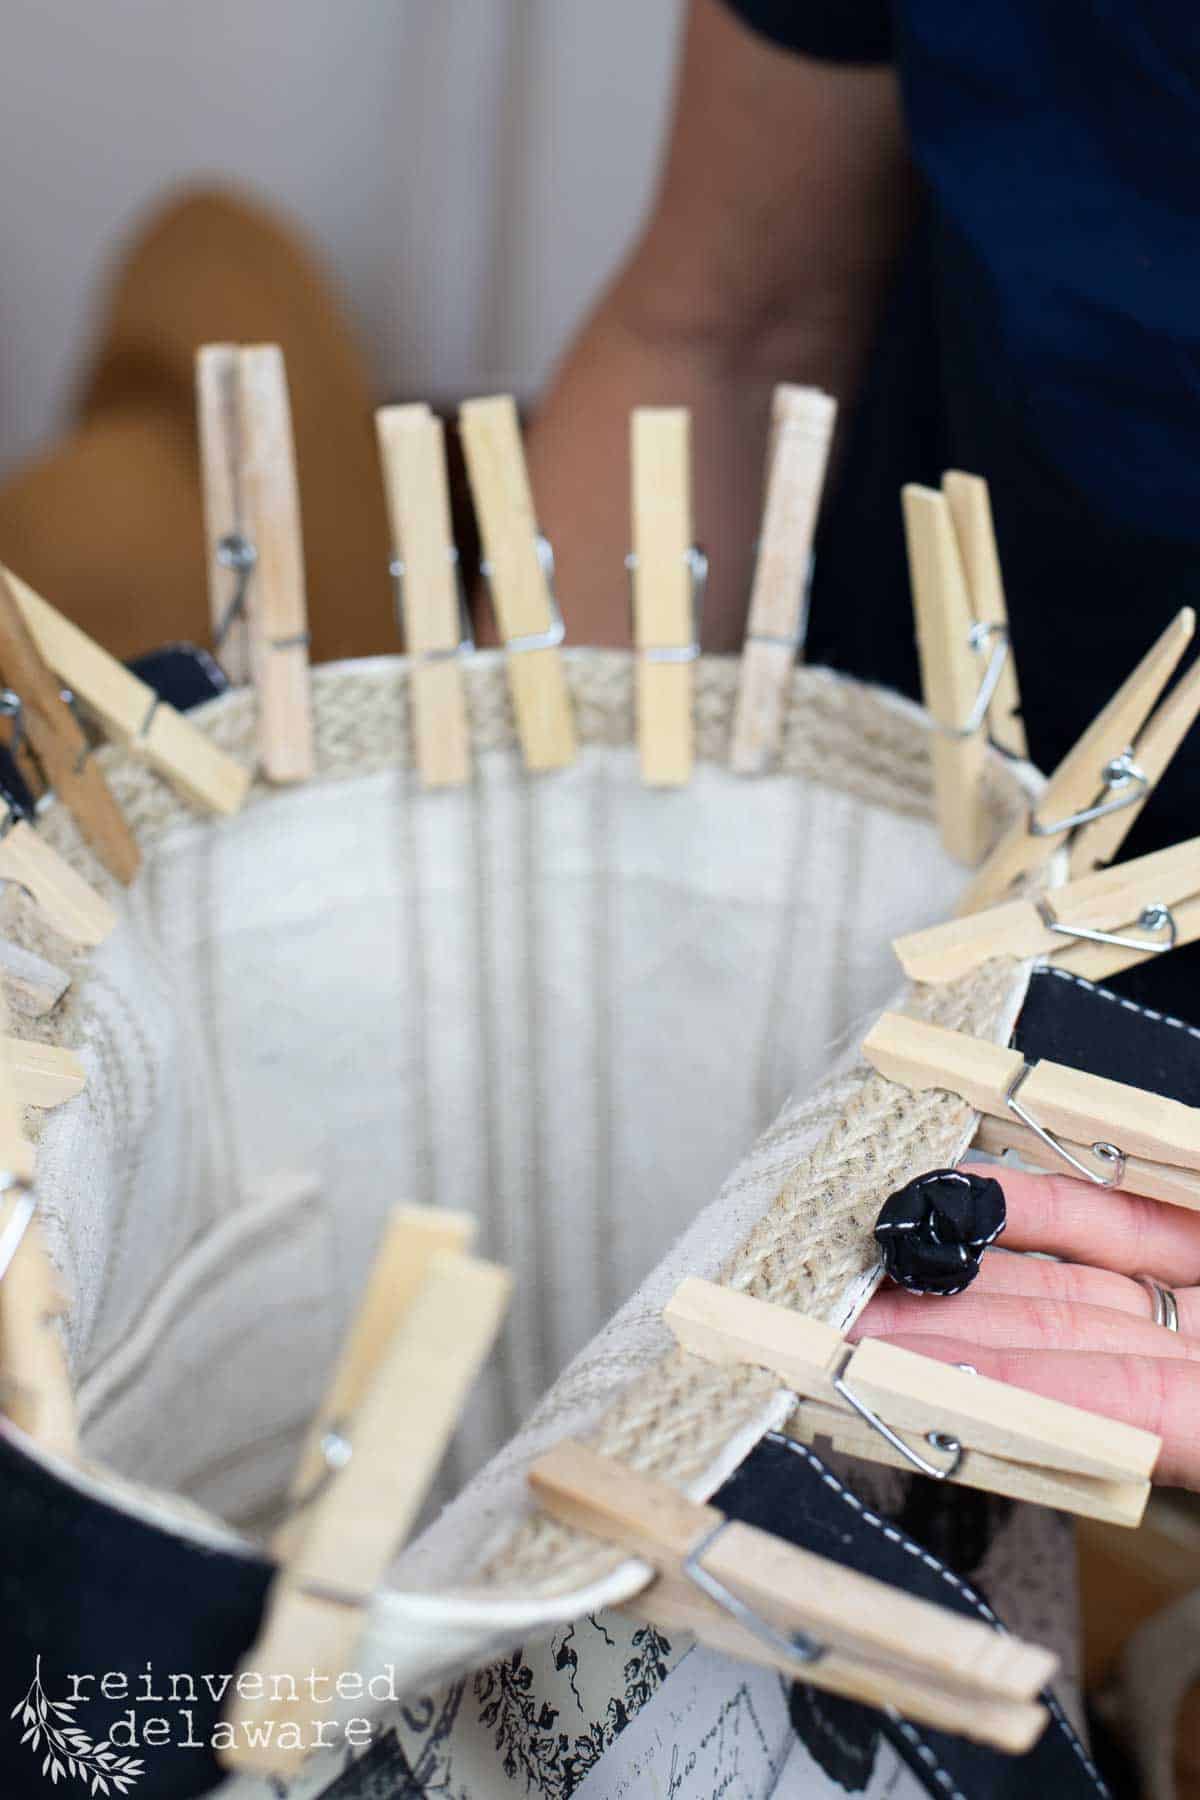
E6000 glue works on so many surfaces and it is durable. The clothespins were a huge help in getting around the interior of the bag. Since the raw edges of the lining were showing, I used a jute braid trim that I have used on many upholstery projects to cover them.
Hot glue worked well for this since hot glue melts into the fibers of the fabric. After the lining and the trim were attached, I allowed the whole thing to dry overnight.
You might be wondering how this method will hold up on a bag that I plan on using often. I’m not sure! But the great thing about loving vintage style anything is the wear and tear of the time-worn aesthetic!
I’m assuming the folded edges of the bag will probably wear away from use but in my opinion, that will only add to the vintage look that I love!

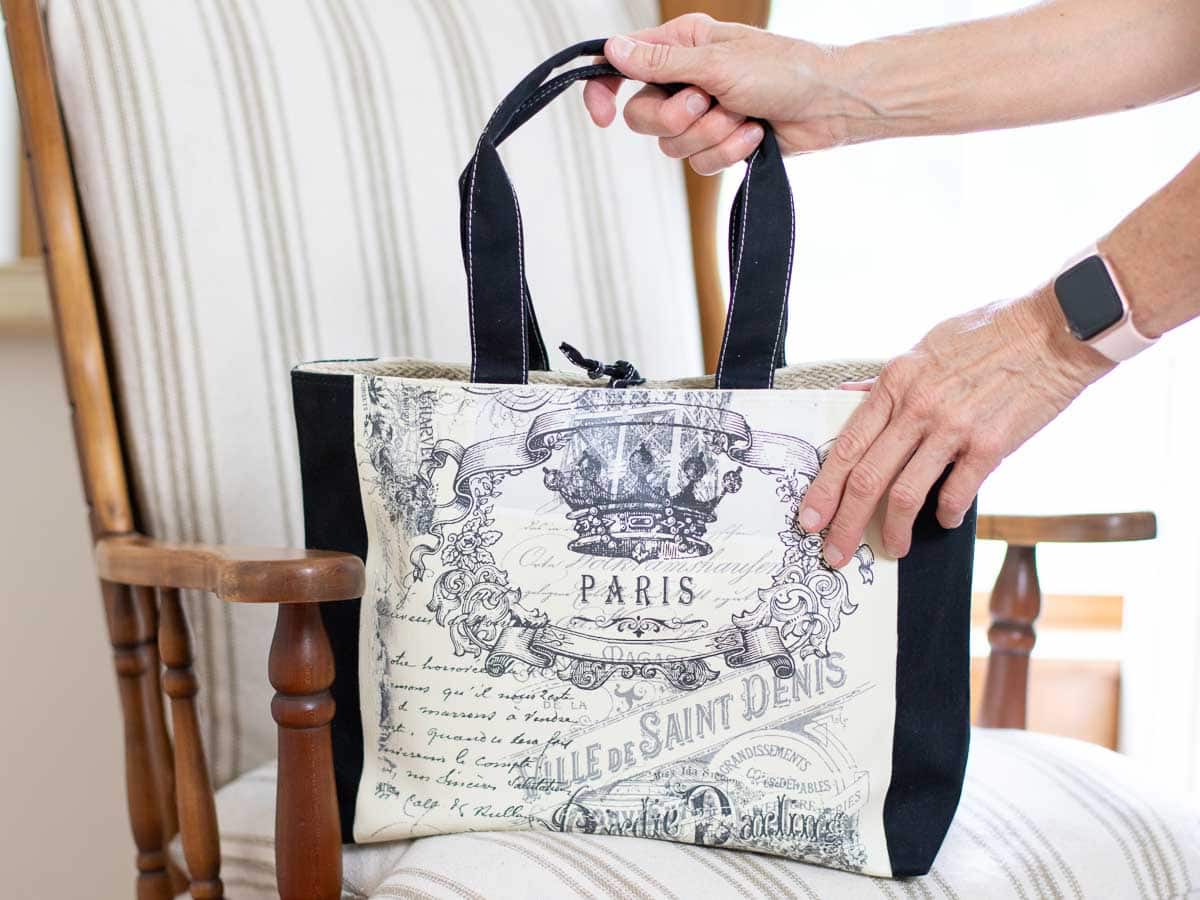
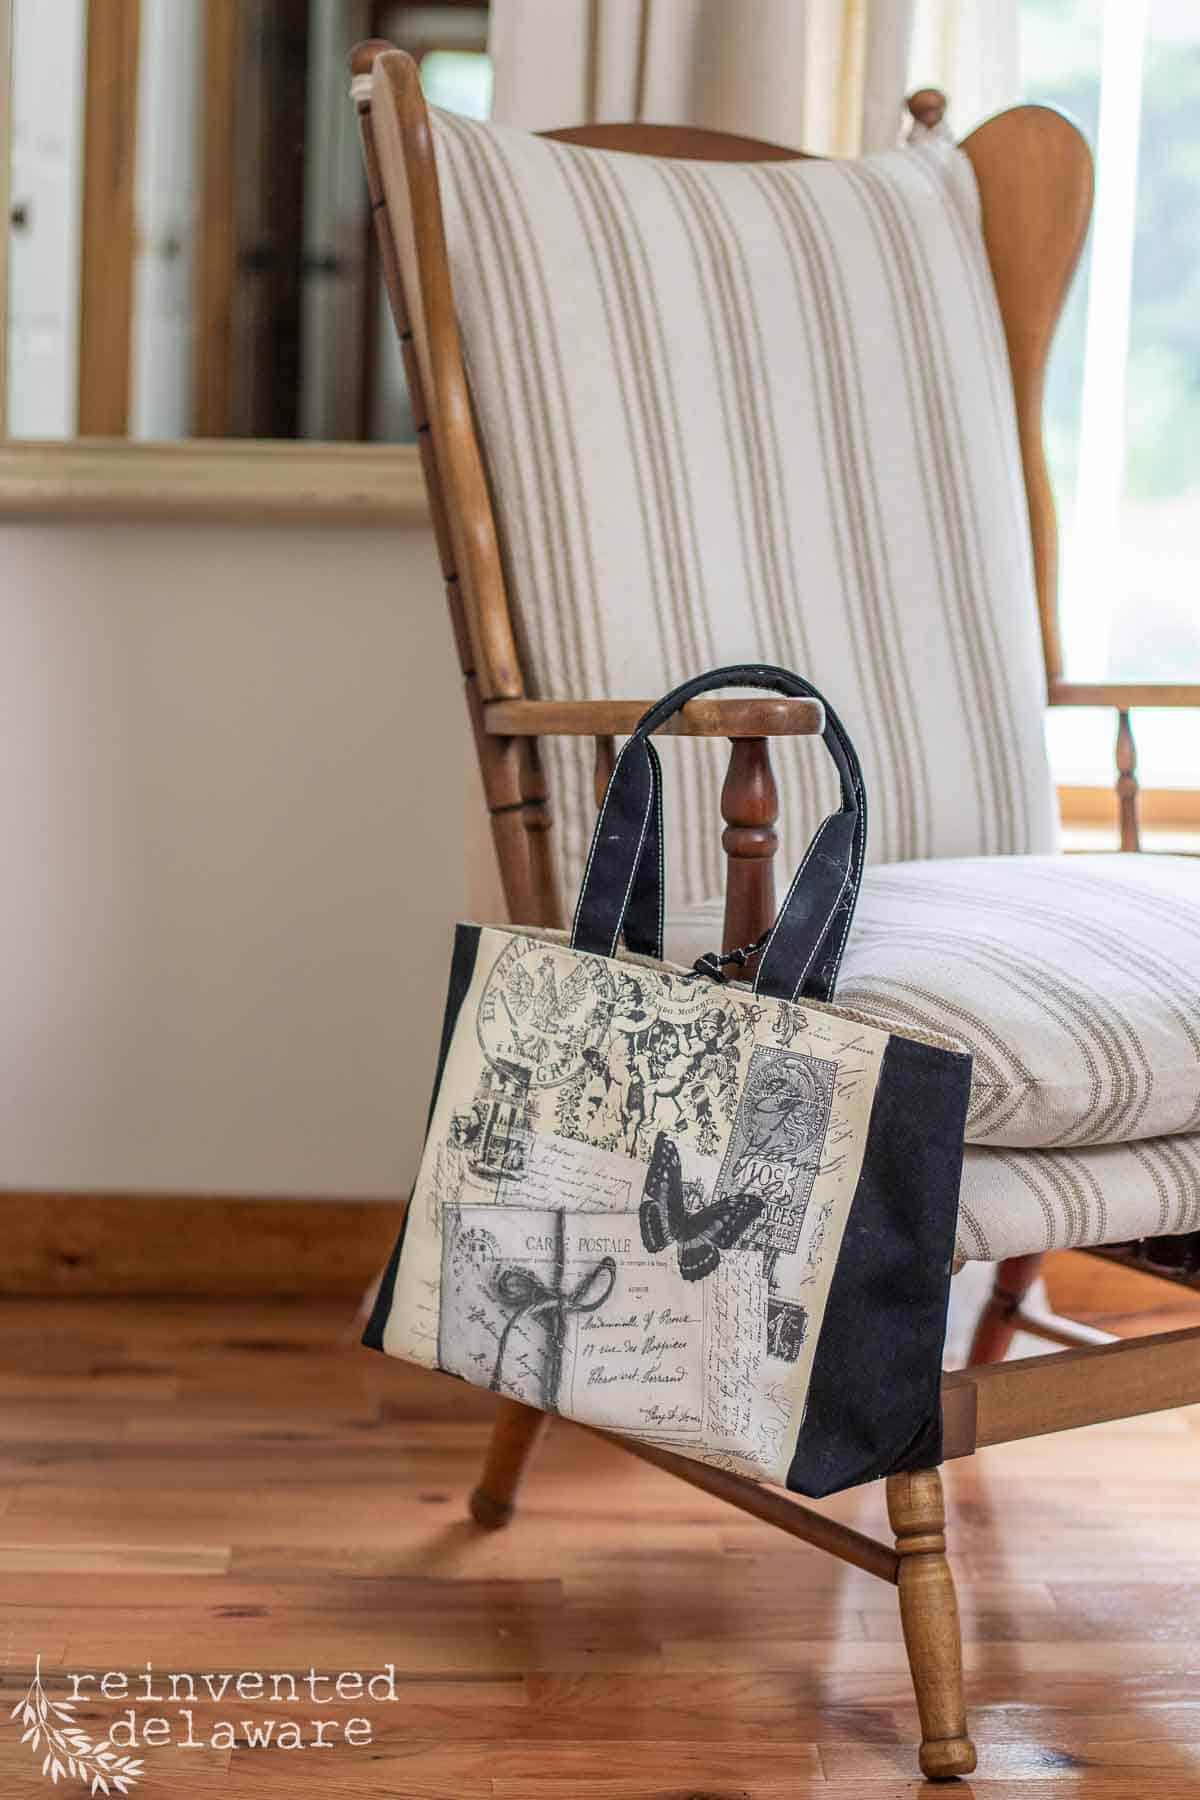
vintage style tote bag
Let me know what you think of this ‘new’ tote bag in the comments section of this post. Is this a technique you will try on a fabric project? I’m sure the next time you are out thrifting, you will keep an eye out for a tote bag that you can upcycle. Let me know how your project turns out!
Using upcycled materials has never been more stylish! Have fun with your project!


supplies
Here are the supplies I used for this project.
YouTube video
Here is a video for you that includes this and other thrift store upcycled projects!

Thanks for joining our journey!
Thanks so much for joining us for this post! Join our journey so you don’t miss any of the fun projects, tutorials, and inspiration that we share with you each week! You can follow us on Instagram, Facebook, and YouTube. We share even more inspiration on Pinterest!
click below to purchase supplies!
Visit my Amazon Storefront!
Click the button below and head over to our online shop on Amazon!


Cindy Rust
Cindy has been decorating her home with thrift store finds for 40 years. She is an avid thrift store shopper who loves to makeover the items she finds into vintage-inspired home decor and furniture. When she isn’t thrift shopping or painting a piece of furniture, you can find her making homemade butter, working in her garden, or painting with watercolors.


Super!!!
Thanks Mariya!
So cute! And great to know transfers work on fabric — well, heavy fabric anyway! Keep us posted on how they wear.
I will post about how well it holds up. I suspect the transfer will show some wear especially on the areas that will touch surfaces like the bottom and the folds of the tote bag. Lucky for me I like a time worn look!
This turned out super cute! I love it.
Thanks Renae!
I live in Central Delaware and would love to know where your favorite thrift store is!
Hi Katie! Yay for living in Delaware!. It’s hard to say my favorite because we have so many great ones. There is one in Millsboro called: Christian Storehouse
(149 Mitchell St, Millsboro DE) They had some great things! I’ve only been once but I will def go back 🙂
What a great upcycle Cindy. Love the transfer.
Thanks Wendy – transfer are fun to work with!
This is beautiful, Cindy! You have such a great eye for design.
Hi Kim! Thanks so much – this tote bag turned out better than I expected 🙂
Oh my goodness, I love this upcycle so much! The bag looks amazing and guess what…I used to have that same tote bag. I don’t remember where I got it but I used it until it wore out! I can’t believe how well the paint covered it! I did not know you could use a transfer like that on fabric so thanks for the heads up! Great job!
Thanks Donna! I was pleasantly surprised at how well the paint covered the red stripes!
That bag is adorable! It looks so much better now.
Thanks Tammy! Transfers and paint work miracles!
Adorable! Absolutely not a fan of the before, but the vintage French country look now is perfect!
How cute, Cindy! I didn’t know that a transfer works on fabric. Well, I’ll just have to give this a go. Definitely an upgrade in the bag. Thanks for sharing. Pinned! 🙂