
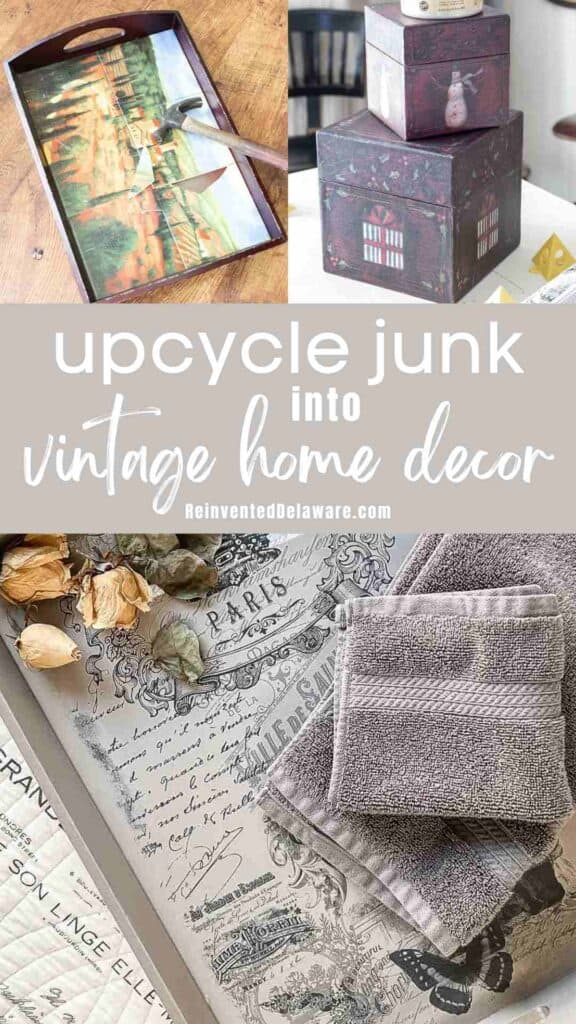
Upcycling Junk – 3 Easy DIY Ideas
Let’s take these thrift store finds that some may call junk and upcycle them into useful home decor pieces! As a bonus, I will be showing you how to give your plain bullet journal or datebook a vintage look!
The following post may contain affiliate links. That means if you click and then buy something, I will make a small commission at no additional cost to you! Thank you for supporting my blog. full disclosure here.
One man’s trash is another man’s treasure. We’ve all heard that, right? We see pieces at yard sales and at flea market sales and be thinking, ‘that old stuff is nothing but junk!”
I for one have had similar thoughts, my friend. One thing I have learned is that there is always a great idea that you can use to breathe new life into pieces like these!
You have to look beyond that first glance. You need to think outside of the box (pun intended!) and let your creative juices flow!
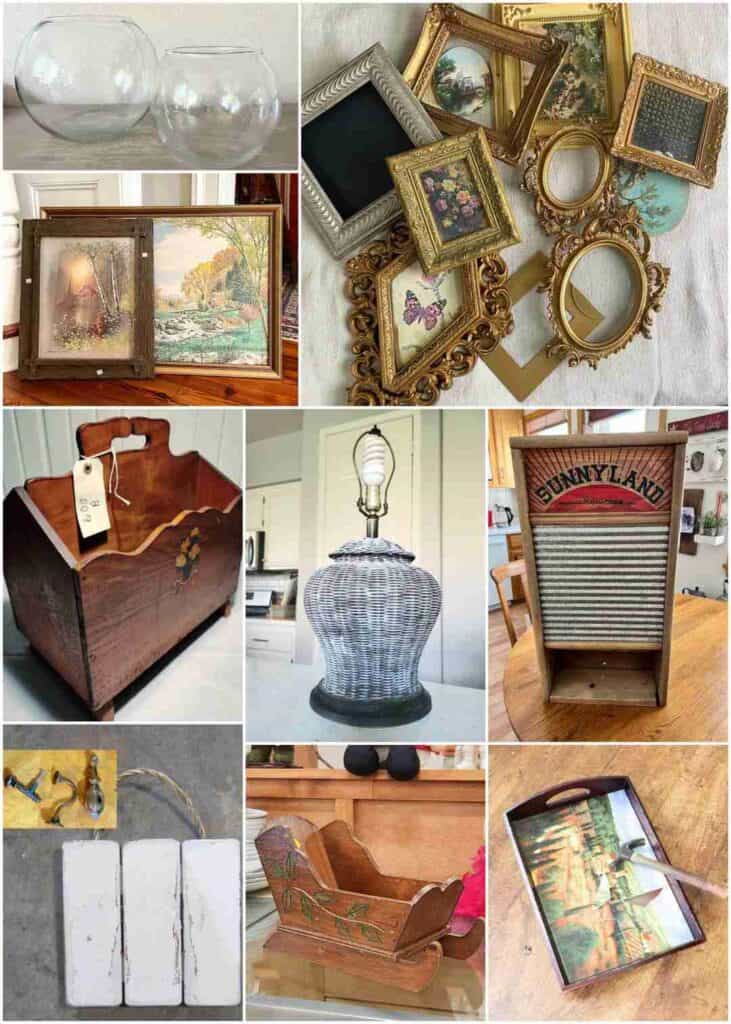
You can find these common thrift store finds at your local thrift shop. Be sure to visit your local thrift shop for your upcycling projects.
fun projects to upcycle
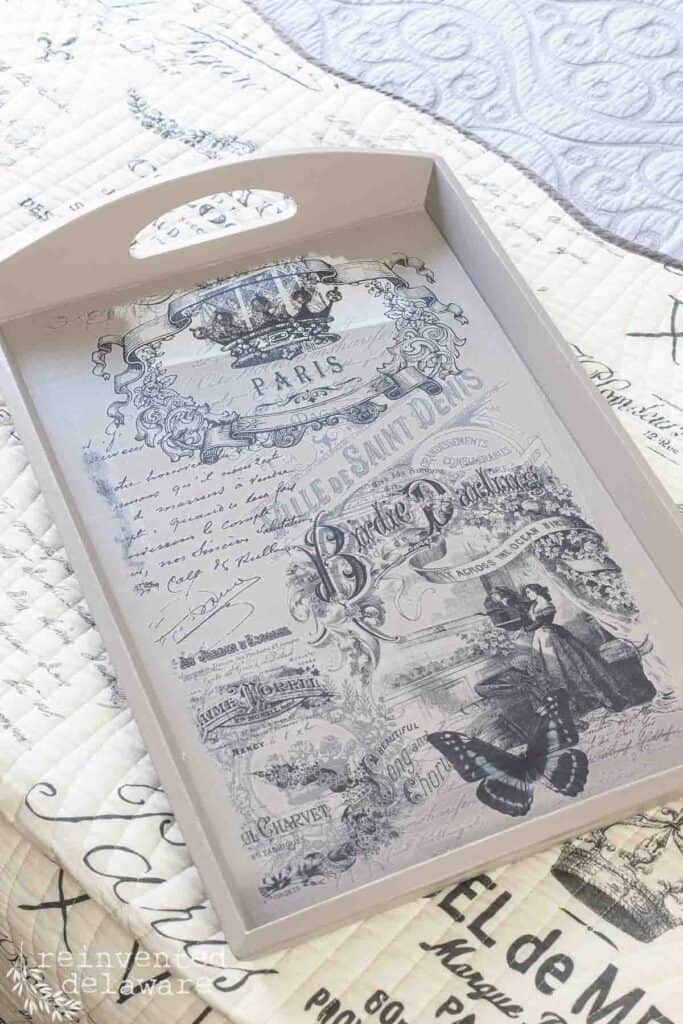
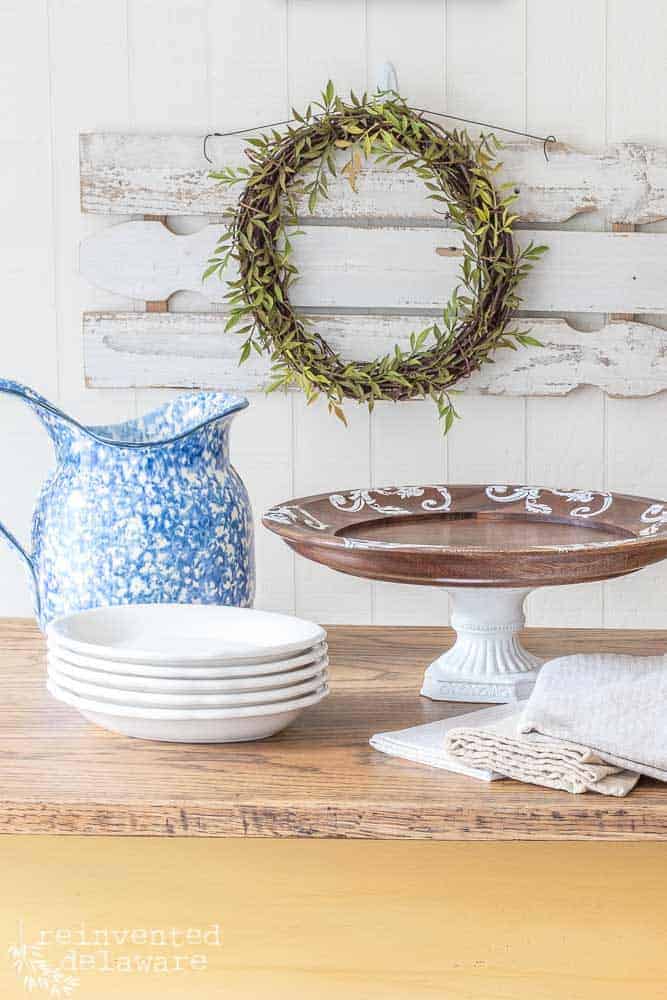
Serving trays are a dime a dozen at thrift stores and yard sales. I made over several here on the blog and over on YouTube.
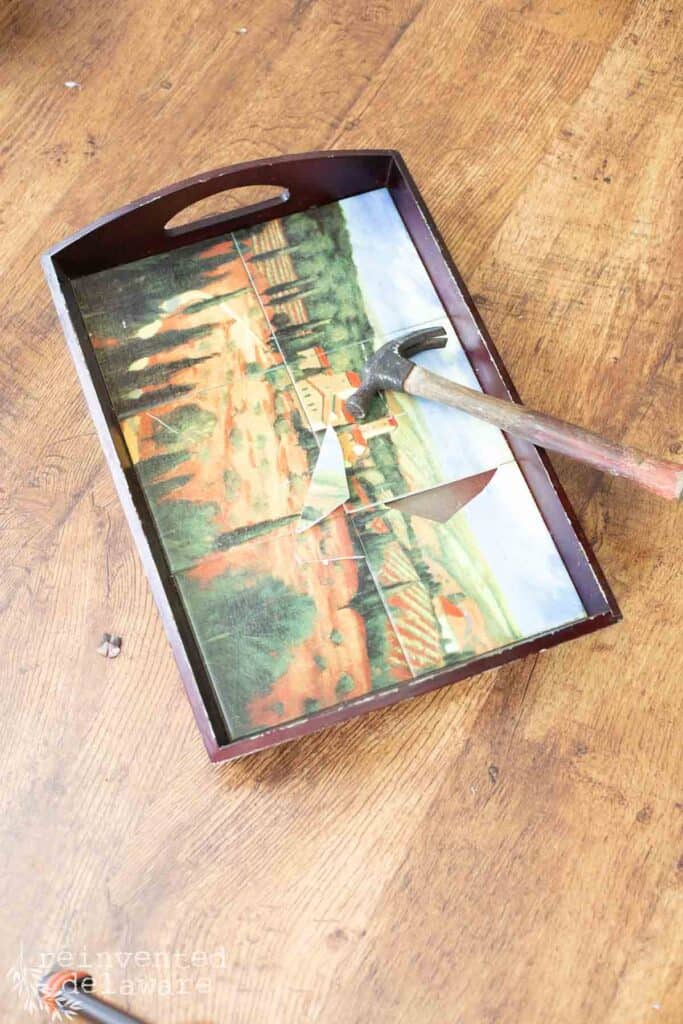
This one was the yuckiest I have encountered. It should have been thrown into the trash bin! Let’s cut down on the amount of waste in this world and find a fun way to reuse this serving tray.
The first step was to get rid of the ugly ceramic tiles someone had attached to the tray. I’m sure someone thought it looked so pretty and in its day, it was pretty.
Styles change!
thrift store find – serving tray
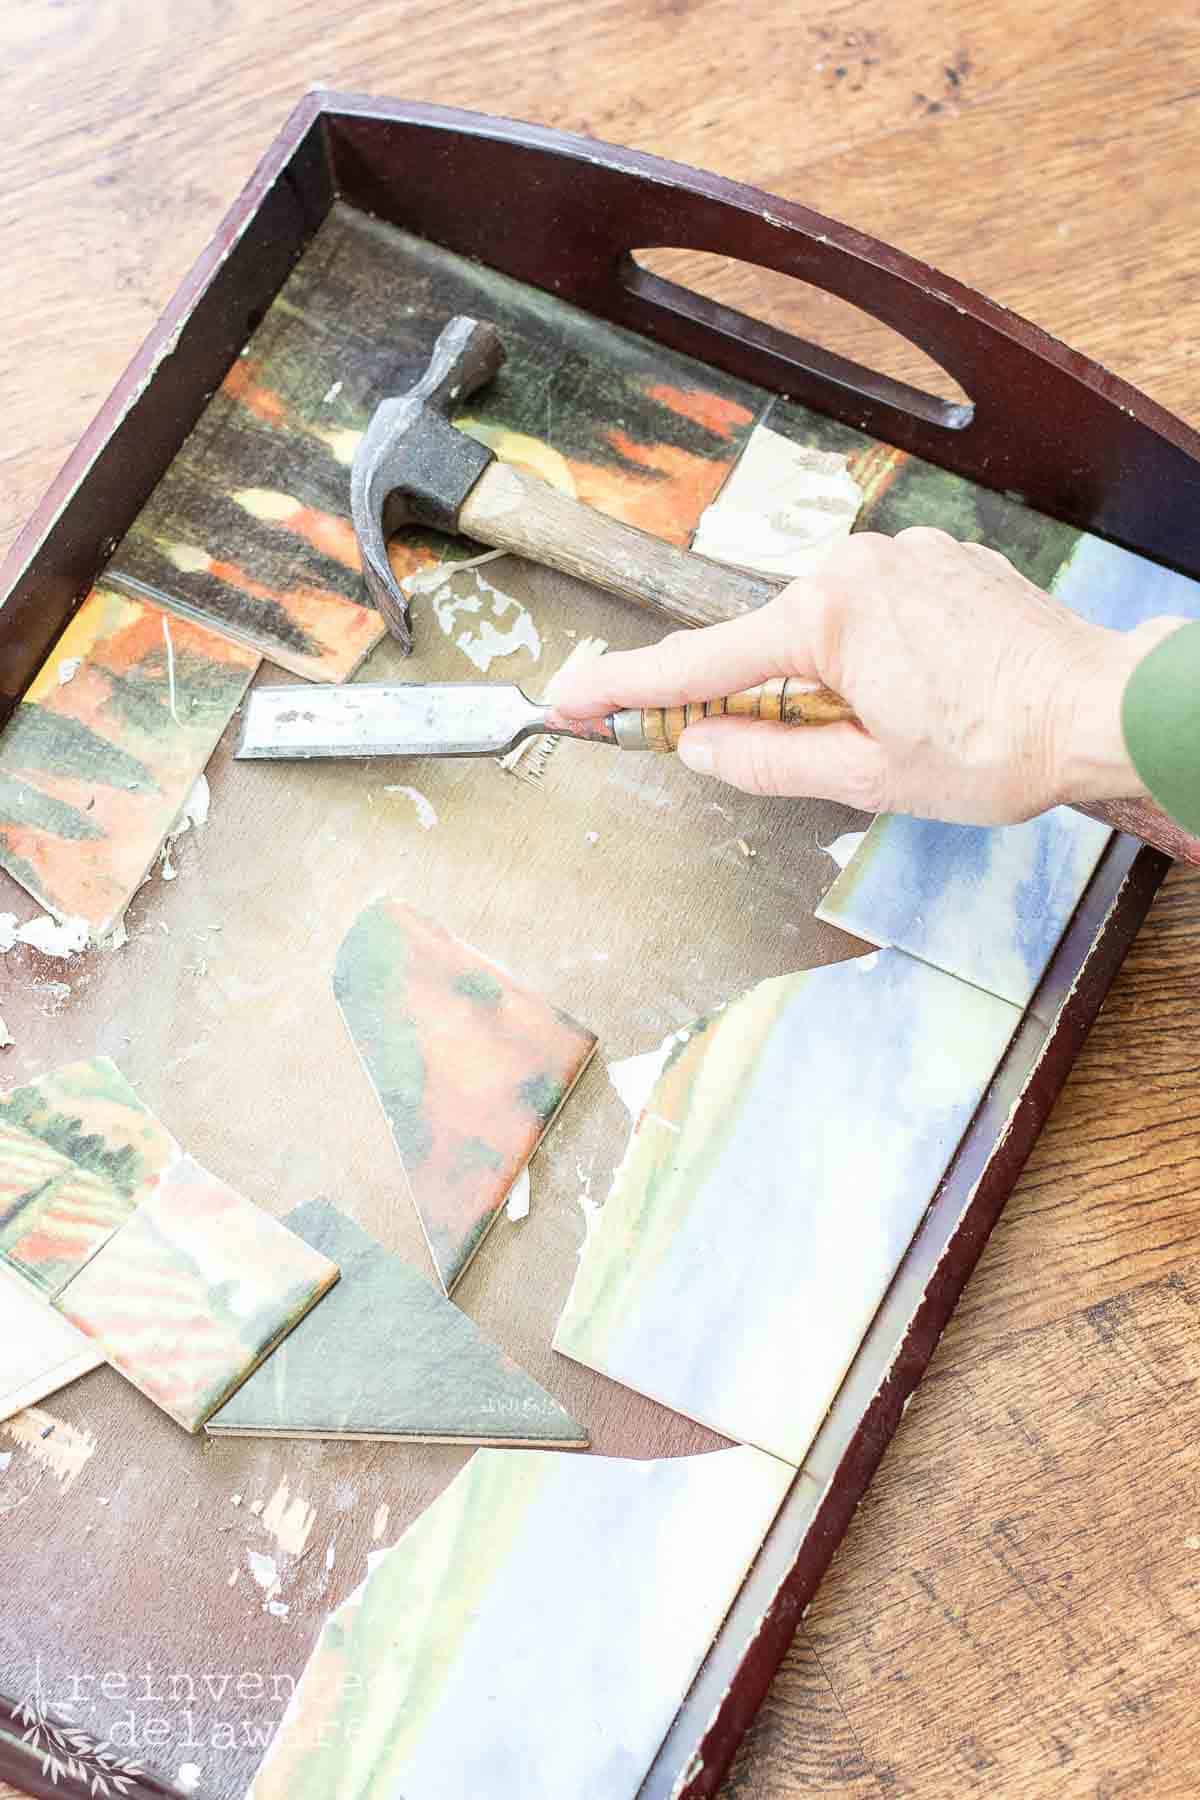
I used a hammer on the back of the tray to loosen the tiles. They broke away in chunks. BTW, I moved my supplies out to my garage and wore safety glasses to protect my eyes.
After I had loosened the tiles, I then used a chisel to get off even more of the broken tiles. Several of them were stuck on pretty well so chiseling the tiles actually removed some of the wood.
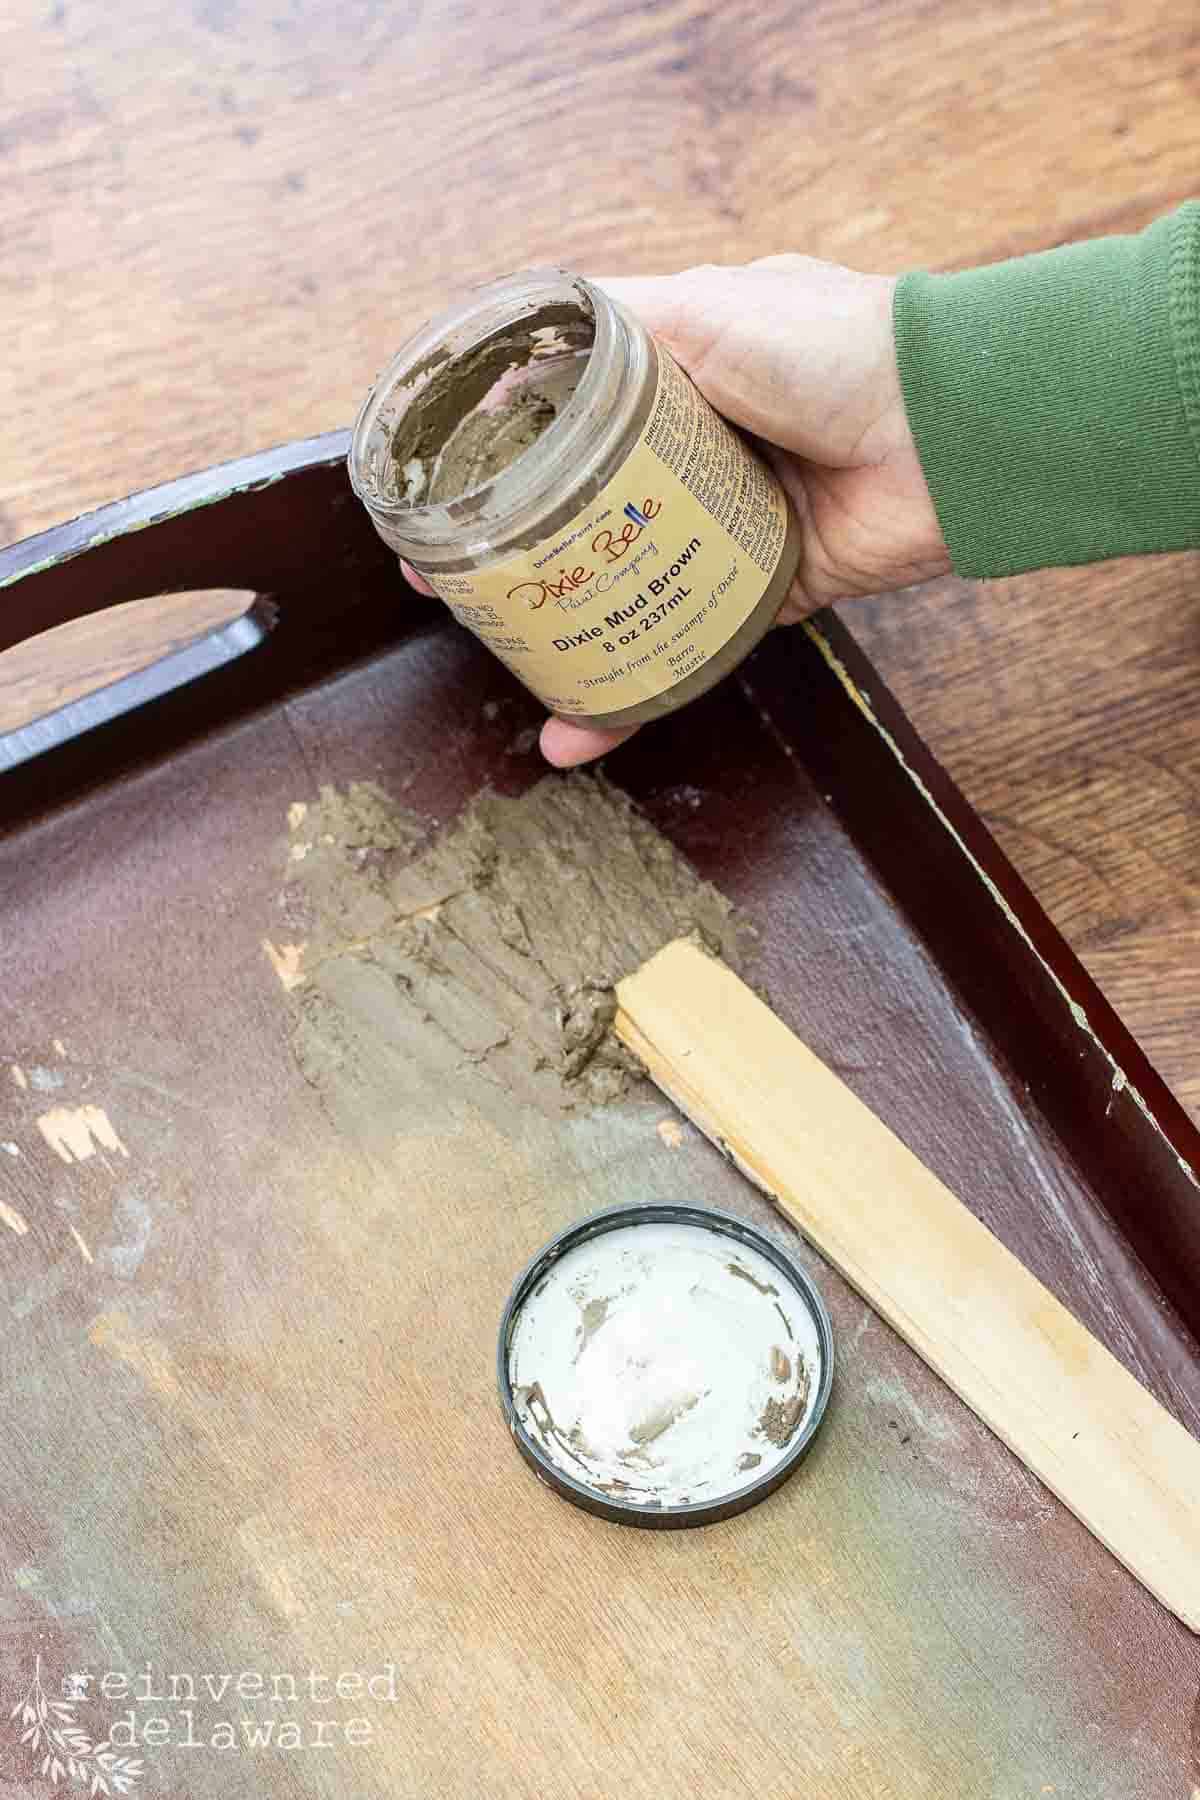
That’s an easy fix!
There are various ways to make this easy repair. I chose to use Dixie Bell Mudd because that is what I had on hand.
Using a paint stick, I spread it on and allowed it to dry. Next, I sanded it smoothly.
Oops, I almost forgot to mention that I cleaned the piece before applying the Mudd. This serving tray was so dirty and covered in something sticky. Yuck!!
upcycling supplies
Let’s look at the supplies for these DIY projects before I go any further:
Handy tip: Shop Often!
If you love to upcycle thrift store finds, the best advice I can give you is to shop often. Even if you only have 15 minutes each week. You will be surprised at all the goodies you will come across!
- thrifted serving tray
- thrifted storage boxes
- Mud wood filler
- stain blocking sealer (Clear and Gray)
- chalk paint (French Linen, Drop Cloth)
- transfer (I used this one)
- paint brush
- clear coat
- painters stands
- BONUS: journal or date book (this is my current fave)
prep before painting
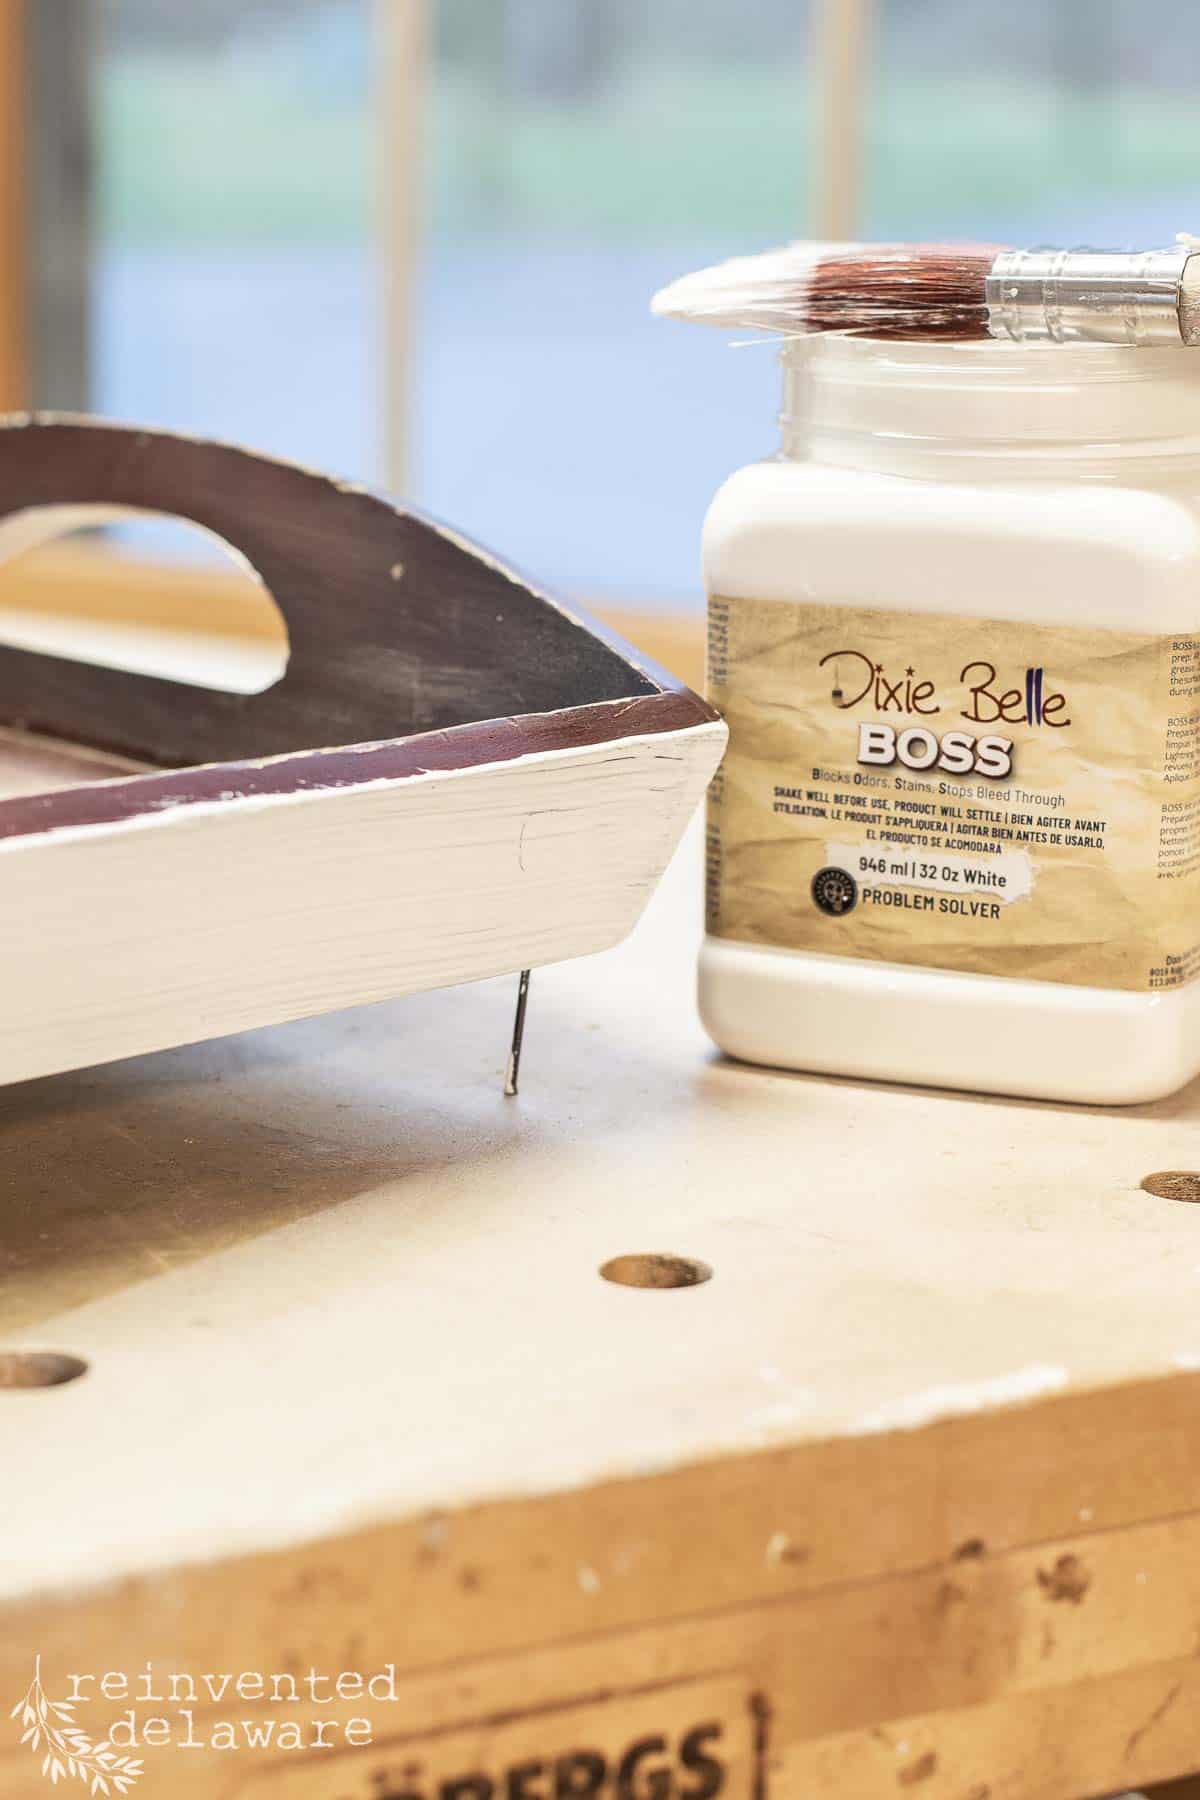
Before applying chalk paint, I sealed the piece with BOSS. It’s a heavy sealer and prevents bleedthrough. It will also take care of any texture difference the Mudd created.
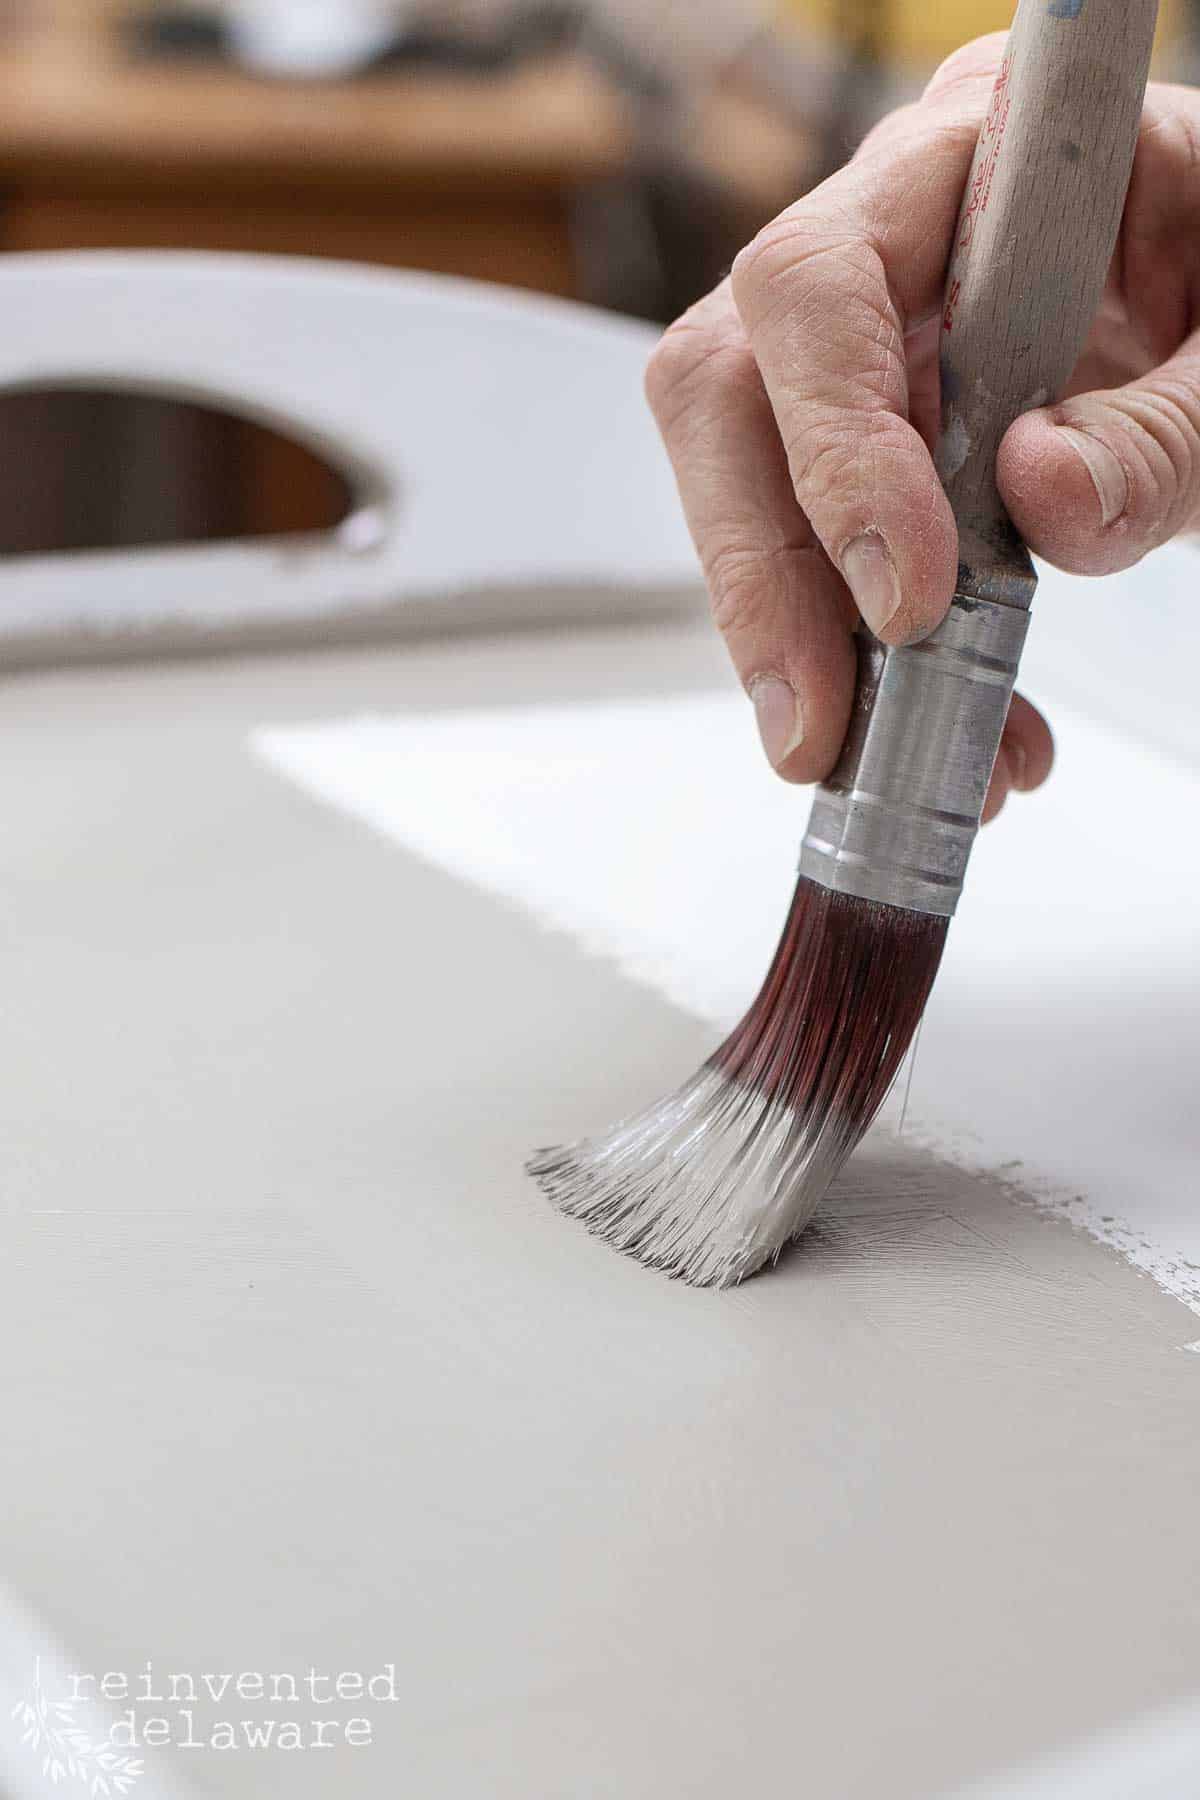
Giving this serving tray a fresh look was easy. I applied two coats of French Linen chalk paint with a small flat paintbrush.
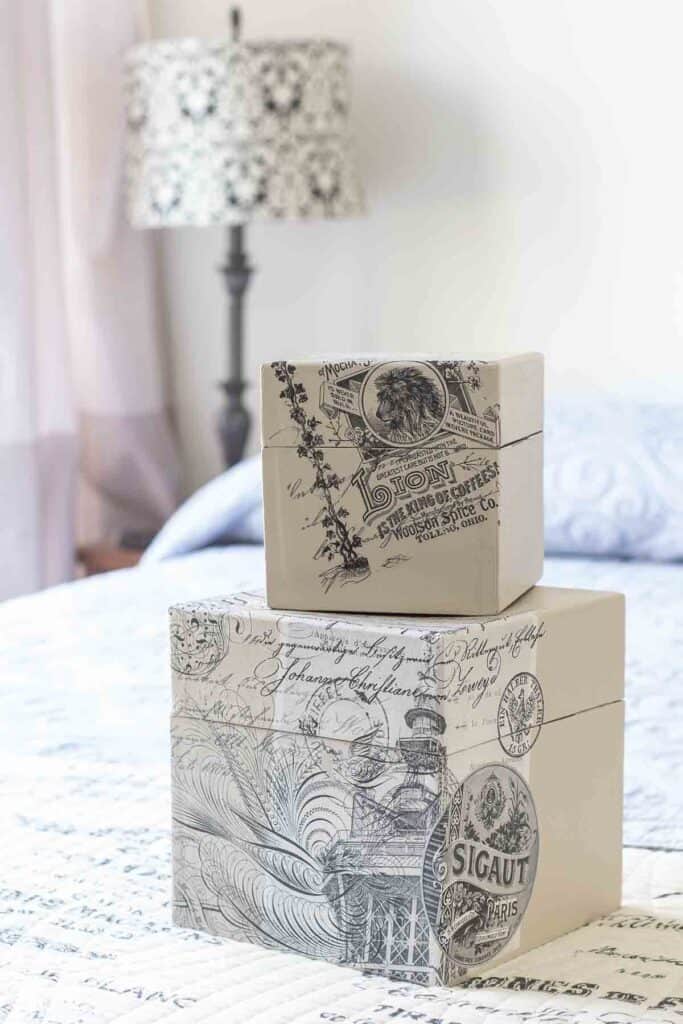
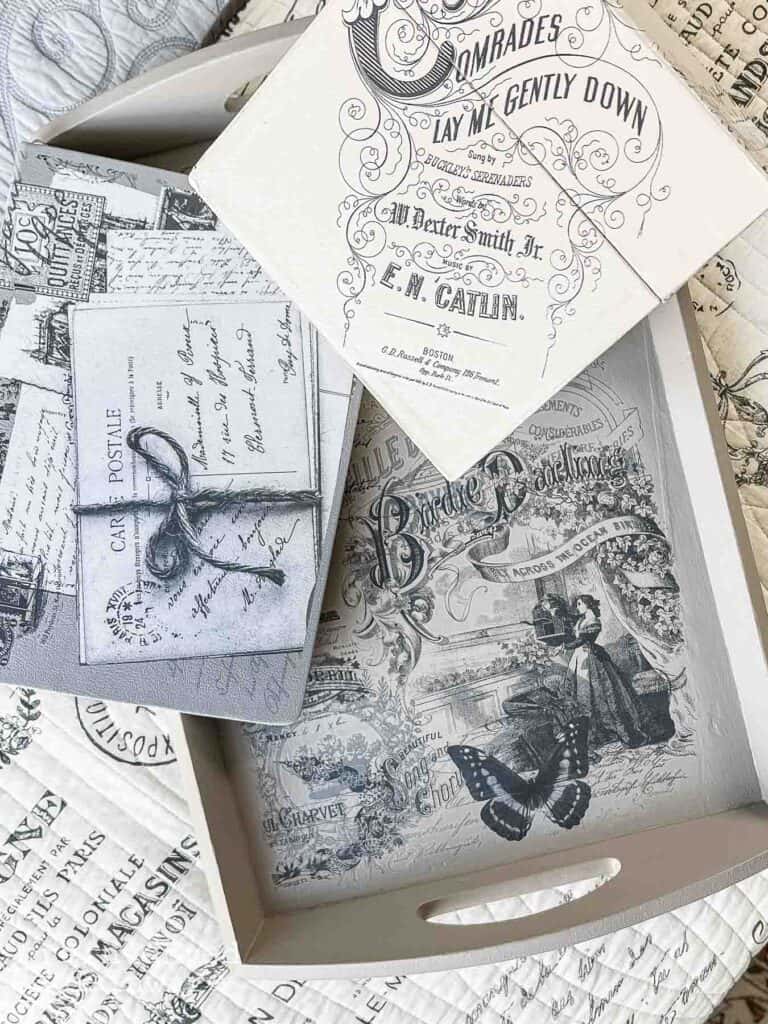
Before I get to the next step, let’s take a look at the next piece I saved from the recycling bin. These decorative storage boxes are abundant in our local thrift stores.
The boxes themselves are sturdy but usually, the decorative exteriors are outdated. That’s why people toss them or donate them.

chalk paint for easy upcycling
Chalk paint is an excellent way to cover the outdated designs of these garage sale finds. If your boxes have a slick surface, it’s a good idea to give them a coat of primer. This is an excellent way to ensure the paint will adhere well.
Choosing paint colors is fun, don’t you think? Dixie Belle offers so many colors but I seem to enjoy the neutrals best. At least during this season in my life!
use painters stands
Drop Cloth is a soft warm neutral and it was perfect for the boxes. Two coats covered them without issue. While I was painting the tray and the boxes, I ordered some of these painters’ stands.


They are little triangle-shaped pieces that hold the piece up off of the surface. This is an easy way to paint all the sides of something without waiting for the paint to dry.
how to apply a transfer
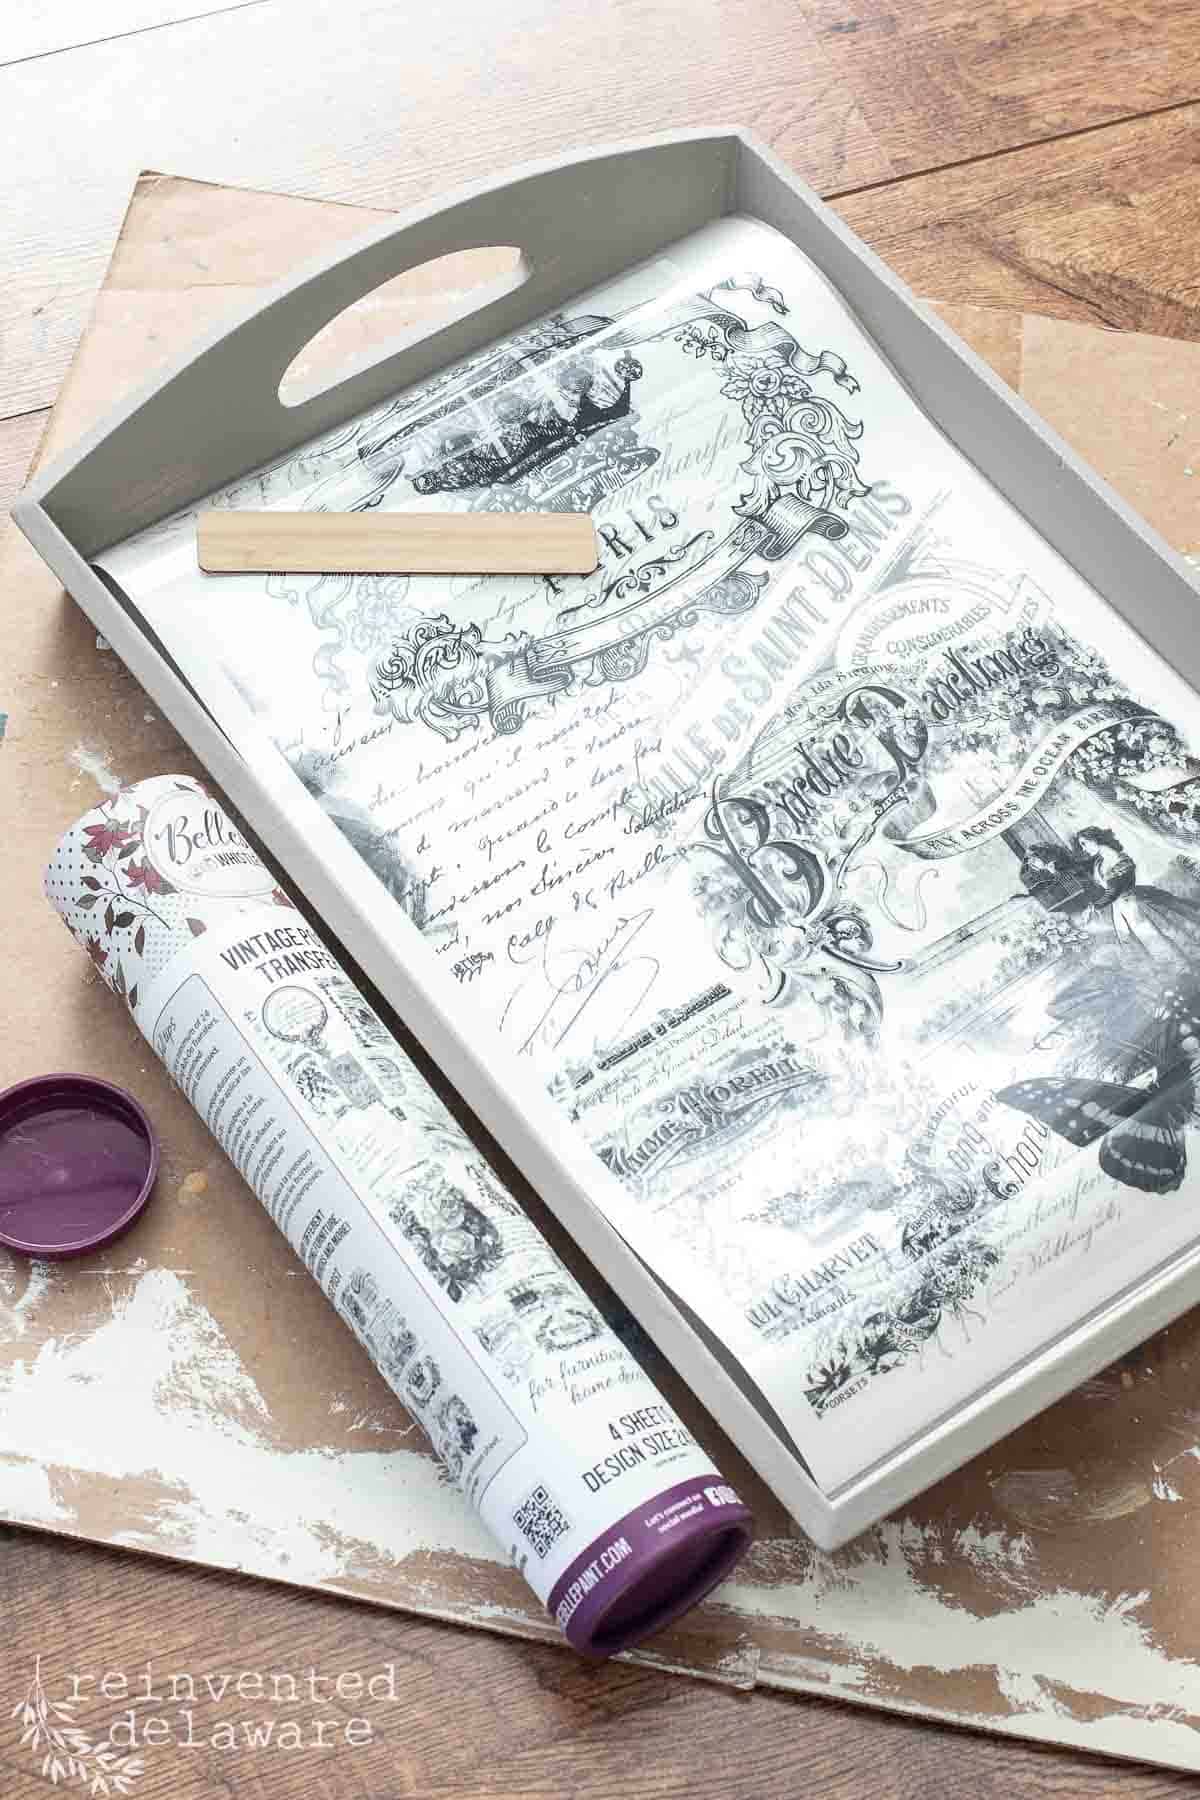
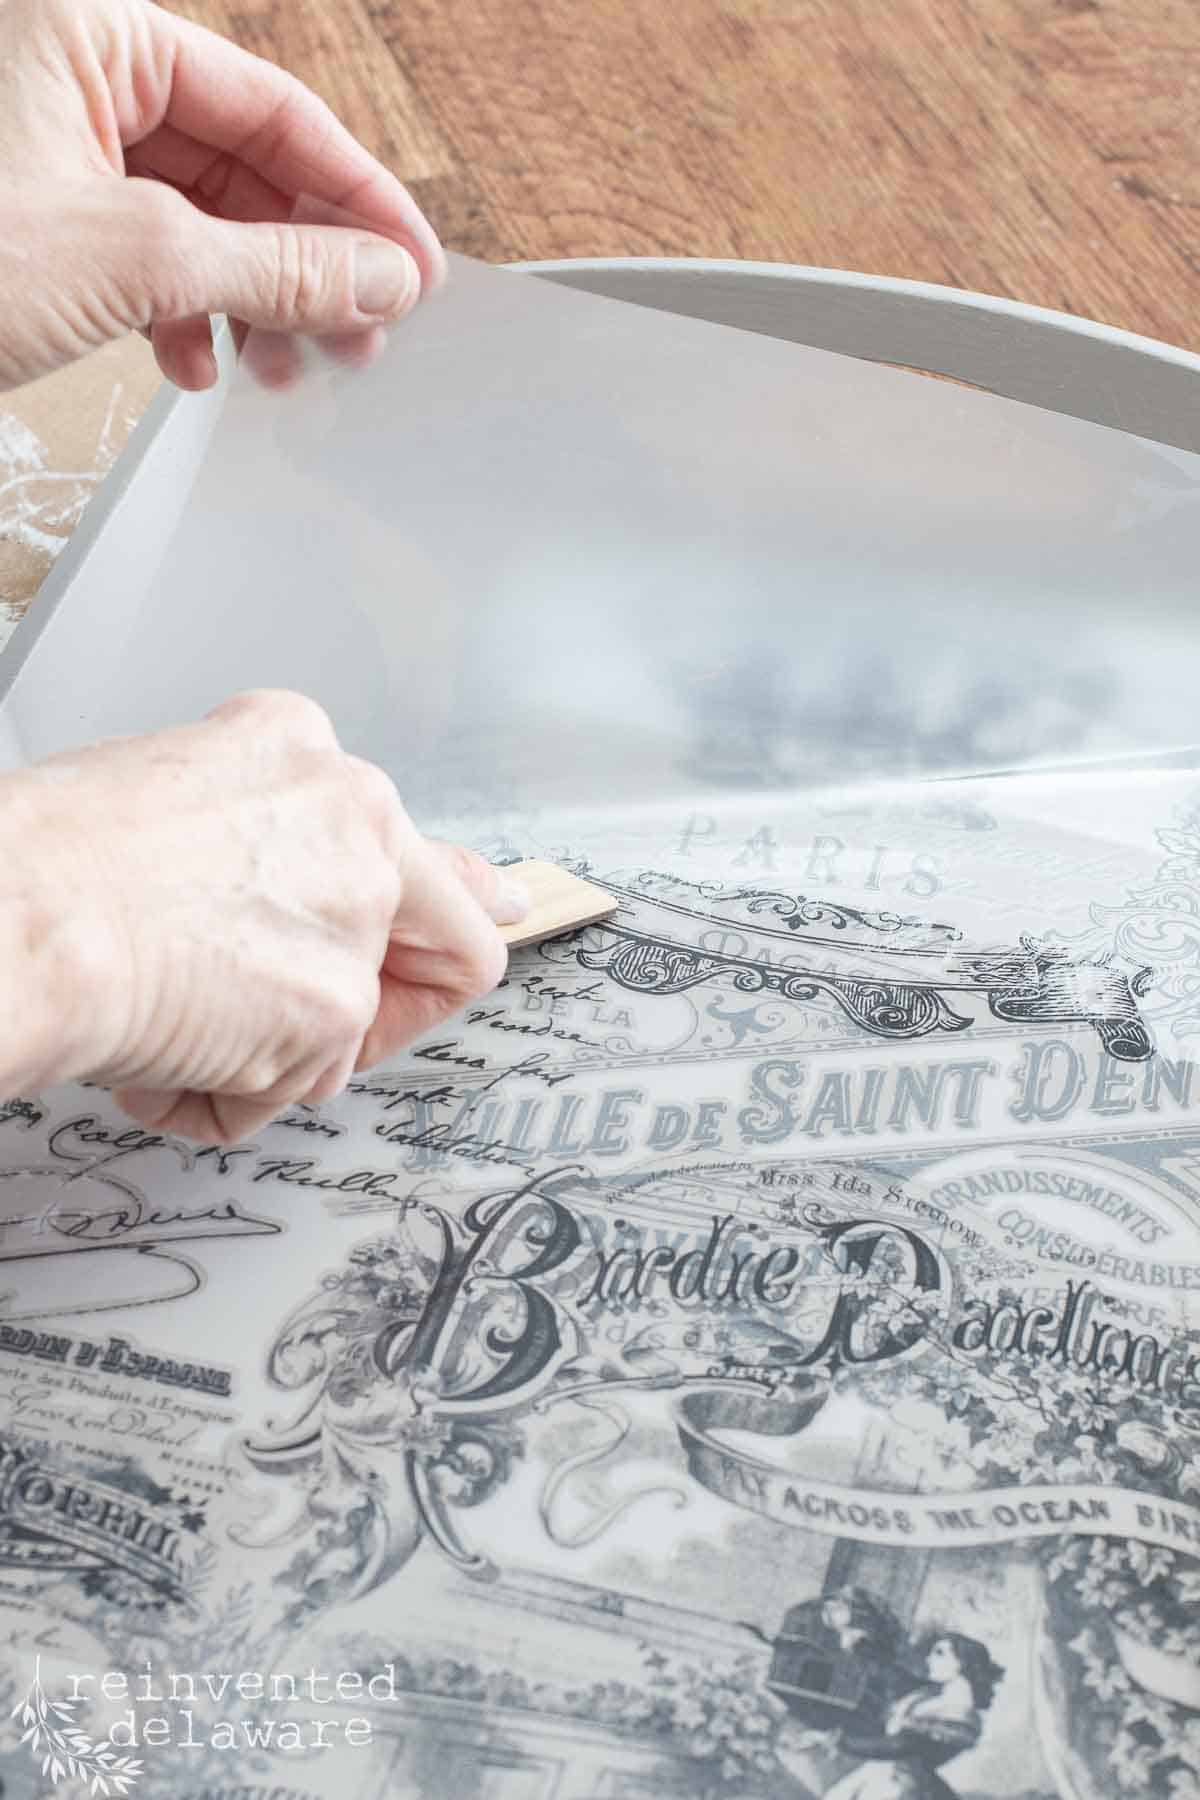
Now for the fun part of this upcycling project! Applying the transfers! Transfers are so easy to use and have such a huge impact on a piece.
Let’s start with the tray since it is a flat surface. The transfer happens to fit the inside area of the tray. Here are the steps to follow when applying a transfer:
- Decide where and how to place the transfer on your piece.
- Remove the backing paper.
- Carefully lay down the transfer design being aware that it could stick to the surface right away.
- Try not to move the transfer after placing it down to prevent parts of it from sticking in areas you do not want the transfer to be
- Use the burnishing tool and rub over the transfer design
- Go over the whole transfer with the tool then gently lift one corner to see if it is adhering to the surface
- You can lift part of the transfer sheet to check that it is adhering and then lay it back down to burnish more if needed
- When all the transfer is on the piece, carefully remove the clear transfer sheet
Applying the transfers to the painted storage boxes was a bit more of a challenge. I used a similar technique as I did with the tray except that I had to think through the design. It needed to fold around the edges and I kept that in mind as I applied the transfer.
more upcycling junk ideas with transfers
As I worked on these upcycling projects, other ideas kept coming to my mind. These transfers are so versatile and they could be used in many ways.
Keep these ideas in your mind the next time you are out thrifting or yard sale-ing for your own home!
- Wooden crates
- An old window
- Small-scale coffee tables
- Side tables
- An old door
- A door on an old dresser
- Old books (I want to do this!!)
- An old picture frame with artwork (paint the art and apply the transfer!)
The possibilities are endless! Transfers are such an easy way to transform just about anything! Including my bullet journal!
the best for last!
Look at this idea! I used another sheet of the transfer and applied it to my bullet journal! Omgoodness, even though this is not a piece of junk, I couldn’t resist! Didn’t this turn out so pretty?
The journal only cost me $17 on Amazon but it looks like a high-end journal that would cost well over $45.
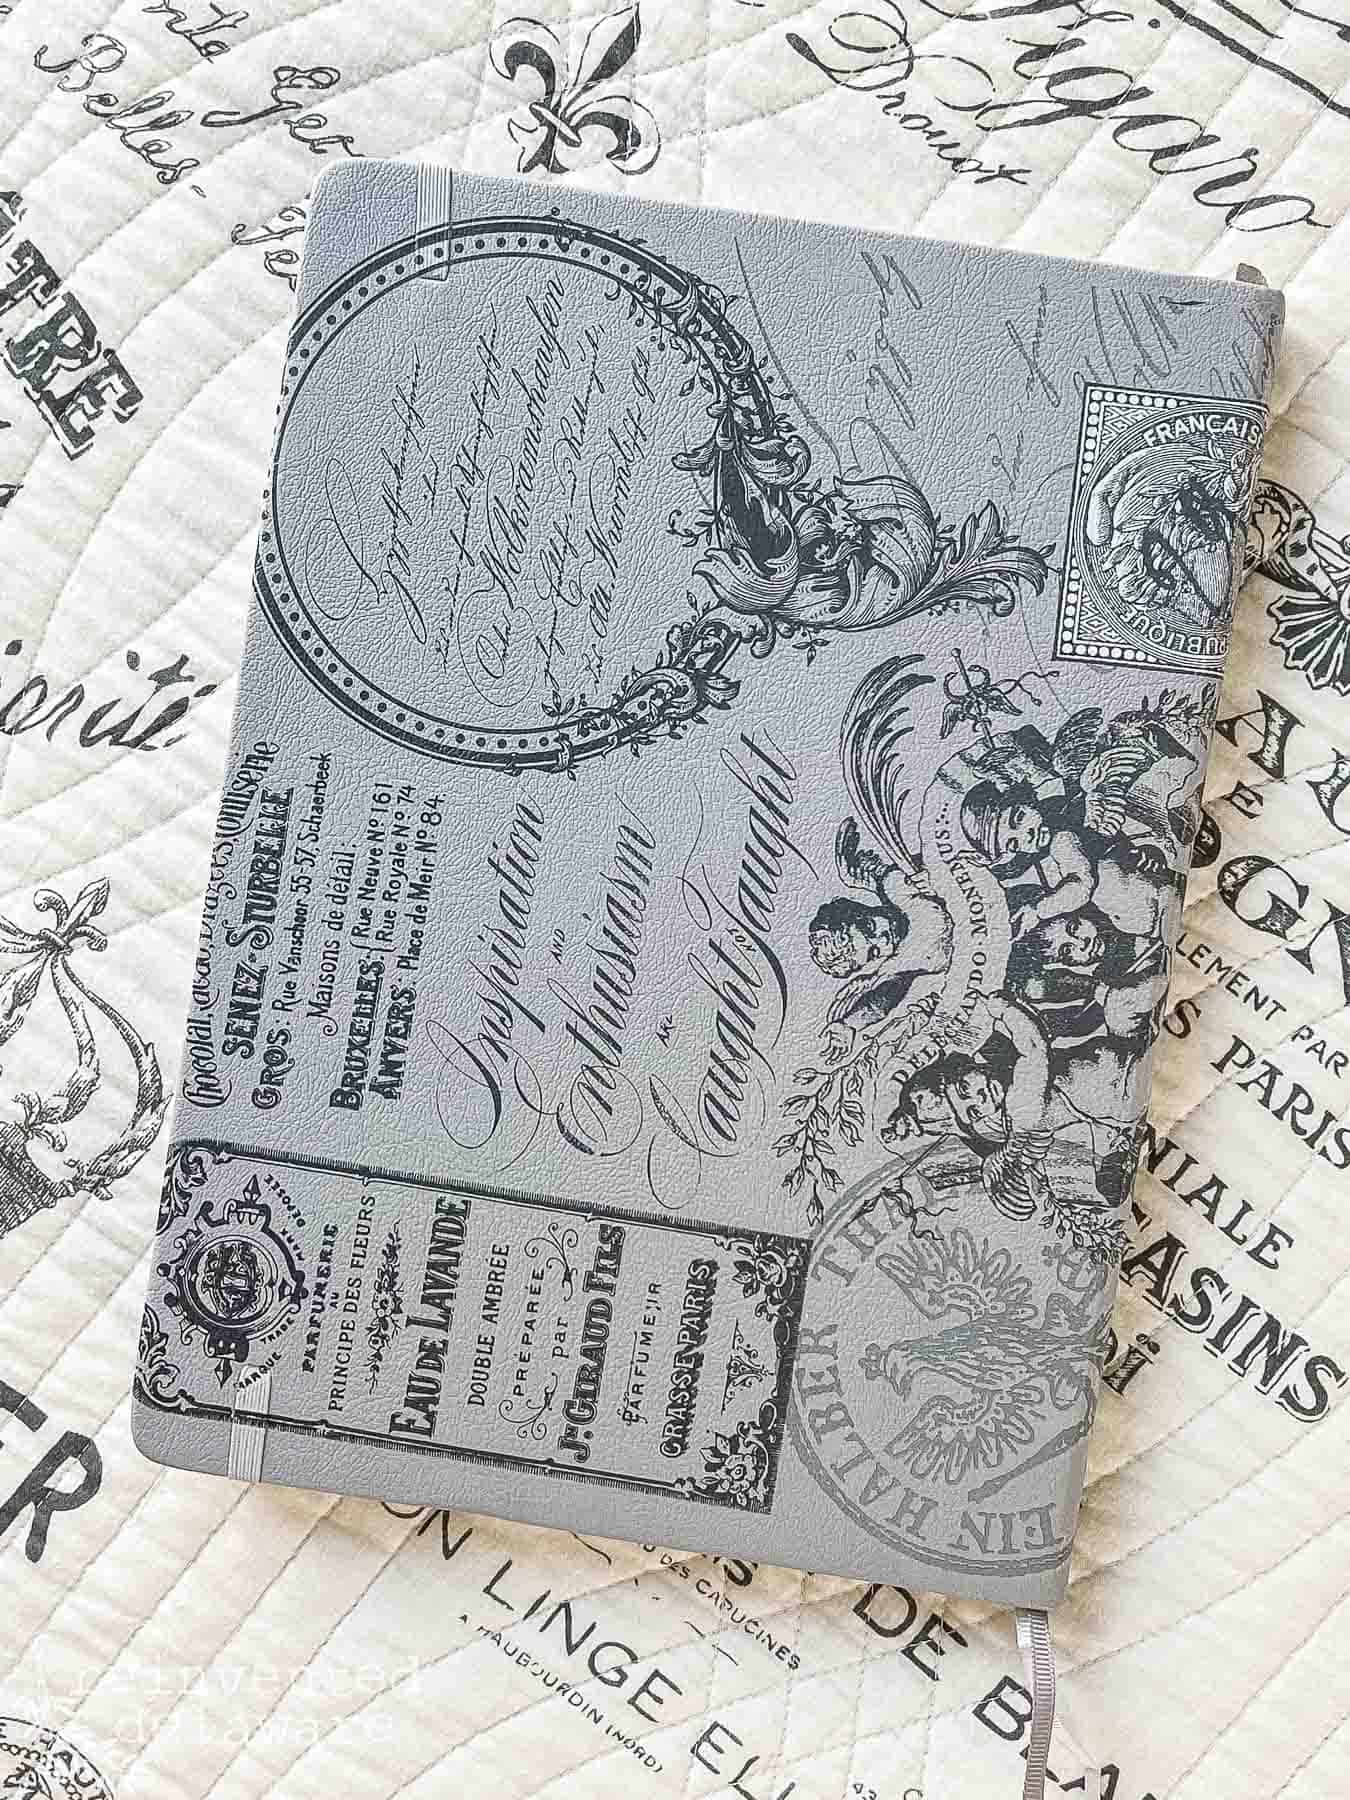

I encourage you to buy this transfer or another design you like. They come in sets of four sheets so you get a big bang for your buck! Look around your home and you will find everyday stuff that you can add a bit of vintage flair.
A little paint, a bit of work, and a vintage-style transfer are all you need!
One last thing before I let you go! These transfers work with so many colors. I especially love the neutral tones. You can clearly see that the transfers will go with warm or cool neutrals.
Which upcycling project is your favorite? Let me know in the comments below this post!
YouTube Video
If you want to see more projects using transfers, check out this YouTube video! Click the image to watch!

more awesome thrift store makeovers
Each month I join several other bloggers who love to do fun projects, simple thrift store makeovers, and their great ideas for upcycled projects.
I’m sure you will find so much creative inspiration as you go through each of their posts! Just click the links below and be ready to get creative!
Our monthly edition
Thrift Store Decor Team
- My Repurposed Life – Get Organized With an Updated Magazine Rack
- Petticoat Junktion – Hanging Necklace Holder
- Sadie Seasongoods – Wooden Sleigh for Winter Decor
- Shop at Blue – Vintage Jewelry Projects
- Organized Clutter – Washboard Cabinet Makeover
- Our Southern Home – Updating and Decorating with Thrift Store Art
- My Uncommon Slice of Suburbia – Hydro Dip Using Spray Paint
- Domestically Speaking – Updated Rattan Wicker Lamp
- Reinvented Delaware – that’s me! Hope you enjoyed all of the projects!
Thanks for joining our journey!
Thanks so much for joining us for this post! Join our journey so you don’t miss any of the fun projects, tutorials, and inspiration that we share with you each week! You can follow us on Instagram, Facebook, and YouTube. We share even more inspiration on Pinterest!
click below to purchase supplies!
Visit my Amazon Storefront!
Click the button below and head over to our online shop on Amazon!
No posts


Cindy-Great post. Love the boxes!
Thanks Regina! They are so easy to makeover!
I love everything you made over but that tray! It looks amazing, would never know how it looked before, as always, gorgeous!
Trays are such an easy makeover and one of my faves to do! Thanks Kristin!
So many great tips and tricks! Love how they turned out.
Thanks Maryann!
I’m wondering where you got the transfers? I was recently on Michael’s arts and crafts store looking for these and was told they do not carry them.
Hi Laurene! Thanks for stopping by! The transfers are linked in the supplies list of the post. Click on the highlighted words in the supplies list. There are so many to choose from but I have the one I used linked specifically as “this one” Hope that helps!
Cindy,
What an improvement! I really love the French transfers. I had not heard of these. They look amazing. I totally went down a rabbit hole looking at them from your link. Thanks for the fabulous idea!
Doesn’t Dixie Belle offer gorgeous transfers? So glad you enjoyed the post!
I loved your makeovers! Can’t beat chalk paint and decor transfer projects!
You and I think alike Carlene! Transfers are miracle workers 🙂
Cindy,
I love all of your projects, but that tray is my favorite. The transfers are so pretty. I have a few floral ones that I’ve used.
Pinned!
gail
I agree Gail, the transfers are gorgeous!
I love a good upcycle, Cindy and these are lovely. They all look like they belong in a high end boutique!
Thanks, Kim! The transfers work miracles!
Cindy, I loved your upcycled projects. They turned out beautiful.
Thanks, Tammy! I appreciate you stopping by my friend!
Cindy, these are all fabulous!!! I don’t know that I would have thought to remove the tile — I won’t be put off by that in the future.
Thanks for sharing at the Fabulous Friday Link Party. We are thrilled to be featuring you this week.
Cindy, I can’t pick a favorite because I love all three! Such great transformations! I ordered some transfers and have not used them yet, so this post is inspiring me to get them out!! Pinning this now! Thanks and have a great week!
Such fun upcycles, Cindy!! I LOVE That transfer paper you used…it’s so pretty!!
SO many great ideas Cindy!
I love these amazing transformations, Cindy! I haven’t used transfers in many years, but you have inspired me to try them again! They’re beautiful projects!!