How To Make a DIY Easter Garland In 5 Easy Steps
Celebrate the holiday season with this easy DIY Easter garland! Learn how to make it in just 5 simple steps and add a festive touch to your home decor.

DIY Easter and spring decor
If you enjoy making Easter crafts then you are in for a treat! This diy Easter garland is simple to make and would be fun to make with kids!
Creating your own home decor is both rewarding and budget-friendly. In this post, I will share an easy way to make an Easter themed garland that will last through spring.
The following post may contain affiliate links. That means if you click and then buy something, I will make a small commission at no additional cost to you! Thank you for supporting my blog. full disclosure here.
This post is sponsored by Dixie Belle. All opinions are my own!
Supplies Needed
Supplies for this Easter bunny garland couldn’t be simpler! Here is the list of items I used to make this Easter garland:
- bunny print Springtime Toile decoupage paper
- Mod Podge
- grainsack style fabric (or dropcloth)
- heavy jute twine
- hot glue sticks and hot glue gun
- scissors and pinking shears
- triangle and circle pattern (in my free printable library)

step by step instructions
It’s hard to even call this post a tutorial since it is soooo easy to make! But for the sake of all things diy, let’s go over how I made thie diy easter garland!
step 1: cut the fabric
If you have scrap fabric similar to dropcloth then you can use it for this bunny garland. My fabric stash includes leftovers from upholstery projects including reproduction grainsack fabric. You can choose a similar weight fabric or even use burlap to create a rustic look.
I have created a printable pattern for the size triangle I am using. It works perfectly witht the Easter bunny decoupage paper I chose for the garland. You will find the printable pattern in my freebie library. Tap the button below to gain access to the library for the pattern and many other designs!
Once I printed the pattern, I cut the two shapes out on the line. Then I used pinking shears to cut out the fabric using the triangle pattern. I cut seven pennant shapes for my garland.

step 2: cut circles from bunny decoupage paper
The circle pattern works like a template for the bunny paper. I placed the cut out circle behind the decoupage paper and centered the bunny within the circle.
Then I lighlty marked the circle on the decoupage paper with a pencil. Once I had all of the circles drawn on the decoupage paper, I cut out the circles with pinking shears.
The pencil mark was visibile on the decoupage paper so I gently erased the lines with a soft eraser.


thanks for being here!
I hope you are enjoying this project! Let me know if you have any questions. Or leave me a comment to tell me about your project and ideas!
thanks, Cindy 😀

step 3: mod podge the bunnies to fabric
If you like to make crafts then you are probably in the ‘Mod Podge rocks’ camp like me! If this is your first time using Mod Podge, then heed this warning – you will want to Mod Podge everthing in site!
First I applied a thick layer of Mod Podge with a chip brush to the surface of the fabric. Then I placed the circle on the fabric and applied a layer of Mod Podge over top going all the way to the edges.


Be sure to orient the bunny in the correct way! My pennant garland will hang with the pointed end at the bottom. You don’t want to glue the bunnys on upside down!
It’s best to protect your work surface when working with Mod Podge. I used the clear packaging envelope that came with the decoupage paper. When I was finished with all seven pieces, I simply tossed the clear package!
Applying the Mod Podge to the entire pennant shape creates the feel of oil cloth when it dries. Allow the Mod Podge to dry completely. You can also apply a layer on Mod Podge on the back of each triangle shape.

step 4: attach pennants to twine
Once all of the pennants are finished, it’s time to string them together. There are several options that would look nice and I will share those ideas later in the post.
For my Easter garland, I used heavy twine that I grabbed from my garden shed. I measured the length I wanted the garland to be for our fireplace mantle and added 10-12″ on each end.
Then I folded the twine in half to find the center. Using my hot glue gun, I attached the pennant sections to the twine with the wider side at the top and the pointed end at the bottom.
You can measure for each pennant section but I just eyeballed it. When I was finished I made a loop at the end of the twine and then tied a knot to hold it in place. The loop will be handy when I hang this garland from the tiny nails I have on our mantle


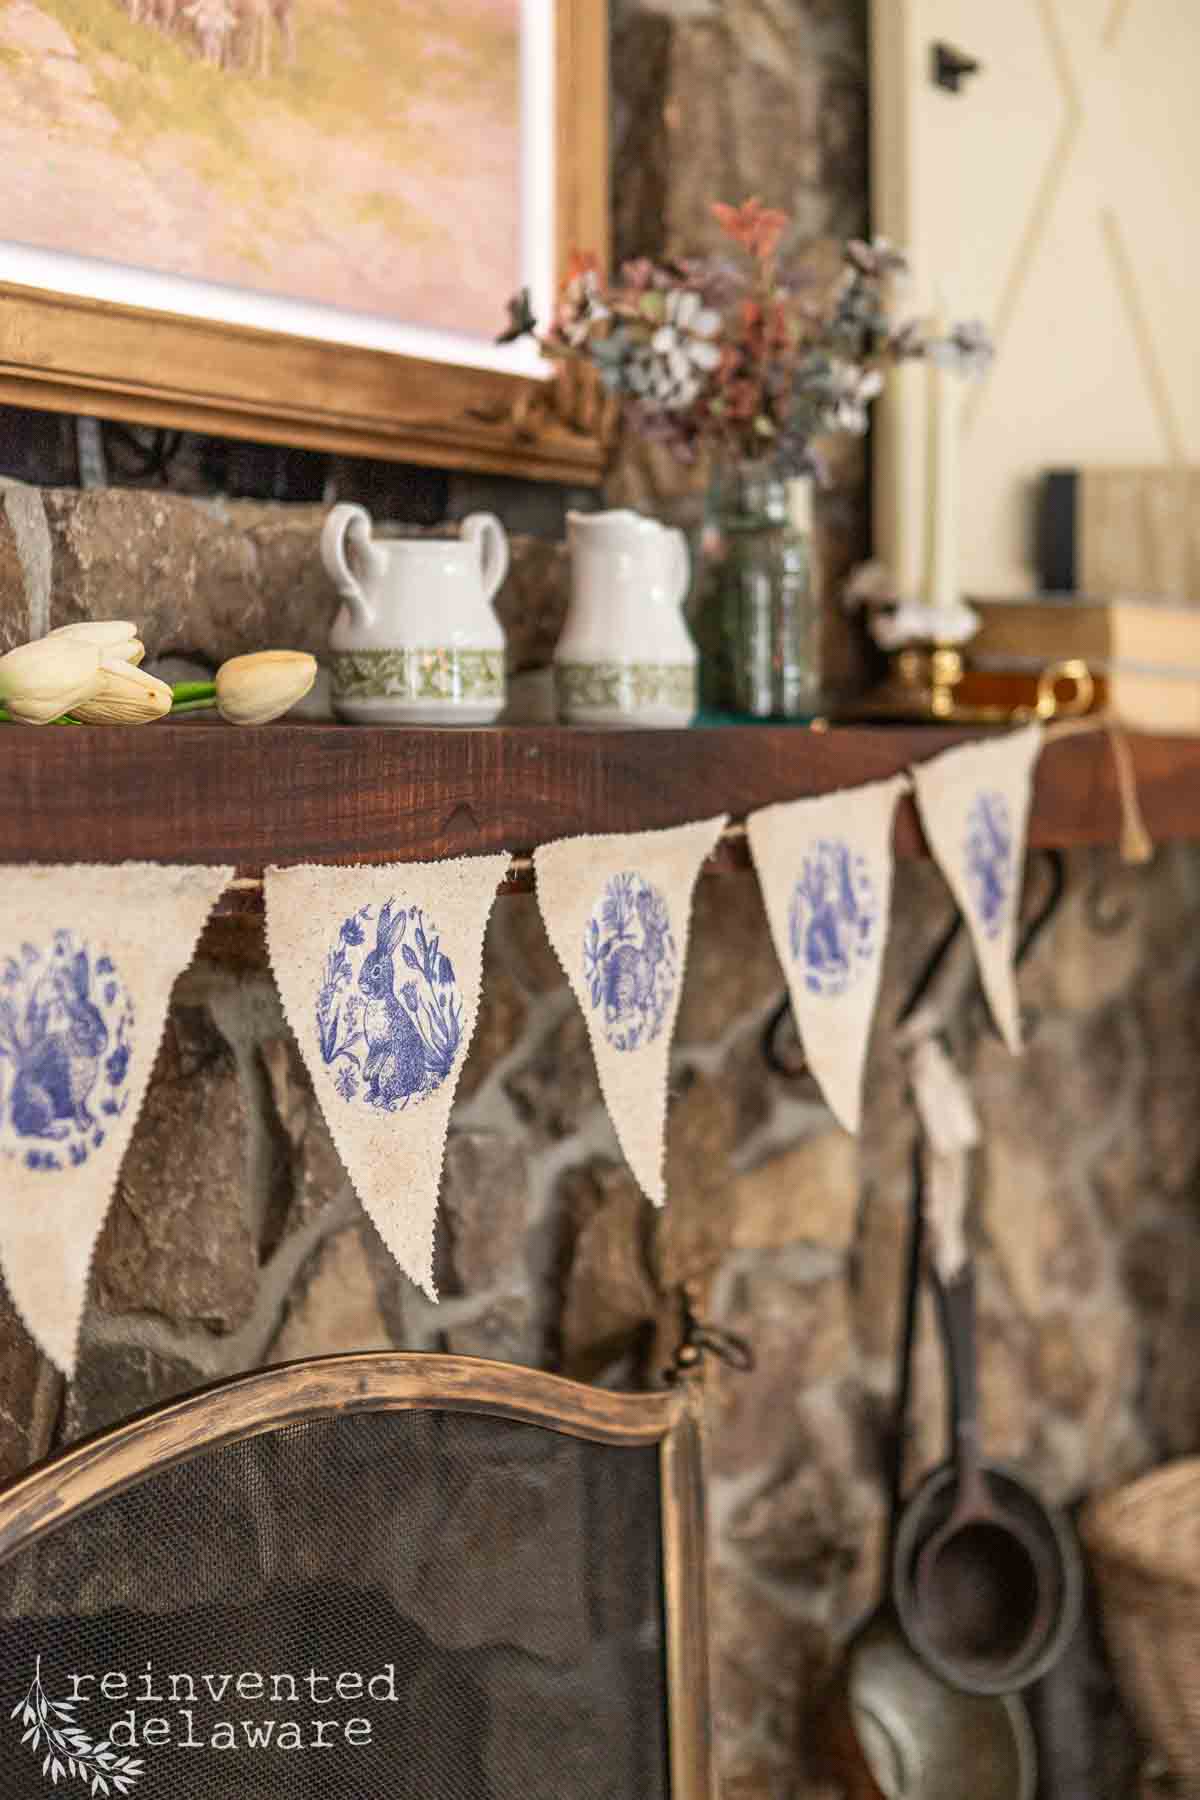
step 5: hang and enjoy
As you can see, my Easter garland is hanging from our fireplace mantel. It could also be displayed on a pretty shelf, a dining room hutch or across a headboard.
This Easter garland project could also be hung on a covered porch for a simple outdoor Easter decoration!

I keep tiny nails in our mantel that I use to decorate for the seasons like Valentines Day, Christmas and the fall seaons. They come in handy for simple diy garlands for any season!
Wouldn’t this Easter garland be adorable in a child’s room? They would be dreaming of Easter for days!
BTW, did you notice the gorgeous art on our Samsung Frame TV? It was free!! The lambs are perfect for the Easter season.
Watch this recent video and learn how to get vintage art for your home!

bonus Easter garland
When you gain access to the free printable library so that you can print the pennant pattern, you will also see a page filled with Easter Crosses. They represent the sacrifice Jesus made on the cross for us.
Print as many of those pages as you need, cut them out and attach them to the fabric pennants. Hang the Easter garland using heavy twine or ribbon!
Easter decorations you can make
Here are some options for your Easter garland:
- use a piece of ribbon (silk or organza) in pastel colors instead of the heavy twine for a spring look
- hand dye the grainsack fabric in different colors for a fun touch.
- cut the bunny shapes according to the shape of each bunny then apply the cutouts to the fabric.
- use white canvas fabric and apply the blue and white decoupage bunny paper to create a Chinoiserie effect.
- cut the fabric and the bunnies in an egg shape to create a diy easter egg garland.
- adhere the bunnys to burlap for a rustic burlap bunny garland.

more diy Easter garland ideas
Here are some of the Easter garland ideas I found on the interwebs – I am sure you will enjoy these creative projects!
- This farmhouse inspired bunny paper garland is the cutest!
- Heidi made an adorable Easter garland for the kitchen!
- The Pioneer Woman shares lots of ideas for diy garlands for spring!
- You will enjoy this Easter Wreath I made a couple of years ago!
Recreate and Decorate
Join the Facebook Group and Share Your Projects With Us!


Thanks for joining our journey!
Thanks so much for joining me for this post! Join my journey so you don’t miss any of the fun projects, tutorials, and inspiration that I share with you each week! You can follow me on Instagram, Facebook, and YouTube.


Cindy Rust
Cindy has been decorating her home with thrift store finds for 40 years. She is an avid thrift store shopper who loves to makeover the items she finds into vintage-inspired home decor and furniture. When she isn’t thrift shopping or painting a piece of furniture, you can find her making homemade butter, working in her garden, or painting with watercolors.
click below to purchase supplies!
Visit my Amazon Storefront!
Click the button below and head over to our online shop on Amazon!