
Simple Step By Step Diy Easter Door Wreath To Welcome Spring
Welcome the spring season with a DIY Easter door wreath! Follow these easy steps to create a beautiful and festive decoration for your home.
In this post, I will take you step by step in making an inexpensive spring wreath for your front door to celebrate the Easter season using a previously handmade wreath, some chalk paint, faux flowers, and air-dry clay colorful eggs! I’ll also be sharing beautiful spring wreaths that other bloggers have created. Let’s get started!
The following post may contain affiliate links. That means if you click and then buy something, I will make a small commission at no additional cost to you! Thank you for supporting my blog. full disclosure here.
This post is sponsored by Dixie Belle. All opinions are my own!
DIY spring wreath
The wreath that I am making for our Easter decorations is an upcycled handmade DIY pinecone wreath that I made last fall I updated that floral wreath for Christmas over on a YouTube live video and then posted the results in a community post on YouTube as well.
Can you tell I am determined to make over this wreath for each season? I have one more season to go – summer!
The pine cone flowers on the wreath are easy to change with some paint. It’s a great way to add spring decor on a budget! I will also add some additional Easter wreath ideas later in the post. You will be inspired to make your own colorful wreath for any season!

Easter wreath DIY
The first thing to make is the wreath. I have step-by-step instructions for this wreath in the original blog post so be sure to check that out. That post includes lots of pictures as well as a link to the original YouTube video.
step by step simple wreath diy
Here are the basic steps to make this pinecone wreath:
- Gather pinecones and use pointed floral snips to cut them into smaller, flower-looking sections.
- Paint the pine cone flowers in the paint colors of your choice. You can use chalk paint, acrylic paint, or craft paint.
- Add a bunch of rafia to the wire wreath form using thin floral wire to secure it. You can also use pipe cleaners in a neutral color or thin burlap ribbon. Use wire cutters to cut off the excess floral wire.
- Using a hot glue gun, attach the painted pinecone flowers to the wreath in the areas you like.
- Add faux greenery by sticking the ends of picks into the rafia and wire wreath frame through to the back of the wreath. This is the best way to add the greenery so you can switch it out seasonally without damaging the whole wreath.
We will chat more about the extras to add to the Easter door wreath to celebrate the Easter holiday season later in this post.
Easter wreath tutorial
Changing up this front porch wreath couldn’t be easier. Let’s go over each step!
upcycle an old wreath
I removed the greenery I used for the winter version of this wreath. Then my favorite part of any project – painting! Seriously, I must have been born with a paintbrush in my hand 🙂
If you don’t have a wreath to upcycle, look for one at your local thrift store. An old grapevine wreath base would work for this project. If you use a thrifted wreath, remove the outdated decorations and keep the wreath base.
paint pinecone flowers with pastel colors
The next step was to choose the colors. Admittedly, I struggle with colors for a wreath for the door on our front porch. The door is painted tomato red. It’s a Magnolia Home color and I fell in love with the color name – Vine Ripened Tomato. I don’t even like tomatoes unless they are in spaghetti sauce or homemade chili!
Anyway, our door color creates a challenge with colors for a wreath. It is usually perfect in the summer, fall, and Christmas wreaths but in spring, not so much. I wanted to use colors for the spring season for this wreath and that means pastel soft colors not bold colors. I need to come up with another solution for the front door paint color. And all the other exterior doors for that matter. Sounds like a project for this summer!
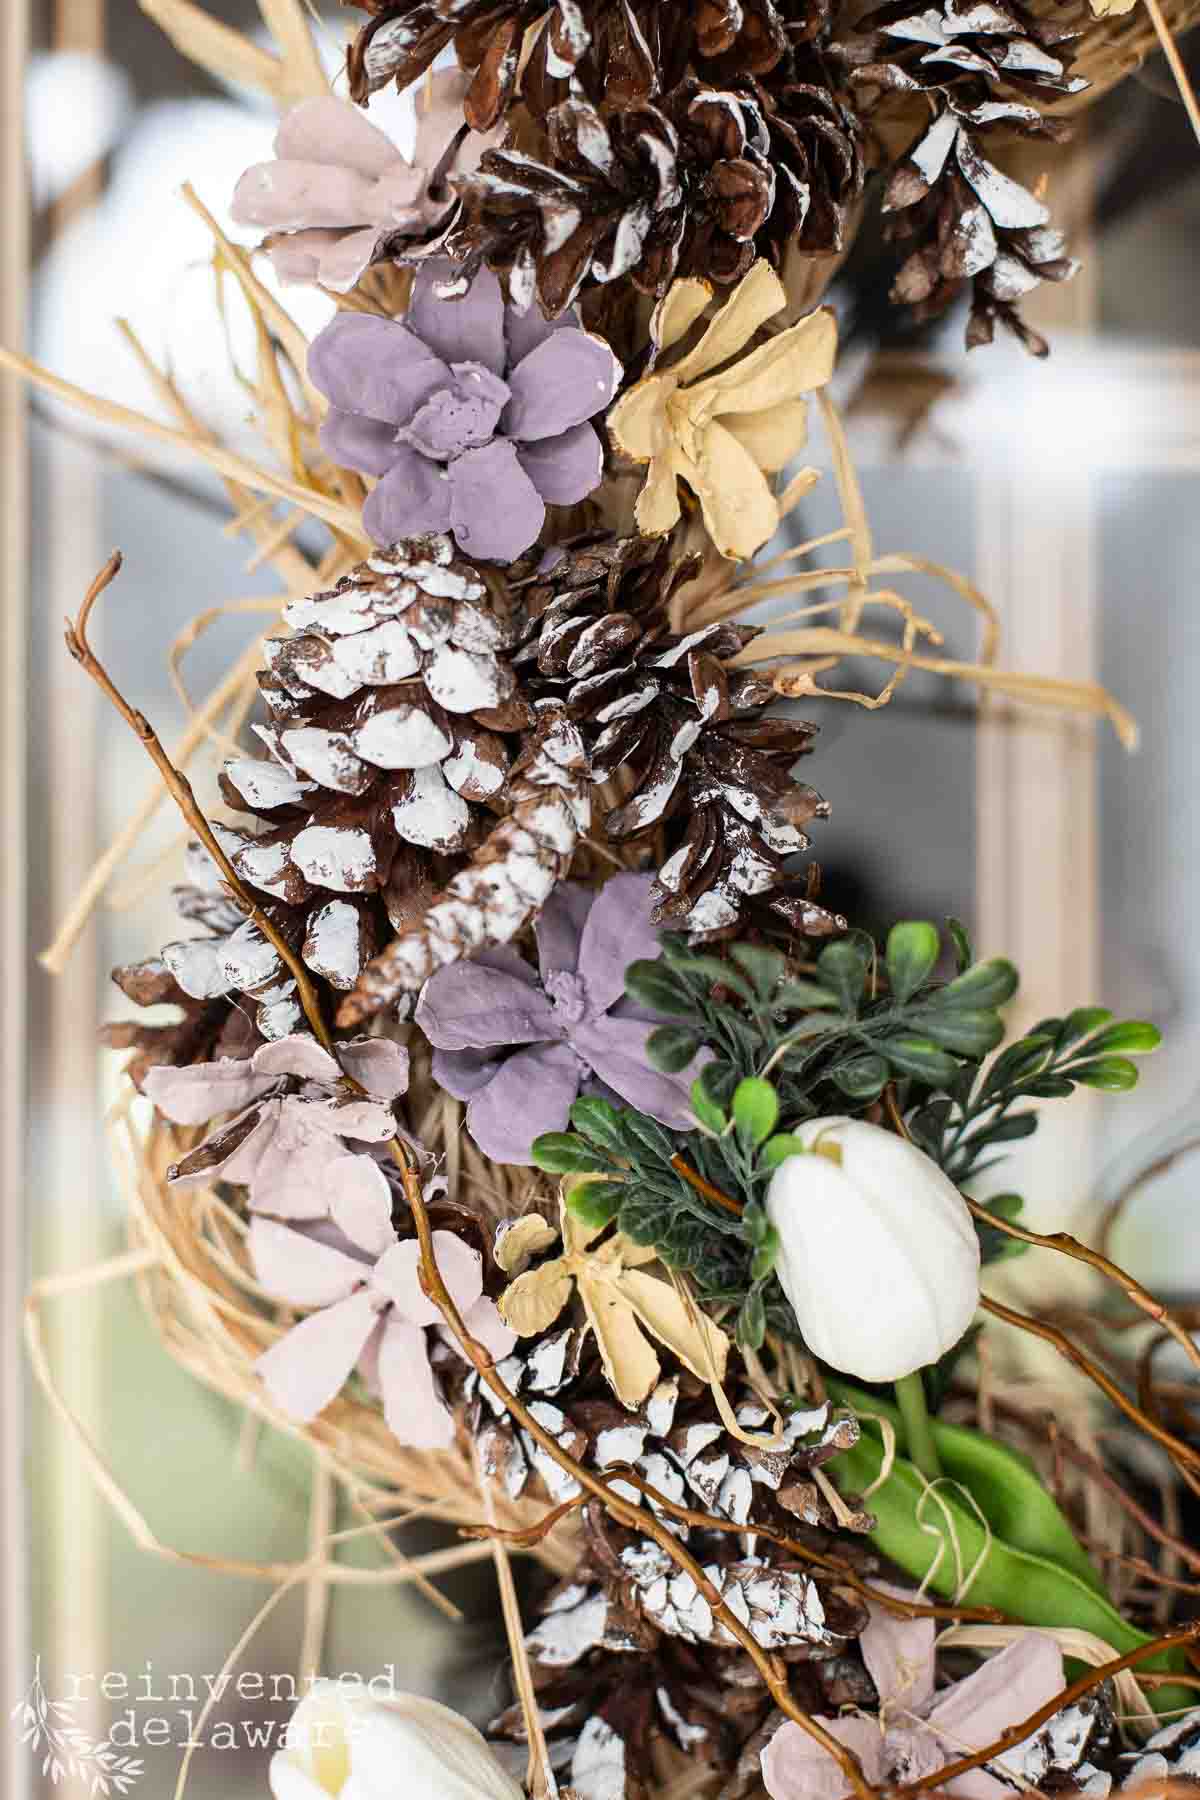
It was easy to paint the pine cone flowers in the soft pastel colors. I used a small artist’s brush to get into the nooks and crannies of the pinecone flowers. Colors included a soft pale pink, a light yellow, and a soft lilac. I will include the paints and other craft supplies I used for this DIY wreath later in the post for you.


create a twig birds nest
While the paint dried, I created a little bird’s nest using fresh curly willow branches from our yard. It didn’t take many branches because this birdnest is small. It’s easy to create by simply wrapping the lengths around and through the opening. It’s sorta of like tying a knot. Next, I added a few loose branches here and there to create a full and wild look to the birdnest.
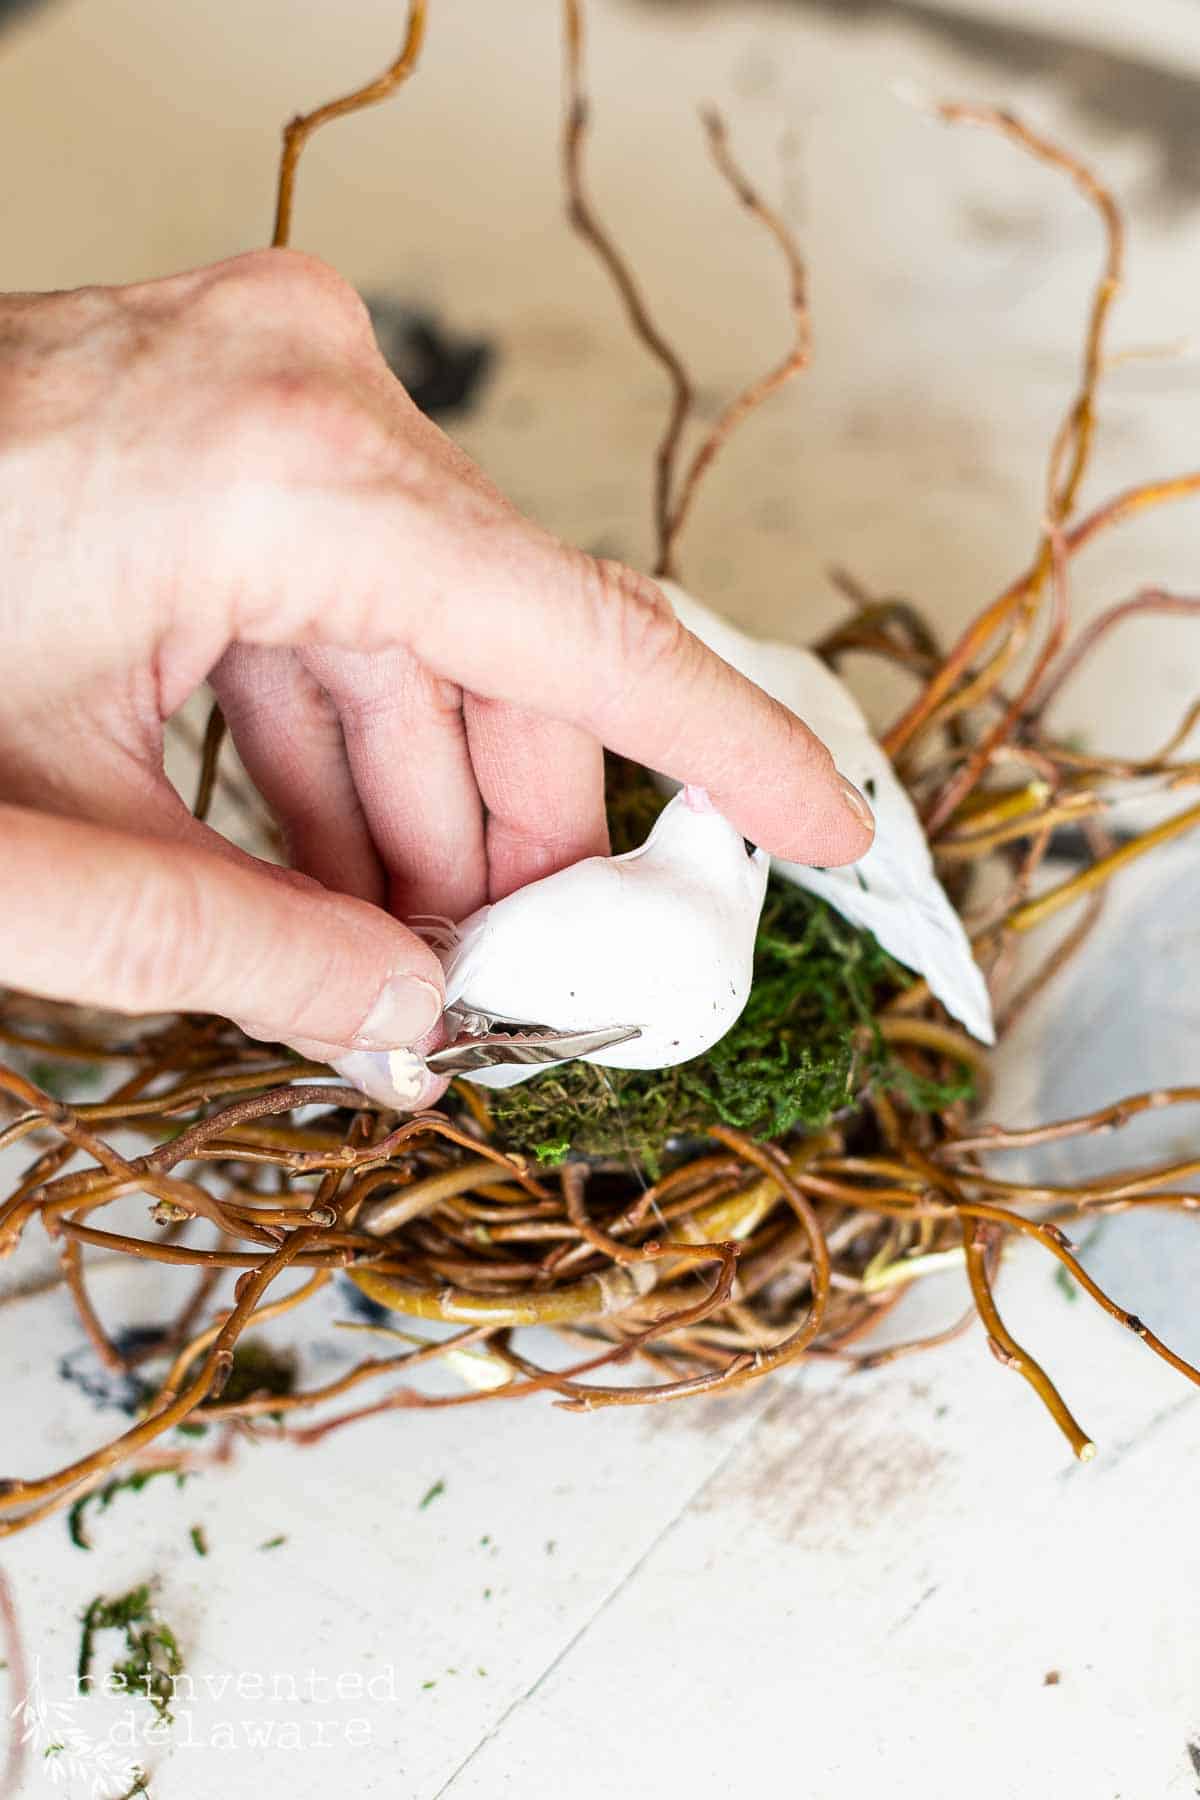
Next, I glued on a small amount of preserved moss in the center of the birdnest to cover the opening. Then I attached one of these sweet little birds to the nest. The birds have a metal clip on the underside of them so attaching them is simple and they can be reused in a different project when I am finished with this spring wreath.


add real-touch spring tulips
To add another spring touch to this wreath, I added a few real-touch faux tulips. Have you seen these artificial flower stems that have become so popular lately? They look like fresh flowers in real life. Spring flowers have never been easier! I bought two packs of these faux florals because each bloom is so pretty and lifelike!
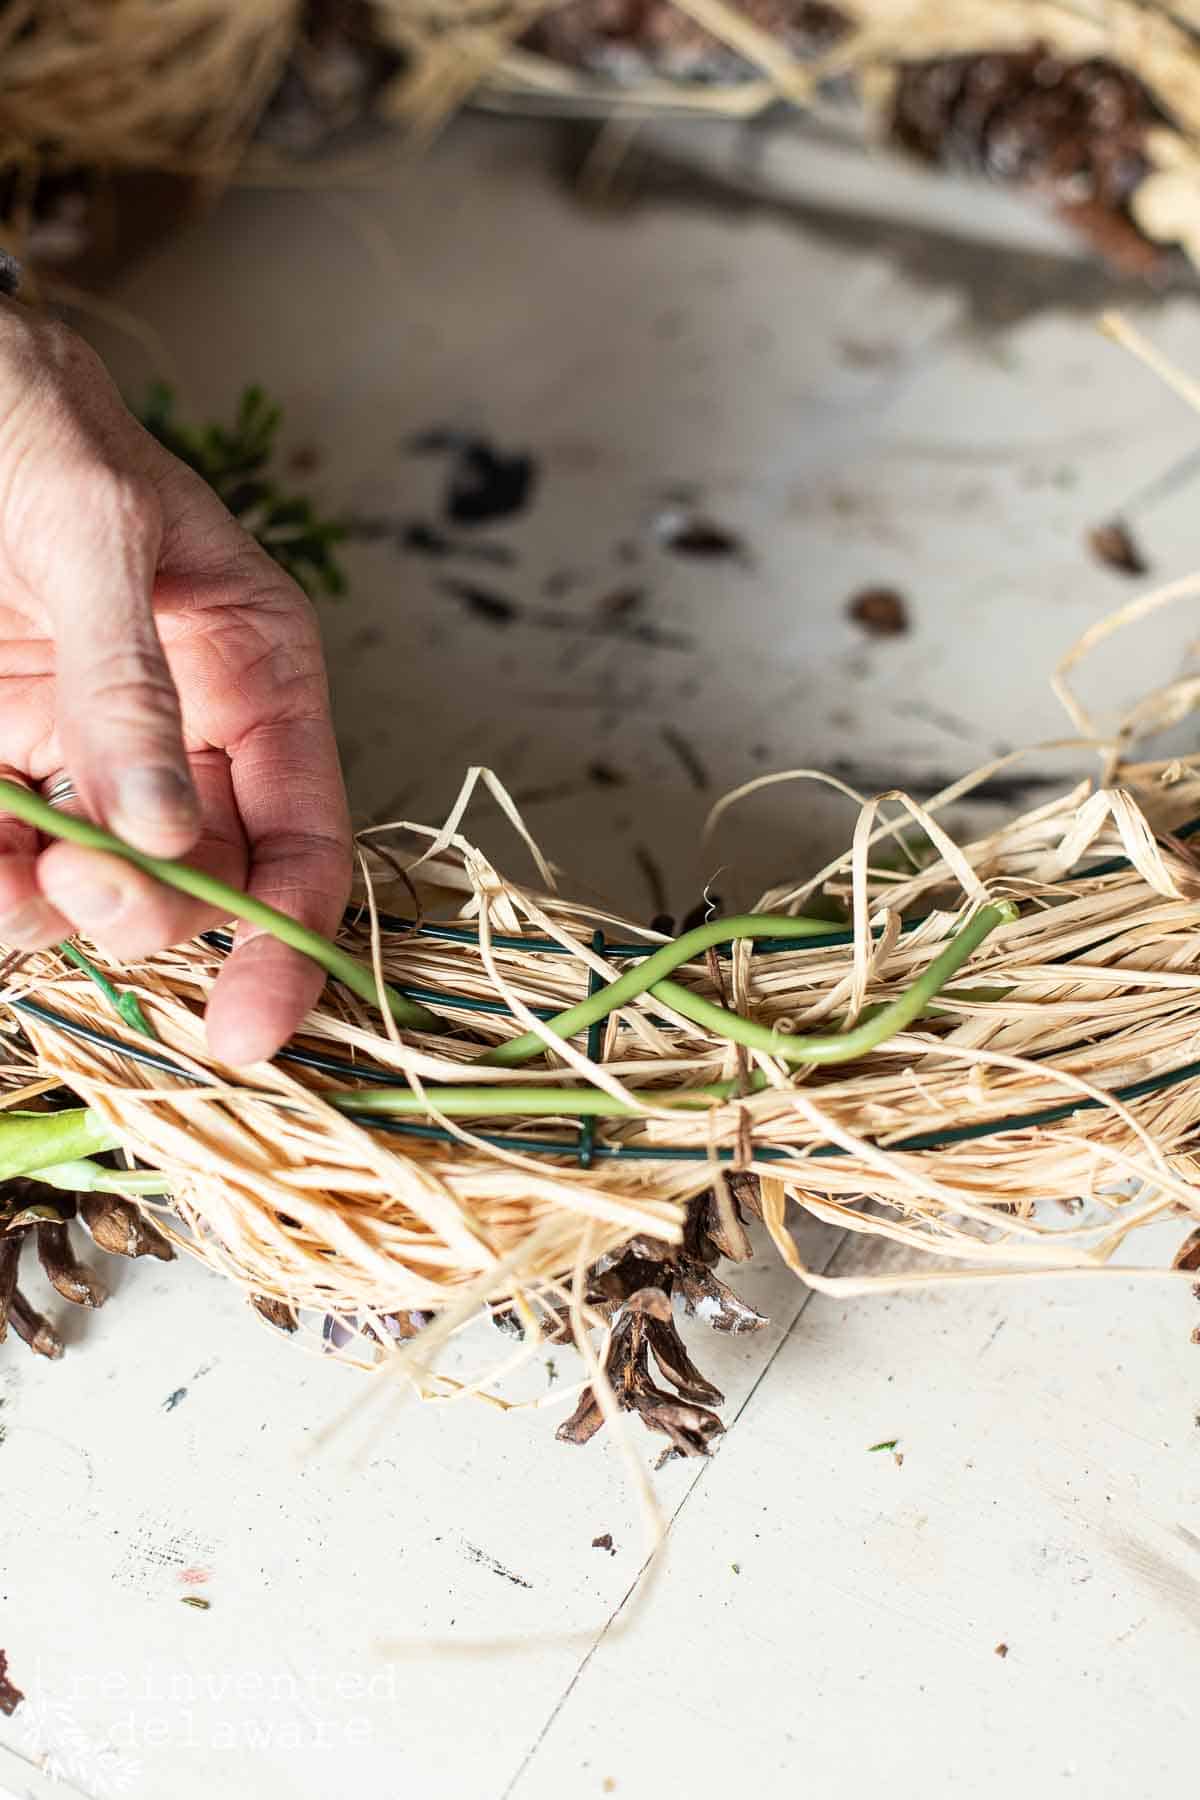
Just as I did with the faux greenery, I stuck the stems into the wire frame and then from the back twisted the wire stems around to help them grab the wire frame. Doing this is a great way to repurpose the flowers for another project when you are finished with the Easter wreath. Easter crafts can be expensive so it’s best to get several uses out of supplies when you can!
The bird’s nest is attached by using this thin craft wire. It’s covered in brown paper and disappears into the wreath. I keep a spool on hand and use it in other DIY home decor projects. It’s a great addition to my craft room supply cabinet!

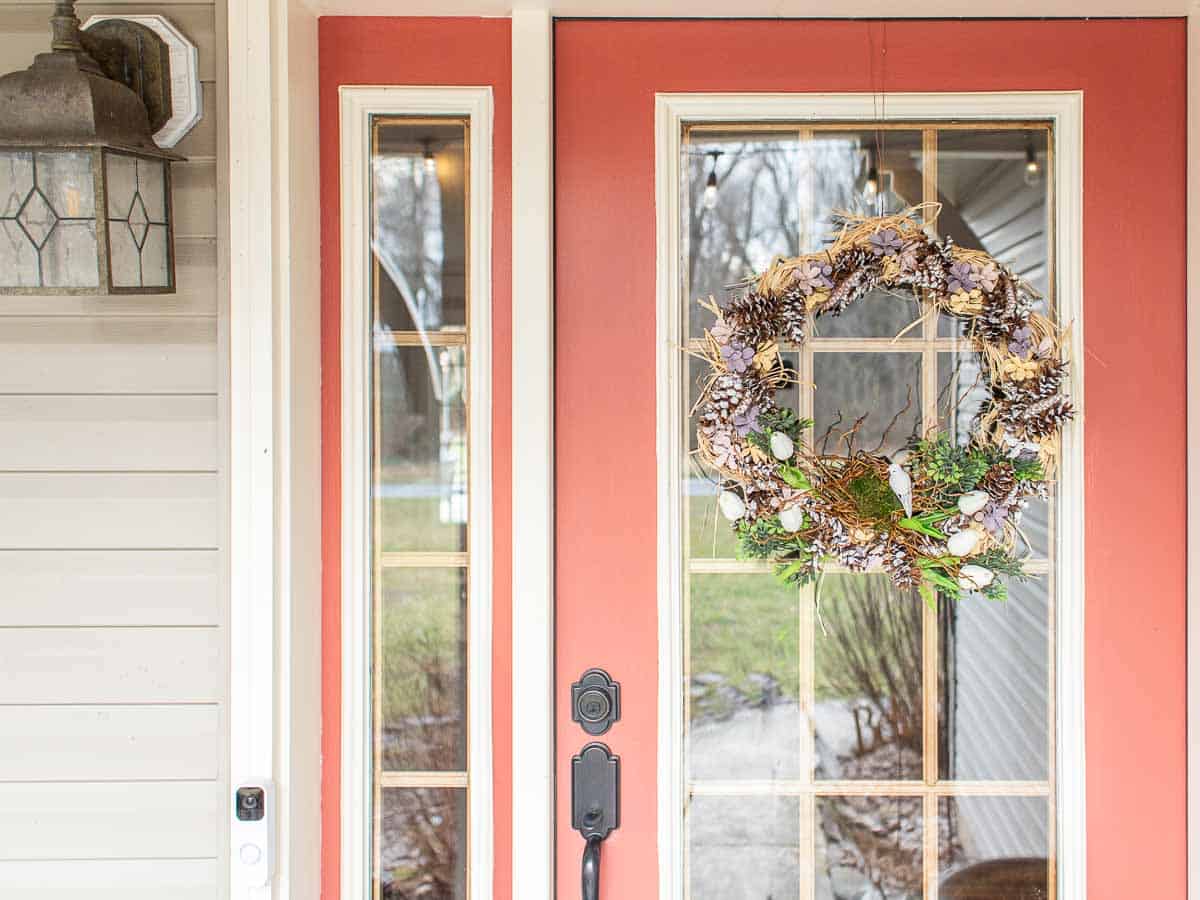
hang a front door wreath
I used the same wire to create the hanger for this wreath. Simply measure the amount you need to hang the wreath in the spot you want. Cut double the length with some extra for wrapping. Then wrap the wire through the wire frame and secure it. This creates a large loop.
I have a tiny little nail tapped into the very top of the door and it is tapped in just enough for the wire loop to go around and still allow the door to close. The wire hanger is the same one that has been on this DIY wreath since last fall so that wire is durable!

add Easter eggs
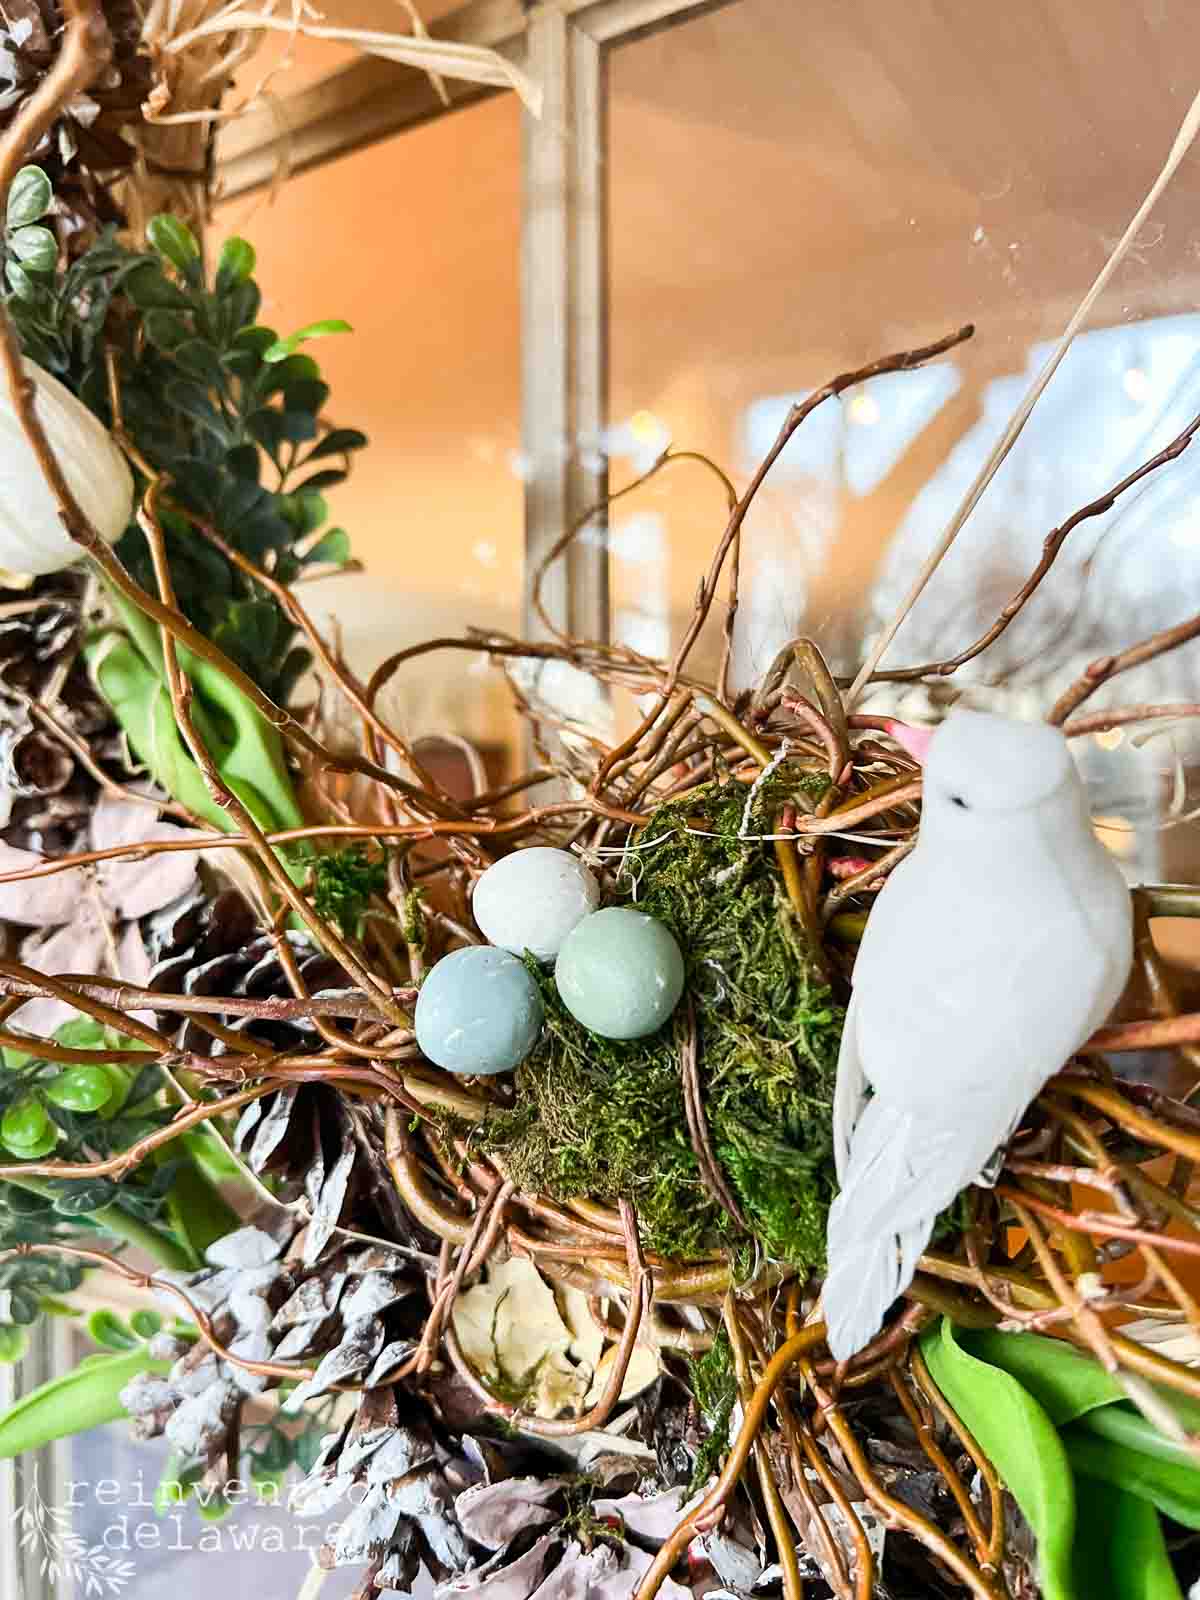
After hanging the wreath on the front door, I realized I forgot to add eggs to the nest! I quickly made some tiny air-dry clay eggs and allowed them to dry. Then I painted them and hot-glued them into the nest. The eggs looks like quail eggs and are the perfect addtion, don’t you think?
Easter wreath ideas
Let’s chat about some options for your Easter door decorations. My style is simple so this plain wreath is perfect for our home. It’s a good use of a previously made wreath and I enjoyed making it. That’s important, right?

plastic eggs
You can use store-bought plastic eggs as the centerpiece at the bottom of the wreath in place of the bird’s nest. Check out your local thrift stores because people get rid of them all the time! Use E6000 to secure them to the wreath because even a little hot glue would melt them.
bunny wreath
Look in the craft stores for little bunnies and tiny easter baskets. Add them to the bottom section in place of the bird’s nest. It would only take a few to create an adorable Easter door hanger!
traditional Easter wreath
Wrap the wreath in a wide ribbon in purple colors. Make small crosses using twigs and twine and attach them to the wreath. Add a pretty bow in white and you have yourself a lovely wreath!
upcycle bunny decor
If your Easter celebrations include the Easter bunny, look for a thrift store stuffed bunny and attach him to the wreath using the brown craft wire. Look for a bunny rabbit that is small so that it goes with the scale of the wreath. Once Easter is over, donate the bunny back to the store or find someone who would enjoy a little bunny snuggle!
thanks for being here!
I hope you are enjoying this project! Let me know if you have any questions. Or leave me a comment to tell me about your project and ideas!
thanks, Cindy 😀

diy spring wreath ideas
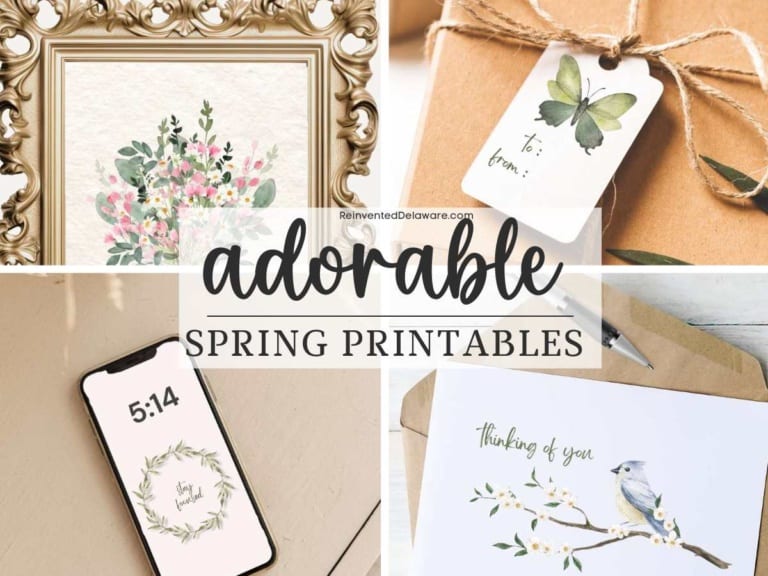
Here are some ideas to inspire you to create your own spring wreath!
- Lynne made an adorable Spring Floral Wreath over on her blog.
- Robyn is so creative and I know you will enjoy her Easter Door Decorations!
- Country Living Online Magazine shares some great ideas for DIY Spring Wreaths!
Easter celebrations
Before we go, I thought I would share some thoughts about Easter. I realize we might have different ways of celebrating this spring holiday but I wanted to share why I picked the ornaments for my Easter wreath.
The dove represents peace, salvation, and above all resurrection. The dove was sent to Noah to show that life had been reborn after the flood. The dove was used sacrifically under the Mosiac law before Jesus was born. A dove descended upon Jesus after His baptism symbolizing God the Father’s acceptance of Jesus, the One who offers peace, and salvation through His perfect sacrifice.
The eggs represent new life through birth.
My wreath is a reminder to me and my family the true meaning of this Easter season. We can enjoy and celebrate with festivities, decor, food, and family gatherings. Having this wreath is a tangible reminder to help me to enjoy the season in my heart.
Hope you have a Happy and Blessed Easter Season. ♰

Wreath Tutorial
watch to see how this fall wreath is transformed into a winter wreath!


supplies
- tea rose chalk paint
- rebel yellow chalk paint
- morning sunrise chalk paint
- craft paintbrushes
- wire wreath form
- brown craft wire
- faux tulips
- faux bird
- air dry clay (for eggs)
Thanks for joining our journey!
Thanks so much for joining us for this post! Join our journey so you don’t miss any of the fun projects, tutorials, and inspiration that we share with you each week! You can follow us on Instagram, Facebook, and YouTube. We share even more inspiration on Pinterest!
click below to purchase supplies!
Visit my Amazon Storefront!
Click the button below and head over to our online shop on Amazon!


Cindy Rust
Cindy has been decorating her home with thrift store finds for 40 years. She is an avid thrift store shopper who loves to makeover the items she finds into vintage-inspired home decor and furniture. When she isn’t thrift shopping or painting a piece of furniture, you can find her making homemade butter, working in her garden, or painting with watercolors.


Hey Cindy! 👋🏻
I love all the lovely touches you added to the Spring wreath. You had me at tulips. My daffodils are in bloom and I’m ready for them. Thank you for sharing your beautiful wreath and I hope you have an early Spring. Pinned 📌 xo, Do
Daffodils already?? That’s amazing Do. But then again you are in the great state of Texas! Happy Spring and thanks for pinning!
Great post
Hi Wanda! I’m so glad you enjoyd the post!
I love all of these wonderful ideas for Spring Cindy. That twig birds nest is the cutest!!
And that little birds nest was free! The best kind of decor 🙂
Your wreath is darling, Cindy, and I love the color you chose to paint the pinecone flowers. Happy almost spring.
I’m so ready for spring Wendy!
A wonderful post
I love recycling the wreath so you don’t have to store it
Truth!! I am not a fan of storing stuff and this is a great way to recycle a wreath. I’m looking forward to switching it up for summer!
So happy I belong to this site
Your projects are truly amazing and inspiring
Wanda, that makes my day! I’m so glad you are here and finding inspiration 🥰
Love the idea of changing the wreath from season to season. I think Spring is my favorite to date. I’ll be looking for the Summer update. Thanks for sharing. 🙂
So pretty Cindy! And how clever to challenge yourself to use the same wreath, year round, just giving it a restyle with each season. Now, I can’t wait to see what you do for Summer