
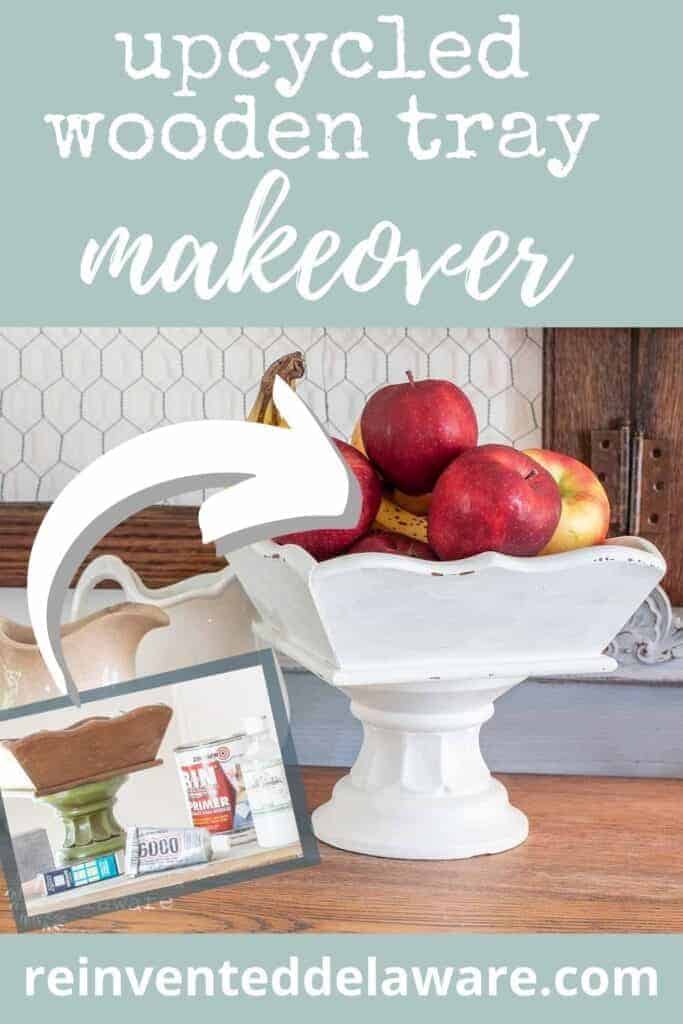
The Easiest Upcycled Wooden Tray Makeover
Are you looking for the easiest upcycled wooden tray makeover that has actually has a purpose? Today, I am sharing the cutest wooden tray makeover ever!
The following post may contain affiliate links. That means if you click and then buy something, I will make a small commission at no additional cost to you! Thank you for supporting my blog. full disclosure here.
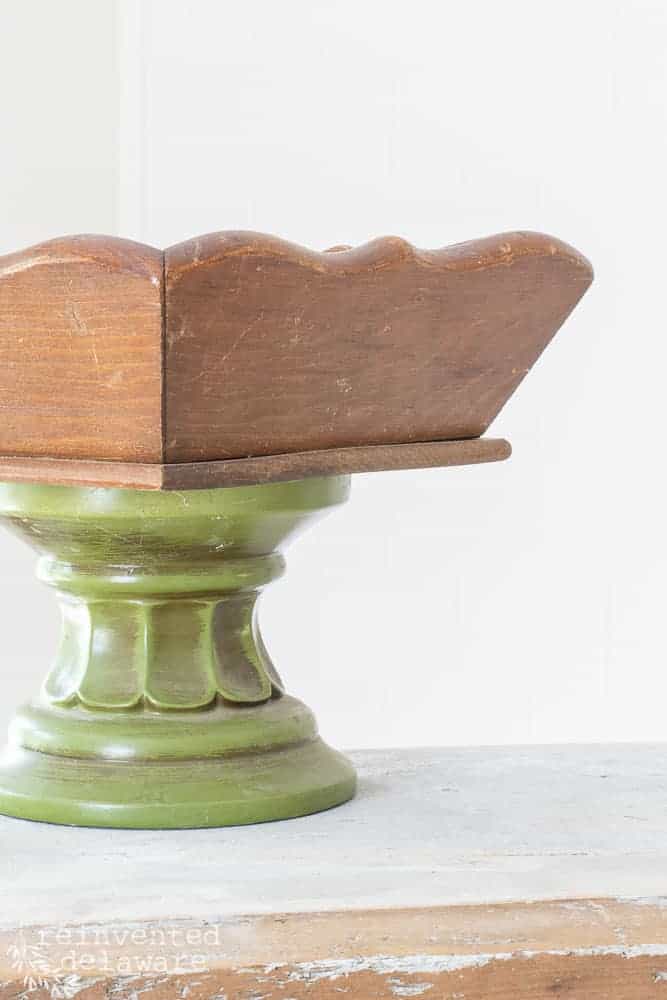
thrifted wooden tray
You’ve probably seen trays like this at thrift stores. They have slanted sides and are made from thin wood. Sometimes you can find them with country-style paintings or decals with daisies or some other country motif.
We seem to come across them often.
We also come across pillar candle stands like the green one you see here.
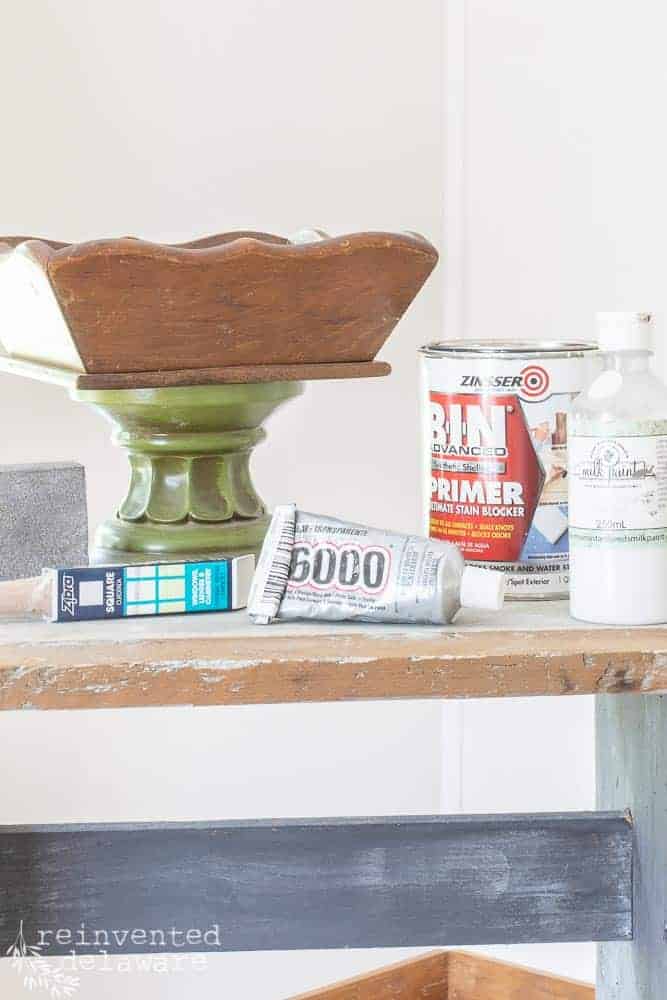
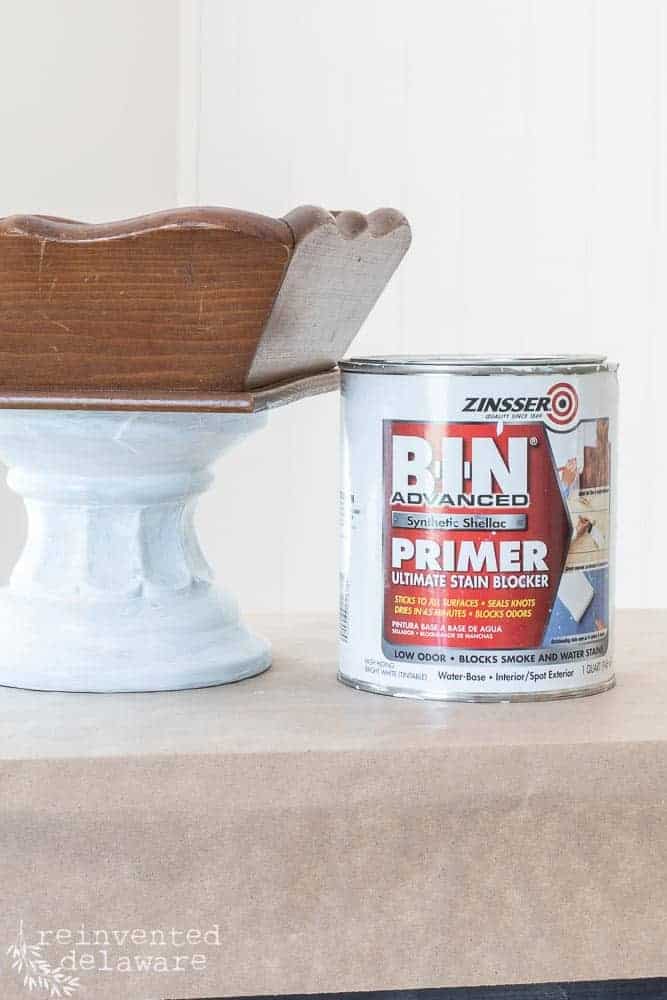
supplies for wooden tray makeover
Let’s take a look at how to turn these two unrelated and out-of-style home decor pieces into something useful and current with today’s style.
Here are the supplies you will need for this easy upcycled wooden tray makeover:
- thrifted wooden tray (mine is about 9″ square and 2-3″ deep)
- thrifted pillar candle stand (mine is about 5″ tall)
- E6000 Glue
- Zinserr Shellac Based Primer
- sanding block
- Zibra Square Paintbrush
- Miss Mustard Seed Milk Paint (I used Ironstone)
- Miss Mustard Seed Hemp Oil
- blue shop towels
- micro-fiber cloth

what to do with an old wooden tray
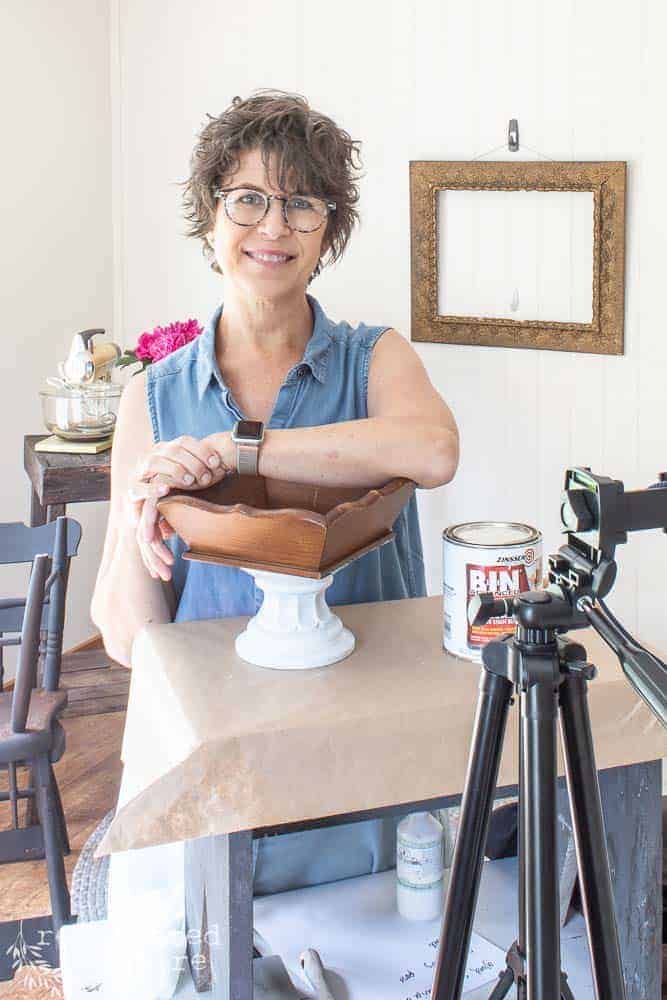
Start by gluing the thrifted tray to the thrifted pillar candle stand with E6000 Glue. E6000 glue sticks anything to anything and it is a staple in my workshop.
Try your best to center the candle stand with the tray. You can measure if you like, I just eyeballed it 🙂
Place something heavy on top of the tray and let it dry overnight.
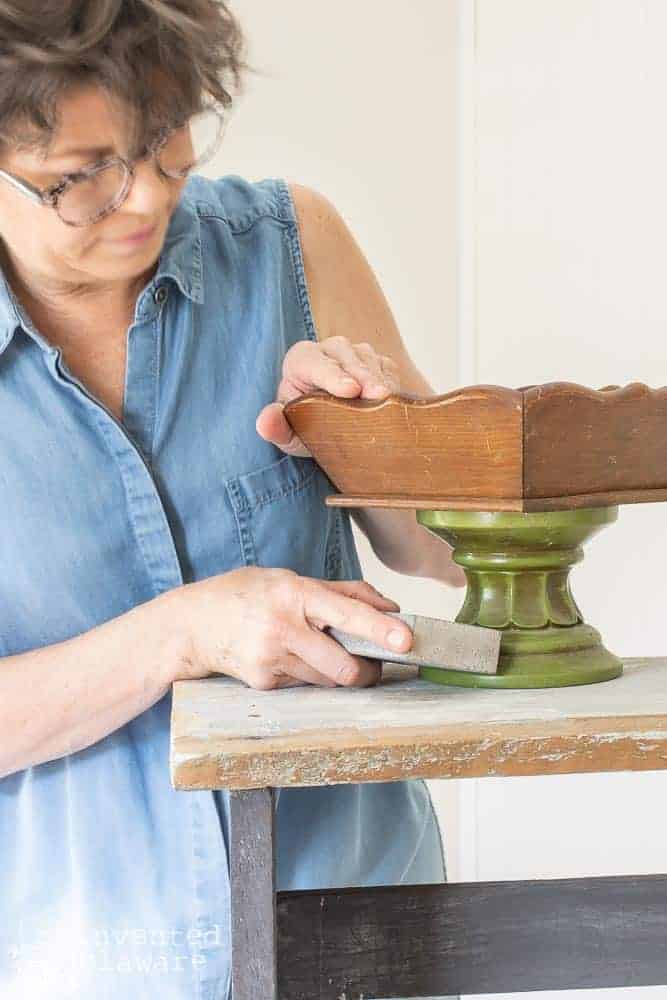
The next day, use the sanding block to scuff sand the surface just enough to rough it up a little bit. This will only take a minute, you don’t need to completely remove the finish on either section.
Afterward, wipe it down with a damp microfiber cloth.
priming is optional
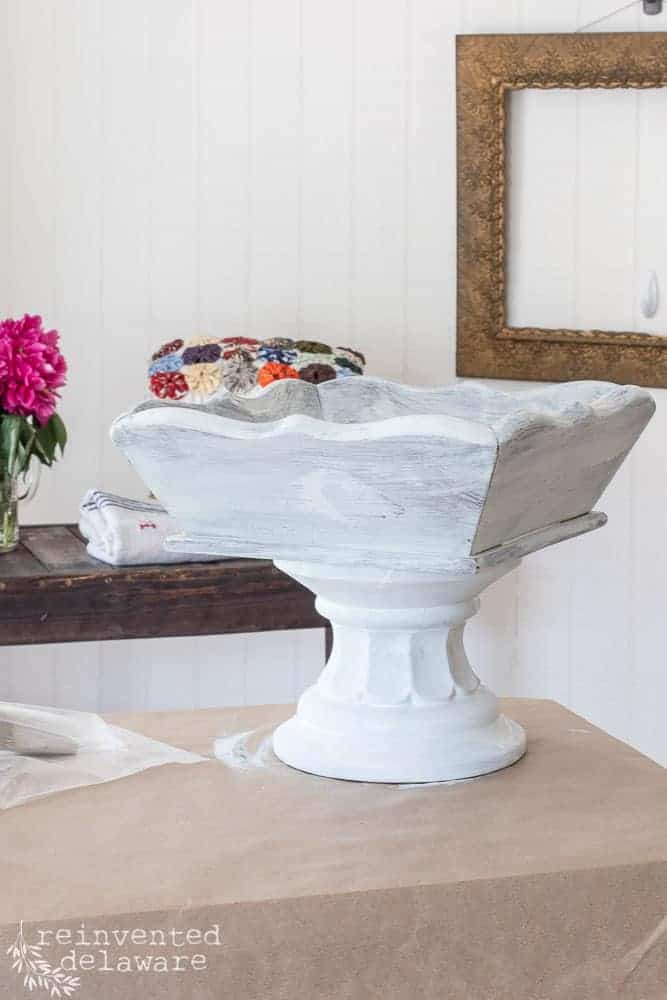
The next step is to prime the base. But let me mention that this is optional.
The thrifted pillar candle stand that I have is hard plastic and painted in a yucky green. I wanted to be sure the green wouldn’t show through the final paint color. Priming was the best way to prevent this
You can also prime the upcycled wooden tray for this makeover. I wanted the chippy finish to show some of the wood so I did not prime it.
Zinsser Bin Shellac Based Primer is my go to primer. It sticks to anything and anything sticks to it!
painting video
My friend Anna from Skylark House did an Instagram Live for this project. We have a lively discussion each month about our love of all things vintage!
Be sure to pop over to her site – she has some amazing vintage finds!
You can see our live chat about this easy wooden tray makeover below. We’ll be chatting about using Miss Mustard Seed Milk Paint among other aspects of this project!
how to refurbish a wooden tray
The upcycled wooden tray needed two and a half coats of paint. I say 2 1/2 coats because the last coat was more of a touch-up coat.
Milk paint dries to a chalky feeling finish so I used my worn-out sanding sponge to smooth the texture just a bit. Some of the paint chipped off giving it an antique look.
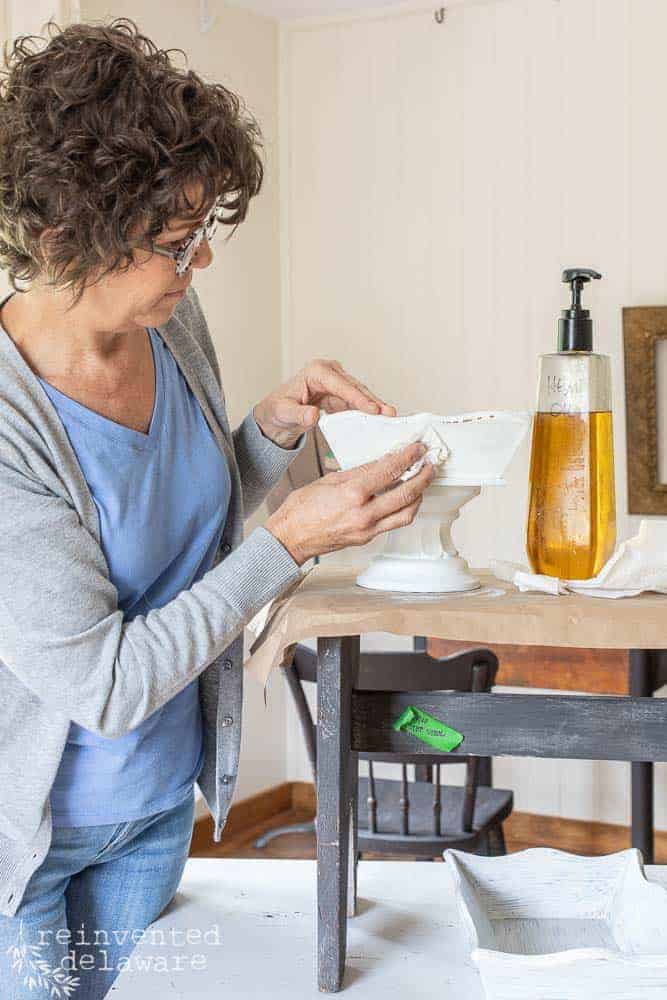
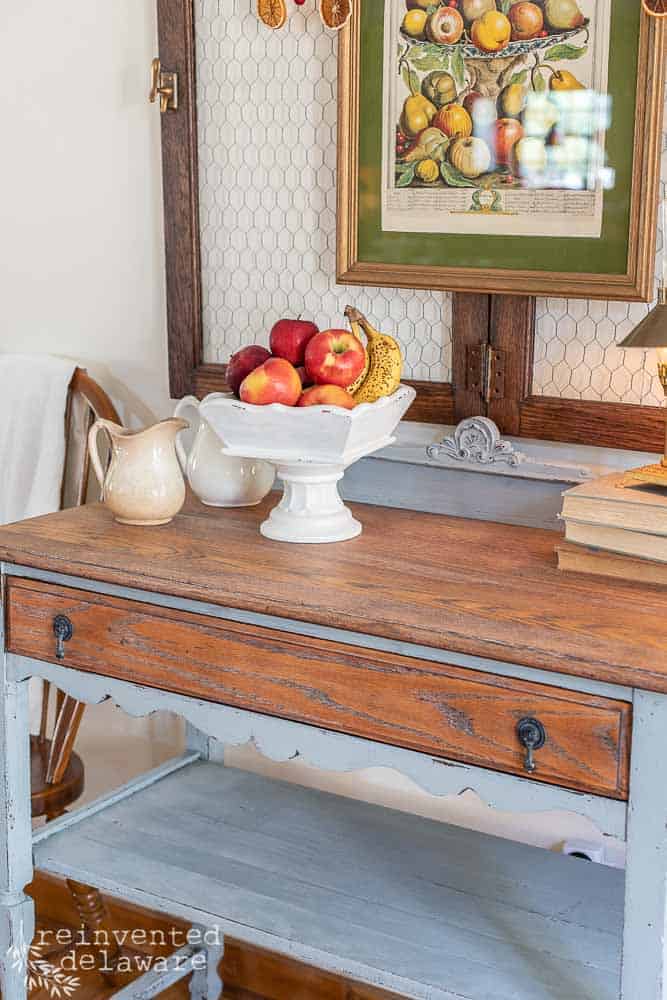
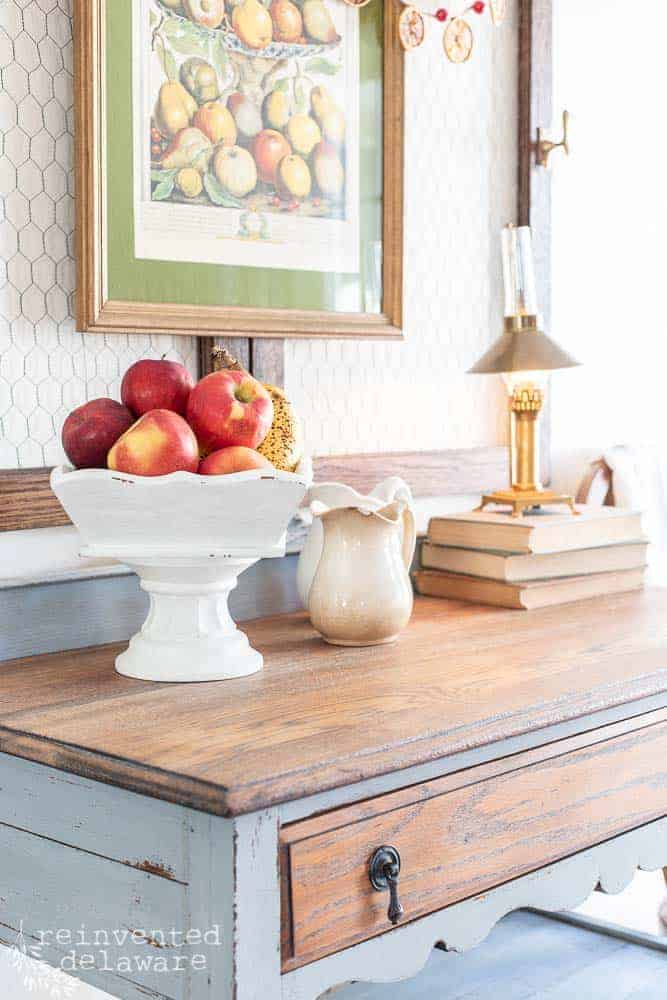
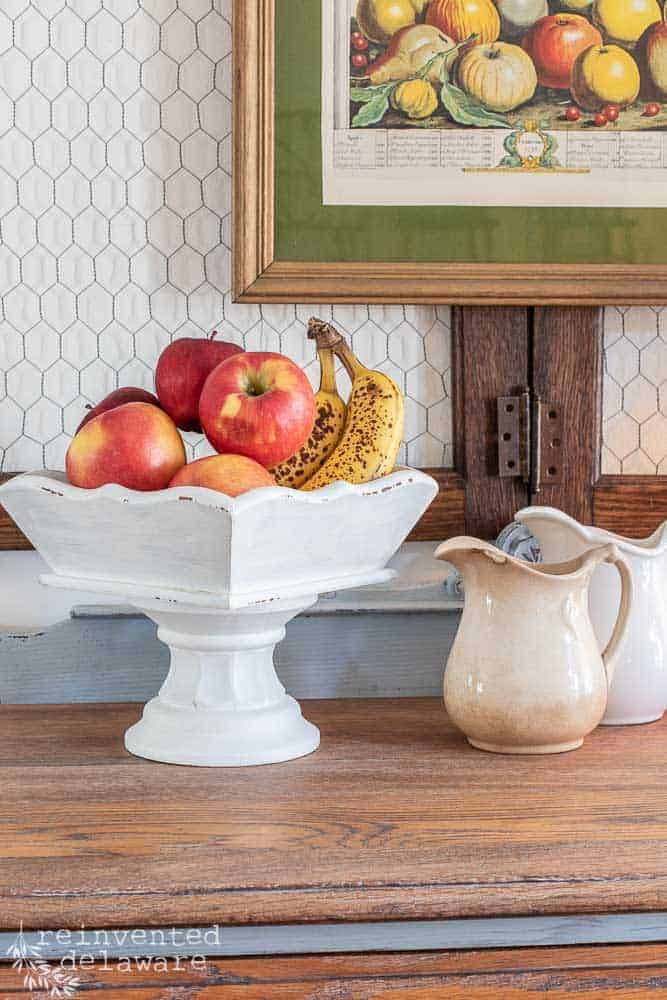
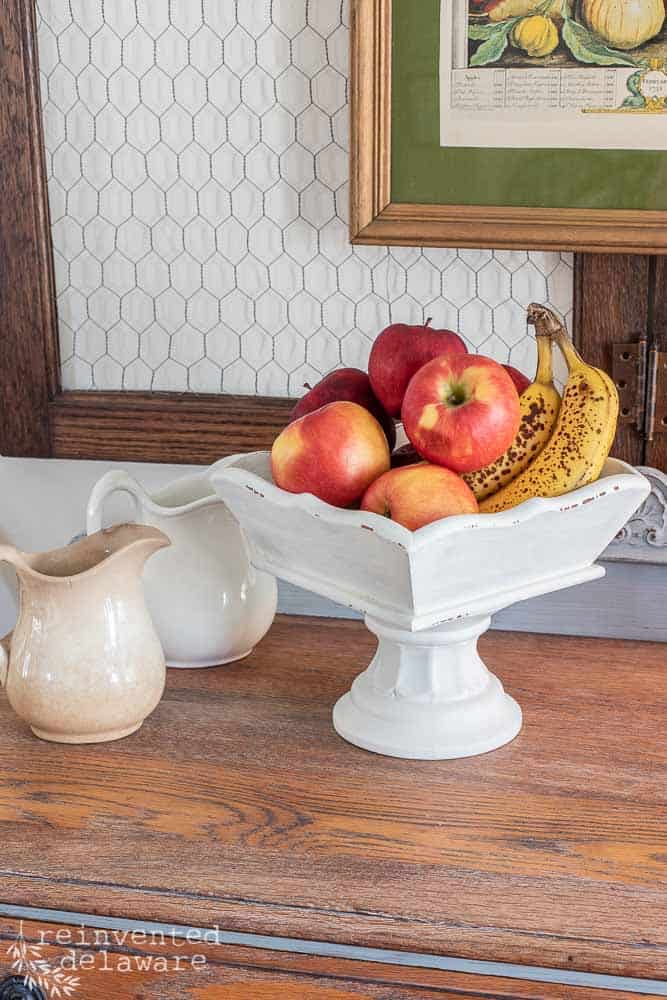
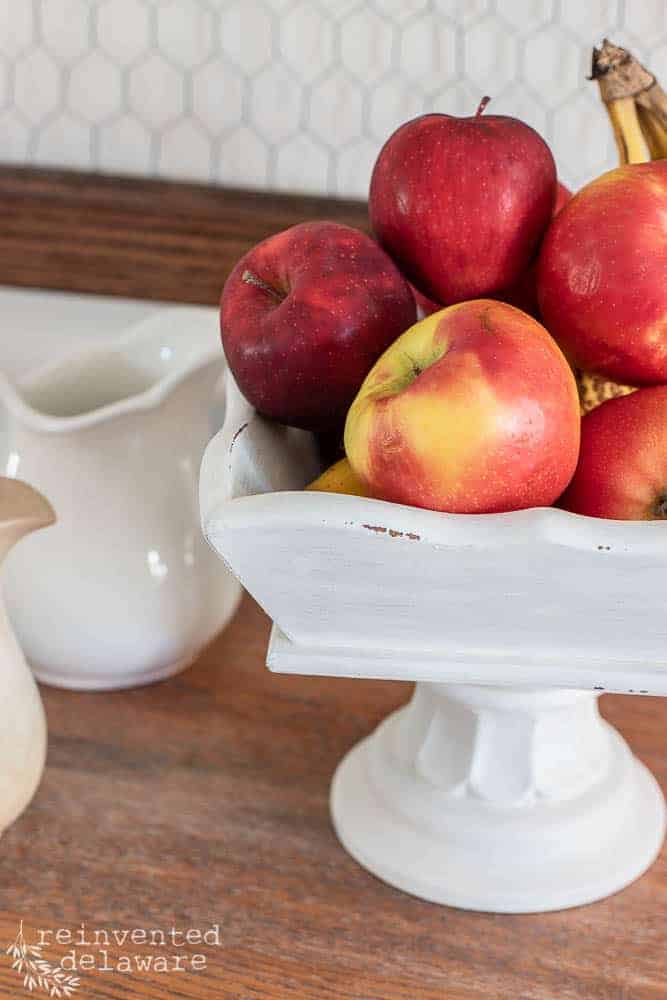
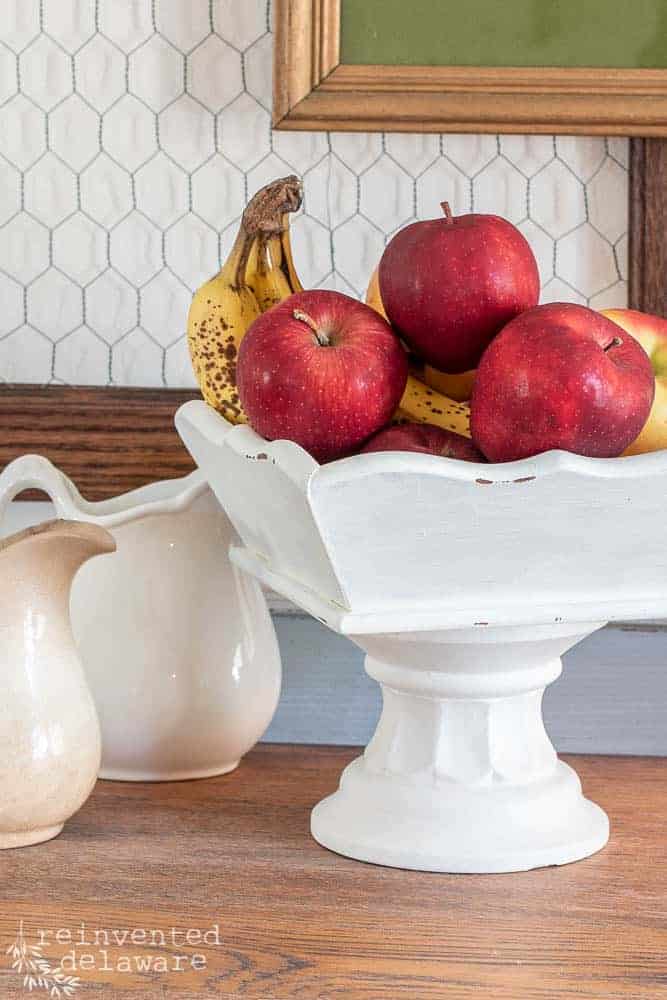
To seal the upcycled wooden tray, I used Miss Mustard Seek Hemp Oil. Wipe it on and wipe it off. It soaked into the wood and once it has cured for a couple of weeks, you can safely use this pedestal tray to hold fruit.
how to use an upcycled wooden tray
Doesn’t it look so cute holding apples and bananas? We have made several of these pedestal-tray-thingies and our customers have loved them!
I have mine sitting on our dining room buffet near a botanical-style fruit print.
Let’s think of some other uses for this upcycled wooden tray!
Imagine with me, Ok?
Maybe it could be used as a candle holder. Put a jarred candle in the center and add some greenery around the candle.
Fill empty mason jars with candies like M&M’s (my faves are peanut M&M”s!), individually wrapped Twizzlers, and bite-size chocolates like Dove Chocolates!
Ok, so I definitely have snack foods on my mind! Let’s say that this wooden tray would be perfect to serve homemade cookies!
Can’t you see a stack of chocolate chip cookies in this wooden tray?
Or maybe peanut butter cookies, sugar cookies???
O golly, I need to stop!
The upcycled wooden tray could be used in the bathroom too.
Cotton balls, Q-tips, and handmade soaps would all look nice in this pedestal tray
your ideas!
Share some of your ideas for this makeover in the comments below! I would love to hear how you would use it in your home!
join our journey
Thanks so much for joining us for this post! Join our journey so you don’t miss any fun projects, tutorials, and inspiration we share with you each week! You can follow us on Instagram, Facebook, and YouTube. We share even more inspiration on Pinterest!


I am always amazed how small transformations make for big impact. Loved your staging again, you have such great style!
And you have great style in your yard Melba! Thanks!
Just watched your YouTube vid with Anna, then jumped over to your site for the detailed information you spoke about in the video. What a cute idea! I see these items at a local auction I go to weekly and now I’m inspired to do this project! Thanks for the great and entertaining vid as well as the details on your site❤️
Yay for being inspired! Aren’t those little trays so cute! Happy Thrifting!
What a great idea! It turned out so cute!
Thanks Danielle! Have a great day!
Love this and the red apples pop. I’m with you when it comes to upcycling and making something from thrifting.
Yes for thrifting kindred spirits! Thanks for stopping by!
I love projects like this that use unspectacular items to create something new and charming!
Yes! It’s so fun to turn something ordinary into something useful and interesting to boot!
What a very cool idea. Can’t wait to try it!!!
Tag me when you try this project! I would love to see yours!
This is so cute. The tray on its own was fabulous but with its stand, it takes it to a whole new level.
New level ;). Most definately! Thanks Carol for stopping by!
I love this creative idea! This is perfect to use for decorating in any season.
Isn’t it so cute?? And yes, Paula, it could be used year-round! Have a great weekend!
Oh, this DIY pedestal tray turned out so pretty. I love the styling too – gorgeous!
Thanks Jayne! Paint is amazing, isn’t it??
Oh wow, this makes me want to get to the thrift store something awful! I love how this turned out. Super cute. We are featuring it at Farmhouse Friday LP this week. Thank you for linking up. Hope you can link up again soon!
Cindy, thanks so much for the feature! I am honored! Happy thrifting!
This is super creative and so darling, Cindy! I’m going to be on the hunt for pieces I can use to recreate the look. Beautiful job!
This is so clever and super cute! I’d love for you to share it at the Sundays on Silverado link party, too!
Niky @ The House on Silverado
Thanks Niky! Isn’t it a fun and easy project?? I will hop over to your blog and check out the link party!
So cute Cindy! I’d like the M&M’s in it myself! 🙂 And I so need to try out that glue! Thanks for the great tutorial!
E6000 is the best glue! Thanks for stopping by today Barbara!
Cindy,
I love this idea. It looks so great with your other vintage items. I’d like to share a link to your post on my Sunday, Dirt Road Adventures. I hope that’s ok. Thanks for your inspiration. I pinned as a reminder.
I love easy upcycle makeovers and this one turned out soooo cute! The tray and candle stick look like they were made to go together.
A match made in heaven! Thanks for stopping by Linda!
Love love love all trays! And a tray on a pedestal takes them to a new level (haha)…this is such a great project, Cindy, with a zillion possible uses (I’m in favor of a tray full of cookies, myself!)
Bake the cookies, and I will bring the coffee! And of course the tray! 😊