
Bullet Journaling for Small Business | Part One
Today I want to share with you some of the ways I use the Bullet Journal planning system in my small business of furniture restoration and reinvention. Before I do that, let me first tell you about the system for planning and how I found out about it.
Each year for the last 25+ years I have used a planner or a datebook to keep our personal and family life organized. Our young children were going in all sorts of directions with sporting events and school activities. On top of that, my husband worked three different shifts – changing each week. I had a part-time job along with being a home manager of all of the chaos. Things could get crazy!
Many of you have experienced similar if not the same kind of chaos and you know that it can become difficult trying to remember it all and keep it together! A close friend recommended to me (thanks Dawn!) that I start using a datebook to keep everything my family was involved in written down in one place. I can’t believe I didn’t think of it but I certainly am glad she thought of it for me!
That is what began a life long journey of looking for a new datebook each fall for the next year. And yes, I started that early because it was always hard to find the perfect one! In fact, it didn’t exist. Usually by March of the new year, I was sick of my current planner. But I would press on and use it throughout the year.
When I started my own business in late summer of 2016, I found myself overwhelmed with business management. There is so much to consider when running your own business and it’s just my husband and I doing this thing! I don’t have a personal assistant, a furniture moving crew, an administrative assistant, a bookkeeper, a buyer or a social media manager. Don’t think I am complaining – I am not! It is just a lot to keep up with and a lot to accomplish 🙂 I love my job!! I just needed some help.
Searching for that perfect business datebook began in November of that fall. Turning to Pinterest to search for the perfect datebook, I came across a You Tube video by Ryder Carroll explaining his fairly new system of planning and accomplishing the tasks he wanted to complete. I strongly recommend you watch the short video. He gives a clear explanation of the system he created.
The system is customizable and that is what I love about it. I can change it as I go throughout the year – I am not stuck with only one way of planning. Using a blank notebook means that I can fill the pages however I like! Pre-printed planners have it all laid out for the user but what if I don’t want all of my Month-at-a-Glance pages at the beginning of the planner? Or what if they don’t give me enough space to plan my day? What if I need to have an ongoing list of inventory? Or an ongoing list of blog post ideas? Traditional planners didn’t offer the freedom this obsessed planner-lady needed!
Enter my new employee. She goes with me everywhere, fits in my purse (she’s a little thing-only about 5 1/2″ x 8″), doesn’t complain when I make a mistake, likes any plan I come up with, always shows up on time, never takes vacation without letting me know, gently nudges me to do my monthly bookkeeping responsibilites, and keeps my massive inventory organized. She also helps me to keep my personal life organized by reminding me to do laundry, to go to doctors’ appointments, when to grocery shop and when to send birthday cards. Heck, she even tells me what to have for dinner! Yay for her!! She is the best employee I have ever had. Actually she is the first employee I have ever had 😉 and I don’t even have to pay her!
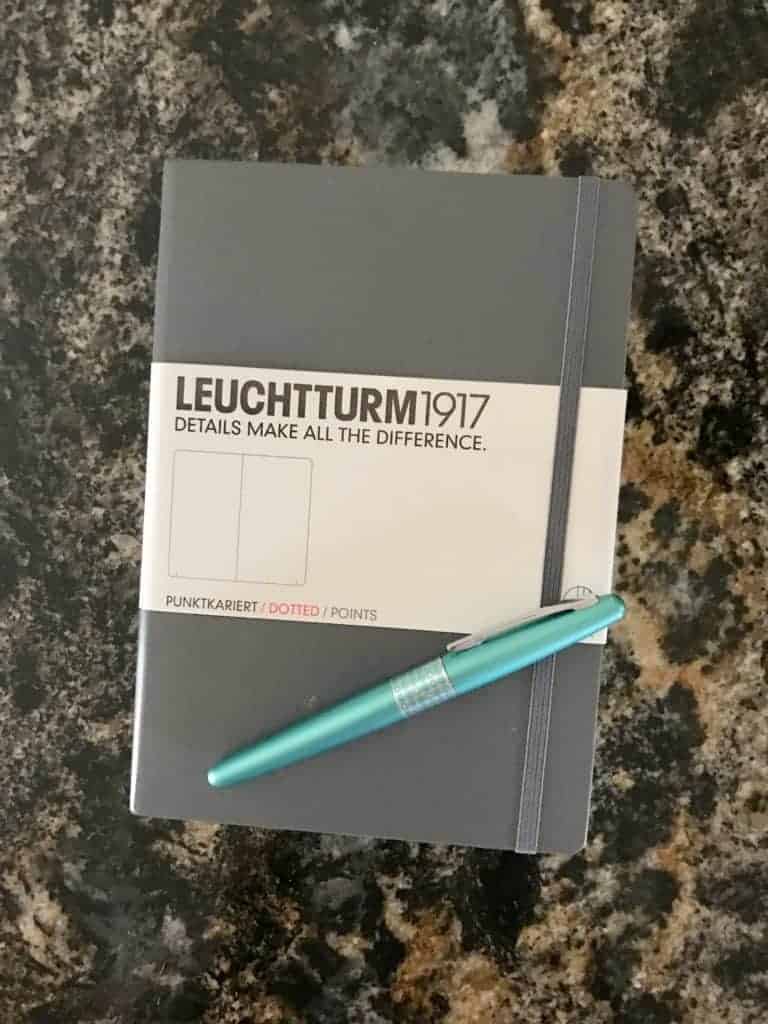
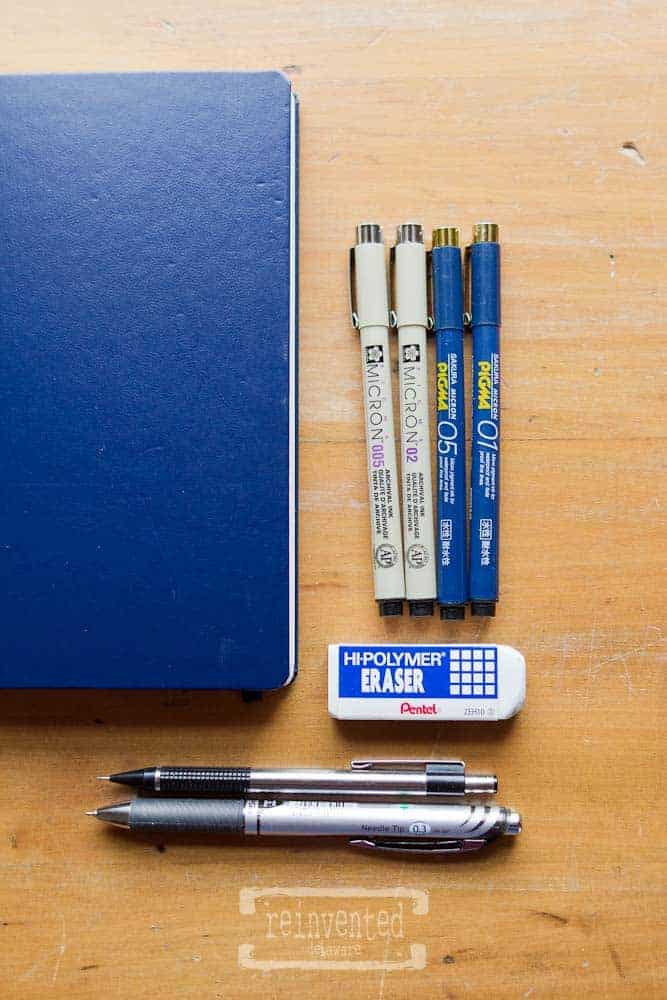
Here is my notebook of choice. Admittedly, I have only used this brand, so I can’t speak of other blank journals for this purpose. I love the Leuchtturm 1917 for several reasons. The paper is excellent quality that holds up after daily use. Each page has a dot grid that I use instead of a ruler to do my page layouts. There are 249 pages so I can get a lot of use out of one journal. They are relatively inexpensive considering how long I use the journal. Last year, I only needed one journal. This year might be a bit different because I am using it even more than I did last year. It has a nice elastic strap that can also be used as a pen holder. It also has a pocket in the back to hold the receipts I need for my business.
Let me just say that this is not a complete guide to starting a bullet journal. I am just showing the basics in this post but I plan on adding more posts about this subject.
There are four main components: The Index, The Future Log, The Monthly Log and The Daily Log. I have added The Weekly Log as well because I like to be able to see my week at a glance.
The Index is at the beginning of the journal – the first couple of pages. I don’t have a picture of mine, but basically it is the the first couple of pages labeled ‘Index’ at the top and then as I add new pages to my journal, I enter the page number and the title or explanation of that page. Kind of like a table of contents or a reference page.
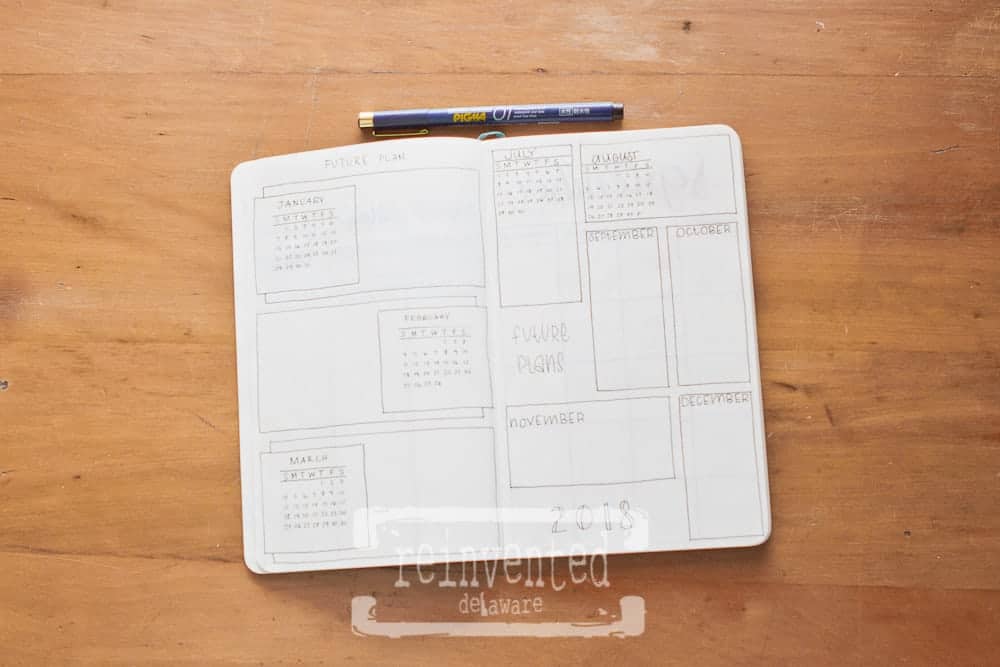
The next component is The Future Log. There are lots of ways to lay this out in your journal. For me having three months listed vertically works. The Future Log is a place to write down appointments and events that are coming up in the year. You know, dentist appointments that are scheduled out 6 months in advance, your vacation or your out-of-state friend coming to visit in the summer. It is necessary to have a place to write down these things for the future. I completed these pages during Christmas break. That way when the new year arrived, I was ready!
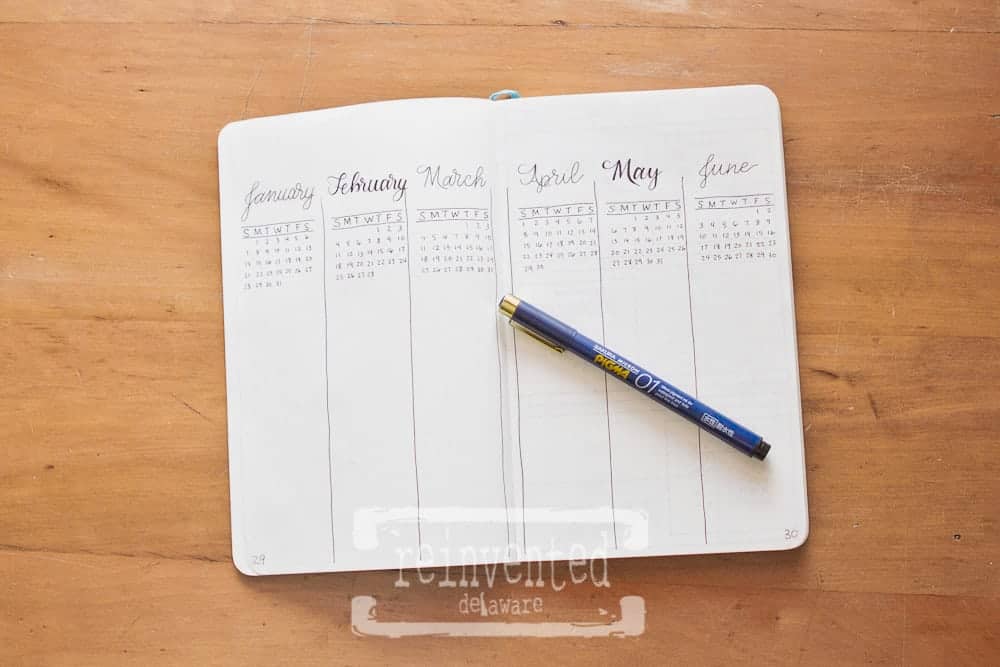
Here are two additional ways to plan out your year. The example on the left will have three months per page as opposed to the example on the right which has six months per page. Of course, your journal would have all twelve months using the amount of pages you need.
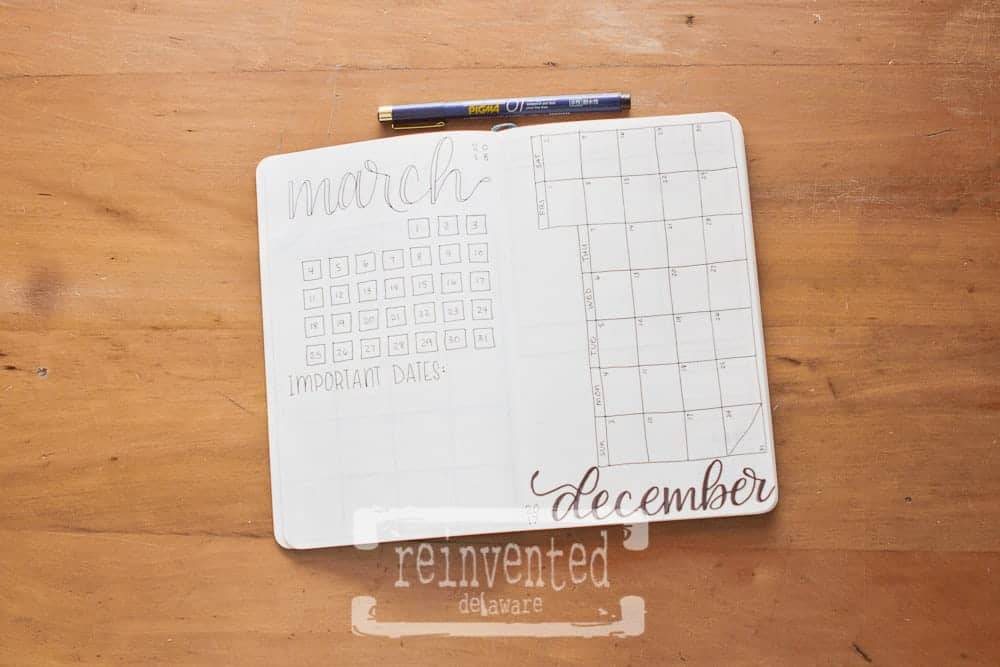
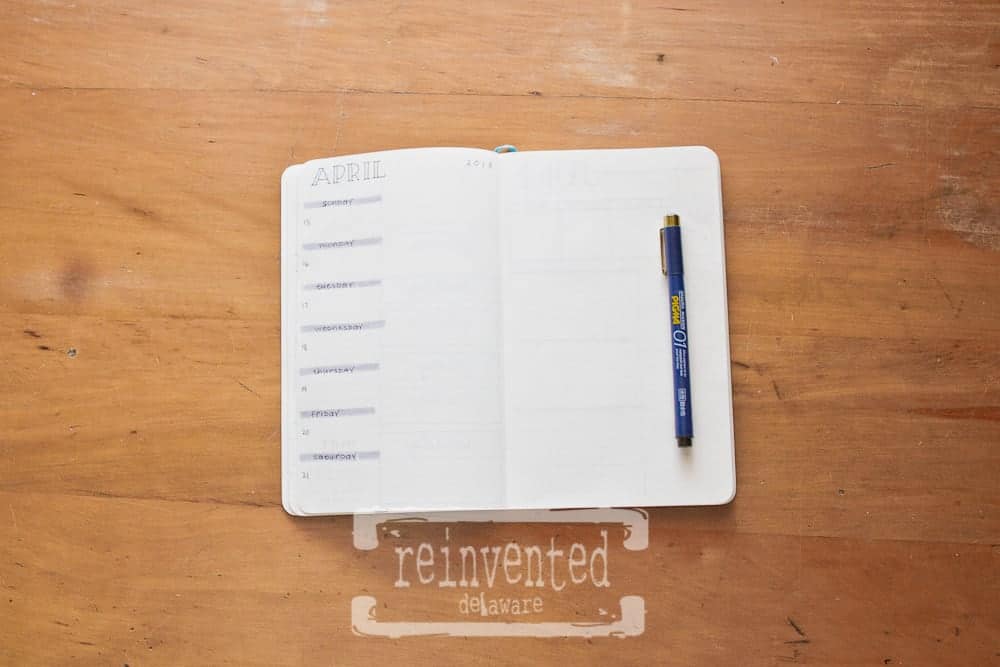
Next is the Monthly Log. The first example has each month using one page. You can see on the left side that the March page allows room on the bottom half of the page to write important dates for that month. The example on the right side of the journal allows room within each block to write down important dates and events. There is also space at the top for additional notes – maybe goals for that month that you want or need to accomplish.
I use the Monthly Log to fill in appointments, birthdays and events from my Future Log. This page is prepared at the end of the previous month.
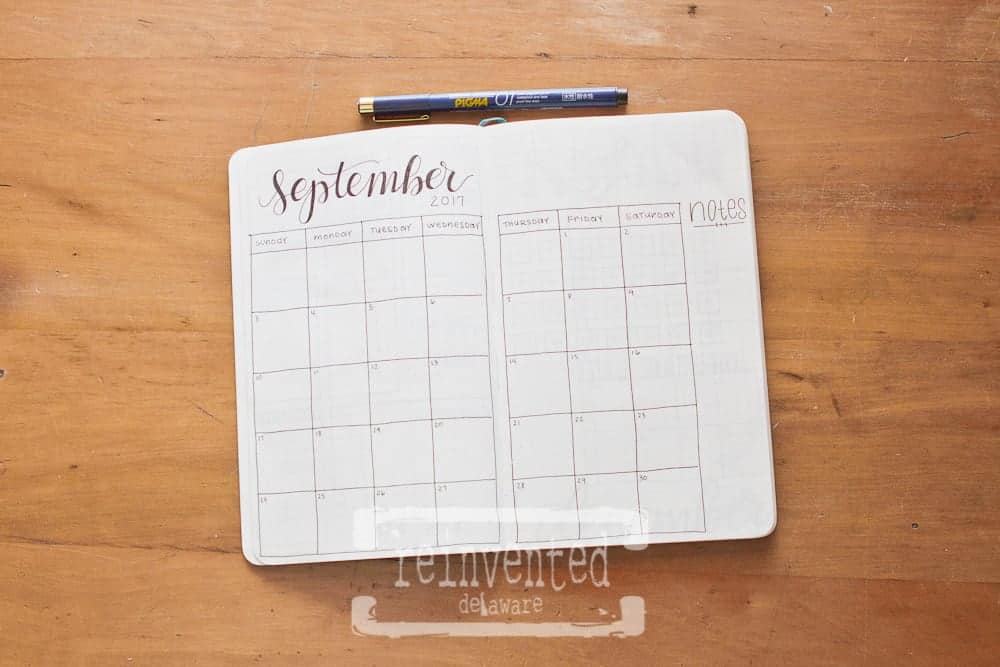
This monthly spread is my go-to layout for the month. I like the extra space that a two-page spread allows. I am a big writer – no I don’t write a lot, just large 🙂 The right side still allows for notes and goals I might have for the month. The top is open as well. An inspirational quote for the month might be nice there.
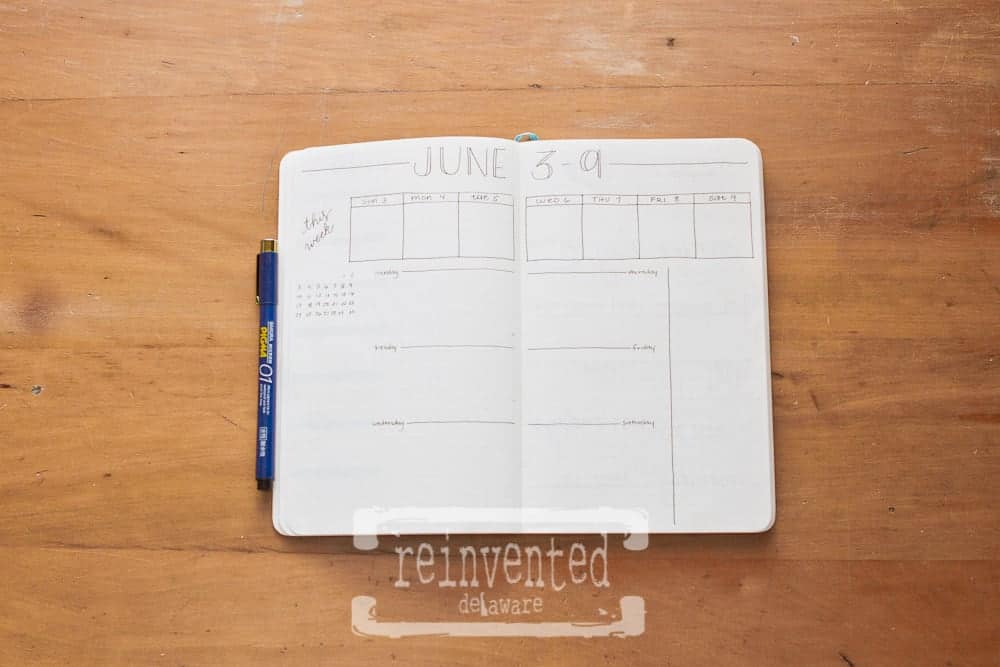
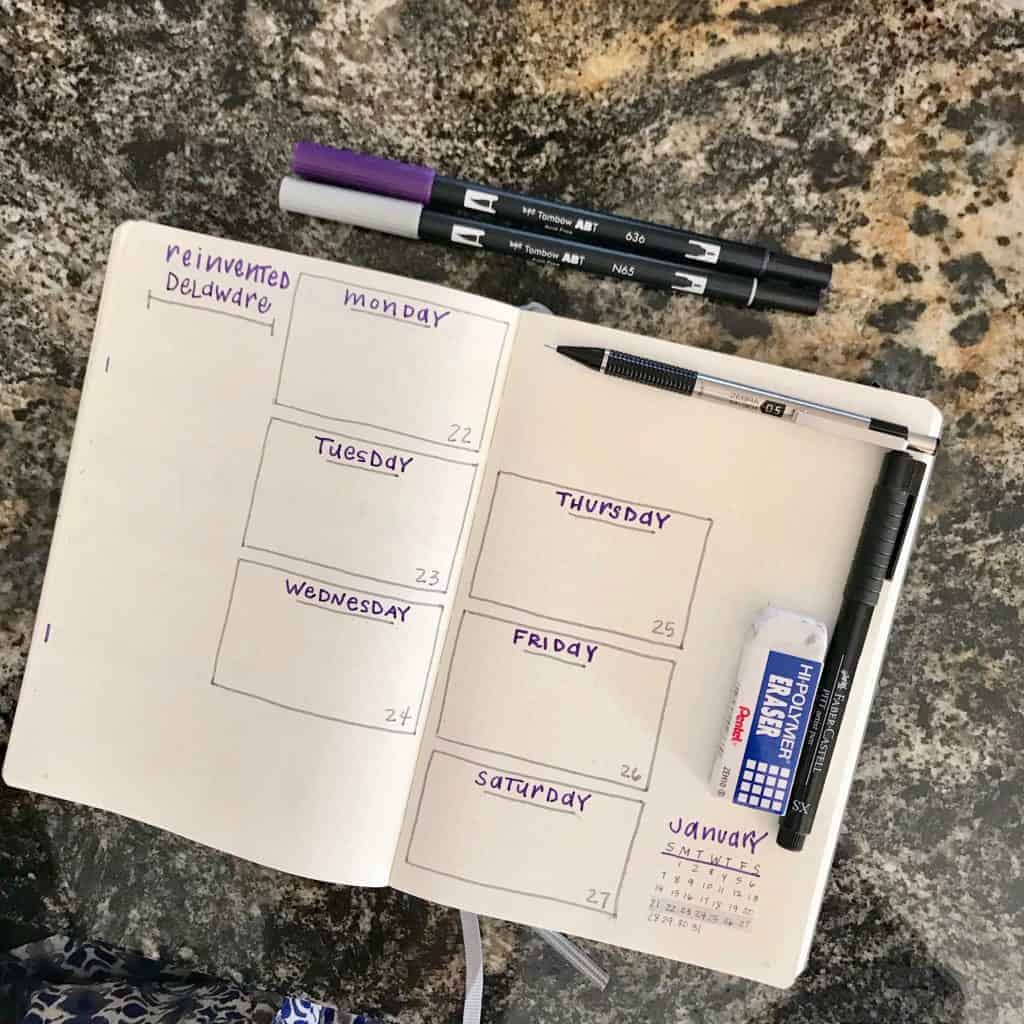
The Weekly Log is next. Again, I just plan out a grid that will fit the days of the week. This is a great addition to the system for me because the daily boxes are bigger than they can be on the Monthly Log. This page is prepared on Sunday evenings so that I am ready for Monday morning and the week ahead. It’s easy to add in last minute appointments or events. As a business owner with lots of projects to complete in a week, I love this spread because it allows me ample room to list out those projects I want to complete by the weeks end. The blank space on the right can be used for a variety of things that we will talk about in a future post – usually for me it is an inspirational quote, a scripture verse or a thought from that week’s church sermon. Our pastor has such wisdom and I like to think on some of the thoughts he shares with us throughout the week. Podcasts are also a great place to get inspiration from. A quote to keep me motivated in my business could go in that space as well. I use this spread daily.
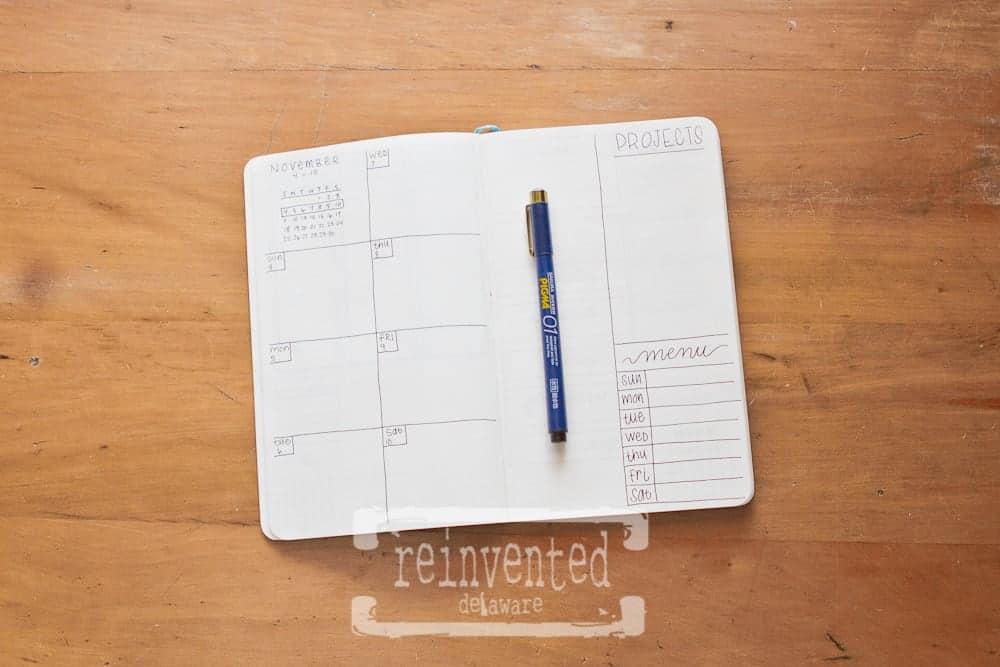
Here are two more examples of a weekly spread. One of the greatest thing about the Bullet Journal system is it’s adaptability. If a layout doesn’t work for me one week, I can change it for the following week. In fact, this year I am challenging myself to change the weekly layout each week. Not promising I will stick to this challenge during my busy season, but hey, a girl can have goals!
These two spreads also include a menu planning space. The layout on the top has them all together on the lower right side and the next layout has a space below each day

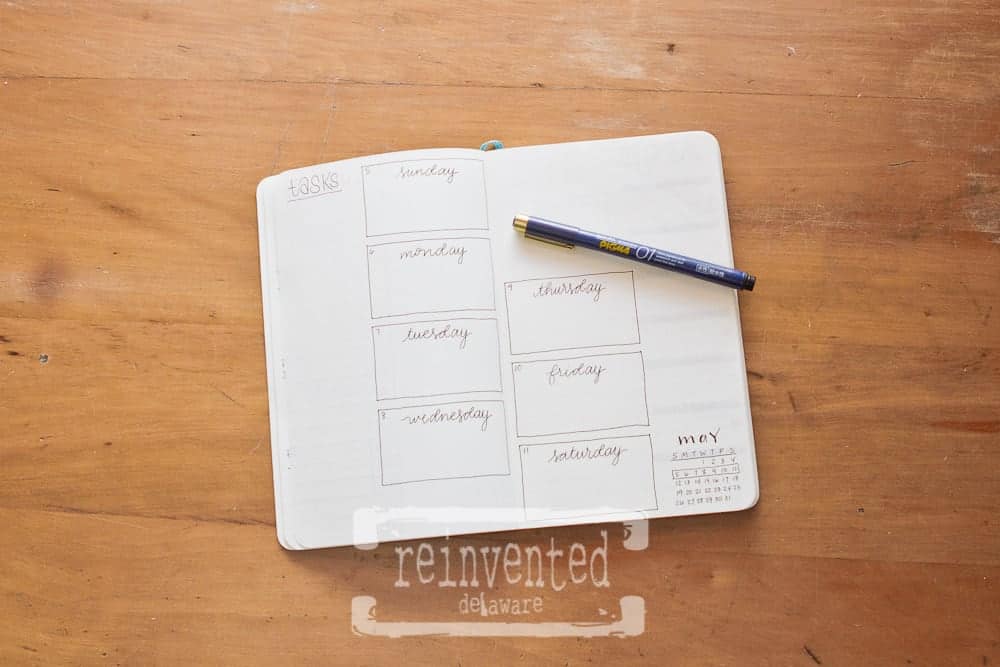
The next two examples are kind of a hybrid of a weekly and a daily layout. You might not need the space that a separate weekly and daily layout provides so this type of layout might be perfect for you.
The first example has the week listed on the left side with a blank page on the right – that could be used as a master weekly task list that you refer to throughout the week.
I really like using a separate weekly and daily layout because I write large and I ususally have many tasks to accomplish in one day. So having them separate works for me. But this layout might work perfectly for you!
I wanted to mention the blank spaces I have created. Not every square inch of the journal needs to be filled. There is something mentally soothing to have blank spaces in our lives. In fact, I love having empty shelf space in my closets. Weird I know.
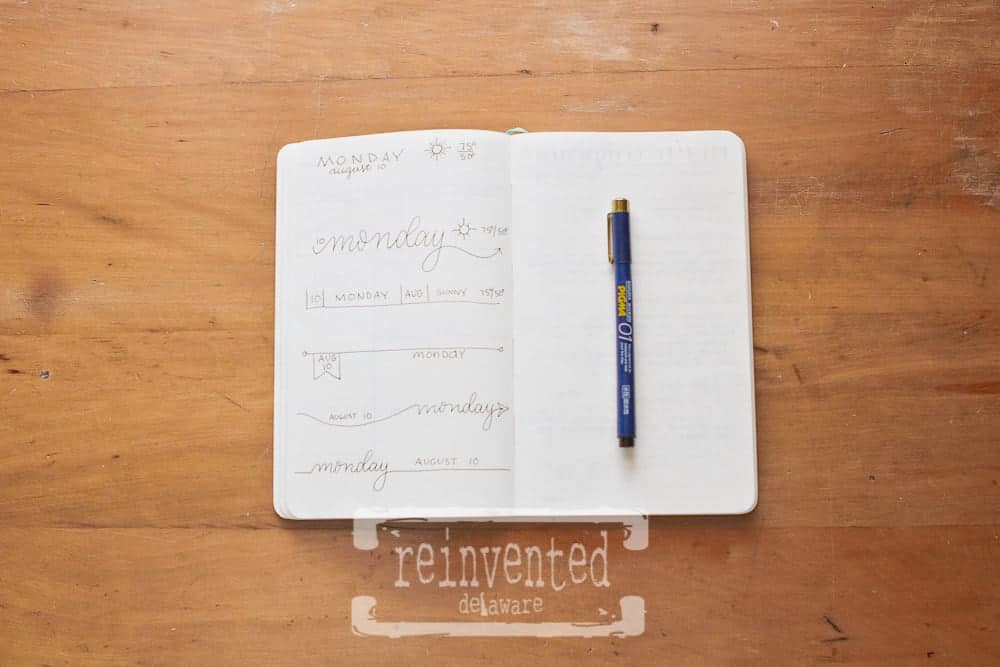
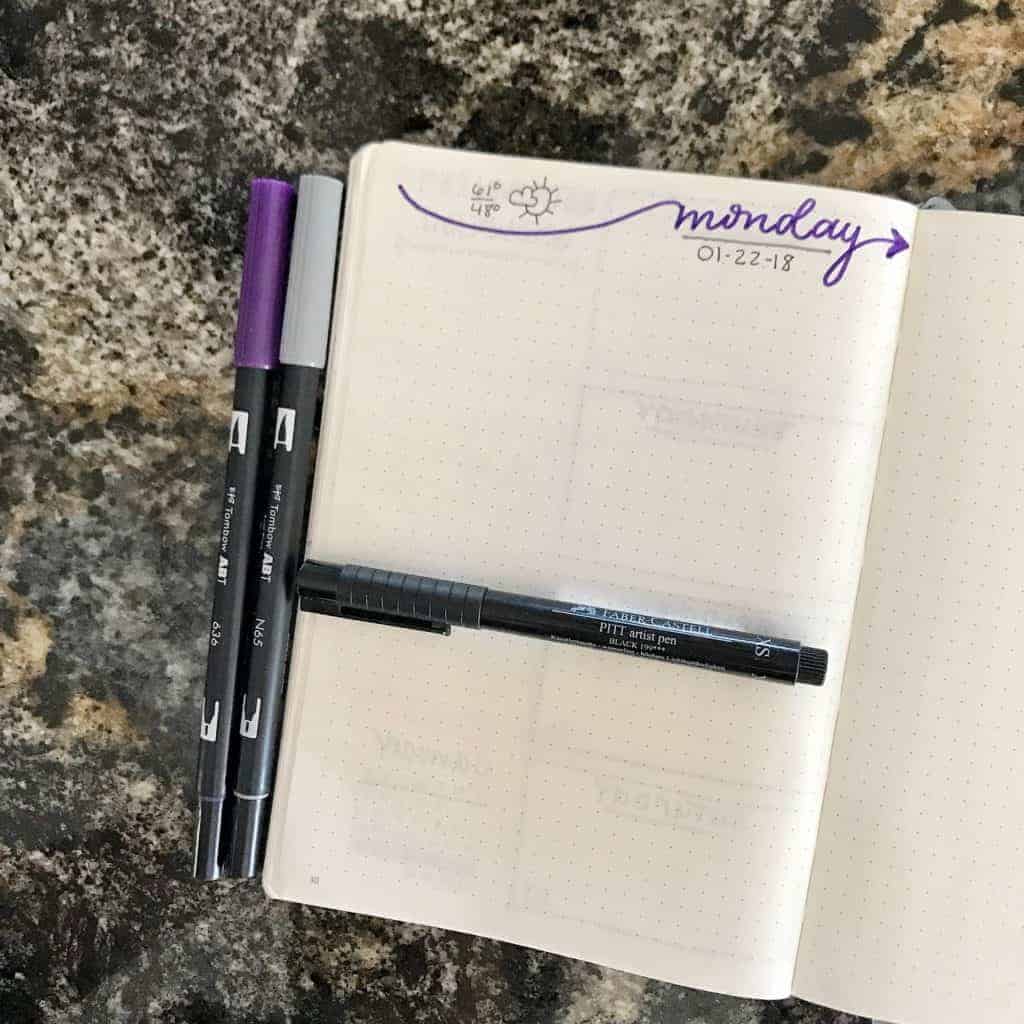
Next is the Daily Log. This is the heart and soul of getting things done! This page is prepared the night before and I do this each and every evening. Each evening while watching a little TV, usually Shark Tank 🙂 I write out the day of the week along with the date. It is important to know that I do not fill out a whole weeks worth of dailies, I only prep for one day a time. I check my weather app for the weather the next day also. It is nice to know what to expect in the weather. Also, my hubby told me that Lewis and Meriweather charted the weather as they traveled across the US and if they thought it was a good idea then so do I! I have just started recording the sunrise and sunset times as well. My sister gave me that idea at one of our Bullet Journal Workshops. It has been fun to see the days get longer and longer as spring approaches! I record both the weather and the sunrise/sunset along with the header for each day.
I jot down what I need to accomplish that day using the Monthly and Weekly Logs as my reference. As the day goes on, I can check off what I have accomplished. If you are someone who gets distracted easily, this is a great way to stay on task. My journal goes with me everywhere – out to my workshop, at my office desk and to the grocery store. If I leave the house, I make sure it is in my purse.
These are examples of daily page headers. My dailies usually take up both sides of the open journal – Monday, Tuesday & Wednesday on the left side and Friday & Saturday on the right side. I don’t usually make space for Sundays. That is a chill day for us 😉
I use these headers just to add a bit of creativity, but really you don’t need to. If it suits you to print the days of the week, do that. If you like to write in cursive, then do that. Keep each day the same or change each day. That is the beauty of this system. You do it the way you want to. If you are at a loss for ideas, search Pinterest. Just be careful not to become overwhelmed. There are so many ideas out there! Just choose what you like. This is YOUR life journal!
So there is the basic system for Bullet Journaling. I want to dive deeper into this system for use in a small business, but just for starters I am sure you can see the advantages of having a customizable planning system for your business. I have pages for mileage tracking, expense tracking, inventory management, blogging schedules and favorite hashtags for social media. This information is with me wherever I go. Just like having an assistant at my finger tips!
Below, I have some more examples for you to see. I have used some color to spice things up a bit but it is not necessary. The basics are all the same! We can dive into this topic in a future post 🙂
Look beyond the color – this is just a basic grid that allows me to have a month at a glance on one page. I usually just copy from month to month, changing out the color scheme for fun.
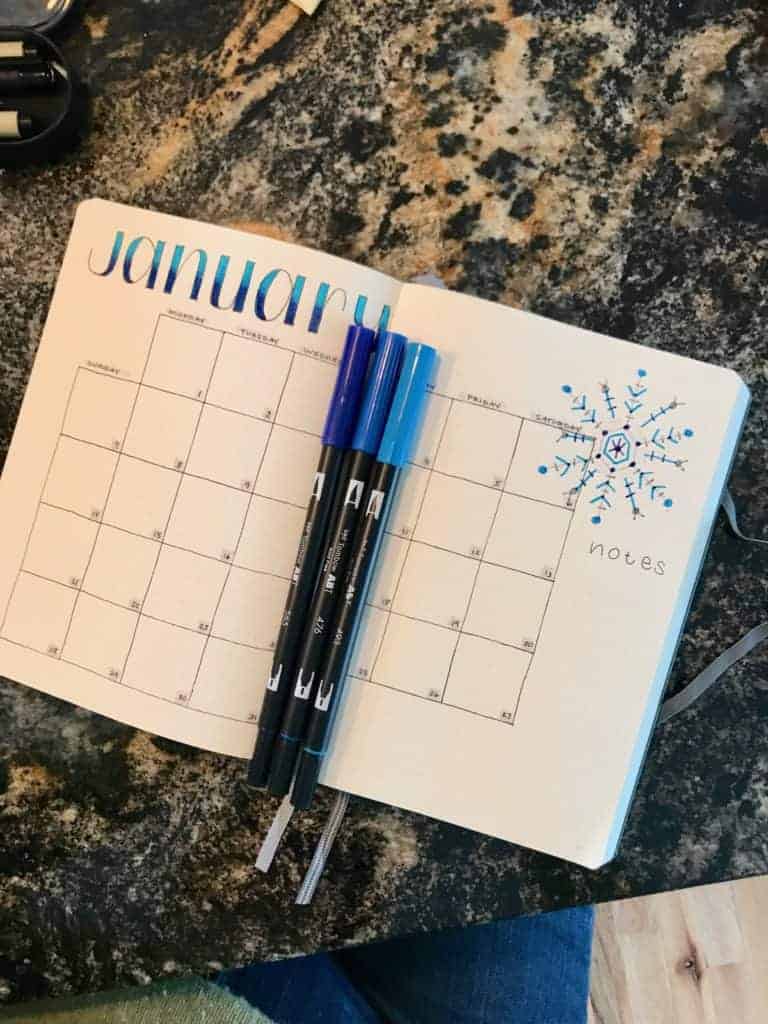
Sorry for the blurry images – using the iPhone camera with too much coffee didn’t work out so well 😉
Ok, so you might feel a bit overwhelmed by all of this info so let’s just recap:
- The Index is at the beginning of the journal and is used like a table of contents
- The Future Log is a place to keep a record of upcoming appointments and events
- The Monthly Log is used like a month at a glance, seeing all the scheduled appointment in one place
- The Weekly Log (my addition) is used like a week at a glance
- The Daily Log is used each and every day to list out the tasks and appointments you have for that day
Each one – The Monthly, The Weekly and The Daily is prepared the day before like this as an example:
The Monthly for January is prepped at the end of December
The Weekly for January 21, 2017 is prepped on the Saturday or Sunday to be ready for that Monday and the week ahead
The Daily is prepped the day before – in the above example dated Monday, January 22, it was prepped the evening of Sunday, January 21,2017
Whew! That’s a lot of information and I certainly hope I didn’t put your brain in overload 🙂 I plan on adding more of these types of posts to show you examples of how I use this system. We completed over 400 projects for our business in one year and if I did not use some type of organized method of completing those project, we would have never been able to accomplish what we did!
Stay tuned for more on this topic. Let me know if you have any questions concerning the Bullet Journal system! Follow me on Instagram @reinventeddelaware


Your examples are a big help to newbies (your pictures speak volumes). Your workshops in tandem with your blog gave me so much help: I started my first bullet journal and stumbled so many times. It didn’t come together for me until this blog followed by the BuJo workshop you held. Thanks you for teaching me ????
Patti, so glad the bullet journal workshops and posts are helpful to you! Happy planning 😉
Thanks, it’s very helpful to me
You are welcome! I hope you can start your own Bullet Journal. It has really helped me to stay on track!
So pretty and so smart! Where do you find the time???
The Bullet Journal system has really helped me to organize my time so I can accomplish more. I take about 15 minutes each night to plan my next day?