
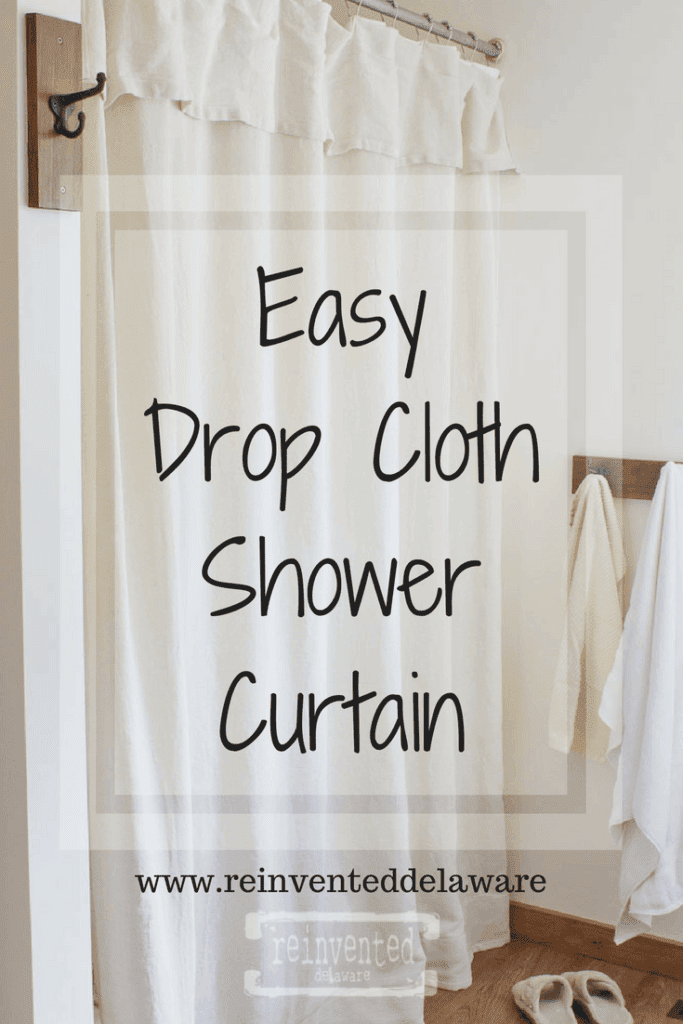
How to Sew an Easy DIY Shower Curtain from a Drop Cloth
Learn how to sew a shower curtain from a drop cloth with this shower curtain diy idea! It’s perfect for beginners.
Does your bathroom feel like it’s stuck in a rut? Is your current shower curtain a tired plastic sheet that clashes with your decor?
Maybe you’ve been searching for the perfect new shower curtain, but standard sizes just don’t fit your unique shower space. Or perhaps, you’re looking for a way to add a touch of personality without breaking the bank.
Well, I have a solution for you: the humble dropcloth! This readily available material can be transformed into a stylish and functional DIY shower curtain. With a little sewing know-how (or even some clever no-sew techniques!), you can create a custom shower curtain that’s the perfect length, width, and design for your bathroom.
Whether you’re a seasoned sewer or a complete beginner, this project is a fun and affordable way to upgrade your shower space.
This easy drop cloth shower curtain is such a great way to add the farmhouse touch to your bathroom on a budget and with minimal sewing skills! Let’s jump right into the project!
easy bathroom makeover
Over the last couple of weeks, we have been completing small projects to update our bathrooms.
We started our bathroom refreshes by replacing the linoleum flooring in both of our bathrooms for only $150 using Shaw Vinyl Plank Flooring in a pattern that resembles wood planks.
The floor was installed first in the guest bathroom and then in the master bathroom. Be sure to check out the before and afters in those posts! The guest bathroom flooring project includes a tutorial for laying the flooring down yourself. It’s super easy and can be done in a weekend.
After the flooring was finished, we decided to tackle some of the other projects in the master bathroom. One of those projects was to replace the shower curtain.
Not a big project by any means if you plan on purchasing ready-made shower curtains. But being the repurposer I am, I chose to make my own shower curtain using from supplies I had on hand.
The following post may contain affiliate links. That means if you click and then buy something, I will make a small commission at no additional cost to you! Thank you for supporting my blog. full disclosure here.
Supplies
- 6′ x 9′ dropcloth
- sharp scissors
- micro tip small scissors
- steam iron
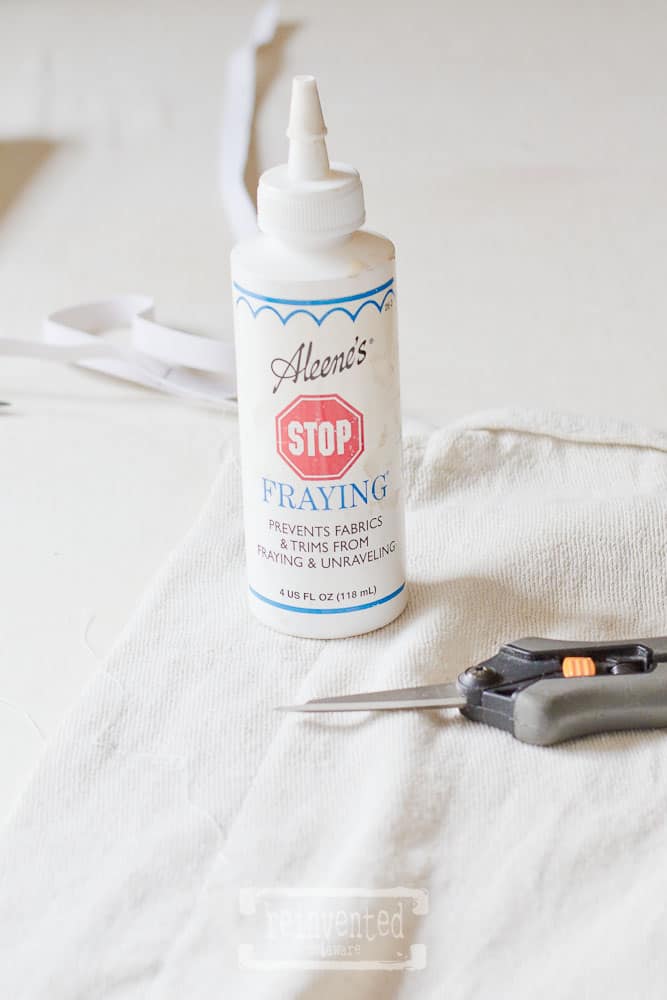
- Aleene’s Stop Fraying
- sewing machine
- measuring tape
- heavy-duty sewing pins
- shower curtain rod wall brackets
- shower curtain rings
- metal conduit (at your local hardware store)
Scroll through the images below to shop this post!

easy shower curtain diy idea
The shower curtain that we had before was a length of upholstery fabric that would have been used for curtain panels that I found on clearance at my local fabric store. I just hemmed it and made a pocket at the top for the pole to hold it leaving the selvages edges un-hemmed.
I also made a small valance out of the same fabric to cover the rest of the hanging pole. You can see here this shower curtain was for decorative purposes only so I also made a DIY curtain tieback. I use a neutral-colored shower curtain liner to prevent the shower water from going all over the place!
Maybe you are wondering what I will do with that gorgeous paisley fabric. I used the gorgeous paisley fabric to reupholster a pair of antique Eastlake rocking chairs. They turned out beautifully!
drop cloth curtains
Painter’s drop cloth would be the perfect fabric for this soft white shower curtain idea I had in mind for our primary bathroom. The drop cloth can even be used to make DIY curtains for any room including a bathroom shower curtain!
The texture the drop cloth provides adds a bit of farmhouse vibe to the bathroom too! Another reason to use a drop cloth for this project is that you can make an extra long shower curtain for only a few dollars. Dropcloth has alot of fabric for under $20 for a 6×9 panel
how to make a shower curtain
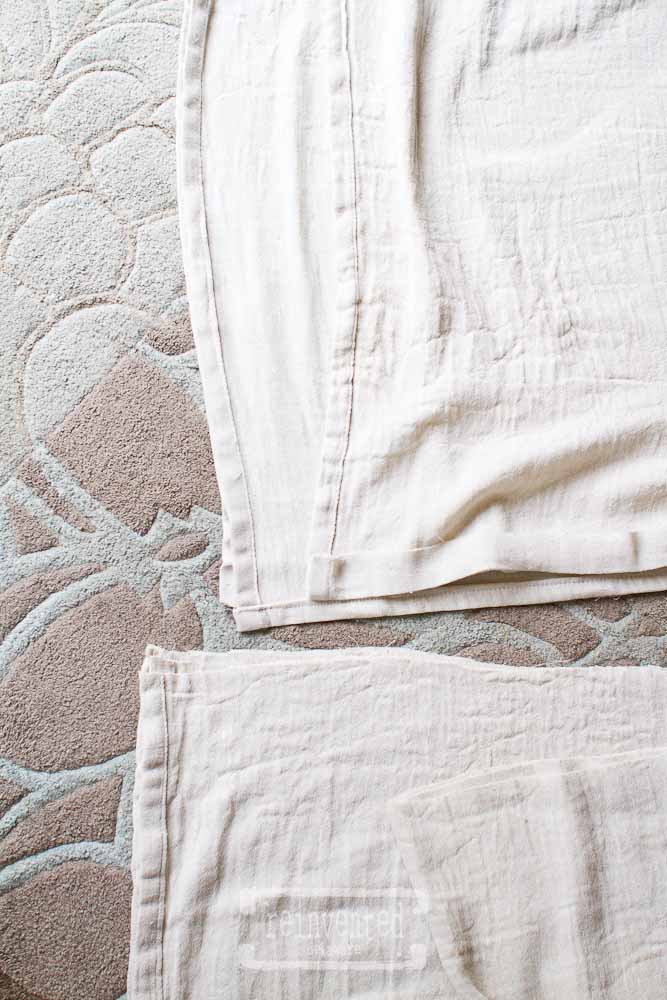
step one: prep the drop cloth
The first thing that needs to be done with any drop cloth project is to wash the drop cloth. They are stiff out of the package and need to be softened. You can laundered it at the laundromat if you washing machine can’t handle this large and heavy piece of fabric. My next DIY shower curtain will begin at the laundermat! For now, let’s look at washing this dropcloth at home!
The drop cloth is stiff right out of the package so I knew it needed to be washed. The hottest water temp cycle on my washing machine would shrink it as well as help to soften the fabric.
The color of the drop cloth was a bit darker than what I wanted so I filled a 5-gallon bucket with bleach water and placed the damp drop cloth in it, making sure it was completely submerged.
In fact, I used landscaping rocks to hold it under the surface of the water. (I did rinse off the large rocks first!)
It sat in the bucket for a couple of days. Then back into the washing machine on the rinse and spin cycle.
When the wash cycle finished, I threw the drop cloth into the dryer on the hottest setting.
My drop cloth measured 9′ x 12′ and had been purchased for another project. Drop cloths can be purchased in a 6’x9′ for around $10-$15. The one I already had on hand was about $20.
Also, keep in mind the weight of the fabric. A drop cloth that says it is 6oz is a looser weave and very textural.
thanks for being here!
I hope you are enjoying this project! Let me know if you have any questions. Or leave me a comment to tell me about your project and ideas!
thanks, Cindy 😀

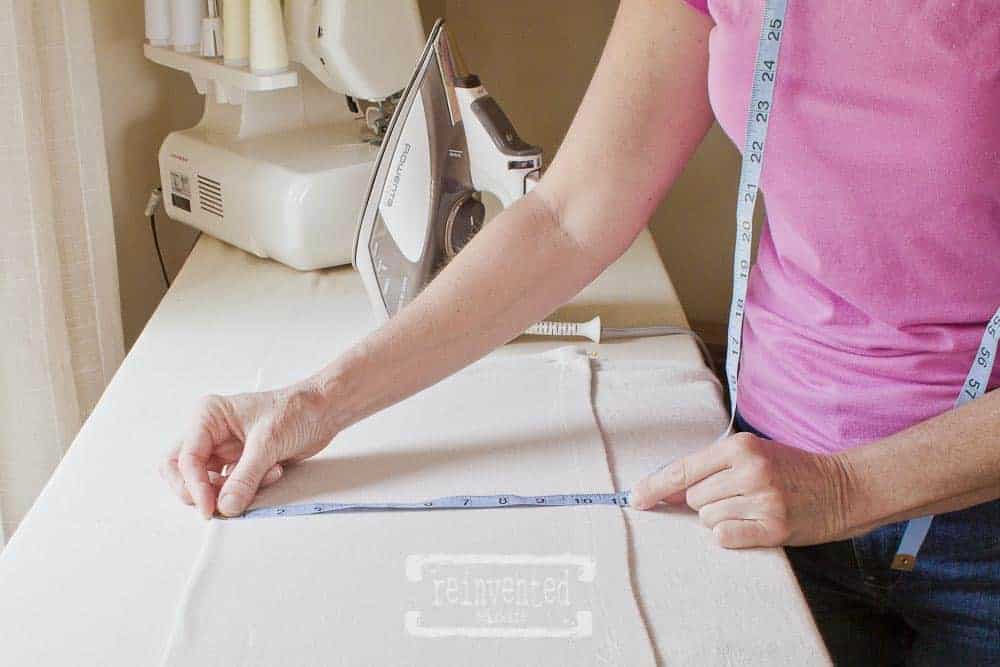
step two: measure for desired size
The next step is to determine how long you want the shower curtain to hang. We will be using the 9′ direction of the drop cloth for the top to bottom measurement
Keep in mind where you will place the pole that it will hang from and also the length of the liner that you will hang with it (if you choose to use a shower liner.) If you choose to sew an extra-long showr curtain, then you will need an extra long liner.
I wanted this simple yet gorgeous shower curtain to hang on the same shower rod as the liner, unlike the previous shower curtain that used two separate hanging rods, one for the liner and one for the decorative paisley fabric.
Make notes about the finished length you want your particular curtain to be. The width is already taken care of by the 6′ width of the dropcloth.
**If you purchase a 6’x9′ drop cloth you can skip this step! The standard size for a shower curtain is 72″x72″ or 6’x6′ so you won’t have to cut and stitch the side seams!
The drop cloth I had on hand was 12′ wide. So I used sharp scissors to cut off the extra fabric and left an additional 1″-1 1/2″ on each side for the seam allowance.
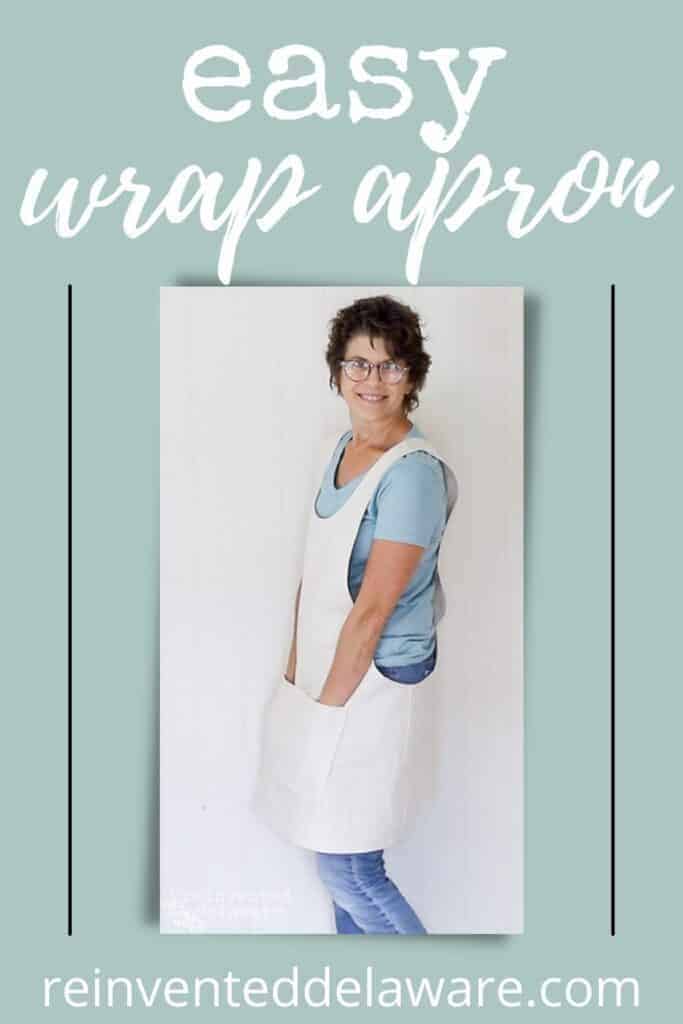
The finished cut size was approximately 75″ wide by 108″ long. Remember the original size of the drop cloth was 9′ x 12′ (108″ x 144″). The extra can be used for other sewing projects like pillow covers, an apron, and upholstered dining chairs.
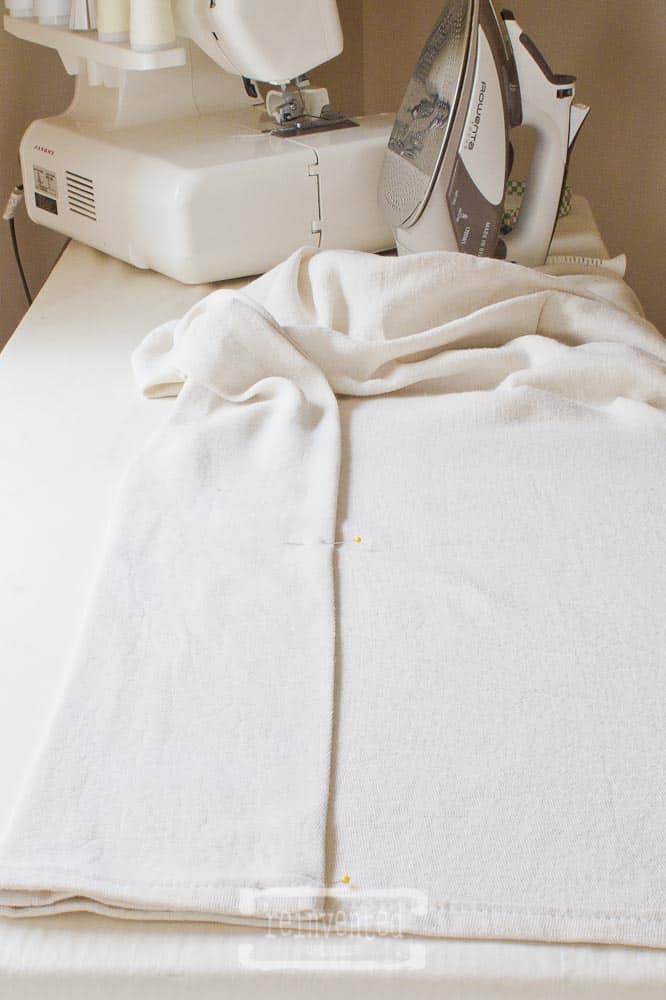
step three: stitch side hems
For the sides of the curtain, I used a steam iron to iron a fold at the 1″- 1 1/2″ allowance to the wrong side of the curtain panel. Look for the flat felled seam on the dropcloth to determine the right side of the fabric. You will see in the next steps how to take care of the raw edges.
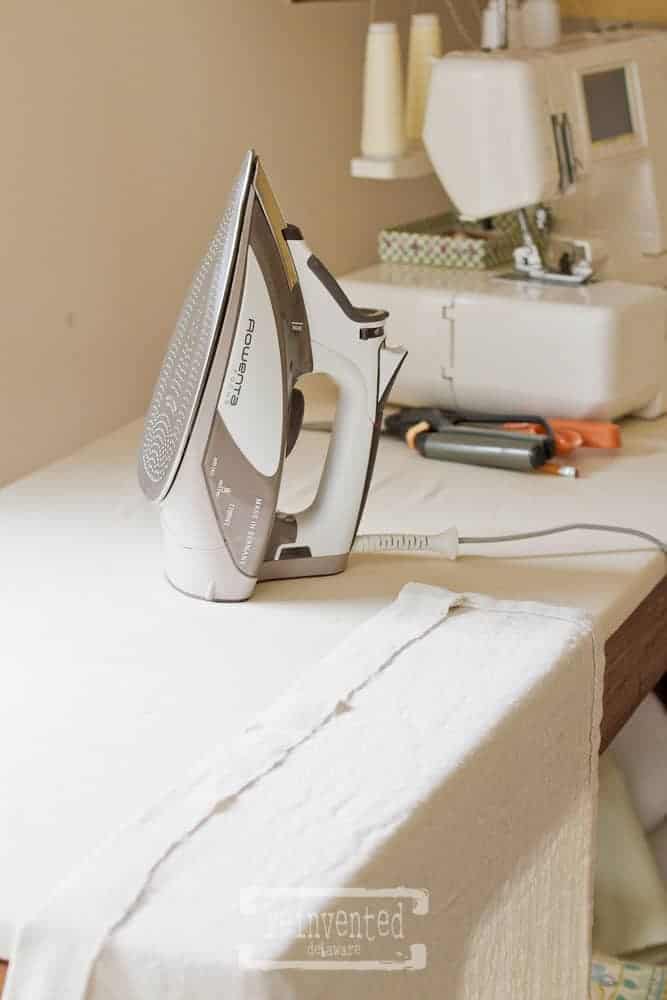
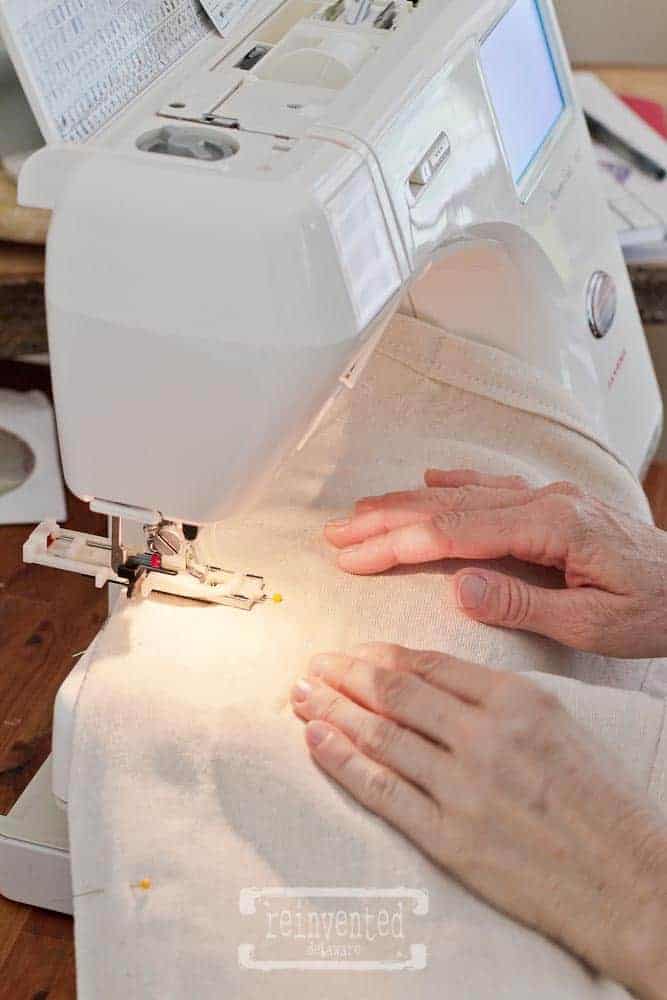
Double fold the hem and place it under the presser foot of the sewing machine. Using a pin to hold the fabric is the easiest way to control the folded hem. You can pin the entire length of the side panels but I like to use the follwoing method instead of pinning.
one pin method
Stitch a few stitches to hold it and keep the needle down in the fabric to hold it tightly for the next step. Be sure to backstitch at the beginning to secure the threads.
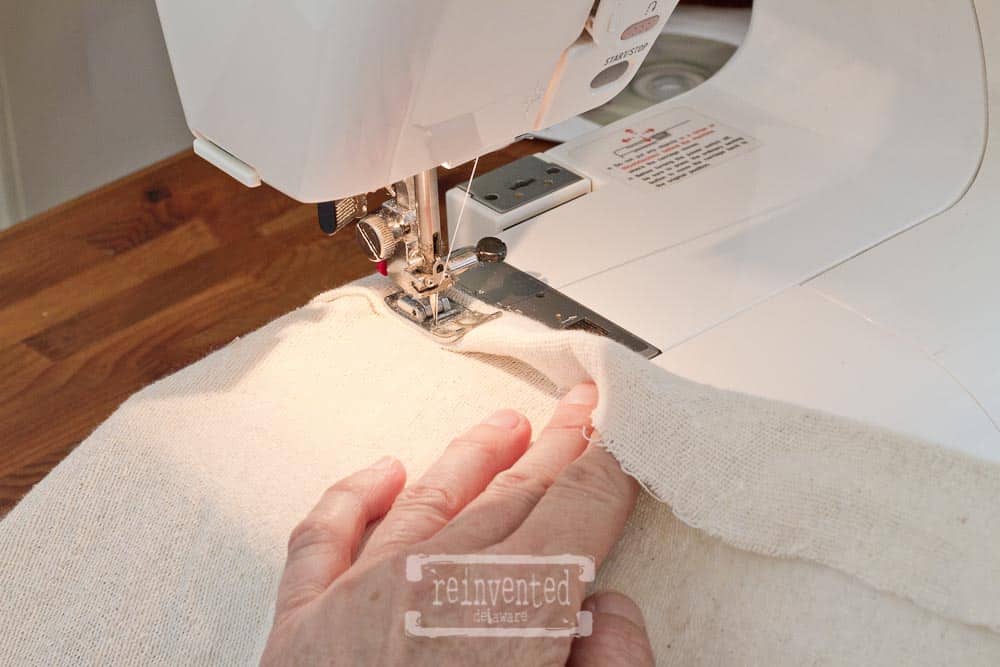
About 10″-11″ away from the presser foot, fold a double fold again. The area between your hand and the presser foot does not need to be folded just yet.
See below how I am holding the folded edge? Keep reading my friend, this will all make sense as we go!
Use your other hand and tuck the raw edge under. Gently smooth to make sure it is all tucked in and stitch a straight line. See the image below.
Go slowly if you are not confident. But after you have done this a few times you will get the hang of it I am sure!
Stitch all the way up to your right hand that was holding the double fold in the first step and start over.
You will work this way holding and tucking about 10″-11″ at a time until you get to the end. This method is a time saver because you only iron the first fold, not both folds and you don’t have to deal with pinning.
You can try different ways of securing the fabric for stitching such as pinning, using small sewing clips, or ironing the double fold. Each method works so use the tools and method that suits your comfort zone!
When you have reached the end, be sure the edges line up nicely. You can pin here as you did at the beginning if that makes you feel better. 🙂
Backstitch at the end to secure the threads. Repeat the same steps for the other side hem.
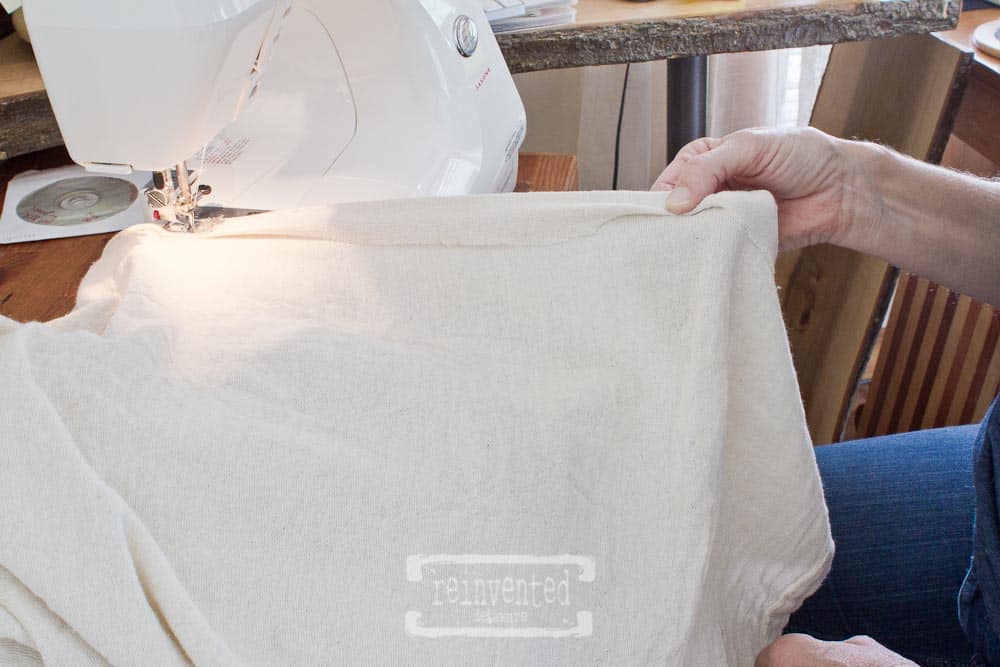
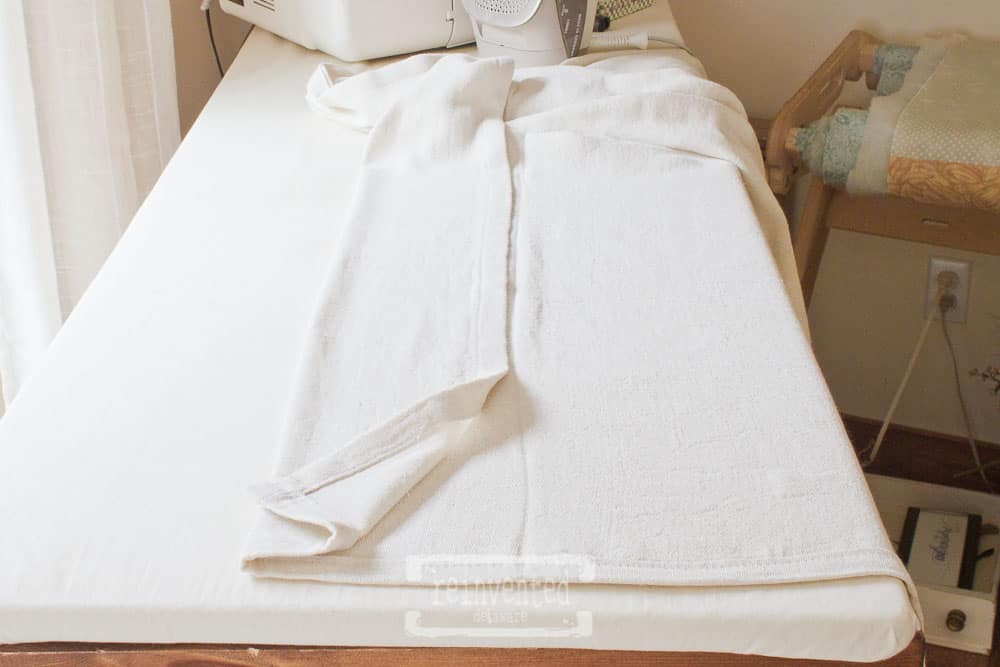
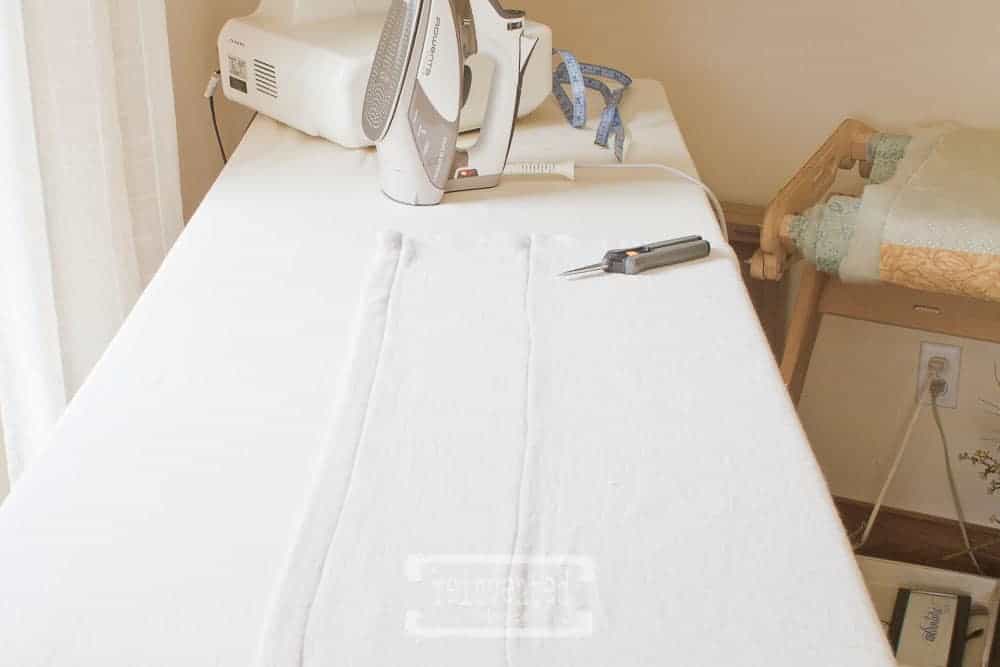
step four: create the valance
This is not a true valance because it is attached to the shower curtain, but adding it brings another detail to the shower curtain and I like that :). If you make an extra-long shower curtain, you may or may not have enough fabric to make this faux valance.
At the top of the fabric, fold down the amount of valance that looks good to you. I folded down 10″ but you can vary this number for your own diy shower curtain. Use your own judgment to make this shower curtain the right size for your bathroom.
You can even fold enough so that you won’t have to hem the bottom! That saves another step!
The original seam at the top will be from the wrong side of the fabric. If you are concerned about the seam showing on the top edge, cut off the seam allowance and stitch a new hem so that it will be uniform with the rest of the shower curtain. This didn’t bother me, so I left it as is.
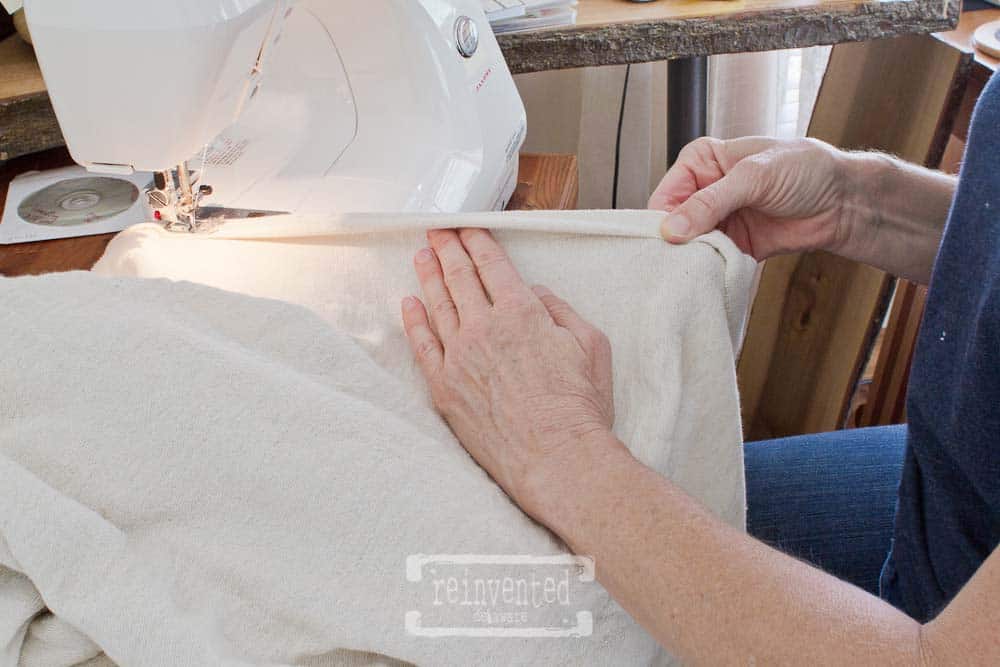
I smoothed every out with a good ironing using my steam iron. I did use pins to secure the loose part of the valance as I stitched about 2″ away from the fold.
You probably don’t have a 2″ guide mark on your sewing machine so measure out from the needle and place a piece of painter’s tape to help guide you along as you stitch.
I chose a 2″ mark to leave enough room for the button holes that would hold the curtain hooks.
step five: create buttonholes (optional)
The next step in this easy drop cloth shower curtain idea project is to mark the buttonholes that will be used by the shower curtain hooks.
You might be saying, ‘buttonholes??? I thought you said this was an easy shower curtain idea??” Hold your horses, girlfriend! Keep reading, I have a tip for you!
My drop cloth shower curtain is wider than the liner so I wasn’t able to use the liner to mark the buttonholes. Instead, I used a little trick I found on YouTube. It definitely makes this step easy!
Here is a link to the video for you!
Use Elastic to Space Buttonholes
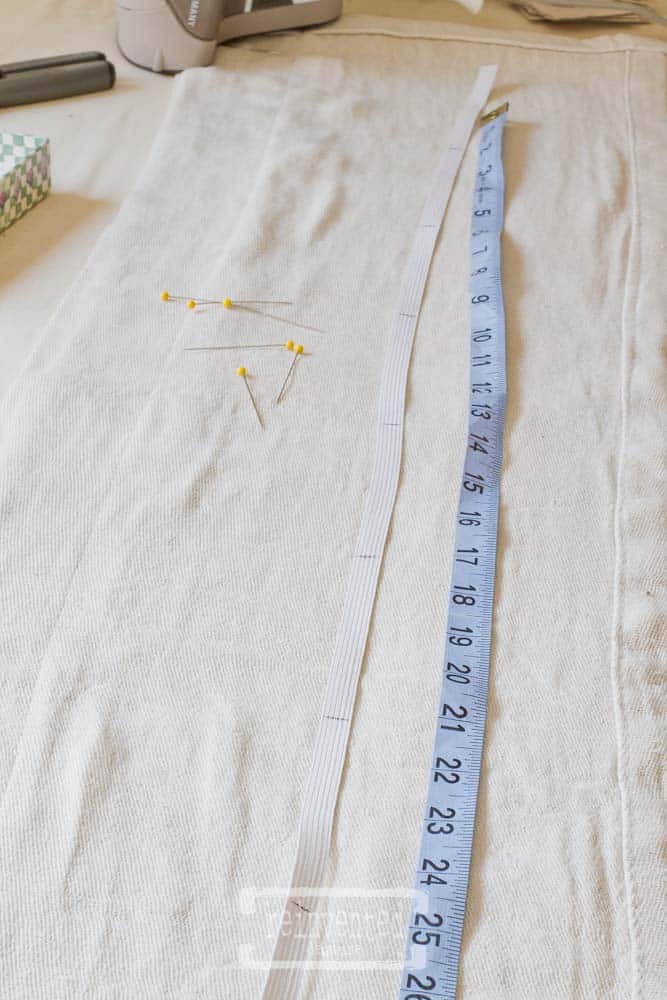
Mark a piece of stretchy elastic for 12 buttonholes. My marks were about 4″ apart. The hooks that you purchase for shower curtains come in packs of twelve.
Then stretch the elastic to fit the width of the shower curtain. Place pins at each mark on the elastic.
The buttonholes will be within the 2″ sewing line in the previous step.
I should also mention that my ironing board is extra large and has padding in it. I was able to place a pin at the end of the elastic to hold it while I stretched it and marked the buttonholes.
If you can’t pin it into your ironing surface, try a safety pin to secure it to the fabric covering of your ironing board.

Notice the direction of the pins in the image below. I do this so that I can easily pull the pin out as I start the buttonhole. Stitch each buttonhole using eh buttonhole foot that came with your sewing machine. Your machine will have specific instructions for using the buttonhole foot.
option for no buttonholes!
- ask your local sewing shop if they provide a buttonhole service. You can have the markings ready before you take the shower curtain to the store and they will stitch the buttonholes for you!
- instead of the standard shower curtain hooks sold in the bath department, choose clip-style with rings that are sold in the curtain department. No buttonholes necessary!
- Use metal grommets instead of button holes. The package of grommets will have instructions to create them. You will also need a special tool for making grommets.
Aleene’s Stop Fraying is a great product to prevent fraying edges. I put a bit on each buttonhole before I clip them open. It is great on button threads as well. They are a bit more secure with this little magic 🙂
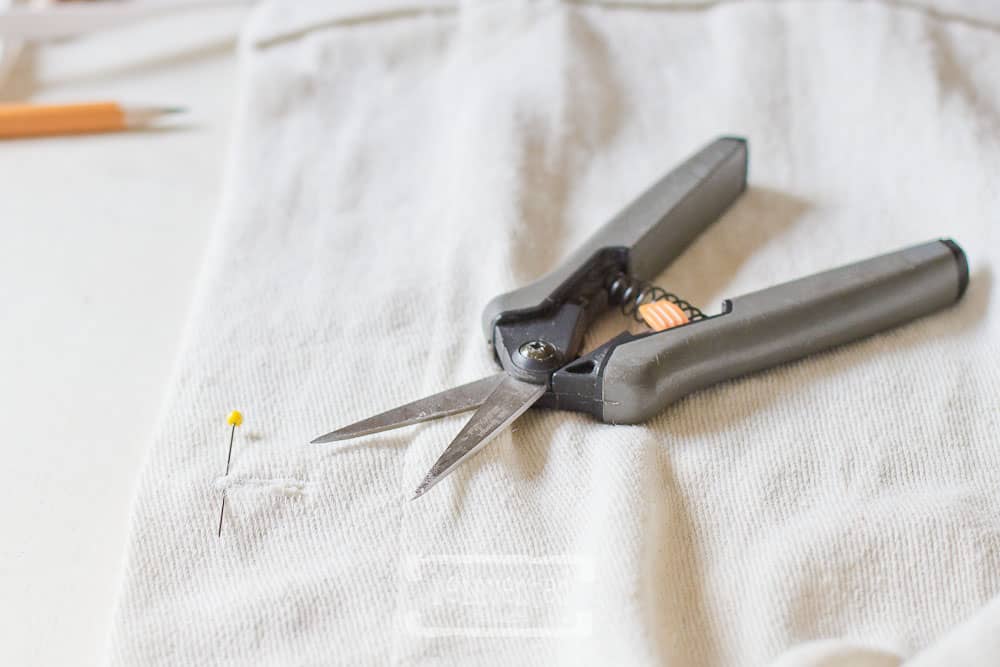
buttonhole cutting tip!
I learned way back in home economics class in high school a tip for cutting buttonholes.
Yep, I actually had sewing classes in school – all four years of high school!
Place a pin at the end of the buttonhole that you are cutting towards to prevent cutting through the end. These little Fiskars snips are perfect for buttonhole cutting!
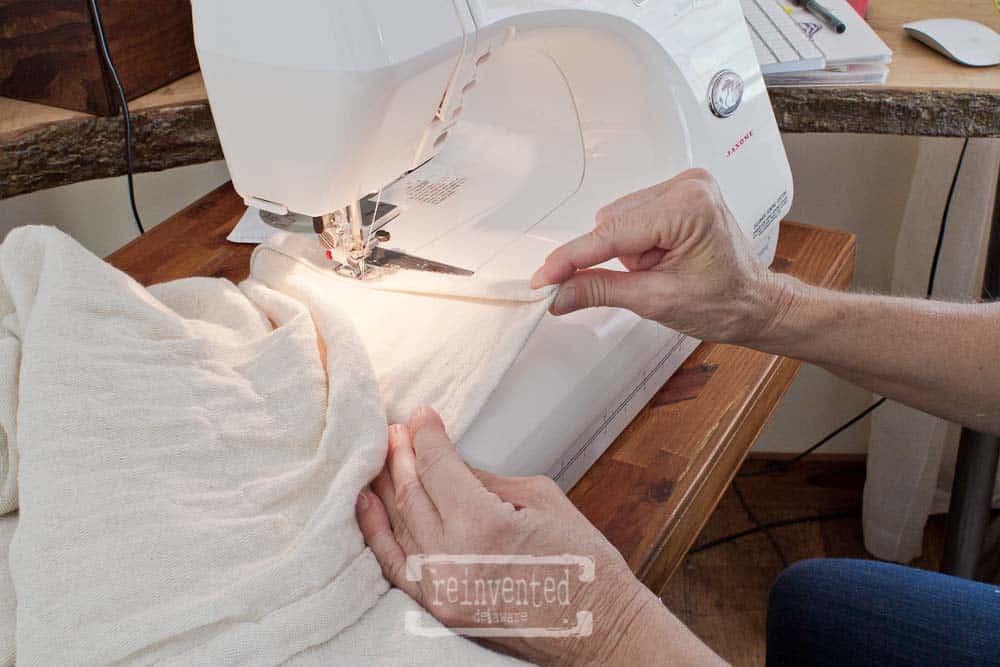
step six: bottom hem
**If you choose to make a wider valance than I did, you will have a different width for the hem or you might not need to hem at all.
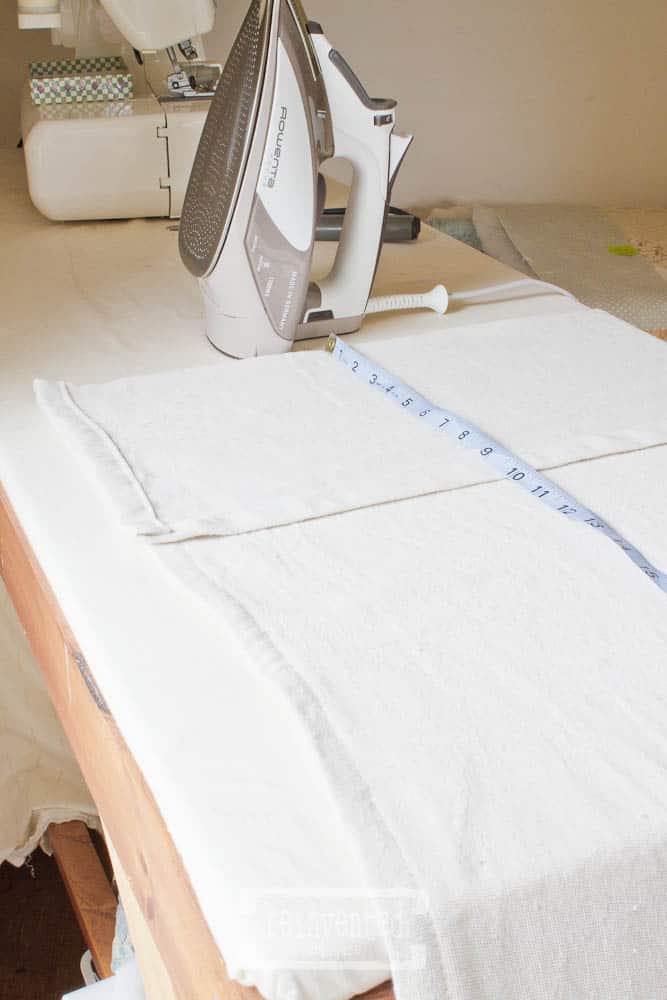
The length of the drop cloth was 9′ and I only wanted the shower curtain to be 80″ in length. Nine feet, by the way, is 108″!
Then I added the fold at the top to create the valance and used up some of the extra fabric but I needed to hem it to take care of the rest of the excess. I wanted a bottom hem because it would create weight at the bottom and the shower curtain would hang nicely.
If you make a floor-to-celing shower curtain You probably won’t have to hem the bottom of the curtain.
You can see here how I measured – with the tape measure looped around my neck, I measured the hem (mine was 11″), ironed the fold, and moved to the next section.
I measure and then iron to save on marking and ironing later.
Keep in mind your measurements can be different depending on the size of the drop cloth you choose and your desired finished length.
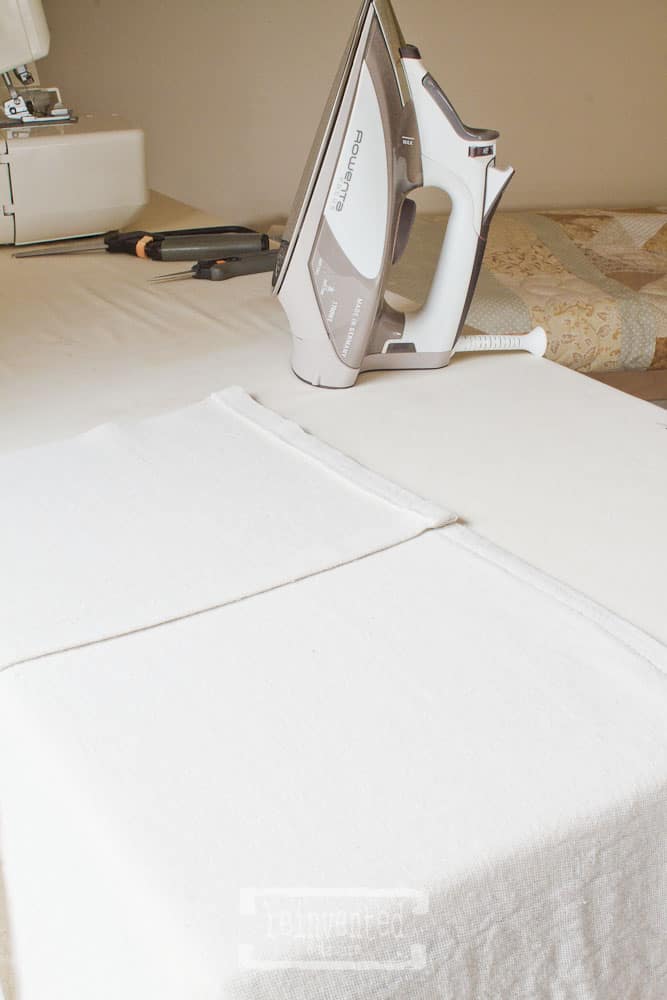
After the width has been measured and ironed, open the fold and then fold the pre-stitched bottom edge to the new fold you just created.
See here in the image below. There, you got it! Making your own curtain for your shower is easy, isn’t it?
Be sure and pin the hem this time. The wide hem – mine was about 5 1/2″ – can be cumbersome and the pins will keep it together while you are stitching.
Stitch about 1/4″ from the pinned edge.
I decided to add another row of stitching about 1 1/2″ away from the edge for added detail. This is optional! You can see the two rows of stitching below.
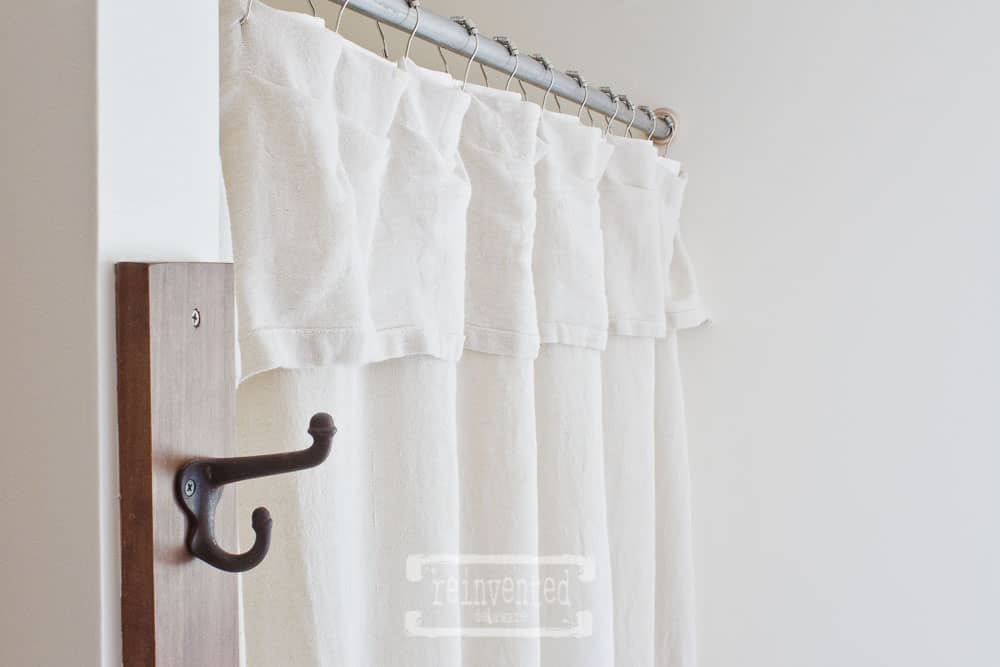
last step: hang the shower curtain
I already had the shower curtain rings but I did replace the pole. The previous pole was the standard spring-tension shower curtain rod sold in the shower curtain department of the box stores.
To go along with the farmhouse vibe, our double shower curtain is hung on a metal conduit pole purchased from the hardware store. It is used to protect electrical wires underground. The hardware store can cut it to your desired size.
The wood pieces on the wall are dowel rod support brackets. Ask for these at your hardware store when you purchase the conduit. I do plan on painting mine. 🙂
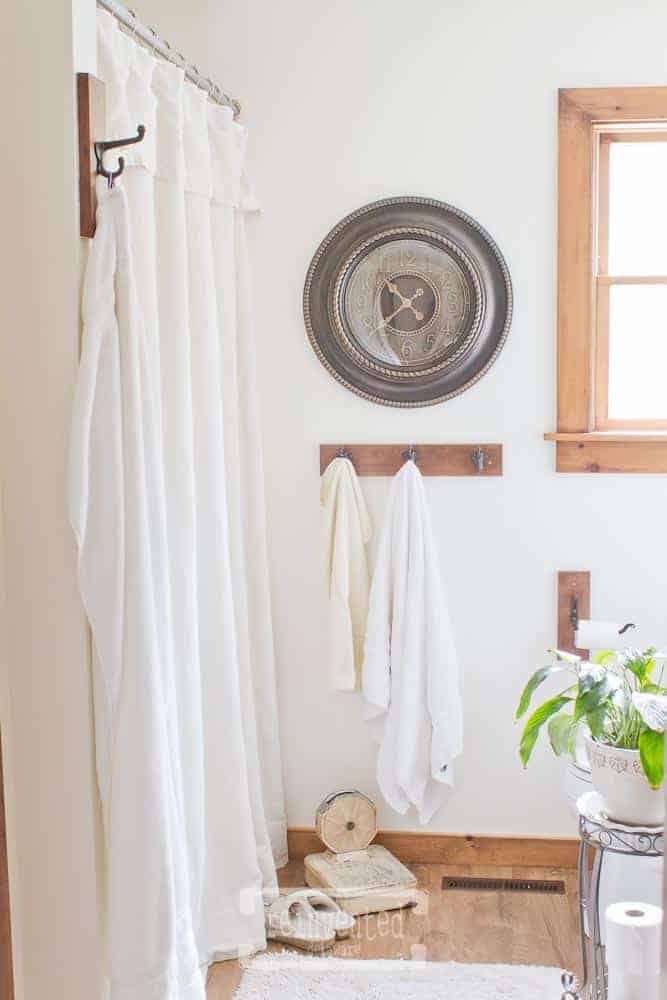
easy shower curtain idea
Wasn’t that easy?? With just a few cuts of the drop cloth and a couple of straight seams, you can make a big impact in your bathroom with a textured, farmhouse-style shower curtain for just a few dollars!
Look how the lighter color of drop cloth brightens the bathroom!
This bathroom is on the north side of our home and doesn’t get any sun until late in the day. It almost feels like I have an extra light on in the room!
And there ya’ have it! An easy drop cloth shower curtain idea that brings the farmhouse feel to the bathroom! Can you believe it only took five straight seams?
And even fewer seams to stitch if you made the easy changes I suggested! So simple!
shower curtain DIY re-cap:
- Determine the finished desired width and correct length of the shower curtain.
- Cut, iron, and hem the side seams.
- Measure, fold, iron, and stitch the top ‘valance’.
- .Measure, fold, and stitch the bottom edge.
- Make the buttonholes – or use clip-style curtain rings or metal grommets.
- Hang the shower curtain and enjoy!
more drop cloth projects!
Tap the images below to see more projects you can make from a drop cloth!


Recreate and Decorate
Join the Facebook Group and Share Your Projects With Us!
Thanks for joining our journey!
Thanks so much for joining us for this post! Join our journey so you don’t miss any of the fun projects, tutorials, and inspiration that we share with you each week! You can follow us on Instagram, Facebook, and YouTube. We share even more inspiration on Pinterest!


Cindy Rust
Cindy has been decorating her home with thrift store finds for 40 years. She is an avid thrift store shopper who loves to makeover the items she finds into vintage-inspired home decor and furniture. When she isn’t thrift shopping or painting a piece of furniture, you can find her making homemade butter, working in her garden, or painting with watercolors.
DIY Shower Curtain from a Drop Cloth
Materials
- 1 6' x 9' drop cloth
- 1 sharp scissors
- 1 sewing machine
- 1 steam iron
- curtain rod or metal conduit
- dowel rod holders for wall
Instructions
- Wash the drop cloth on the hottest settings and cycle on the washing machine.Dry the drop cloth in the dryer on the hottest settings.Measure the shower stall and tub for the correct size for the height of the shower curtain. The standard shower curtain size is 72" x 72". If you want a larger size, determine that ahead of time.If your drop cloth is larger than 6' x 9' then cut it down to size.Stitch the side seams if necessary.Create a faux valance by folding over the top edge of the drop cloth to the desired depth of the valance.Stitch a straight line approx 1.5-2" down from the top edge from one side to the next side.Create buttonholes within the section just created. Optional: use small curtain clips with hoops or use a grommet kit to create grommets along the top edge.Hem the bottom of the diy shower curtain to the desired length.Install the dowel rod holders in the appropriate area of either side of the shower. Use shower curtain hooks in the buttonholes and hang the shower curtain on the metal conduit pipe.Hang the conduit pipe in the dowel holders previously installed.

Hi Cindy! I love how your drop cloth shower curtain turned out. It makes such a pretty addition to your bathroom. And your tip on placing a pin at the end of the buttonhole to keep from cutting through – genius! Thanks so much for joining us and linking up at Homestyle Gathering.
Kim, thanks for commenting! Drop cloths are such an economical way to decorate! So much fabric for so little cost!
This is perfect, Cindy! Love the look, and how it really is not difficult, with your easy tutorial. I’ve been thinking about using a shower curtain in front of my shower doors, just to make it look nicer in my rental bathroom! This is definitely an option! Thanks so much for sharing on Homestyle Gathering!
Thanks for the encouragement Julie! I am crazy about drop cloths for so many projects! I would love to see what you come up with!
Thanks Julie! Drop cloths so useful in home decor! So much fabric for a great price. I think the shower curtain in front of your shower doors will look great! Thanks for sharing the Homestyle Gathering with me! It has been fun seeing all the other bloggers and their projects?
How much bleach did you use?
Hi! Sorry for the delayed response! I used approx 1/2- 3/4 of a large bottle of bleach.
Nice job! I would also have suggested that the holes for the shower curtain rings be made with grommets.
We made a custom shower curtain out of a twin sheet (perfect width) and then cut off the excess length (which I use for a runner for my outdoor table settings sometimes).
It’s easy peasy to install grommets and it looks very professional.
That’s a great idea! The next time I make one I will be sure to do that 🙂
I can’t wait to see how you bathroom comes together, Cindy! Your dropcloth shower curtain is perfection. I love how it has such a french country feel yet is totally budget friendly. It makes me want to try a set of curtains! Hugs, CoCo