
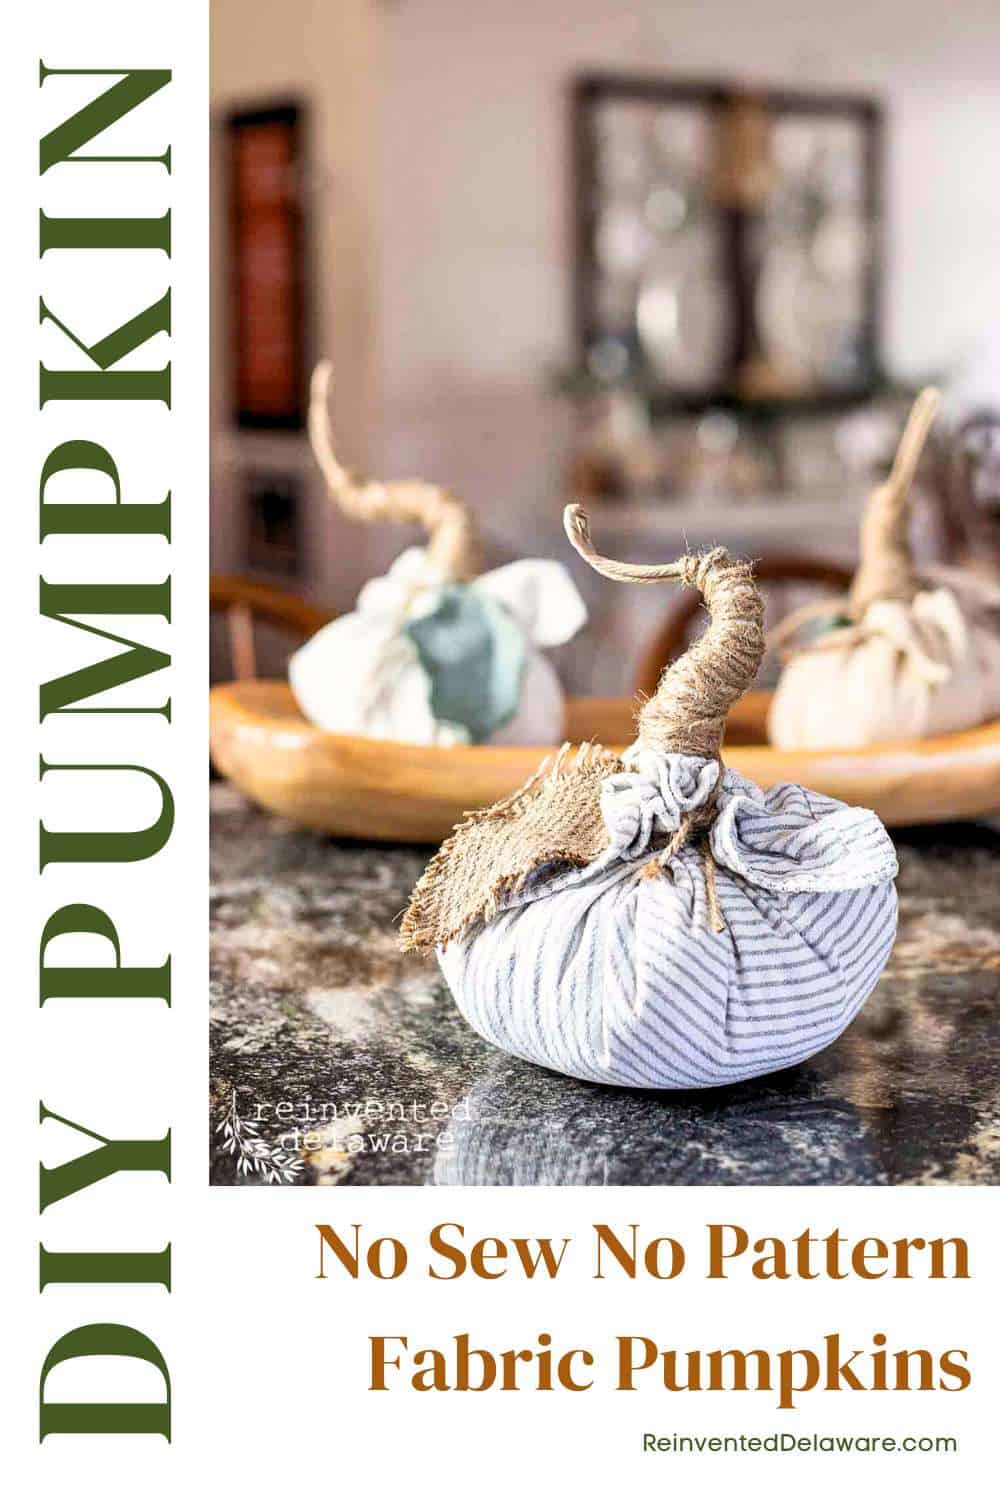
How to Make Easy DIY Fabric Pumpkins No Sew Pattern
Learn to make easy DIY fabric pumpkins with a free no-sew pattern. Make your own fabric pumpkins in minutes with this simple tutorial.
Looking for a fun and festive way to decorate your home for fall? Then you will enjoy making these no-sew and no-pattern-needed pumpkins!
These fabric pumpkins are perfect for decorating your mantel, porch, or anywhere else in your home.
They’re also a great way to add a touch of fall to your Thanksgiving table. Fall is here, and it’s time to spruce up your home with some cozy and budget-friendly DIY decor.
The following post may contain affiliate links. That means if you click and then buy something, I will make a small commission at no additional cost to you! Thank you for supporting my blog. full disclosure here.
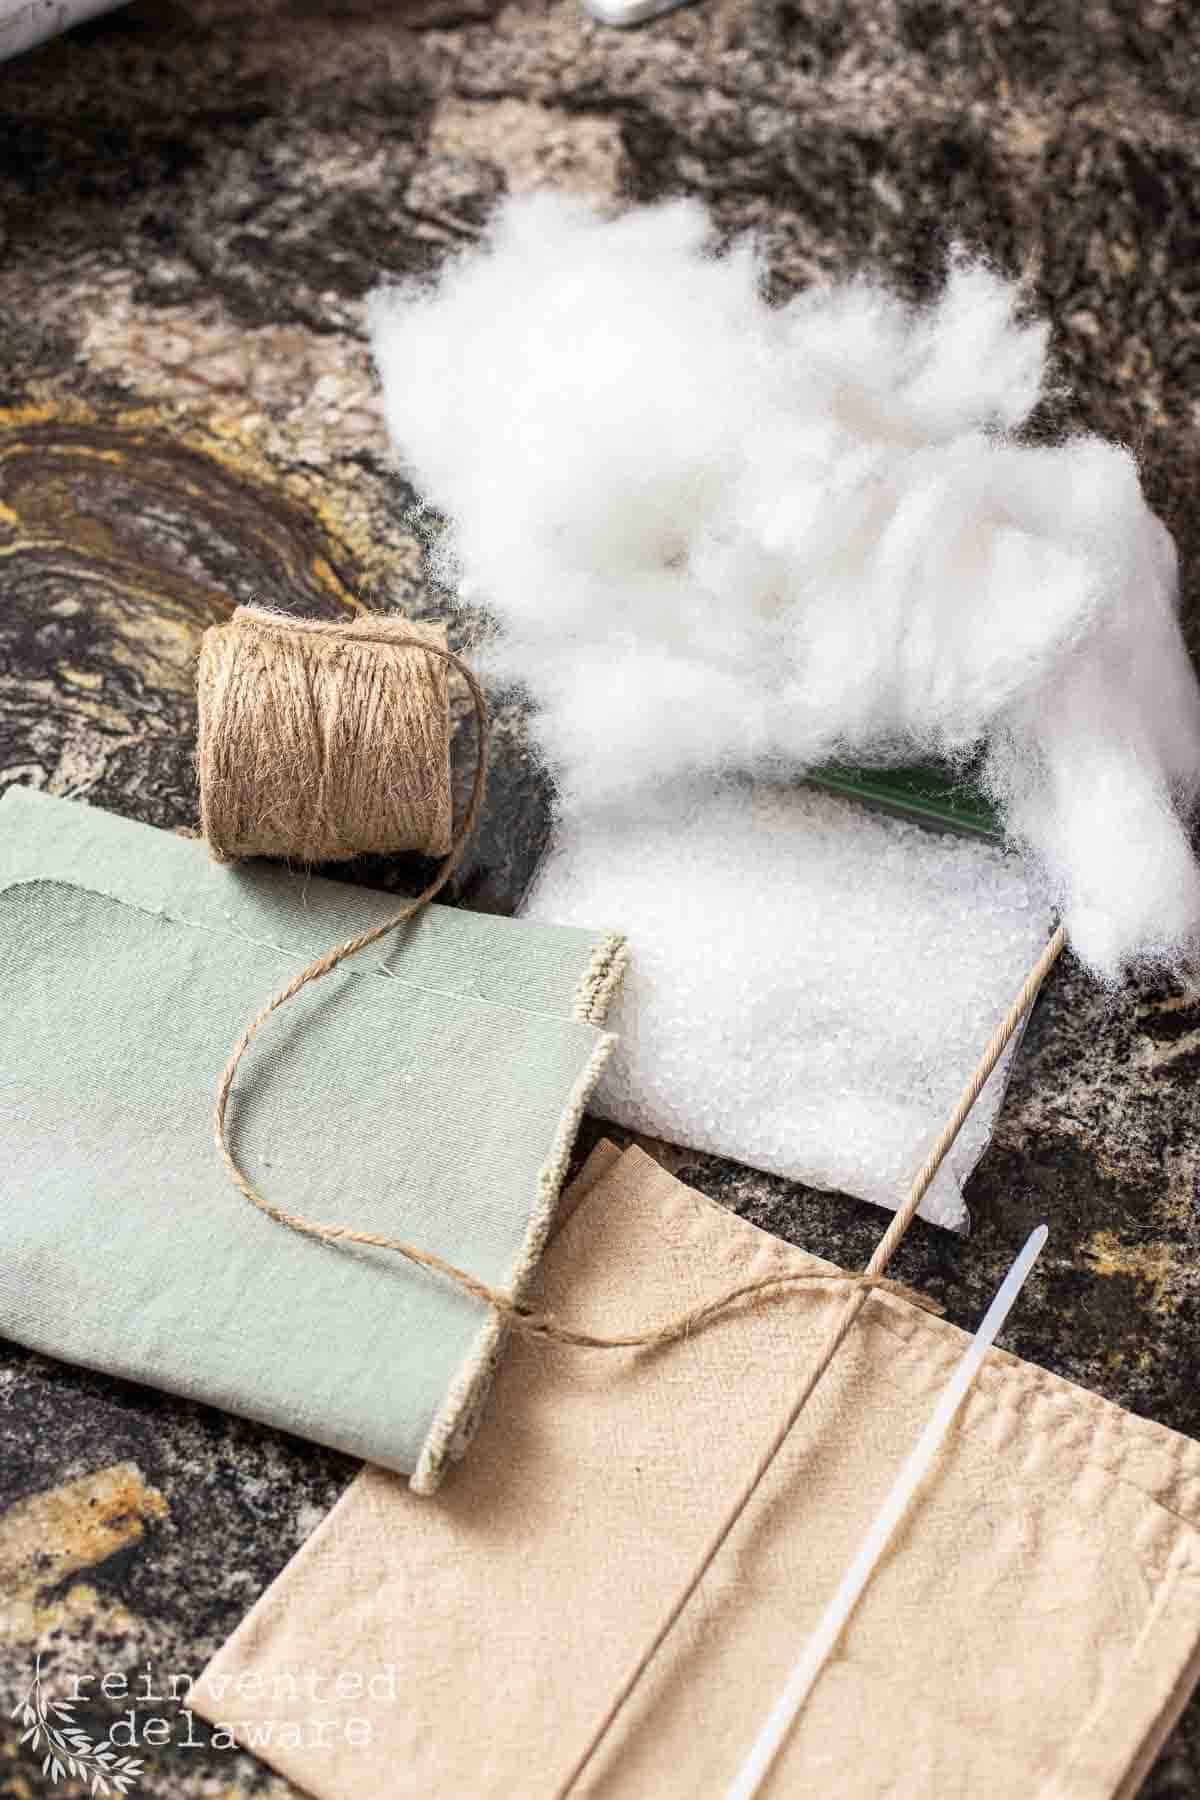
supplies for diy fabric pumpkins
- Assorted fabrics in fall colors (I use cloth napkins – they are the perfect size and they can be reused once the fall season is over! I’ve linked several packs of gorgeous cloth napkins later in this post!)
- Polyester fiberfill stuffing
- PolyPellets
- stiff precut craft wire 18″ long
- jute twine
- zip ties
- Ziploc sandwich bags
how to make fabric pumpkins
With just a few supplies and a little bit of creativity, you can add a touch of autumn charm to any room.
Fabric pumpkin pattern free tutorial
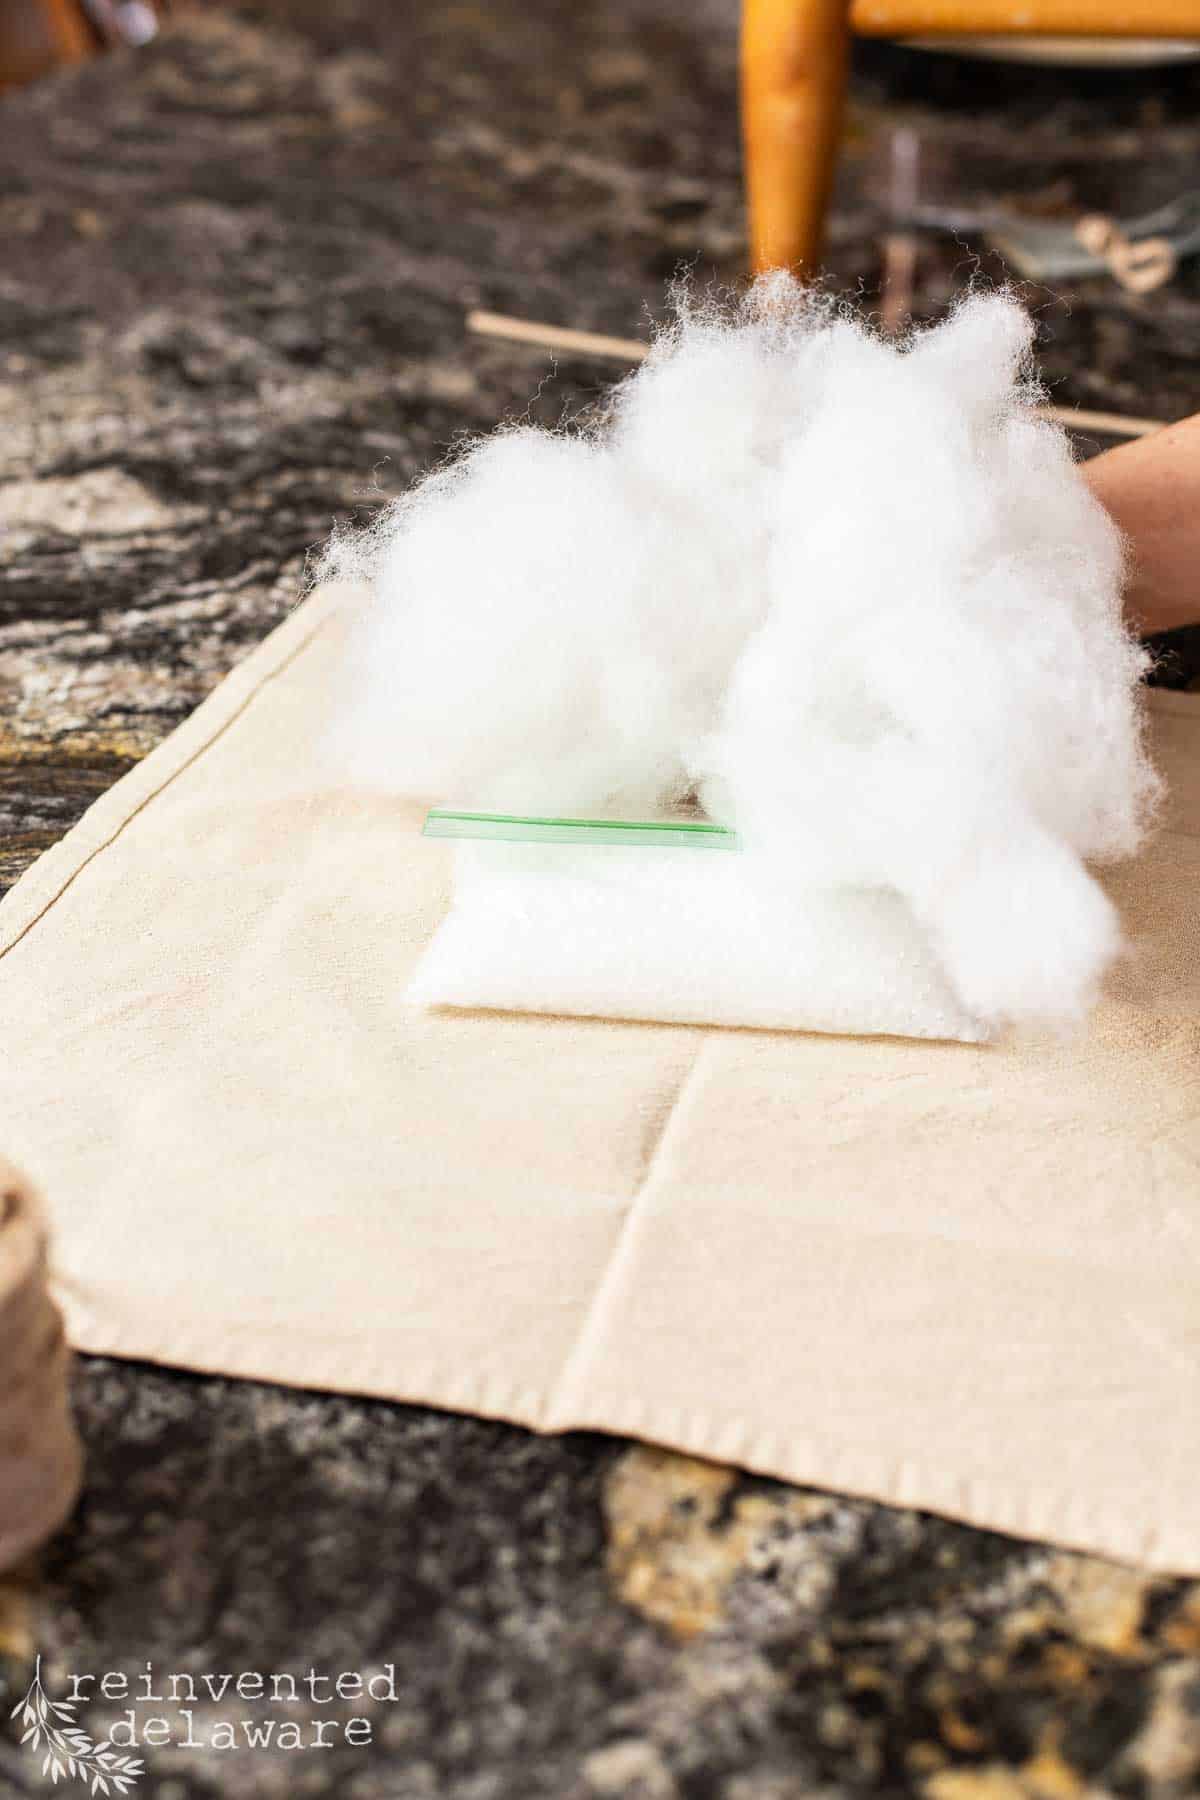
- Pour approximately 3/4- 1 cup of poly pellets in a sandwich baggie.
- Place the baggie in the center of the fully opened cloth napkin.
- Place a handful of polyfill on the baggie.
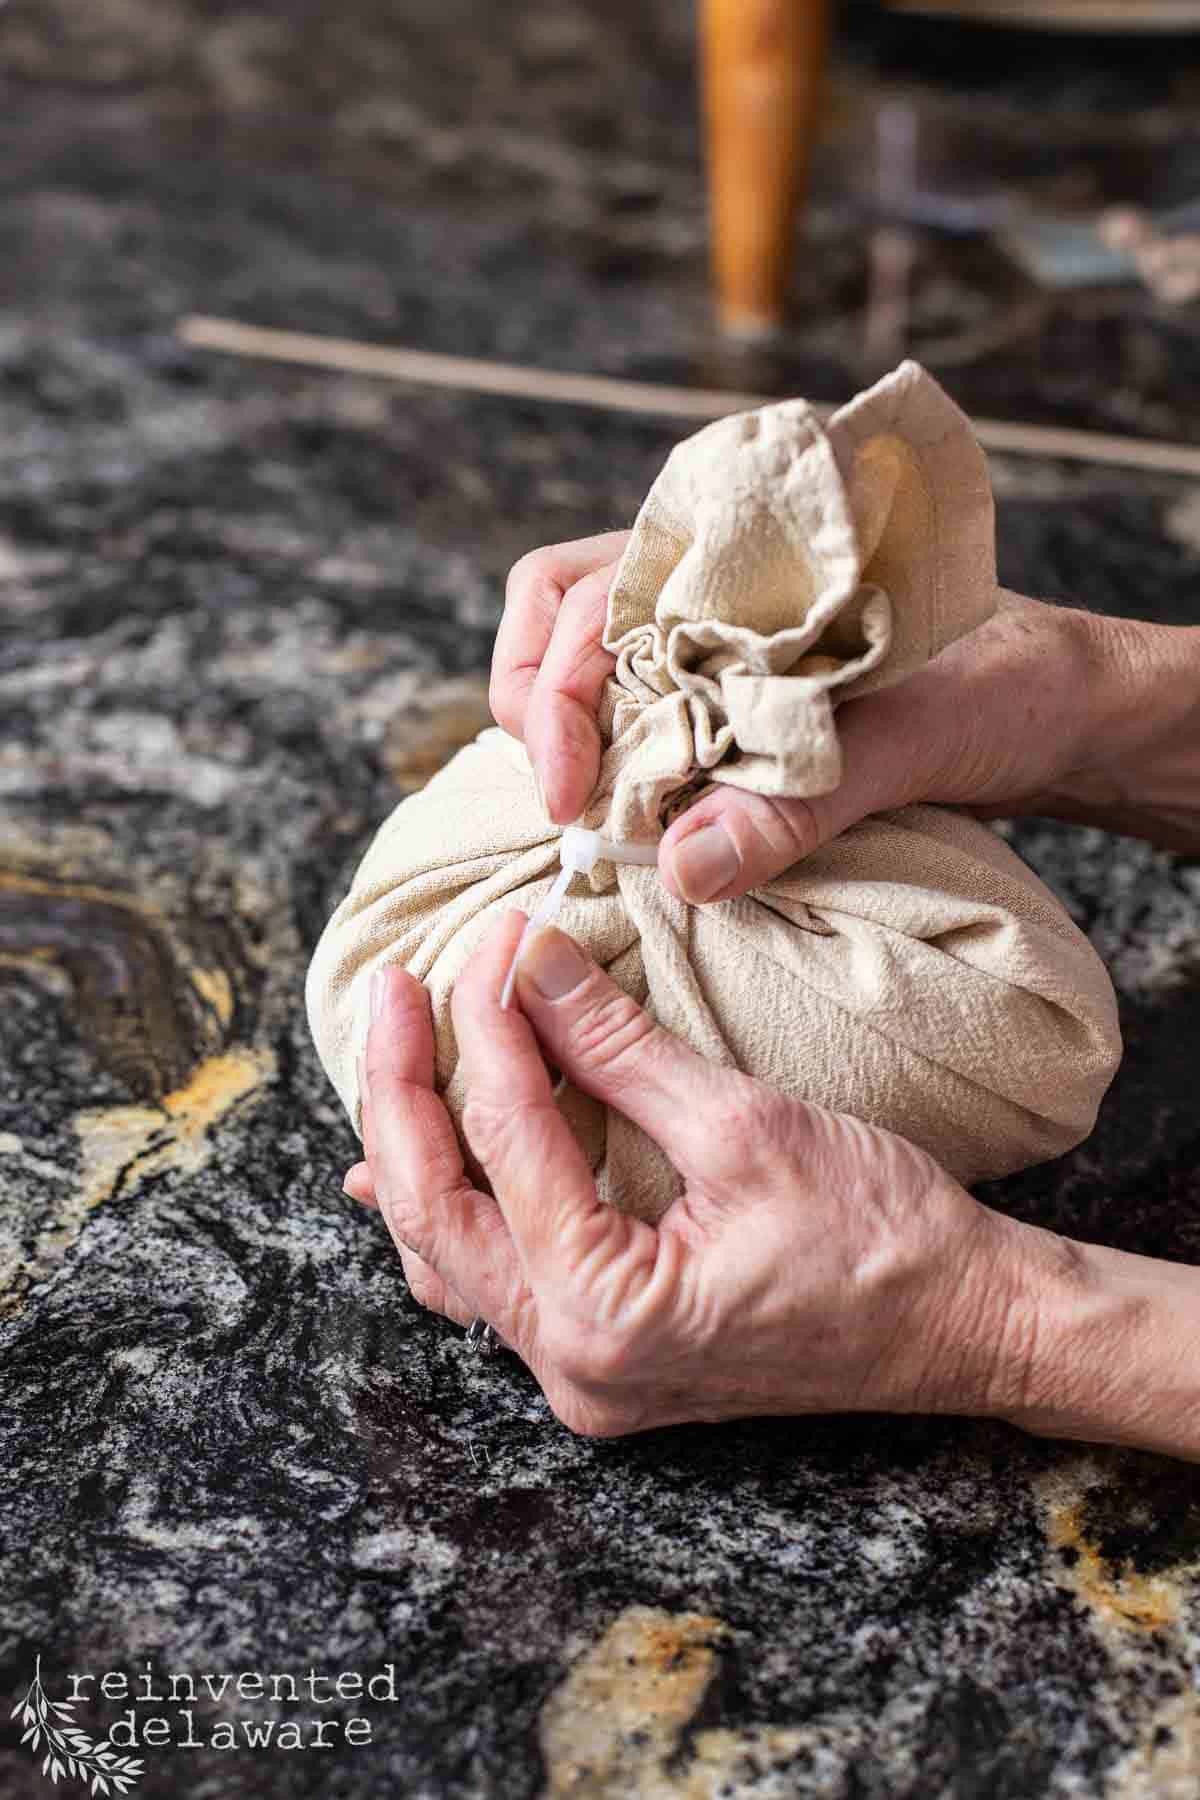
- Pull all four corners of the fabric up towards the center and secure them together with a zip tie but do not tighten the zip tie completely.
- Pull the edges of the napkin all the way through the zip tie, making sure the edges are secure in the zip tie.
- Pull the zip tie snugly ensuring the napkin edges and corners are all secured inside the grip of the zip tie.
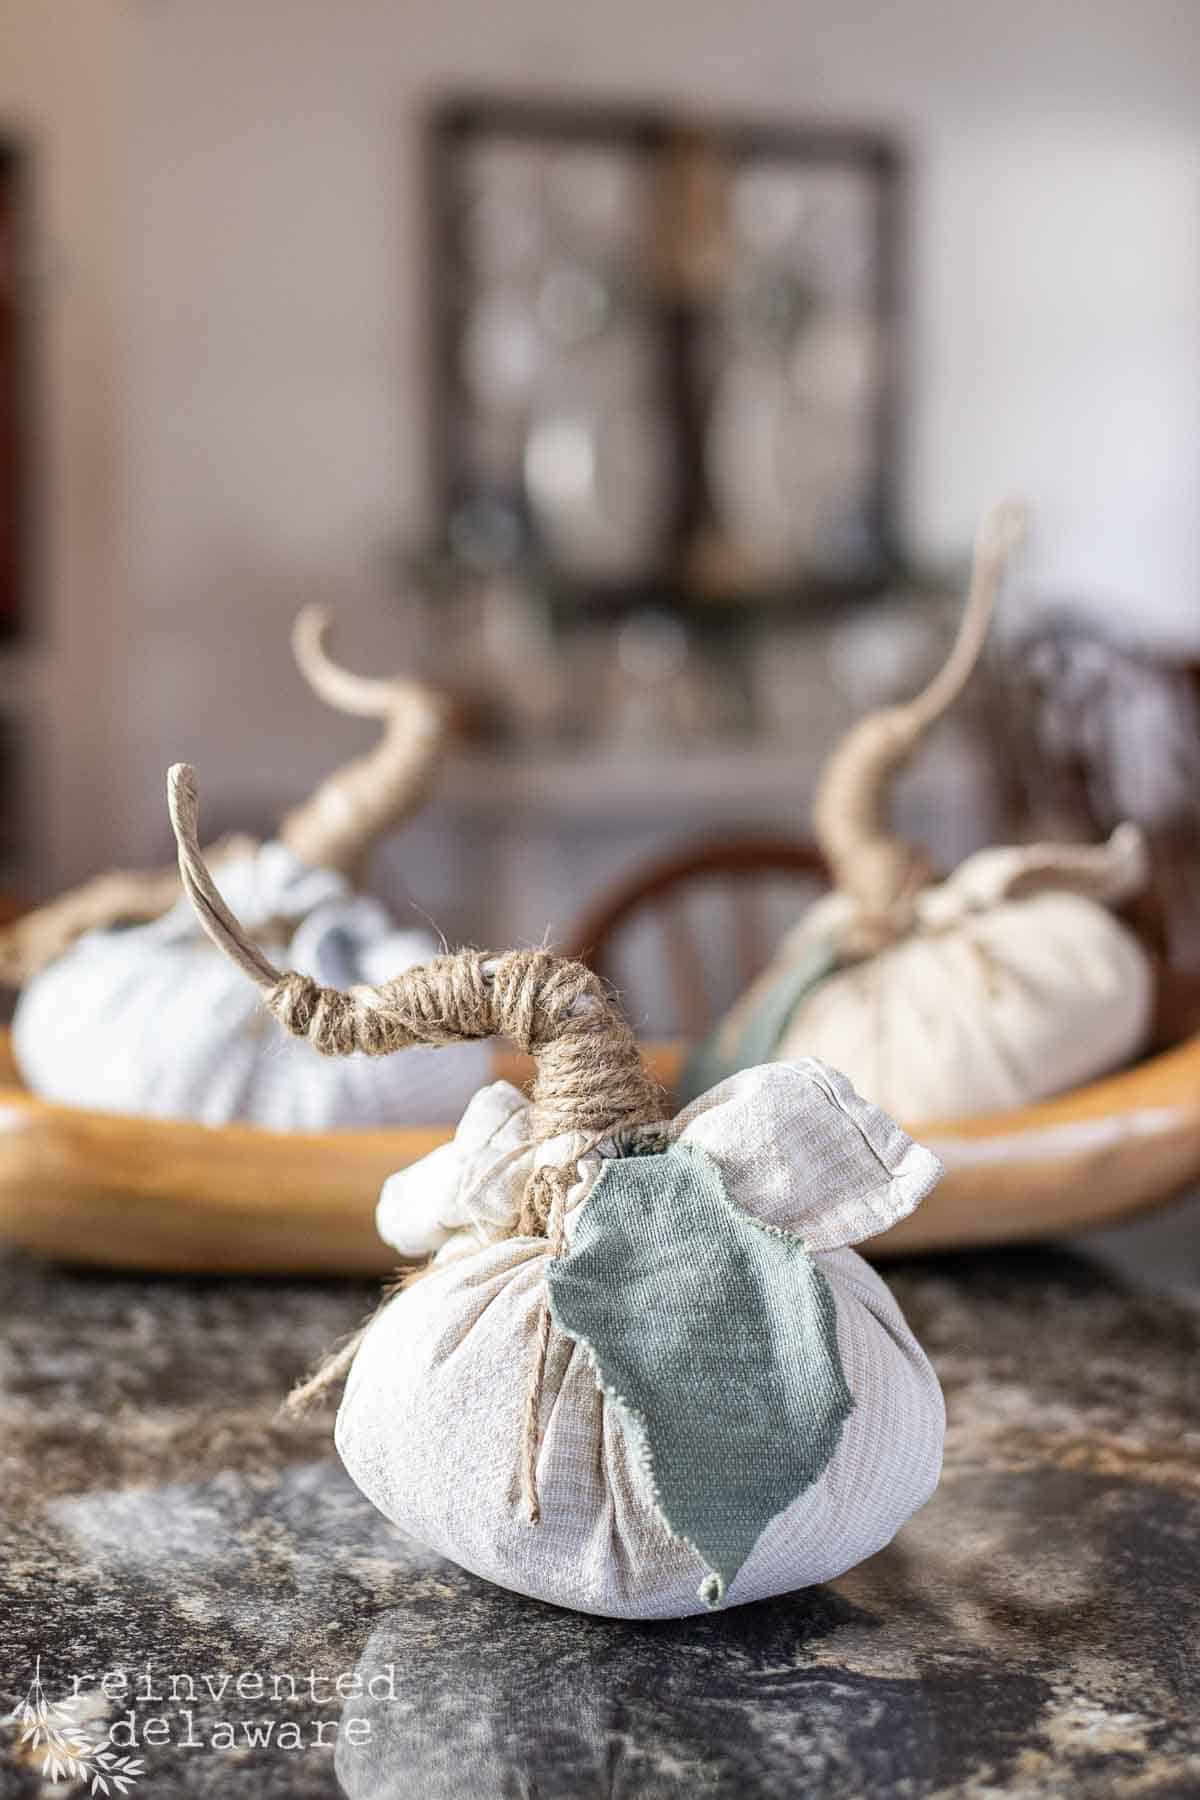
- Fold the heavy gauge wire in half and then stick it into the hole created with the zip tie. try not to damage the cloth napkin with the wire.
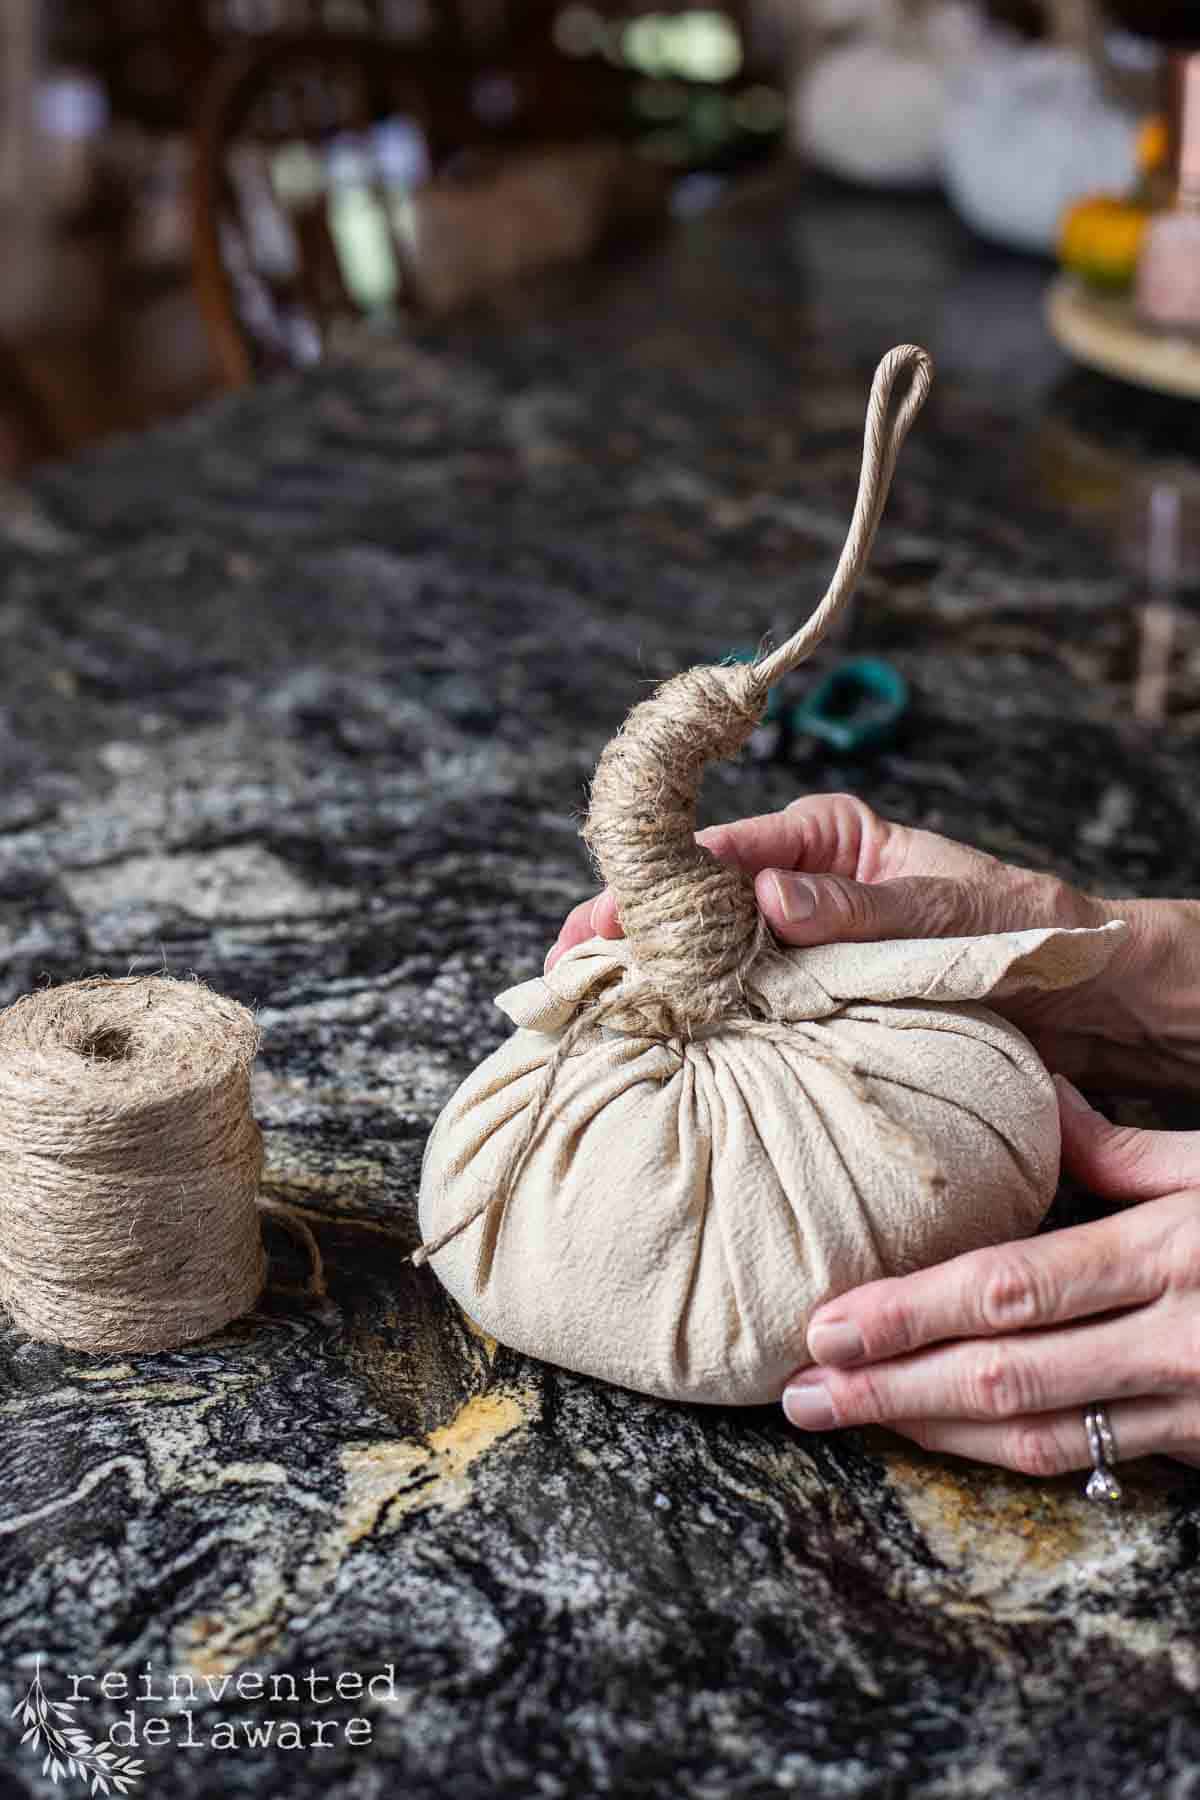
- Tie a length of the jute twine around the neck that the zip tie created leaving plenty of excess twine for wrapping.
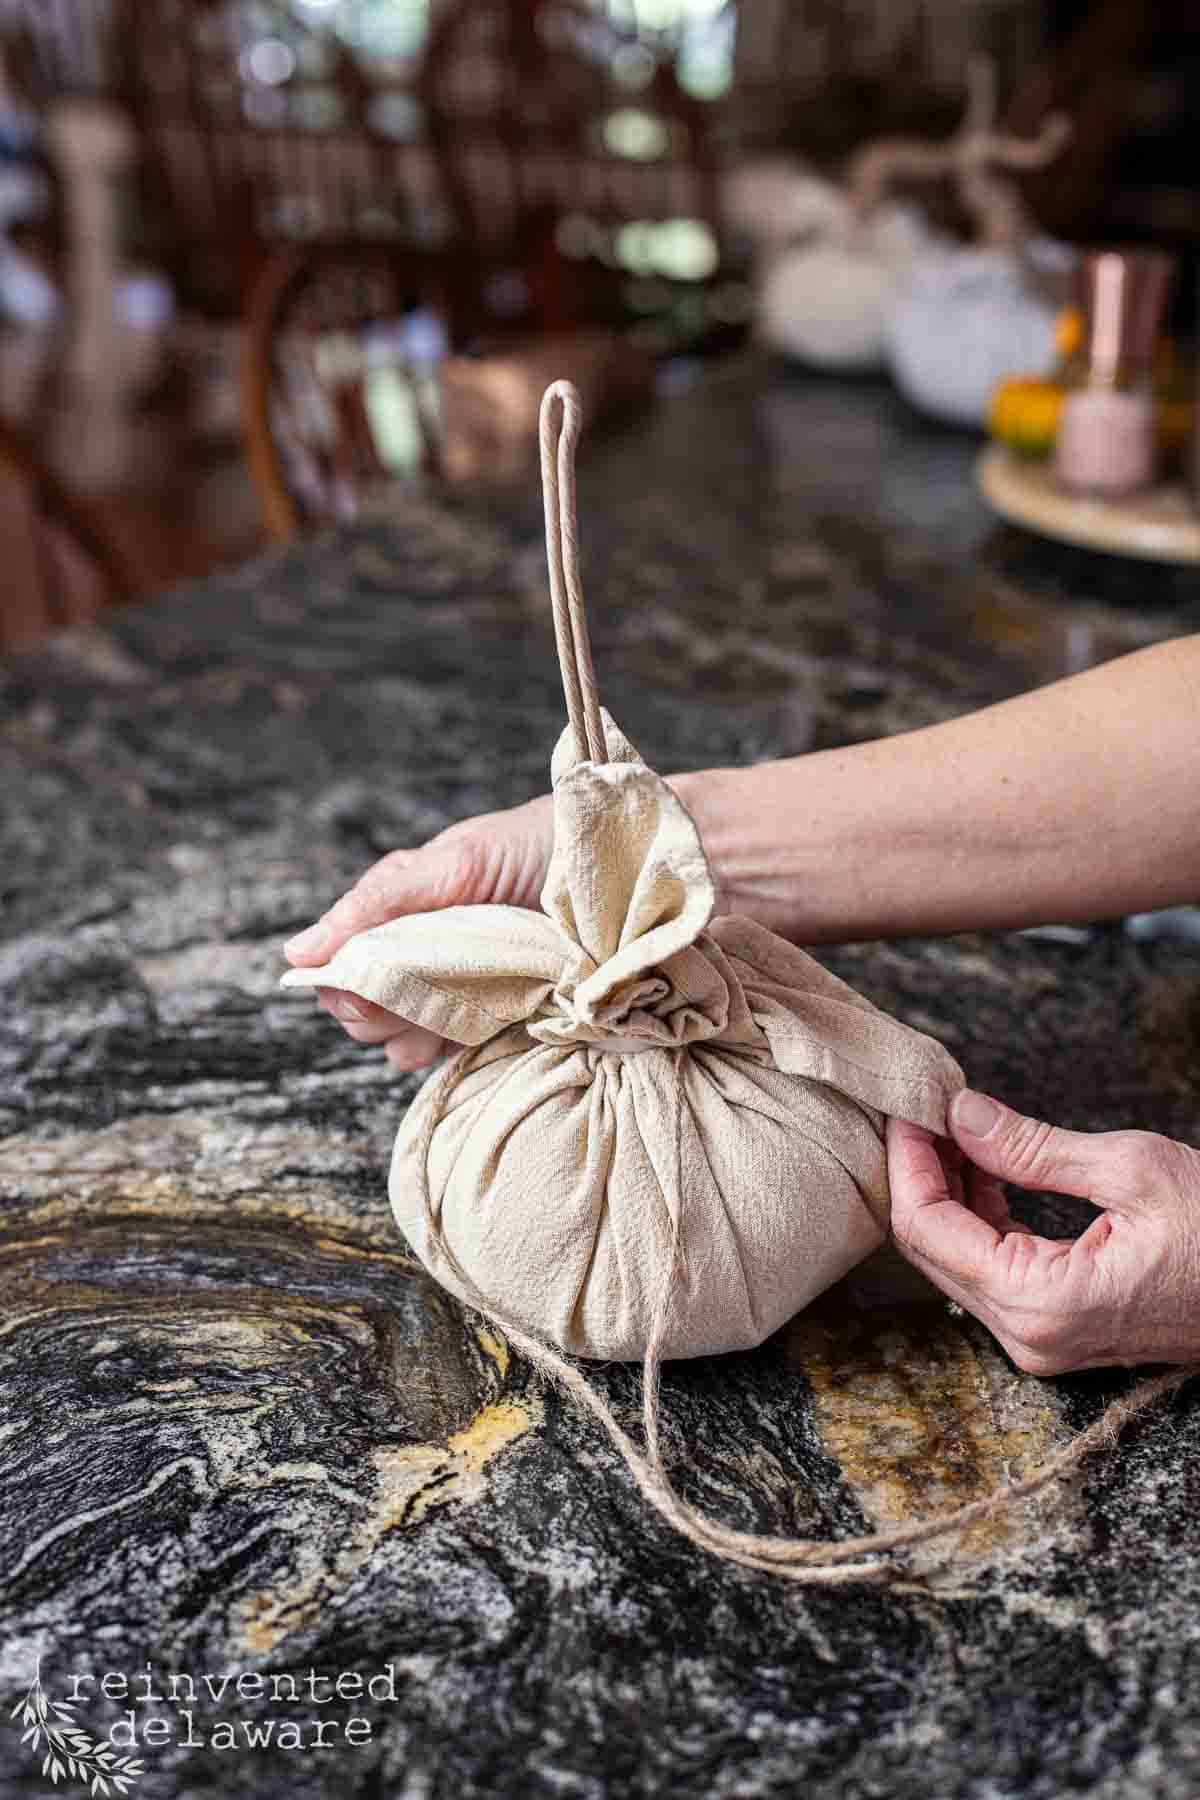
- Pull two of the fabric napkin corners in towards the heavy gauge wire and wrap the jute twine around the corners and up the wire creating a thick and bulky pumpkin stem.
- Slightly bend the stem for a whimsical look.
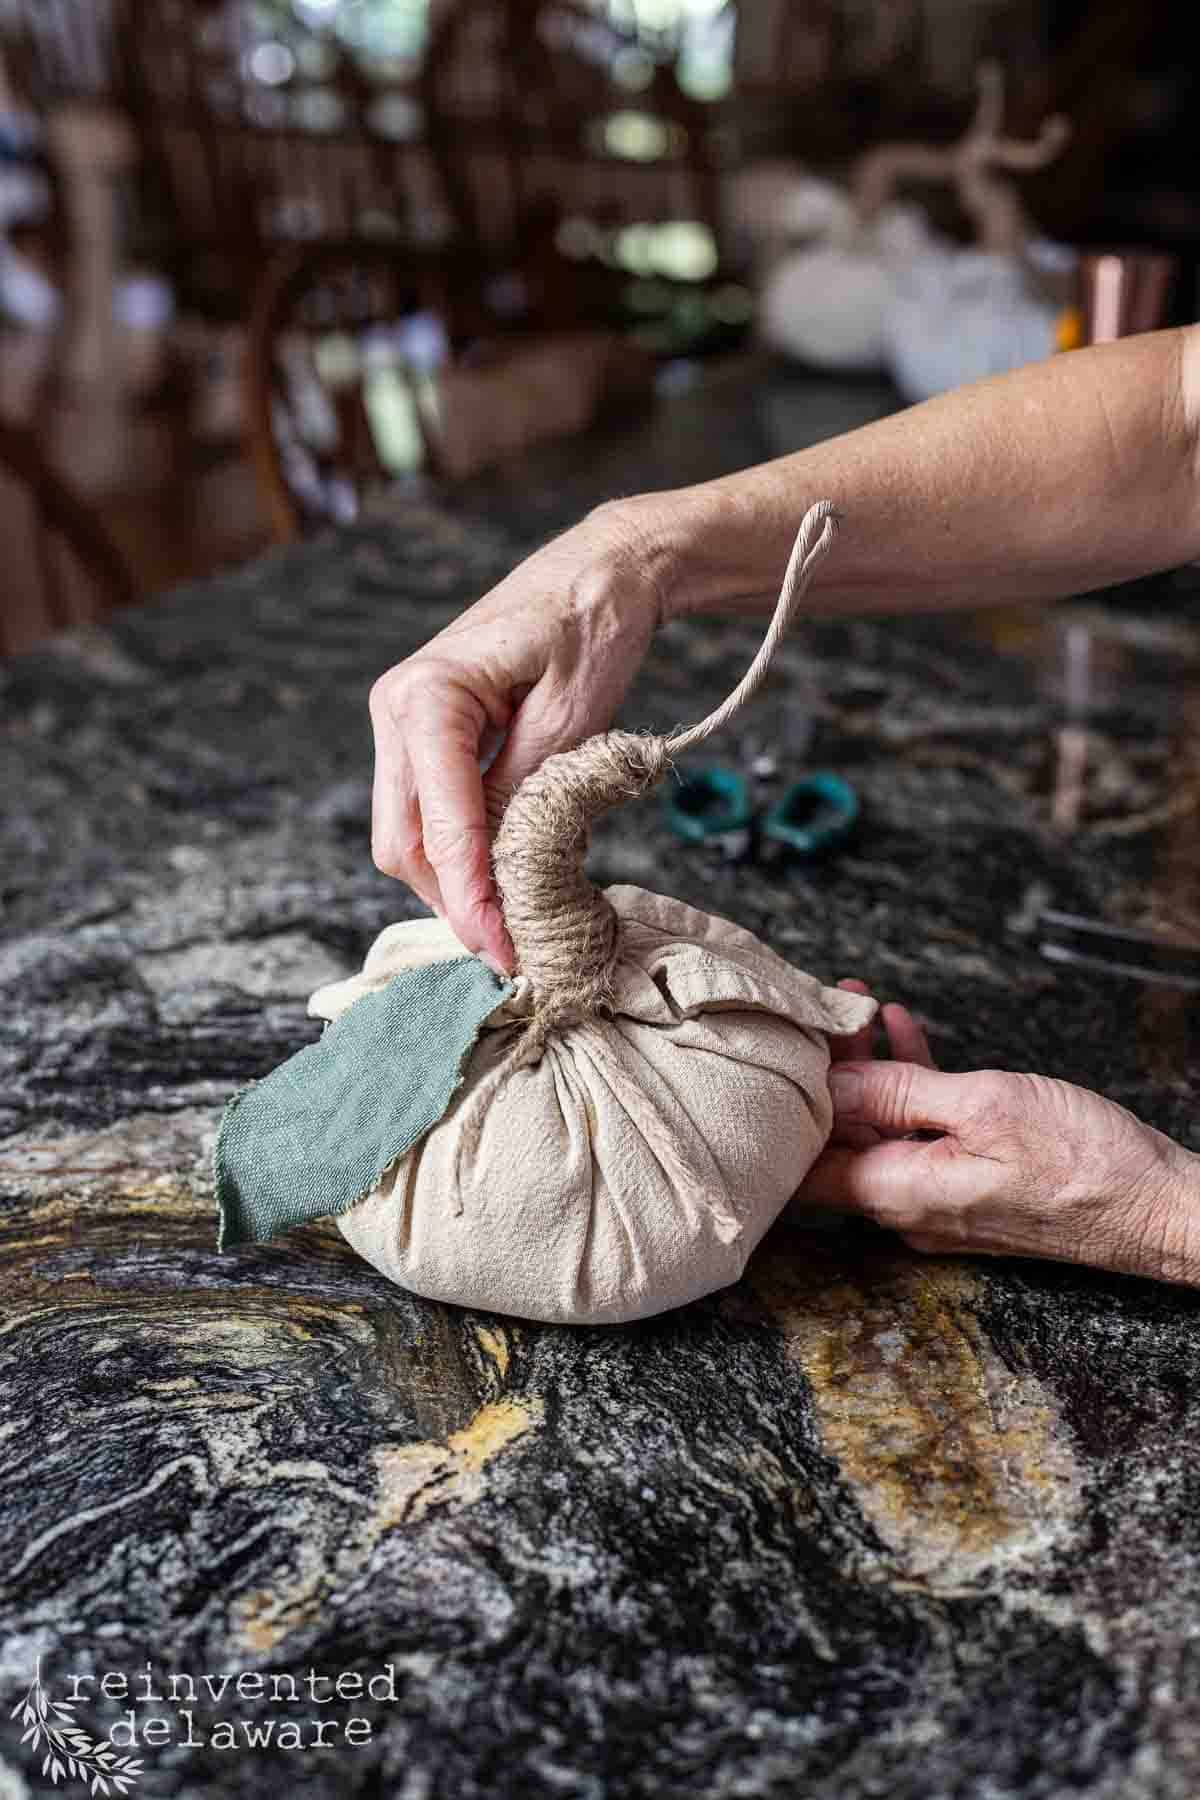
- Cut one leaf design from scrap fabric like burlap or heavy canvas.
- Push the end of the fabric leaf into the same area as the heavy gauge wire.
easy fabric pumpkins
Wasn’t that so easy? This no sew fabric pumpkin idea is one of my faves. You can use them to decorate your home for the fall season all the way through Thanksgiving.
When you are done with the fall season, simply take the fabric pumpkins apart, save the supplies for other projects and you still have those gorgeous reusable cloth napkins!
fabric pumpkin pattern
Let’s chat about another idea for making fabric pumpkins. You just might have some fall fabrics that you are itching to make pumpkin crafts from! I get it! I have so much fabric – it’s a serious problem in my craft room!
Grab that fabric, and some embroidery floss, and let’s make some more fabric pumpkins!
Cut the fabric in several sizes of circles starting with a 12″ circle. Lay the right sides of the fabric down and run a gathering stitch using the embroidery floss and a sewing needle. Stitch approximately 1/2″ from the raw edge. Be sure to knot the heavy thread at the beginning.
Have your baggie of poly pellets and a large handful of polyfill ready. Pull the running stitch until the circle starts to close.
Add the baggie of poly pellets and the polyfill in the center and completely pull the heavy thread to tighten the circle. before you completely tighten the circle, add your fabric leaf and the heavy wire for the stem.
You can finish these no sew fabric pumpkins using the same instructions for the cloth napkin pumpkins.
Keep in mind that you can make your fabric pumpkins in the desired size that you want. Simply cut the circle of fabric larger or smaller to make the size pumpkin you want!
easy fall pumpkin diy
I’m sure you will enjoy either of the DIY fabric pumpkin ideas I shared with you! You didn’t even have to pull out your sewing machine or your glue gun! Don’t you just love that?
YouTube video
Do you like to watch videos of DIY projects like this sweet pumpkin project? Then you are in luck – I created a video just for you!
Tap the image below to watch! I’ve also included some other DIY fall ideas that you will enjoy!

decorate with fabric pumpkins
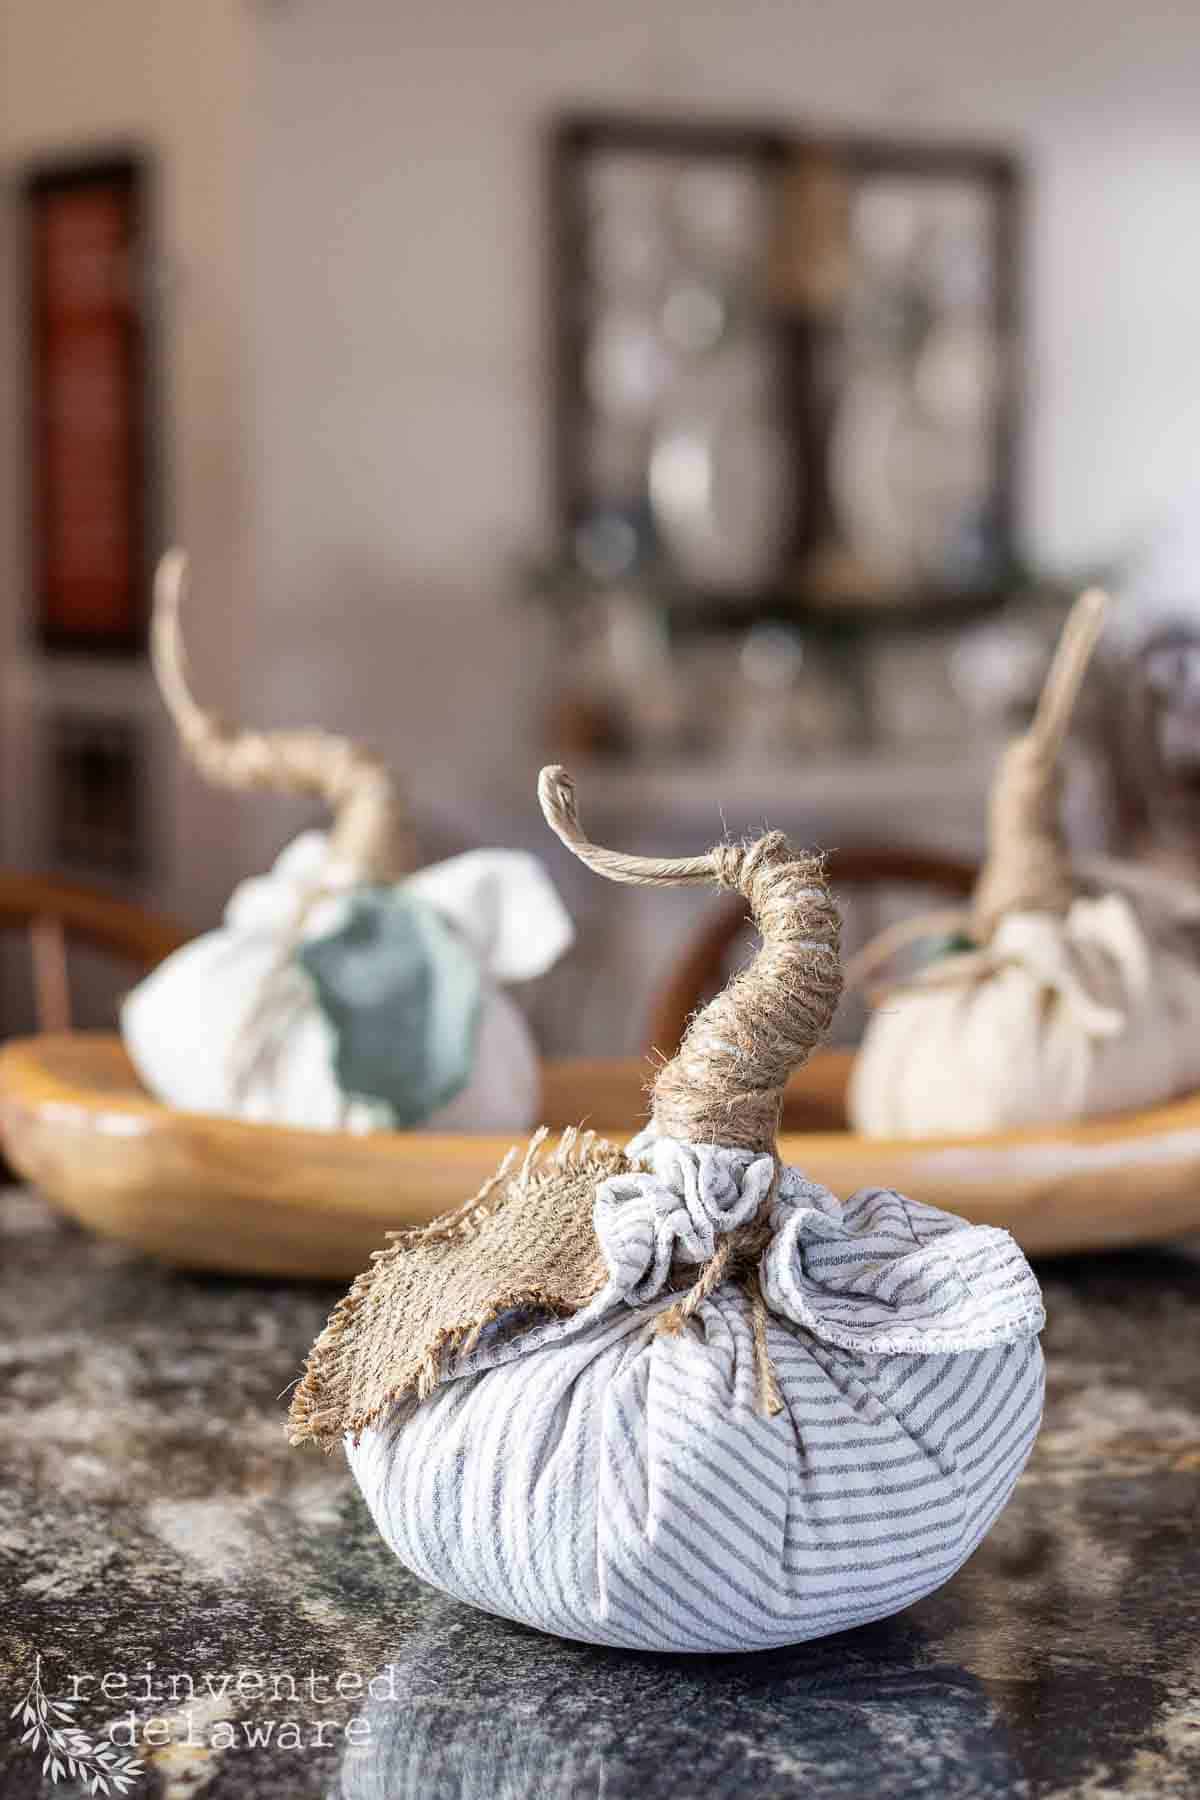
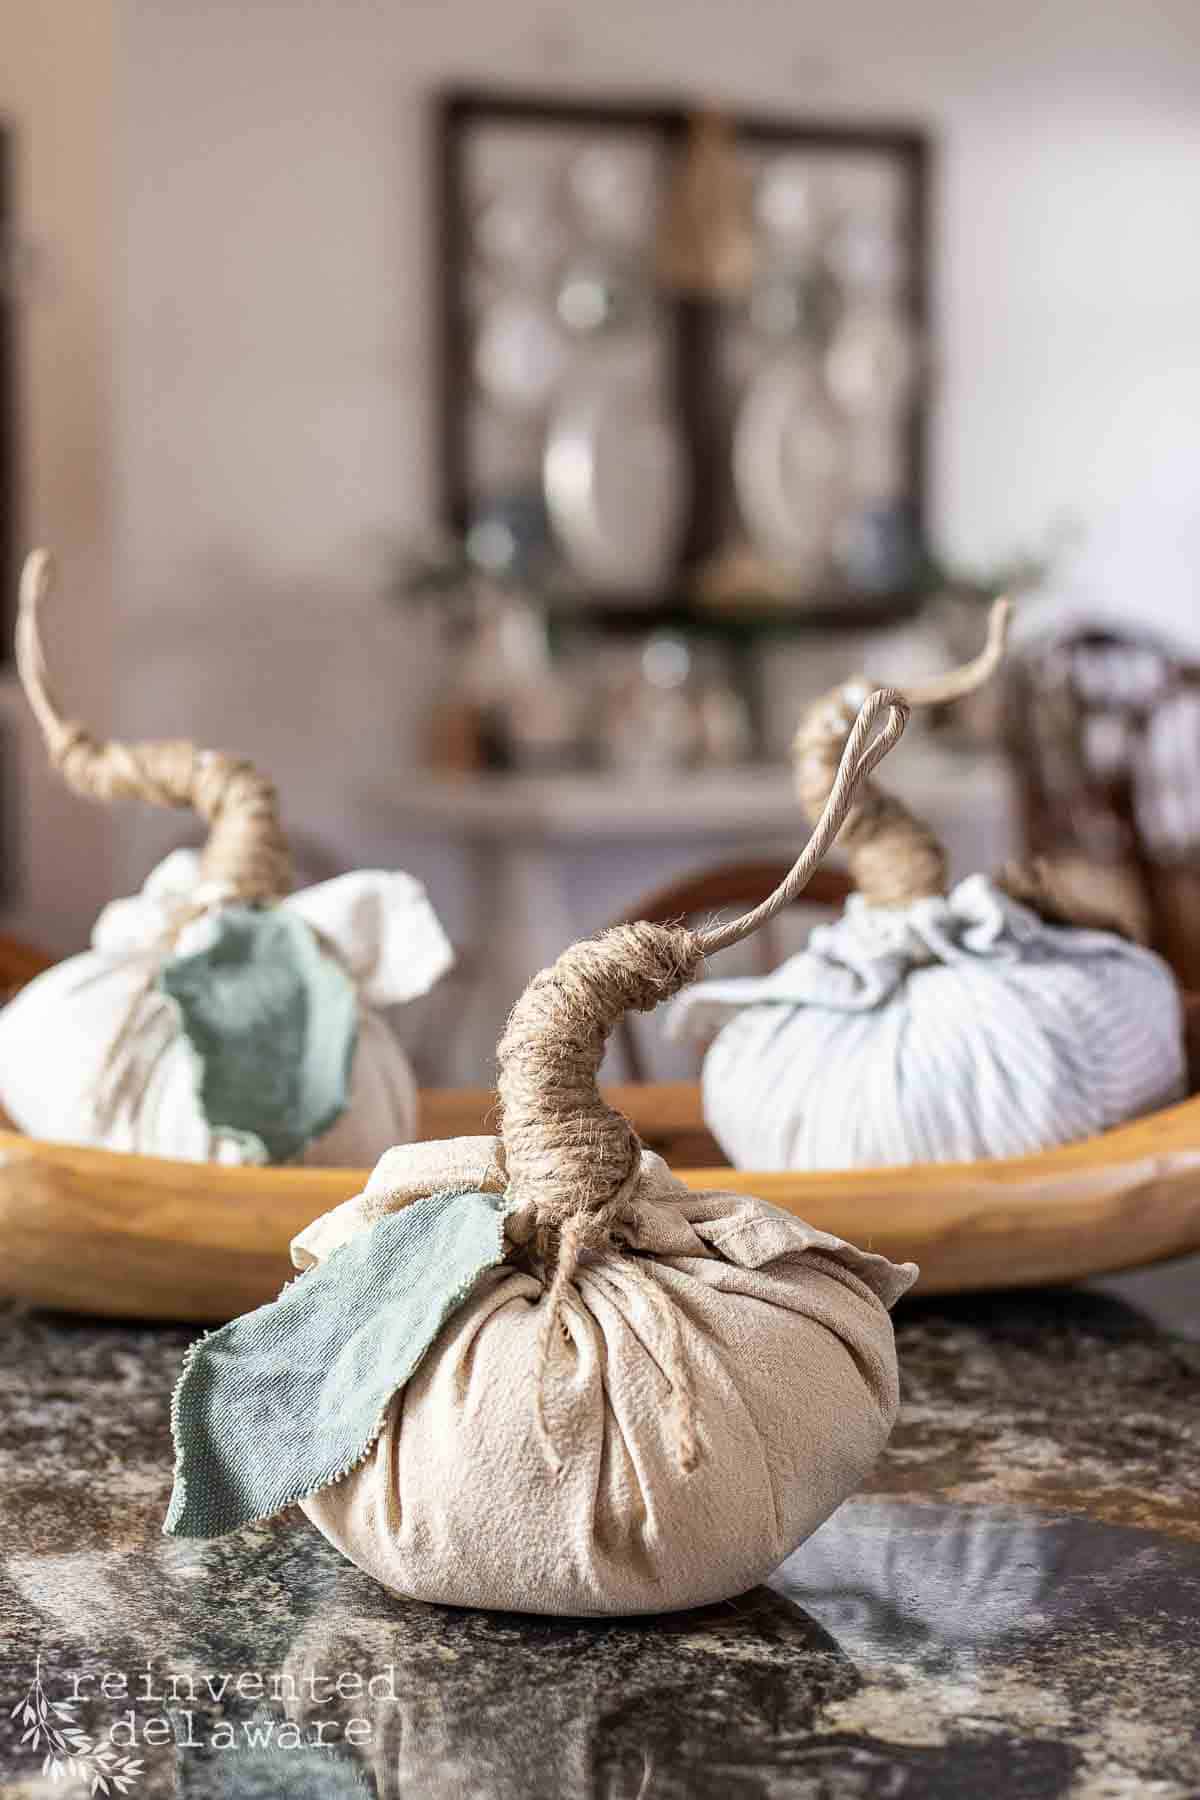
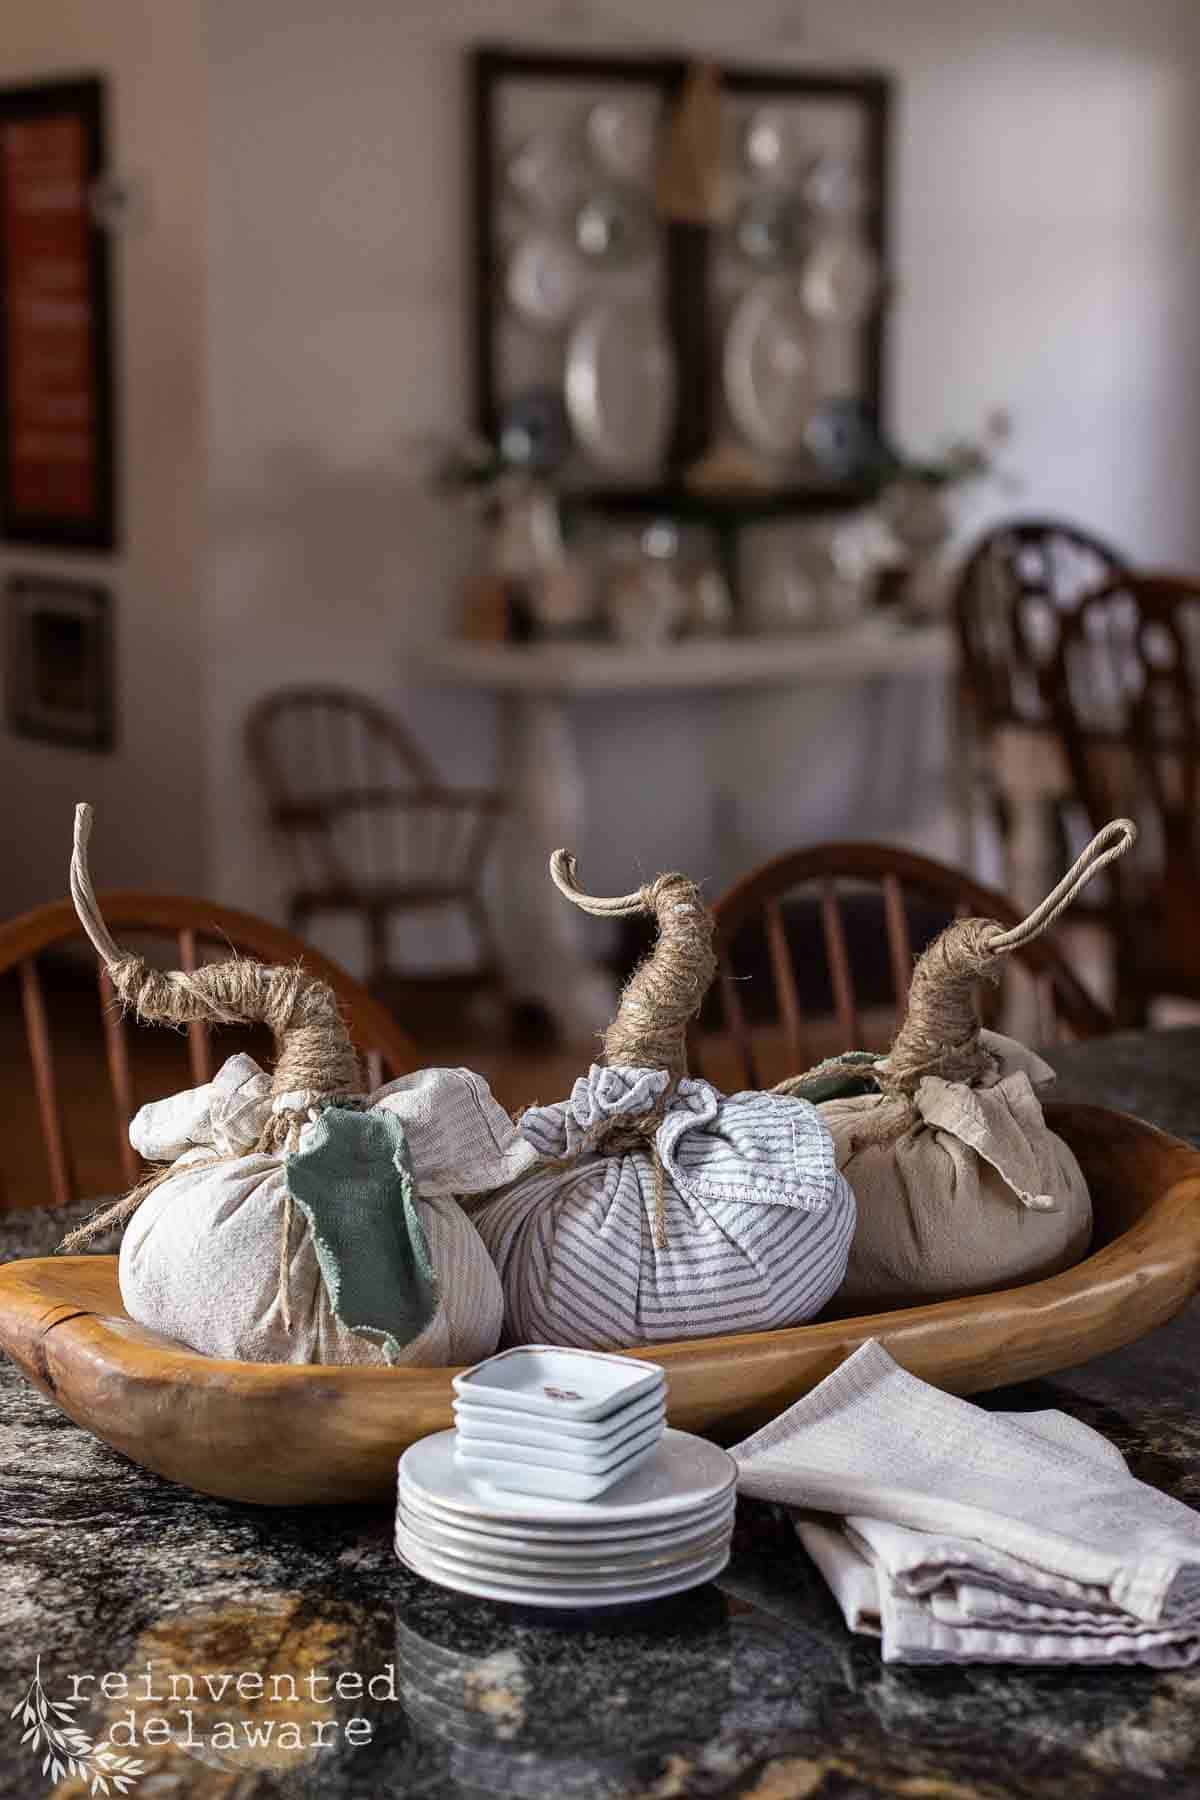
How will you decorate your house with these pumpkins? Mine are in a grouping of three in a dough bowl sitting on our kitchen island.
My fireplace mantlel needs a touch of DIY fall decor too so I am sure I will make a few more.
My front porch might get a couple of orange-colored fabric pumpkins for Halloween. Wouldn’t these be so cute on a front porch?
Place these little pumpkins anywhere your heart desires. You could even give some away as a gift!
supplies to make DIY napkin pumpkins

more fabric pumpkin decorating ideas
- Use them at place settings or centerpieces for your Thanksgiving table.
- Create a garland by stringing together small fabric pumpkins of different sizes and colors. Hang the pumpkin garland to decorate your fireplace or staircase!
- Use fabric pumpkins to make a fall wreath. This is a fun and easy way to decorate your front door or any other door in your home. Simply attach fabric pumpkins to a wreath form using wire or ribbon.
- Sew fabric pumpkins together to create a soft and cuddly toy for your child (skip the heavy wire for safety!)
- Use fabric pumpkins to create a festive fall centerpiece. Place a few fabric pumpkins in a bowl or basket and add some other fall decorations, such as pinecones, berries, and candles (use caution!)
No matter how you choose to use them, fabric pumpkins are a fun and easy way to add a touch of fall to your home.
Handy tip: Thrift Shopping
You can find so many pretty cloth napkins at your local thrift store! Take them home and give them a good wash and they are ready to turn into a pumpkin!
No Sew Fabric Pumpkin DIY
Materials
- cloth napkin or fabric scrap
- poly pellets
- polyfil
- precut stiff paper covered wire
- jute twine
- zipties
- ziploc sandwich baggies
Instructions
- pour approximately 3/4- 1 cup of poly pellets in a sandwich baggie.
- place the baggie in the center of the fully opened cloth napkin.
- place a handful of polyfill on the baggie.
- pull all four corners of the fabric up towards the center and secure them together with a zip tie but do not tighten the zip tie completely.
- pull the edges of the napkin all the way through the zip tie, making sure the edges are secure in the zip tie.
- pull the zip tie snugly ensuring the napkin edges and corners are all secured inside the grip of the zip tie.
- fold the heavy gauge wire in half and then stick it into the hole created with the zip tie. try not to damage the cloth napkin with the wire.
- tie a length of the jute twine around the neck that the zip tie created leaving plenty of excess.
- pull two of the fabric napkin corners in towards the heavy gauge wire and wrap the jute twine around the corners and up the were creating a thick and bulky pumpkin stem.
- slightly bend the stem for a whimsical look.
- cut one leaf design from scrap fabric like burlap or heavy canvas.
- push the end of the fabric leaf into the same area as the heavy gauge wire.
Notes

Thanks for joining our journey!
Thanks so much for joining us for this post! Join our journey so you don’t miss any of the fun projects, tutorials, and inspiration that we share with you each week! You can follow us on Instagram, Facebook, and YouTube. We share even more inspiration on Pinterest!
use code: 10OFFRD at checkout and save 10%!
click below to purchase supplies!
Visit my Amazon Storefront!
Click the button below and head over to our online shop on Amazon!


Cindy Rust
Cindy has been decorating her home with thrift store finds for 40 years. When she isn’t thrift shopping or painting a piece of furniture, you can find her making homemade butter, working in her garden, or painting with watercolors.


These pumpkins are super cute, Cindy! I love that big, chunky stem!!
Thanks Rachel! Those little pumpkins are so easy to make!
These are the best lookin fabric pumpkins I’ve seen to date. Oh, I’m making these! Thank you so much for sharing your talents.
xo 😘
Thanks Do! I’m sure yours will be adorable!
I love these sweet little pumpkins so much! Pinning 🙂 Tanya @twelveoeightblog
I’m so glad you enjoyed them Tanya! Thanks so much for pinning 😊