
Easy $5 Corn Husk Wreath – How to Make This DIY Fall Project
Add a touch of charm to your front door this fall with this homemade corn husk wreath! It’s such a great fall project and takes less than an hour of your time!
In this post, I will teach you how to make an easy corn husk wreath for under $5! You won’t believe how easy this fall wreath is!
There’s a good chance you already have many of these supplies on hand, and if you not, you can find them easily at your local craft stores or dollar store.
As an Amazon Affiliate (and other companies including Michaels), we earn a small commission on products sold through affiliate links. Your purchases through those links help to support this blog at no additional cost to you. In purchasing the supplies we use and recommend via our links, you help to support the free tutorials we offer you and our other readers. Thank you so much! Read my full disclosure here.
DIY corn husk wreath
I walk most mornings before I do anything else. Well….except for one cup of coffee!
The farmers near us have just recently been cutting the cornfields. It’s really a beautiful scene to watch the tractors, hear the sounds and see the day getting started as the sun rises.

While I was walking my 3-mile trek, I noticed that the corn husks were all over the side of the road.
They just couldn’t go to waste, so I grabbed handfuls and stuffed my hoodie pocket with corn cobs.
I must have been quite a sight to behold!
All the way home, I ran through my mind the supplies I would need for this corn husk wreath. And then I realized I had those supplies on hand!!
That’s how this simple wreath cost me under $5!
All the way home, I ran through my mind the supplies I would need for this corn husk wreath. And then I realized I had those supplies on hand!!
That’s how this fall wreath cost me under $5!
corn husk wreath tutorial
I wanted to share this quick tutorial to help you make your own corn husk wreath. They’re such fantastic fall decorations, and you can easily make them yourself. They’re so much fun!
I’ve gathered links for the supplies you might need for this project, but I suggest you raid your craft cabinet and get creative with the supplies you already have on hand! That’s what I did and this wreath cost me only pennies to make!
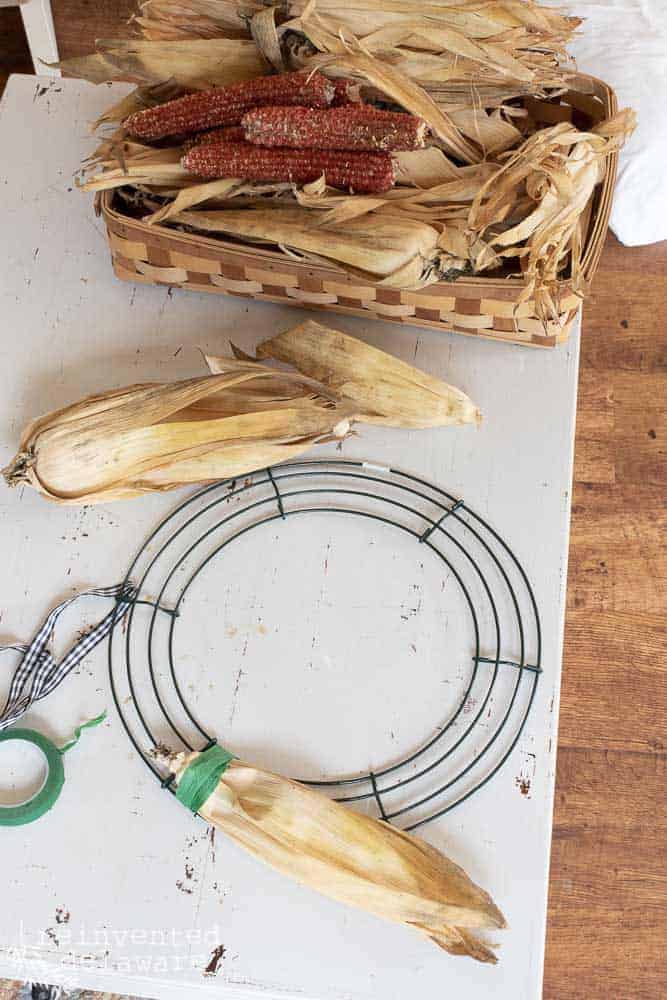
list of supplies:
- metal wreath form
- corn husks and cobs
- buffalo ribbon
- jute twine
- floral tape or floral wire
- hot glue gun and glue sticks
Thanks for shopping my links!

where to buy corn husks and cobs for crafting
If you don’t live next to a corn field, you might be wondering where on earth you can even buy these supplies
- See if your local grocery store or craft store has corn stalks or decorative corn cobs
- Ask your friends on Facebook for any leads on local farmers
- Check Amazon and Etsy for dried corn husk
- Stop by your local dollar store to look for seasonal decor
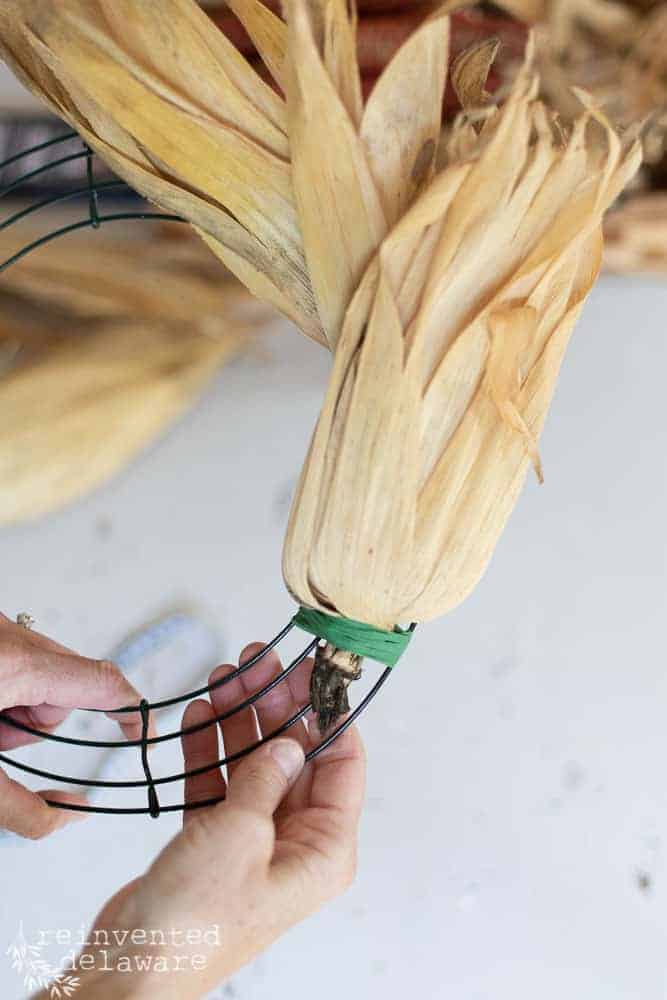
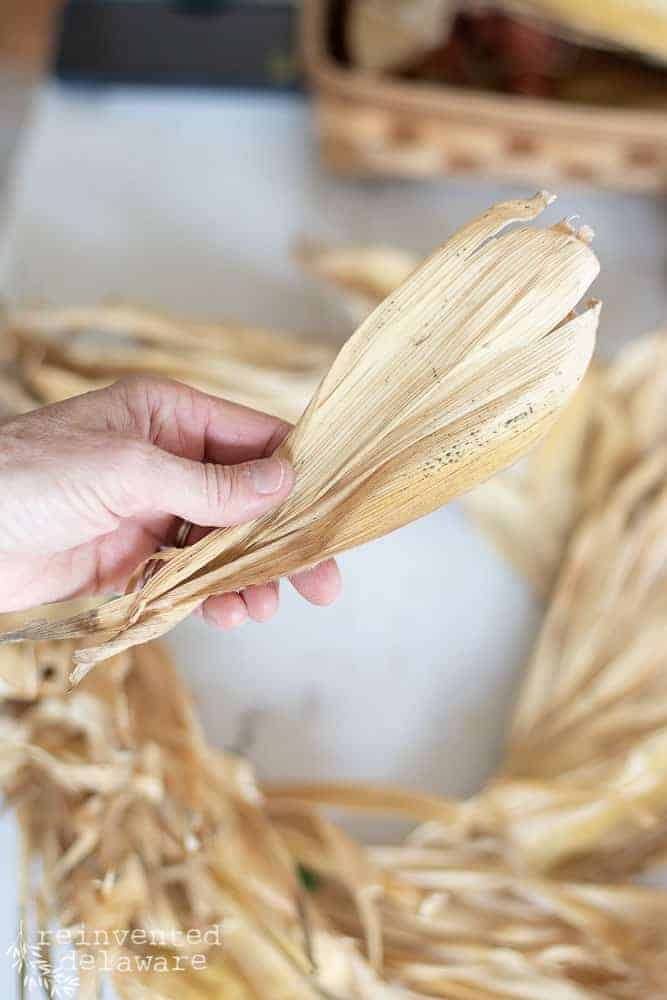
step one: attach the husks
Take one of the long corn husks and break it into two halves. Turn the inside towards the back of the wire form and wrap the floral tape around the bottom to attach the corn husks securely.
You can also use floral wire or floral pins to attach the corn husks. Use what you have on hand to keep the costs down on this project!
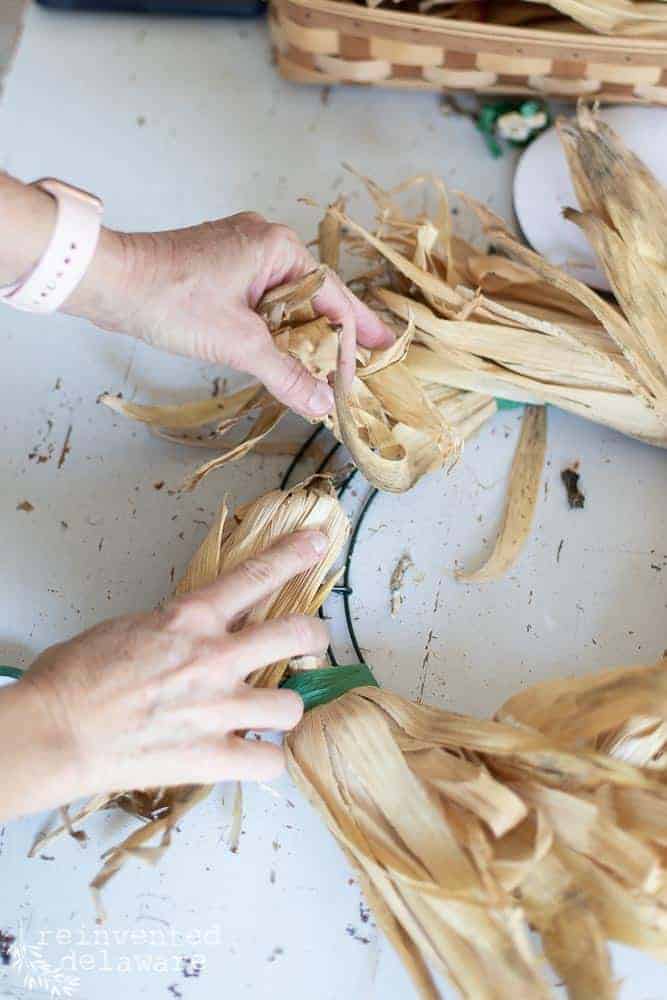
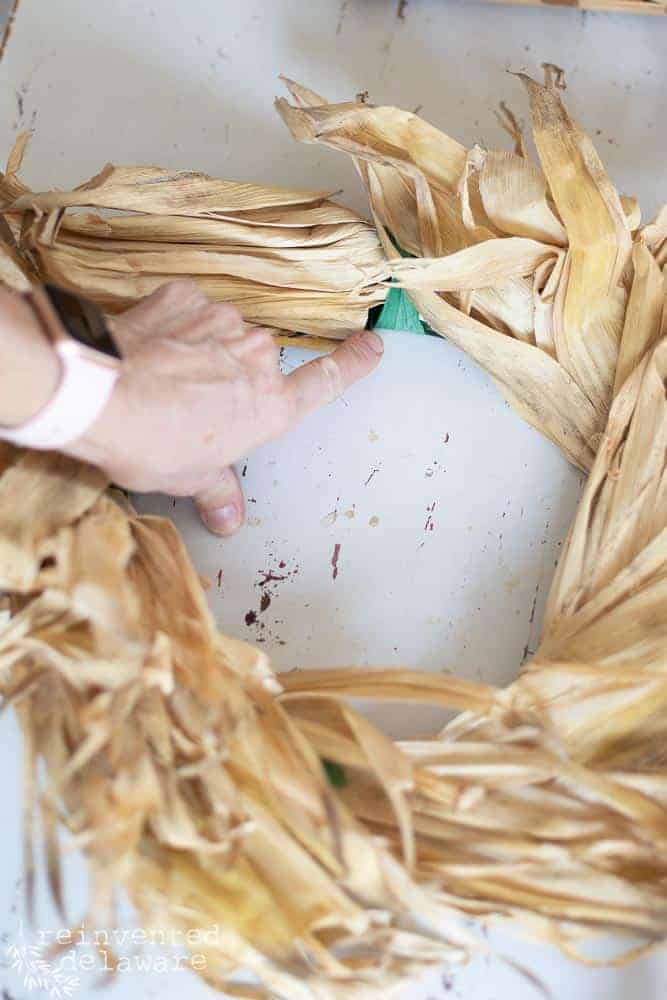
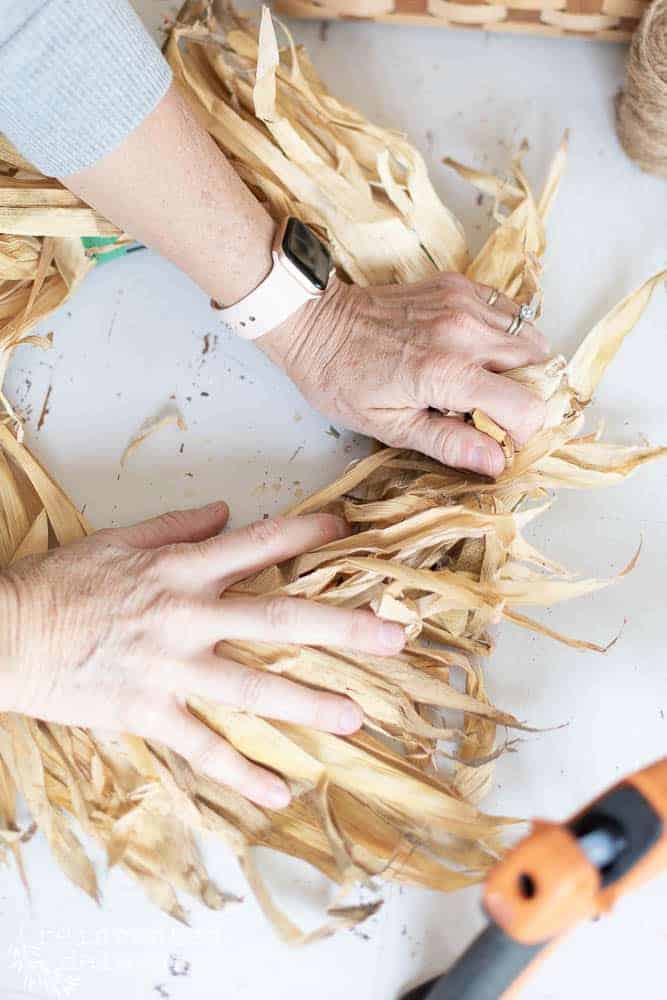
Continue all the way around the form adding each new corn husk just a few inches away from the previous one.
When you get to the end, lift up the first corn husk that you attached and tuck it under the last corn husk. This way, you won’t be able to tell where you started with the first corn husk.
step two: cover the floral tape
The floral tape I had on hand was green. You can get the floral tape in white and that would show less than the green. Or you could use brown floral wire like the one I have linked above.
Extra corn husks will cover the green tape just fine.
I used extra corn husks and some glue to cover the green floral tape in the areas it was most obvious.
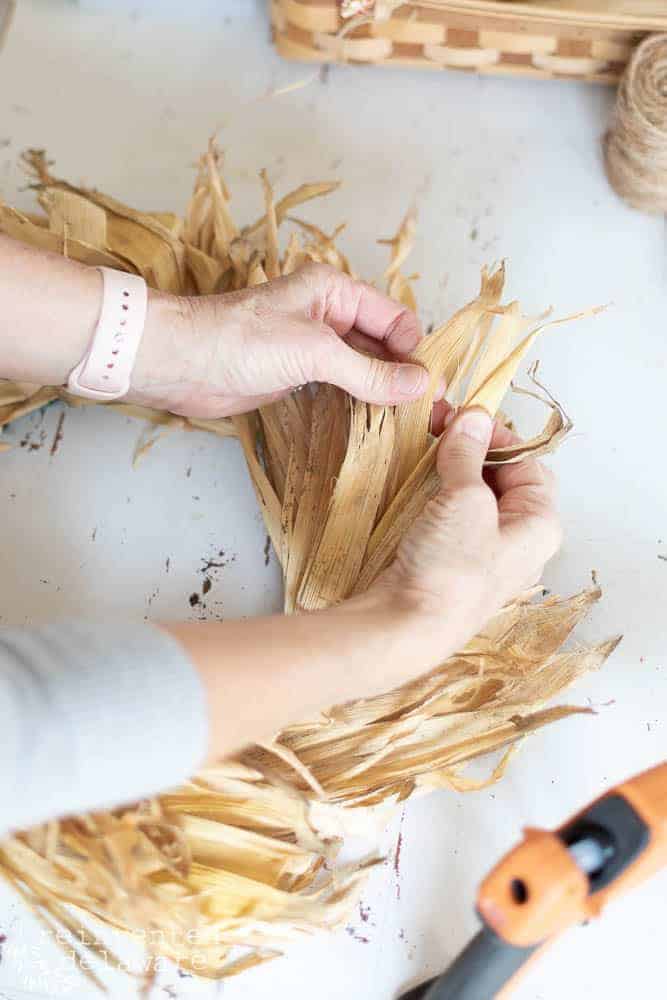
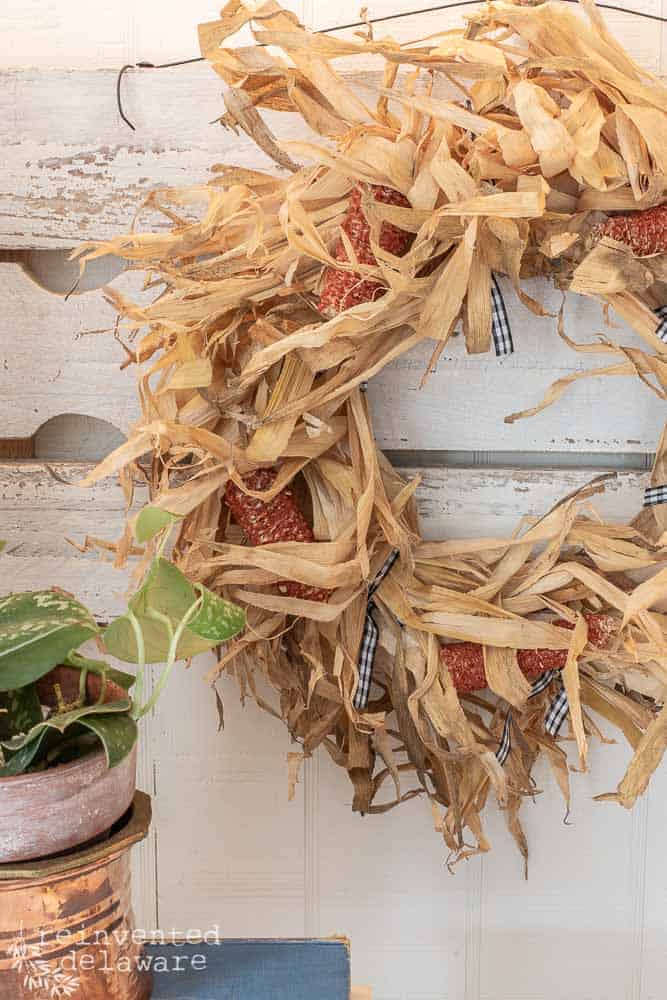
step three: squish the corn husks
Some of the corn husks were still intact and kinda large so I tore them lengthwise to make narrow lengths. While doing this, I accidentally squished some of the husks.
I realized I liked the wrinkled-up look so I went with it for the rest of the wreath! I squished all of the corn husks after tearing them lengthwise.
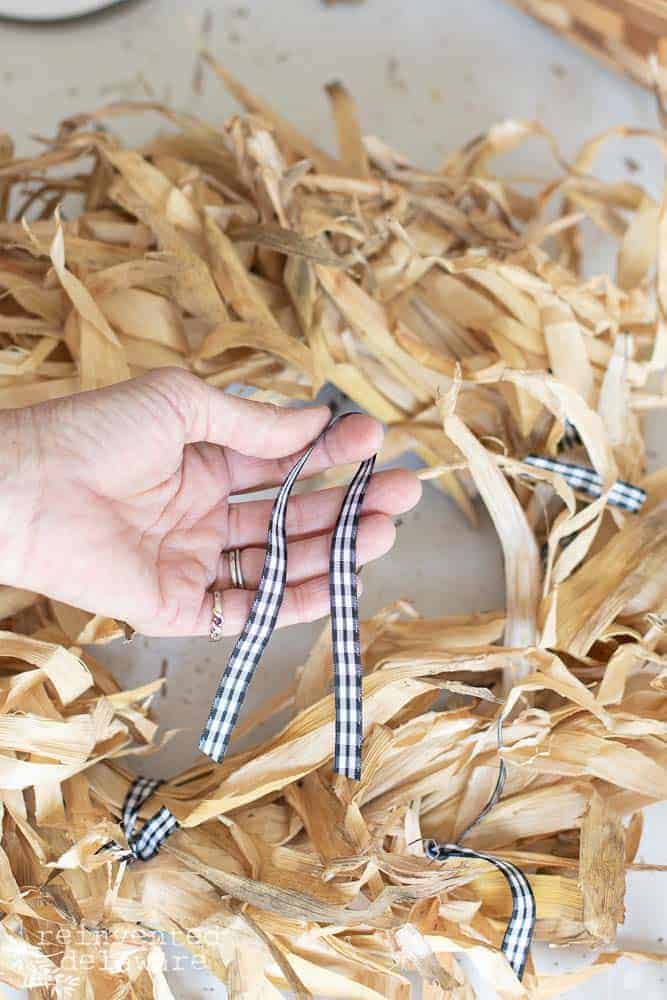
step four: attach ribbon
The ribbon I had on hand from a previous project (o golly, you have to see the project I originally used this ribbon on! I’ll link it for you!) was a perfect way to add a bit of contrast to the natural tones of the corn husk wreath.
Here is the link to the project I just mentioned! It’s such a fun one – you have to give it a try!
Beaded Christmas Tree Ornaments
I tied it on in several sections as though I used it to attach the corn husks to the wreath form.
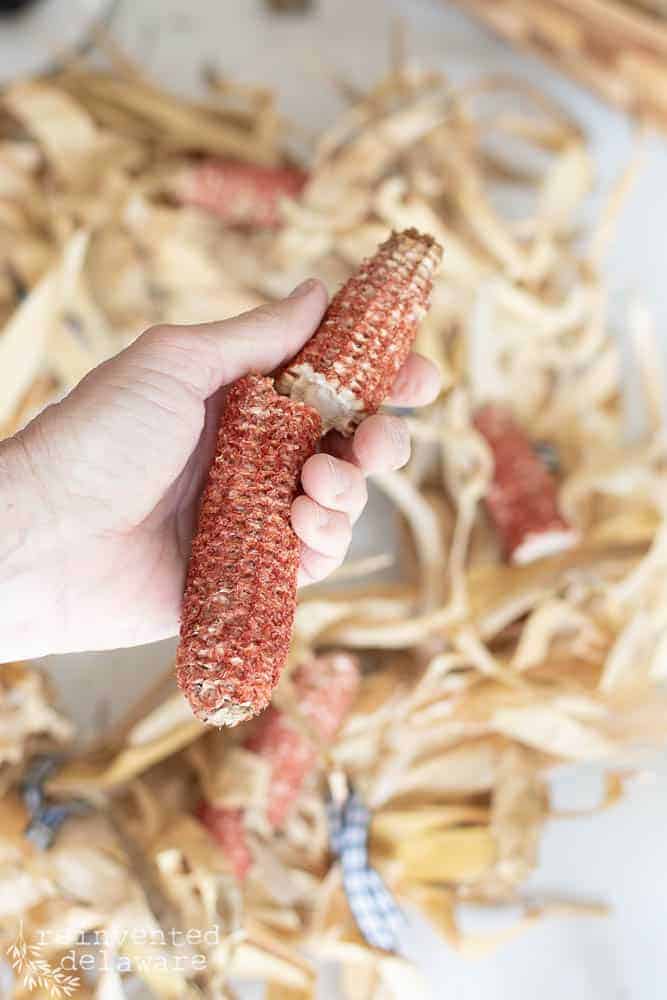
step five: hot glue the corn cobs
The corn cobs were such a pretty color, I knew I had to use them. As I said earlier, I had grabbed the supplies for this $5 corn husk wreath while out on my morning walk. My hoodie pocket could only hold so much and only 5 cobs would fit!
It’s just as well because the full cob seemed too big for the wreath. So I broke them in half and they were the perfect size!
Some hot glue was all it took to attach them to the corn husk wreath.
Enjoying this post? Want to see more? Sign up below to receive new posts!
Thanks for shopping our links! I’ve also included some pre-made wreaths with a similar look for you!
step six: hang the finished wreath
Now that you’ve finished your new corn husk wreath, it’s time to hang it on your front porch, over your fireplace mantle, or on the wall!
I tied a piece of twine around the wire wreath form at the top of the wreath, which makes it easy to hang on a hook or the wall. You can also use a wreath hanger if you’re displaying it on your front door.
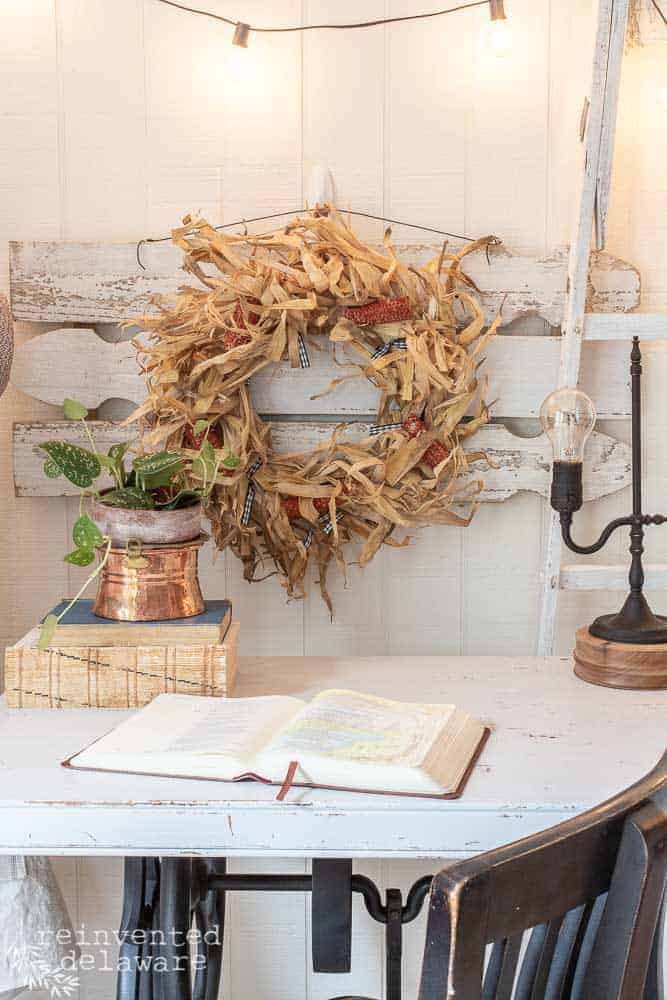
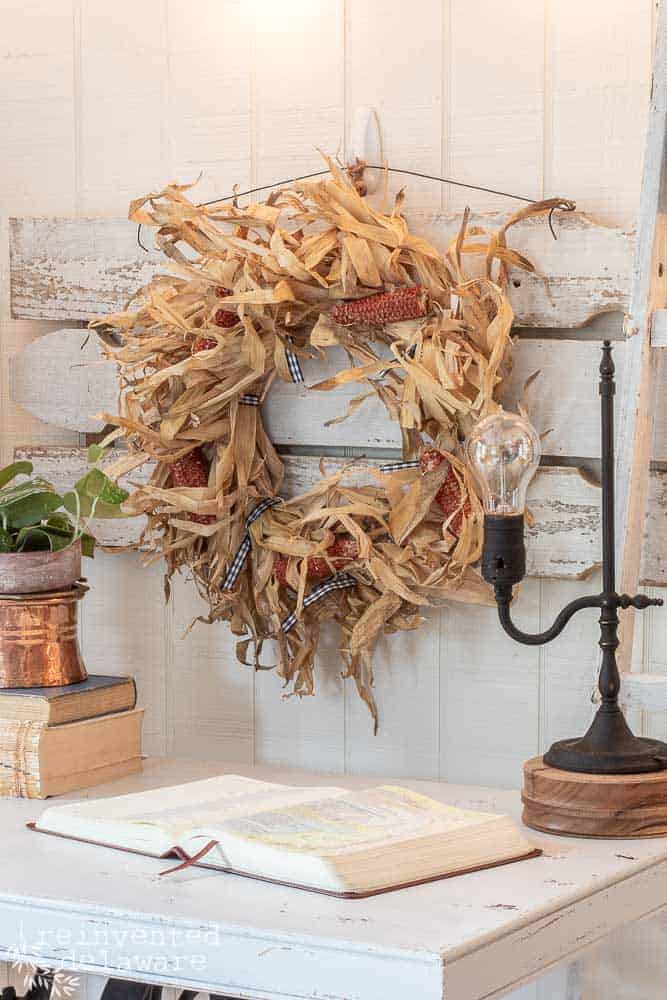
diy corn stalk wreath
And here it is! Isn’t this gorgeous corn husk wreath so fall-ish and so cute??
And it took me under an hour to make. In fact, if I hadn’t photographed it, the project would have been finished in about 30 minutes!

Don’t you think the corn cobs and the buffalo check ribbon look perfect with the natural tones of the corn husks?
This wreath was featured in The Pioneer Woman! What an honor that they found this sweet corn husk wreath and shared it with their audience!
Remember the squishing I did to the corn husks? It makes them look like they are blowing in the wind, don’t you think?
If your corn husks still look new too and fresh, you can spritz them with a spray bottle of water and scrunch them up while they’re still damp.
FAQs
How do you make a corn husk wreath?
Although there are different ways to make these corn husk decorations, I prefer to follow this process:
- Break long husks in half and either tape or glue them to your wreath frame with the broke side down.
- Add extra corn husks to fill the gaps and make your wreath look full.
- Squish and crimp the corn husks to give them an aged, weathered look.
- Attach decorative ribbon around the wreath.
- Break corn cobs in half and hot glue them for extra color and texture.
- Tie a piece of twine to the top of the wreath form or hang your finished wreath on a hanger. Happy Fall!
How do you dry corn husks for wreaths?
If you can’t find dried corn husks for your wreath, you can dry them yourself at home! Store them in a dry, well-ventilated space like a porch until they dry out completely. If they are damp at all, they can mold.
How do you soften corn husks for crafts?
If your corn husks are too crisp and new looking, you may want to soften them to give them a softer, more natural look. Soak them in warm water for a few minutes or spray them with a spray bottle. Be sure to let the pieces dry completely before attaching them to the wreath frame or let the wreath dry in front of a fan before displaying it on your porch.
DIY fall wreaths
I have the wreath hanging on a handmade picket ‘sign’ that doesn’t have any words painted on it. I’ve used it the last few weeks just as wall decor and it’s kinda growing on me!
It looks good as a background for the wreaths I’ve been making lately!
This cheap wreath for fall is the perfect addition to your entryway or living room.
This thrift store wreath makeover turned this sad old wreath into something new and fresh!Break out the gathering basket and go foraging to make this DIY pinecone wreath with acorns!
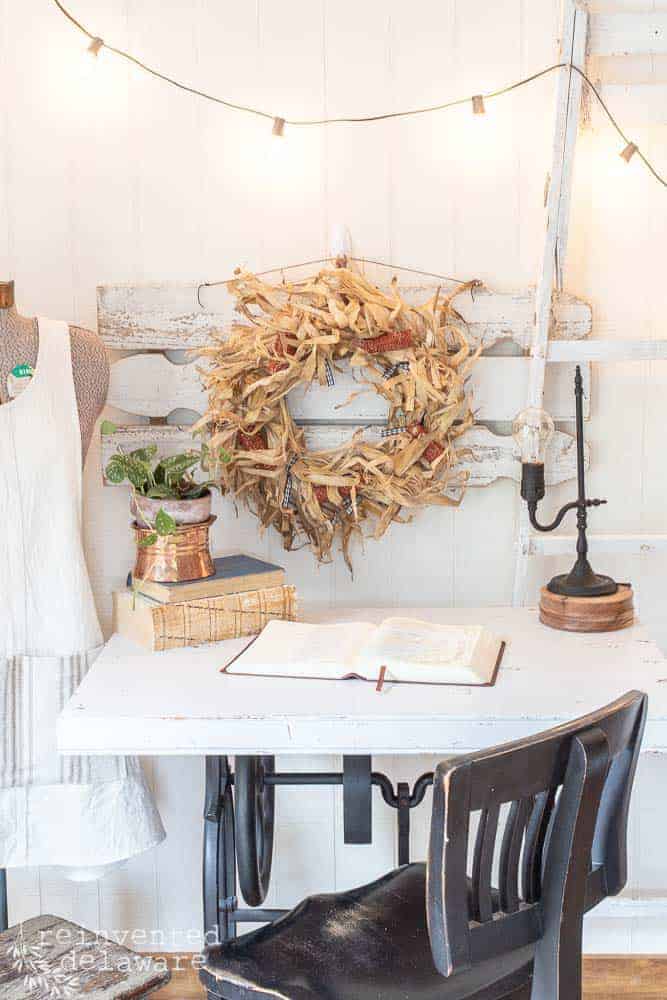
Wreaths typically go on a door but they can also be used as wall decor. I think added elements like this in our homes is another way to celebrate a season like fall.
This wreath was moved again after this post! She is now proudly hanging on my wall in the dining area of our home!
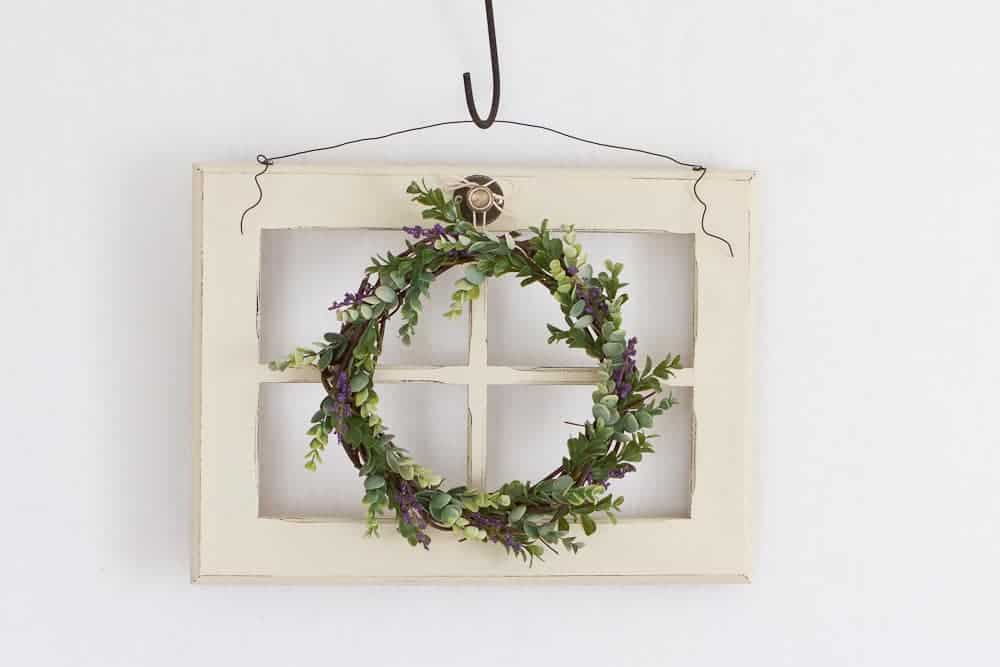
Here is another wreath that I made several years ago with natural elements from our yard and a few items in my craft room. I think you will find it super easy too! Just click the image to head over to the post!
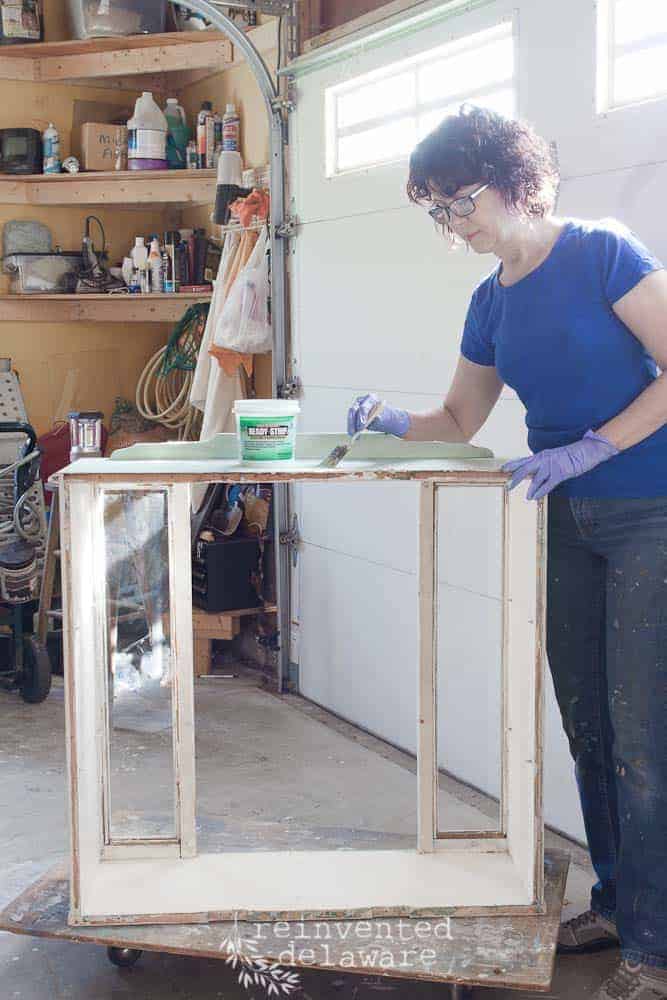
UPDATE: When the fall season was over, I reinvented this wreath wire frame! It turned out so gorgeous and I can’t wait for you to see it! Click the button below to see the new wreath!
more fall decoration ideas
if you love these corn husk projects, you’ll love these other posts and projects!
- Learn How to Copper Leaf a Pumpkin
- Thrifted Sweater Pumpkins
- Gorgeous Thrift Store Makeovers for Fall
- 39 Budget Fall Themed Decor Ideas
- Pine Cone Flowers (paint them with gold or jewel tones for Fall!)
Easy $5 Corn Husk Wreath DIY Fall Project
Equipment
- Gorilla� Full Size Hot Glue Sticks
- Gorilla� Dual Temp Full Size Hot Glue Gun
- 22 Gauge Brown Paddle Wire by Ashland�
- 30yd. Natural Jute Twine by Recollections”
- 1.5″ Faux Burlap Wired Natural Buffalo Check Ribbon by Celebrate It”
- 12″ Wire Wreath Frame by Ashland�
Materials
- metal wreath form
- corn husks and cobs
- buffalo ribbon
- jute twine
- floral tape or floral wire
- hot glue gun and glue sticks
Instructions
- Attach the husks to the wire frame using floral tape, thin wire or jute twine. Add additional husks over the previous. Tuck the last husks under the first corn husk to hide the starting point.
- Cover any exposed floral tape by gluing an extra piece of corn husk over the tape with hot glue.
- Use your hands to squish the corn husks for a natural look.
- Attach ribbon in various places on the corn husk wreath.
- Use hot glue to attach corn cobs around the wreath.
- Add a handmade wire hanger and hang the wreath on your door.

Pin the image below to your fall decorating boards! Just click the pin button at the top left corner!

Thanks for joining our journey!
Thanks so much for joining us for this post! Join our journey so you don’t miss any fun projects, tutorials, and inspiration we share with you each week! You can follow us on Instagram, Facebook, and YouTube. We share even more inspiration on Pinterest!


I am in love with your corn husk wreath!
Isn’t it so pretty?? I’m glad I scrunched it! Thanks Paula!
Love it! You have inspired me to try this!
Happy corn husk gathering Leslie! 😊
I love how this turned out! I really like the “messy” look of the corn husks it looks soo cool! Great post! Pinned!
I’m a fan of the messy look too Karin! Thanks for stopping by 😊
I love making use of ‘found objects’ too! The every which way of the husks give the wreath character and movement. Happy Autumn!
Happy Autumn to you too Mary! So glad you enjoyed the project 😊
The color of the corn is so pretty! Can’t beat a beautiful wreath for just $5!
Isn’t that corn cob such a pretty red color?? Perfect for fall! Thanks, Marie!
Such a clever idea! Well done!
Thank you Dara! Happy Fall 😊
Brilliant idea and I love how it turned out!
xoxo
Lovely
http://www.mynameislovely.com
So glad you enjoyed the wreath tutorial!
I love this wreath. How awesome to find this while walking.
Perfect and rustic!
I walk most mornings and I like to look for things of beauty. There was something so pretty about all the husks laying on the side of the road next to the field. Thanks for stopping by 😊
This wreath is so beautiful, Cindy! I’m in love and I can’t believe how inexpensive it was to make too. You are so creative. Loving and pinning, CoCo
That’s so sweet of you to say CoCo! Thank you so much for pinning!😊
You’re so crafty with the wreaths! This one is my favorite … love the ribbon so much. xo
Thanks Juliet! This was one of my favorites too! Thanks for stopping by 😊
Cindy this is so cute!!!!
Thanks, Elizabeth! It was so fun to make too!
This is so awesome. Great job! Your pics are wonderful.
Thanks, Renae! Glad you enjoyed the post!
What a creative idea! Love the look of it so much. Great job, as always!
Thanks Melba! It’s such an easy wreath to make!
oh I LOVE this. such a perfectly “natural” wreath for the Fall and Thanksgiving season. Thanks so much for joining in at All About Home, I’m featuring this post this evening at the party!
So glad you enjoyed the wreath Debra! Thanks so much for featuring the project!
Love your corn husk wreath Cindy. So whimsical! I’m excited to feature your post this week at the Tuesday Turn About Link Party. Thanks for sharing it!
Omgoodness, Michele! Thanks so much for the feature and for your kind words about our fun fall wreath!
What a fabulous way to upcycle corn cobs and husks, Cindy! This wreath is totally fabulous and I’m not surprised at all you were featured. This is definitely one of those projects that can easily be used throughout the entire fall season which makes me excited to try it too. Big hugs and I look forward to sharing this idea on an upcoming From the Front Porch post, CoCo
Thanks for sharing the corn husk wreath CoCo! I appreciate it so much!
I love this Cindy. You made me laugh with the visual of your stuffing your pockets. It’s totally something I would do. I love decorating with nature & you did a fabulous job. Thanks for sharing at the Home Imagined link party. XO- MaryJo
So glad you enjoyed the post MaryJo!
Such a beautiful wreath for Fall, Cindy!! It’s full of texture and natural beauty which just can’t be found from anything else! I love it. Thanks so much for sharing at Home Imagined this week! Pinned!
Thanks Rachael- I love making things out of natural elements too. 😍
This is the cutest wreath Cindy! I sure wish I lived near a corn field. I may just have to take a field trip.
Come on over to the east coast Wendy – we have lots of cornfields!
Cindy – This has been and continues to be one of my favorite tutorials you put together. I love how the wreath turned out and I also love the black and white gingham ribbon you used. Thank you for sharing this post on the Home Imagined Link Party.
Thanks Anna! It’s one of my fave projects!
Good morning from Crazy California!
I really like this, it is simple but beautiful. I think I may have most of the items for the design. Thank you for the post!
Awesome! I hope you get to make one for your home Tracey!
Hi Cindy!
I want to thank you for all you’re projects ,i like everything you suggest for all the seasons.
Aline
Now that’s just the sweetest comment!! Thanks so much Aline!🥰