
Easy DIY Beaded Ornaments: Step by Step Tutorial
Create beautiful beaded ornaments with just a few simple steps. This easy tutorial will guide you through the process and have your tree looking festive in no time!
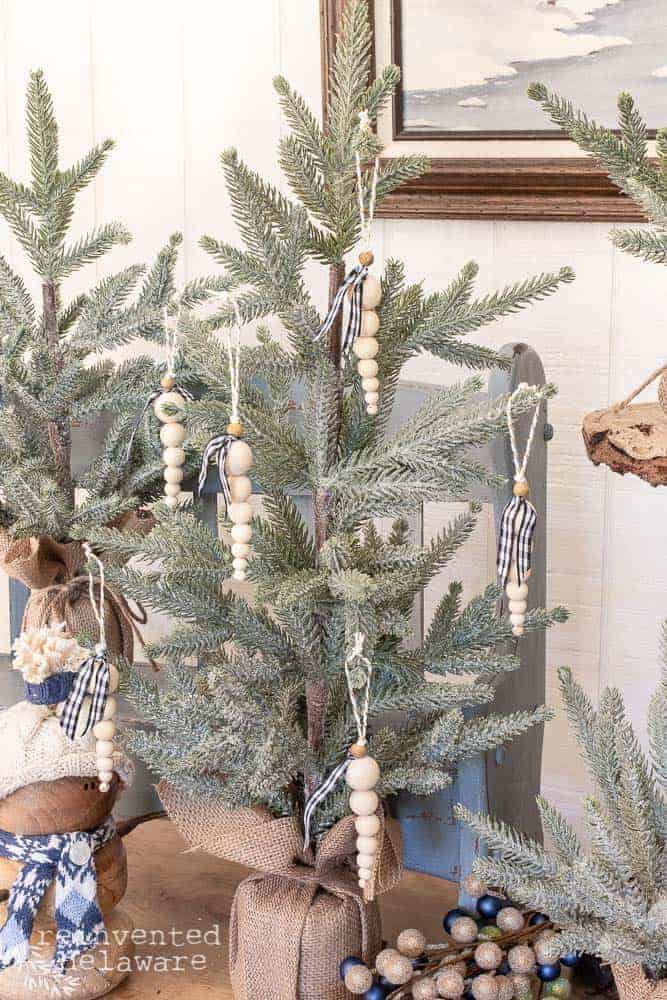
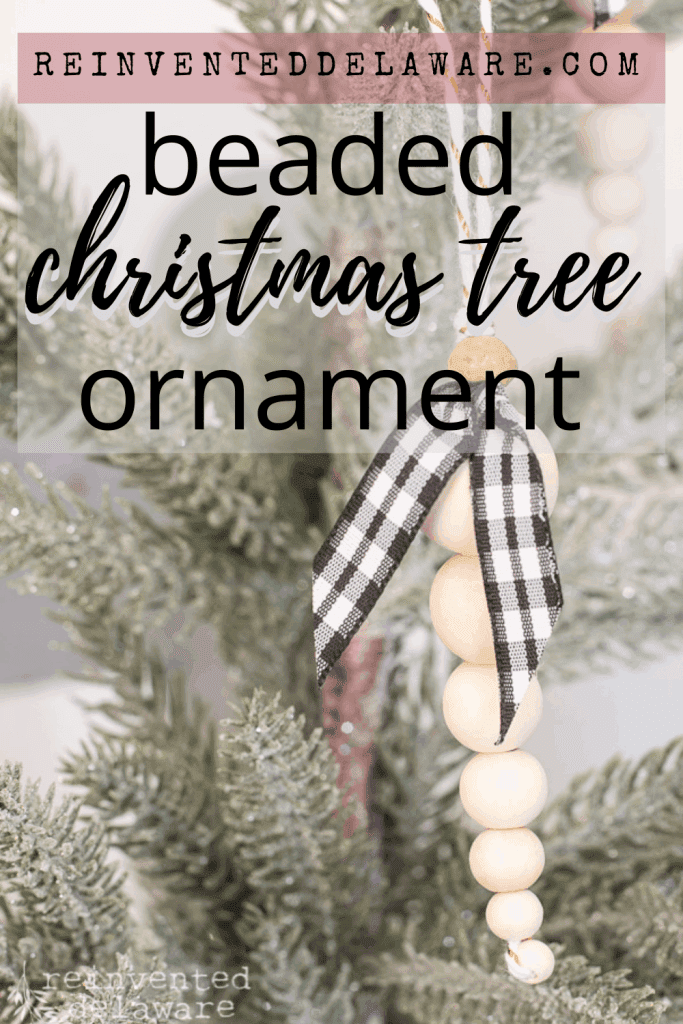
diy ornaments – wood bead icicles
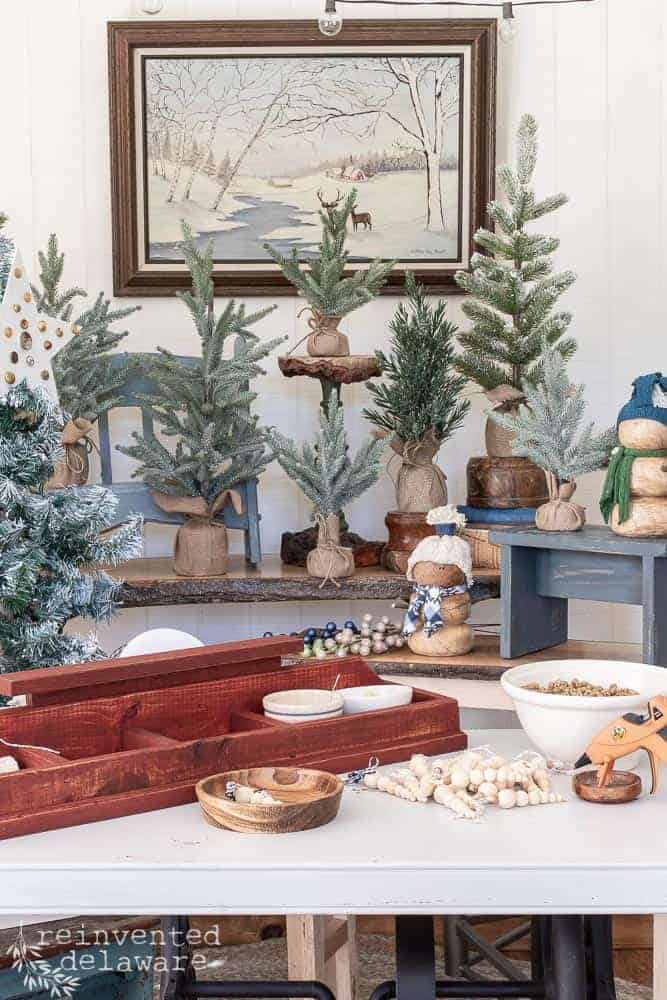
Every year around this time, I start to look for an easy ornament to make for our Christmas tree. Angels, small trees, pinecones, and stars are just some of the ornaments that are on our tree each year. Some years I made extra ornaments that were also used as a replacement for gift toppers.
The idea of an icicle came to mind so I ordered this graduated-size bead package from Amazon along with some other supplies.
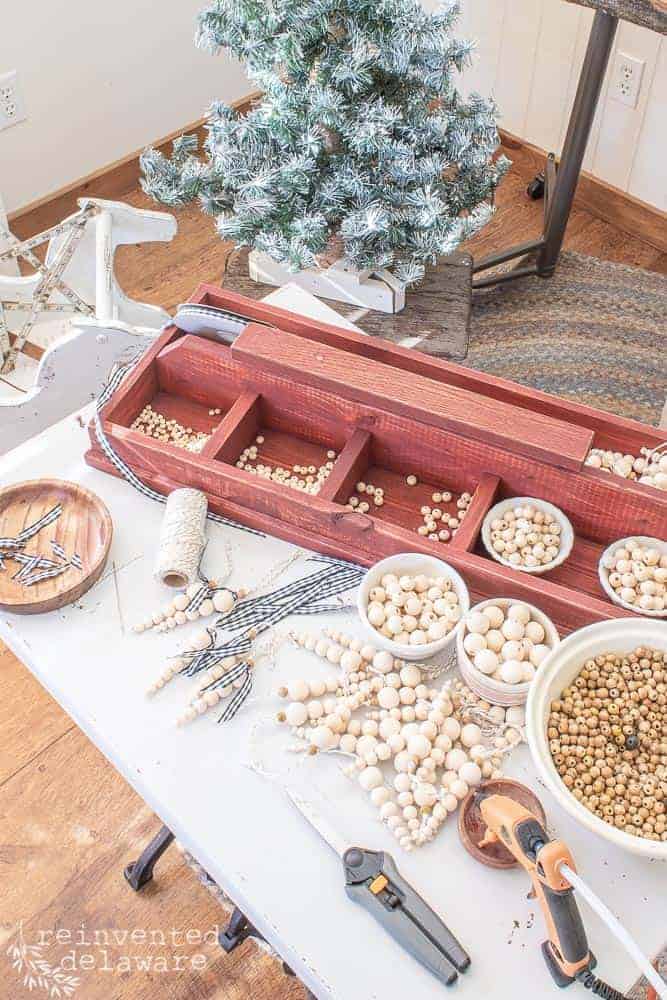
supplies list
Here is a list of the supplies needed for this DIY beaded Christmas tree ornaments:
- various sized wooden beads
- twine string (optional: pieces of wire)
- decorative ribbon
- large eye needle
- scissors (wire cutters if using wire)
- glue gun and glue sticks (optional)
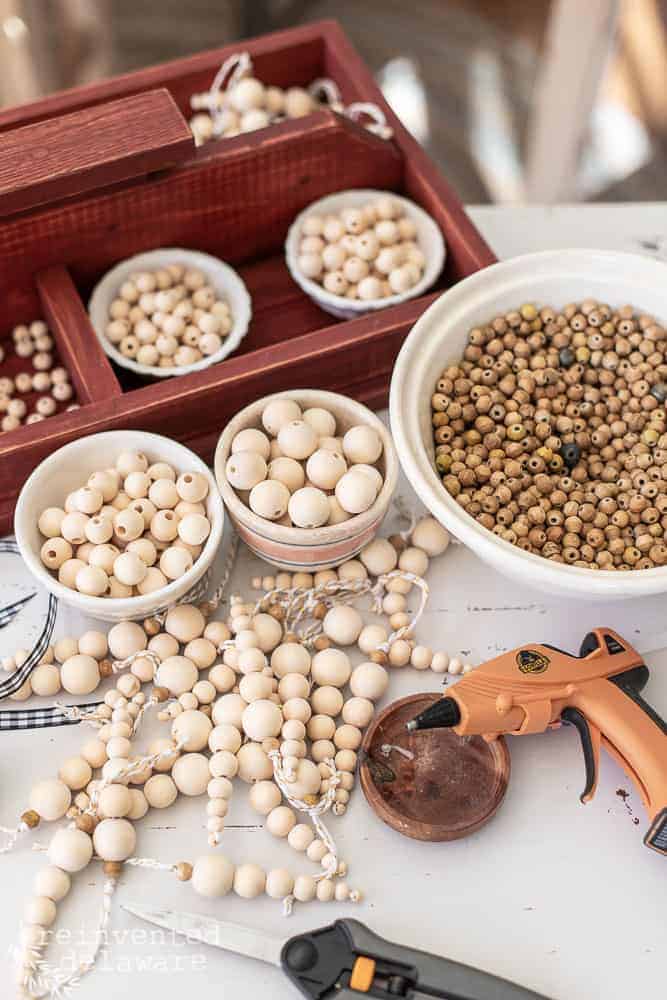
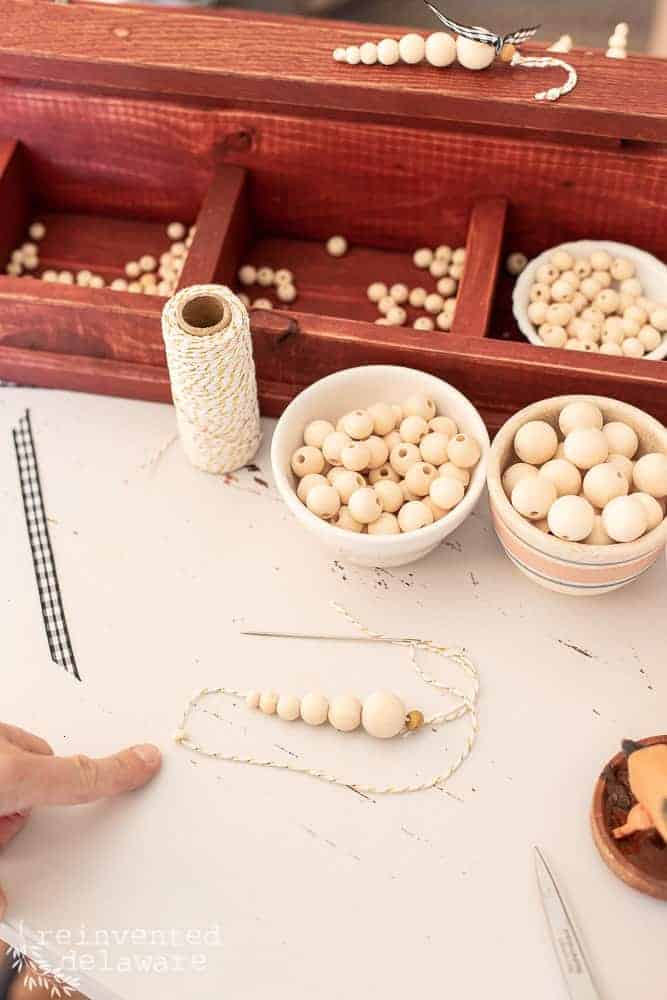
As a side note, the wood beads came separated by size and I wanted to keep it that way. Little cubbies in this handmade tool caddy plus a couple of bowls helped me to do that.
step by step instructions
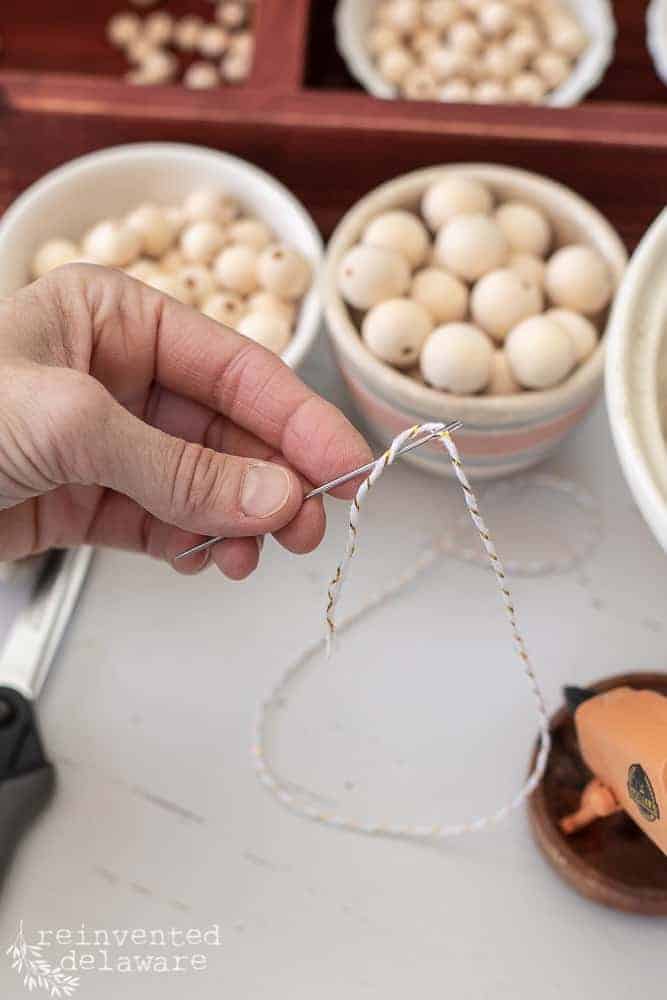
step one: thread the needle
Threading the needle proved to be the most challenging. The cord needs to be strong enough to hold the beads which mean, the cord is a bit thick.
My floor lamp/magnifying glass combo was a huge help! Having the large eye needle is a help too. Here is a video of my Sweater Pumpkins showing how I thread a large eye needle with a thick cord.
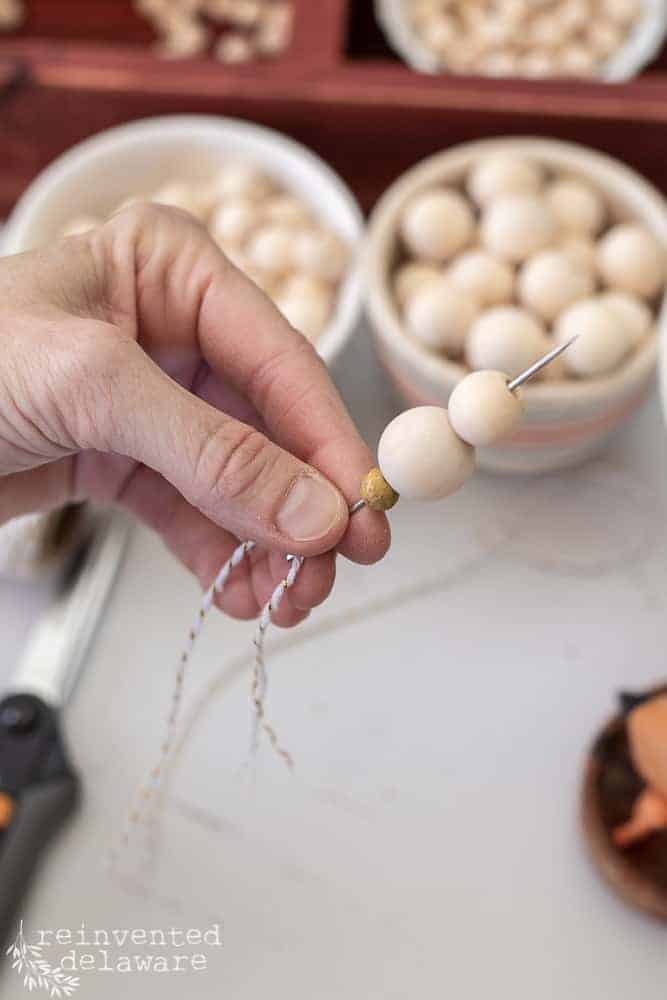
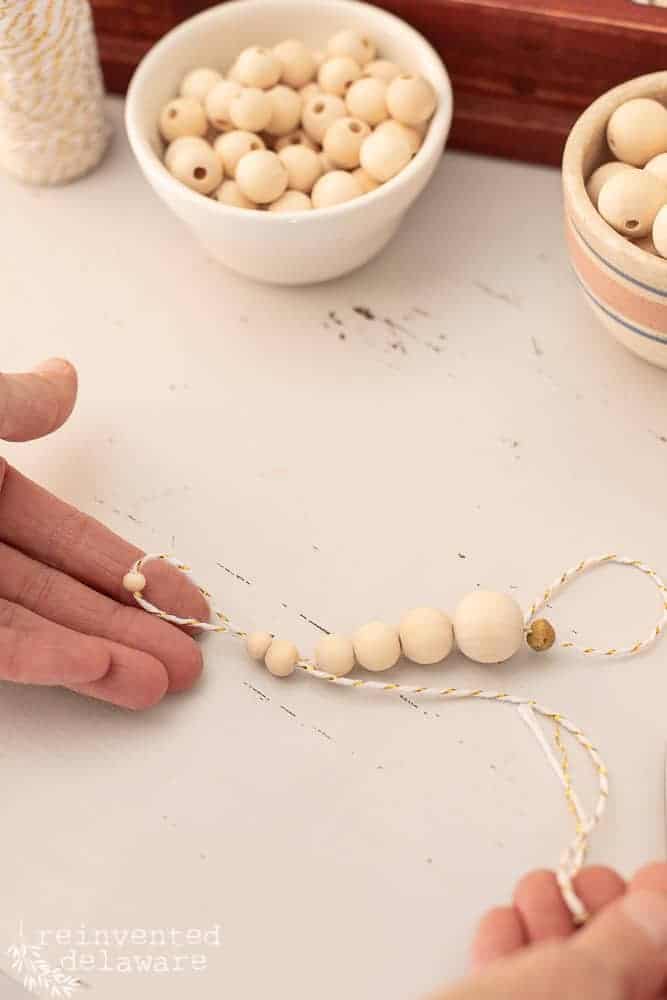
step two: add the wood beads
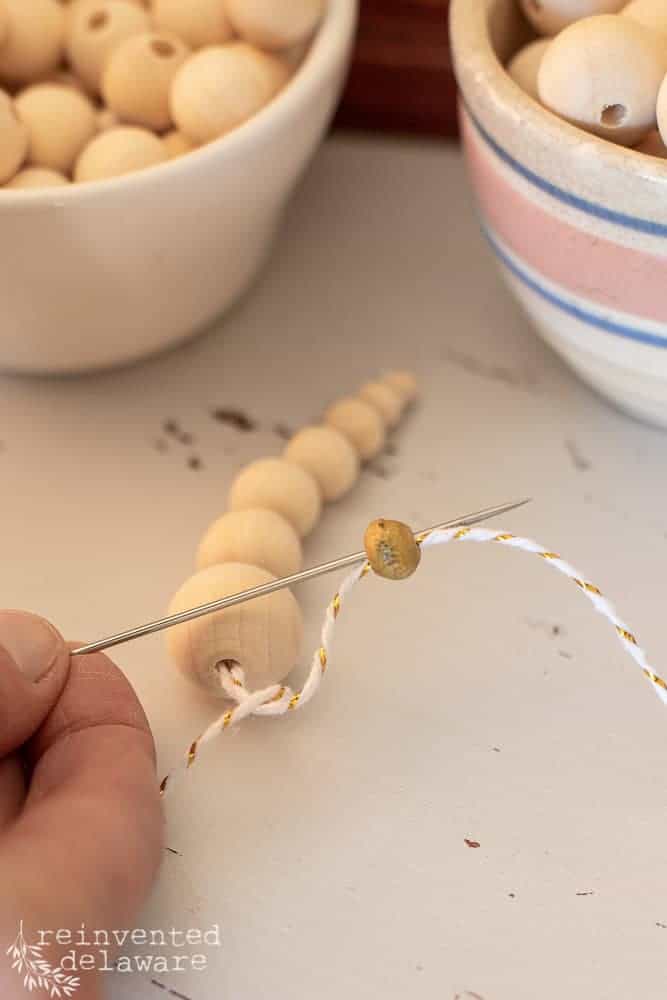
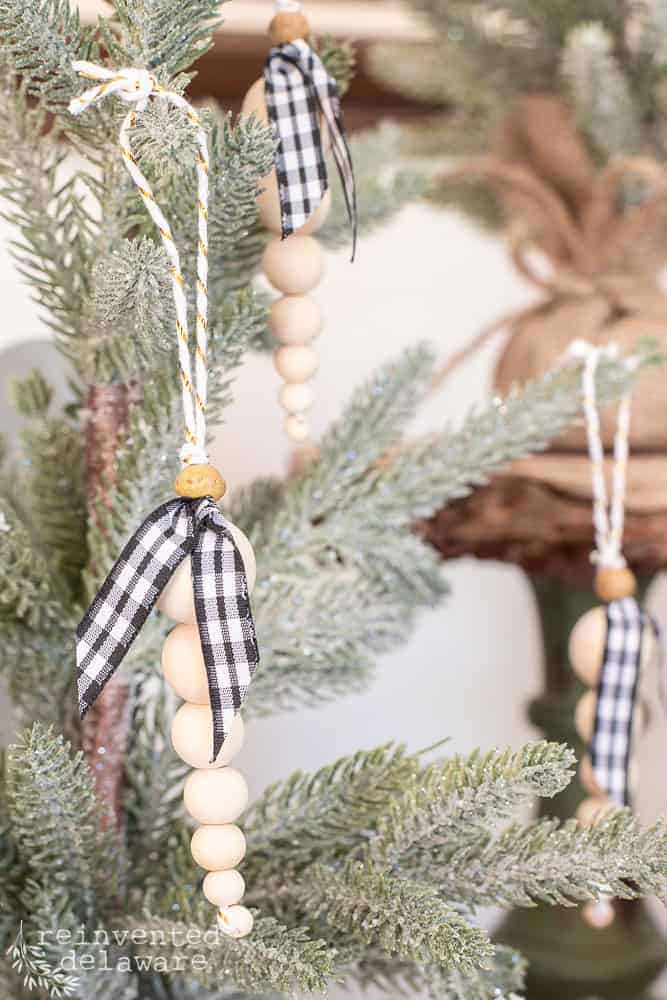
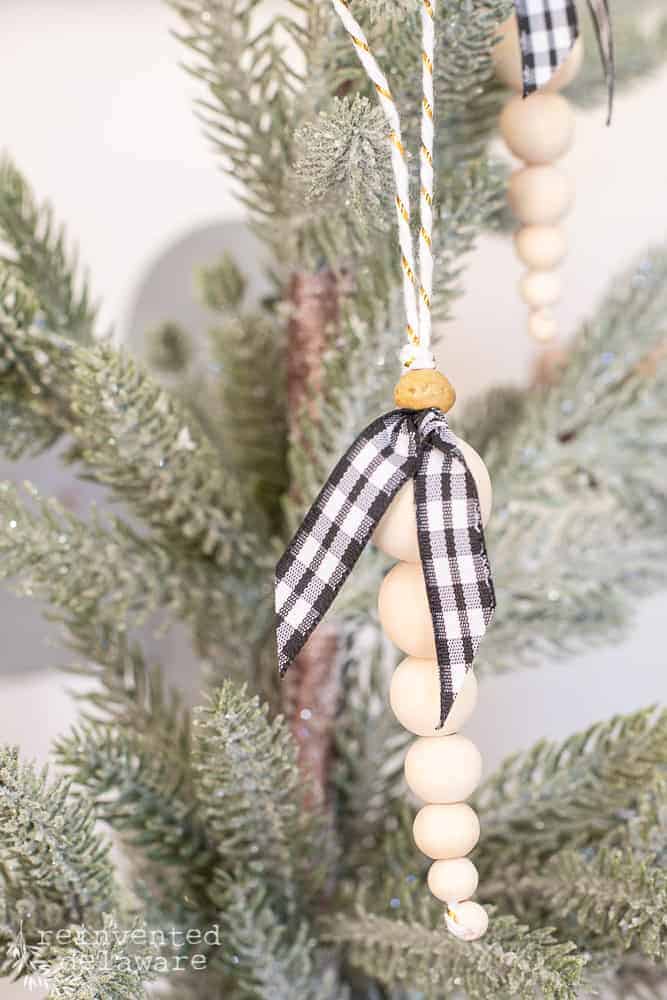
The first bead you add for the beaded ornament will ultimately be on the top. With that in mind, I added a bead from a stash I already had on hand. That bead has a bit of color and is smaller than the largest bead in the Amazon package.
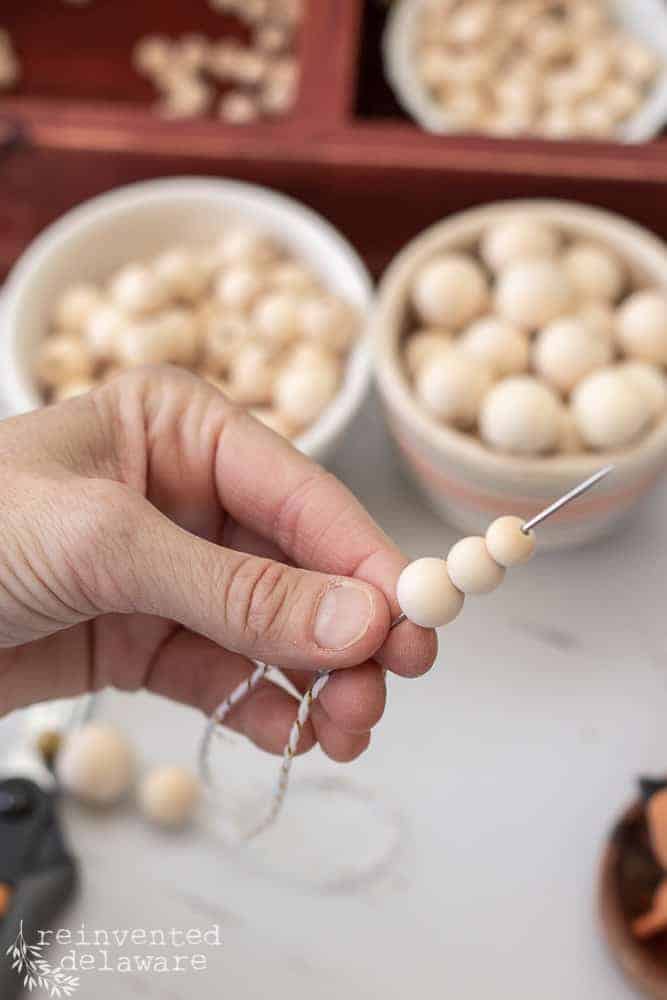
Then I added the next two largest beads, then the next three sizes of beads…..
….and finally, the smallest two beads for a total of seven beads plus the extra colored bead from my own stash. This is an easy beaded ornaments pattern to follow and they remind me of icicles!
BTW, even though I am not a beader, I happened to find packages of beads while out thrifting last year. I knew I would use them for something! And this is just the beginning of my beading!!
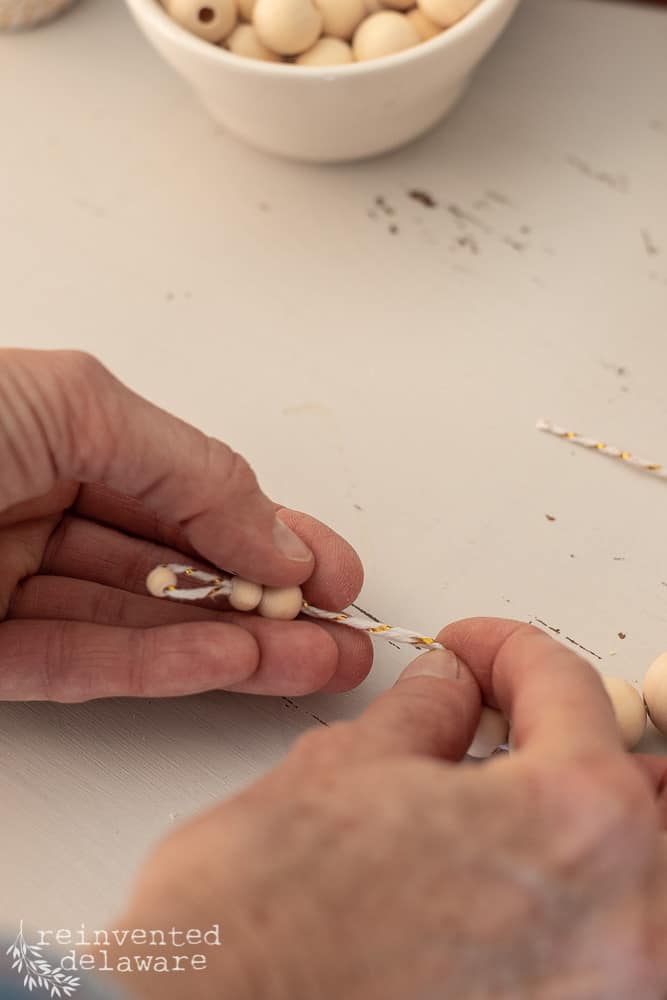
step three: anchor the beaded ornament
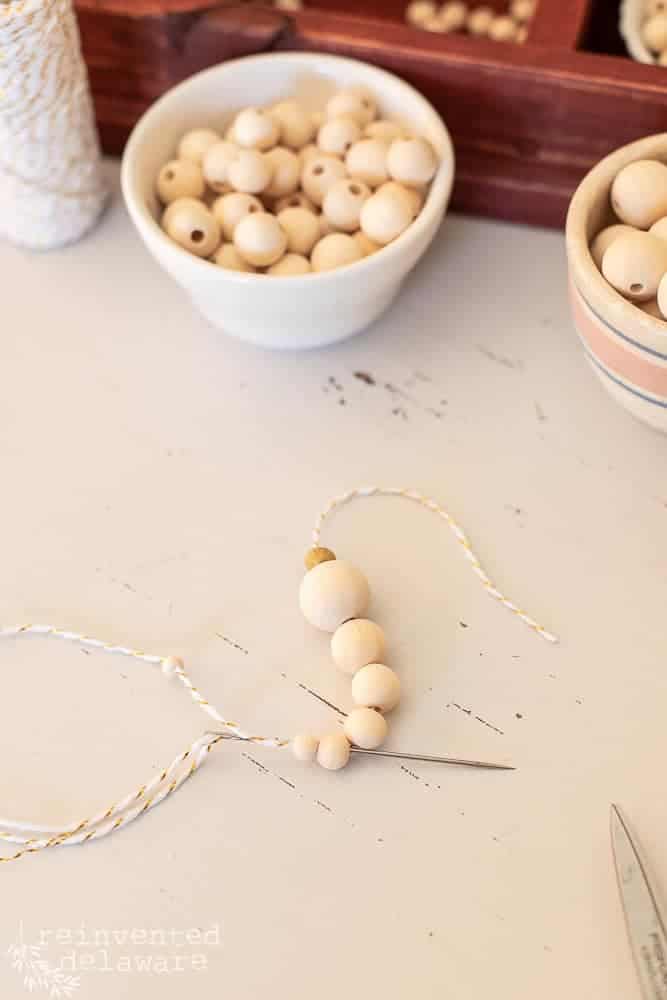
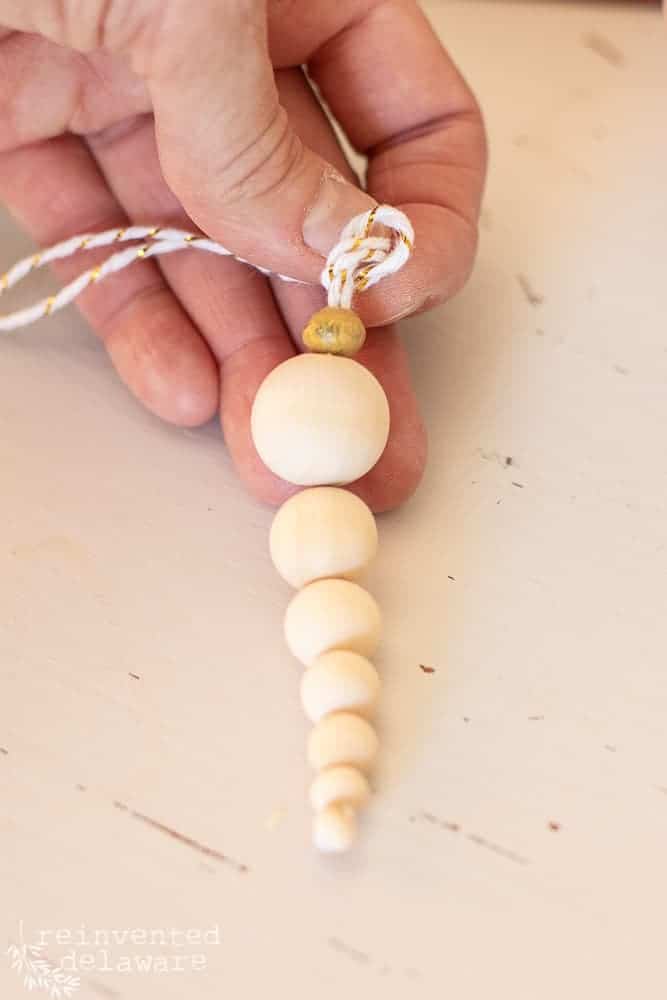
See that little bead I am pointing at in the image below? That is the smallest bead and I placed it in the middle of the cord.
The smallest bead acts as an anchor or a turning point. The next step is to go back through the beads skipping the smallest bead and picking up the next smallest bead. Picking up two at a time is fine.
This will make a loop near the smallest bead.
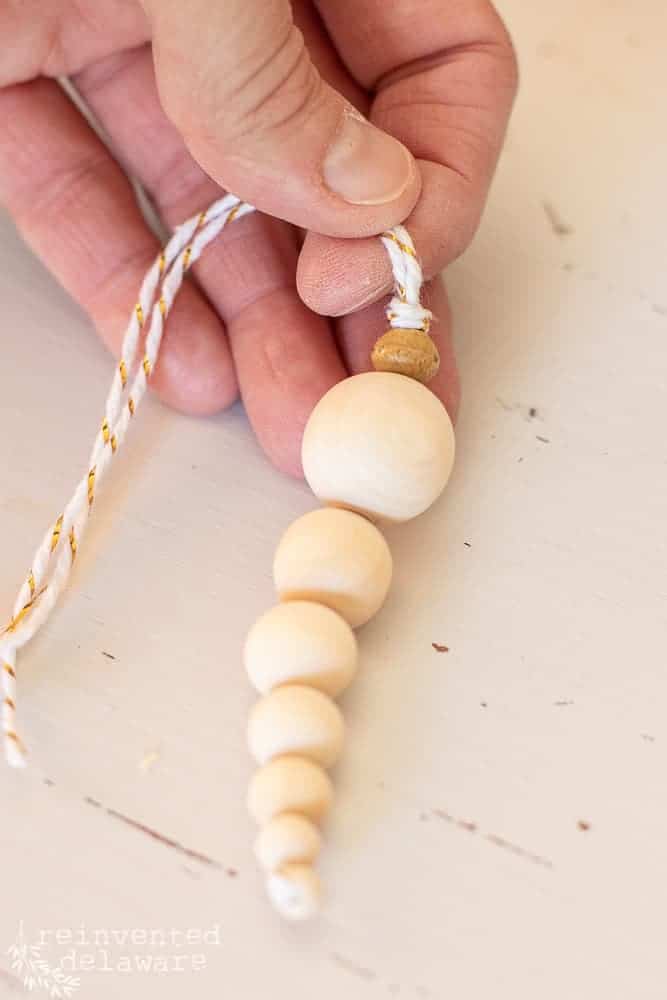
Grab the two lengths of cord and pull the beads slowly downwards toward the smallest bead. Be sure to hold both sections of the cording so that it doesn’t twist. I did that a few times and it made a knotty mess. It’s best to slide those beads toward the smallest bead slowly.
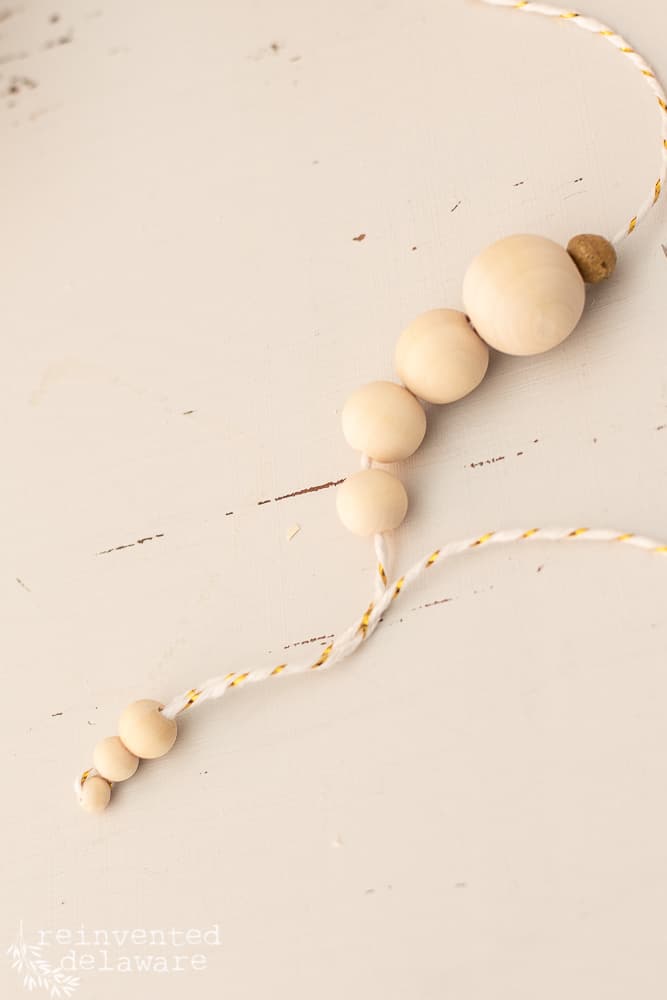
Do the same with the remaining beads. At first, I only picked up 1-2 beads at a time, but as my fingers became used to this process, I picked up as many beads as my needle would hold.
Practice first so that you can get used to sliding the beads downward without the cord twisting.
Remember that first bead I added to the cord? That is the last bead and the top of the ornament! You can skip this extra bead at the top. My bead stash just wanted to be part of the fun!
step four: avoid this!!
Here’s an example of what happens when you don’t hold both ends of the cord tightly as you slide the beads downward. The cord will loop and ultimately tangle.
There were a few ornaments that I had to cut the cord and start all over. It’s best to slow down and enjoy the process!!

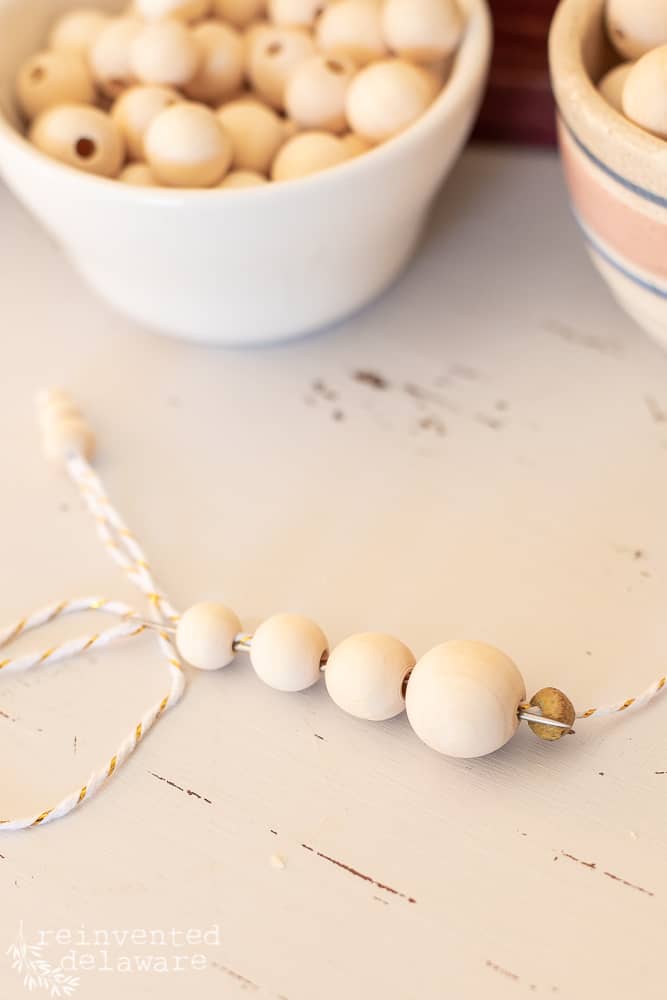
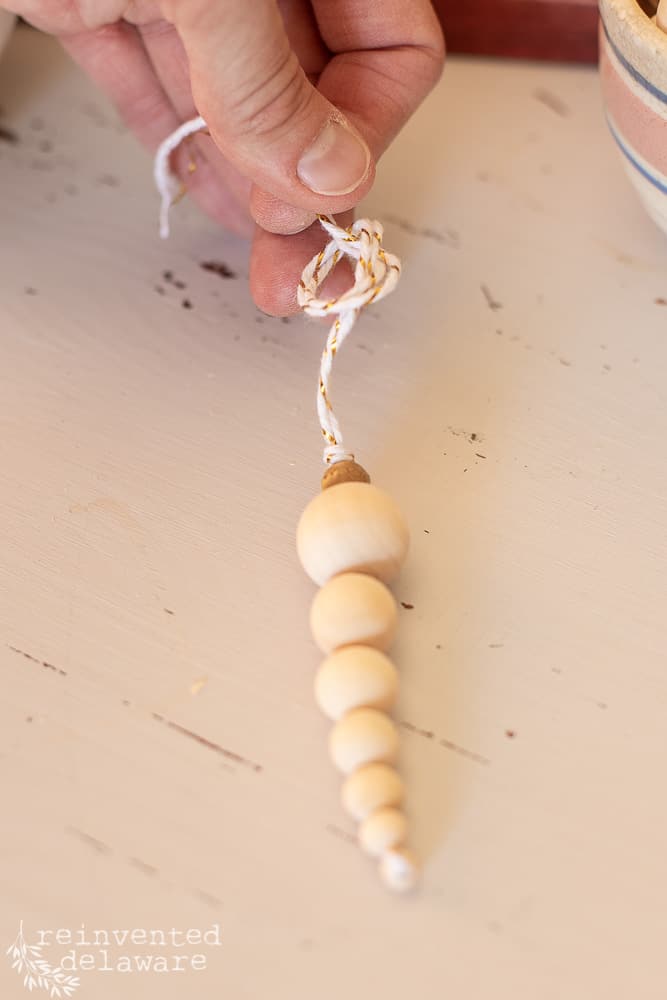
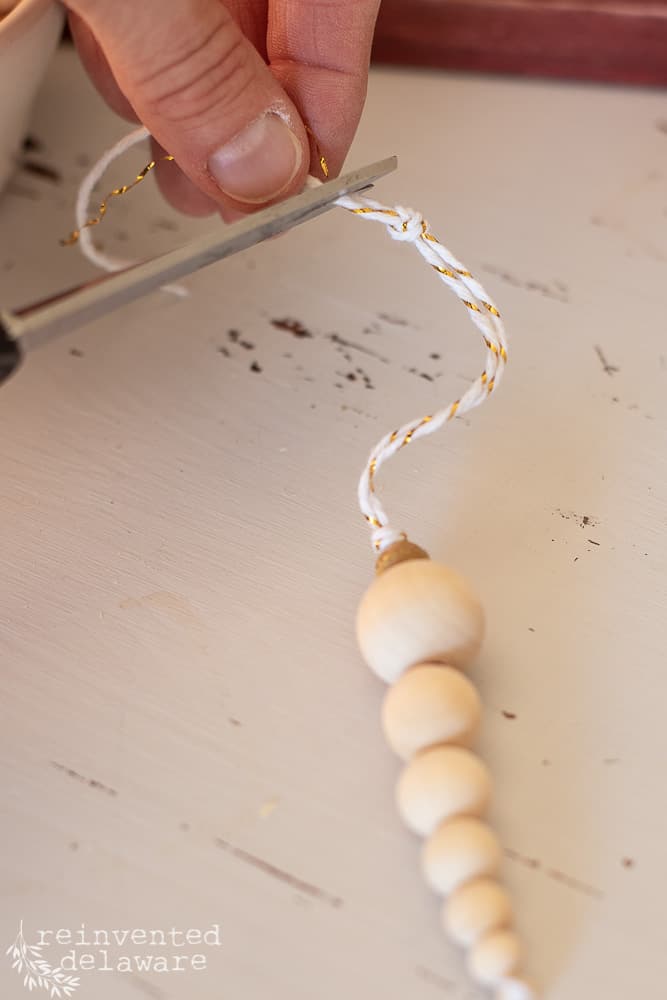
step five: tie a knot to secure
Next, tie a knot by looping the cord around and going through the hole – O goodness, you know how to tie a knot!
Let me give you a tip for this, keep the loop loose while you slide it towards the first bead. The knot should be snug against that first bead.
step six: tie a knot for the hanger
Tie another knot allowing enough of a looped section to hang the beaded ornament.
Clip the excess and go on to the next beaded Christmas tree ornament!
If you decide to use wire instead of the heavy thread or twine, allow enough for a loop that has extra wire at the end. Thread that back through the beads. The beads are not heavy so this loop will hold just fine. Be sure to create a know with the wire at the top of the bead to hold them on securely.
decorate your beaded ornaments
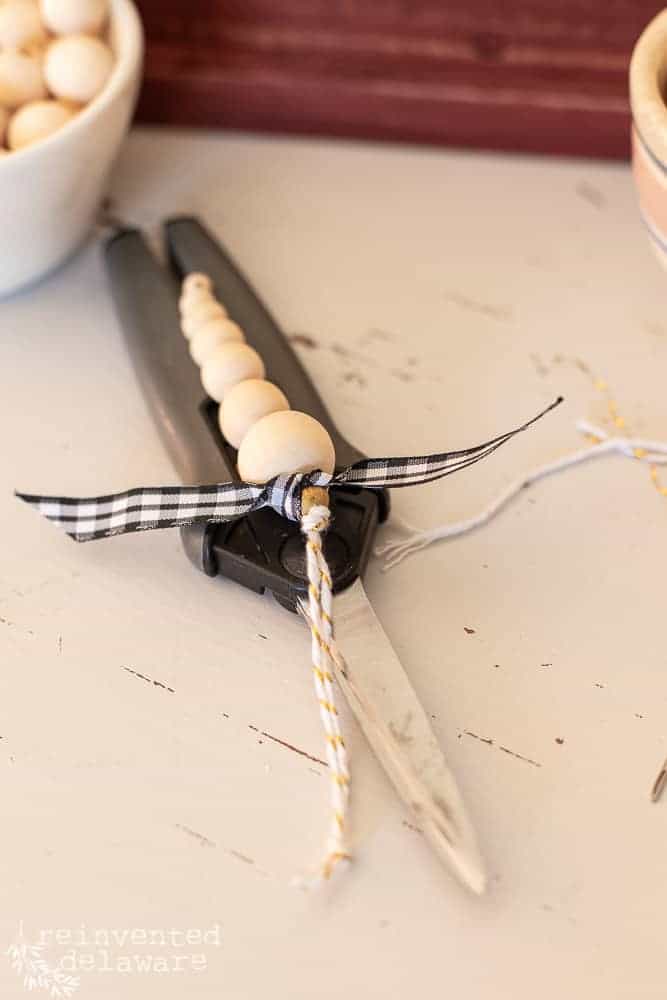
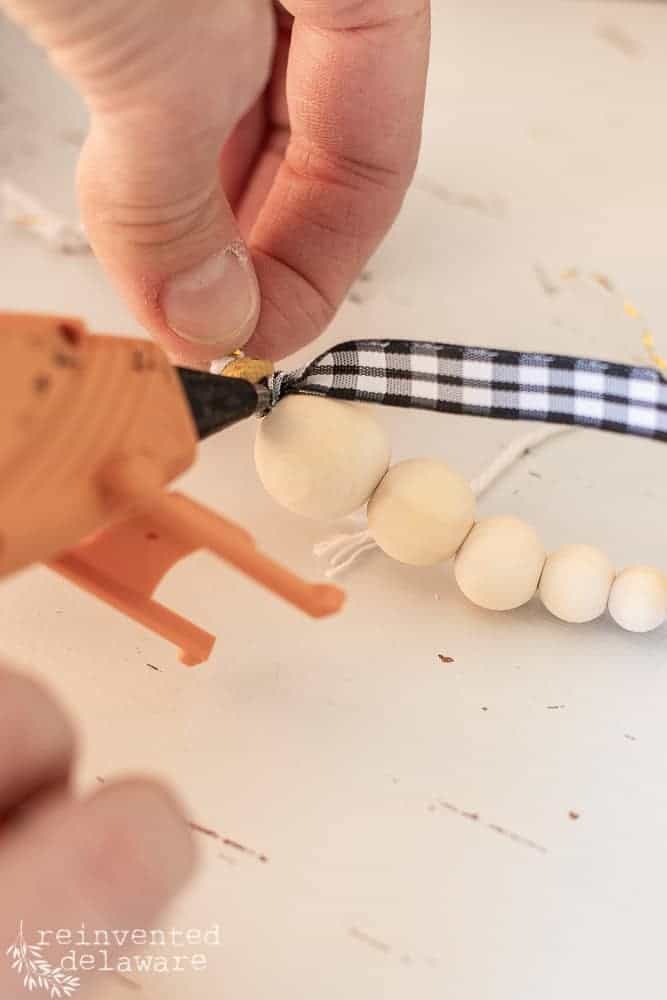
Let’s dress it up a bit with this adorable decorative buffalo check ribbon! Simply cut enough ribbon to tie on the wood bead icicle ornament. I tied mine in a knot. If you want a bow, make your ribbon long enough to create one! You could choose any ribbon that would go with your other Christmas decor.
After tying the knot on the ribbon, it can look a bit katty-wumpus. If you don’t like that look, use a dot of hot glue near the knot to hold it in place.
You’ll notice that I used my scissors to steady the beaded ornament. You can also use a small towel to steady the beaded ornament and prevent it from rolling around.
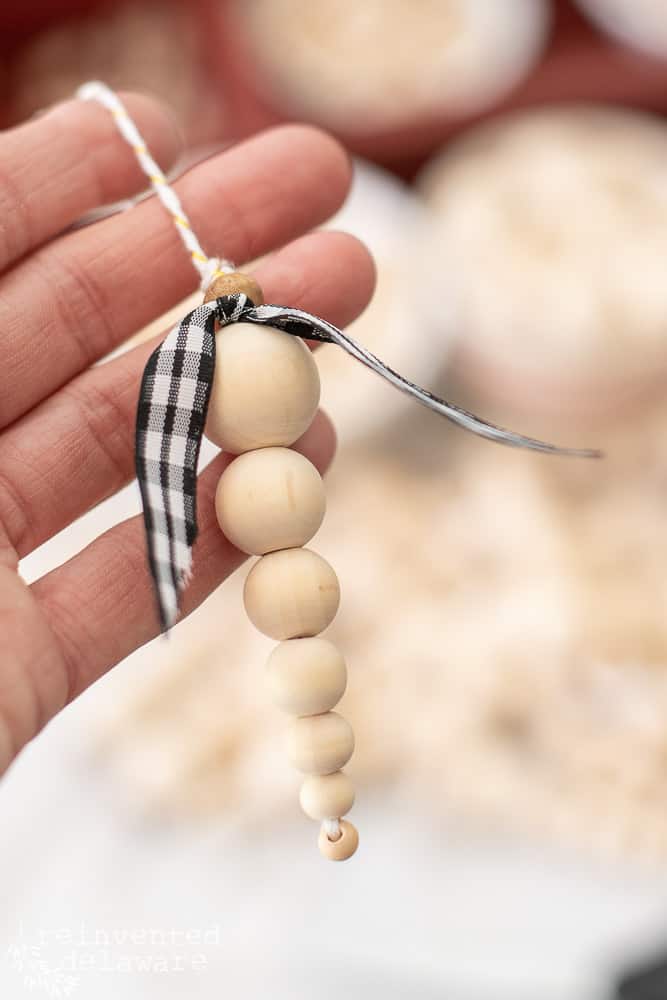
beaded Christmas tree ornaments
Aren’t they the cutest beaded ornaments for your Christmas tree?? And I think they do look like icicles! What do you think?
bonus step: paint the diy ornament
These beaded icicle ornaments would be adorable painted. Especially if you you choose a silver color with metallic sparkles. They could be painted to coordinate with your Christmas colors. Icey blue, white with glitter. There are so many ways to enhance this simple diy ornament. I would love to hear in the comments if you paint yours!
more ideas to use diy beaded ornaments
These 3″ wood bead icicles could be used in other diy Christmas decorations. Here are a few ideas to get your creative thinking in motion:
- Add handmade beaded ornaments to a wreath. Tie coordinating ribbon to match your decor.
- Use craft wire to add these ornaments to garland. Create an icicle look to the greenery.
- Use the diy ornaments as gift toppers instead of a traditional bow.
- Hang a beaded icicle from kitchen cabinet door handles for a festive touch.
- Create a garland by cutting craft wire and space the beaded icicles along the length of the wire. Hang the garland in your home.

more diy Christmas decorations
Tap the images below for more projects you can make for the holiday season.


thanks for being here!
I hope you are enjoying this project! Let me know if you have any questions. Or leave me a comment to tell me about your project and ideas!
thanks, Cindy 😀

share your ideas!
Share with us your thoughts on painting the beaded ornaments. Would you paint some? What colors would you use? Would you add glitter?
Let’s inspire each other!
Thanks for stopping by for this easy beaded Christmas tree ornament tutorial! I would love to see the ornaments you make – share on the socials and tag me so I can see your creations!
Recreate and Decorate
Join the Facebook Group and Share Your Projects With Us!
join our journey
Follow along on our reinventing journey on Instagram, Facebook, Pinterest, and here on the blog. Sign up below and I will send you this fun freebie along with the tutorials blog posts right to your inbox!
Feel free to pin any of the images to your Christmas inspiration boards!

Thanks again for stopping by today!


Cindy Rust
Cindy has been decorating her home with thrift store finds for 40 years. She is an avid thrift store shopper who loves to makeover the items she finds into vintage-inspired home decor and furniture. When she isn’t thrift shopping or painting a piece of furniture, you can find her making homemade butter, working in her garden, or painting with watercolors.


I’m so glad you shared these this week! I was the last to choose, and I’m so EXCITED that I got to choose you! These are so easy, and make such a statement! I’ll be featuring you at Tuesday Turn About this week!
Thank you so much Julie, for choosing our beaded ornaments for TTA!! 😊
Wow, those turned out perfectly! When I saw your stash of beads my jar dropped. I love it! I’d be one happy DIY camper with those. Not sure what I’d make but it would make me happy just playing with them. Love how your mind works. Great tutorial too. Merry Christmas!
Merry Christmas to you too Cindy! BTW, I’m not sure what to do with all those beads!!😊
Very Scandinavian. Love it. Clean and blends so well with any decor. You do creative crafting very well.
Well thank you very much Cindy! I’m itching to make more of the beaded ornaments this year too!
Hi Cindy! These are so cute! I have a project similar to this on my to-do list! Not sure if I’ll get to it this year though! Happy day!
Hi Cindy – This is such a fun project! Every year, I love to make a few handmade ornaments. Every time I re-use them in future Christmas celebrations, it’s a sweet reminder of years past. Thanks for the step by step instructions and tips. The end result is so charming!