
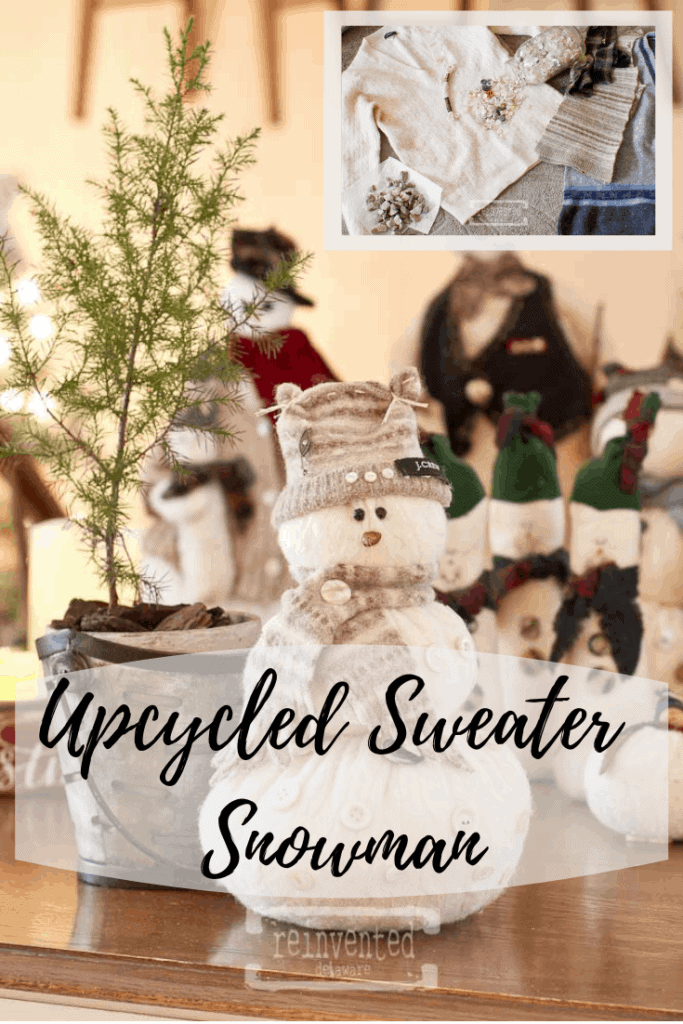
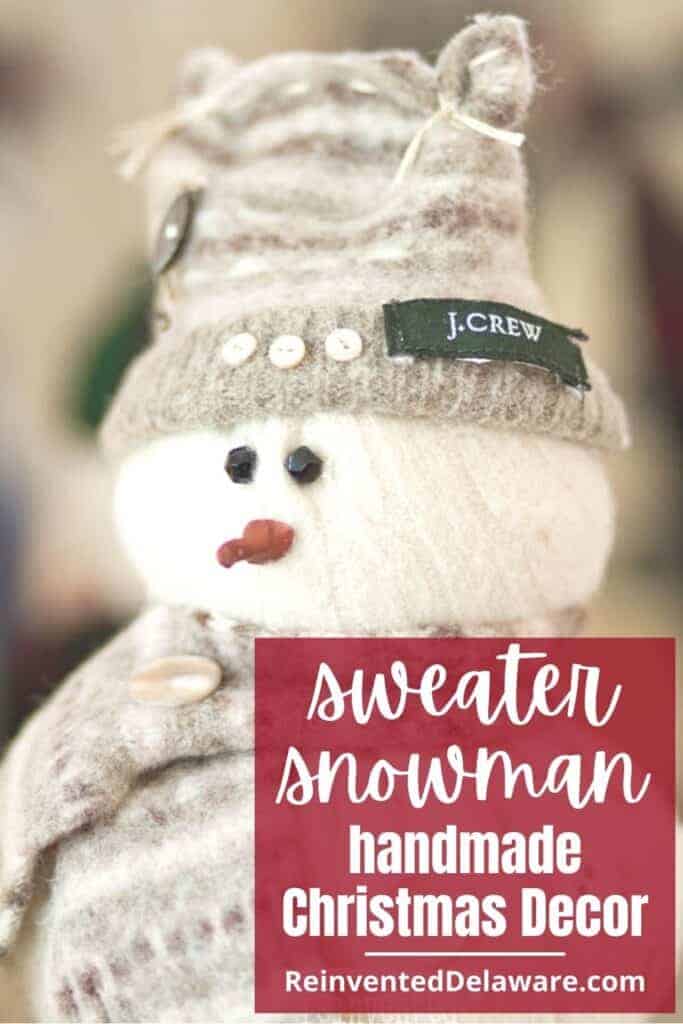
The Cutest Snowman made from Old Sweaters
Looking for a fun and creative way to repurpose old sweaters? Learn how to make an adorable thrift store sweater snowman decoration using scraps of sweaters from old winter clothes!
In this step-by-step guide, we’ll walk you through the steps to create an adorable thrift store sweater snowman decoration using scraps from your old winter sweaters.
Not only is this project a fun way to repurpose and recycle, but it also adds a personal touch to your holiday decor.
So grab those sweaters, gather your crafting supplies, and let’s get started on making an adorable sweater snowman that will bring a smile to your face all season long!
Winner Giveaway Announcement!
I’m excited to let you know the winner of the amazing giveaway in our recent post has been selected! You can see the lucky winner later in this post!
The following post may contain affiliate links. That means if you click and then buy something, I will make a small commission at no additional cost to you! Thank you for supporting my blog. full disclosure here.
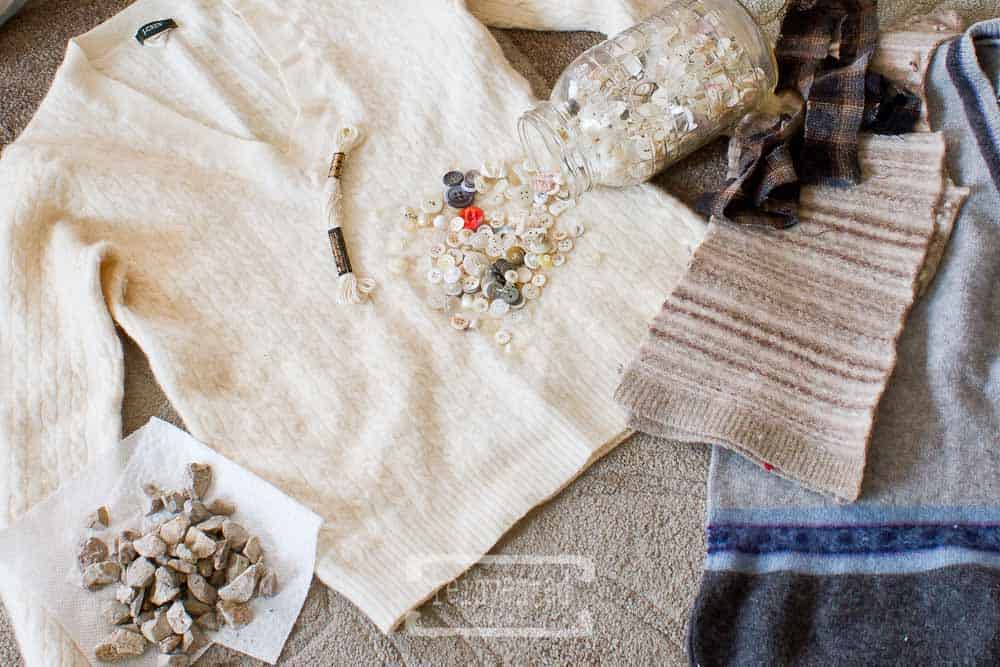
supplies:
Let’ get to it! The first step is to gather the supplies. Tap the links below to get the supplies and tools you need. Then head to your local thrift store and find some cute sweaters!
- thrifted wool sweaters – one in a neutral color, one with stripes, plaids or pattern
- vintage buttons
- DMC embroidery floss or heavy thread/yarn in a neutral
- sewing needle with a large eye
- old pillow or new Poly-fil stuffing
- fabric scissors and fabric snips
- plates in varying sizes or compass w/marker
- small rocks or plastic Poly Pellets
- lunch baggie
- hot glue gun and glue sticks
- E6000 glue
how to wash old sweaters
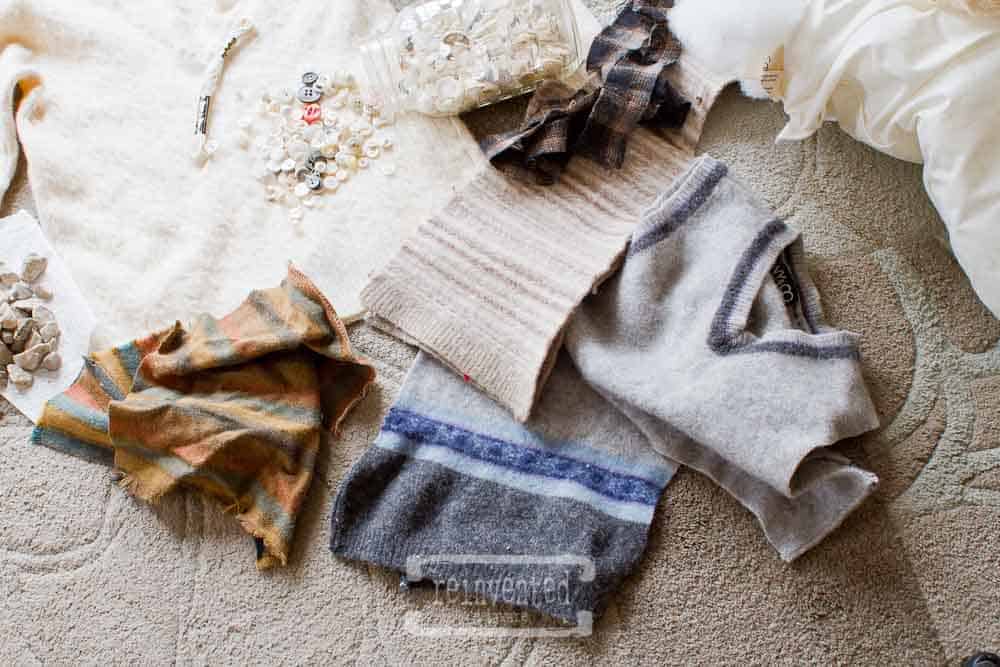
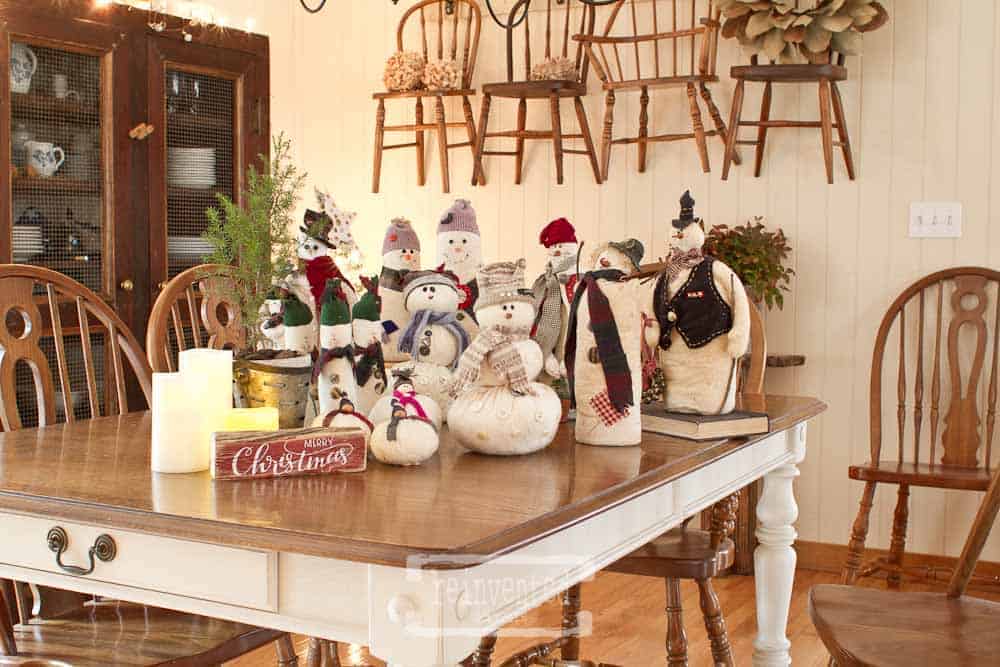
You can shop for sweaters at a thrift store or in your own closet. Look for a sweater with an all-over design that reads like one in a neutral color – off-white or white is fine. It is important that the sweaters be 100% wool. The scarf and hat will be made from a sweater with more defined designs – think stripes and plaids. See the examples below. They have a pattern to them and will be perfect for the snowman scarf and hat!
Because I keep a stash of sweaters on hand that has already been prepared for wool projects, the first step is not pictured. Did you ever have a sweater that was accidentally shrunk in the wash? That is exactly what we want to do with these sweaters!
Throw the sweaters in the washer and wash on the hottest water setting as possible with the most agitation possible. This process shrinks the sweater. In the textile industry, it is called ‘boiled wool or felted wool.
Then throw it into a hot dryer until it is completely dry. As a result, the sweater will be much smaller in size than when you started. Boiling the wool prevents the yarns in the sweater from fraying and raveling apart.
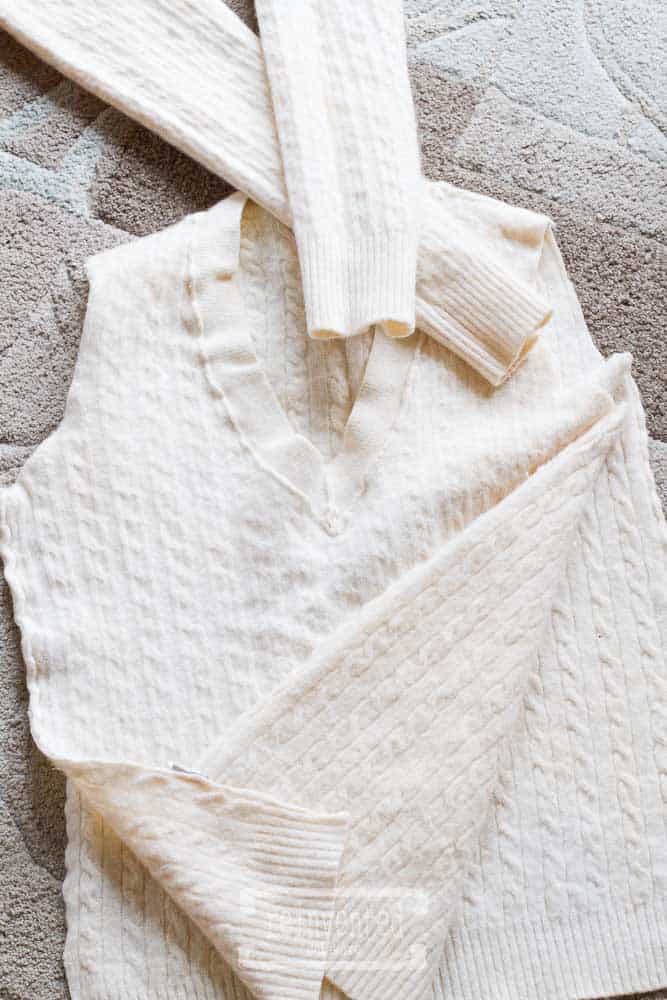
how to cut old sweaters
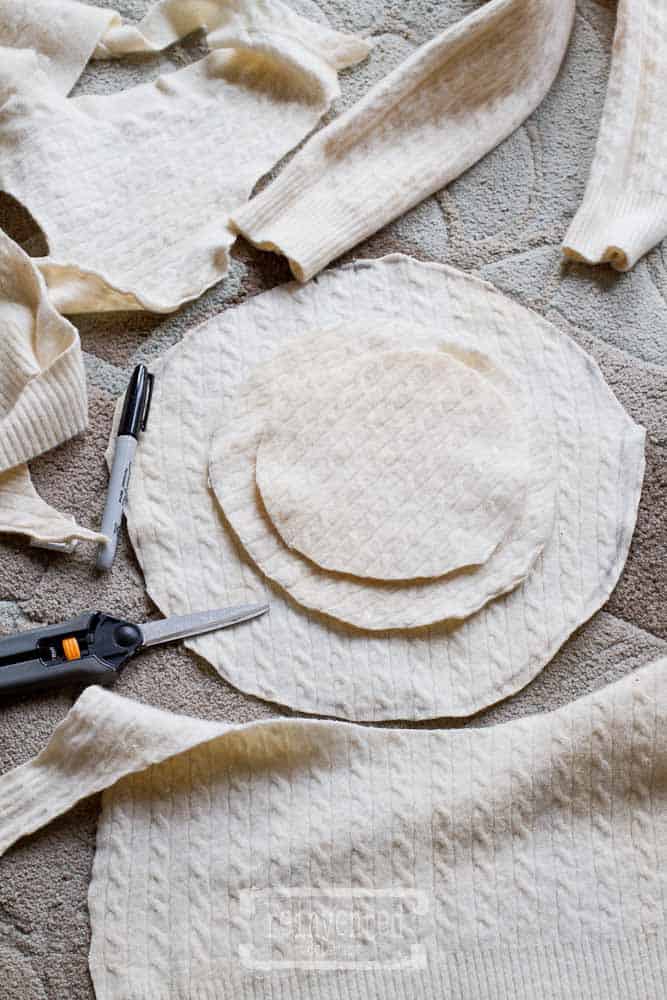
Turn the sweater inside out and cut along both side seams. Next, cut the seam that attaches each sleeve. Leave the sleeves in one piece. I see another snowman in the making with those 😉
This snowman stands almost 12″ tall. I didn’t plan the height of our little fella, I just started cutting circles!
The largest circle is about 12″ in diameter and could be cut from the back sweater piece. Trace around a 10″ dinner plate adding approximately 1″ extra. Don’t worry about the marker on the sweater – it won’t show in the final result!
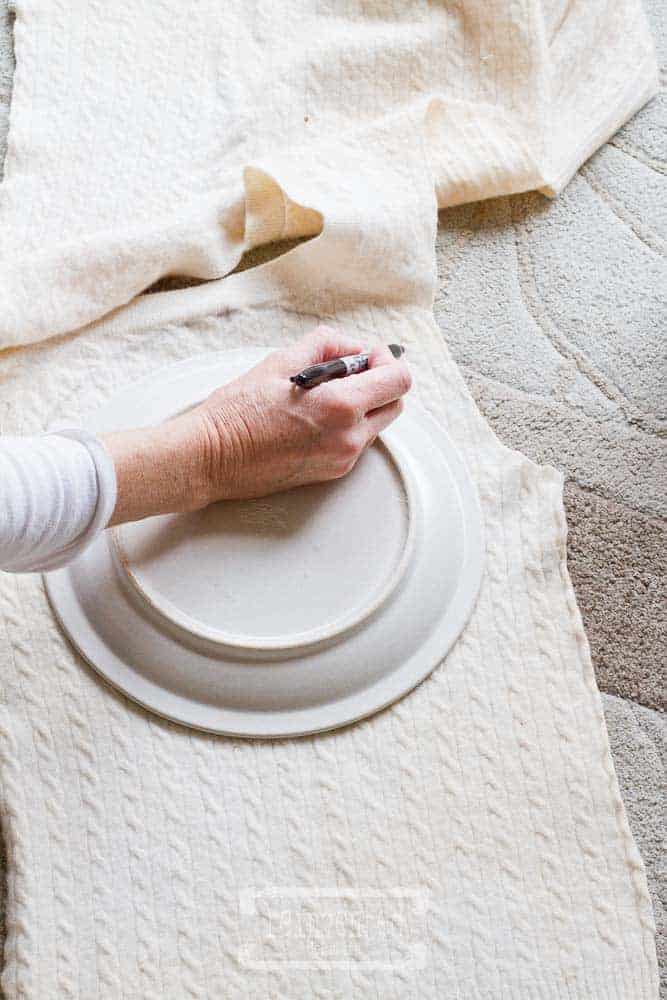
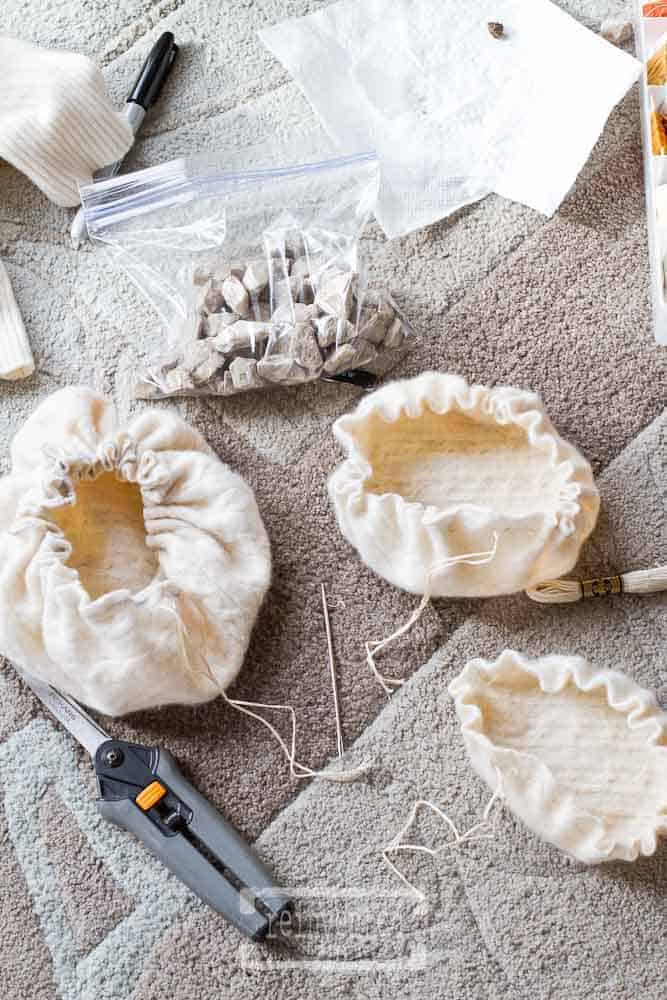
Cut a total of three circles. I used a smaller salad plate for the middle circle, cutting extra just like I did with the larger plate. Then I cut the smallest circle using the same plate.
Don’t get hung up on the measurements with this step. Rather, just be sure to have three circles cut in graduated sizes as I have pictured below,
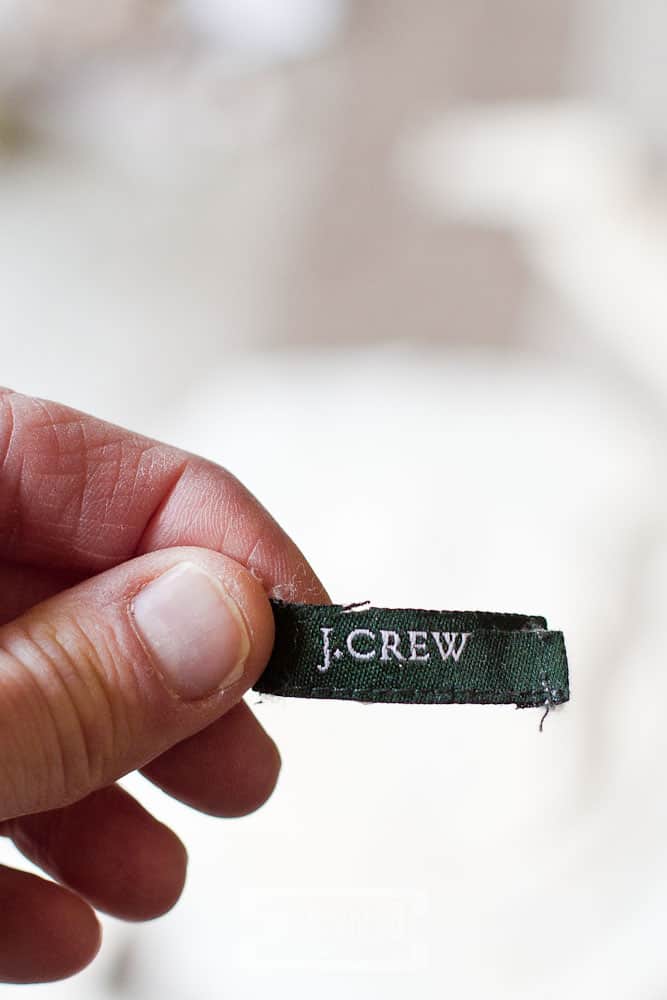
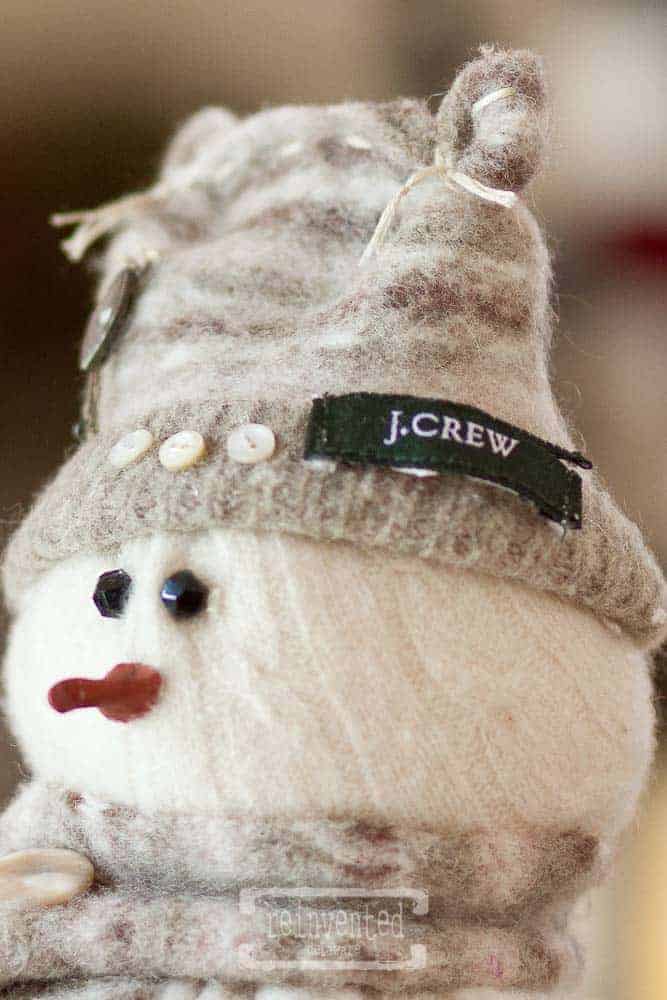
The neutral sweater that I chose happened to be a name brand. I have plans for this cute little tag!
how to stitch felted sweaters
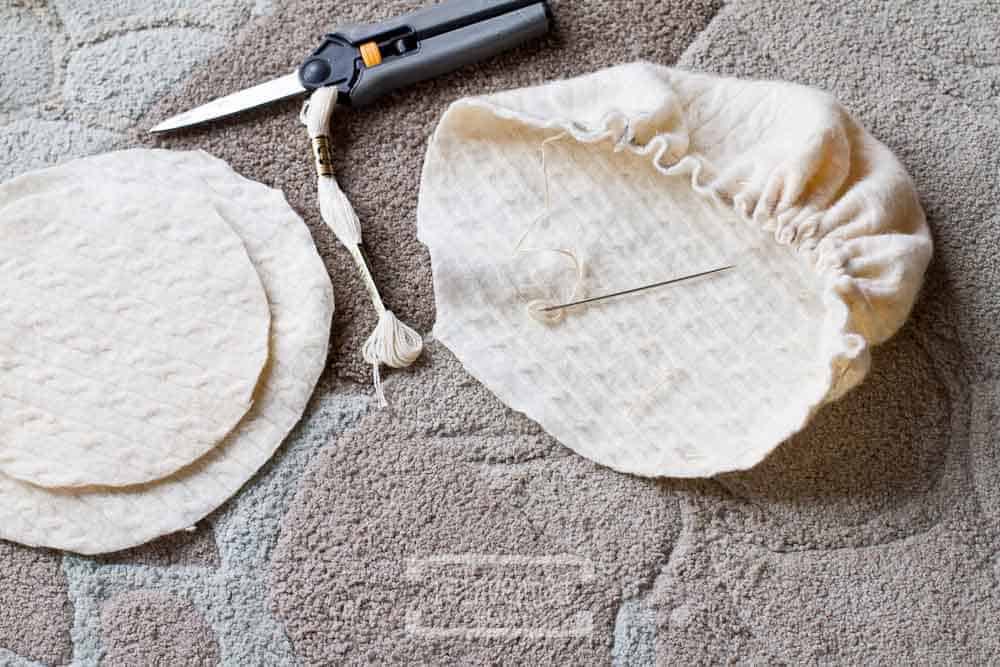
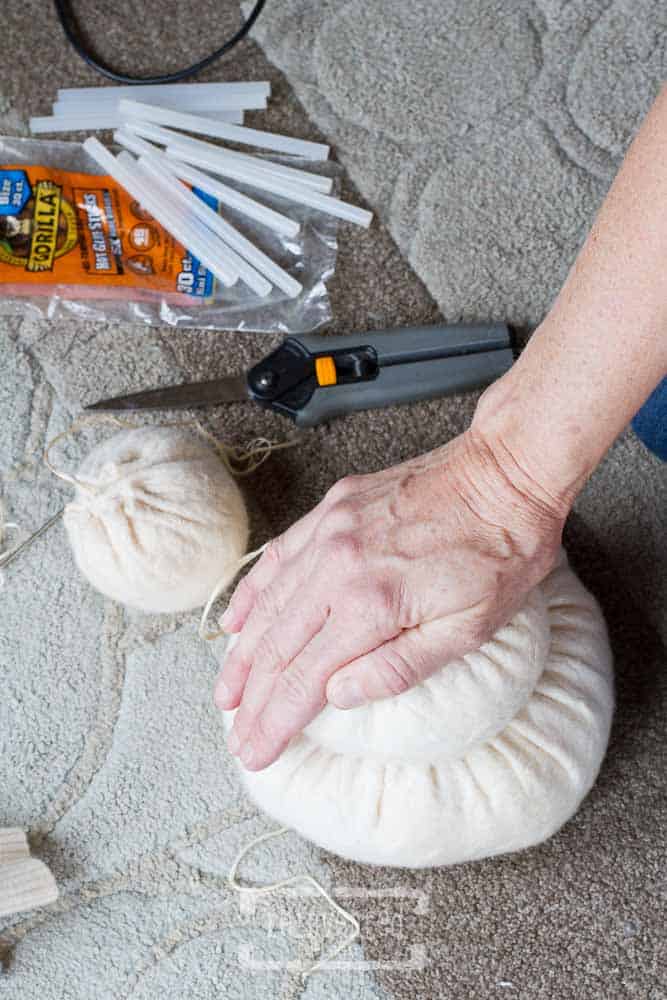
This next step takes just a few minutes. Using the large needle and the DMC embroidery floss (or heavy thread/yarn), stitch a running stitch all the way around each circle made from the off white sweater. Stitch approximately 1/2″ away from the edge.
As you stitch around, the wool will begin to gather. See how it starts to gather into a ball? Be sure not to pull too much thread – you want a tail left at the beginning of the stitching! When you are finished with each circle, keep the thread ends loose.
poly-pellets or rocks?
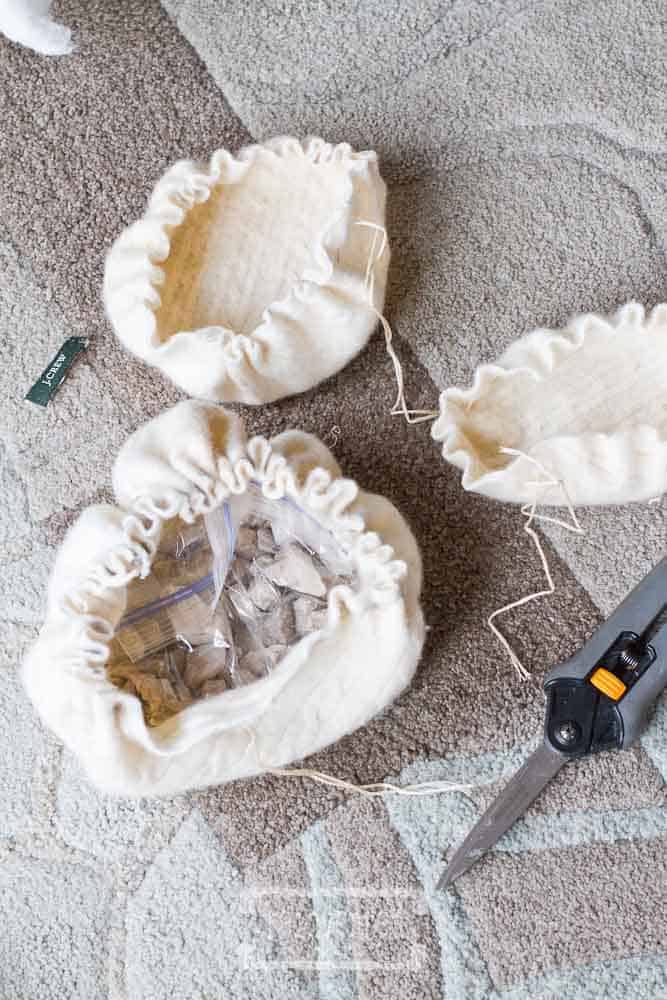
I was fresh out of Poly-Pellets for this upcycled sweater snowman, so the rocks in my landscaping area were the next best thing!
A handful (about 1 1/2 cups) of the rocks will give the snowman some stability for standing. The plastic baggie adds some additional protection for the surface that the snowman will be placed on.
The baggie with rocks (or the Poly-Pellets) goes into the largest circle. This will give some weight to the bottom of the snowman and will help this cute snowman to stand upright.
how to use an old pillows
Now for the stuffing! I used an old pillow that I kept when we replaced our bed pillows. Cut open the seam of the pillow cover just enough for your hand to reach in. This is a great use of old pillows! If you don’t have old pillows, you can use fiber fill.
To prevent the stuffing from getting lumpy, make a well in the center of the previously added stuffing and add a new handful of stuffing to the center of the well. Keep doing this until they are filled firmly.

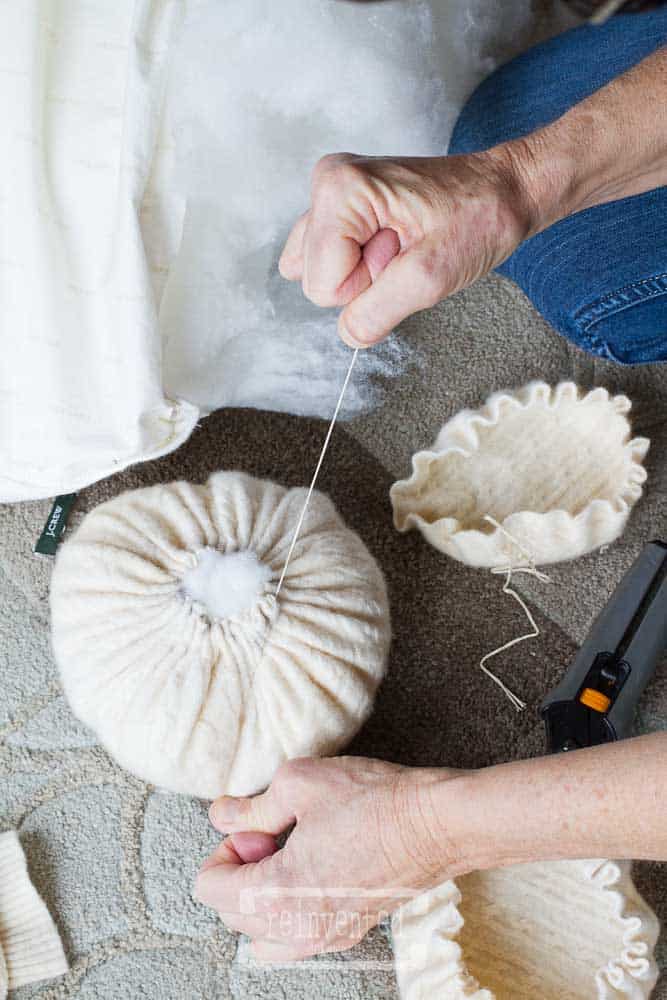

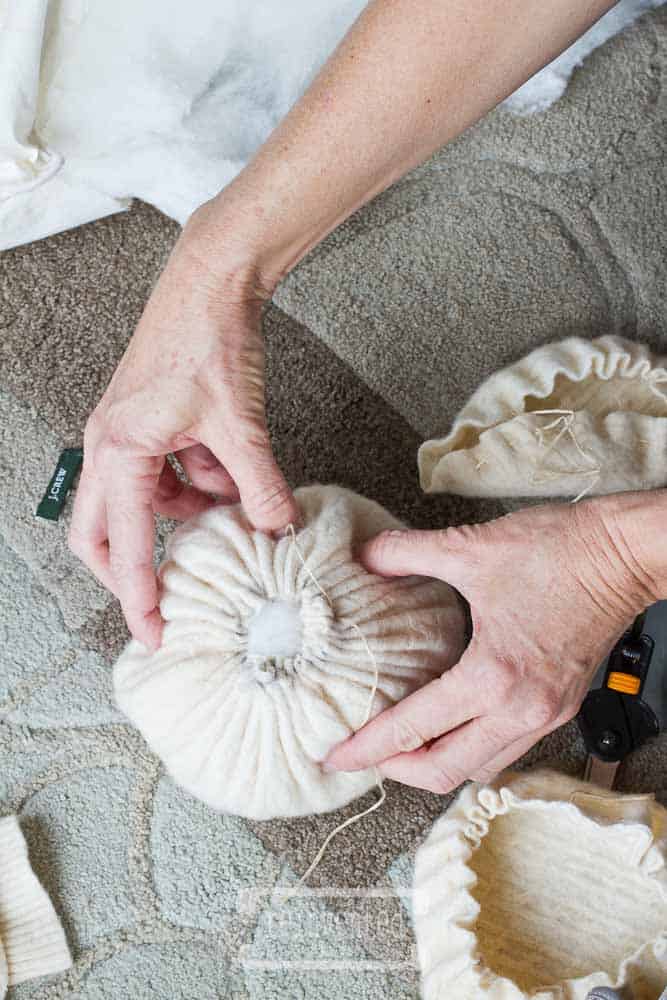
Pull the thread to tighten up the opening….
…then tie a knot! Most of us don’t have an extra hand so my big toe was very helpful 😉
The snowball might be a bit flattened out by now so just use your fingers to fluff it up a bit.
thanks for being here!
I hope you are enjoying this project! Let me know if you have any questions. Or leave me a comment to tell me about your project and ideas!
thanks, Cindy 😀

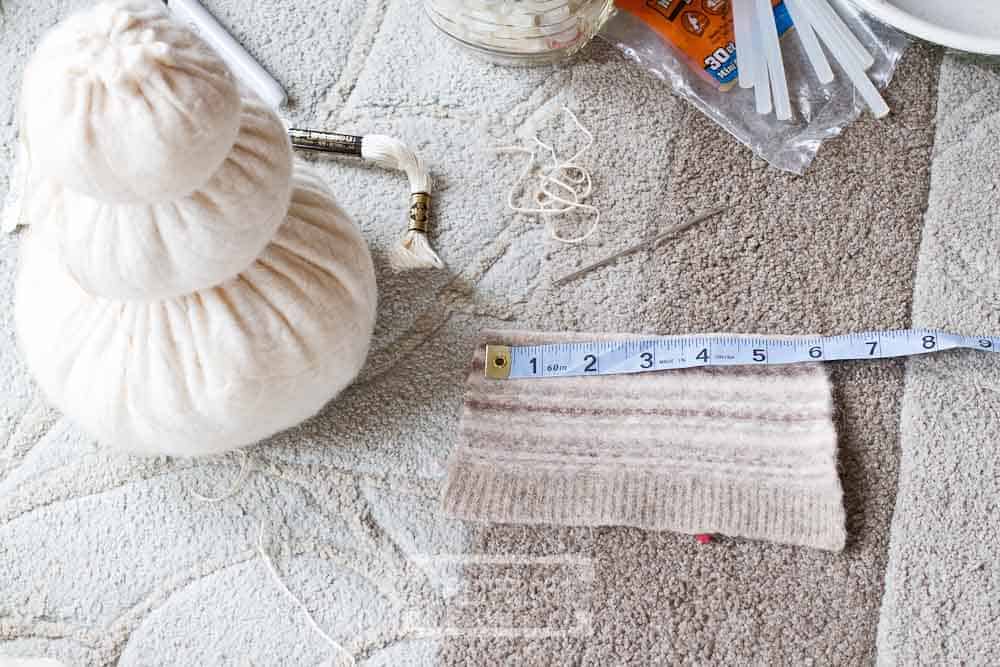
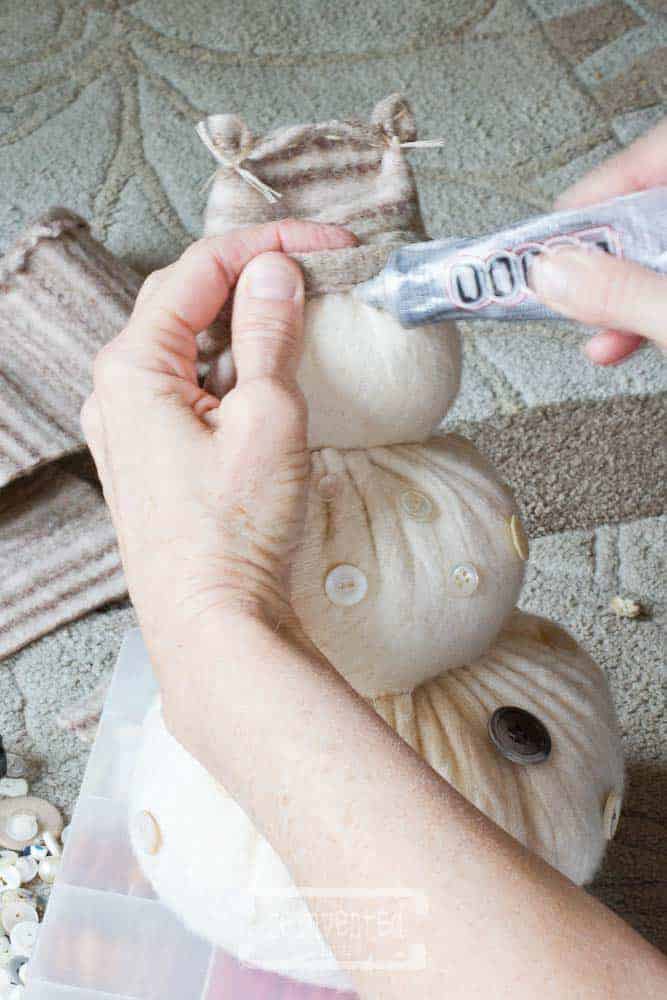
assemble the snowballs
After tightening and securing all three snowballs, glue them together with hot glue. The largest snowball should be on the bottom 😉
Use a good amount of glue on each snowball and hold each one down firmly for a couple of minutes. Most importantly, the glue should be completely cooled off and set before lifting your hand.

how to dress a snowman
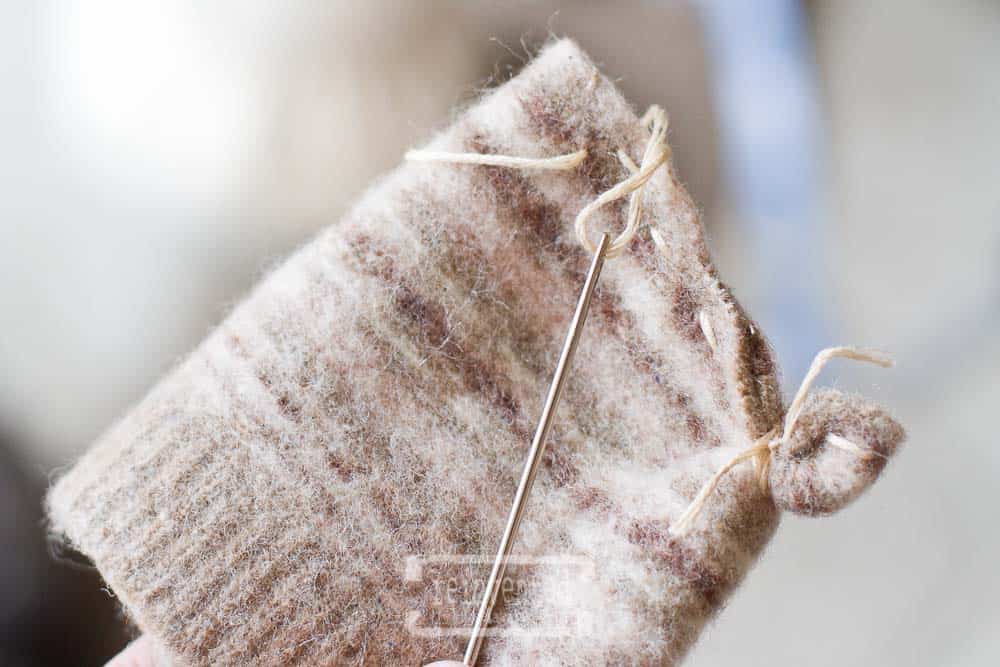
Our little snowman needs a cute scarf and hat! For the hat, I cut a piece from the patterned sweater and included the ribbing at the bottom of the sweater. I cut the piece to be approximately 6″ x 4″. Precision is not necessary.
Put the two 4″ edges together and stitch. I deliberately stitched a bit cattywampus to create the handmade look that I love. Make sure that the end result is turned right side out!

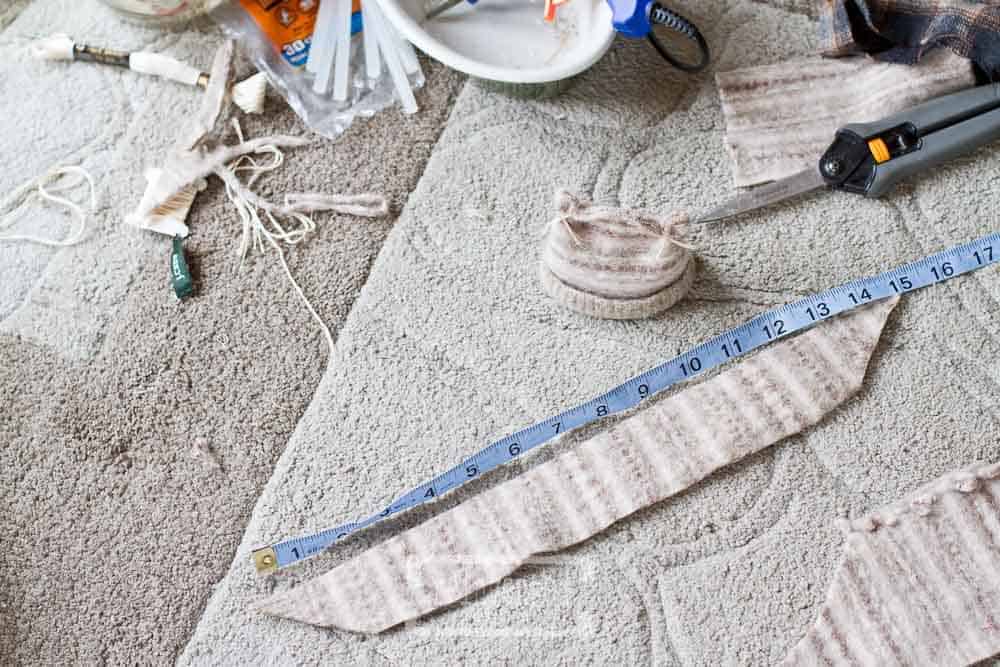
Turn the little hat around so that the seam runs up the center back (see the image above?). Using a running stitch, close up the top of the hat. I also used thread to tie around each corner. That gives it a nice touch.
The scarf is a piece of the same wool sweater cut at approximately 15″ by 2″. The scarf needs to be to the scale of the snowman, so these measurements might vary for your snowman. For this reason, it is better to cut a piece too big rather than too small. I also added ‘fringe’ to the scarf by cutting 1″ slits on the ends. You will see that in the final result!
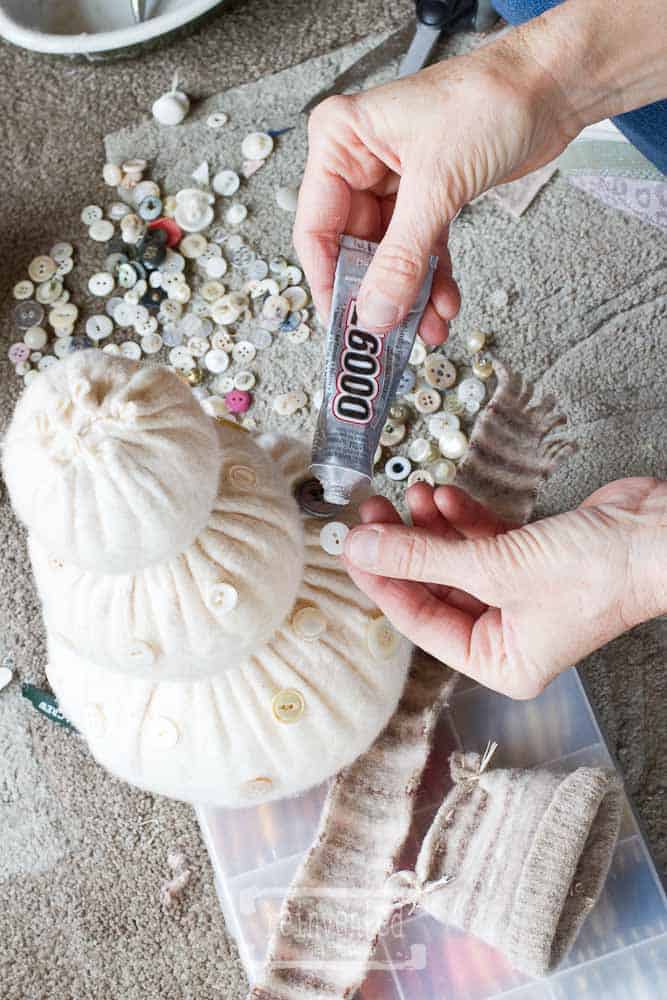
what to do with old buttons
Now for the buttons! This step is completely optional. The buttons add such a cute touch. If you do not have vintage buttons, you can use small scraps of the patterned wool sweater and create little patches. I have done this with other snowman projects and it is an adorable look!
Be inspired to use embellishments like old jewelry, beads and snaps in creative ways to make this adorable snowman unique!
E6000 is a great household and craft glue to have on hand. I glued buttons on all over the snowman. Use as many as you want. The buttons I chose were of varying sizes and neutral colors. I think silver buttons would add such sparkle to the snowman!
finishing touches
Our little fella might be getting cold by now so let’s give him a hat and scarf! Pull the hat down onto his head more than you think is necessary to allow for a rolled hem on the hat. Adjust the hat where it looks best to you and roll up the hem.
Use a dollop of E6000 just under the hat to secure it. Do this in the front & back and on both sides of the hat. Be sure that you hide the glue under the hat – you don’t want it to show!
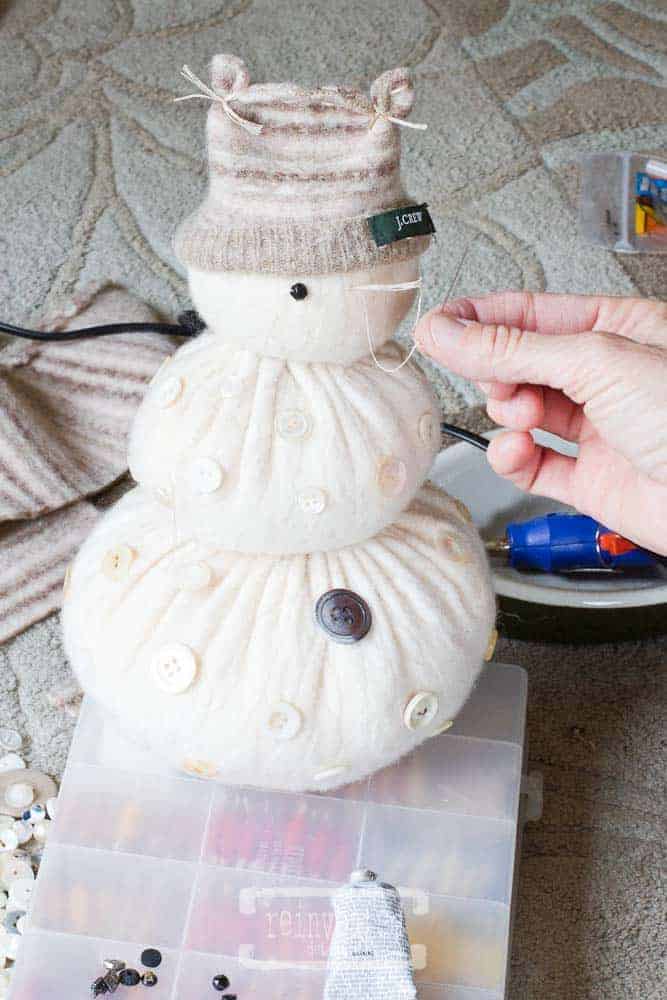
His eyes are small black beads I found in my vintage button stash. If you don’t have beads, you can use small black snaps or small black buttons.
First, secure your thread onto the wool with a knot, and then add the first bead. Secondly, run the needle through to the spot where the second eye will be and pull the thread up. Third, add the second bead then stitch back to the first bead.
By doing this you will be able to pull the thread tightly and the ‘eyes’ will dent inward just a bit. It creates a cute little expression. Stitch the eyes fairly close together. Check out the final snowman to see what I mean!
how to make a snowman nose
I started making a new handmade snowman each year several years ago. As a result, I knew that I would need snowman noses each year, so I made a bunch on them at once out of orange polymer clay. The little noses hang out in my craft room just waiting for the perfect snowman!
Here are a couple of substitutes for polymer clay noses:
- small orange buttons
- wooden skewer painted orange
- short, small stick from the yard painted orange
If you use a stick or a skewer, make sure it is a size that fits the snowman face. Poke a little hole where the nose will be and add a bit of glue to the end of the stick. Next, just poke the stick into the opening! Don’t worry, it won’t hurt the snowman 😉

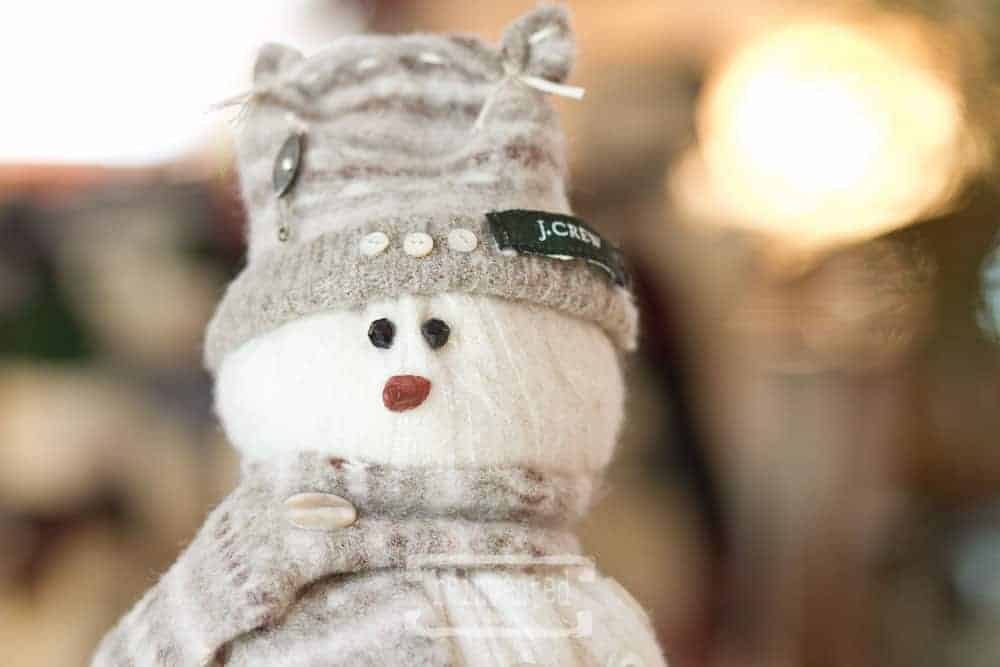
sweet snowman made from old sweaters
And here he is! I added the scarf with a stitch to hold it on. The little button on the scarf adds some cute detail as well as the doll buttons on the brim of the hat.
See the little cuts made on the ends of the scarf? That is the fringe I mentioned earlier in the post.
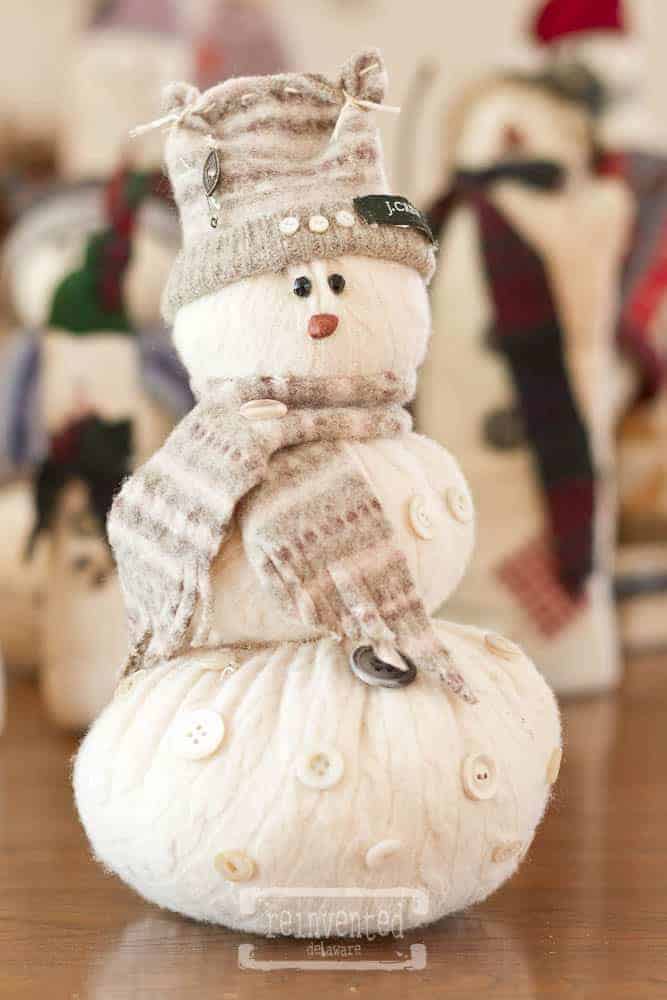
Remember the tag on the sweater? It fits perfectly on the brim of his hat! Just a touch of E6000 holds it on!
While rooting around in my vintage button jar, I found this little jewelry clasp! I attached it with a stitch. If you find little pieces like this, be sure to add them to your snowman. They really make each snowman unique!
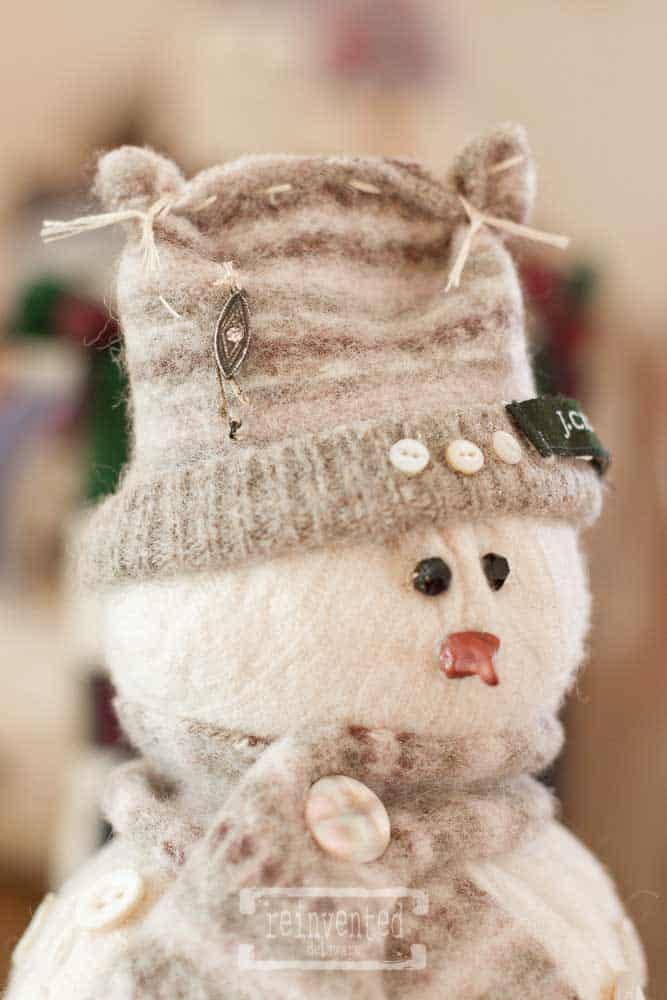
Check out his little beady eyes! See what I mean about pulling that thread just enough to create little indentations? He really has such a cute expression on his face!
Recreate and Decorate
Join the Facebook Group and Share Your Projects With Us!
thanks for stopping by!
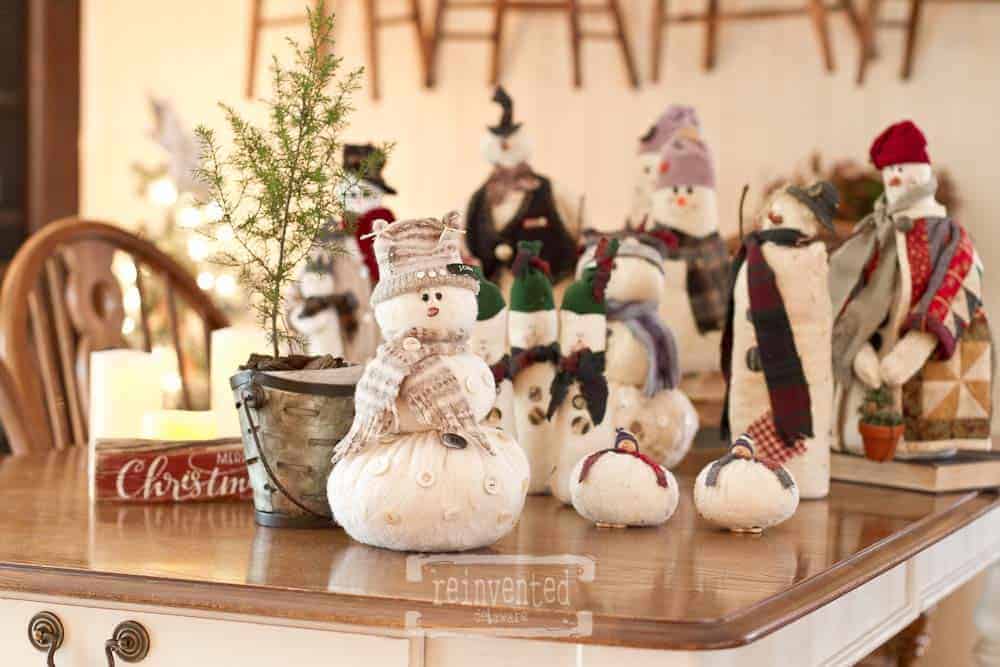
This little fella was so much fun to make! I hope you are able to make one this year. Even if you don’t have time before Christmas, you can make one during the winter months. These little snowmen love to stay out all winter!
supplies and tools
Here are the supplies and tools you need to create this adorable snowman! Tap the images to shop!

YouTube video
UPDATE: Here is a video I made making another snowman! I’m sure you will enjoy watching it! Tap the image below to watch!

Giveaway Winner!
And the winner is….. Jennie K! Thanks to everyone for entering this amazing Dixie Belle Giveaway!
Jennie, I’ll be in touch via email about claiming your $200 shopping spree! Congratulations!
thanks for joining the journey!
That’s all for today! If you make a snowman, let me know down in the comments section! I hope you have a happy holiday and that you can make one of these thrift store sweater snowmen for your holiday season!
Thanks so much for joining us for this post! Join our journey so you don’t miss any fun projects, tutorials, and inspiration we share with you each week! You can follow us on Instagram, Facebook, and YouTube. We share even more inspiration on Pinterest!
UPDATE: Be sure to read this post for more ideas on upcycling thrifted sweaters:
DIY Wool Felt Christmas Ornaments made from an Old Coat
And here is a fun post that includes more Christmas projects from Pinterest:
DIY Christmas Decorating Ideas


Cindy Rust
Cindy has been decorating her home with thrift store finds for 40 years. She is an avid thrift store shopper who loves to makeover the items she finds into vintage-inspired home decor and furniture. When she isn’t thrift shopping or painting a piece of furniture, you can find her making homemade butter, working in her garden, or painting with watercolors.

Love your snowman! Is he for sale? Thank you for sharing this creative process!
Thanks Julie!! Sorry but he has made himself at home at our place 😉 I encourage you to try to make one for your home!!
I’m going to make one right after my nap, licking, dinner, snoring, and pooping……..if there’s any time left.
This is the cutest snowman. I love this project. He is aborable.
He’s our little cutie!
He’s gorgeous, Cindy! I love that you used the J-Crew tag on his hat, what a great detail. I’ve been saving some old sweaters maybe I should give your sweater snowman a try 🙂
Yes!! I would love to see your snowman creation! Happy crafting 😊
Oh, my goodness! He is the sweetest! I’ll have to make a few of these for Christmas gifts. Thank you for the inspiration.❤️❤️❤️
So glad you were inspired to make some as gifts! Happy crafting 😊
Wow is this snowman cute! I see a trip to my local Sal Army store in my near future to shop for sweaters 🙂 I can’t wait to try making one – thank you for sharing!
Yay!! I’m so happy you enjoyed this snowman! I just bought my thrifted sweaters for this years’ snowman. I will be making a YouTube video in the next couple of weeks so be sure to subscribe to my YouTube channel. I don’t want you to miss it! Thanks so much for stopping by 🙂
This is the cutest! Great how-to; might be making one of these for my snowman-loving sister-in-law:) Love your blog! My vintage, repurposed-loving self is inspired! I’m sharing a link to this project on my Weekly Rambles today:)
Thanks so muhc Lora! Isn’t this little fella the cutest?? I made this years version just the other day and I will be posting about him along with a YouTube video. I hope you get to make one! Thanks for the feature. I will check it out 😊
This little snowman is adorable! I like the way you fashioned and stitched the cap, and think he can be set out for the whole winter.
I’m looking forward to another year of pretty inspiration like yours when the FWF party starts up again tomorrow, Friday, January 7th.
Hope to see you there!
Happy New Year!
Rachelle
Thanks Rachelle! I’ll be sure to pop over to the link party!
Cindy this is darling! I’ve seen the sweater pumpkins but I adore these snowmen! Just pinned! I would love it if you would stop by my weekly link party I just started cohosting and share! https://www.ourtinynest.com/2022/10/05/wednesday-link-party/
Thanks for the kind words about our little snowman Nicolle! I’ll be sure to check out your link party!
Your sweater snowmen are absolutely adorable, especially the cute little handmade noses! They would make wonderful gifts.
Aren’t they the cutest little fellas?? I make one each year to add to our collections. Thanks for the kind words Marie!
Love this snowperson.. I will be looking for wool sweaters to felt.
Question .. on the scarf you fringed the ends, does felting keep it from unraveling??
Idea.. a friend of mine makes snowmen and also use polymer for noses and eyes, however she adds a hole across the end of the nose. Then runs embroidery thread and sews the nose or eyes on.
Why…. When sewn on and it is time to put away you can gently lay the nose down so it dose not break off.. I can’t tell you how many noses I have lost or broken..
Hi Cathy! Felting usually prevents raveling. True felting works on wool fabrics so bear that in mind when choosing your supplies. I love the idea of the hole in the clay for the nose! I’m going to give that a try!
I just wish these ads would stop getting harder and harder to X out of! There are soooo many but its frustrating when youre trying really hard to see the project ad all these dumb ads cover half the screen that you cant X out of
I’m so sorry about that Kim! Unfortunately, it’s the ads that make if possible for me to run my business and provide the free tutorials here on my blog and my YouTube channel. They are basically my paycheck 🙂 Thanks for stopping by and I hope you were inspired by these sweet little snowmen!
Such a sweet snowman. Never knew about the felted wool. Thank you for all the great tips.
Felting wool is fun to work with! I also made some cute ornaments from felted wool. Here is the link if you are interested! https://www.reinventeddelaware.com/diy-felt-christmas-ornament-patterns/
Very cute Snowman, I just might have to find me a thrift store sweater and make one. Just love it.
Yes and yes!! You have to make one – they are so fun to make and have. I just updated a YouTube video for this snowman. It will go live on Wednesday, Nov 13. Be sure to subscribe so you don’t miss it!
That is definitely one of the very best snowmen I’ve ever seen. Absolutely adorable. Love everything about him.
He’s a cutie pie, isn’t he? I hope you get to make one too!
Cindy – This is one of my favorite projects you created. I had to chuckle when I read that you pre-made a bunch of polymer noses. I will check out your video too. Thanks for the inspiration. Love the snowmen and snowladies cute little faces. Oh and PINNED.
It is funny to thing I have a bunch of fake snowmen noses stashed away for emergencies!! I am excited to make another snowman soon!
This is so cute & love to recycle as much as possible.(keep it out of the landfill !) The toe works ! Lol thanks xox 💚
I’m so glad you enjoyed the snowman project Sharon! Recycling is always fun!