
How to Paint and Stencil a Concrete Porch in 5 Easy Steps
Transform your outdoor space with a fresh coat of paint on your concrete porch. Follow these easy tips and tricks for a beautiful before and after result.
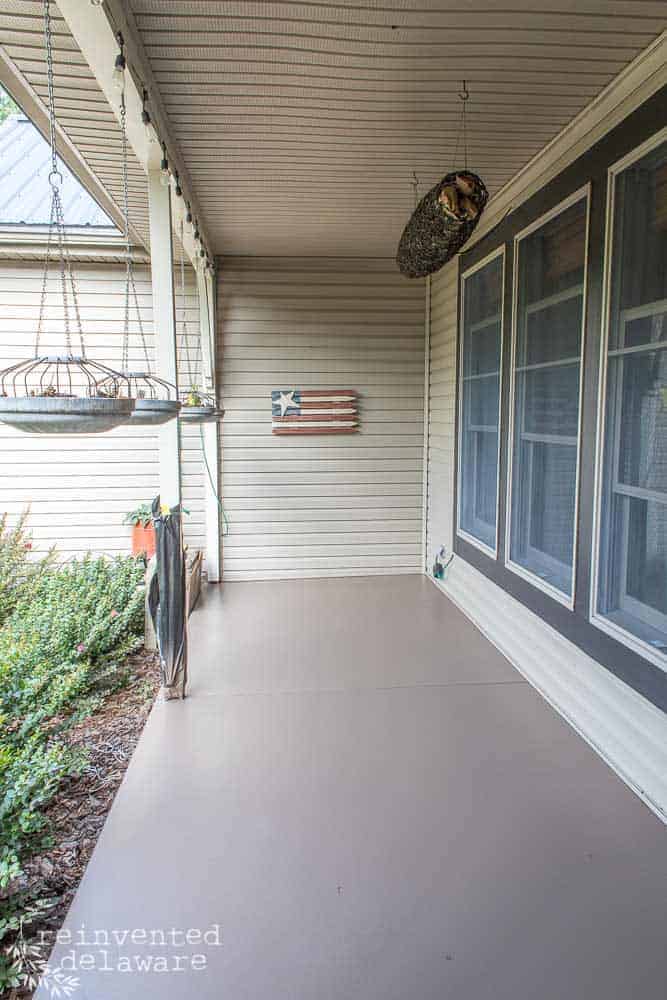
DIY painted concrete patio
Are you getting tired of your old concrete patio floor? Over time, the concrete begins to look dingy and sometimes even rusty. Fortunately, it’s really easy to paint your concrete floors to completely transform your outdoor space!
In this post, I’ll guide you through painting your concrete porch, and I’ll teach you how to stencil your concrete porch for a unique design that instantly transforms any space!
The following post may contain affiliate links. That means if you click and then buy something, I will make a small commission at no additional cost to you! Thank you for supporting my blog. full disclosure here.
this post is sponsored by Wagner SprayTech
list of supplies:
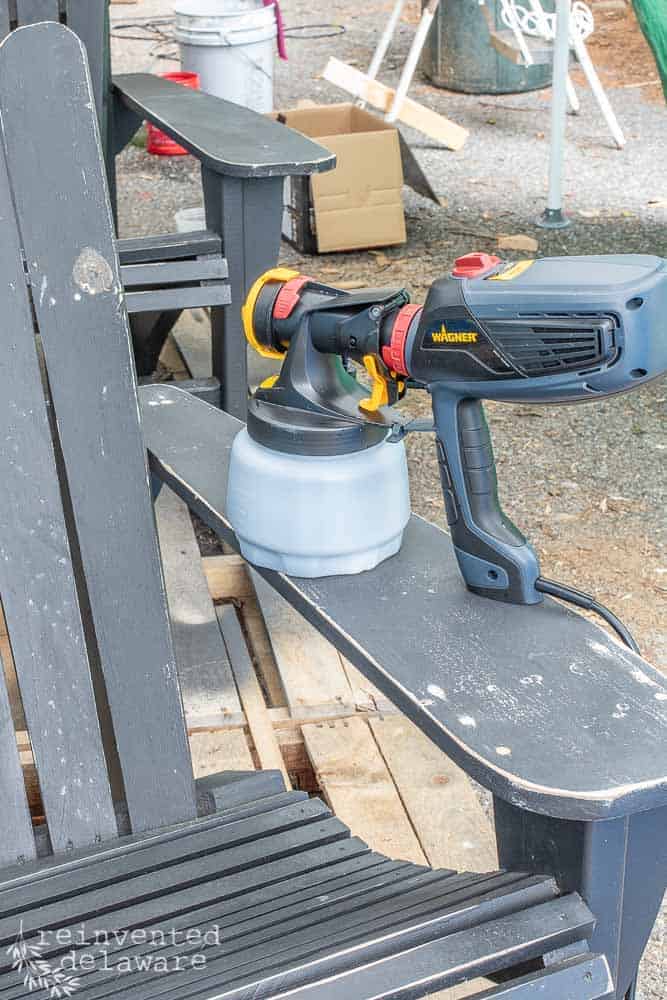
You really don’t need a lot of tools to paint your cement front porch, but I do recommend using a paint sprayer! It will make this paint job so much faster and more consistent. Plus, you won’t have any brush strokes or marks at all.
- Porch and Floor Paint in your desired color
- Wagner Flexio paint sprayer
- Painters plastic
- Stencil of your choice
- 4″ paint roller and paint pan


concrete front porch makeover: step by step
Here is the step by step process I followed to give our front porch a makeover!
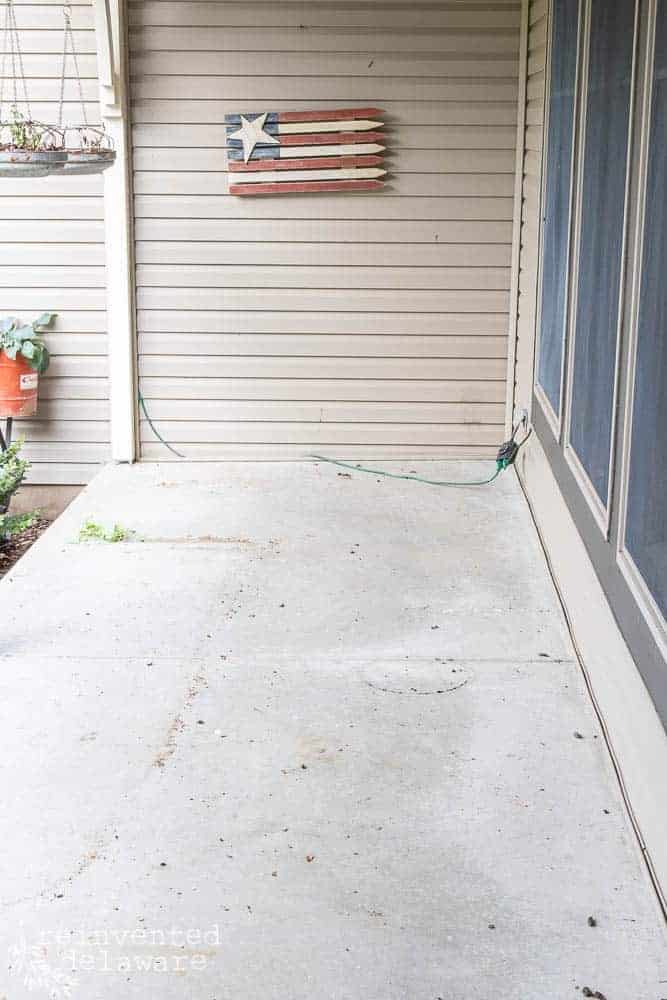
step one: clean your patio
The first step for this concrete front porch makeover was to remove all of the furniture. The two largest pieces are the Adirondack chairs my hubby built a couple of years ago and a milk can table. All of the other furniture and decor had to come off of the porch.
If your concrete surface is under cover, cleaning will be quick and easy. I cleaned the porch by sweeping away the dirt and then giving it a good scrubbing using a broom and some Dawn dish soap.
If your concrete patio is uncovered, consider using heavy duty cleaners and possibly Muriatic Acid. Read the instructions before using the acid!
Now if your patio surface is uncovered and has a lot of marks or wear, it can be helpful to use a pressure washer or a concrete cleaner first for best results. Be sure to let it dry completely before painting your concrete front porch.
step two: prepare your porch surfaces
Allow the concrete surface to dry completely before painting the surfaces.
Protect the walls, windows, porch posts and any nearby shrubs with painters plastic. The sprayer does have some overspray and the plastic will protect the surfaces you don’t want paint on.

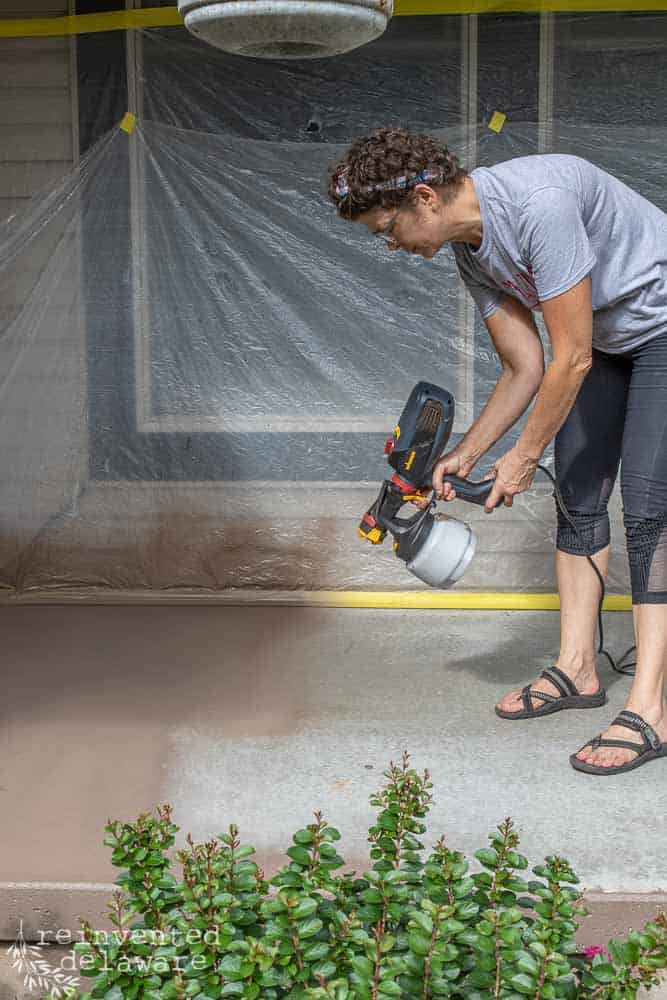
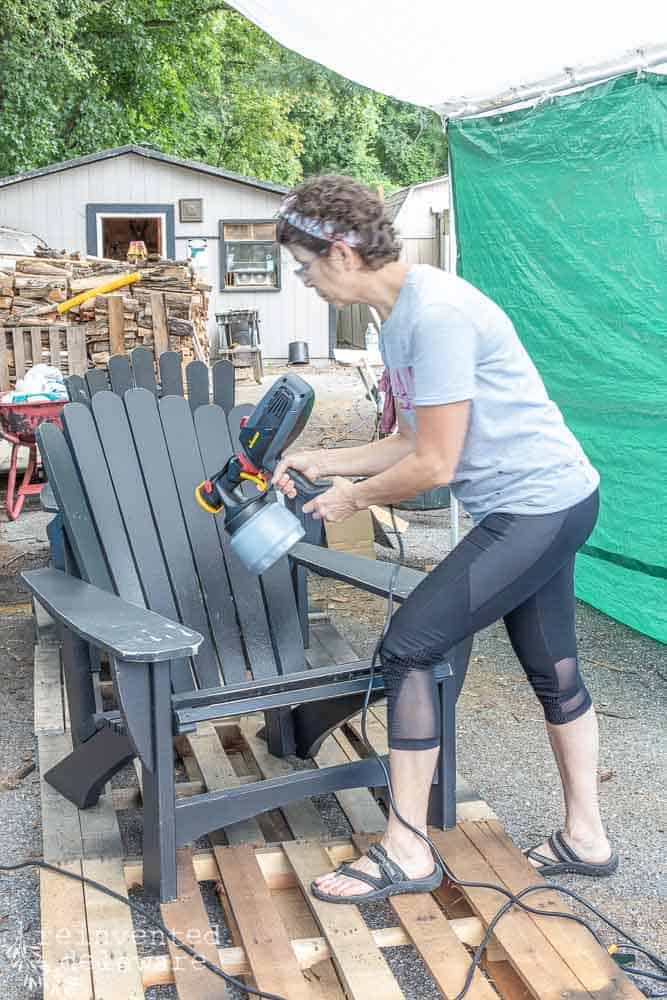
step three: spray your concrete porch
The sprayer has options to spray upright like I did for the chairs or tilted downward like I am doing for this concrete front porch floor.
Again, slow and even motion across the surface. This sprayer speeds up the process of painting. And it covered the surface so well that I only had a couple of touch-ups to do the next day.
TIP: Watch the weather forecast
Choose a couple of days with a warm, sunny forecast to make this DIY project go easier.
step four: allow the paint to fully dry
To stencil, you will need to crawl around your patio. It’s really important that the paint is completely dry before you move onto the next step.
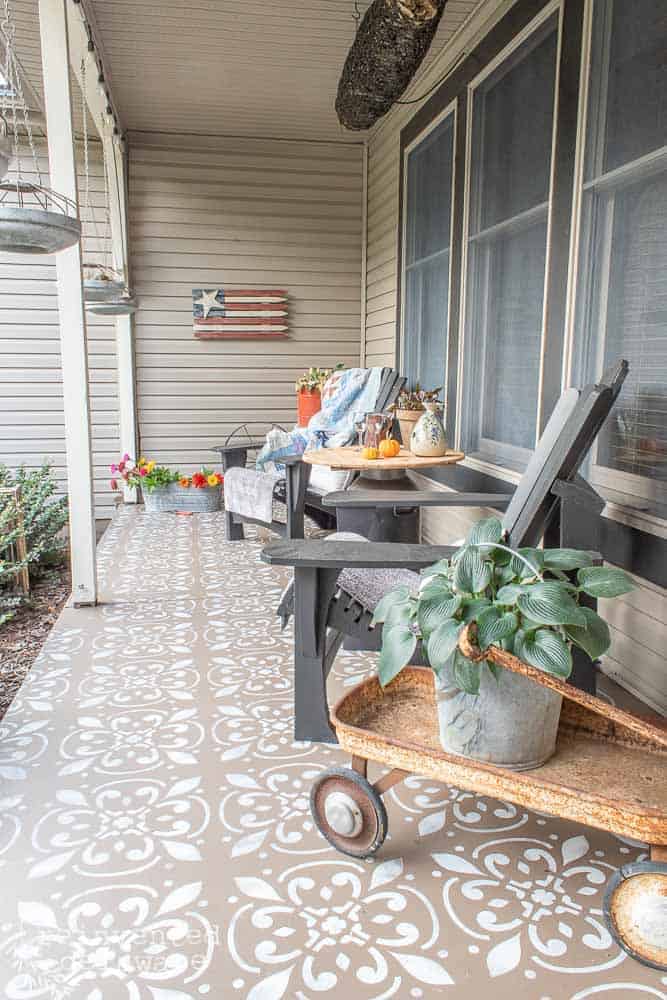
Look at the difference the paint made on this concrete floor! I seriously don’t know why I haven’t done this before. Even if I didn’t do anything else, the painted floor makes a huge difference!
But of course….. I’m not going to stop here!
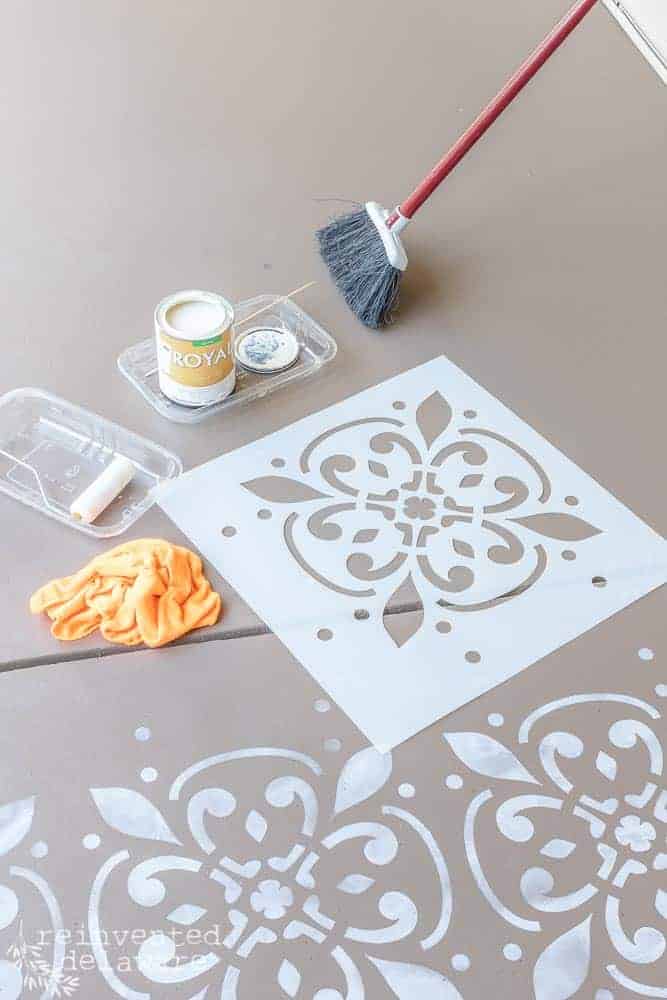
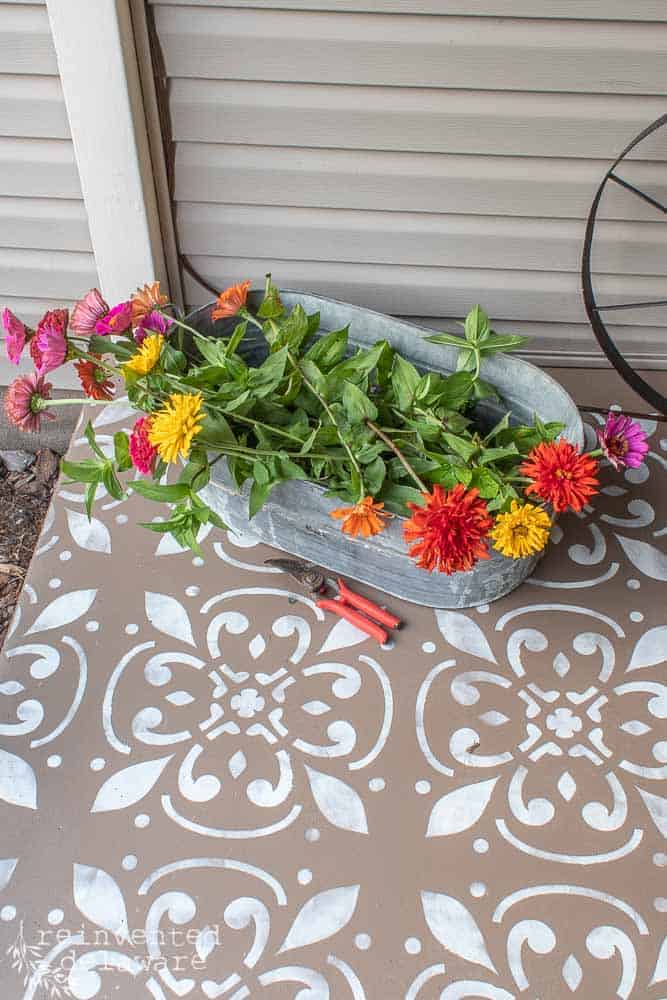
step five: apply your stencil design
One of our daughters stenciled her front stoop at their home and I fell in love with the look! Stenciling a painted surface is such an easy and inexpensive way to add texture to a concrete floor.
The stencil was only about $20, and the quart of light-colored porch and floor paint was under $20. I already had the foam roller, so I was in business!
The great thing is that the stencil makes it look like you have a giant outdoor rug, so they instantly make any space feel cozy and welcoming.
Let your paint dry completely before adding your furniture or decorating your space.
how to stencil concrete patio
Here are a couple of tips when stenciling a concrete porch floor:
- start in the corner that is the most noticeable and place the stencil to make sure it will fit
- envision where the other placements will be to make sure it will look nice.
- use a small tray and pour a small amount of paint into it
- roll the foam roller in the paint, getting very little paint on the roller
- use a stack of folded paper towels to offload some of the paint – the roller needs to be dryish
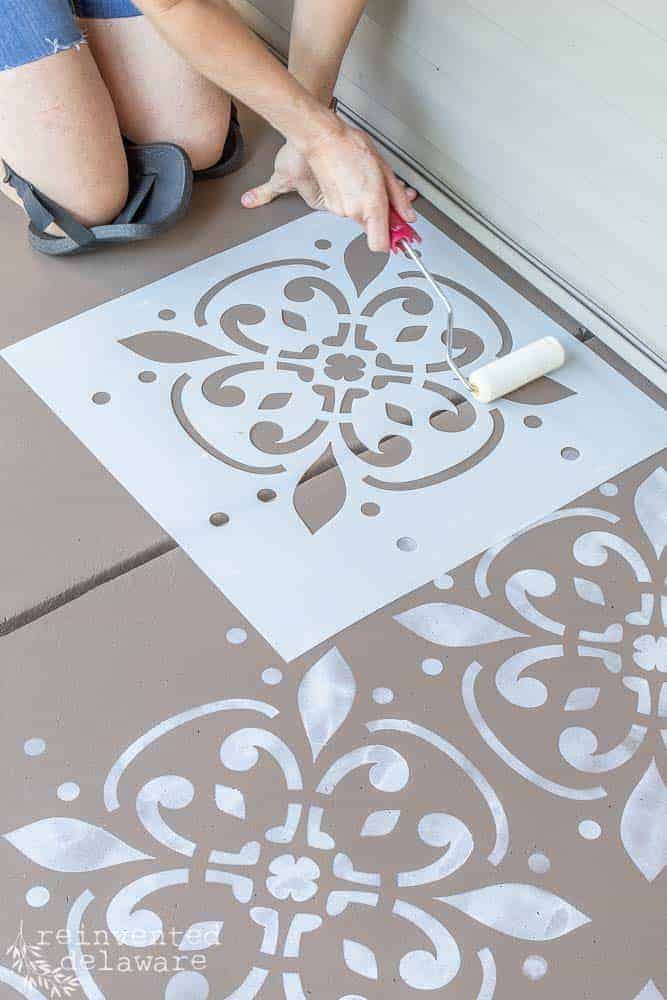
- roll over the stencil and keep it steady with your hand – if you need to, you can use repositionable spray adhesive on the backside of the stencil
- don’t press down on the foam roller – you want to avoid the paint from bleeding under the stencil
- avoid the opaque look with the paint – it will look nice if you don’t aim for complete coverage 🙂
- carefully lift the stencil, let it dry for a minute or so and reposition the stencil in the next area lining up the registration marks
If you look closely, you will see that I didn’t line up the registration marks correctly! I didn’t notice until I was completely finished stenciling the ENTIRE concrete floor!!😊
It’s a good thing I like the handmade look! I’m not worried one bit about that area. Instead, I will relish the fact that I did this project and that I enjoyed doing this project! 😊
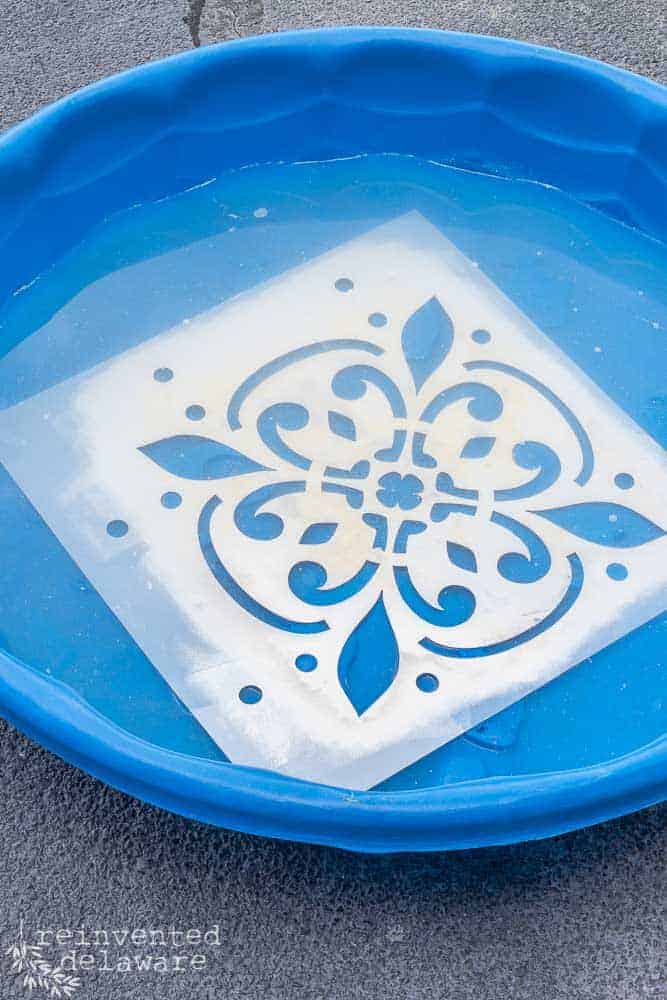
how to clean a large stencil
The paint can build up on the stencil pretty quickly. I found that it was best to clean the stencil every 3-4 rows of stenciling.
We have a kiddy pool for our dog, Barkly, and it seemed like the best way for the large stencil to lie flat and stay covered in water. I added a bit of ammonia to the water. This helps to soften the paint.
Once it sat for a couple of minutes, I used a putty knife to scrape off the majority of the paint and then finished cleaning it with a Scotch Brite pad. Wear gloves and protect your eyes if you clean them with ammonia!
thanks for being here!
I hope you are enjoying this project! Let me know if you have any questions. Or leave me a comment to tell me about your project and ideas!
thanks, Cindy 😀

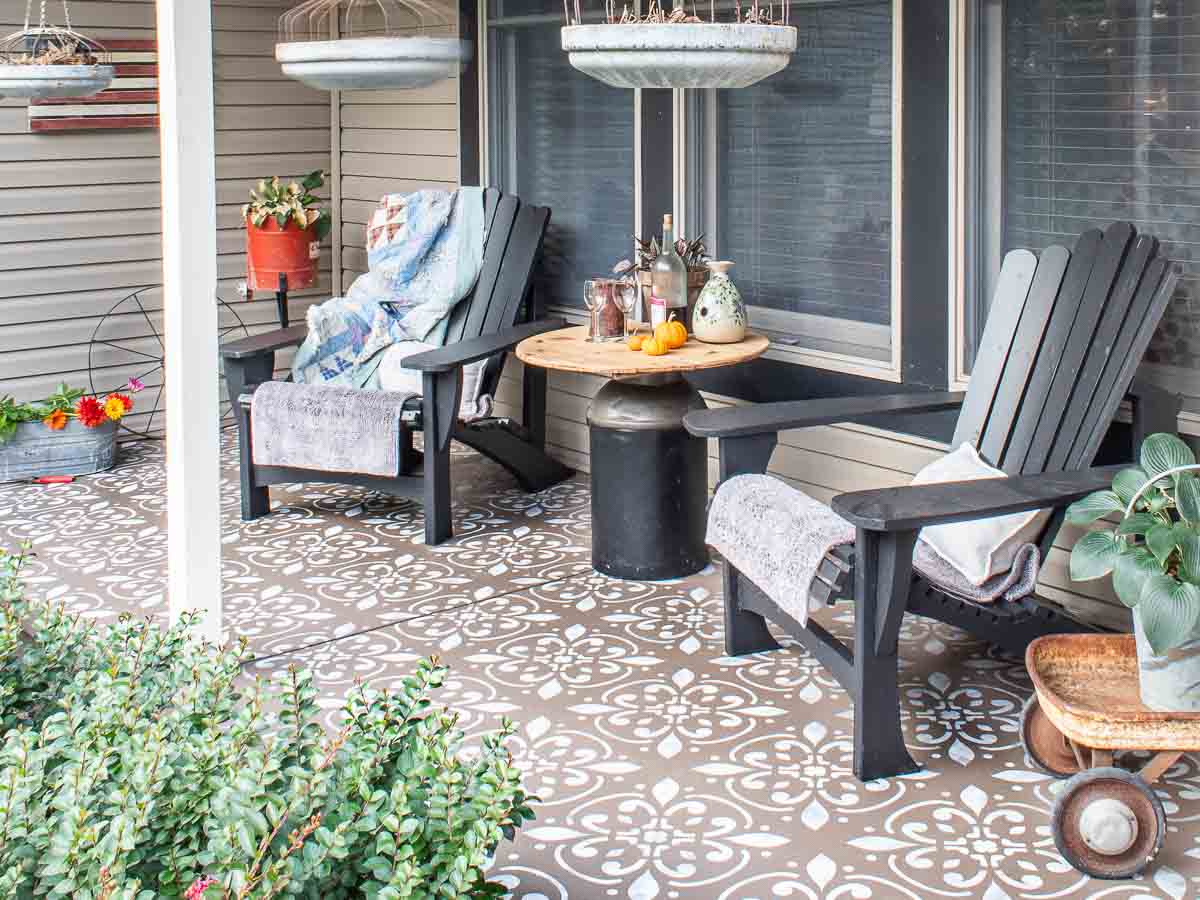
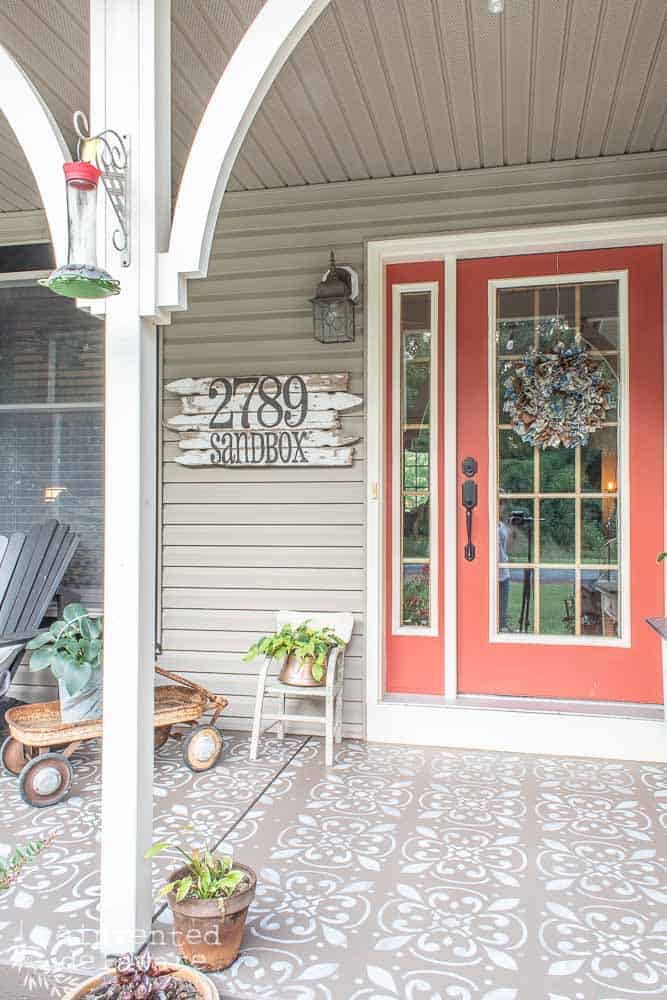
painted concrete porch makeover
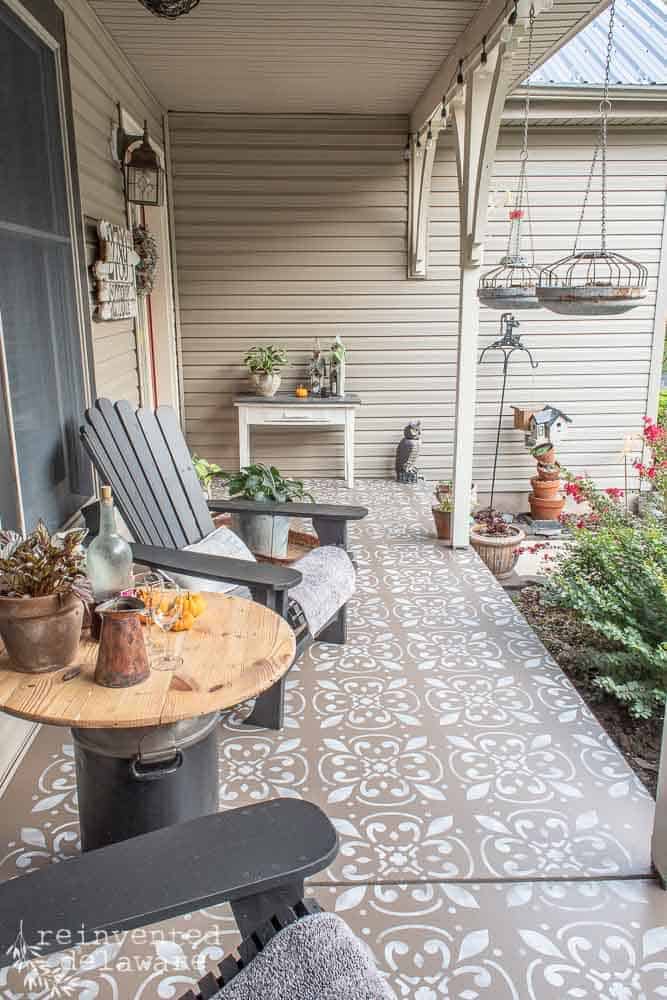
And here is the finished concrete front porch makeover!
Don’t the chairs look so good with a fresh coat of paint? I plan on painting the milk can side table soon. I will let you know when I get that done!
In fact, tell me your thoughts – should I whitewash the wood top or leave it natural with a protective clear coat? What about the milk can base – a dark charcoal color or milky white?
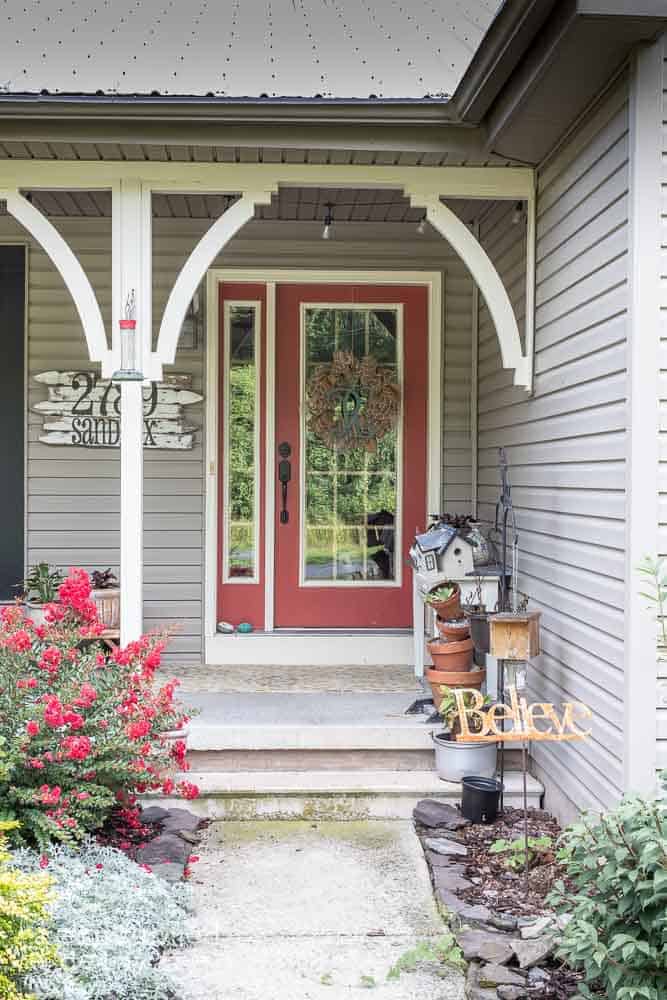
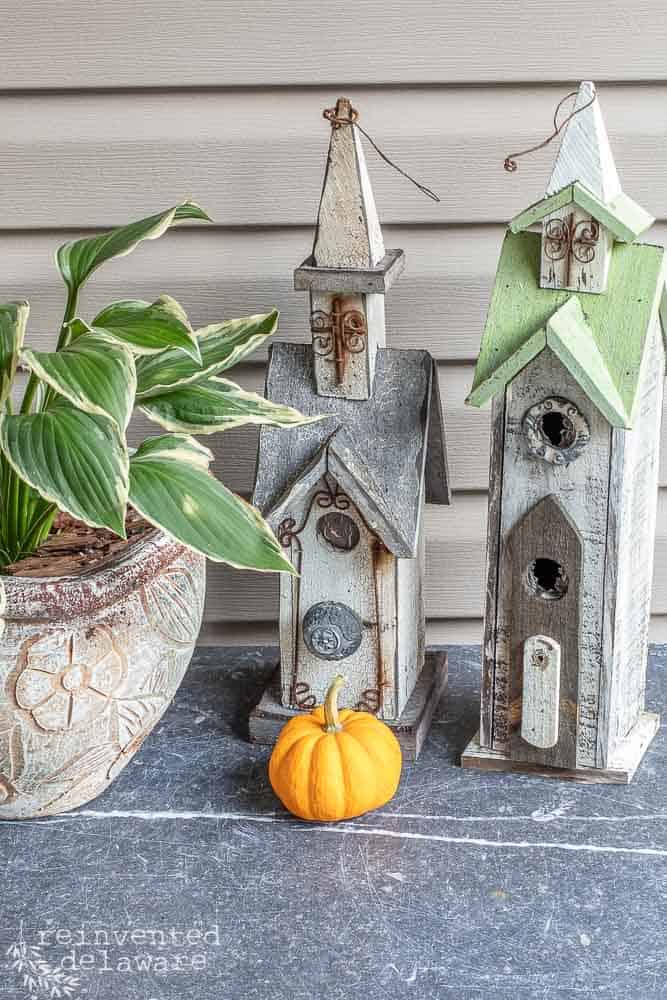
ranch house front porch decor
I also don’t go all out with decor. Simple is best for us and the way we live. Browse through the images below to see some porch decor inspiration for the fall season. Changing out the decor seasonally is always fun!

more concrete front porch decor ideas
If you loved learning how to paint your front porch concrete, you’ll love these other creative cement porch ideas.
- Paint your garage floors for a completely new look
- Make a checkerboard pattern for a vintage feel
- Use painter’s tape to add vertical lines for extra dimension
- Paint a bold pinwheel pattern for a designer look
- Mark off just one section to paint to use like an outdoor rug
bonus: how to paint outdoor furniture
Painting the outdoor chairs was easy: first I turned them upside down and sprayed the surfaces. Then I flipped the chairs right side up and spray painted the top surfaces.
The paint comes out of the sprayer so smooth and evenly so I didn’t have any problems with it. I moved the sprayer evenly across the surfaces, starting the sprayer off of the surface, continuing across the surface, and then spraying off of the surface on the other side.
I moved from left to right in one, even motion, and then I started again on the next section.The sprayer is super lightweight, and it really only feels like you are holding a can of paint.
Last summer I also painted an old wooden bench using this sprayer. It was a fast painting project too!
update: how has the painted concrete held up?
I’m excited to say that after four years of using our front porch, the painted concrete has held up amazing! We spend a ton of time on this front porch in the spring, summer and fall seasons. I have moved furniture and decor on this painted concrete many times over the last 4 years and it still looks great!
Of course the floor needs to be cleaned but that is to be expected. In the image below you can see how well the painted surface held up! Now all it needs is a broom!

Youtube video
Here is a video showing our front porch! Hope you find inspiration to update your outdoor spaces! Tap the image to watch!

FAQs
What is the best concrete paint for painting porches?
The great thing about this sort of project is that you can use any type of concrete floor paint! This type of paint is formulated to attach to concrete porches really well for a durable, long-lasting finish. The best part is that you can tint your patio floor paint with any paint color! Most people tend to use shades of grey, black, tan, and white, though, as they have a neutral look that goes with a variety of styles.
How many coats of paint do you need to paint your concrete patio?
If you use a paint sprayer, you may only need one thorough coat of paint like I did. If you’re using a paint brush or roller, you will likely need 2-3 thin coats of paint. Let the first coat dry completely before adding the second coat.
Do I need to add concrete sealer before painting my porch?
If you’re using concrete paint, you don’t need to use concrete primer or sealer unless you’d like to. These paints are made to adhere to concrete and last a long time. Priming can help extend the longevity of the paint, but I’ve been impressed to see how long my painted cement patio has lasted using just the concrete patio paint.
How long do painted concrete porches last?
If you use the right paint, your painted concrete patio can last up to 3-5 years! High traffic areas will fade faster, as will porches that receive direct exposure to the elements. Since our porch is under an awning, it’s lasted really well, even years later. Like any paint job, you’ll need to refresh your paint a few years down the line.


How to Stencil a Concrete Porch
Equipment
- Flexio 3500 Electric Handheld HVLP Paint Sprayer
- Icarus Tile Stencil – Reusable Mediterranean Tile Stencils for Painting Custom Floors, Walls, Fur…
Materials
- Porch and Floor Paint in your desired color
- Wagner Flexio paint sprayer
- Painters plastic
- Stencil of your choice
- 4 ″ paint roller and paint pan
Instructions
- Prep, clean, and paint the entire surface in a solid color of porch and floor paint in the desired color. Use a paint sprayer.
- Envision the stencil pattern on your painted porch floor and plan the layout.
- Place the first stencil design in the most prominent corner on your porch.
- Use a small paint pan to hold a small amount of paint.
- Roll the foam paint roller in the paint getting very little paint on the roller. Then roll off excess on paper towels. This is a dry-ish roller technique.
- Roll the paint roller over the stencil with a light hand to avoid paint going under the stencil.
- Apply a thin layer of paint for an opaque look and don't aim for complete coverage.
- Carefully lift the stencil, allow the stenciled area to dry for a couple of minutes, and then reposition the stencil lining up the registration marks.
- Continue across the entire surface of the concrete porch until all of the surface is stenciled.
Video
Notes
painting cement front porch
I hope you enjoyed this concrete front porch makeover! And I hope that you will see that making a few small changes to your home doesn’t have to break the bank or take much time. In just a few hours, you can have a space that feels fresh and new!
Thanks so much for stopping by! You show your support for the free tutorials we offer by reading, subscribing, commenting, and sharing our posts! We appreciate that so much!
Thanks for joining our journey!
Thanks so much for joining us for this post! Join our journey so you don’t miss any fun projects, tutorials, and inspiration we share with you each week! You can follow us on Instagram, Facebook, and YouTube. We share even more inspiration on Pinterest!
Until next time…


Cindy Rust
Cindy has been decorating her home with thrift store finds for 40 years. She is an avid thrift store shopper who loves to makeover the items she finds into vintage-inspired home decor and furniture. When she isn’t thrift shopping or painting a piece of furniture, you can find her making homemade butter, working in her garden, or painting with watercolors.


Recreate and Decorate
Join the Facebook Group and Share Your Projects With Us!


What a great job you did on this front porch! I’m sure the sprayer was a time saver. Stenciling the porch sure gives the area a fresh look. You have created a wonderful place outdoors to enjoy.
I seriously don’t know what took me so long to paint it! It was such an easy makeover! Thanks for stopping by Kim!
Such a huge difference, Cindy, this looks amazing! We stenciled the master bedroom several years ago and while it was a ton of work it was totally worth the effort. We’re still enjoying it to this day. Love this porch makeover – it looks fantastic! Hugs, CoCo
Thanks Coco! I can’t believe it took me so long to do it! Are your bedroom floors wood? I bet it looks amazing!
I am always amazed and how much you can change a space with paint! This really turned out incredible Cindy!
Isn’t paint so amazing?? And this makeover was super fast!
That turned out beautifully! What a difference!
Isn’t is amazing the difference paint can make?? So glad you enjoyed the makeover Dara!
I love the stencil! I was looking for that look for the front porch and have that planned for repainting the deck this fall. Love the tutorial. We may even spray the deck this time…who knows?!
The sprayer was soooo easy to use – and this was my first time! Stenciling your deck would look amazing Leslie!
Your front porch looks so good! I hope you and your husband enjoy many fall evenings relaxing on it.
I’m sure we will Paula! It’s one of our favorite places! Thanks for stopping by 🙂
Wow, Cindy!! That is a crazy good makeover. I am so impressed with the after. Enjoy your lovely space!!
Can you believe it took me over 20 years to finally get to the makeover?? If I had known it was so easy, I would have done this years ago! Thanks for stopping by Kim!
Cindy!!! I love how this turned out. It looks so good. Thank you for sharing!
And thank you for stopping by Stacey! By the way, your pumpkin bread is so good! I made the recipe for a family dinner and everyone loved it!
Wow Cindy this is a beautiful makeover. Love the stencil too and great tutorial. All the years I used stencils it never dawned on me to get a kiddy pool to clean them. Pinned!
The kiddy pool did the trick for cleaning. Somehow the idea to use it just popped in my mind! Thanks for stopping by Cindy!
We have a back porch that is in desperate need of makeover! Pinned to save your tips. We really want a paint sprayer too! Thanks for all of the helpful tips.
The sprayer made all the difference Marie! It was so easy to use – and this was my first time using it! You will love yours!
Cindy, your front porch is stunning! The contrast between the stencil and concrete color really sets it off-great job! The stencil itself is also very pretty. It reminds me of a Pfaltzgraff pattern that you’ve collected over the years: Village or Folk Art (sorry I can’t exactly remember the pattern). Stunning! I also love the idea of how you cleaned the stencil!
Thanks Patti! I would have done this project years ago if I knew it was this easy! 🥰
This is exactly what will help my front porch makeover project come together! I’ve been in the search of a Porch & Floor paint color exactly like what you used, may I ask what the brand and color name used was?
Hi Karina! I’m so glad this post provided the solution you need for your concrete porch! I used Sherwin Williams concrete and floor paint. Our local Sherwin Williams recommended one that would hold up to traffic well and I can say that it is holding up so well! I can’t remember the color off hand – I will check my supplies and see if I have any leftovers. Is it ok if I email you the color names if I can find them?
I would like to know the paint color as well.
Hi Ashley, unfortunately, I didn’t save the name of the paint colors in my post! So sorry for that. This is how I chose our colors: bring home a few paint color cards that I thought would match our siding; then I compared them to my actual siding and selected the one that matched precisely; from there I chose a shade that was darker (paint color cards have shades of the same color on them so this part is easy); from there, I chose a light color in that same family of colors. This ensures the colors will look good against our home. I hope this helps! If you have any more questions, feel free to ask 🙂 I’m going to add this information to the post in hopes of helping others. Thanks so much for asking!