
Easy DIY Rustic Light Fixtures to Make for your Porch
These easy DIY rustic light fixtures are easy to make in just one day and add a farmhouse vibe to your front porch!
rustic light fixtures
Do you love the look of creative DIY light fixtures? I sure do. In fact, when we were selling in a local vendor spot, we sold a ton of them. Our local customers loved the creative ways we came up with to use light bulbs in DIY lighting.
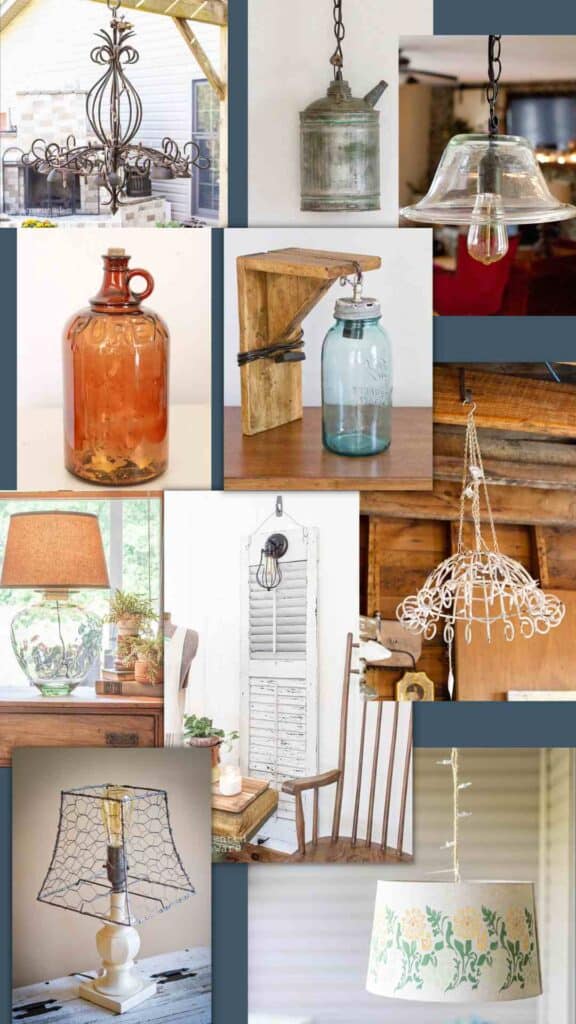
Here are just some of the ideas we came up with:
- Hanging lights made from vintage mason jars
- Vintage milk bottle lights to sit on a table
- A pendant light made from a large glass bowl
- A rustic chandelier fashioned from an old candle holder
- A hanging pendant lamp made from an old oil can
- A DIY hanging light made from a thrift store lampshade
- Wall sconce rustic lighting fixtures made from old shutters
The following post may contain affiliate links. That means if you click and then buy something, I will make a small commission at no additional cost to you! Thank you for supporting my blog. full disclosure here.
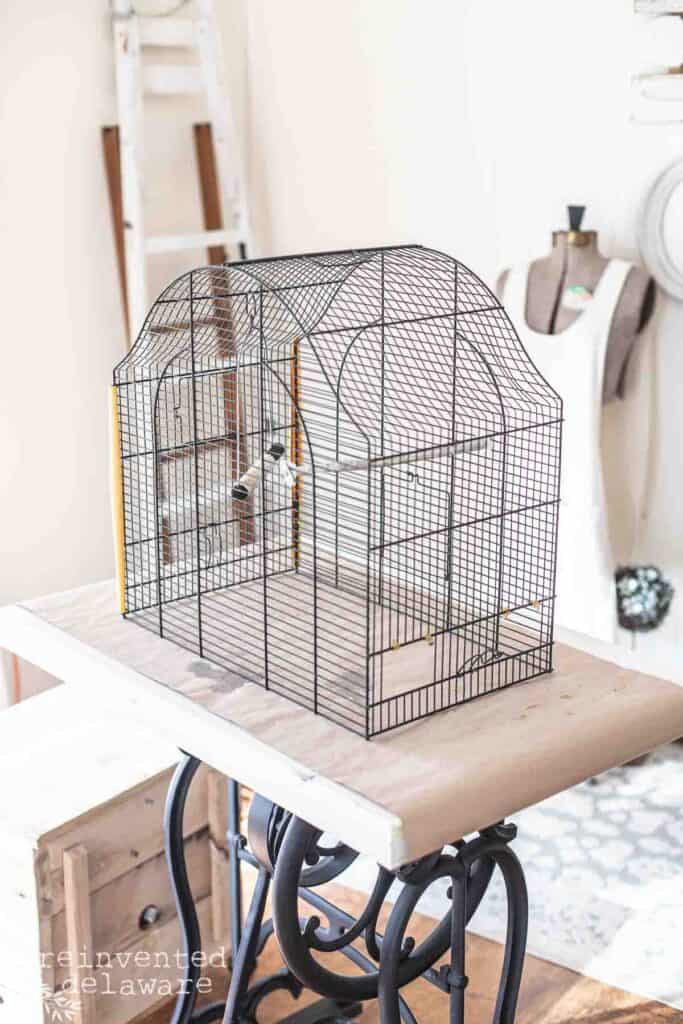
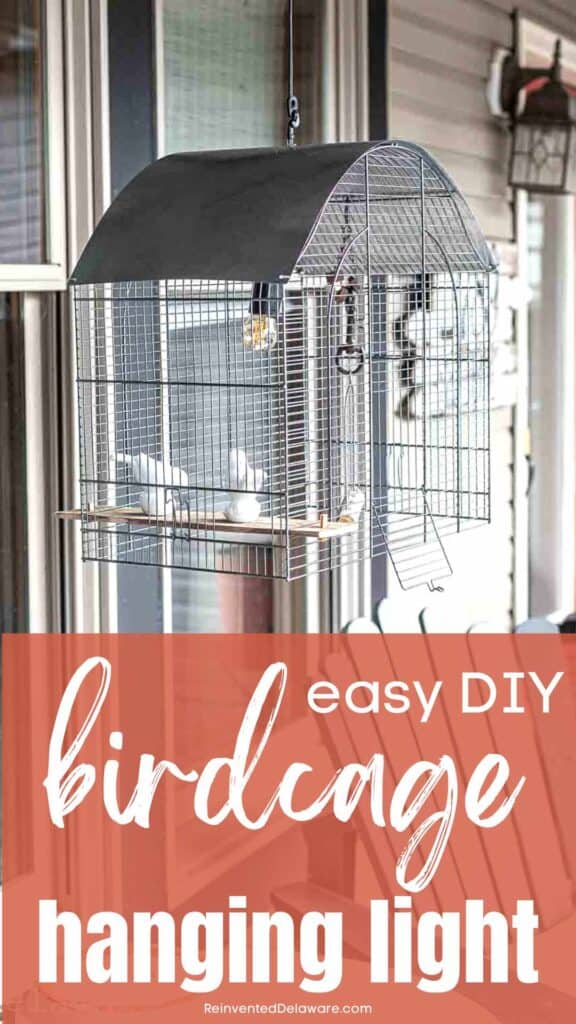
DIY birdcage light fixture
We’ve had fun coming up with creative and rustic light fixtures and then sharing DIY tutorials of many of those projects.
DIY rustic chandelier
Here is another rustic light fixture just for you!
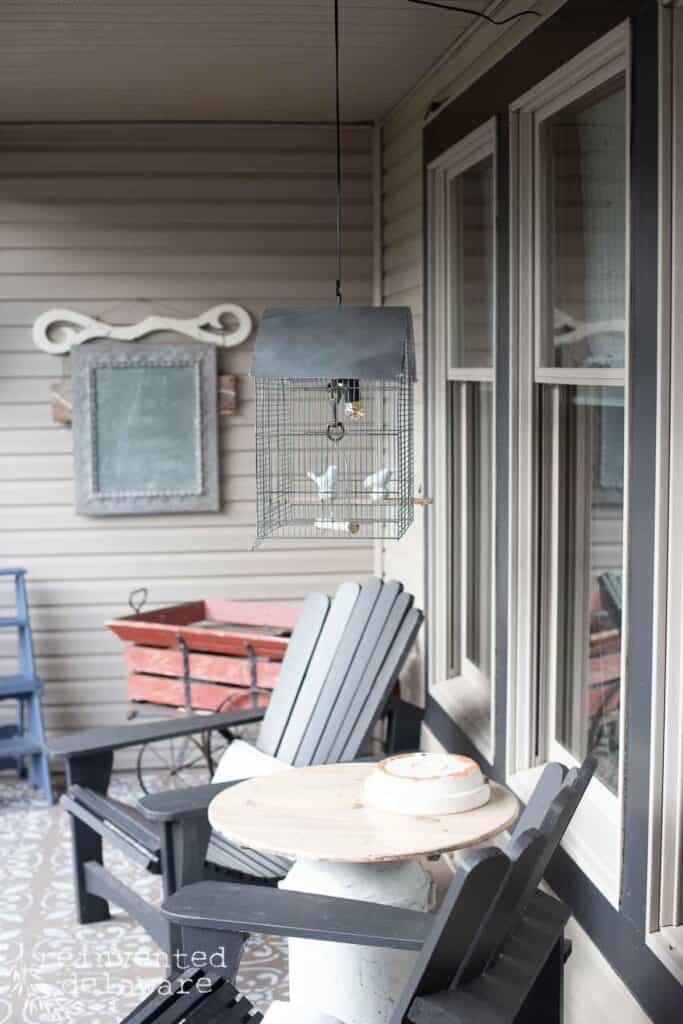
Our front porch is full of rustic decor that we have upcycled over the years. There’s the step ladder plant stand, the milk can side table, our picket fence address sign, the vintage seed spreader we turned into a plant container, and of course, the beautiful hanging porch light we made last summer.
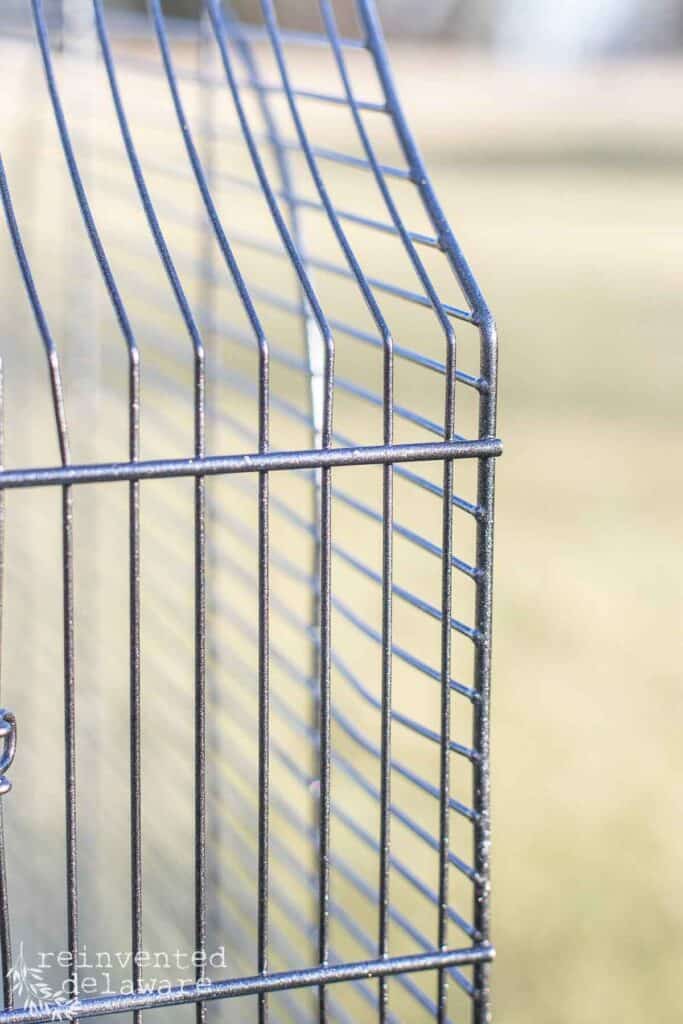
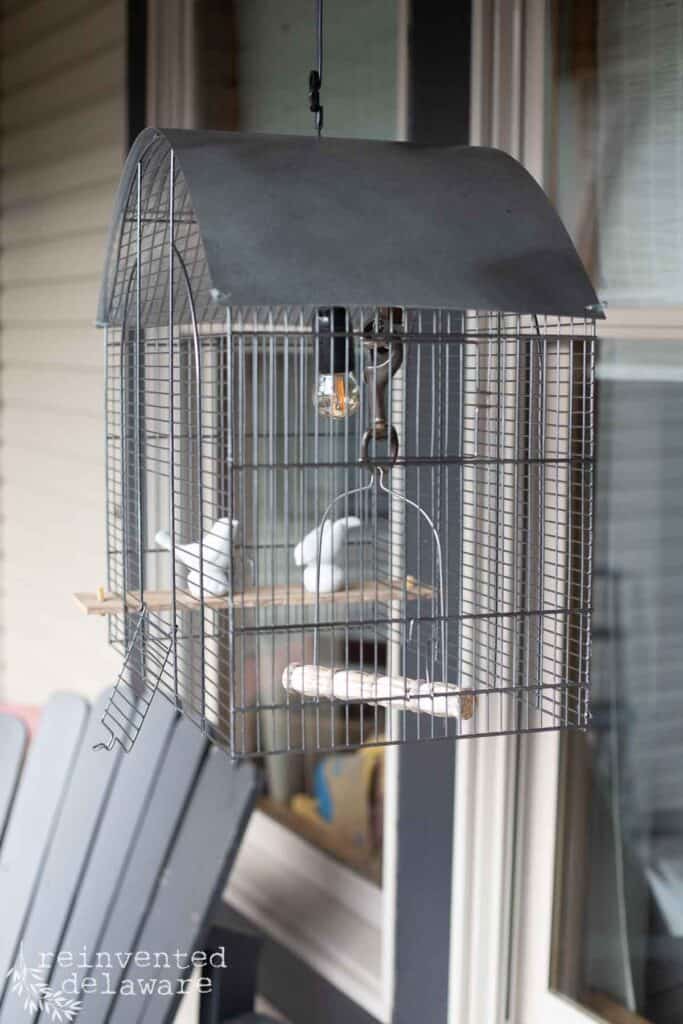
So I knew this thrift store bird cage would make another excellent DIY chandelier for our front porch. The birdcage itself only cost a couple of bucks probably because it was missing the bottom piece.
can I DIY a light fixture?
Yes, you can! You need a basic shell like this bird cage, an easy-to-use hanging light kit, a hook to hang it from, and some creative thinking!
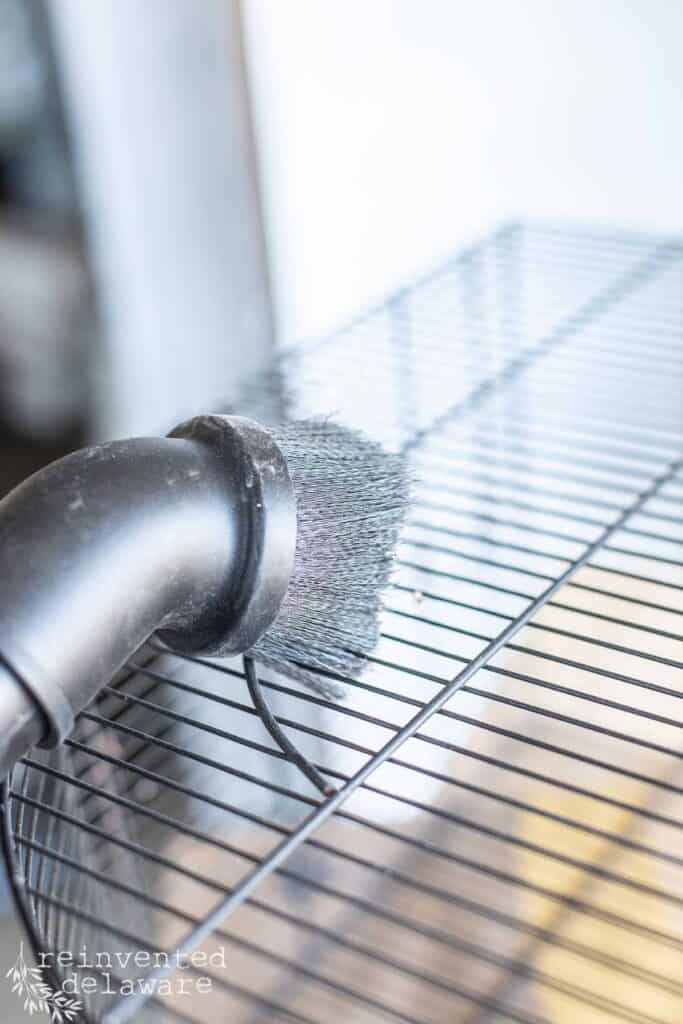
step one – clean the birdcage
The first step was to clean it. I used my shop vac and the dust brush attachment and got rid of all of the loose dust, spider webs, and anything else I could find on it.
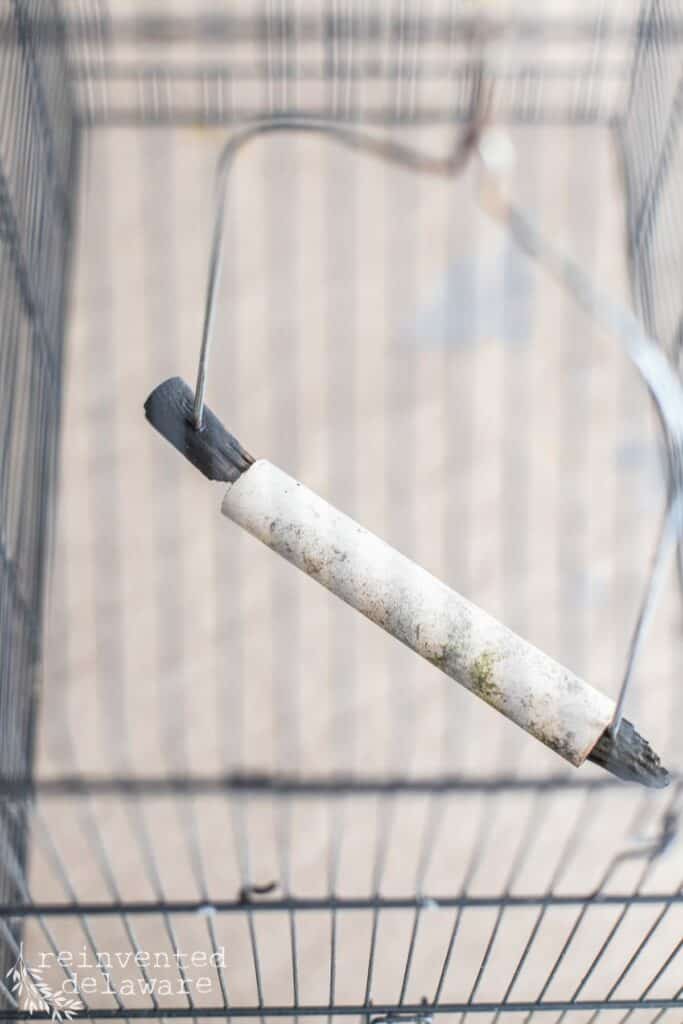
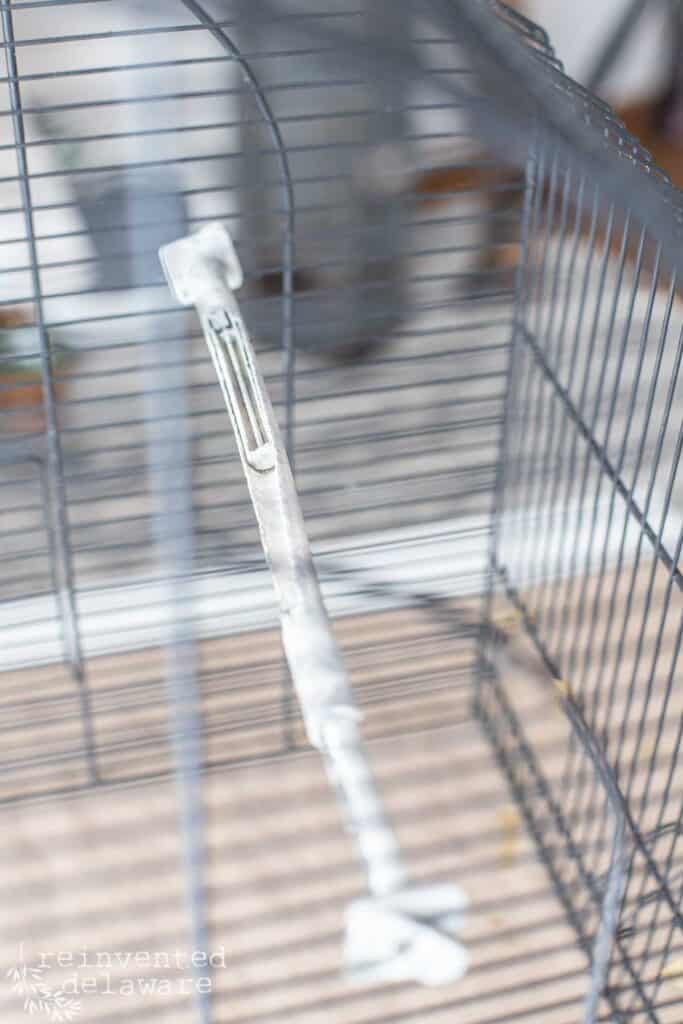
step two – remove the broken parts
After I cleaned it, I had to remove some of the parts that were not worth fixing. The little bird swing was in rough shape and so was the stationary perch. Some of the plastic corners were missing so I removed the pieces that were hanging on and put them in the trash.
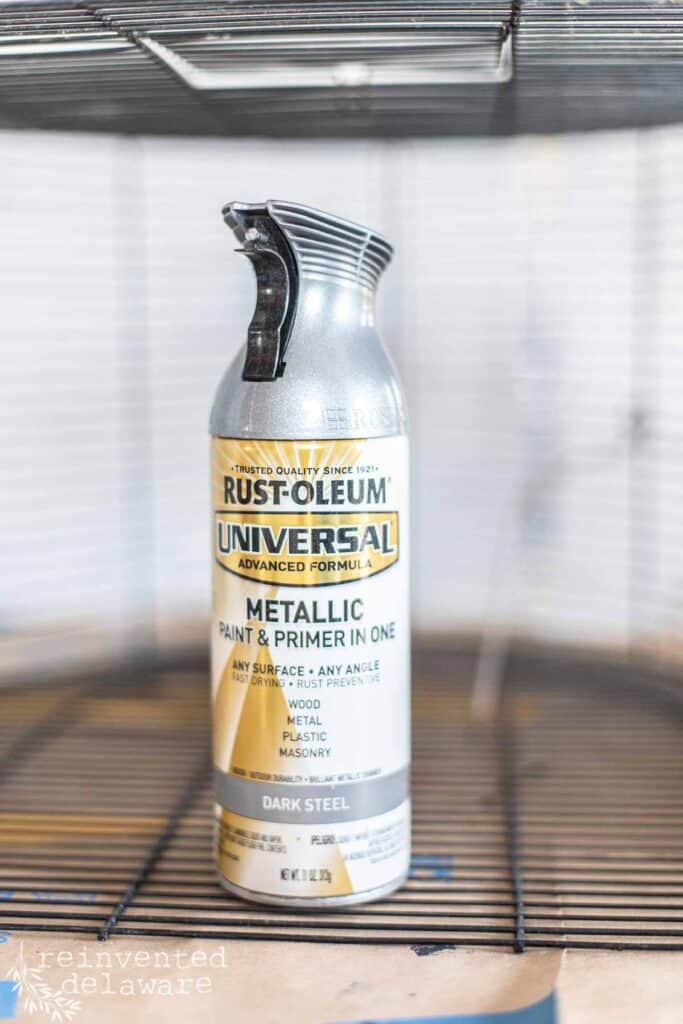
step three – spray paint the birdcage
Next, I decided to give it a new color. Rustoleum makes some of the prettiest hammered finish spray paints. The next time you are at your local hardware store, be sure to check out the colors.
You can also find more colors on Amazon. I’ll have some of my favorites linked later in this post.
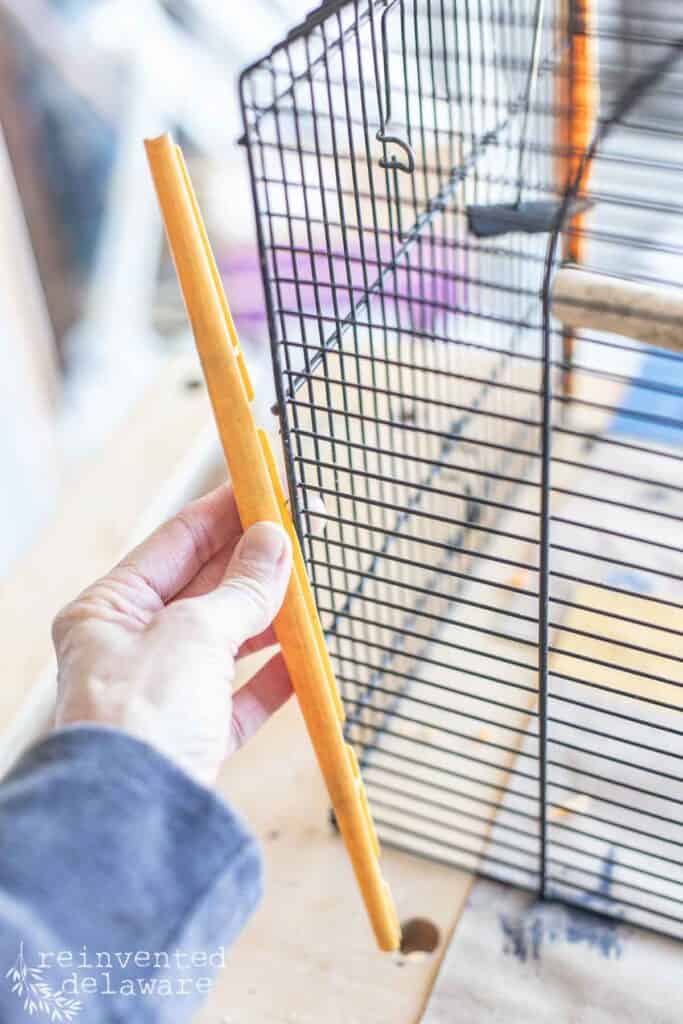
While I spray painted the birdcage soon-to-be hanging light fixture, my hubby ran to the hardware store and picked up a small sheet of metal. We measured the curved top of the birdcage and knew that we could get a piece of flexible metal in that measurement.
step four – add a roof to the rustic light fixture
The roof area needed protection from rain coming into the light fixture. This birdcage hanging light might end up on our back patio and our pergola would not prevent rainwater from gushing into the light.
So we thought a sheet of metal would help the water to run off and away from the electrical cord. The fixture says it is water-resistant but we wanted to err on the side of caution and make a roof! BTW, the sheet of metal we found fit our birdcage roof perfectly!
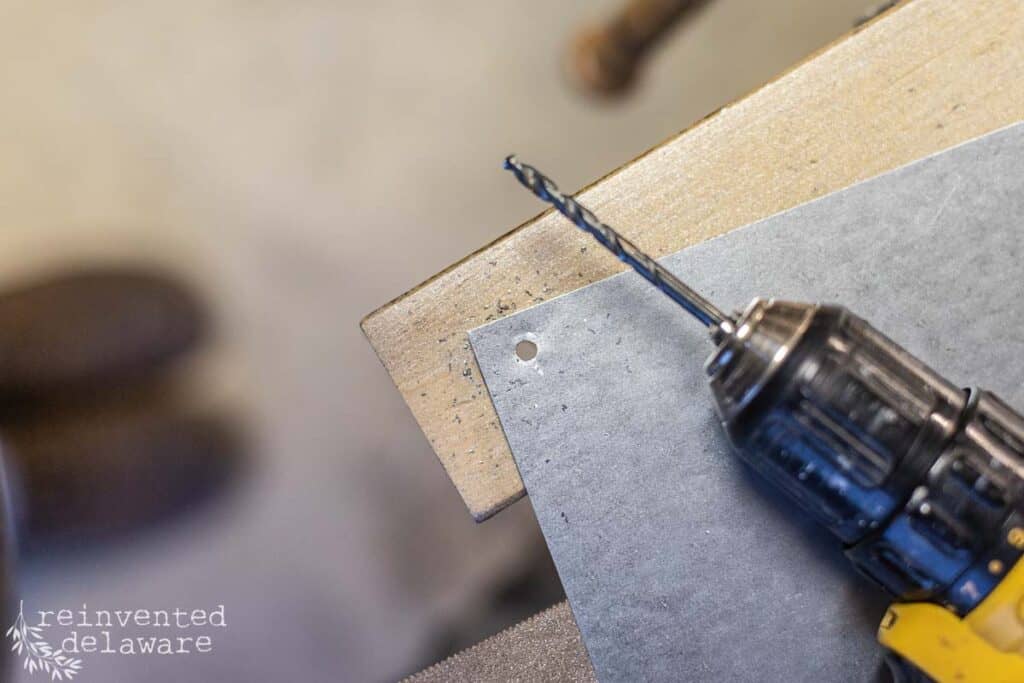
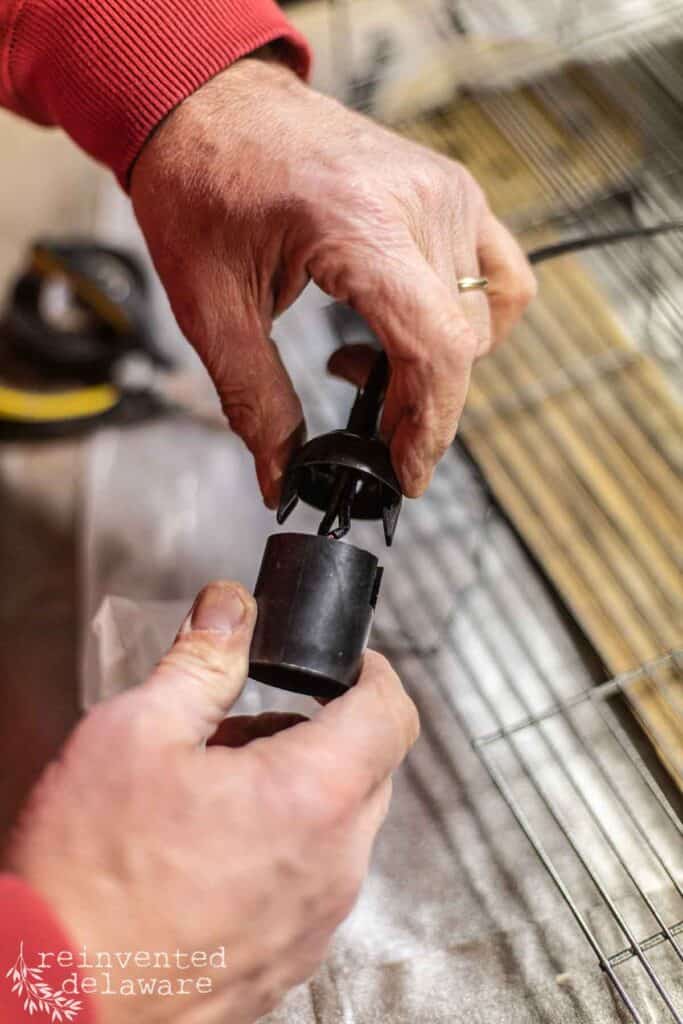
We drilled a hole in the center of the metal sheet so that we could run the electrical wire through it. Hubby disassembled the bulb housings, then ran the wires through the hole in the metal. He reconnected the wires on the inside of the birdcage.
When I drilled the hole in the center of the sheet of metal, I also drilled a small hole at each corner. Then I used small zip ties to secure the metal to each corner of the birdcage. The metal is flexible and made the perfect roof. It kinda looks like an old-fashioned barn roof!
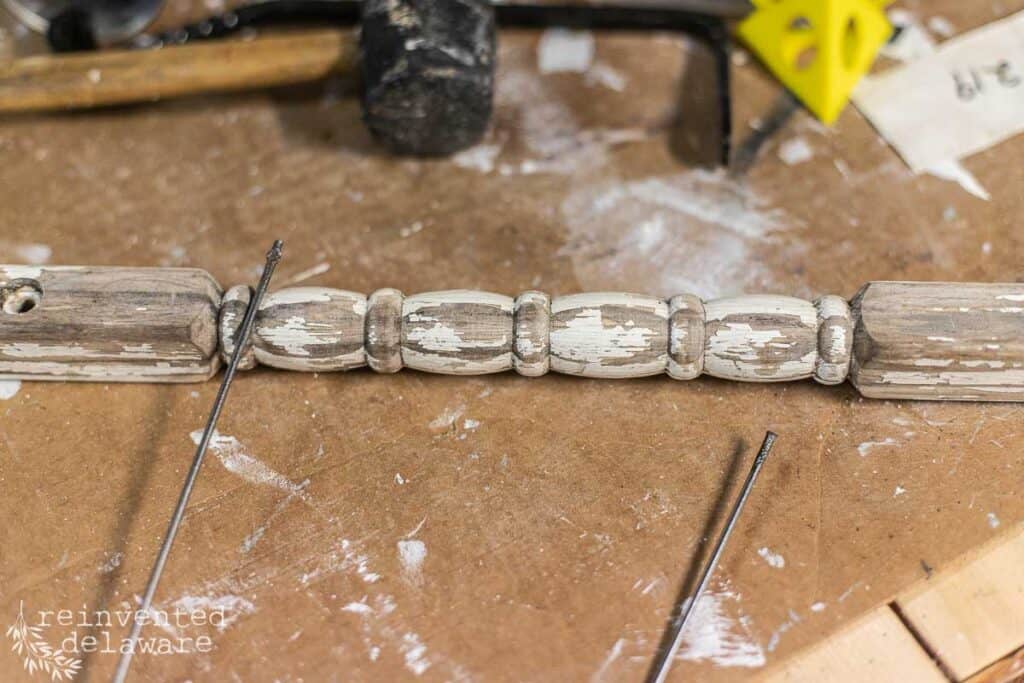
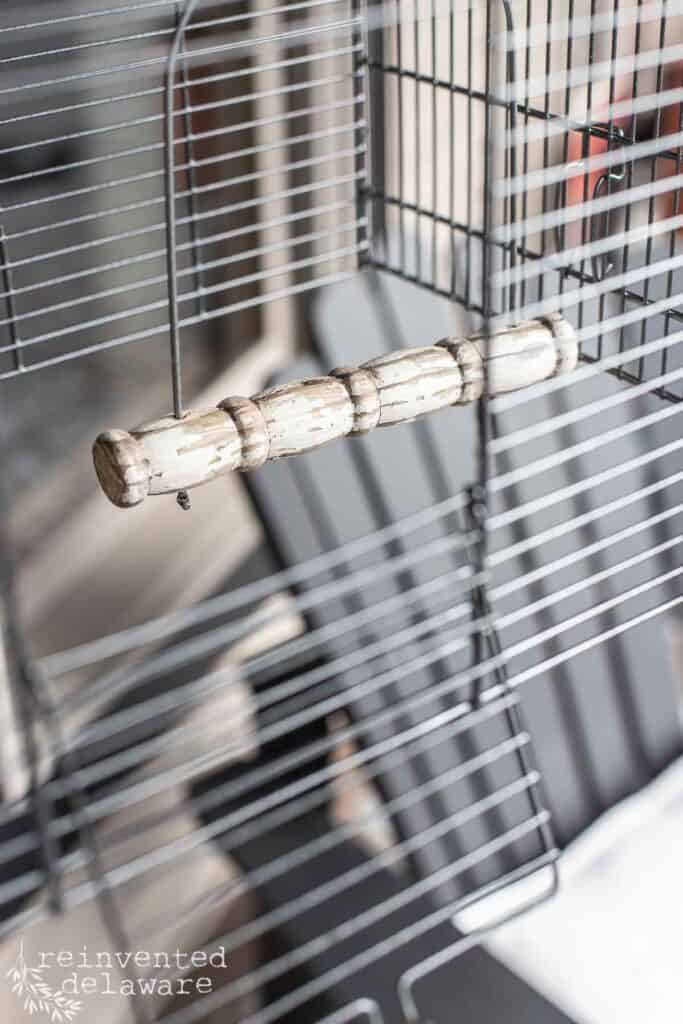
step five – repair the birdcage swing
Now let’s take care of the little bird swing. I could have used a little wood piece cut to the size of the metal swing but instead, I grabbed a spindle and cut it to size. Hubby drilled small holes and stuck the metal arms of the swing into the holes then bent the wire so it wouldn’t come back through.
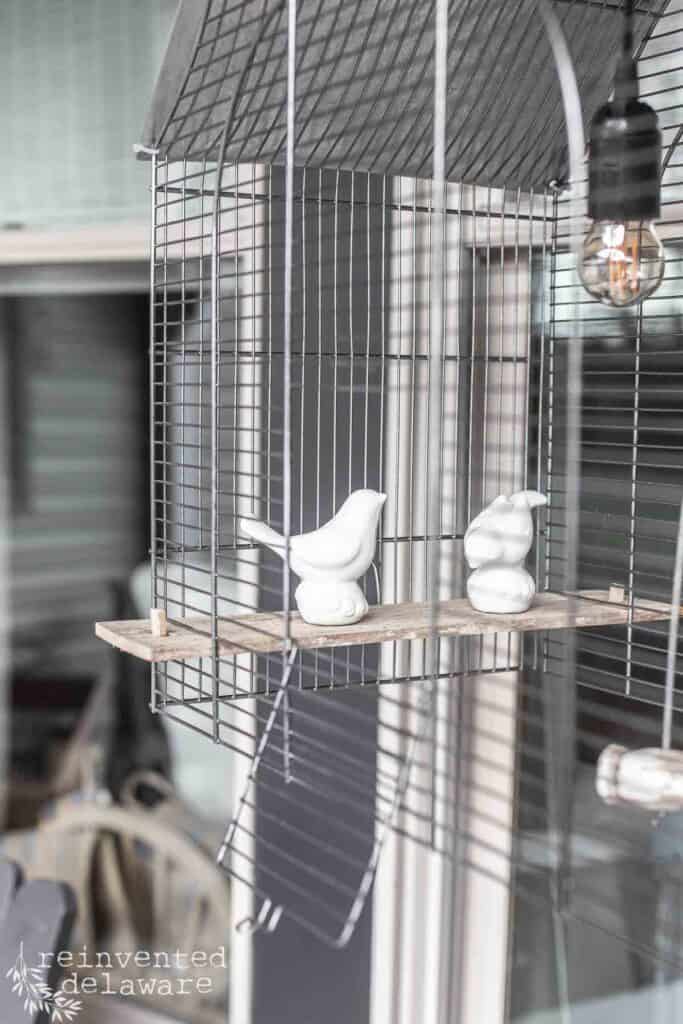
We really tag-teamed this project. While he reassembled the bulb housing and fixed up the little swing, I went to the local thrift store to find some little bird figurines. I found the perfect set – a small bird salt and pepper shakers for $1!
step six – add thrift store finds
In fact, I visited all four of our local thrift stores and came home with more than just the bird salt and pepper shakers! We’ll talk about that in another post!
I dug around the pile of pieces of wood I have and found the perfect size to fit between the slats of the birdcage. The piece could have had wood stain applied to it but I like using natural materials without doing anything to them sometimes.
You can see I used even smaller pieces of wood to act as a stop so the wood wouldn’t slide out. The little pieces are glued with wood glue. Then I glued the little birds onto the wooden shelf with E6000. BTW, don’t use hot glue on a project like this. The glue can expand and contract at different temperatures. We don’t want those cute little ceramic birds to fall and break!
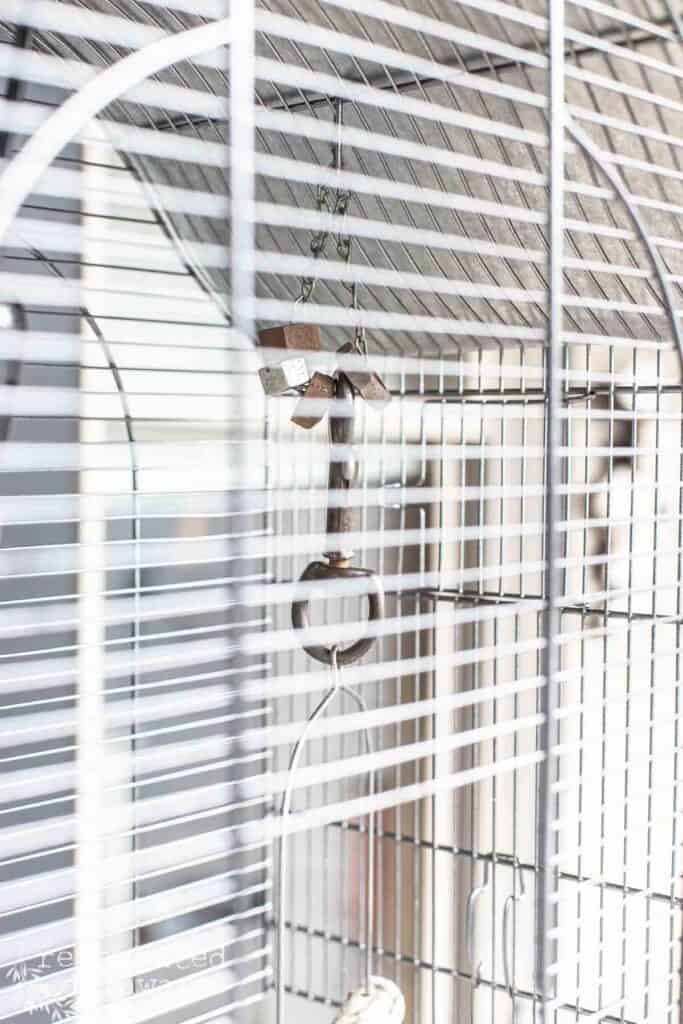
The weight of the wood shelf and the birds made the birdcage hang crooked so I added a couple of heavy bolts to the swing to balance everything out.
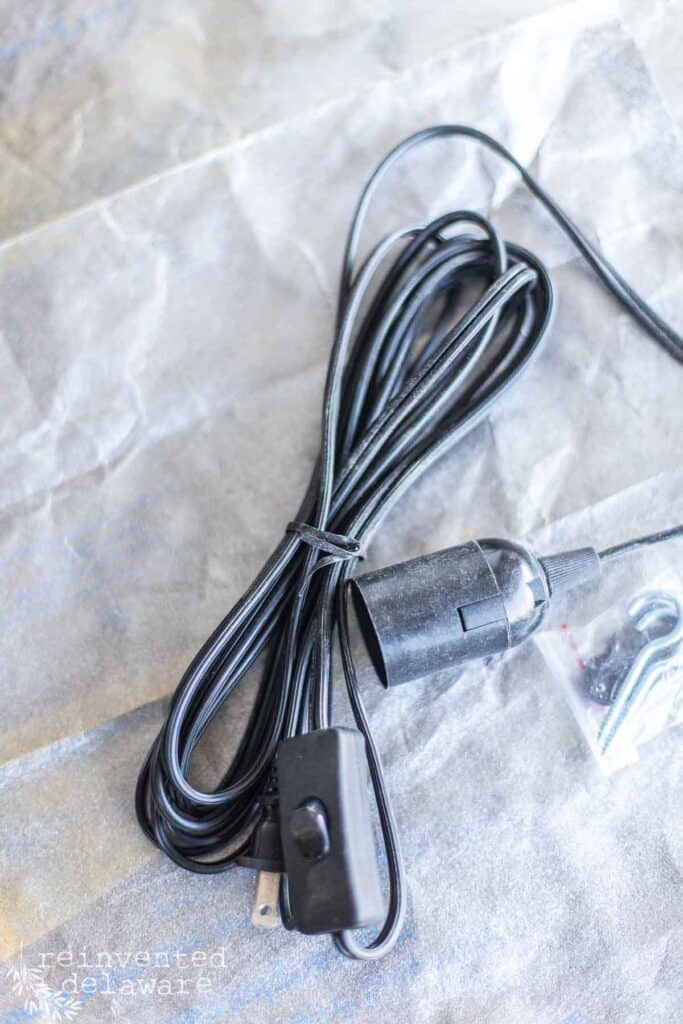
step seven – add the light kit
The light kit that we have used countless times is going to work perfectly on this rustic-style light fixture. I still have a couple of the light kits in my stash from our vendor booth selling days.
Remember while I was running in town to grab the little thrift store birds for the light? Hubby stayed home and worked on adding the light. I had already drilled the large hole in the center of the metal roof. So he disassembled the light kit, ran the wires through the hole, and then reassembled the light kit.
The wires coming from the top of the roof are secured to the birdcage with zip ties.
Handy tip: think outside of the box!
When it comes to looking for interesting lighting, learn to think outside of the box. You can find all sorts of unusual pieces at you local thrift store to turn into a diy rustic light fixture! Have fun and get creative!
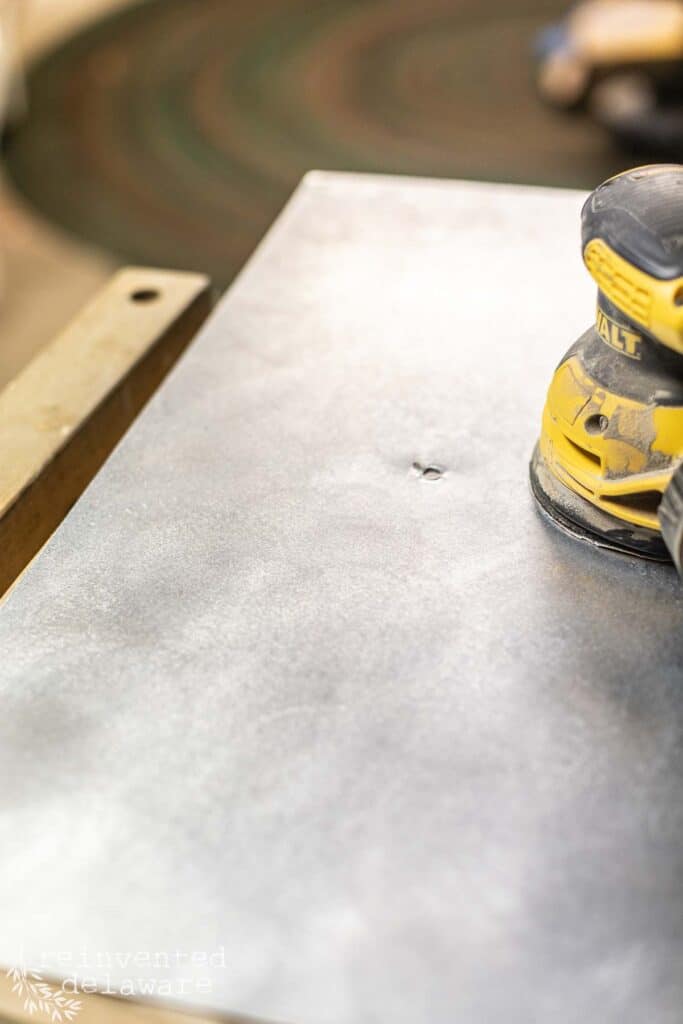
By the way, I forgot to mention that I used my orbital sander on the metal sheet to create this rustic home decor finish. This is an inexpensive way to change the appearance of metal. I also applied one coat of flat clear coat to protect the metal.
step eight – hang the diy rustic light fixture
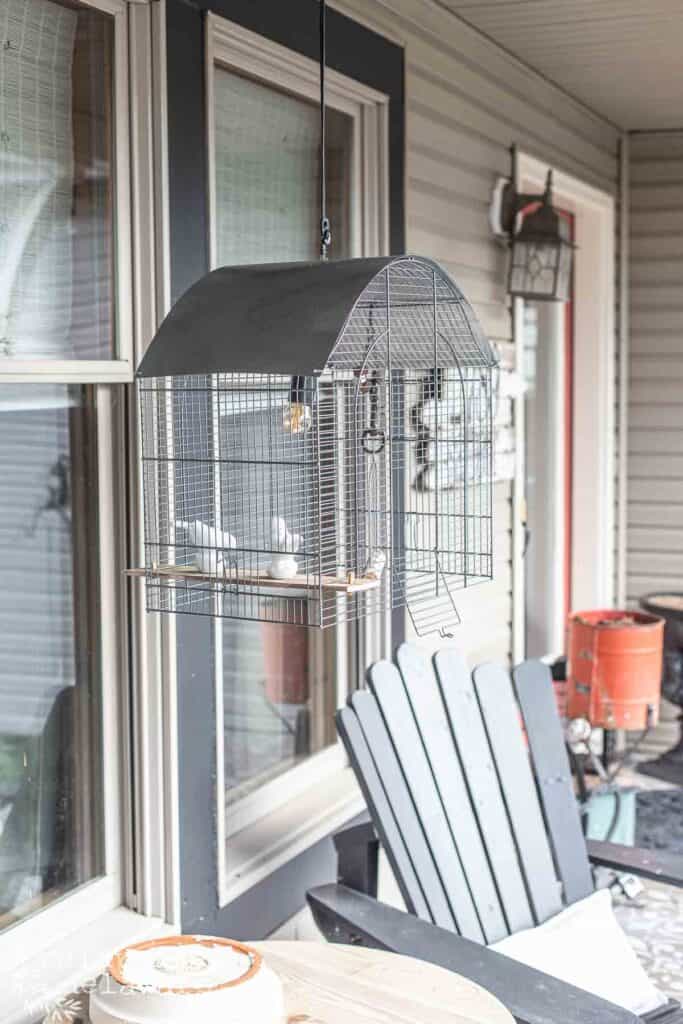
The last step is to add an Edison bulb. Well, ok, we have to hang it too! I’m not sure if this will hang on our front porch or under the pergola on our back patio. I probably won’t decide til the weather warms up a bit and we are using those spaces more.
You can see here that I made another gorgeous light fixture with a smaller birdcage. It turned out just as nice!
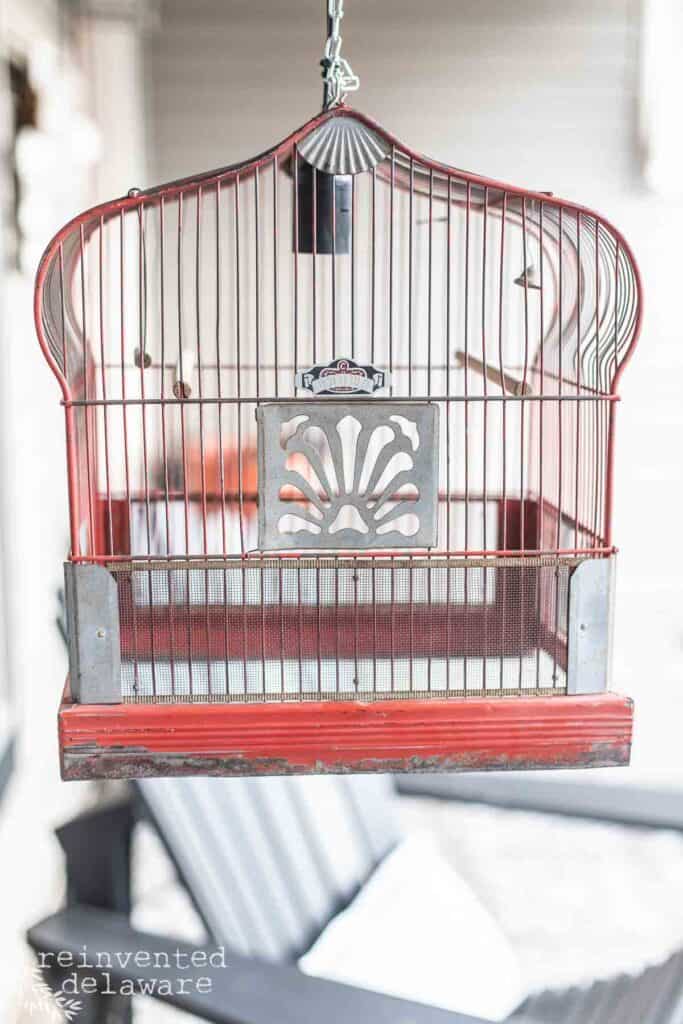
Which one should hang on the front porch? The large gray birdcage hanging light or the smaller red one?
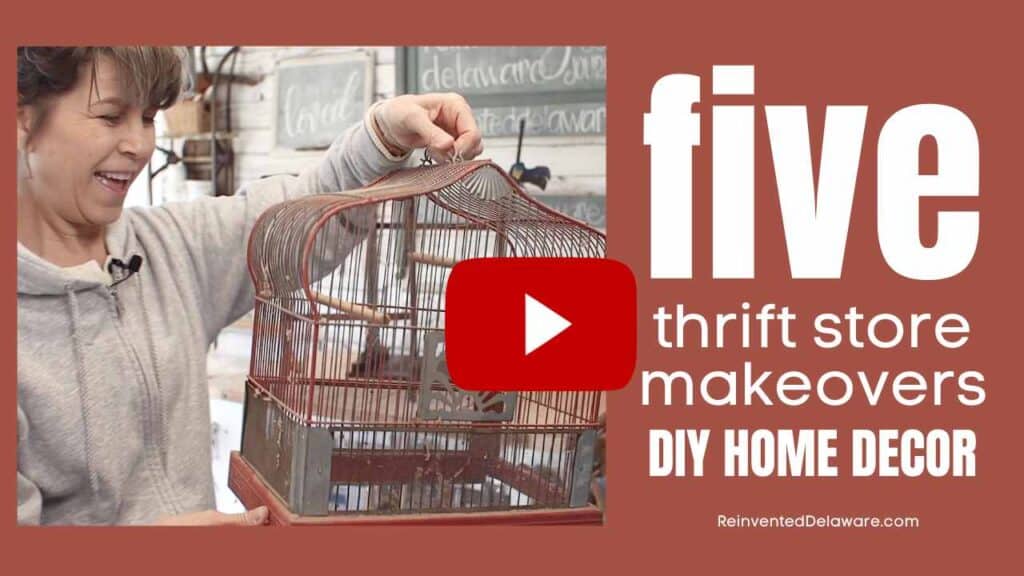
more awesome thrift store makeovers
Each month I join several other bloggers who love to do fun projects, simple thrift store makeovers, and their great ideas for upcycled projects.
I’m sure you will find so much creative inspiration as you go through each of their posts! Just click the links below and be ready to get creative!
Our monthly edition
Thrift Store Decor Team
- My Repurposed Life – DIY Painted Suitcase
- Petticoat Junktion – Upcycled Lamp Parts Candle Holder
- Sadie Seasongoods – Valentine Pillows
- Shop at Blue – Valentine Heart Mantle Decor
- Organized Clutter – Vintage Valentines with Yardsticks
- My Uncommon Slice of Suburbia – Succulent Wall Planter
- Domestically Speaking – Coastal Rope Lantern
- Reinvented Delaware – that’s me! Hope you enjoyed all of the projects!
more from the thrift store decor team
No posts
list of supplies:
Use the links below to purchase some of the supplies for this project! You are helping to support this blog and all the free tutorials we offer here! Thanks so much!😊
- light kit (or this pretty one: hanging light kit)
- Rustoleum spray paint
- E6000
- shop vac
- power drill driver
- sheet metal (get this at your local hardware store
- zip ties
- birdcage

Pin the image below to your home decor and furniture boards! Just click the pin button at the top left corner!
YouTube video tutorial
Watch how I turned this birdcage into another hanging light fixture! You’ll enjoy the other projects too!
Tap the image to head over to YouTube to watch. Be sure to subscribe when you get there! We post videos weekly 🙂
thanks for joining our journey!
Thanks so much for joining us for this post! Join our journey so you don’t miss any of the fun projects, tutorials, and inspiration that we share with you each week! You can follow us on Instagram, Facebook, and YouTube. We share even more inspiration on Pinterest!
click below to purchase supplies!
use code: 10OFFRD at checkout and save 10%!
Visit my Amazon Storefront!
Click the button below and head over to our online shop on Amazon!


Super cute idea. I love it. It looks great on your porch. Hugs to you.
Thanks Renae! We’ll be enjoying it all summer!
Love this project. Such a fun thrifts item for a light!
Thanks Lynn! It was an easy project too!
As always Cindy, your tutorials are all inclusive! What a sweet addition for the pergola. On my list of projects for under the deck! Pinned.
Thanks Sue! We’re always looking for ways to repurpose!
This is so cute and just perfect for the porch! Or should I say perch
Haha! Nice play on words Wendy!
So Cute Cindy!!!
Love the birdies hanging out together.
I could hardly believe I found them at the thrift store!
This is an adorable project, I just love how it turned out and it’s perfect on your beautiful porch!
Thanks, Kristin! I was thrilled that I could make two of them!
I love love love the birdcage light! Perfect on the porch too. Pinned!
Thanks Carlene! It was a fun project to work on!
So fun and creative! I need to keep my eyes open for a bird cage, I know my mom would love something like this on her porch.
I hope you find one to upcycle Maryann!
Cindy! This is the cutest light fixture ever! I love that you found a pair of bird salt and pepper shakers. Clearly, this project was meant to be. (Who finds the perfect pair of bird S&P shakers in the perfect size exactly when they need them??? ) You are amazing. Thanks for the tutorial and great step by step instructions. Have a fabulous weekend.
The little birds were a stoke of luck! But they are perfect for this hanging light. Thanks for stopping by Anna!
Forgot to say – obviously – PINNED!
Haha! Thanks!
Cindy, this is the cutest thing ever! Again, I am blown away by your creativity! I love how you think outside the box! Pinning this now!
Thanks Donna! Your kind words made my day 😊
This is adorable! I love all things bird related and this is brilliant!
Thanks Janet! Birds bring a sense of spring – and I’m ready for it! 😊
This birdcage light is really cute, Cindy. I love how you added a couple of ceramic birds in there too.
Aren’t they cute? They make me excited for spring!
This is amazing and you shared great information too!
We have no good thrifting here. You have great vision. I don’t know that I would have thought of doing this.
I’m so glad you enjoyed the birdcage light! Maybe you could try some yard sales in the coming months. Or look for an auction in your area. We have an auction that we really enjoy going to!
This birdcage is so adorable, Cindy! I love how you upcycled it, and I’ll have to check out that Rustoleum spray paint that you used. Pinned!
Isn’t it a fun light? We will really enjoy it this coming spring and summer on our porch! Thanks for pinning!