
Easy Upcycled Valentine’s Day Decor: A Thrifted Sweater DIY
Create beautiful upcycled Valentine’s Day decor without spending a fortune!
In this tutorial, I’ll show you how to transform a thrift store sweater and basic terra cotta pots into charming heart ‘flower’ pots. These budget-friendly DIYs are perfect for romantic centerpieces or thoughtful handmade gifts.

Why upcycled Valentine’s day decor is a budget win
Most of us don’t decorate every room for Valentine’s Day, but adding small, handmade touches is a wonderful way to celebrate the season. This project is perfect if you want easy and inexpensive home decor that looks high-end but costs very little to make.
It’s also a versatile craft! You can get the kids involved to make a DIY gift for their teacher or grab extra supplies for a “Galentine’s Day” crafting session with friends.
finding affordable supplies
I’ve been gathering small terra cotta pots to decorate my garden she shed, and they are one of my favorite things to thrift! You can find them for pennies at:
- thrift stores and salvage yards
- auctions and yard sales
- local online marketplaces
If you can’t find used pots, you can also grab a set of terra cotta pots on Amazon. Just remember: if yours are secondhand and a bit dusty like mine were, give them a quick scrub with soap and water and let them dry completely before you start painting!
The following post may contain affiliate links. That means if you click and then buy something, I will make a small commission at no additional cost to you! Thank you for supporting my blog. full disclosure here.
This post is sponsored by Dixie Belle. All opinions are my own!
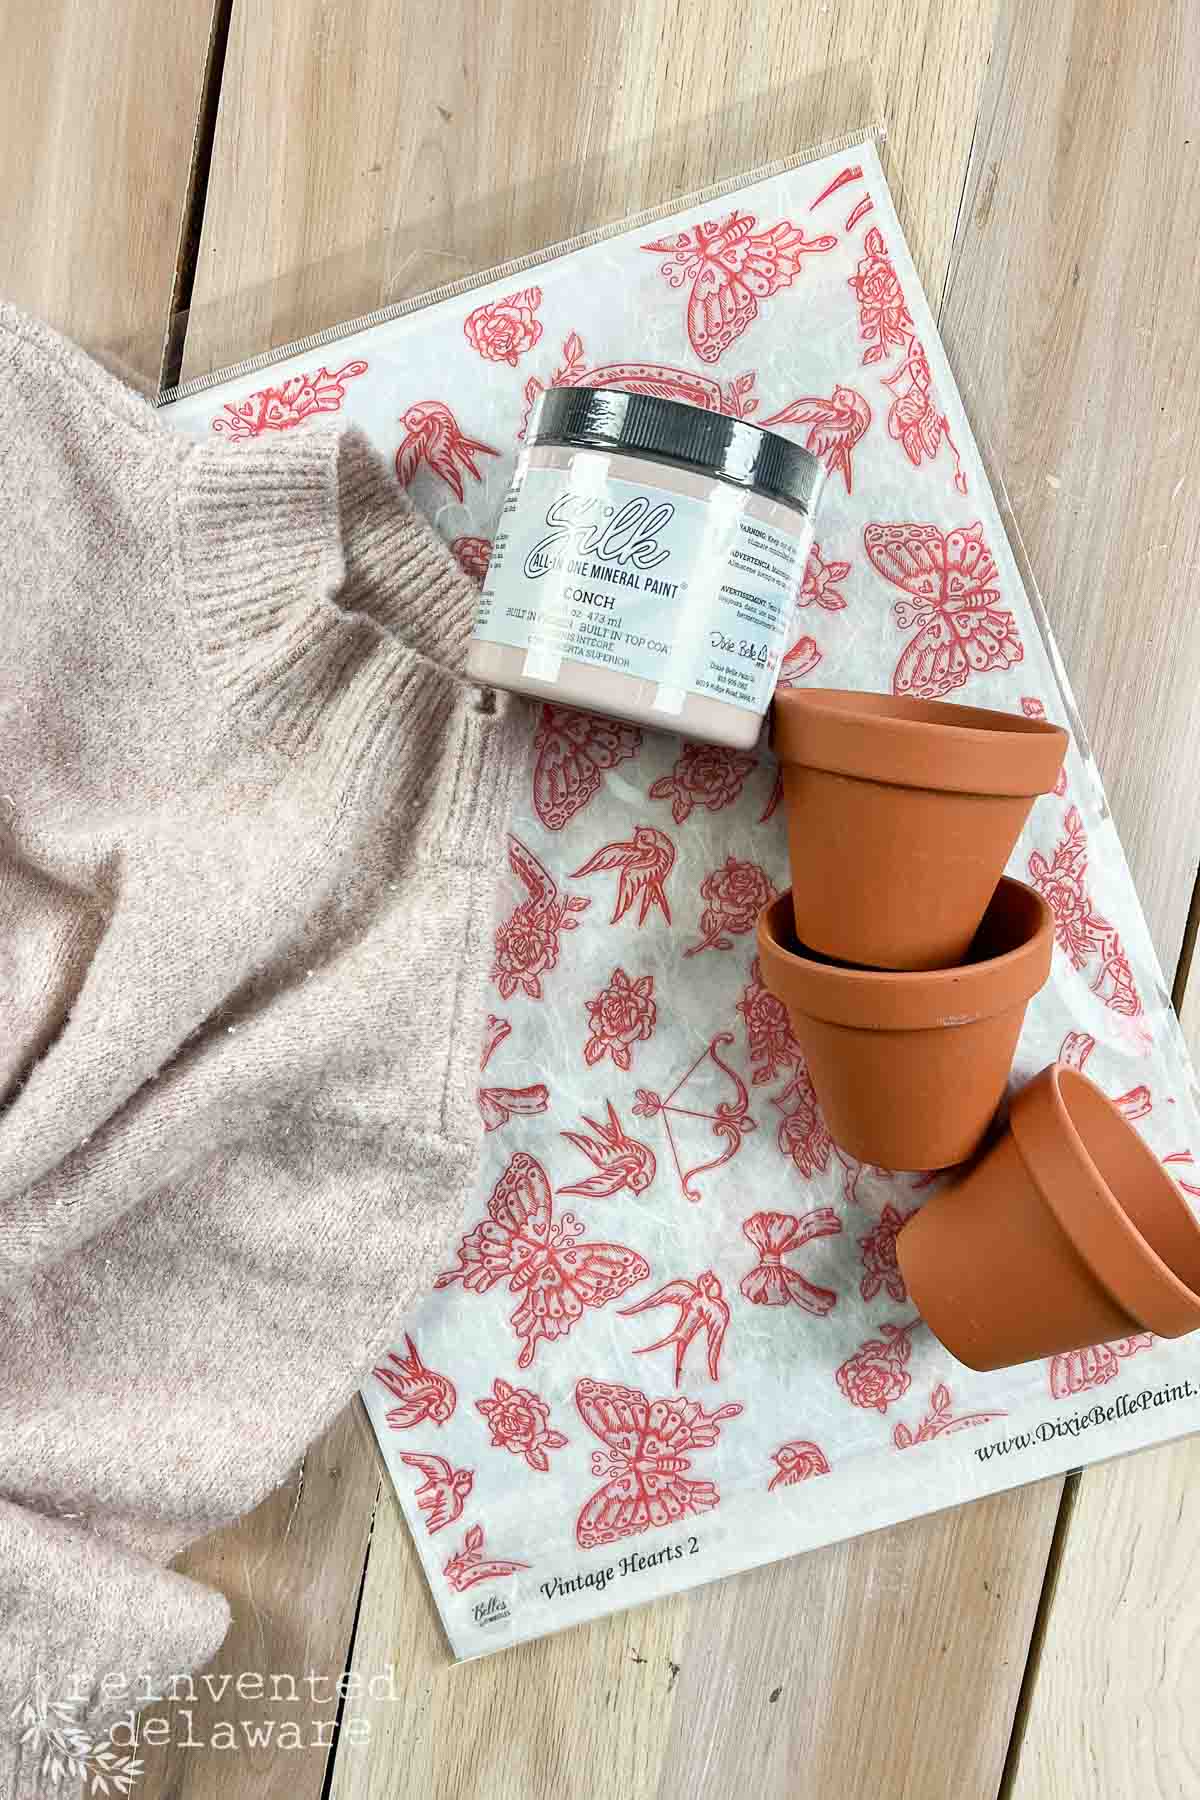
supplies for upcycled Valentine’s Day decor
- 3″- 4″ terra cotta pots (new or thrifted)
- thrifted sweater (look for pinks, reds or creams with fun texture)
- chalk paint (I used pink but white or red also works well)
- decoupage paper (floral or vintage designs work best)
- Mod Podge (gloss or matte finish)
- paper covered wire (for the ‘stems’)
- floral moss
- floral foam
- embroidery floss & needle
- fiberfill or fabric scaps (for stuffing the hearts)
- hot glue gun & glue sticks
Thrifting Tip: Keep an eye out for terra cotta pots at yard sales and auctions year-round! Even if they are stained or dusty, a quick wash and a coat of chalk paint make them look brand new for this project.
how to make upcycled Valentine’s day heart pots
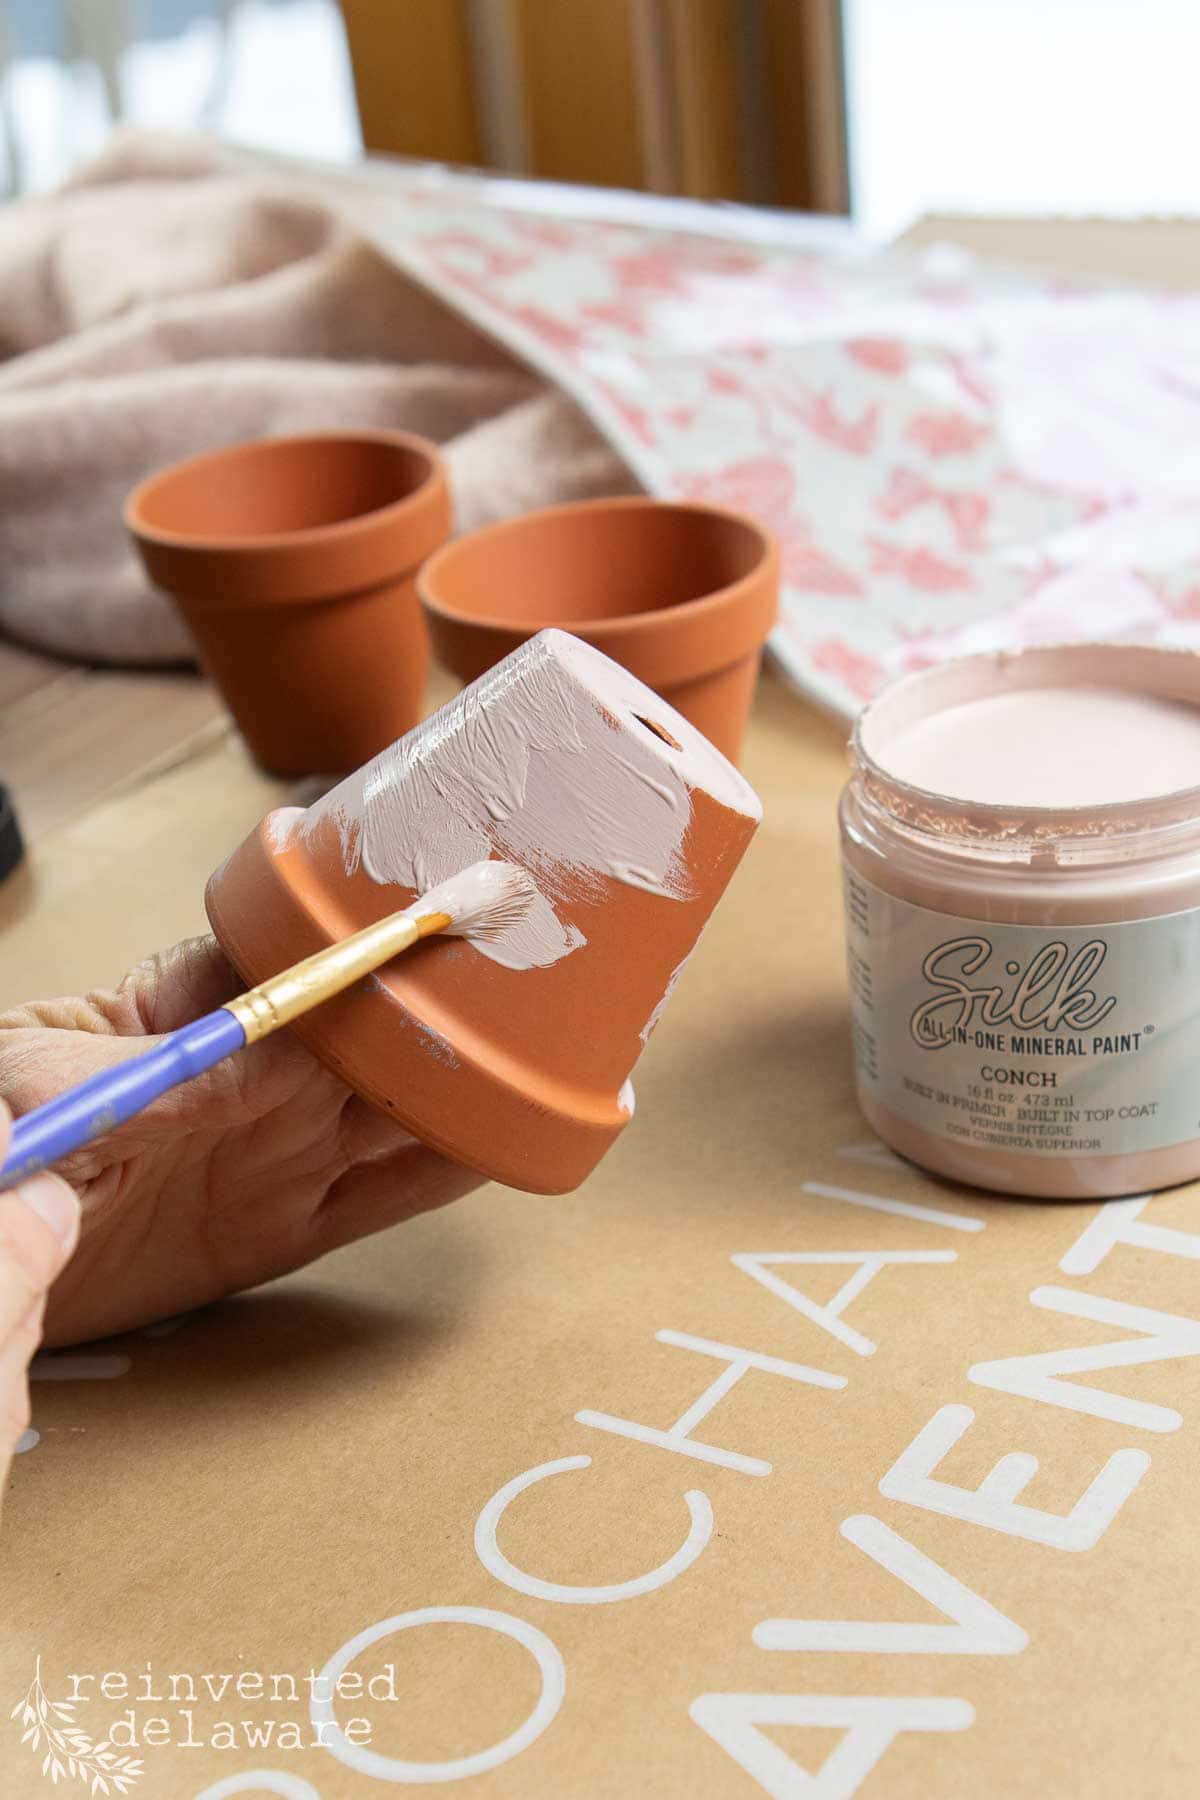
step 1: prep and paint the terra cotta pots
Since I will be applying decoupage paper to these terra cotta pots, I chose to paint them first. Decoupage paper can be thin and I didn’t want the orange tone of the terra cotta to show through. I thoroughly cleaned them before applying the paint.
It only took one coat of this pretty pink color of chalk paint. The pots could also be painted white. If you choose a light color you may have to paint more than one coat. Allow the paint to dry thoroughly before applying the decoupage paper.
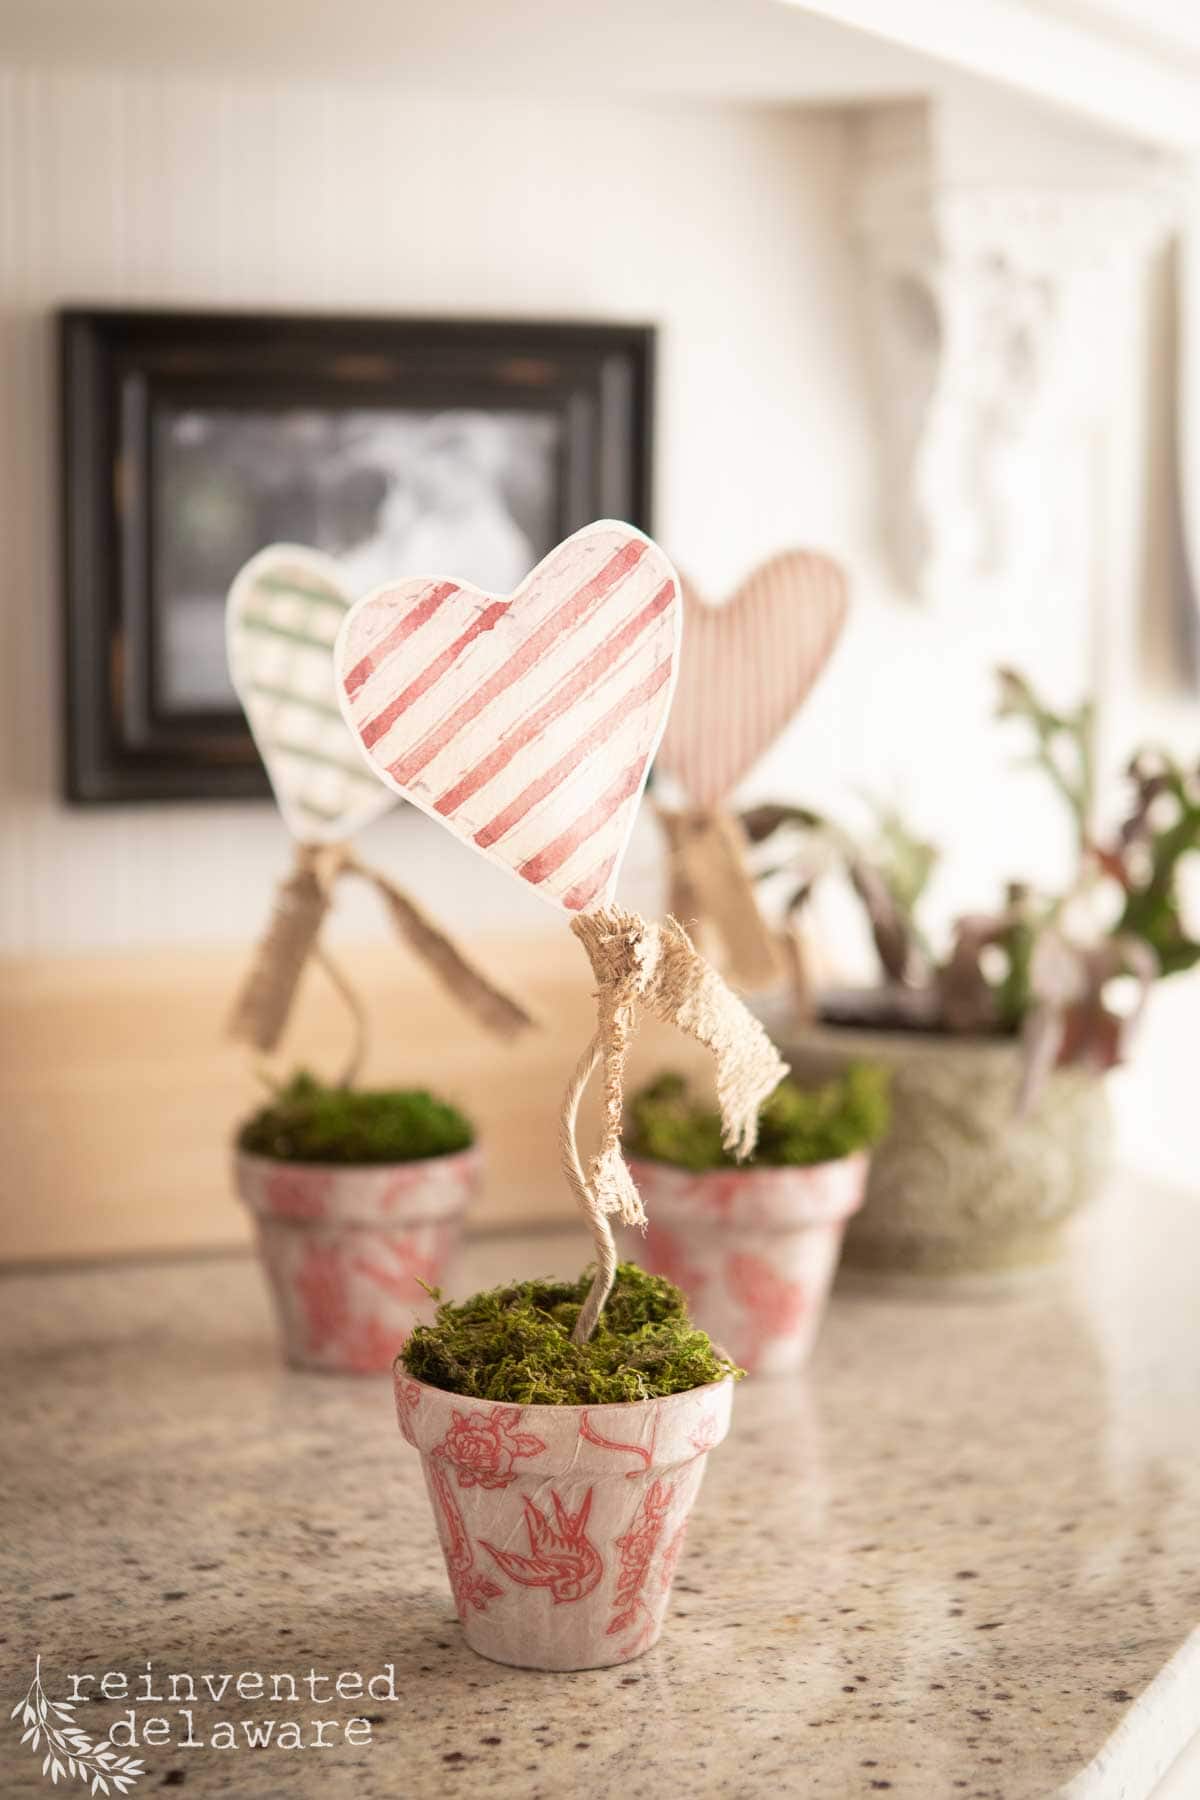
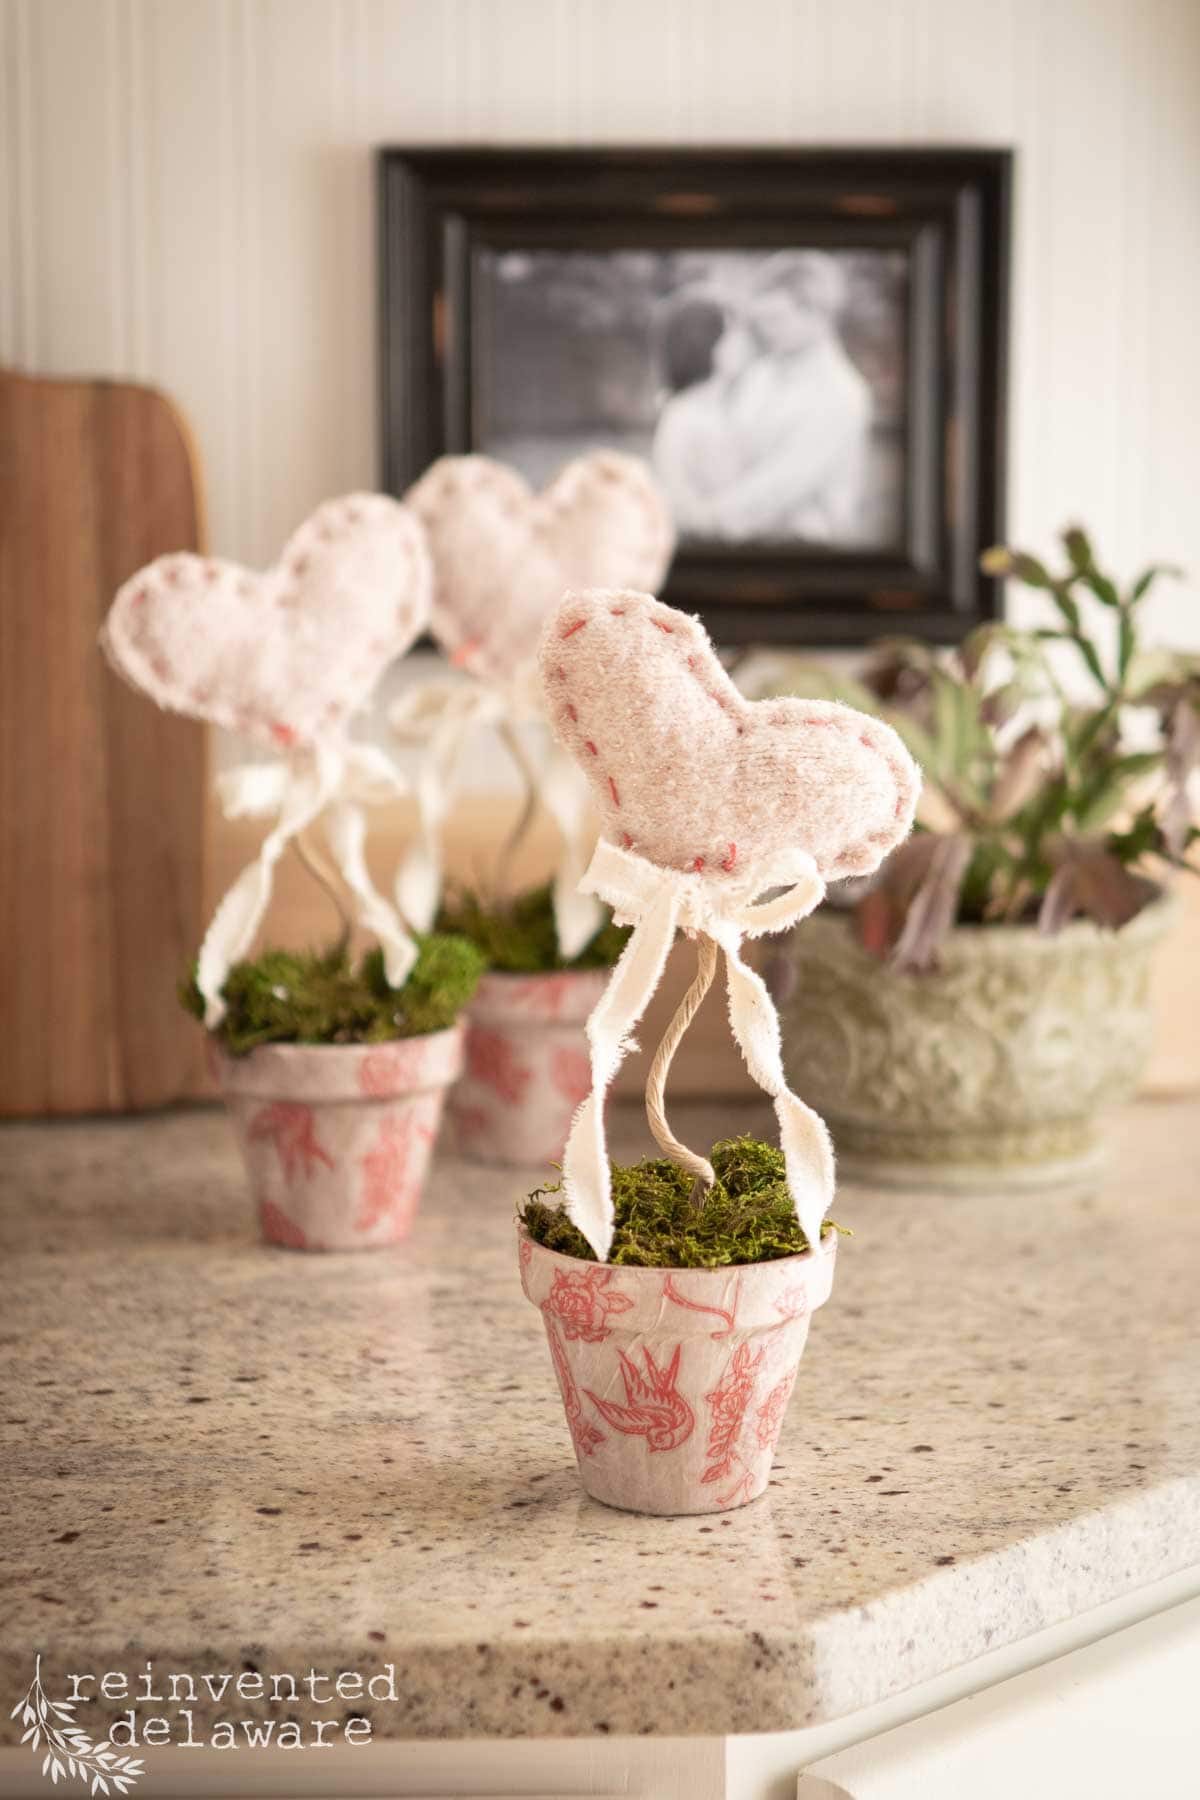
step 2: create the sweater hearts
Now let’s make a bouquet of hearts! I purchased a pink sweater from the thrift store to make my hearts. The sweater has a bit of glitter in the weave and the color is a muted pink. You can choose whatever shade of pink or red that you like!
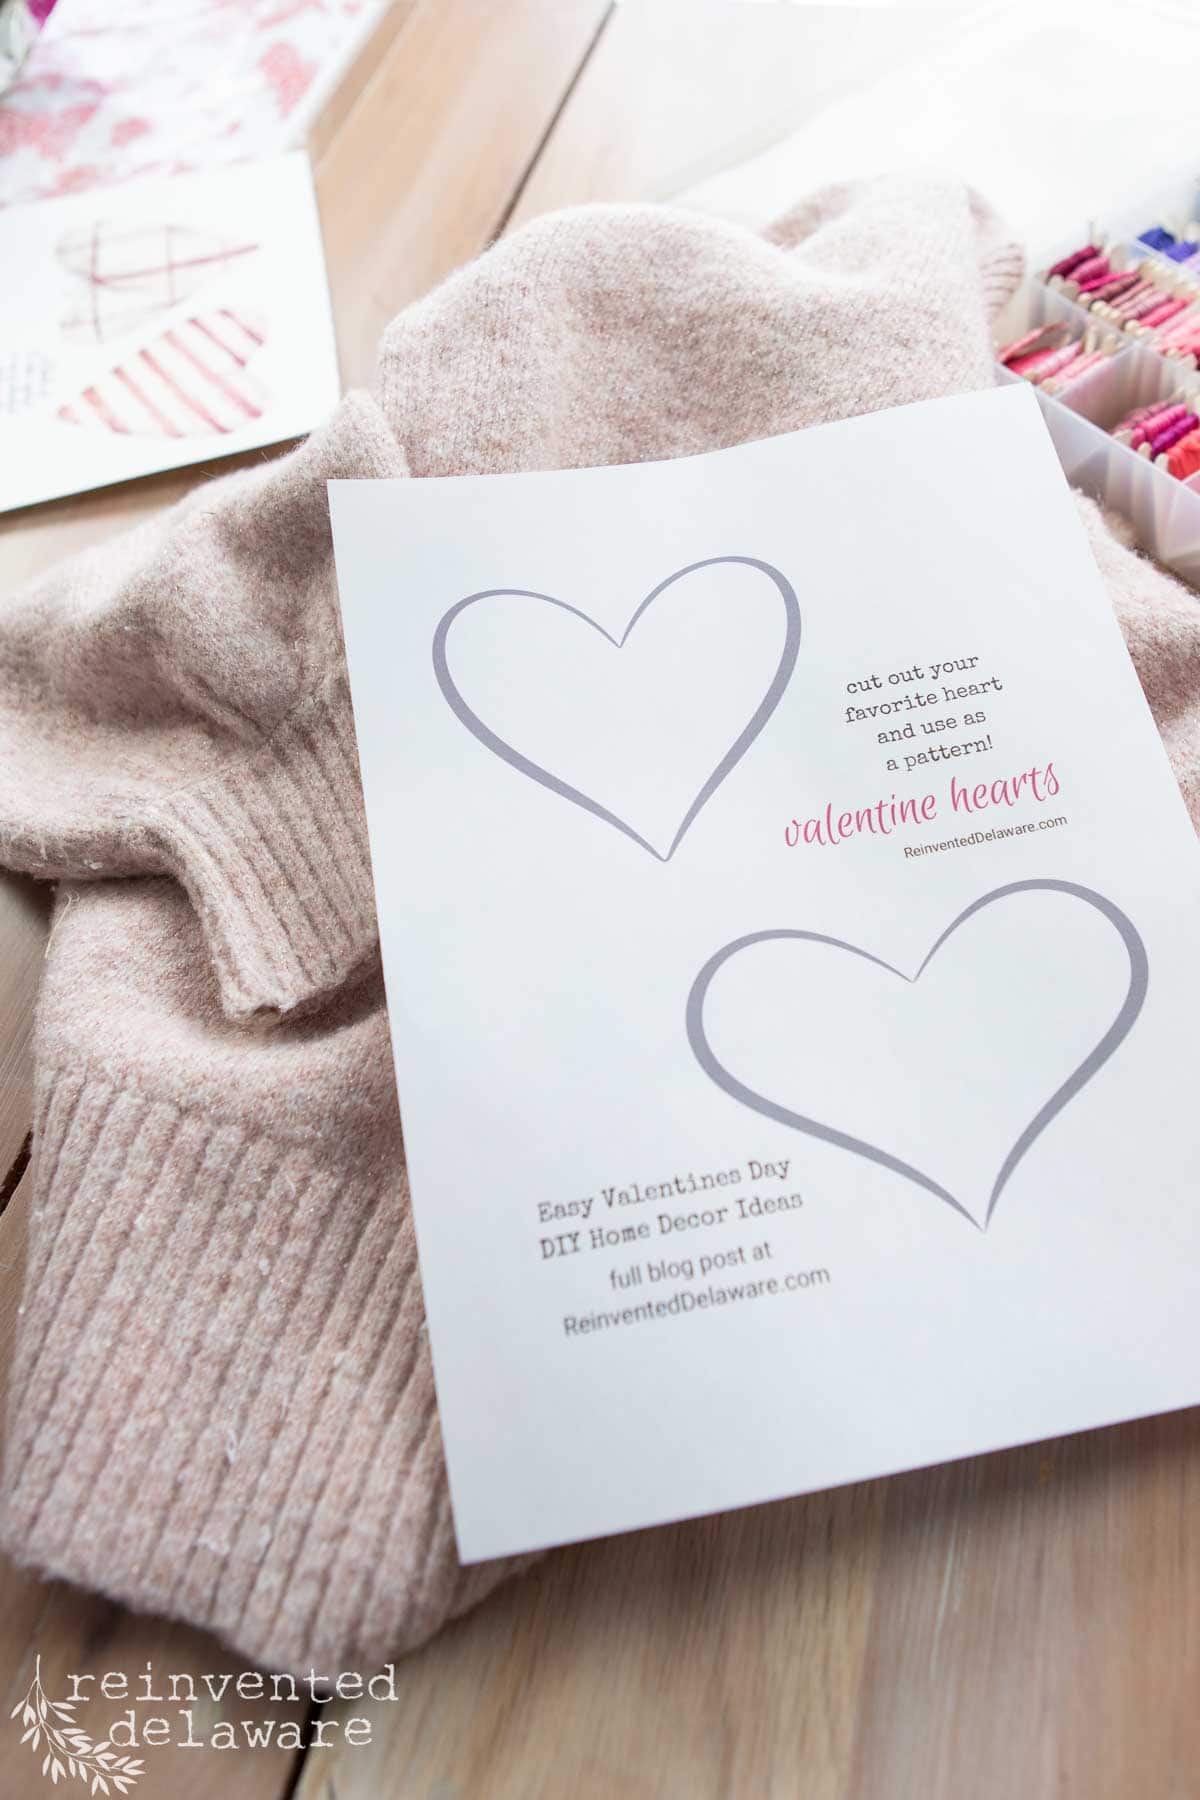
cut the heart shapes
Cut out the heart shape paper patterns that I have made for you. You can grab these heart shapes by joining my email list. You will gain access to an entire library of free printables including these sweet hearts! There are two fun shaped hearts for you to choose from.
You can trace the heart shapes onto the sweater or fabric of your choice using a permanent marker. If you do this, trace out the design larger than the pattern so you can cut away the marker.
thanks for being here!
I hope you are enjoying this project! Let me know if you have any questions. Or leave me a comment to tell me about your project and ideas!
thanks, Cindy 😀

I chose to use scissors and the pattern directly on the sweater to cut out the design. I didn’t even bother to use pins to hold the pattern in place! If you are more comfortable using straight pins to hold the pattern in place, go ahead and do that!
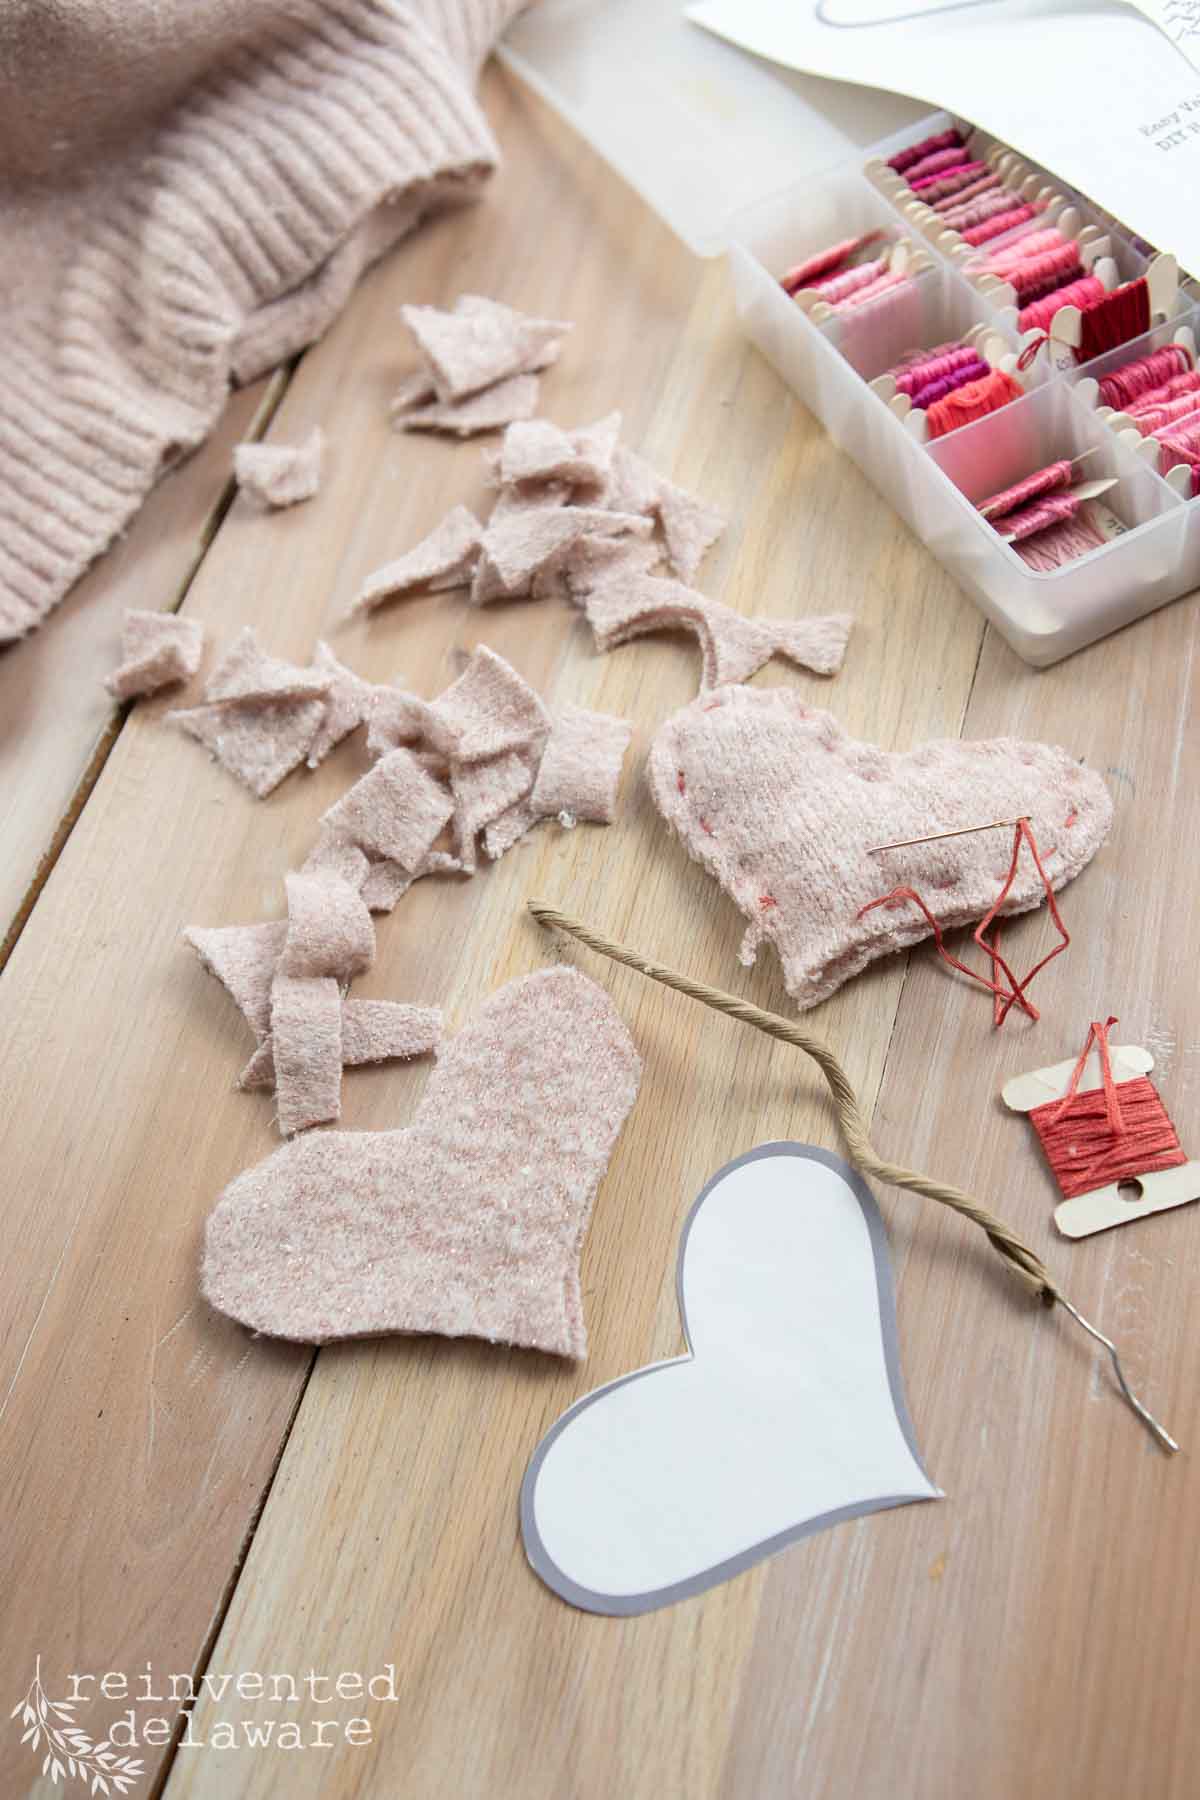
Cut two sections for each heart design. These hearts will be stuffed!
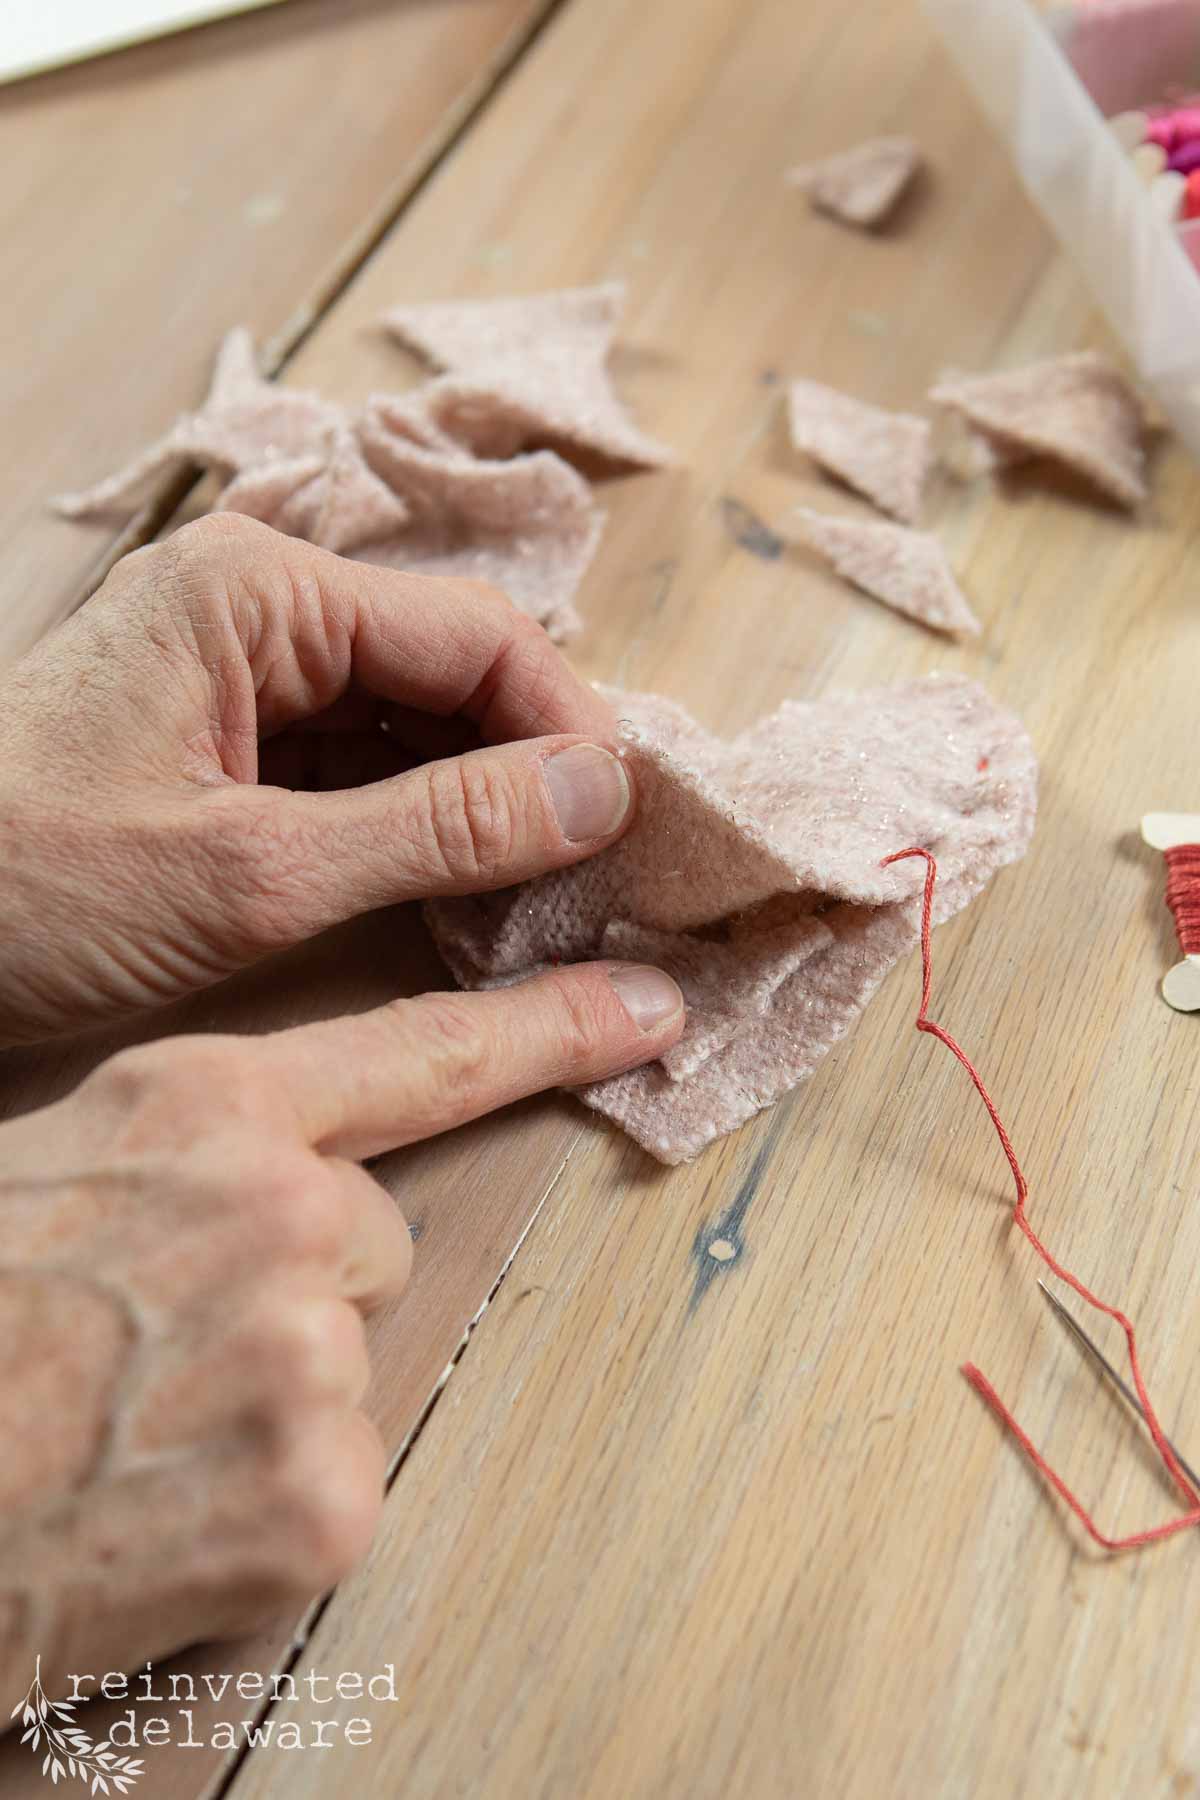
stitch the stuffed hearts
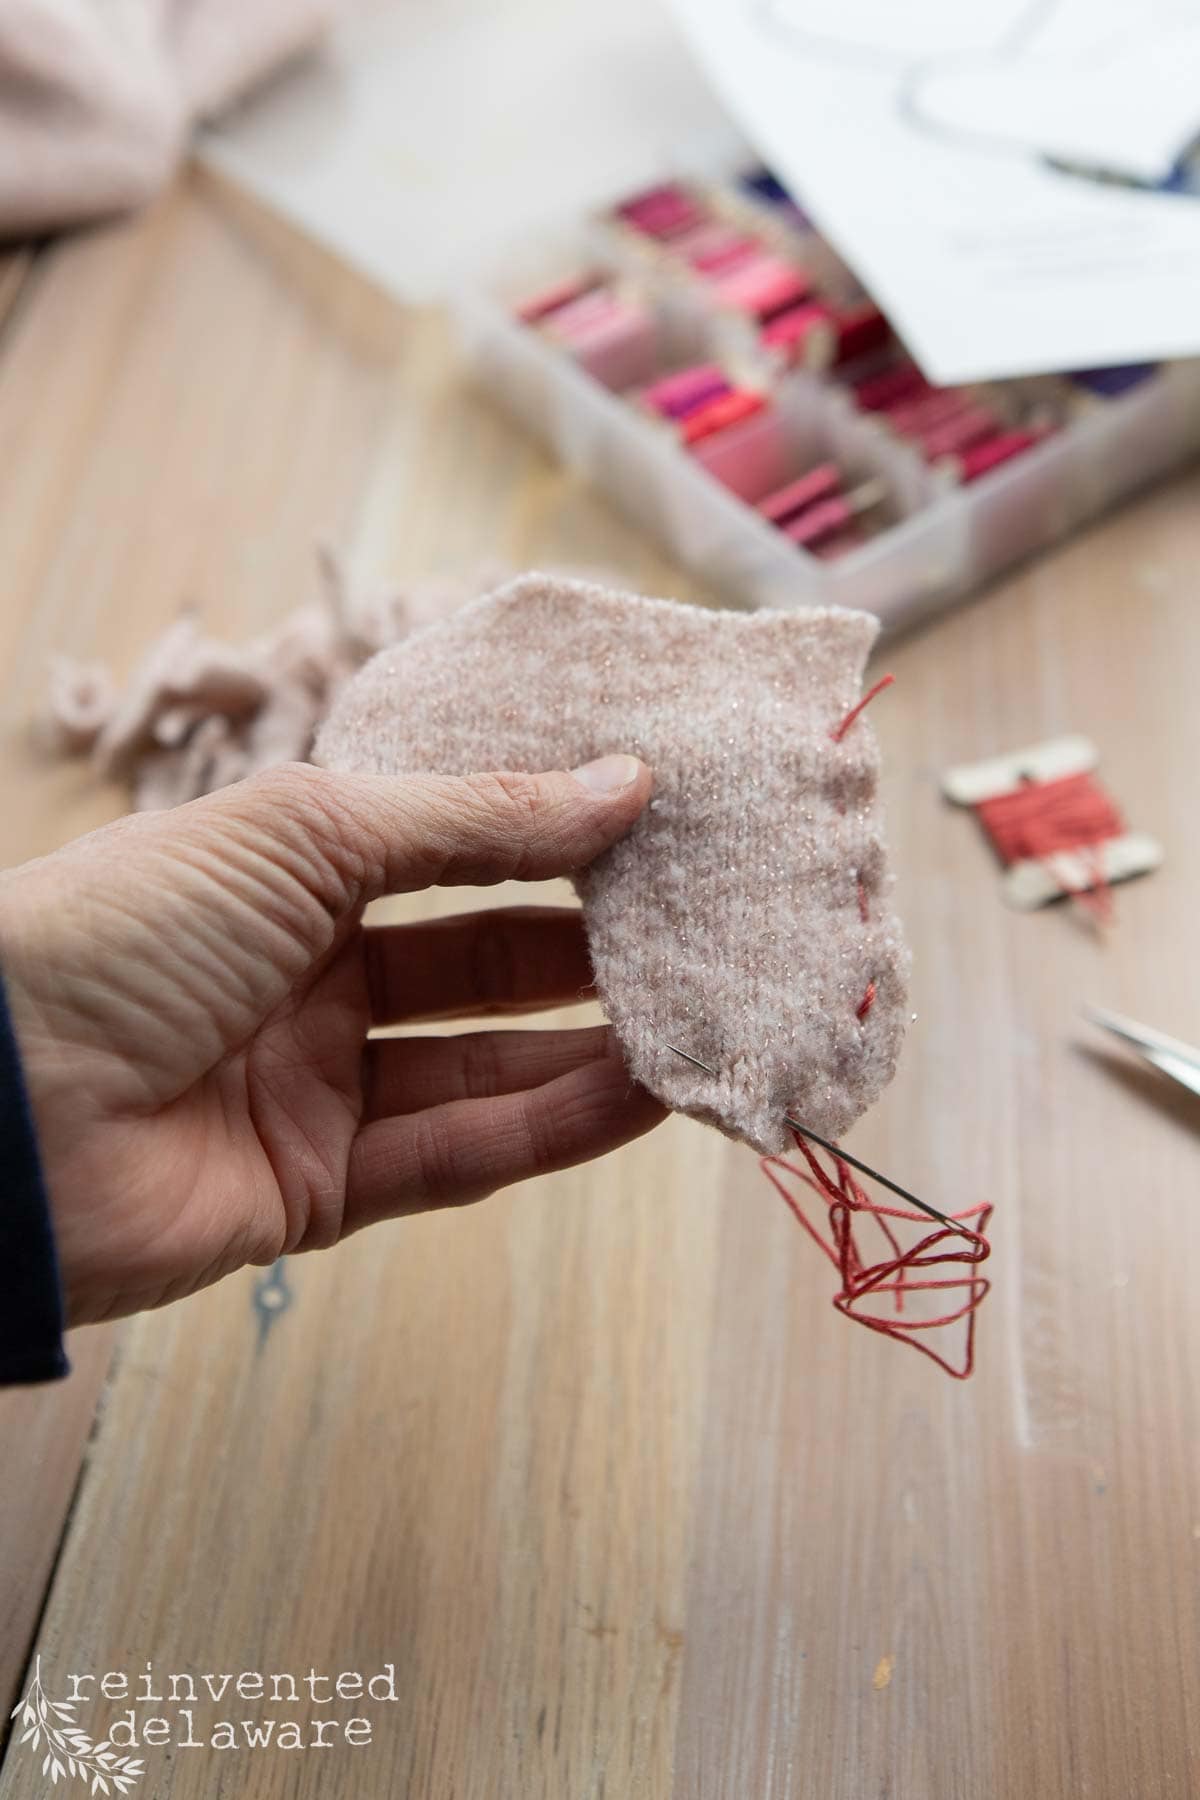
The next step in this easy diy craft does not take a high skill level to accomplish! Grab a large eye needle, some embroidery floss and a sharp pair of scissors.
Stitch a running stitch around the perimeter of the sweater heart cutout about 1/4″ from the edge. The stitches should be long, about 1/4″. We want to see the stitches to help create the handmade look we want.
Stitch all the way around the heart leaving about 1″ opening. Grab some scraps of the sweater used to make the heart and stuff the little heart slightly. You don’t want it overly stuffed, just slightly puffy. You can also use fiber-fill stuffing.
purchase a tighly woven pink sweater at the thrift store for only a few dollars!
Once it is stuffed, add the paper covered wire into the heart. Add a dab of hot glue to hold the wire inside the heart then finish stitching the heart closed. Tie off the threads at the end.
Use the end of an artist’s brush to create a curvy look to the paper covered wire by loosly wrapping the wire around the handle of the paintbrush. I think it adds a bit of whimsy to this wonderful decoration!
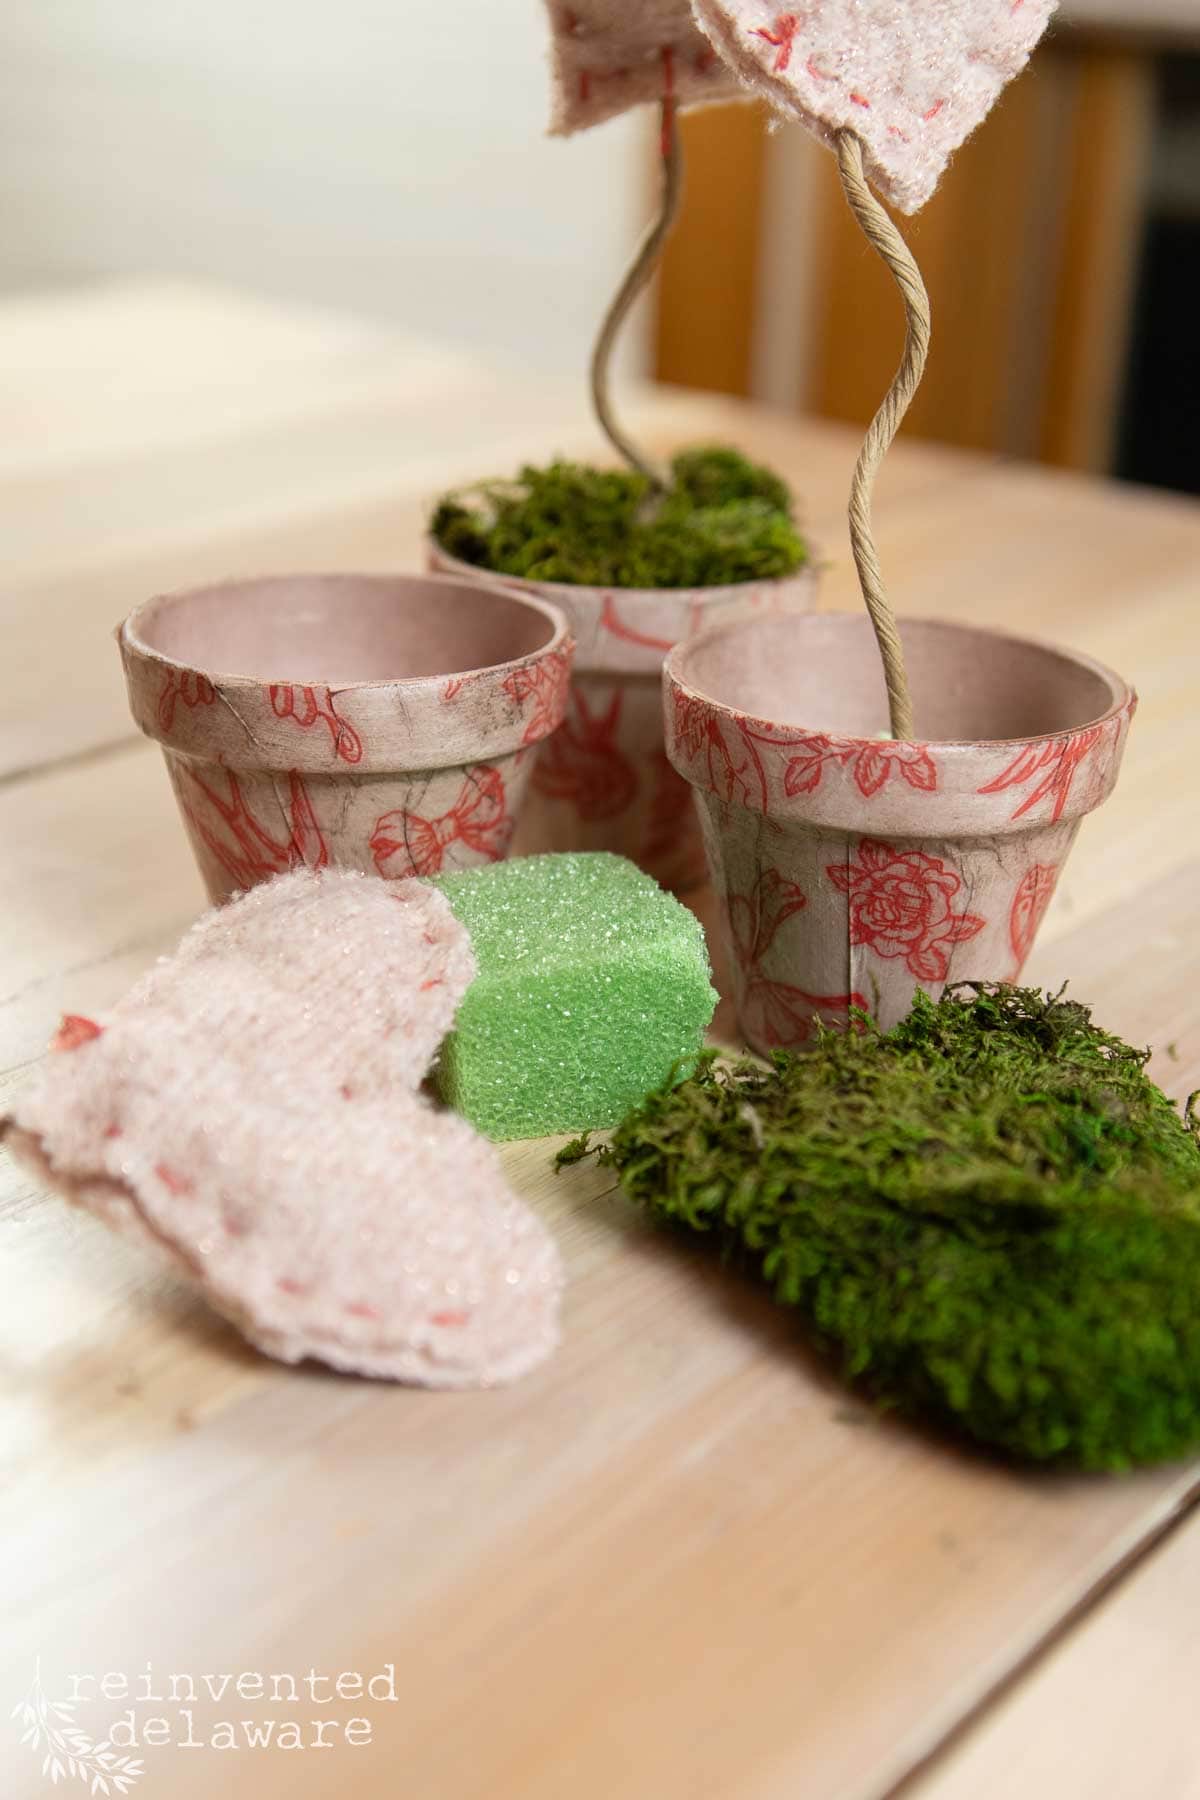
step 3: apply decoupage paper
Dixie Belle has this adorable decoupage paper filled with butterflies, roses, bows and of course, Cupid’s famous arrow. It’s perfect for this Valentine’s day project! (supplies are linked at the top of this post!)
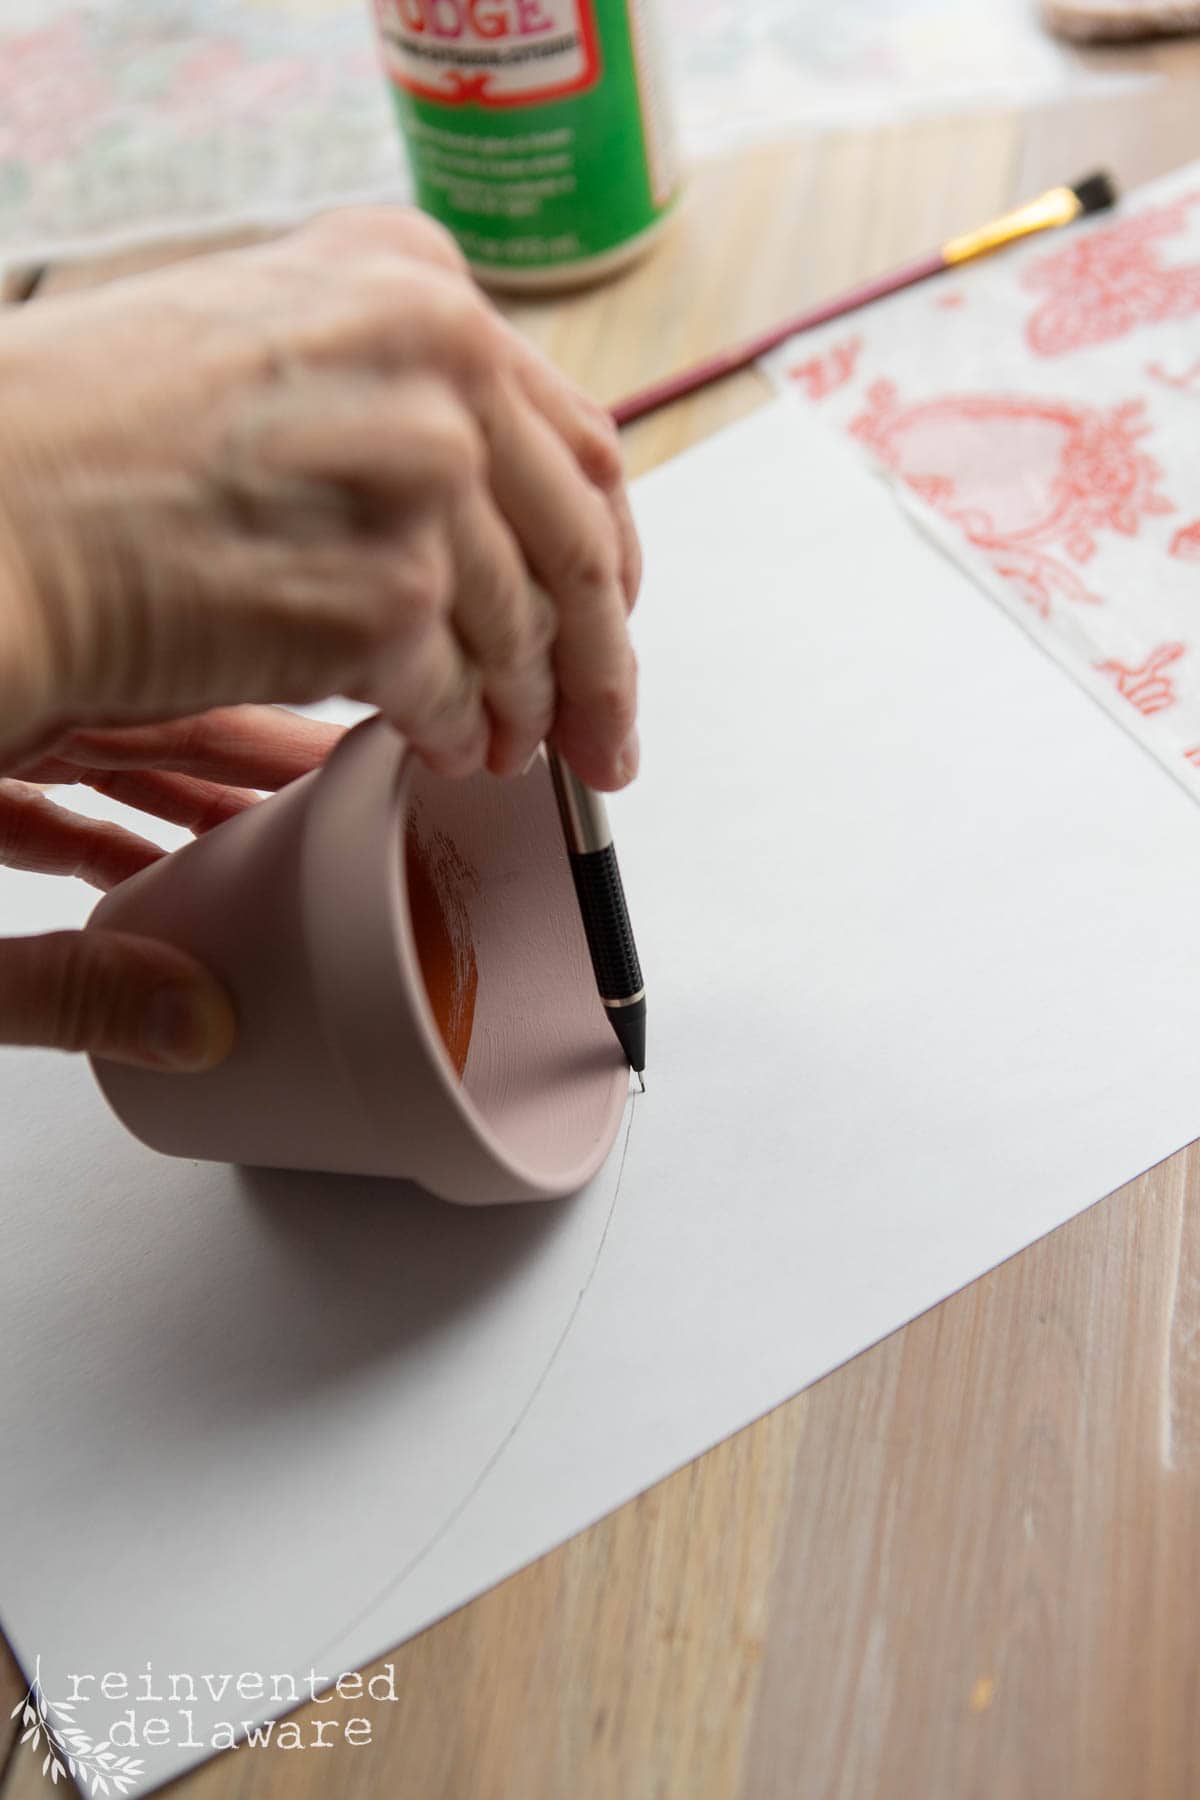
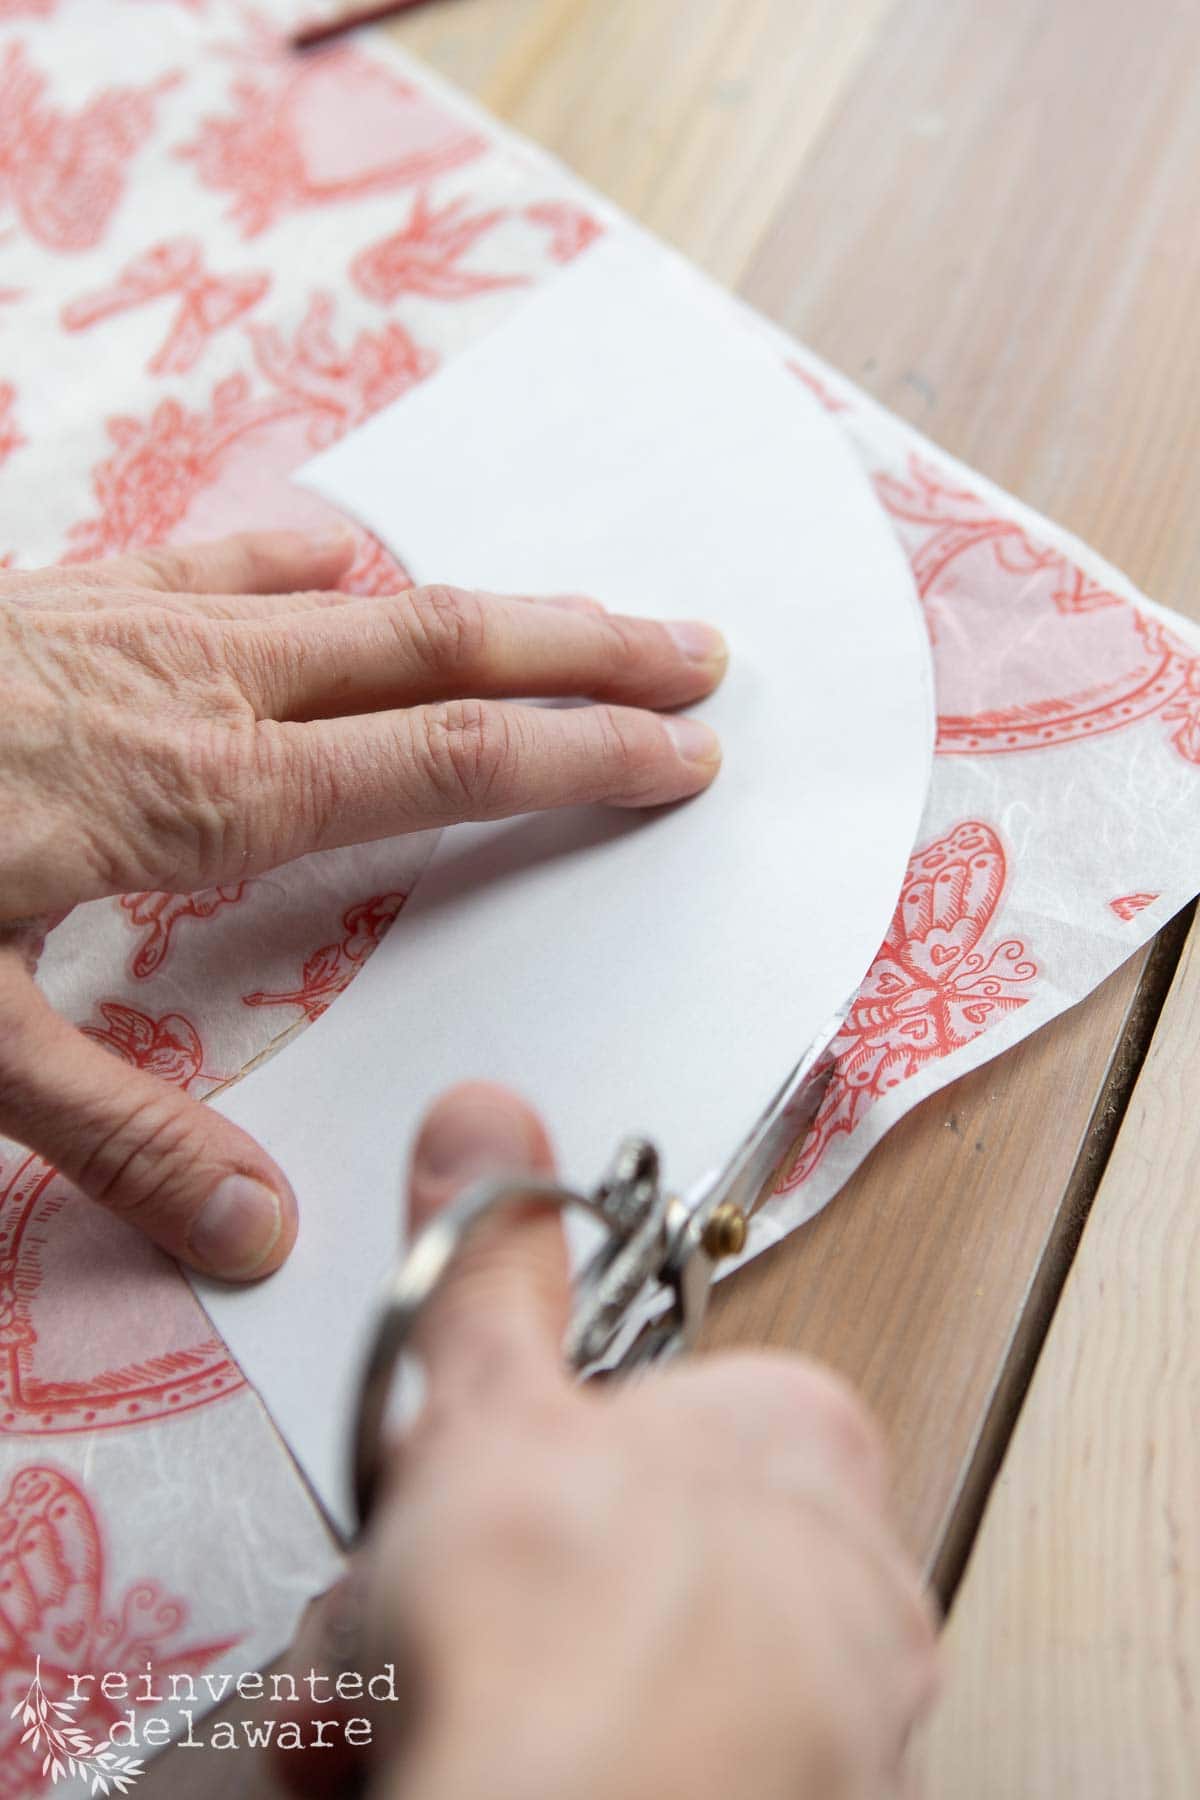
Applying decoupage paper is so easy! First let’s cut a pattern to form around the shape of the terra cotta pots.
Using a scrap of computer paper and pencil, I marked around the paper as I rolled the terra cotta pot on the paper. Next I cut out the pattern with a bit of excess at the top and bottom and used it to cut out the decoupage paper.
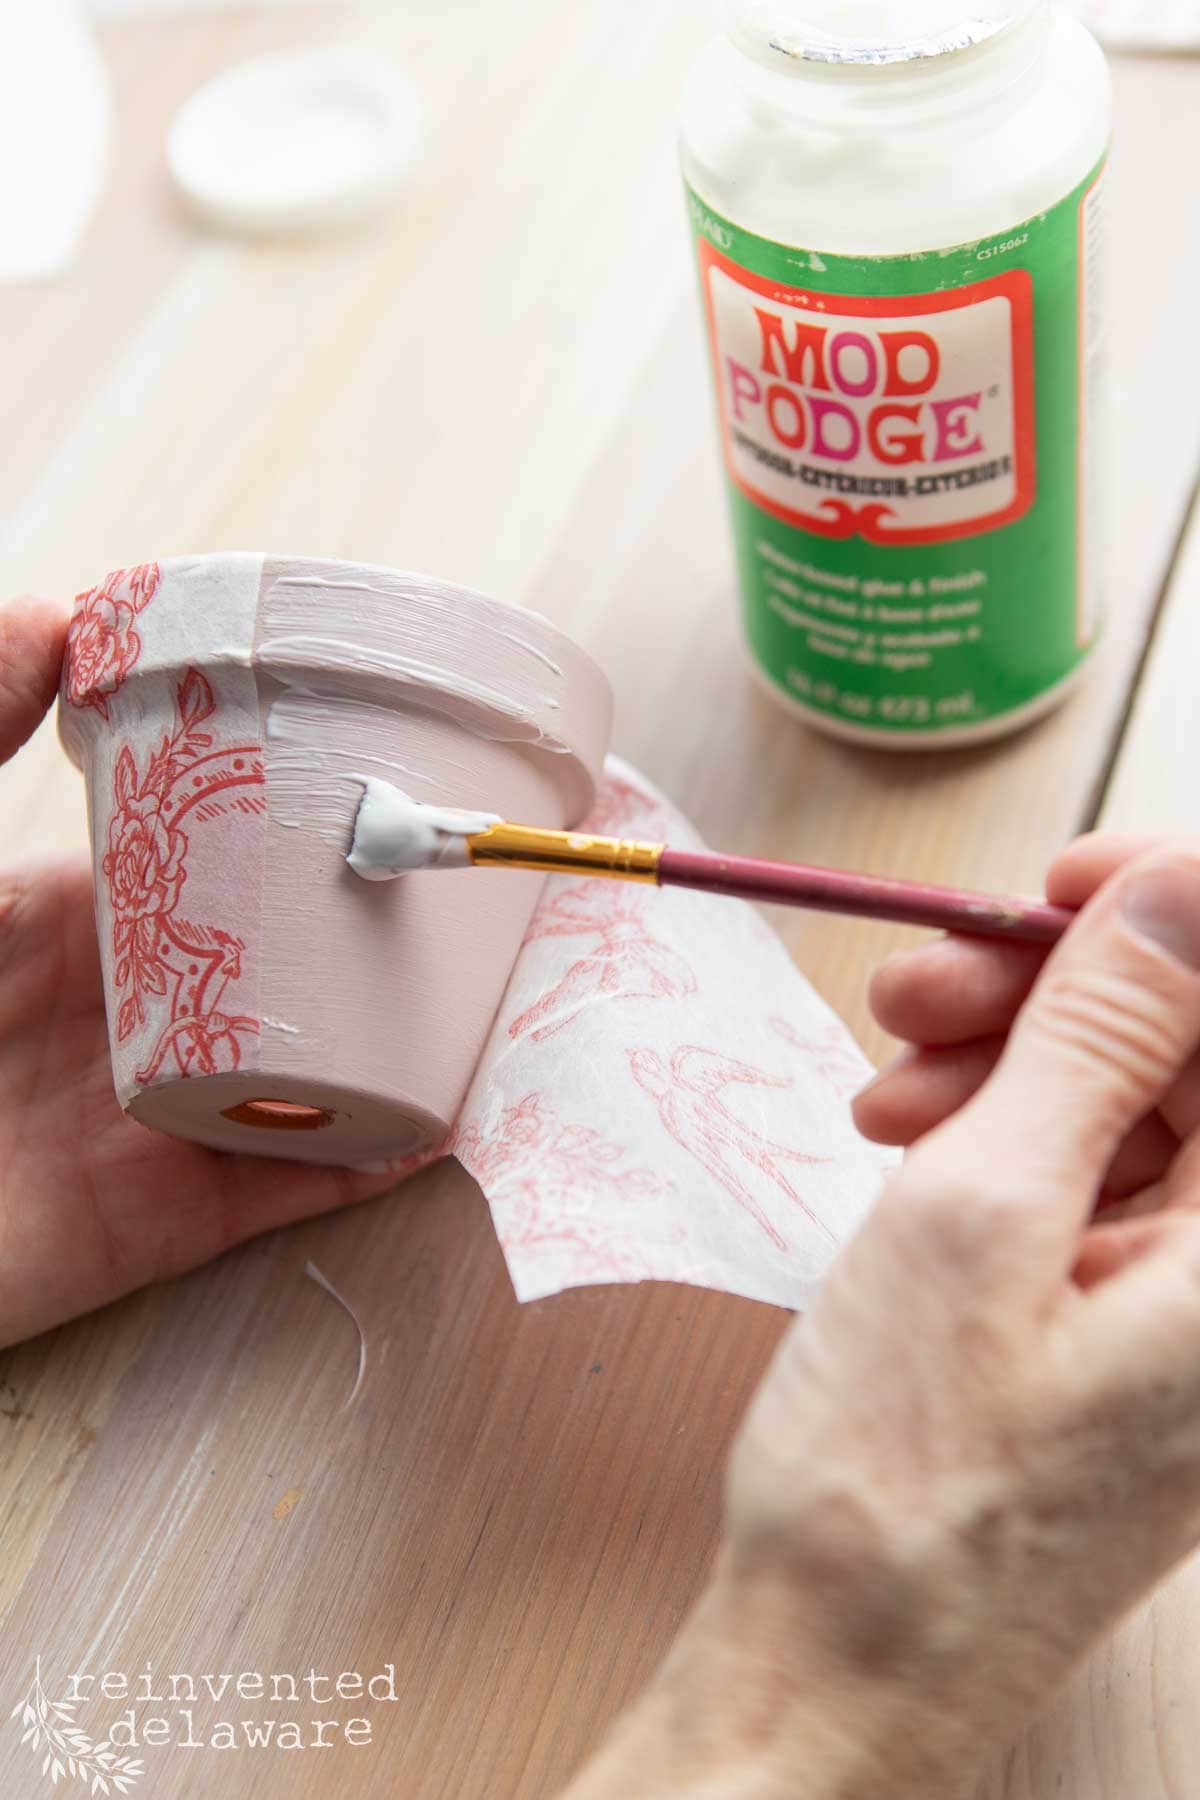
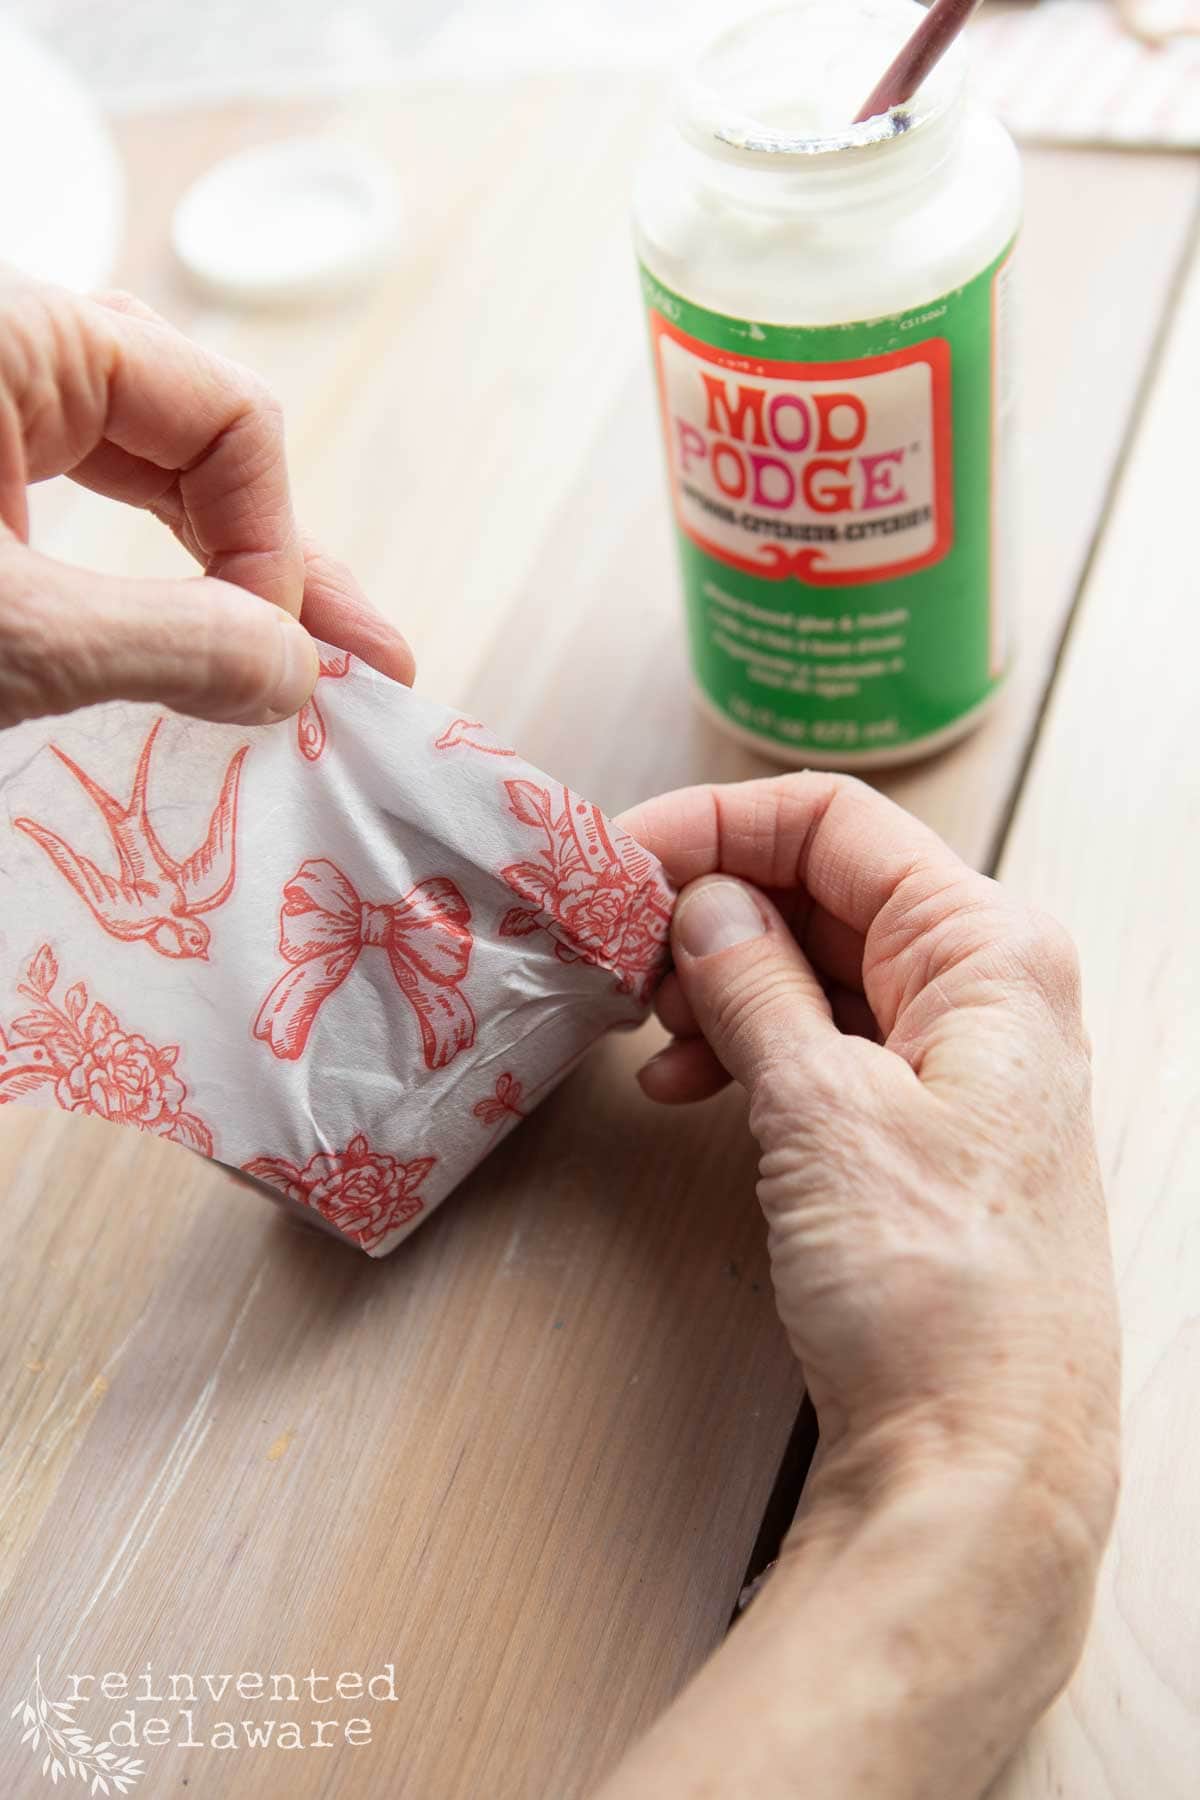
This gave me the shape to conform to the angle of the flower pots and will be the perfect fit. I applied a thin coat of Mod Podge on the terra cotta pots in sections, laid the decoupage paper on that area and smoothed it out. I continued around the pot working in small sections at a time.
When I got all the way around the pot, I tore the edge of the decoupage paper so that it would blend in. A hard cut edge would be noticeable.
Once all of the decoupage paper was adhered to the pots, I applied a thin coat of Mod Podge to seal it and I allowed it to dry completely.
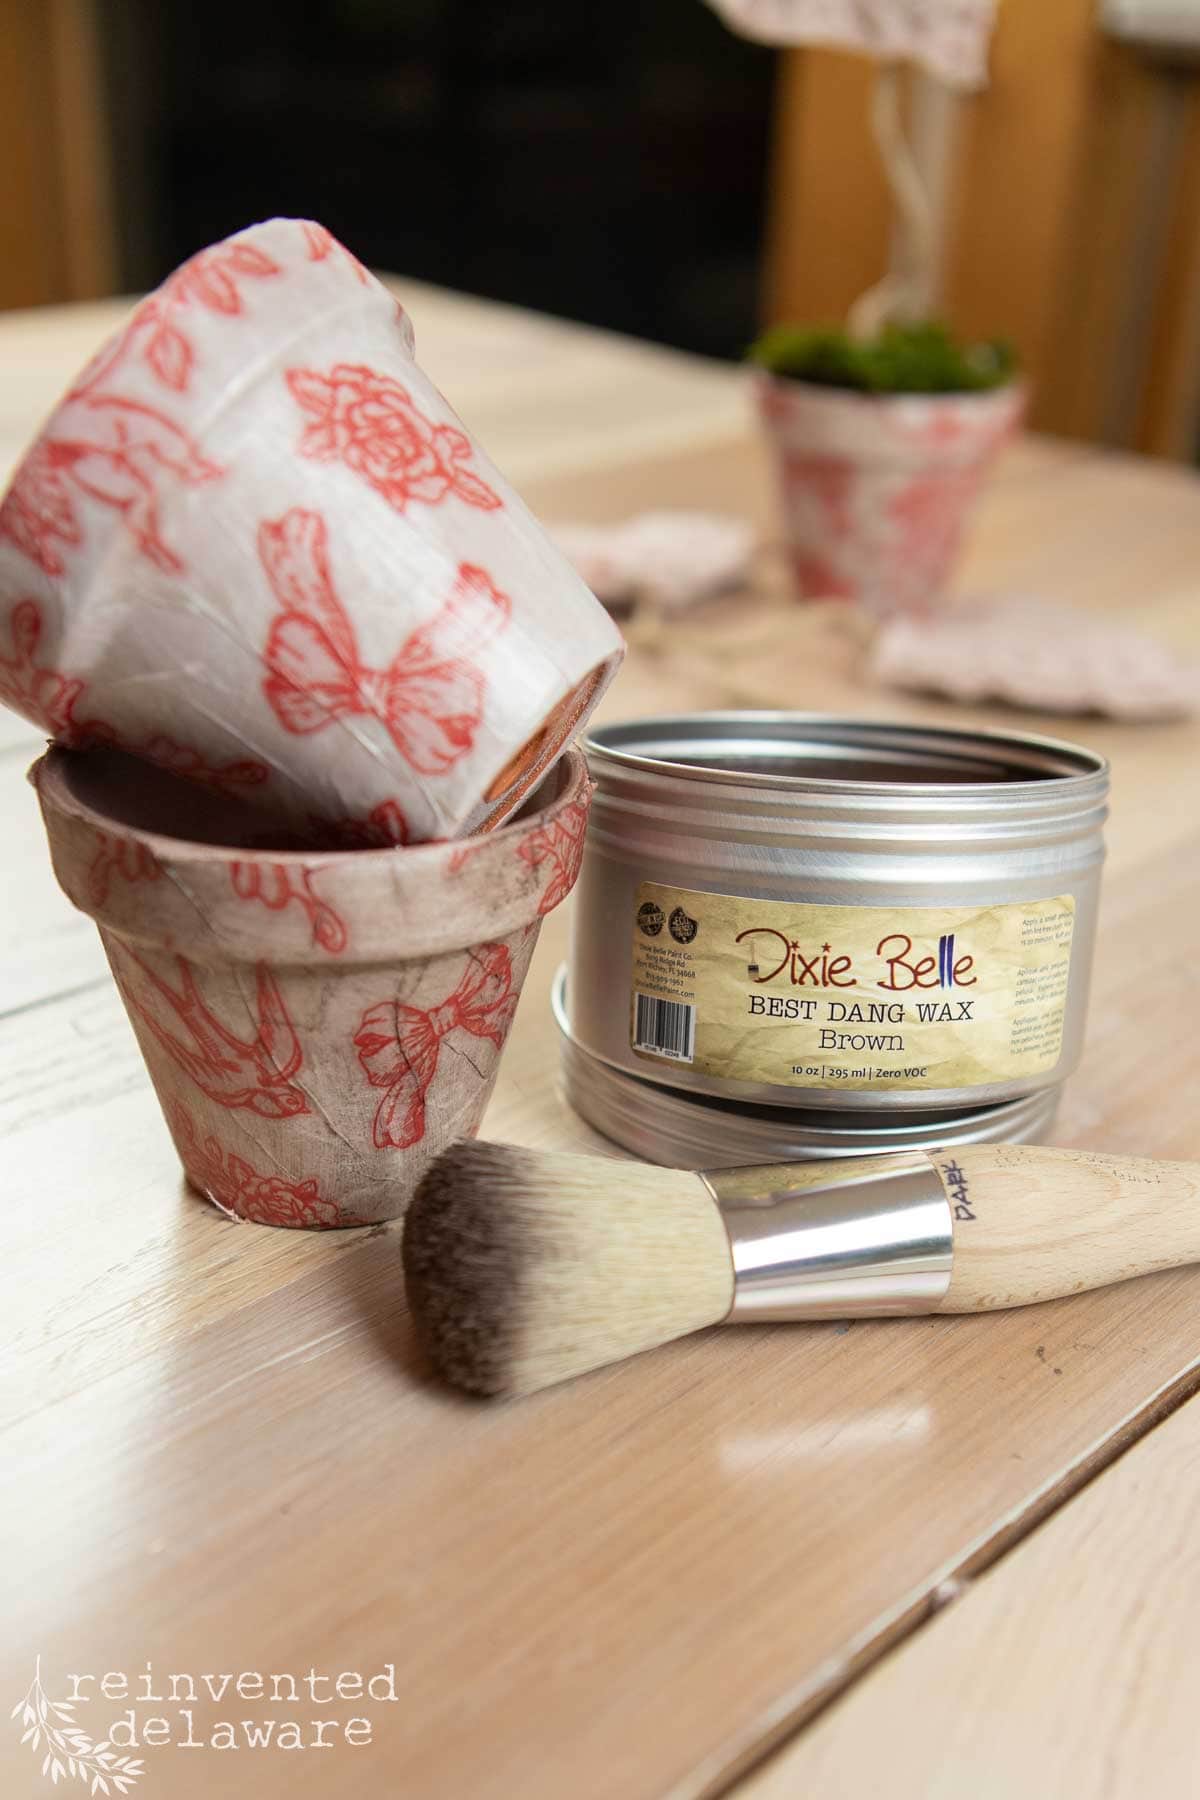
The next day, I used the edge of an emery board to file off the excess paper along the top and bottom edges. Then I applied one coat of dark furniture wax to age the paper and give it a vintage feel.
step 4: assemble the Valentine’s heart flower pots
Now that all the components are ready, let’s put these heart flower pots together! Place a small piece of floral foam in the terra cotta pot. You want to cut the foam a bit large so that it fits tightly in the pots. You can also add dab of hot glue to hold the foam in the pot.
Stick the paper covered wire into the foam. Use floral moss to cover the foam and to create a pretty base for the heart flowers.
If you do not have the paper covered wire, you could use pretty paper straws or soft green pipe cleaners as the stems.
I tied a piece of diy fabric ribbon around the top of the wire for an added touch of whimsy. You could use any kind of ribbon, twine or other fabric to create a similar look.
bonus: free vintage style heart printables
If you do not want to cut the hearts from a thrifted sweater, then I have another idea for you! In my freebie library, I have created adorable watercolor painted hearts that could replace the sweater hearts!
Print the design on heavy card stock or better yet, on watercolor paper. Cut the hearts out using sharp scissors leaving a narrow white border around the edges of the heart.
Then simply use hot glue to attach the paper covered wire to the back of the hearts. You can print double the amount of hearts you want so that the heart shaped flowers will be two-sided. The choice is yours and the hearts of free!
Check out my post on Vintage Inspired Valentine’s Decor! You will be inspired to add a touch of romance to your home!
Click the button below to gain access to my printable library that includes the pattern for these adorable hearts! You’ll find the heart pattern in the Cheatsheets and Patterns folder once you sign up!

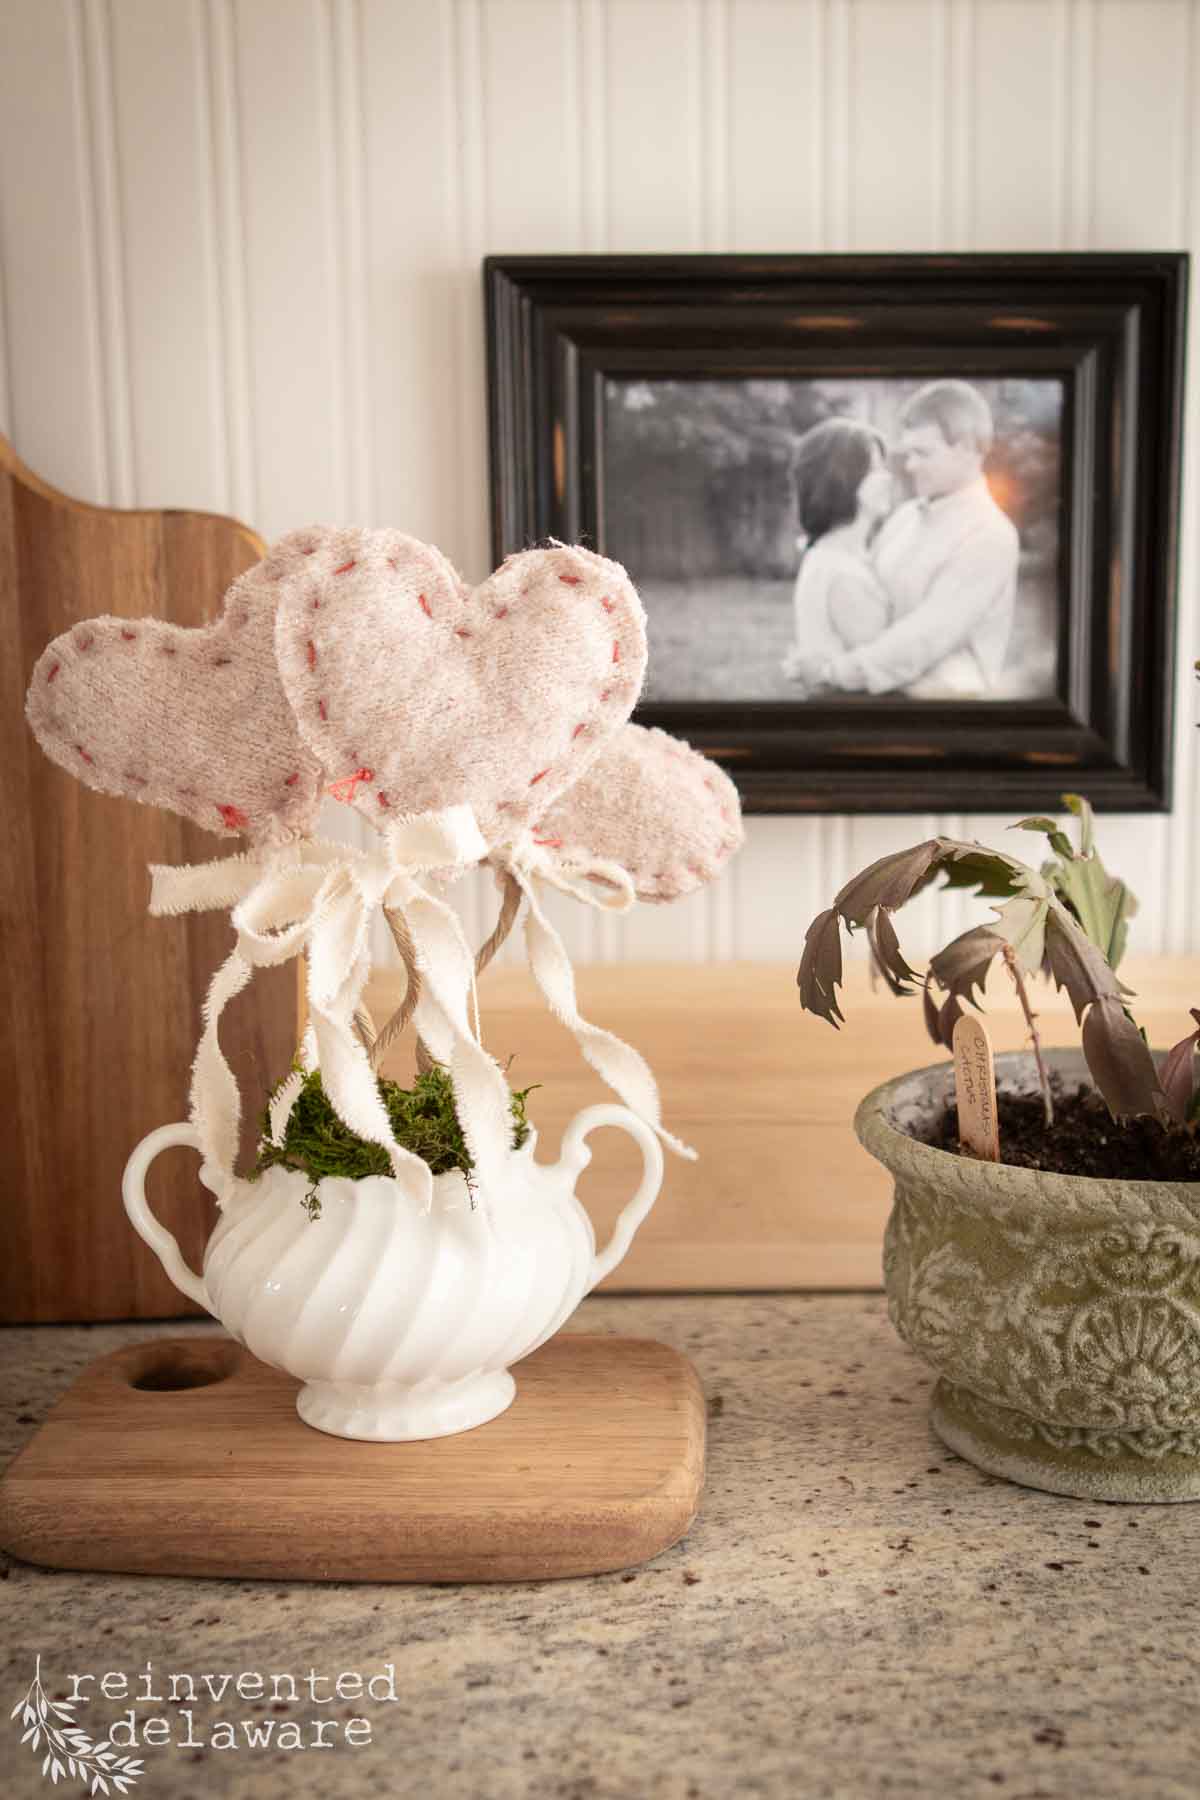
7 Creative Ways to Use Upcycled Hearts for Valentine’s Day
- Upcycled Heart Wreath: Create a variety of hearts using pink and white sweaters and hot glue them to a grapevine wreath for a cozy front door display.
- Sweet Treat Pots: Instead of moss, fill your terra cotta pots with jelly beans or conversation hearts—a version the kids will absolutely love!
- Romantic Centerpiece: Group three heart flower pots on a vintage platter and surround them with scattered chocolates for an easy dessert table look.
- Handmade Teacher or Galentine’s Gift: A single heart pot makes a thoughtful, budget-friendly gift for friends or teachers.
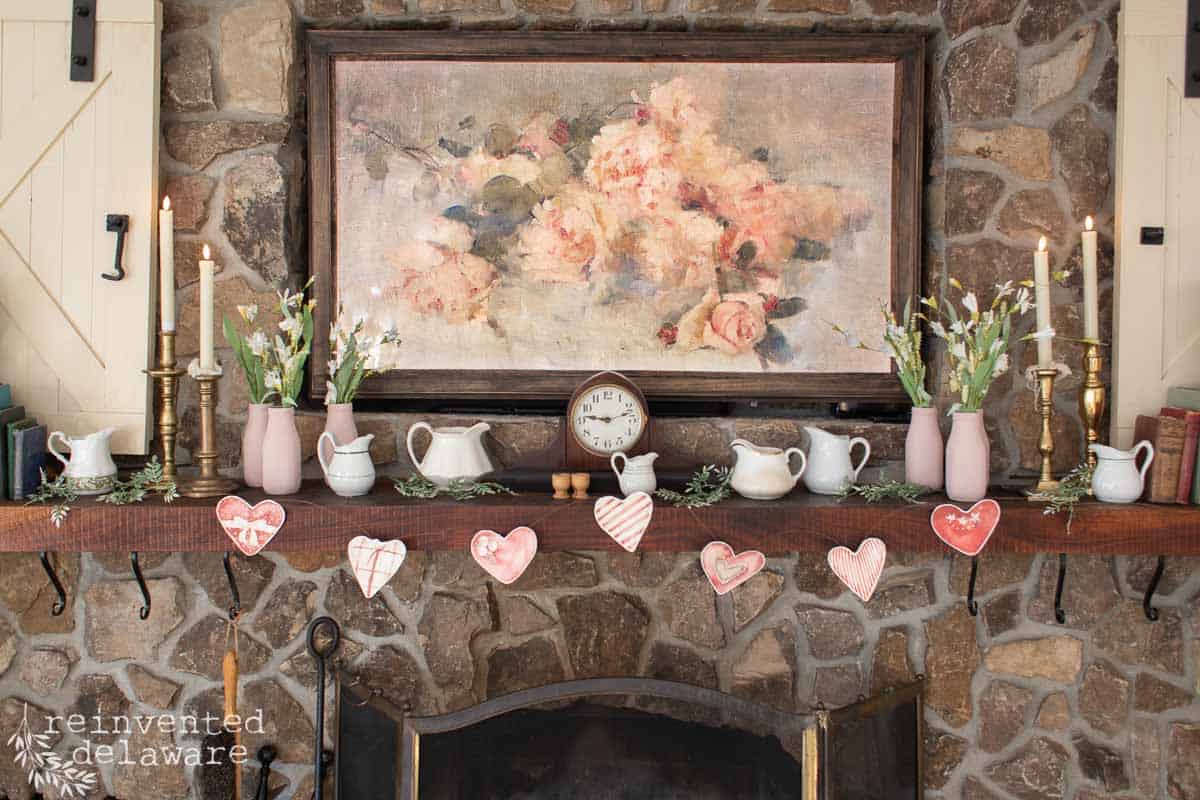
- DIY Heart Garland: Stitch several sweater hearts together (or use my free printable watercolor hearts) to create a charming Valentine’s Day garland for your mantel.
- Hand-Written Valentine Cards: Print the watercolor hearts on cardstock to use as unique note cards. Just write a message on the back for a sweet, personalized touch!
- Valentine’s Day Table Centerpiece: Use the heart flower pots to create a simple table centerpiece. Lay down a vintage lace tablecloth, the terra cotta heart flower pots, small bowls of chocolates and battery powered candles to create a romantic mood!
faq’s: Upcycled Valentine’s Day Decor
Thick, textured fabrics work best! A thrifted wool or acrylic sweaters provide a cozy, high-end look. Velvet would add a touch of elegance. Flannel and dropcloth would add a casual look.
It is not absolutely necessary but applying a base coat of chalk paint acts as a primer. It will prevent the terra cotta from soaking up too much of the adhesive and it will prevent the orange tone of the terra cotta from bleeding through the thin decoupage paper.
Yes! If sewing isn’t your thing, simple run a bead of hot glue along the inside edge of the hearts to secure the two sides together. Use a thin bead of glue, a little goes a long way. Keep in mind the simple embroidery stitch adds to the charm of these Valentine’s hearts.
Thrift stores often have small terra cotta pots. Keep an eye open while thrift shopping year round. Yard sales and estates sales have inpensive pots too. Even if they have been used, grab them! Give them a good scrubbing and you are all set!

Upcycled Valentine’s Day Heart Flower Pots
Equipment
- large eye needle
- scissors
- hot glue gun
- small paintbrush
- emery board
Materials
- thrifted sweater (pinks, reds, with texture)
- 3:- 4" terra cotta pots
- chalk mineral paint
- decoupage paper
- mod podge
- heavy paper-covered floral wire for stems
- floral foam and moss
- embroidery floss
- fiberfill (or sweater scraps for stuffing)
Instructions
- Paint the Pots: Clean the terra cotta pots and apply one coat of chalk mineral paint. Let dry completely.
- Cut the Hearts: Use a template to cut two heart shapes from your thrifted sweater.
- Stitch and Stuff: Use a running stitch with embroidery floss to join the hearts, leaving a 1-inch gap. Lightly stuff with fiberfill or fabric scraps.
- Add the Stem: Insert the floral wire into the heart with a dab of hot glue, then stitch the heart closed.
- Decoupage the Pot: Cut your decoupage paper to fit the pot. Apply with Mod Podge, smoothing out any bubbles. Once dry, sand away excess paper at the rim with an emery board.
- Final Assembly: Place floral foam inside the pot, insert the heart stem, and cover the top with floral moss.
Notes
Recreate and Decorate
Join the Facebook Group and Share Your Projects With Us!


Thanks for joining our journey!
Thanks so much for joining me for this post! Join my journey so you don’t miss any of the fun projects, tutorials, and inspiration that I share with you each week! You can follow me on Instagram, Facebook, and YouTube.


Cindy Rust
Cindy has been decorating her home with thrift store finds for 40 years. She is an avid thrift store shopper who loves to makeover the items she finds into vintage-inspired home decor and furniture. When she isn’t thrift shopping or painting a piece of furniture, you can find her making homemade butter, working in her garden, or painting with watercolors.
click below to purchase supplies!
Visit my Amazon Storefront!
Click the button below and head over to our online shop on Amazon!

Cindy- These are adorable! I love how you mod podged the pots. Happy Galentine’s Day!!
Hope you had a nice Galentines Day too Anna!