
Old TV Cabinet Makeover Reveal (Step-by-Step Tutorial)
A step-by-step tutorial showing you a repurposed old TV cabinet makeover that offers additional storage for your home!
In this DIY tutorial, I will take you step by step through the process of converting an old TV cabinet that you can find at thrift stores and transform it into a useful piece of furniture for your home.
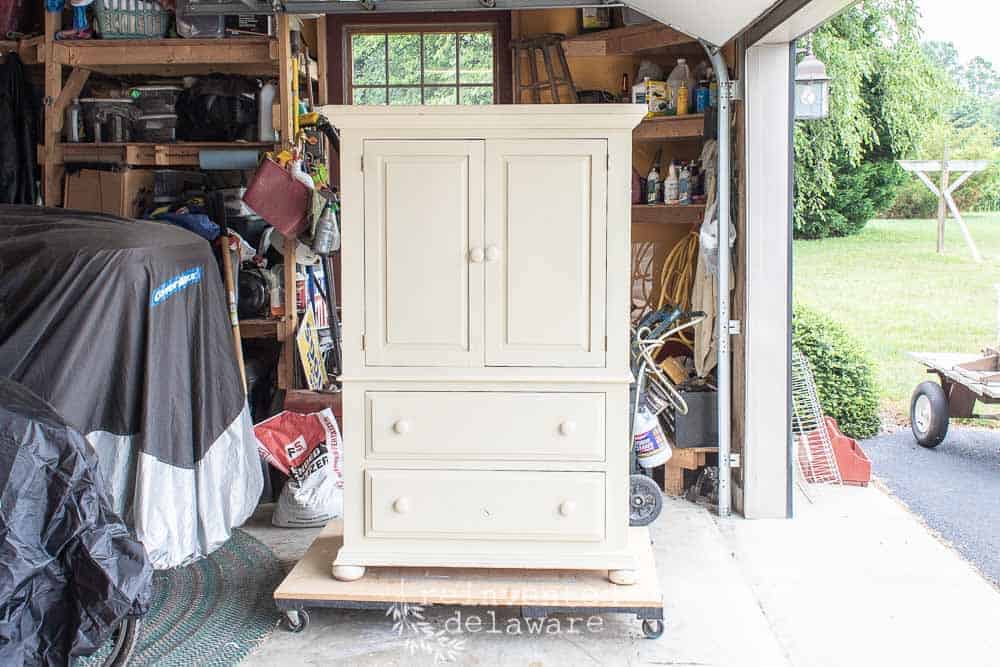
Remember these? Back in the 80’s and 90’s, we used cabinets like this to hide our big, bulky TV sets. So what are we supposed to do with all of those cabinets now that we have flat screens? Save them from the trash heap and try your own old TV cabinet makeover!
upcycled entertainment center
If you have a bulky old entertainment center, give it a new life with a few coats of paint! They’re a great way to get some extra storage in your living room or family room, but many of these old TV armoires need a bit of work. They have that orangey wood tone that was so popular in the 90s.
Fortunately, it’s easy to upcycle a TV cabinet! In this post, I’ll guide you through this process so you can give your repurposed TV cabinet a new purpose.
This project was for a client of ours who found it at a local thrift store. Someone spray painted it very poorly and it needed to be taken down to the raw wood finish. After a busy week of removing the paint on this old TV cabinet and giving it a new look, it is finally done! Keep reading for all the details!
old TV cabinet makeover: step-by-step instructions
Whether you found your piece on Facebook Marketplace or it’s been hiding in a corner of your basement for years, you can give any old TV console a fresh look with a little paint. I’ll show you how to repurpose a TV cabinet every step of the way and even share my DIY chalk paint recipe for a gorgeous transformation.
equipment
There are a variety of tools that will simplify this project for you. You likely already have many of these on hand, and if you don’t, you can easily find them at a hardware store or online. The tools you’ll need will vary depending on the conditioner of your piece.
to scuff up the surface:
- Orbital sander
- 80 & 150 grit sandpaper
to remove old paint:
- Paint scraper
- Heat gun (optional)
- Safety glasses
- Heat-resistant gloves
to refinish your old TV cabinet:
- Paintbrush
- Distressing tools
- Stiff waxing brush
- Buffing tool (I use a piece of upholstery weight batting)
supplies
Once you have your tools and equipment, you really only need a few simple supplies (and a little elbow grease!) I will have a full list of tools and supplies later in the post.
- Primer (I like Zinsser Bin Primer)
- Chalk paint (buy it from the store or make your own with interior paint, calcium carbonate, and hot water)
- Finishing Wax
- Spray primer, paint, and sealer for the hardware or new hardware
1. prepare for painting
If your piece has never been painted or was painted well, your prep will be easy. Scuff the entire piece using your 150-grit sandpaper to give the primer something to hold onto. All you need to do is remove the shine. You do not have to go down to bare wood in this case.
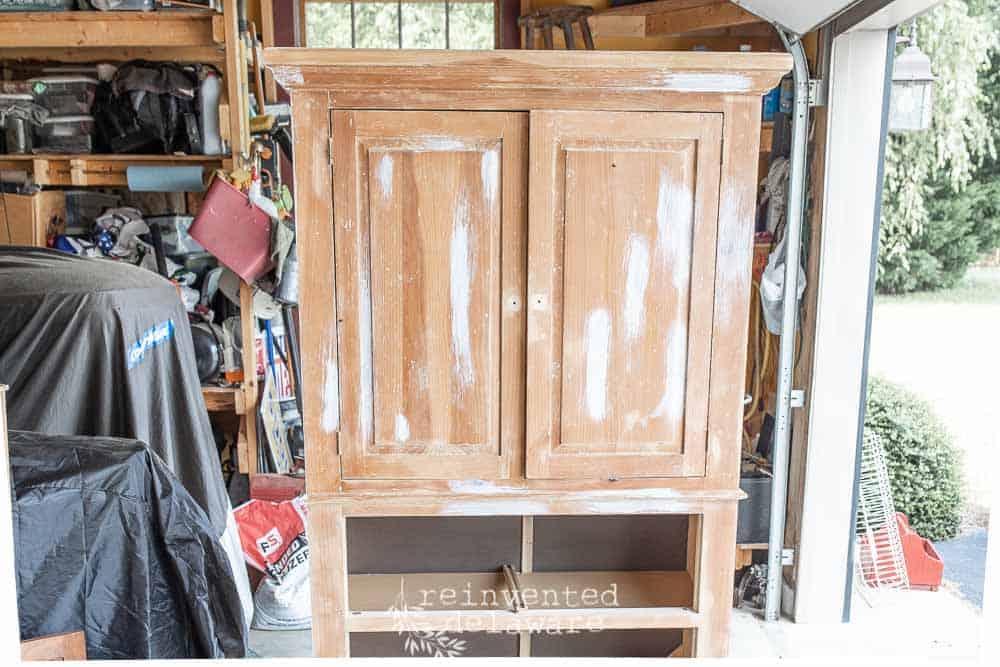
However, if your piece was poorly painted like this one, you’ll want to strip it down to the original wood to get the best finish. Sections of paint were peeling off as I was sanding, so this media console had to be completely stripped down. I knew that a new coat of paint would not adhere to the furniture piece.
I used a paint scraper and a heat gun for this process to speed things up. See my tutorial for this process here.
If there are any nicks or dents, use some wood filler to fill those before you move on to the next step.
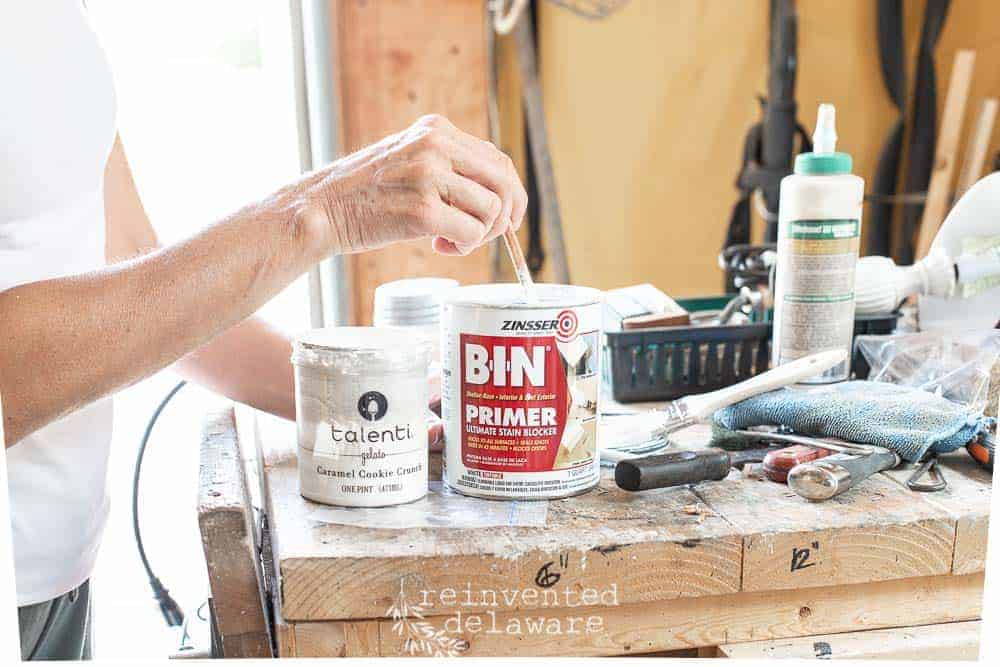
2. prime first!
After stripping off the poor paint job from the previous owner, the piece needed to be primed. Zinsser Bin Primer is a shellac-based primer that is perfect for knotty wood like this cabinet has. A good stir and then I used my Talenti Ice Cream container to hold a small amount of the primer. It is a smaller container and easier to hold. Plus, it’s just another reason to buy the ice cream – I mean I need these small containers, right?? Wink, Wink!
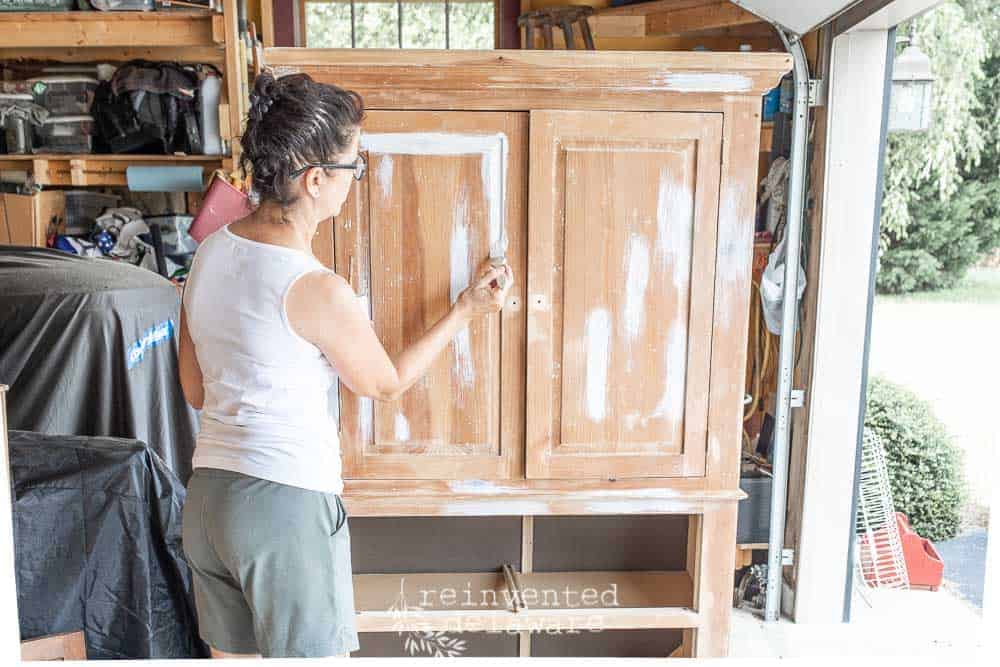
I spot-primed the knots first since those tend to peek through the paint. The primer only takes about 45 minutes to dry, so I was ready for the full coat in no time.
I only used one coat of primer for this repurposed TV cabinet, but if you are covering a dark piece of wood, you may need two coats of primer.
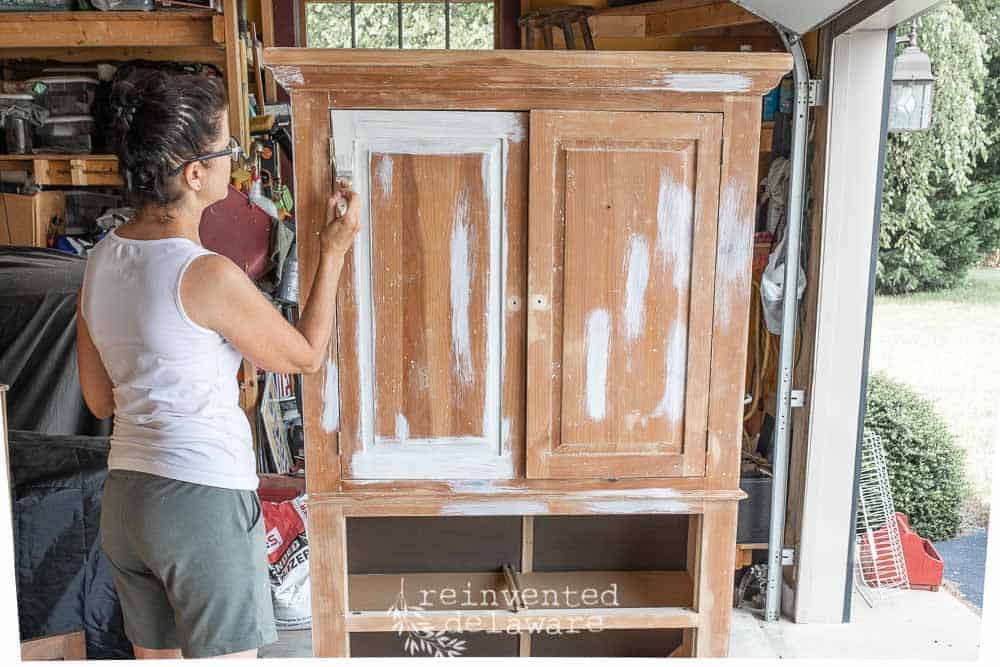
quick furniture painting tip
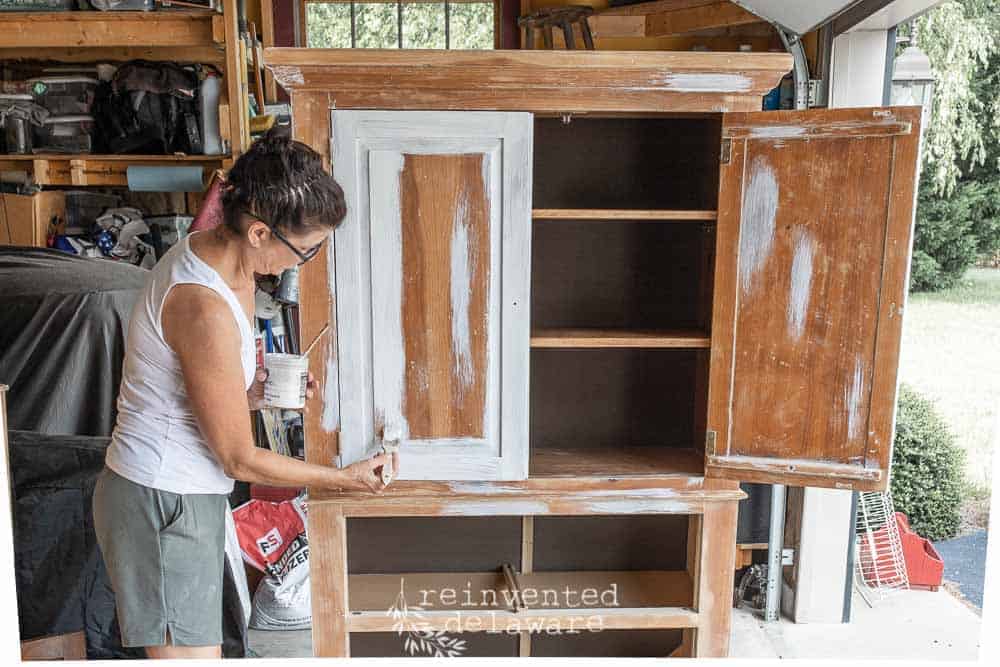
Here’s a quick tip when painting paneled doors on furniture or even on kitchen cabinets: paint the inset sections of the cabinet doors first, going with the grain. Watch the corners and edges so that you don’t get any runs.
When all four insets are painted, paint the four framed sections of the door.
Finally, paint the middle of the paneled door. Be sure to check constantly for any runs on the edges. It is easy to let one slip by 🙂
3. paint the furniture
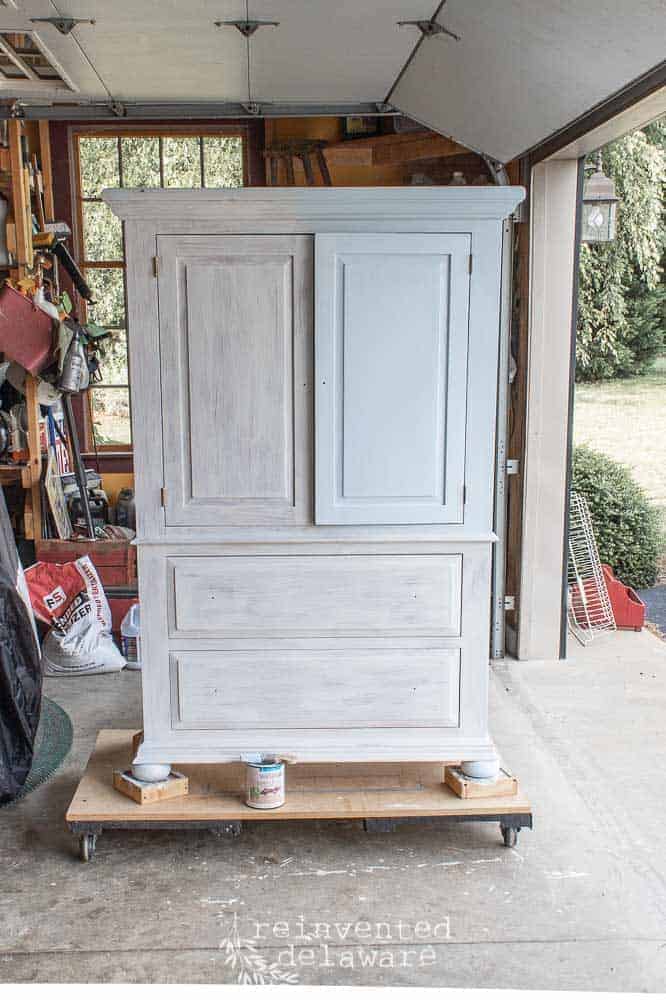
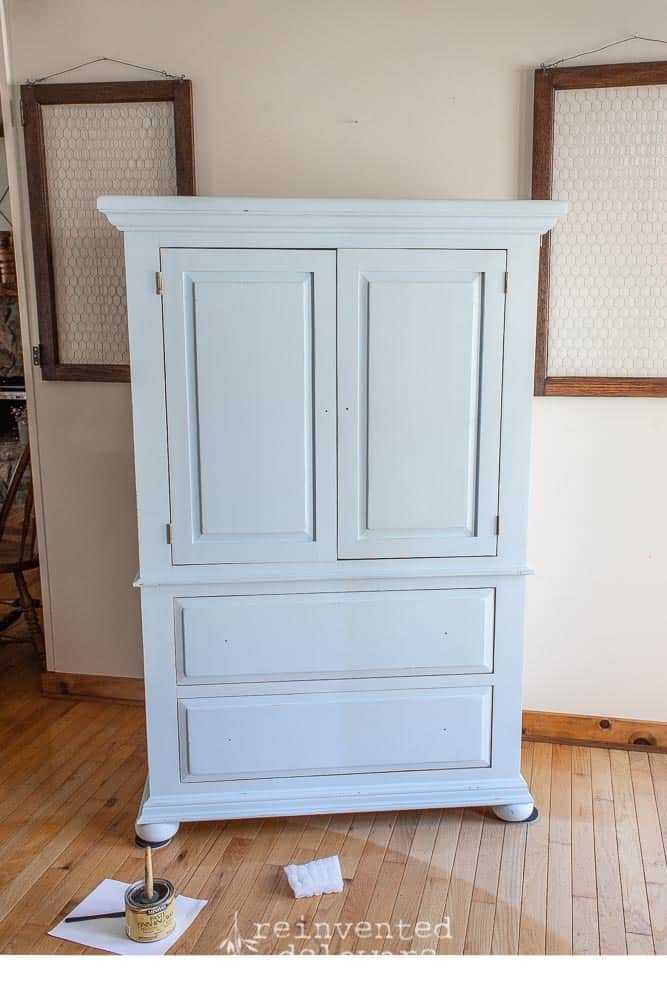
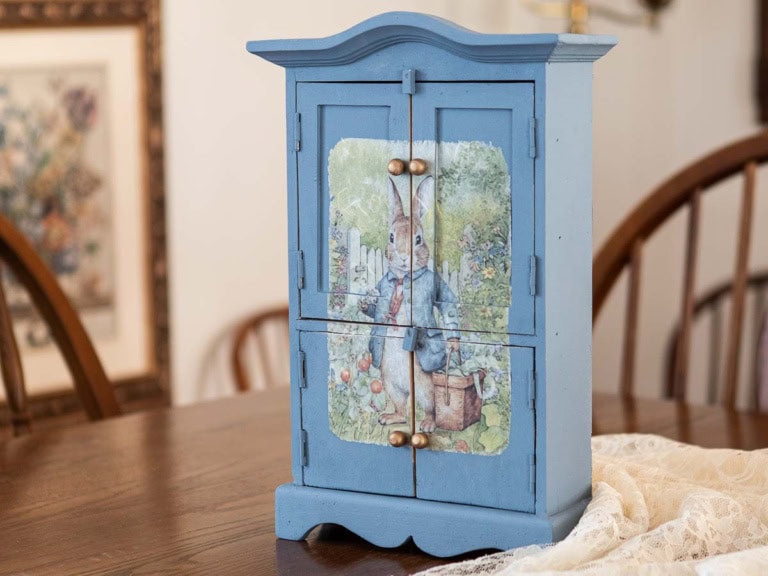
Grab a container of your favorite chalk paint or make your own using my recipe below! Because this client wanted to use this old TV cabinet in her beach house, we wanted to keep it light with a pale blue color scheme. Choose whatever color you like depending on the room this piece will live in. White paint is a classic option for refinishing furniture, but I love adding a subtle pop of color whenever possible.
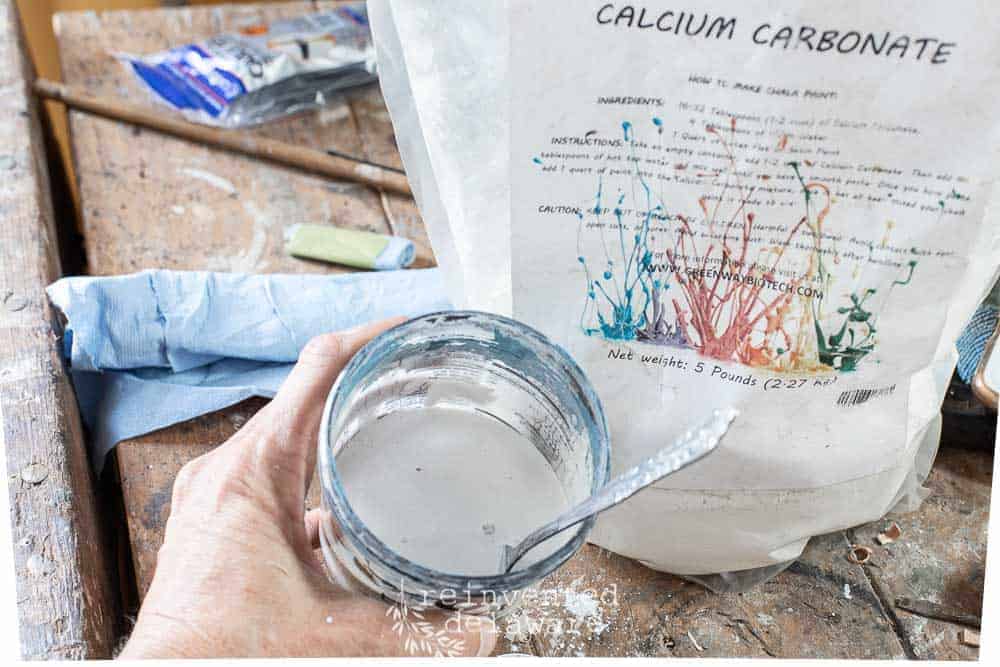
DIY chalk paint recipe
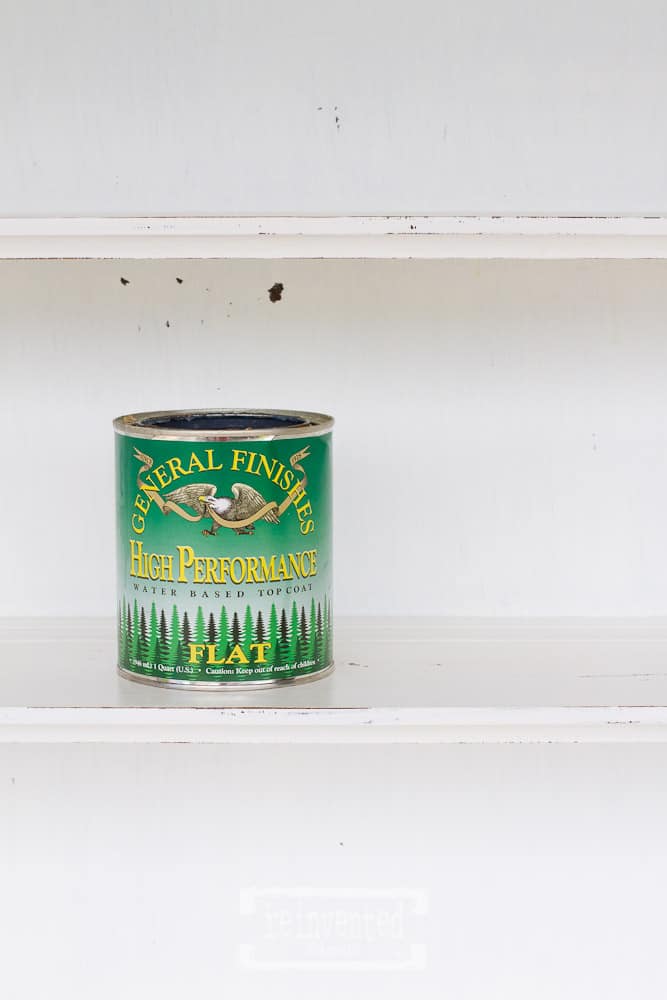
Our client chose to use a custom mix of chalk paint using the Valspar color Blue Mist. I purchased a quart of the paint in a flat finish and mixed the chalk paint myself using this Calcium Carbonate from Amazon. I have used this method of mixing chalk paint in the past and have been very pleased with the results!
The recipe is easy:
- 1-quart flat interior paint
- 1 cup calcium carbonate
- 4-6 tablespoons warm water
Mix the calcium carbonate and warm water in a small container until all the lumps are dissolved and mixed in. Remove some of the paint from the quart can then pour in the calcium carbonate mixture. Mix very well to incorporate the paint with the mixture.
You can use either a regular bristled paintbrush. If you keep scrolling, you’ll see why I use a regular bristle brush instead of a high-density foam roller. It adds so much more character in the end! You can also cut in with a paintbrush and then roll on the paint if you prefer.
Two coats covered the cabinet perfectly. The primer helps the coverage of the paint.
4. distressing, waxing and buffing
A bit of light distressing on the cabinet helps to create a vintage feel to the piece. You can read about the distressing method I used in this post.
Next, I waxed the TV cabinet. I used Johnson Paste Finishing Wax in Natural for this project because I love the aging effect of the wax. It tones the color down just enough that the paint doesn’t look so new.
A stiff waxing brush is helpful to for getting into the nooks and crannies. Be careful not to let the wax build up in the corners. That just looks messy!
I like to buff this finishing wax with a chunk of upholstery weight batting. I know that sounds weird, but it is the perfect amount of texture to buff while being soft enough to polish to a matte luster. It is also easy to hold for arthritic hands 🙂
See what I mean about the finishing wax aging the piece? It’s subtle, but adds just enough vintage goodness to the cabinet!
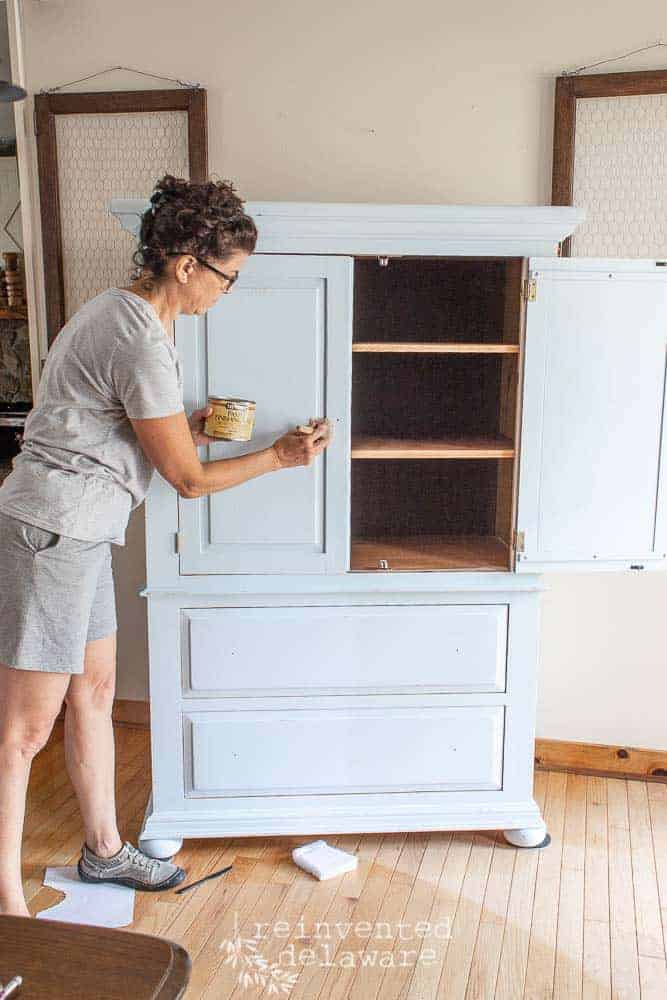

5. add additional shelving
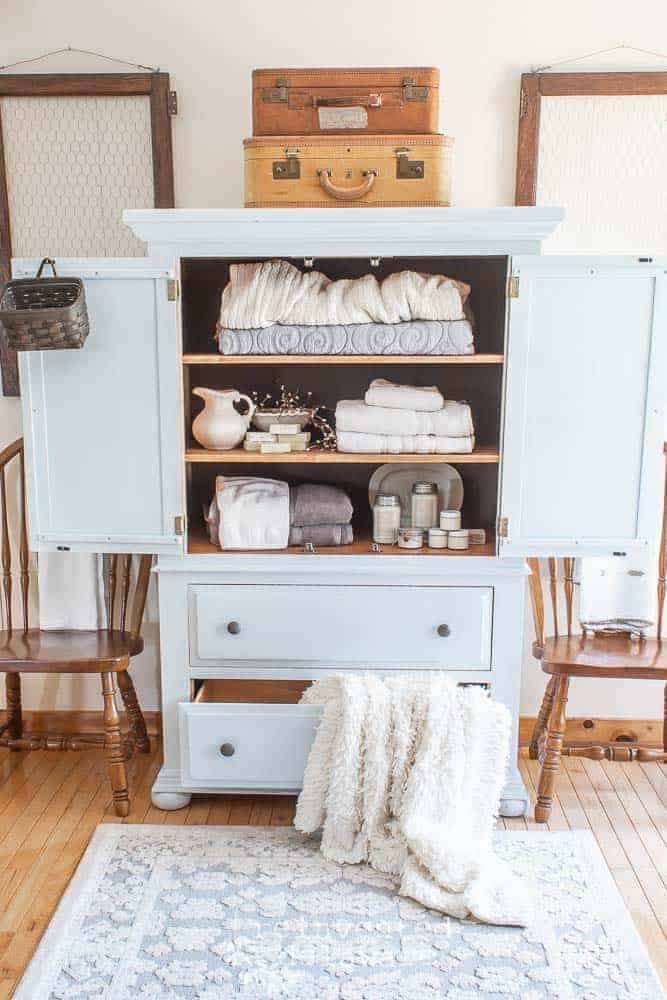
And here she is! Our client needed shelving so hubby took care of that for her. Look at all of the storage this TV cabinet makeover provides!
It would be perfect for holding board games, but they’re honestly pretty enough to style with linens, ironstone, and your favorite bath products for a spa-like experience.
After cutting the shelving to fit, he stained them to match the existing color of the interior of the cabinet. Then he installed them by drilling small holes to accommodate shelf pins. The wood shelves rest on the shelf pins.
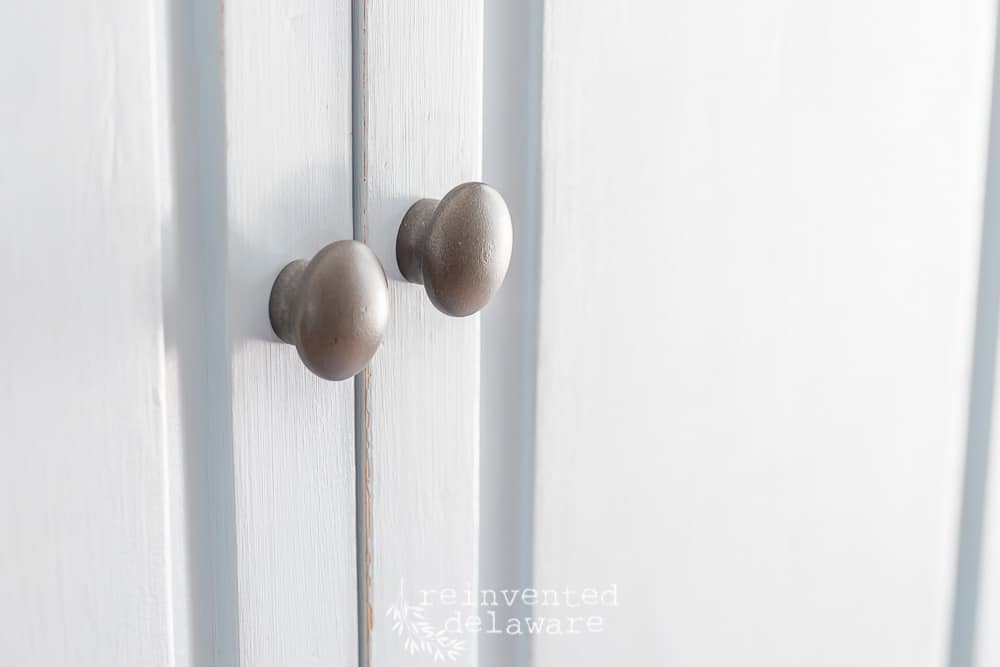
6. spray paint the knobs!
Rustoleum Hammered Spray Paint makes the wooden knobs look like metal. I love this spray paint for so many projects!
I primed them first with Rustoleum Flat Spray Primer in flat black, then two light coats of the Hammered Finish in Dark Bronze. The knobs were finished off with a light coat of clear sealer in a matte finish.
You can always purchase new hardware at Home Depot or your local hardware store if you don’t like your existing knobs. Painting them is surprisingly quick though and you’ll never have to worry about making sure you order the right size!
tips for adding character and texture
Remember the lite distressing I mentioned earlier? It is just enough to add some character to this repurposed TV stand! Also, notice the texture the chalk paint provides!
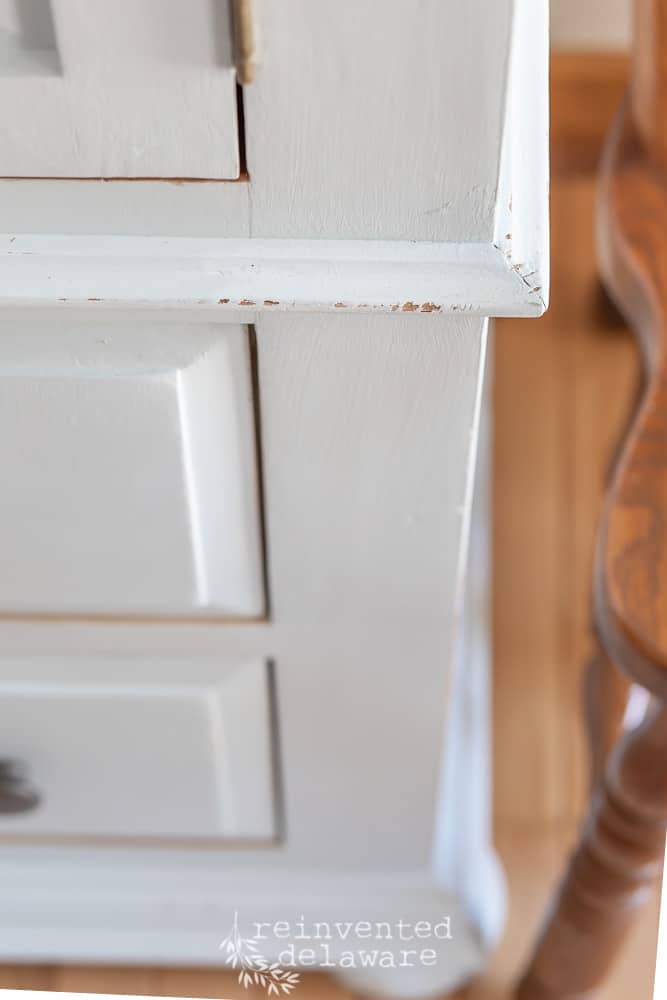
When I painted the cabinet, I painted in one direction for the first coat and the opposite direction for the second coat creating a hatched texture. This helps to add additional character to the piece. The wax settles into the texture creating even more character!
The steps we took to get the finished look for this old TV cabinet makeover are simple and created a whole new look. Amazing isn’t it?? It makes such a big difference and this particular piece looks so expensive and luxurious now. Quite a change for a thrift store cabinet, right? Tell me what color you would paint your old TV cabinet down in the comments! What room would you use this piece in?
thanks for being here!
I hope you are enjoying this project! Let me know if you have any questions. Or leave me a comment to tell me about your project and ideas!
thanks, Cindy 😀

supplies
- orbital sander
- sandpaper
- carbide scraper
- heat gun
- safety glasses
- heat protective gloves
- Zinsser Bin Primer
- synthetic paintbrush
- waxing brush
- chalk paint (so you don’t have to mix your own!)
- calcium carbonate
- furniture wax
- shelf pins
FAQs
Can you paint a TV cabinet?
You can paint almost any piece of furniture! Old TV cabinets make such great furniture makeovers because they are usually easy to update and add so much storage. To repurpose a TV cabinet, you’ll want to start by preparing the surface (either sanding or stripping the wood), then priming it for great paint adhesion and to hide any wood knots or stains. Then, add a coat or two of your favorite chalk paint before finishing the piece off with any distressing, buffing, and waxing. You’ll absolutely love how your old TV stand looks with a fresh coat of paint!
Should I paint the inside of my old TV stand?
The answer depends on your particular piece of furniture. If your cupboard is made from solid wood, you can stain the wood or leave it as is. If your cabinet has particle board, it may look nicer with a coat of paint. This piece had some overspray on the inside, which looked unappealing. I removed that with a little sanding, but you certainly can paint the inside of the cabinet or even add peel-and-stick wallpaper to the back for an extra touch. If you do paint it, take the time to add some primer first so the paint will adhere well.
How can I add shelves to my old TV cabinet?
My husband took care of this part of the process. You’ll need to look for boards that fit the dimensions of your cabinet, as they can be deep. He cut these panels to size using a circular saw and then attached them by drilling holes and adding small shelf holders. This allows you to move the shelves up or down depending on how you want to use the piece.
more ideas for old TV cabinets
Those old TV cabinets are the perfect way to add extra storage space to any room!
- Hold old board games and extra blankets in your family room or basement
- Use them as a linen cabinet to hold sheets and towels
- Display your favorite vintage finds or dishes
- Create a custom cocktail bar or coffee bar in a kitchen
- Make a crafting station to hold your stamping tools, scrapbooking materials, or more
- Add one to your home office to hold your binders, extra paper, and other supplies
- Use them as a dresser to hold baby clothes and supplies in your nursery
before, during and after the makeover
Just for fun, I created this in-process image. It’s amazing what a makeover can do to an old piece of furniture!

thanks for joining our journey!
Thanks for following along on this transformation journey! We would love to share more projects with you! Join our mailing list in the sidebar and don’t miss a makeover!
We would love to chat on Instagram and Facebook! Join us there. Feel free to pin this post to Pinterest for a project transformation of your own!
See you next time!
Visit my Amazon Storefront!
Click the button below and head over to our online shop on Amazon!


Cindy Rust
Cindy has been decorating her home with thrift store finds for 40 years. She is an avid thrift store shopper who loves to makeover the items she finds into vintage-inspired home decor and furniture. When she isn’t thrift shopping or painting a piece of furniture, you can find her making homemade butter, working in her garden, or painting with watercolors.
Old TV Cabinet Makeover Tutorial
Equipment
- orbital sander
- sandpaper
- carbide scraper
- heat gun
- safety glasses
- heat resistant gloves
Materials
- Zinsser BIN Primer
- paintbrushes
- waxing brush
- chalk paint
- calcium carbonate
- furniture wax
- shelf pins
Instructions
- Prep the furniture. Strip off old paint and/or sand as needed.
- Prime the surface with stain-blocking primer.
- Paint 2-3 coats of homemade chalk paint or store-bought chalk paint of your choice.
- Seal paint with furniture wax.
- Add a distressed look for a vintage appearance if desired.
- Add additional shelving to the interior of the TV cabinet using 3/4" plywood and shelf pins.

Such a sweet cabinet! What a great way to repurpose those old TV entertainment pieces ?
Better than throwing them in the trash heap!! Our client had the great idea of adding shelves and I love the storage it provides!
Lovely makeover…and so functional! Cindy, I’m so impressed by your knowledge of the different types of paints, finishes and techniques. Keep posting. Your before & afters are very inspiring.
Omgoodness this just makes my day that you commented!! I have admired your work and your blog for the last several years so this means alot to me!!??
Love this step-by-step photo tutorial…and the crosshatch painting is a new idea for me! Lovely transformation and photos throughout. Your styling is gorgeous, too. 🙂
Awe so sweet of you to say Jaimee! I love using the crosshatching especially with thick paints. It makes the brush strokes purposful?
Hi Cindy! Too many of these TV cabinets go to waste so i am inspired by this makeover. I have never used that kind of cross hatching to create texture. I have always been taught to only paint with the wood grain. I will have to try this technique. Is the was a dark wax or just a thick wax? Thank you for sharing!
Hi Cheryl! I used Johnson Paste Wax in Natural. It adds a slight aged tone to the piece!
This turned out so pretty. Perfect as for storing linens!
Thanks Marie! I think that is what our client is using it for! Great minds😉😉
It turned out so beautiful! I love the color you chose and how you styled it! Thank you for sharing at Charming Homes & Gardens!
And thank you for reading the post! Our client picked out the color for her beach home and I would agree with you, she picked it perfectly!
What a great job! I love the color you picked out! I had 2 of these cabinets in the day, one in the living room and one in the bedroom, both for tv hiding! Wish I would have known then what I know now, You’re one of our features this week at Charming homes and Gardens! Pinned.
Kim, thank you for your kind words about this TV cabinet! We hide TV’s differently now don’t we?? 😊 Thanks for the feature too!! I really appreciate it!
Such a great idea. Thanks for Sharing with us at Charming Homes & Gardens Link Party. Look for your feature on Wednesday’s post.
Thanks Rachel! I look forward to the next Charming Homes & Gardens link party. Thank you for the feature!
This is so beautiful! I love the warm wood tone on the inside contrasting the outside! Your styling of it is perfect too! If you have a minute I would love for you to join us at Embracing Home and Family Link Party! Every Friday!
Thanks Jennifer for your kind words and the invitation!! I will pop over this weekend and check it out!
This looks great Cynthia! I love how you styled it. XO- MaryJo
Thank you MaryJo! I appreciate your kind words 😊
This is a great post, Cindy! Thank you for sharing your great tips! I need to tackle two pieces made out of similar wood so this will be a big help!
Yay! I’m so glad this post was helpful for you Kim! Have a great week 🙂
That is a brilliant idea. Reusing is eco-friendly. I love how the Cabinet has transformed. White is also a lovely and simple color to work with. Please share more similar posts with us.
So glad you enjoyed the post, Jennie! I’ll keep them coming here on my blog! Thank you for stopping by today😊
Before & afters is amazing. Keep track of your post! Thanks for your sharing.
And thank you for stopping by!
It looks so great after you painting it!! Thanks for sharing this tutorial 🙂
So glad you enjoyed the tutorial! Thanks for stopping by 🙂
Wow! The result looks amazing! I never knew it takes so many steps to paint a furniture. Thanks for sharing. I learned a lot from this post!
Thank you! We love to offer step-by-step tutorials on many of our projects! Be sure to sign up with your email so you don’t miss any of them 😊
Love the way this came together, Cindy! The color and the finish you chose are just gorgeous. Honestly, it doesn’t even look like the same piece. It’s been forever since I’ve painted a piece of furniture or been to a thrift store but this makes me want to dive back into the hunt and find something special to make over. Big hugs and great job sweet friend, CoCo
Thanks CoCo! I love to makeover thrift store furniture. I hope you get to makeover one soon! Have a great day my friend!
Cindy – WOW! What a transformation! Who would have thought a tv cupboard from the 90s could look SO good! Thanks for the detailed instructions and for listing the specific products you used. I am inspired to mix my own chalk paint now . . . Pinned!
I’m so glad you are inspired to mix chalk paint! Have funn experimenting!