
Grey Chalk Paint Furniture Makeover Before and After
Revamp your old furniture with a step-by-step grey chalk paint furniture makeover. Witness the stunning before and after transformation!
Welcome to our latest blog post where we dive into the world of DIY furniture makeovers using grey chalk paint. Join me and explore the transformative power of this versatile paint and showcase inspiring before and after projects that will ignite your creativity.
In this post, I will take you step-by-step in choosing the right grey chalk paint color, prepping the furniture piece for paint, adding decorative touches, and getting the results you want for your next furniture makeover!
fun giveaway
I’m excited to tell you that this post is part of an amazing giveaway! Friend, you are going to love the offer I have for you! Read all the way through the post so you don’t miss your chance to win!
The following post may contain affiliate links. That means if you click and then buy something, I will make a small commission at no additional cost to you! Thank you for supporting my blog. full disclosure here.
This post is sponsored by Dixie Belle. All opinions are my own!
choosing the right brand of chalk paint
Chalk paint is a popular paint because it is so easy to use for furniture makeovers. It’s one of my favorite choices when giving a piece of furniture a fresh look. I’m sure you will love it too!
Dixie Belle vs. different brands
There are several brands of chalk paint on the market. One of my favorite brands is Dixie Belle. They offer gorgeous colors and they even offer an online custom color mixer if you can’t find the exact color you want!
Dixie Belle has a line of paint called Silk. It has a built-in primer and sealer with each color. This makes the paint easy to use and beautiful to look at! Not all chalk paints on the market have these qualities.
color selection for your furniture makeover
Choosing a color can be so much fun. It can also be a difficult decision. To help you make your choice, I suggest you decide on the room that your furniture pieces will live in. Look at the existing colors in the room. The curtains, the rug or carpet, the wall color, or other decor pieces you have in the room will help to guide you toward a color. Choose colors that will coordinate with or complement your existing colors.
As a DIY blogger and one who used to sell pieces of furniture, I usually choose a neutral color like gray, white, black or navy. Neutrals will go with any decor. Gray colors will give a whole new look to a piece of furniture without going wild!
If you enjoy a punch of color, check out the new line of Silk Paint colors Dixie Belle has to offer! It’s called the National Park Collection. The colors are amazing!
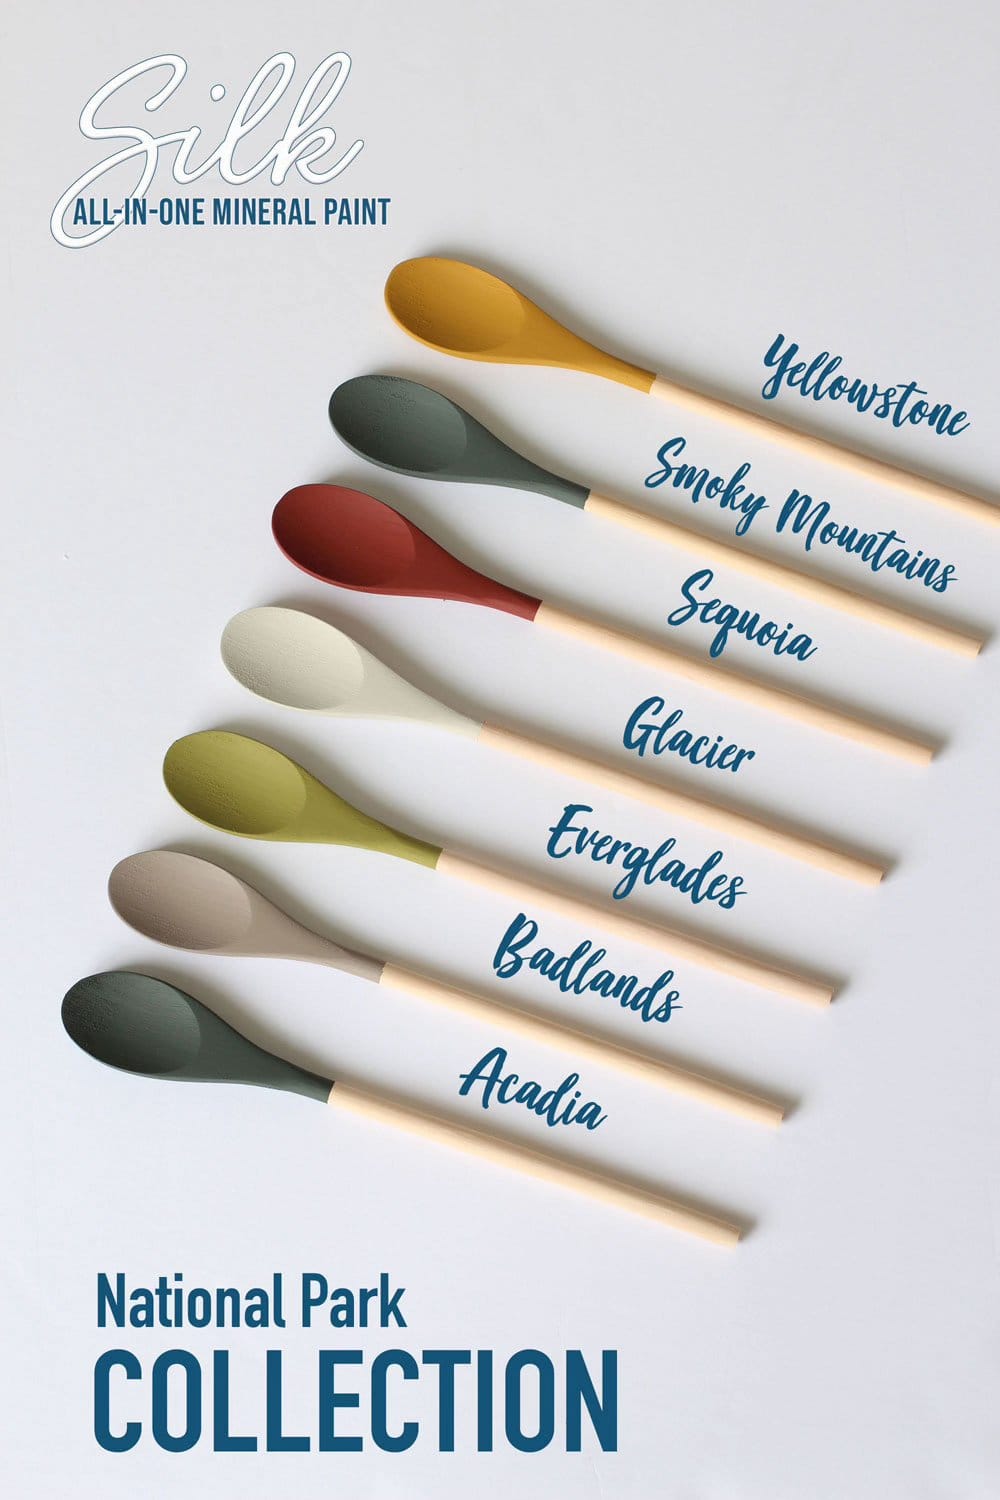
Here is a selection of grey chalk paint colors that are available in the Silk Mineral Chalk Paint line. Some have hints of color like blue or tan. They are all so gorgeous!
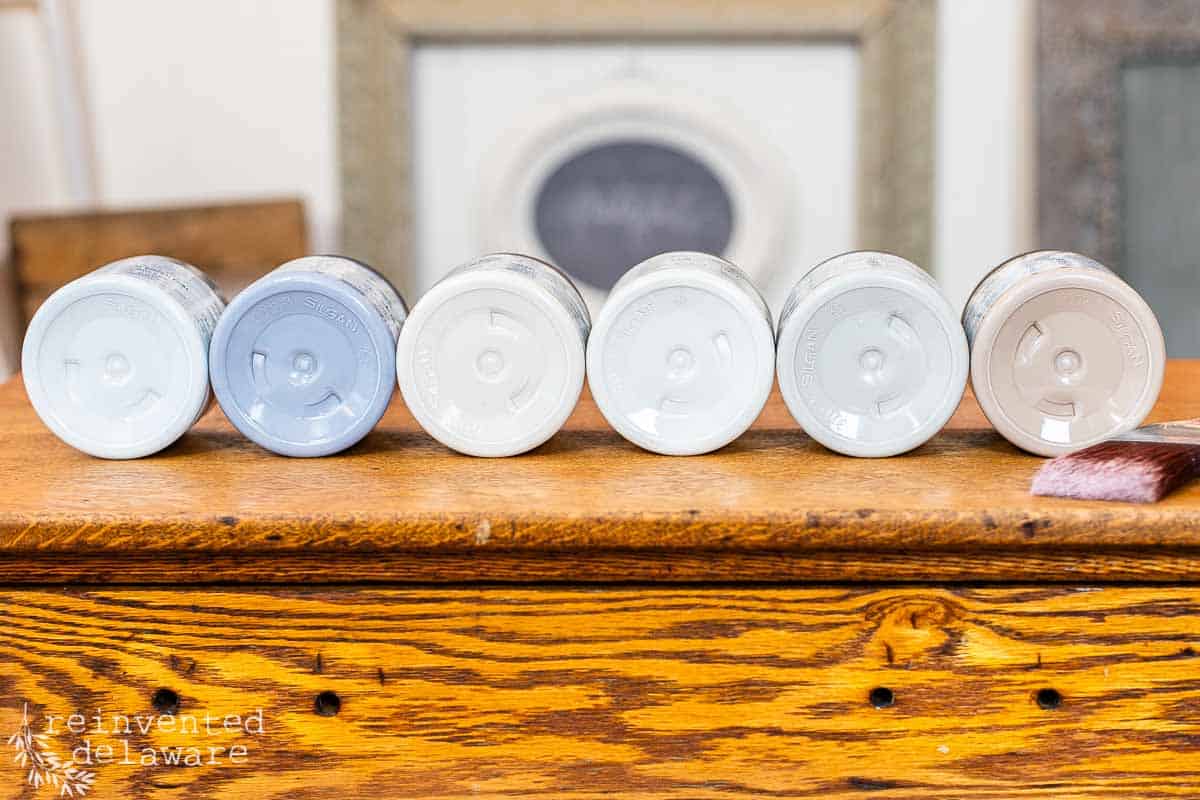
Here are the Silk Mineral Chalk Paint grey color names from left to right:
- Bay Breeze ~ soft, blue nautical tone with gray undertones
- Quiet Cove ~ medium blue-grey color
- Glacier ~ soft white with cool gray undertones
- Oyster ~ stunning light gray almost white
- Baja Gray ~ light to medium gray works well with other colors
- Badlands ~ light to medium warm gray tone
prep work for chalky paint
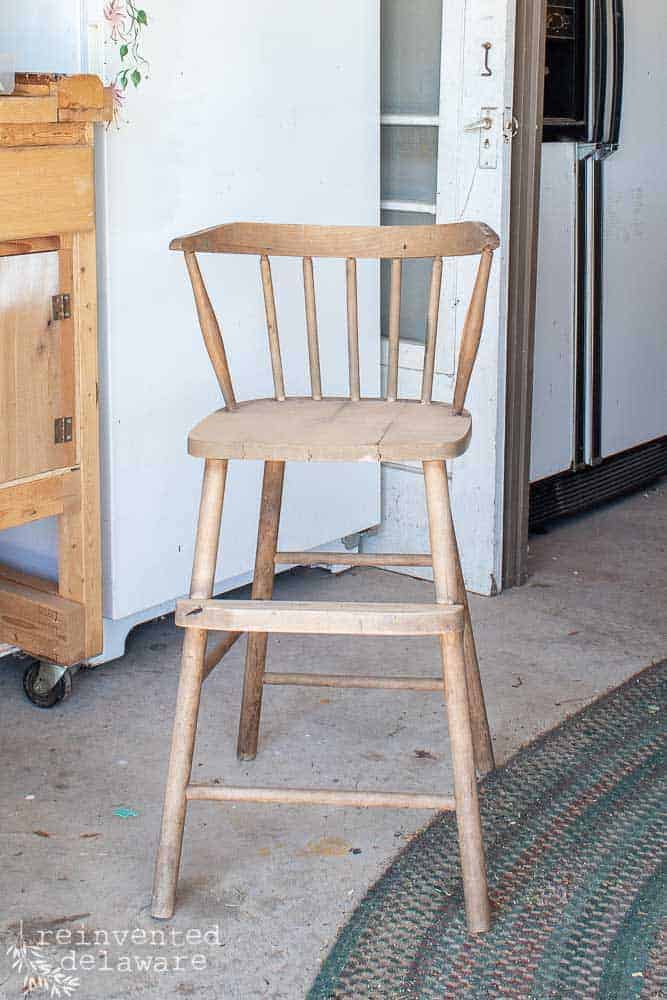
The first step to any furniture makeover is to clean it. It’s the most important step to ensure the paint will adhere to the surface properly.
BTW, you will notice that I do not use drop cloths for my furniture makeovers. They tend to bunch up as I move around. Instead, I use large boxes I got from Walmart. I flattened them and put them under the piece of furniture. When I am finished, the flat cardboard tucks away under a bed or behind a dresser out of sight!

cleaning and sanding
Every piece of furniture that I buy at the thrift store to makeover gets a good vacuuming with my shop vac. I don’t want any visitors coming into our home!
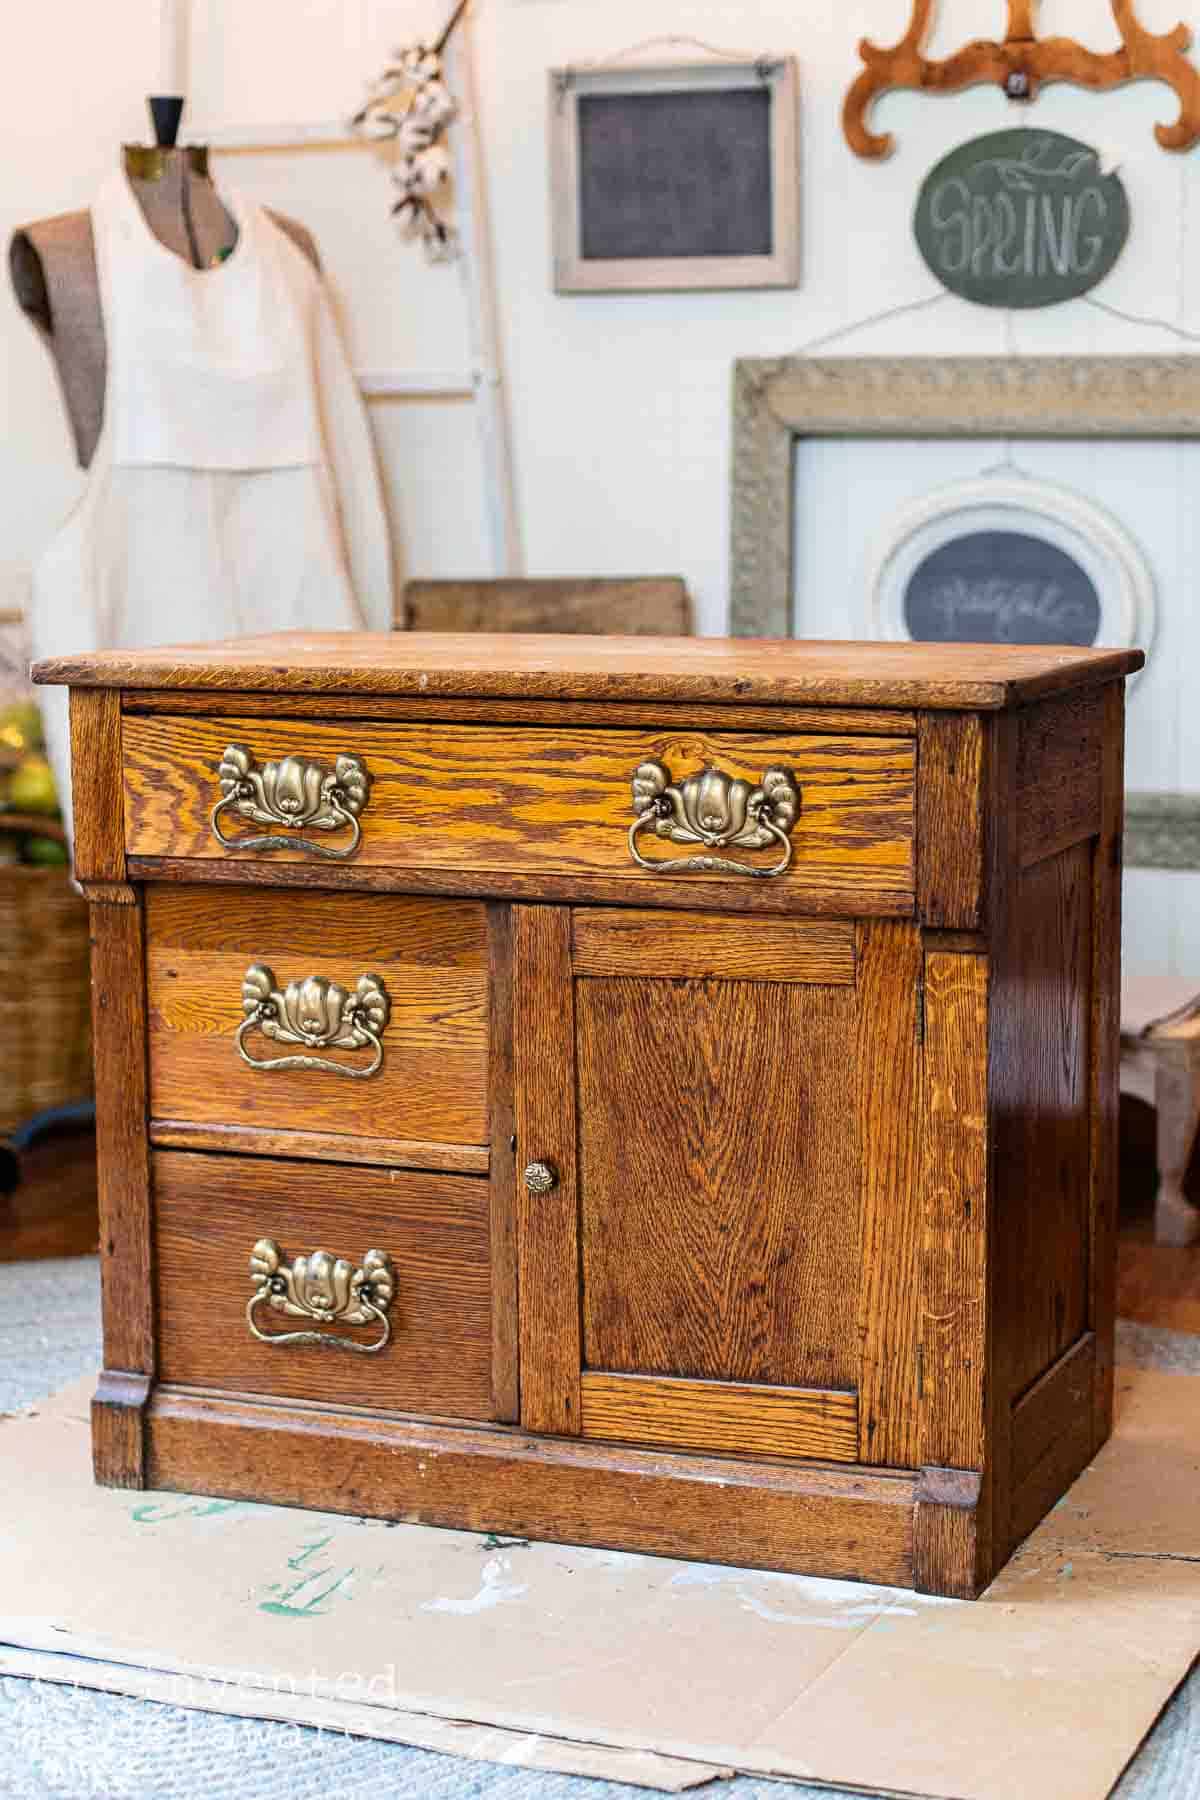
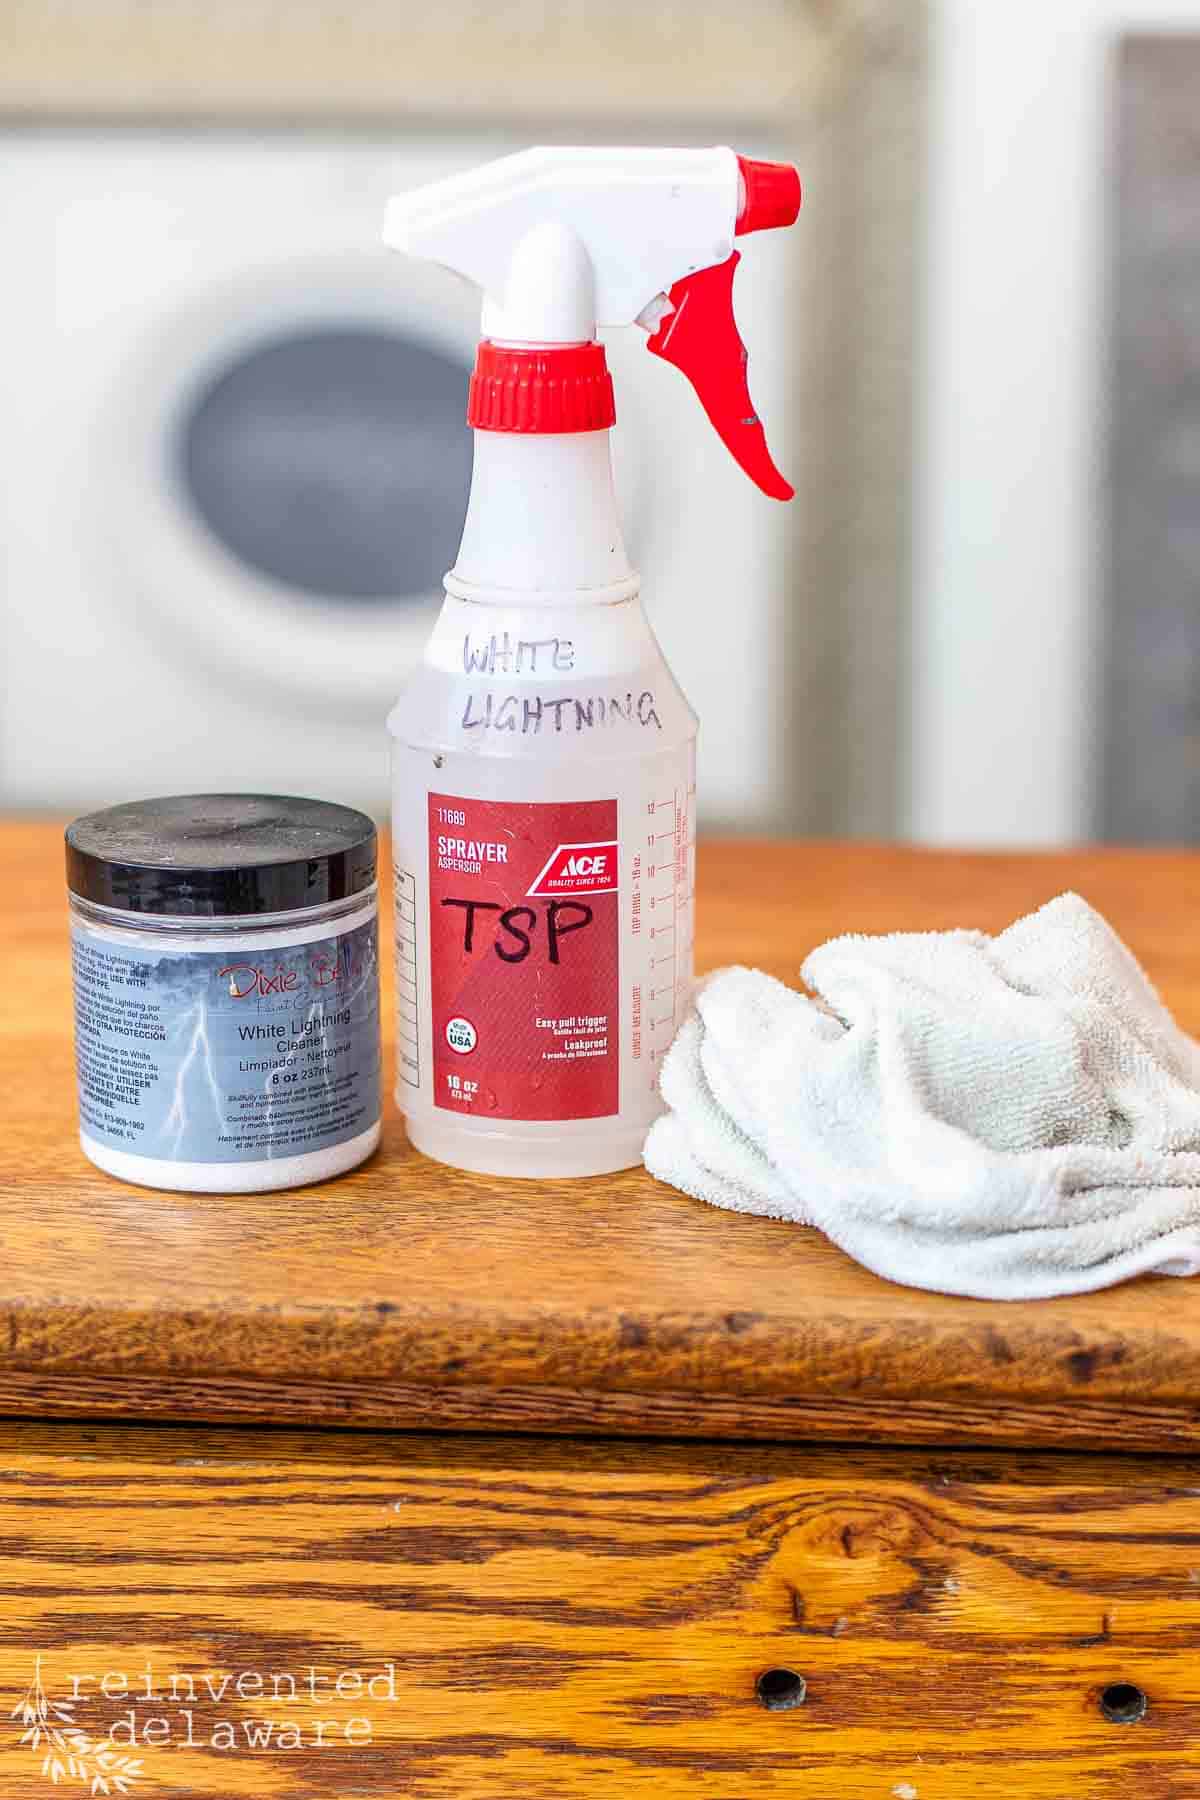
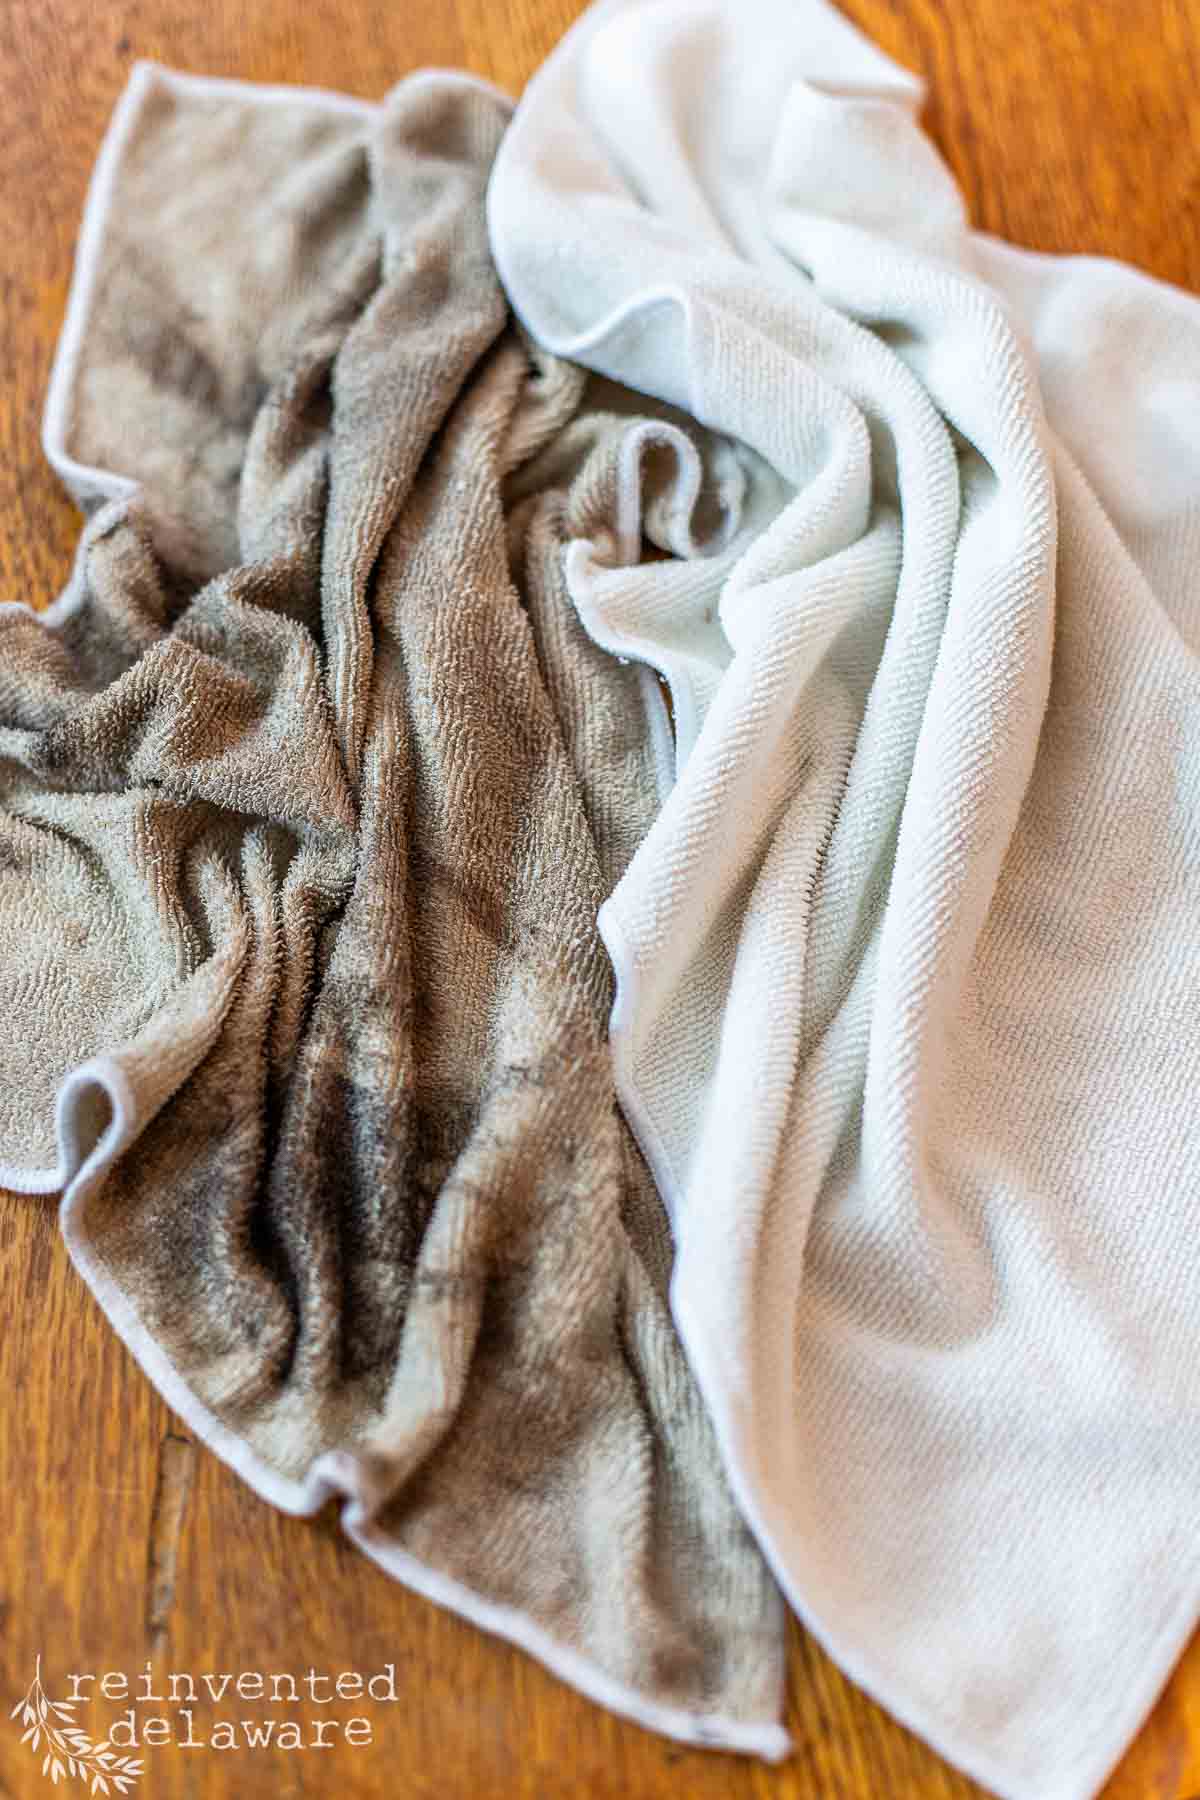
After vacuuming, I like to use White Lightening TSP Alternative to clean my furniture makeover pieces. First, I mixed it up according to the directions with warm water, put it in a spray bottle, and sprayed the solution on the wood. Then I used a damp microfiber cloth to wipe the whole piece down. I did this several times because the antique washstand was pretty dirty! You can see the evidence of that on the cloths!
Once I was finished removing the grime, I grabbed a clean damp cloth and wiped the entire piece to remove any TSP residue.
filling in gaps and scratches
The next step is to look for any deep scratches or gaps in the wood that you might want to fill. For most of my pieces, I prefer the imperfections to show. It’s a way to tell the story of an antique piece.
If you want to fill those places, this is the time to do it. Choose a high-quality wood filler and fill the areas with a putty knife. Allow the wood filler to dry completely then sand the surface smooth.
You might have to apply more than one coat of the wood filler. Dixie Belle Mudd is a great product to use because it doesn’t take a long time to dry and is easy to clean up with soap and water. Do not clean it up in the sink! It dries to a hard consistency that you do not want in your drains!
At this point, you may have to give a light sand to the entire piece. Use a fine-grit sanding block to scuff the surface. Then wipe back the dust with a dry microfiber cloth. You can also give it another vacuuming to get the dust in the crevices and corners.
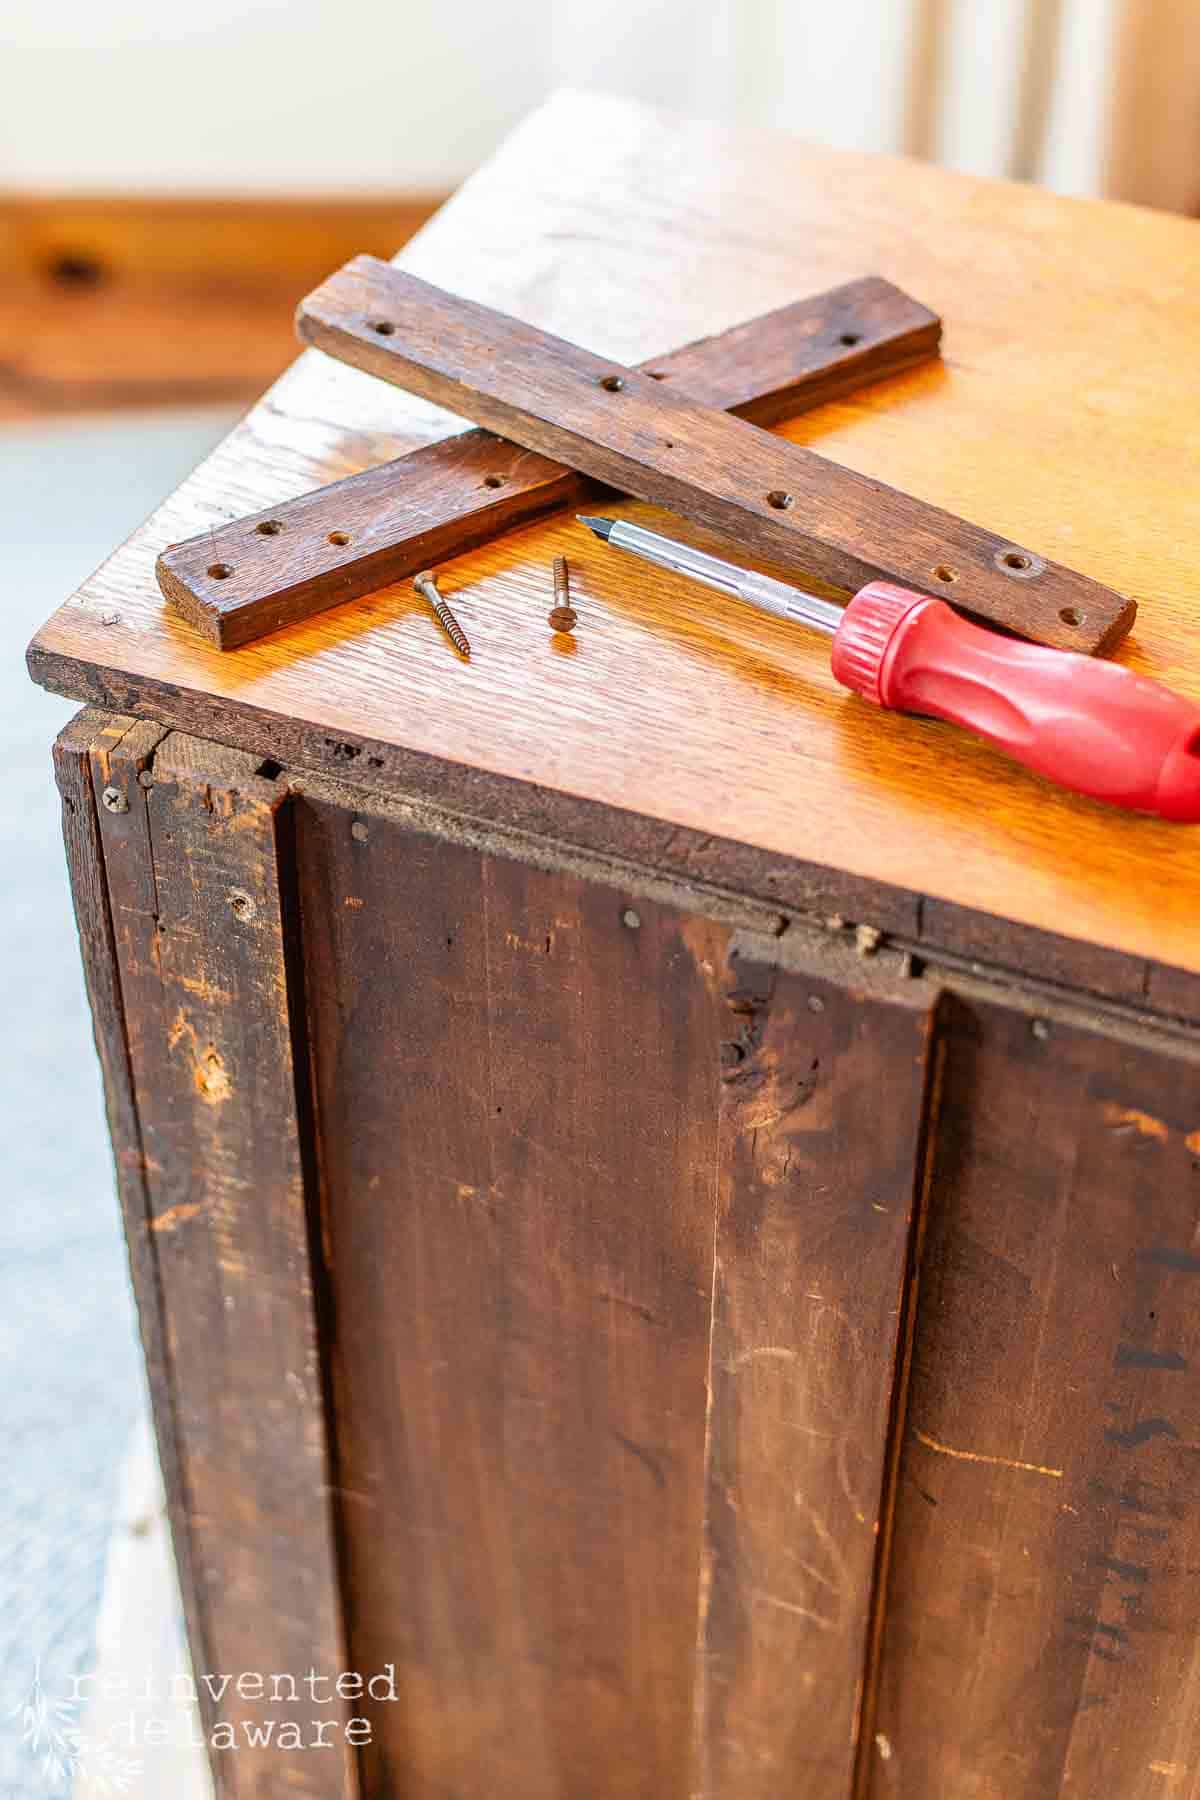
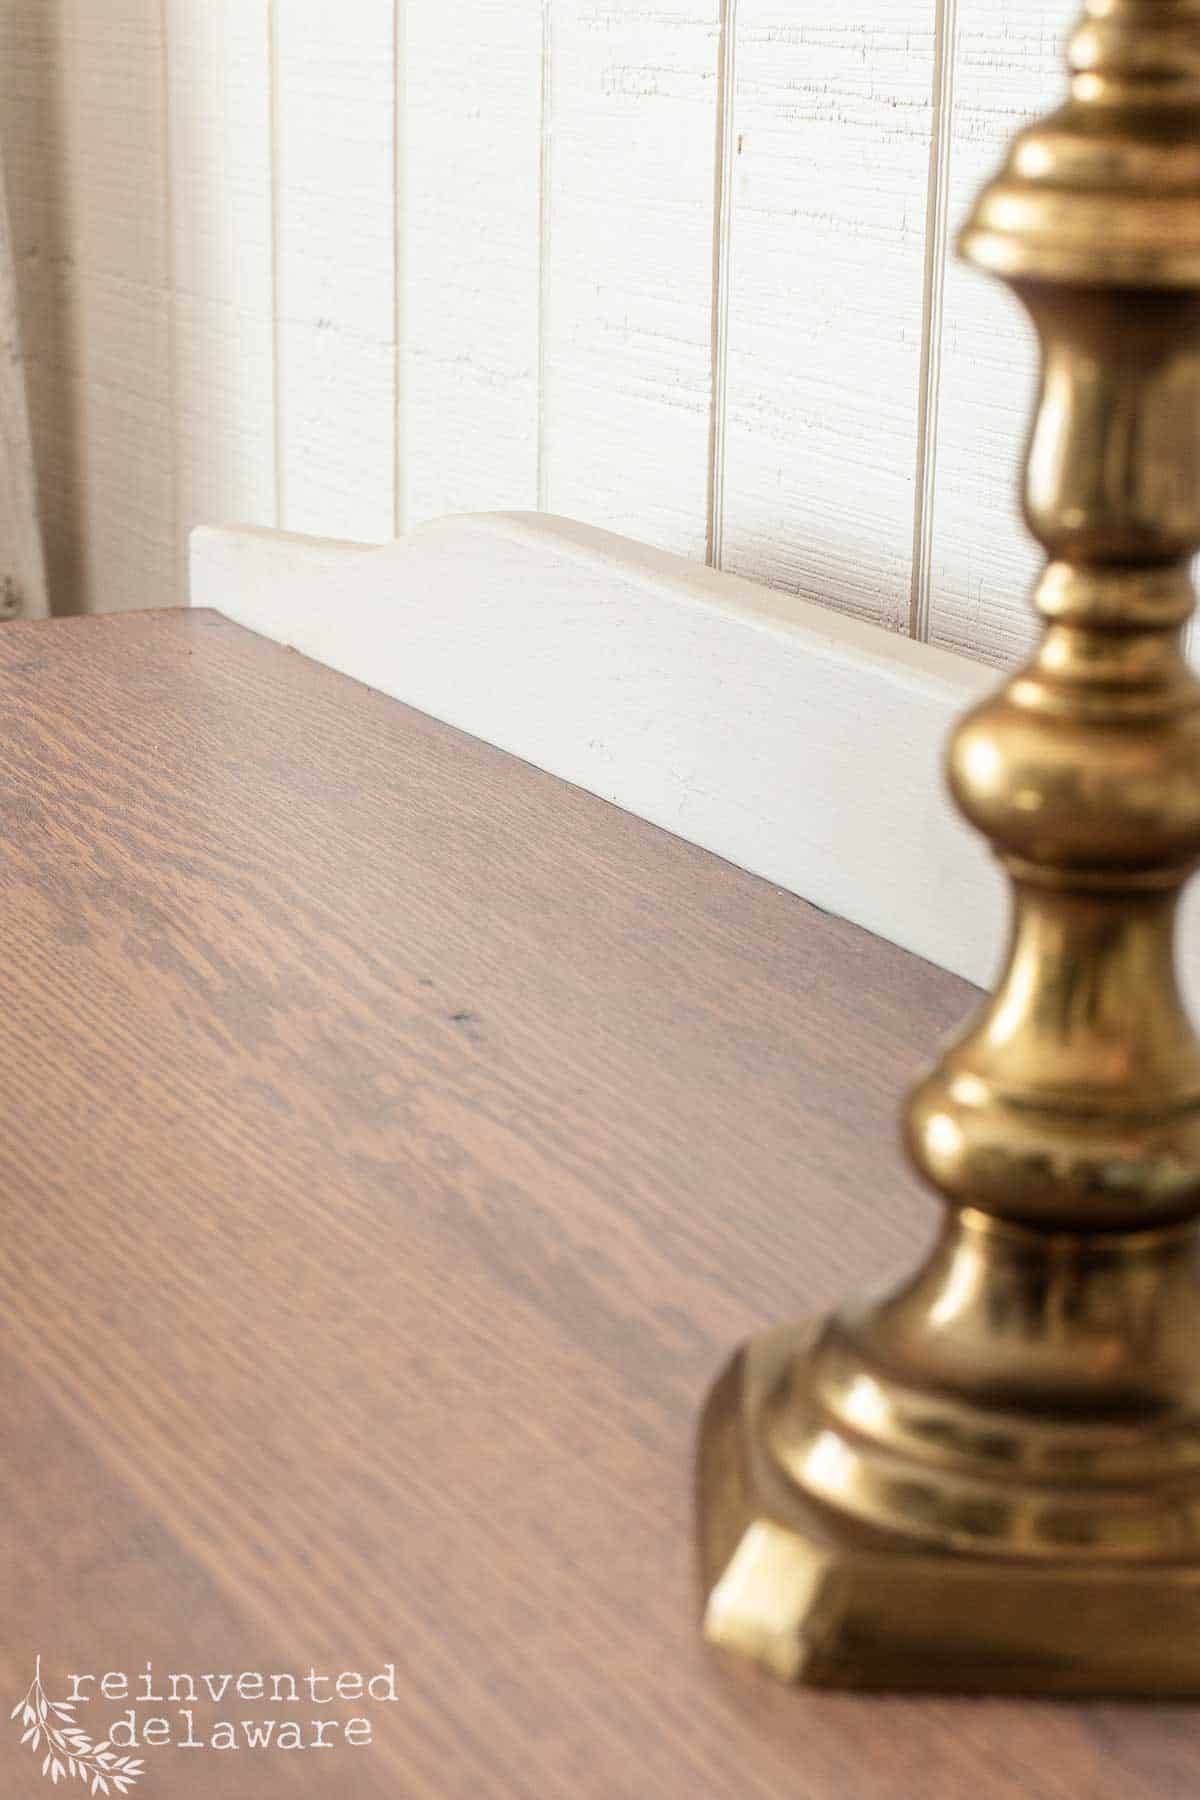
I also removed the wood brackets on the back of the washstand. Those brackets would have held the washstand harp in place. This washstand is missing the harp so I didn’t need them. You’ll see later in this post how we solved the gap that the missing harp created.
thanks for being here!
I hope you are enjoying this project! Let me know if you have any questions. Or leave me a comment to tell me about your project and ideas!
thanks, Cindy 😀

the painting process
Do you love to paint furniture? I bet you do since you are reading this post! Painting furniture is one of my favorite things to do. The difference you can make to an outdated piece of furniture is amazing.
I love oak furniture but I do not like the orange tone it can have. Let me show you how easy it is to change that!
paint-on primer
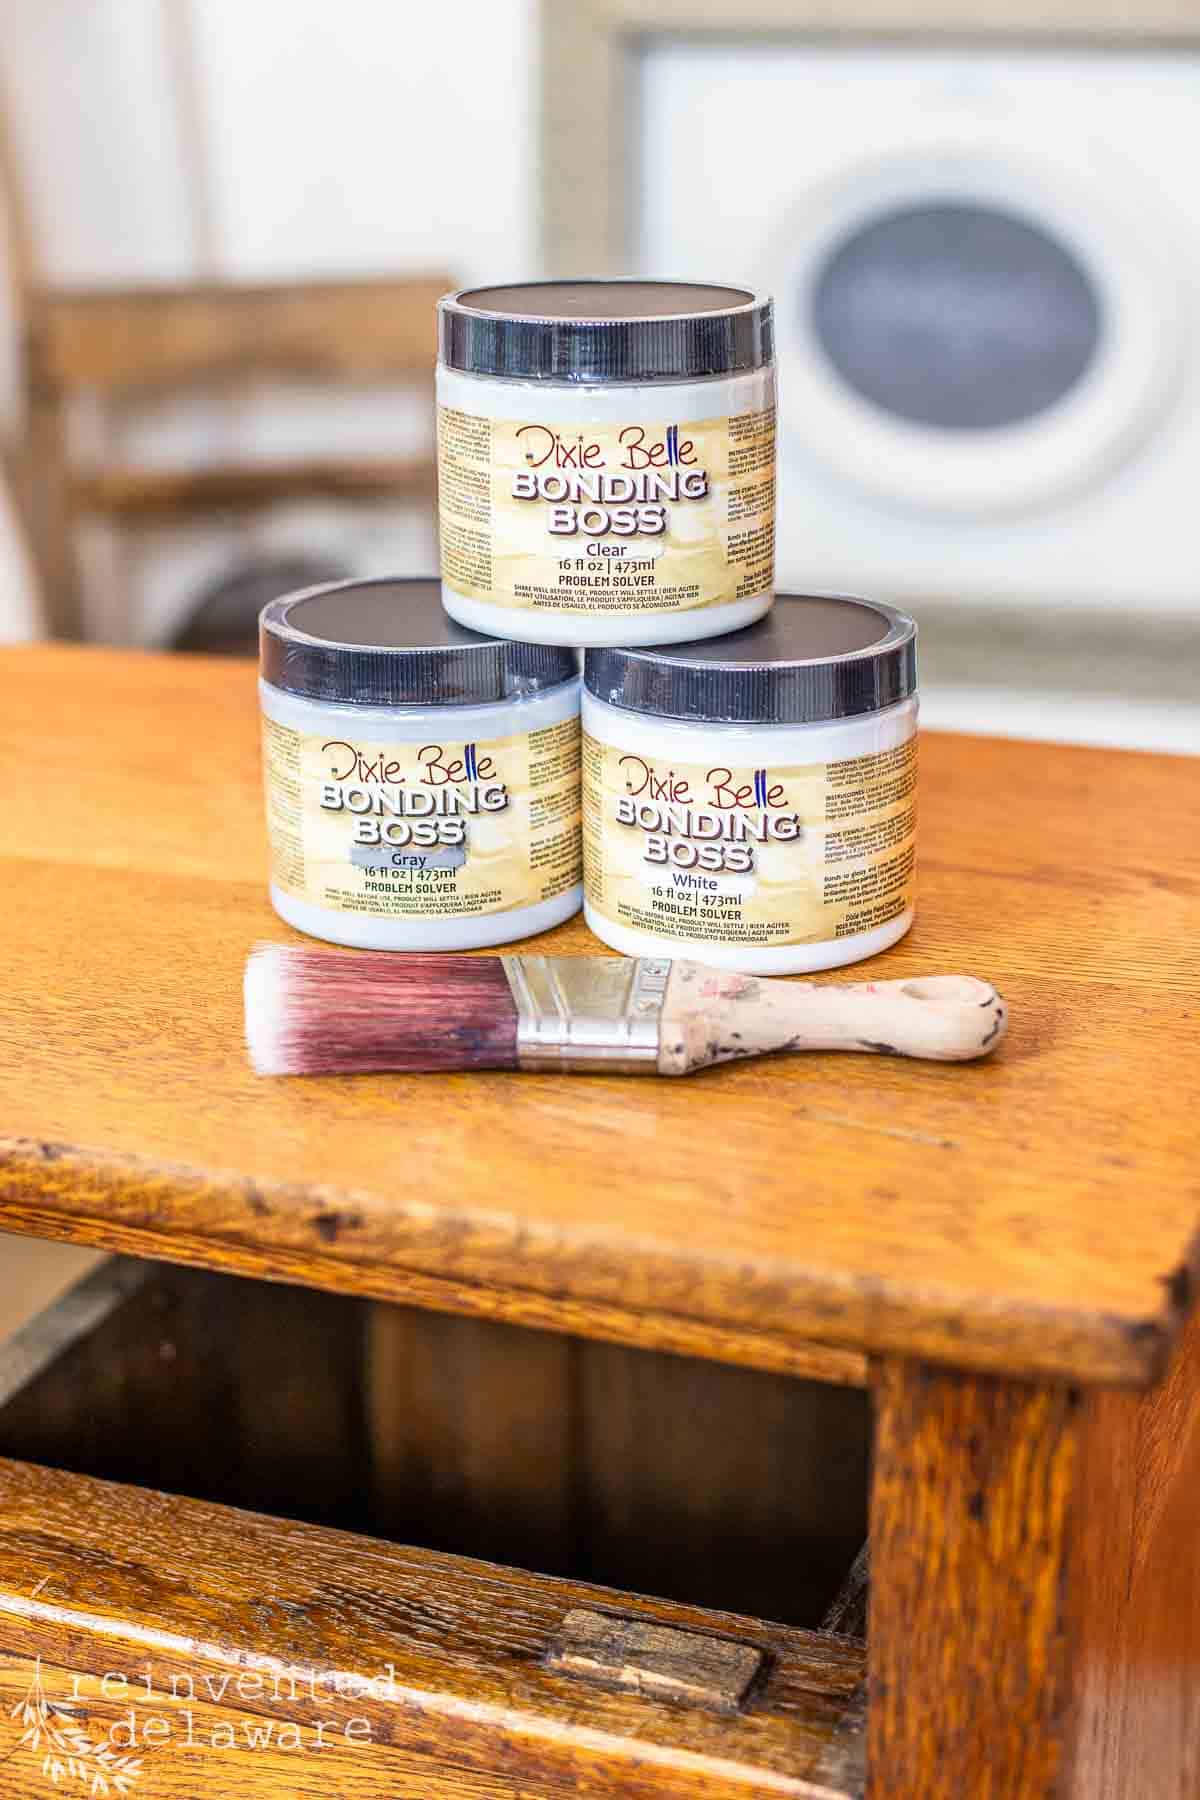
Depending on the sheen that your furniture pieces have, you may have to apply a primer. I wanted to ensure my paint would adhere because this piece had a bit of shine to it. I used Bonding Boss in Clear. This primer also comes in White and Gray.
This amazing primer will block bleed-through that can ruin a furniture makeover. I applied two coats of primer to this washstand allowing it to dry for four hours between coats. This is an important step to prevent the naturally occurring wood tannins from coming through the light-color paint I have chosen.
Clear Bonding Boss goes on whitish and dries clear.

applying the first coat of paint
After all of that prep work, let’s paint this gorgeous little piece of furniture! Oh goodness, can you tell I love washstands?? Haha!
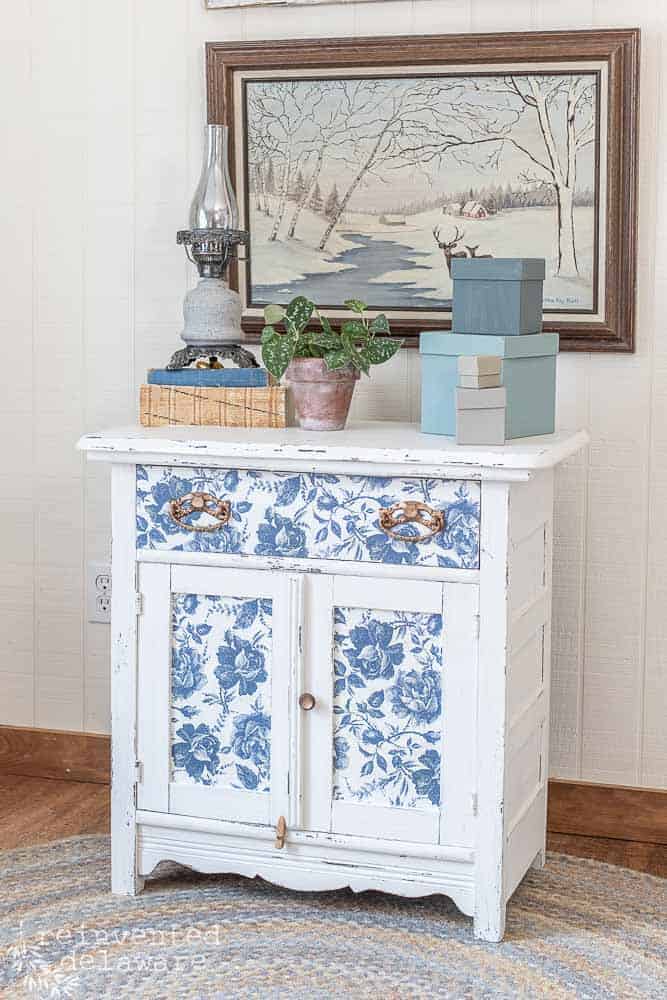
I’m using Silk All in One Mineral Chalk paint in the color Glacier. It’s a soft grey that will look amazing with the special detail I want to add to this washstand.
I applied the first coat of chalk paint using a synthetic brush. I painted in the direction of the wood grain making sure I didn’t have any runs.
Silk Paint is self-leveling so you won’t have to worry about brush strokes. Don’t overwork the paint. Apply it evenly and allow it to dry.

adding a second coat for best results
It usually takes 2-3 coats of chalk paint to cover oak wood so I add a second coat of paint. Since Silk Paint contains a primer, I didn’t need to add a third coat of paint. I applied both coats of paint to the frame of the washstand and not to each dresser drawer or top. I have something else planned for those! Can you guess?
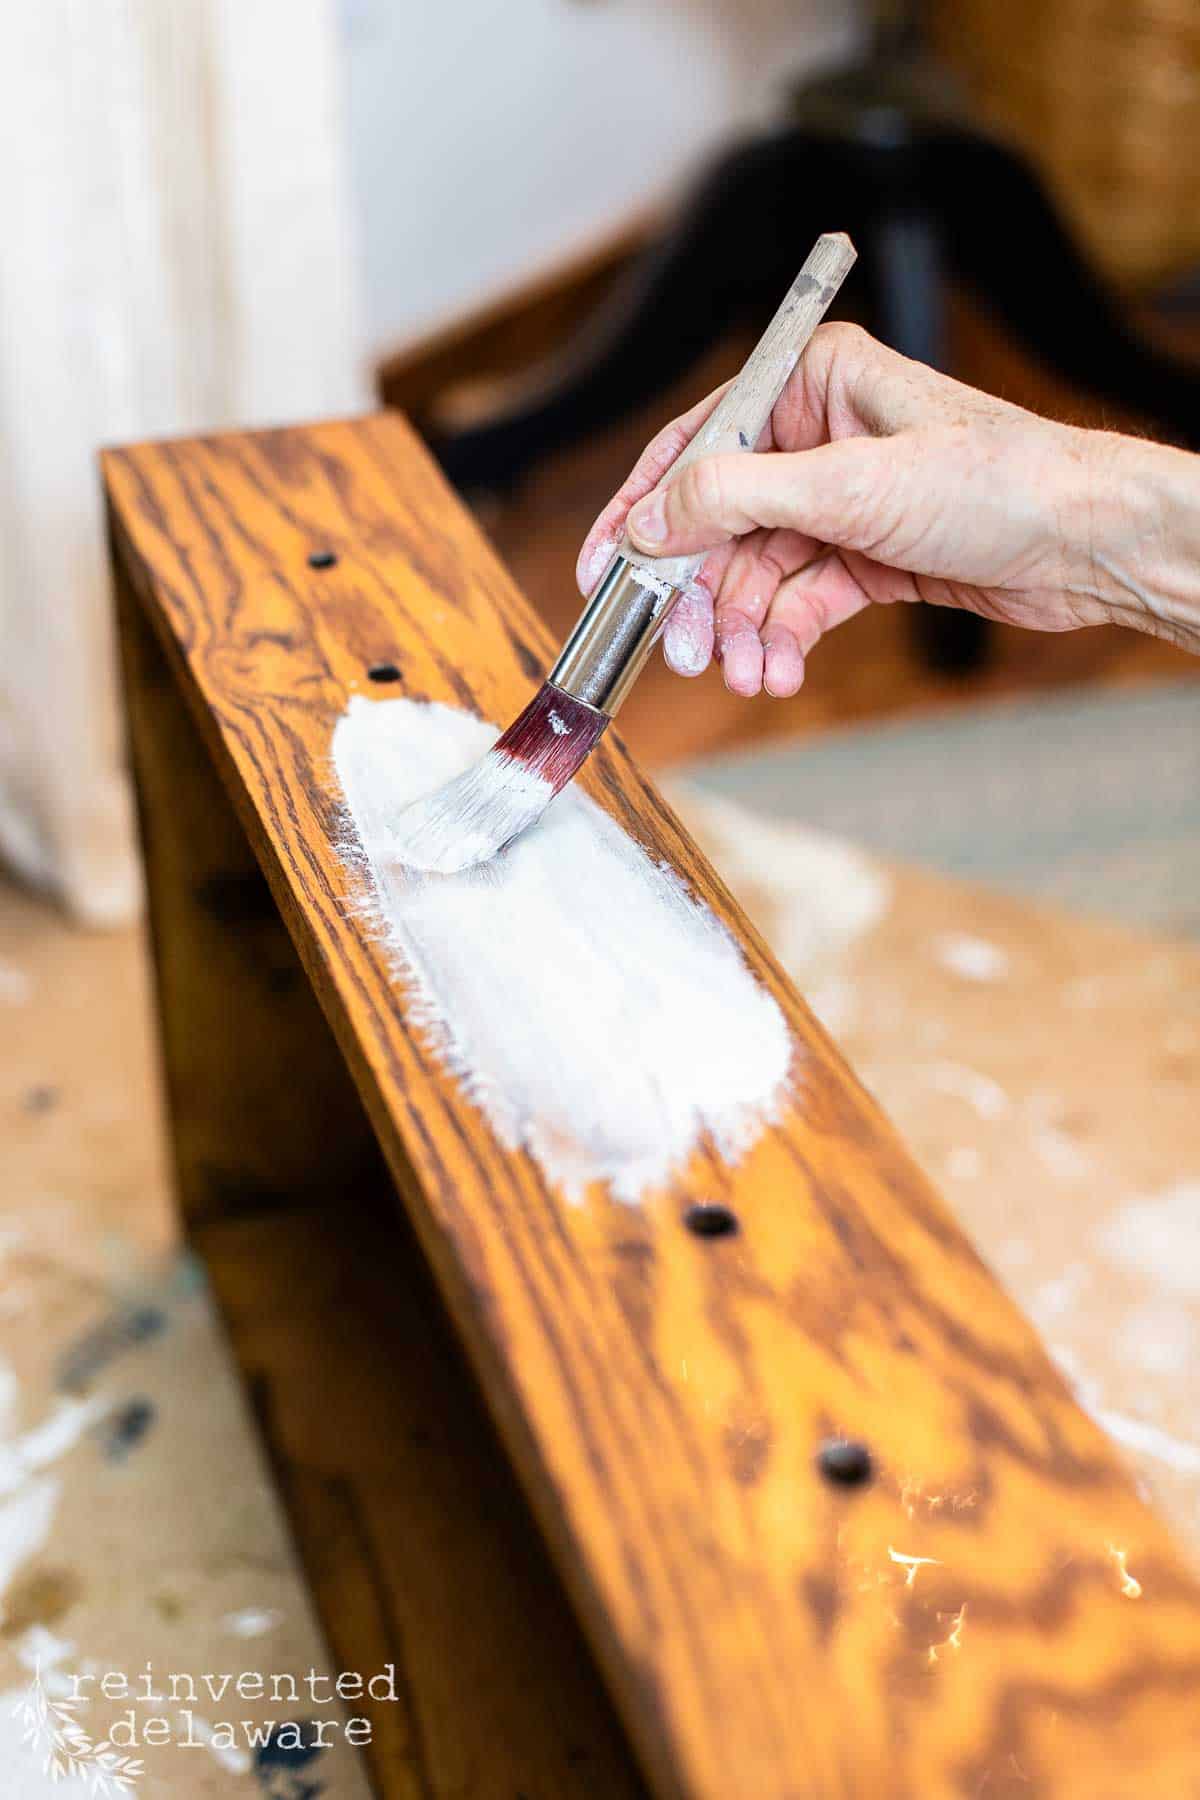
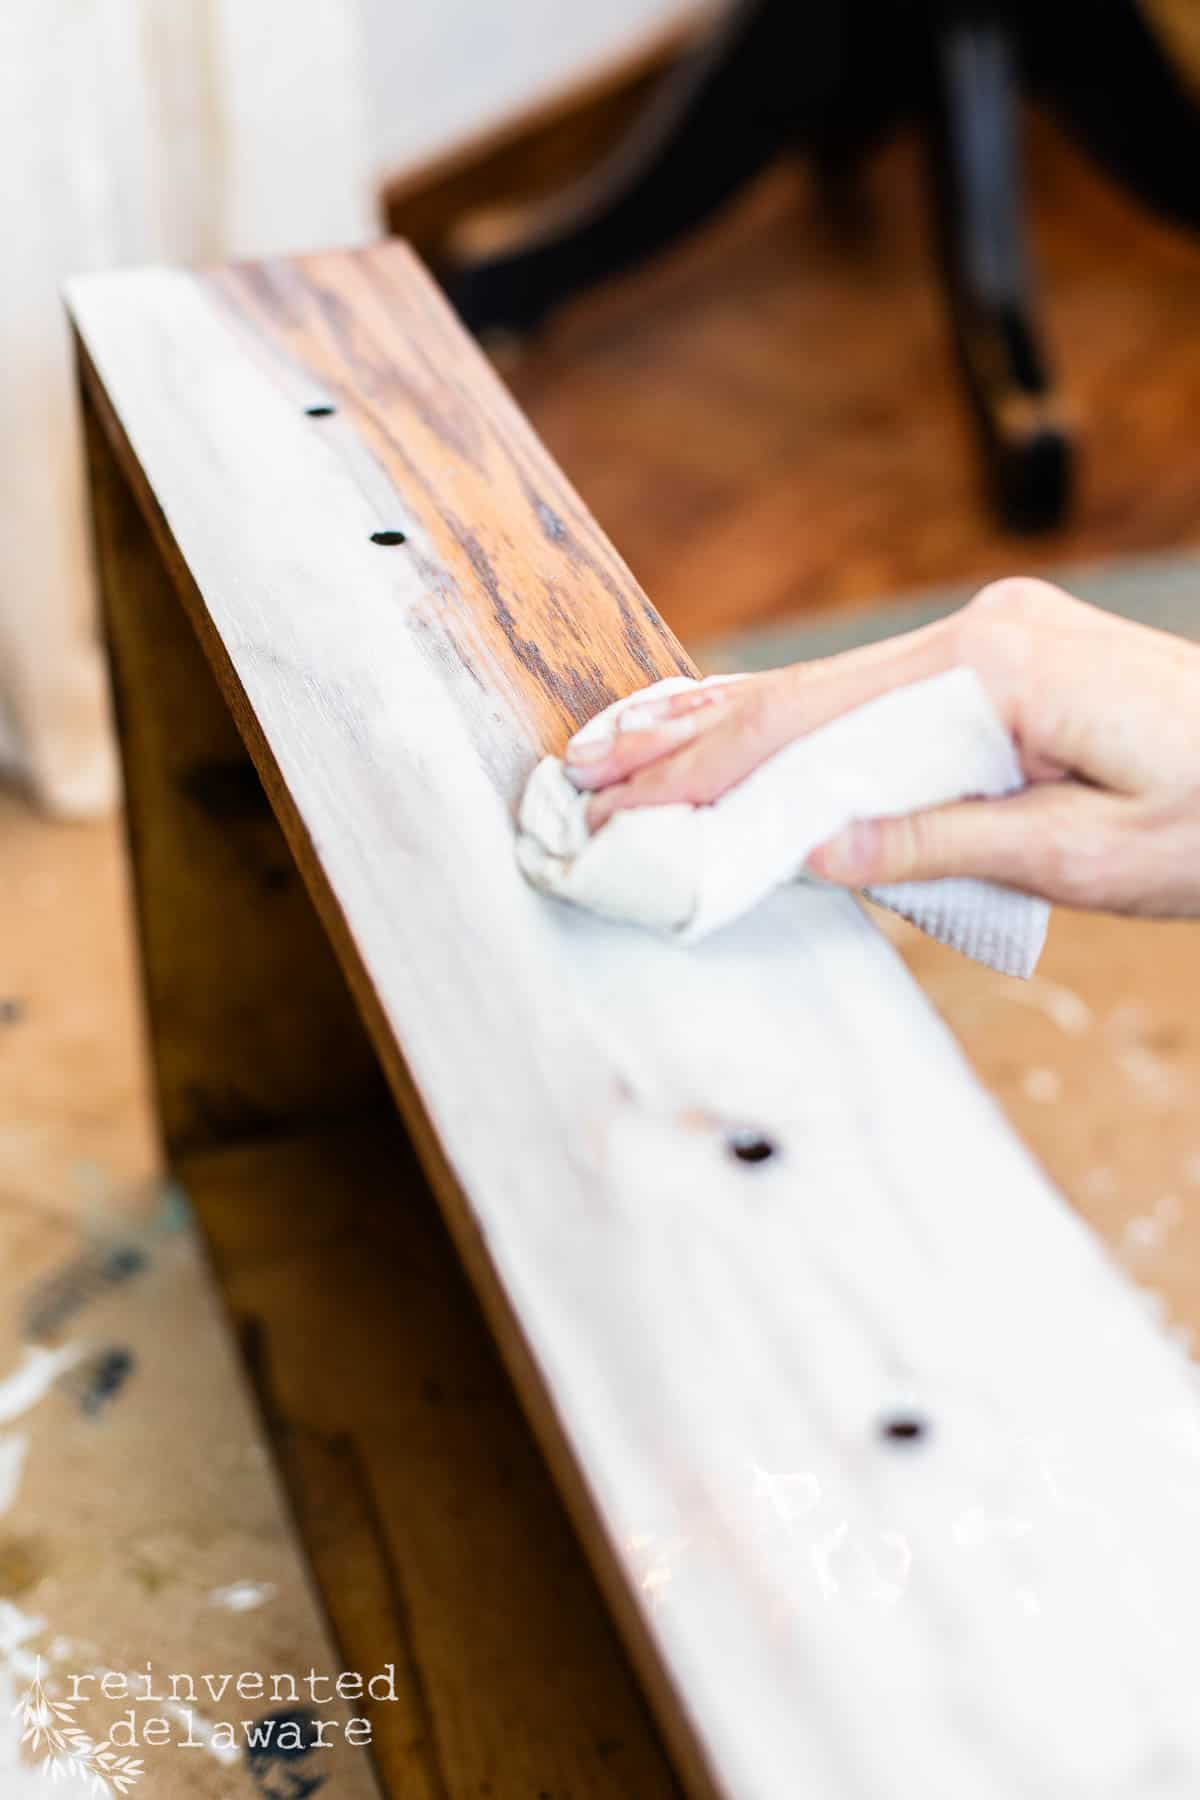
how to whitewash oak wood
I love the look of wood tones along with painted surfaces. Using a whitewashing technique is a great way to achieve this look. And it’s so easy!
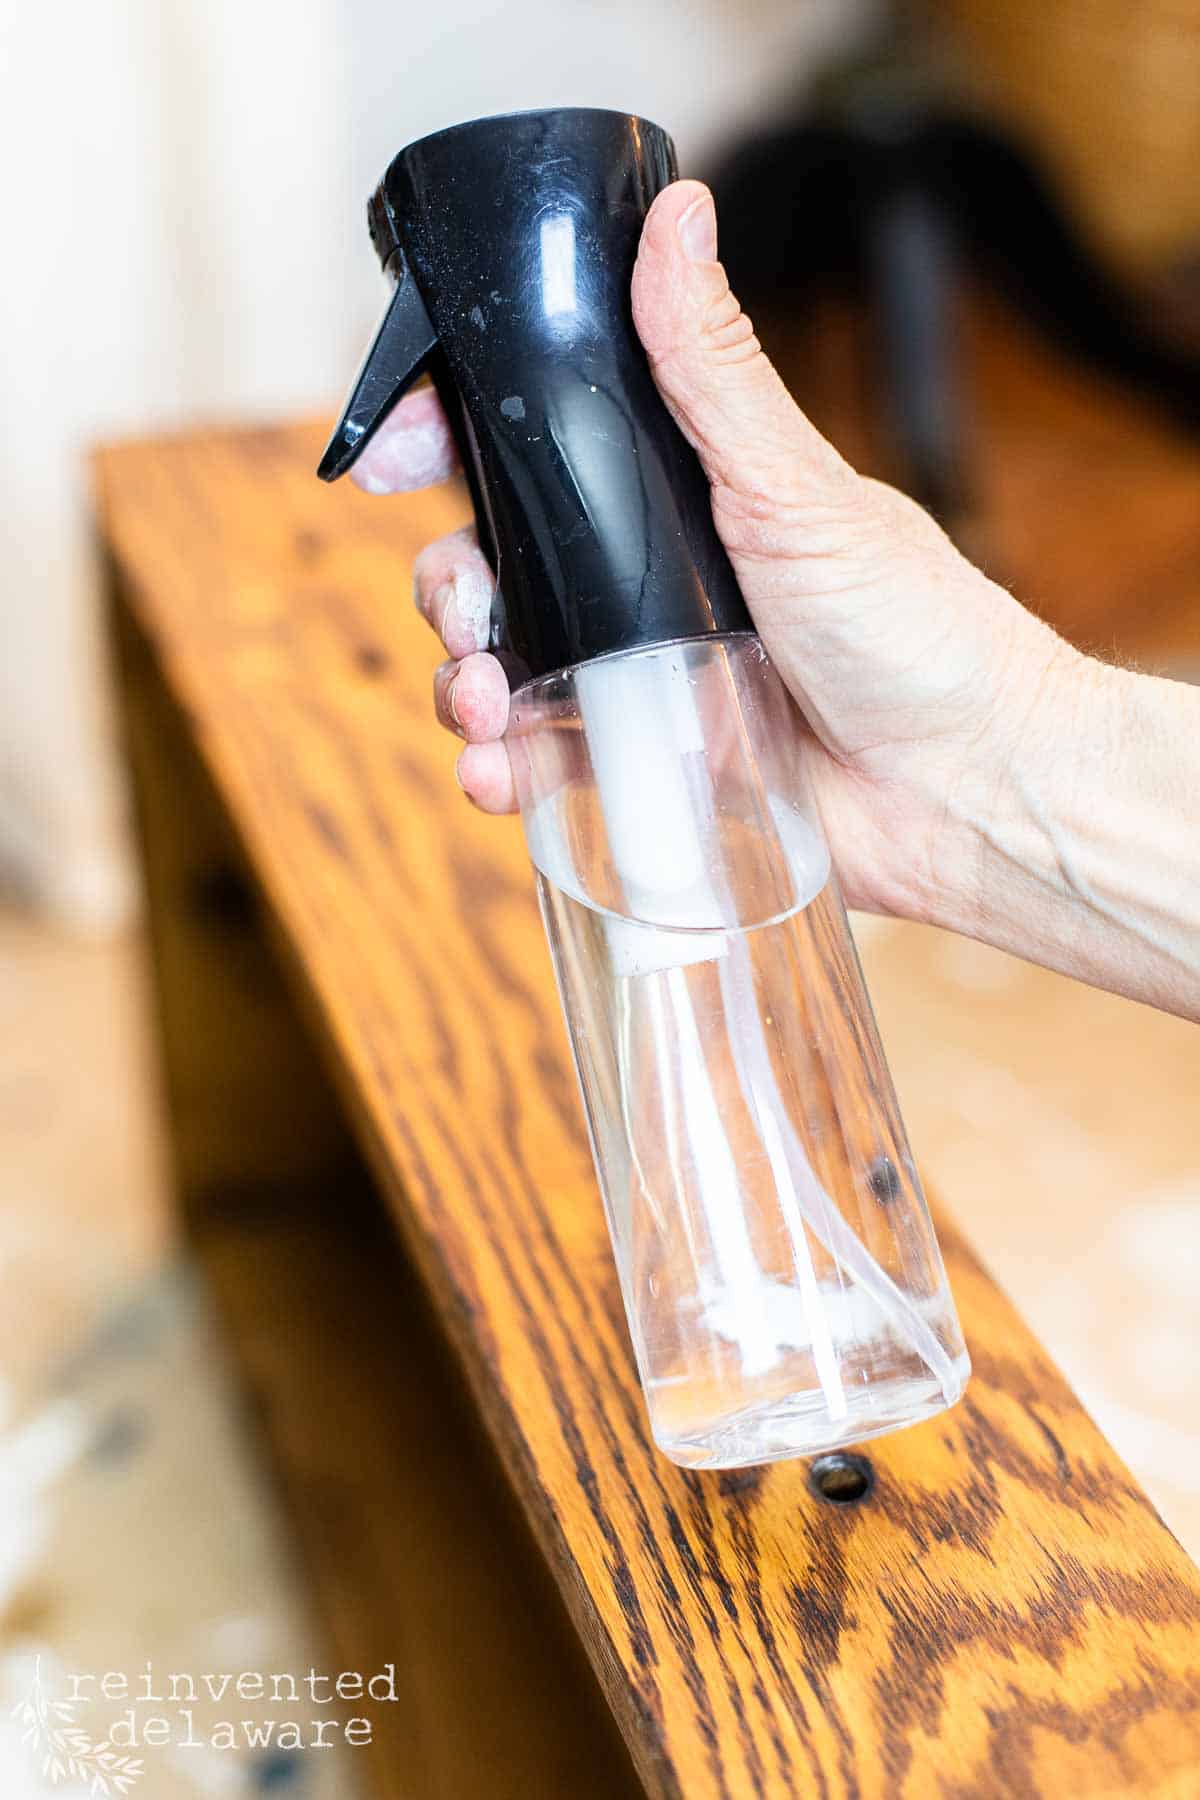
Simply wet the surface (it’s been primed with Bonding Boss in Clear) using a misting water bottle, spread on a little bit of paint then wipe it back with a clean dry workshop paper towel. Once the paint is dry, I used a fine-grit sanding pad to smooth the slightly raised grain of the wood.
It’s that easy! This one step can take away the orange tone of the wood without covering the grain. Glacier is an amazing gray color for this technique. With a little paint and a spray water bottle, you can eliminate the orange tone of oak wood.
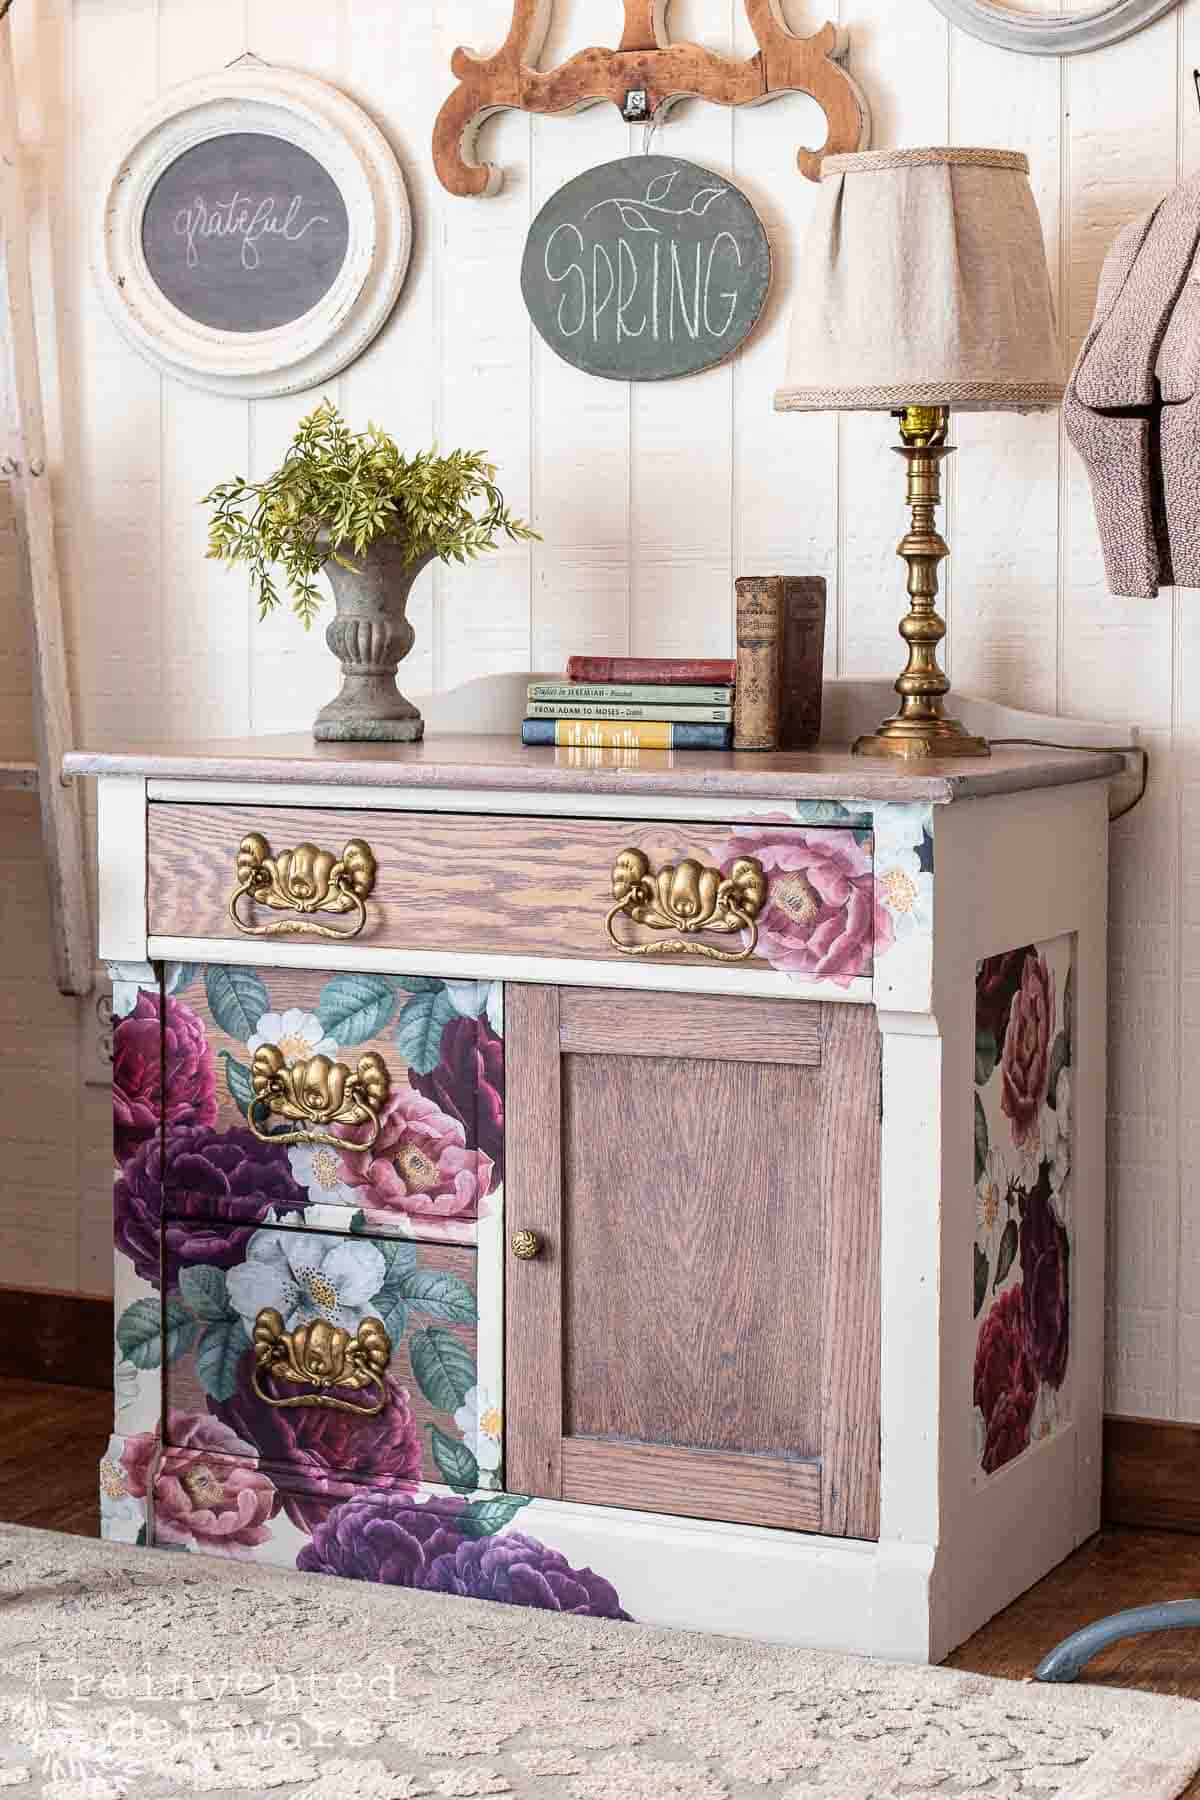
I whitewashed the top of the dresser (a washstand is like a mini-dresser) and the drawer fronts. The frame and the backsplash are painted.
finishing touches
Let’s finish this lovely lady with some pretty details. We all like a little accessorizing, right?
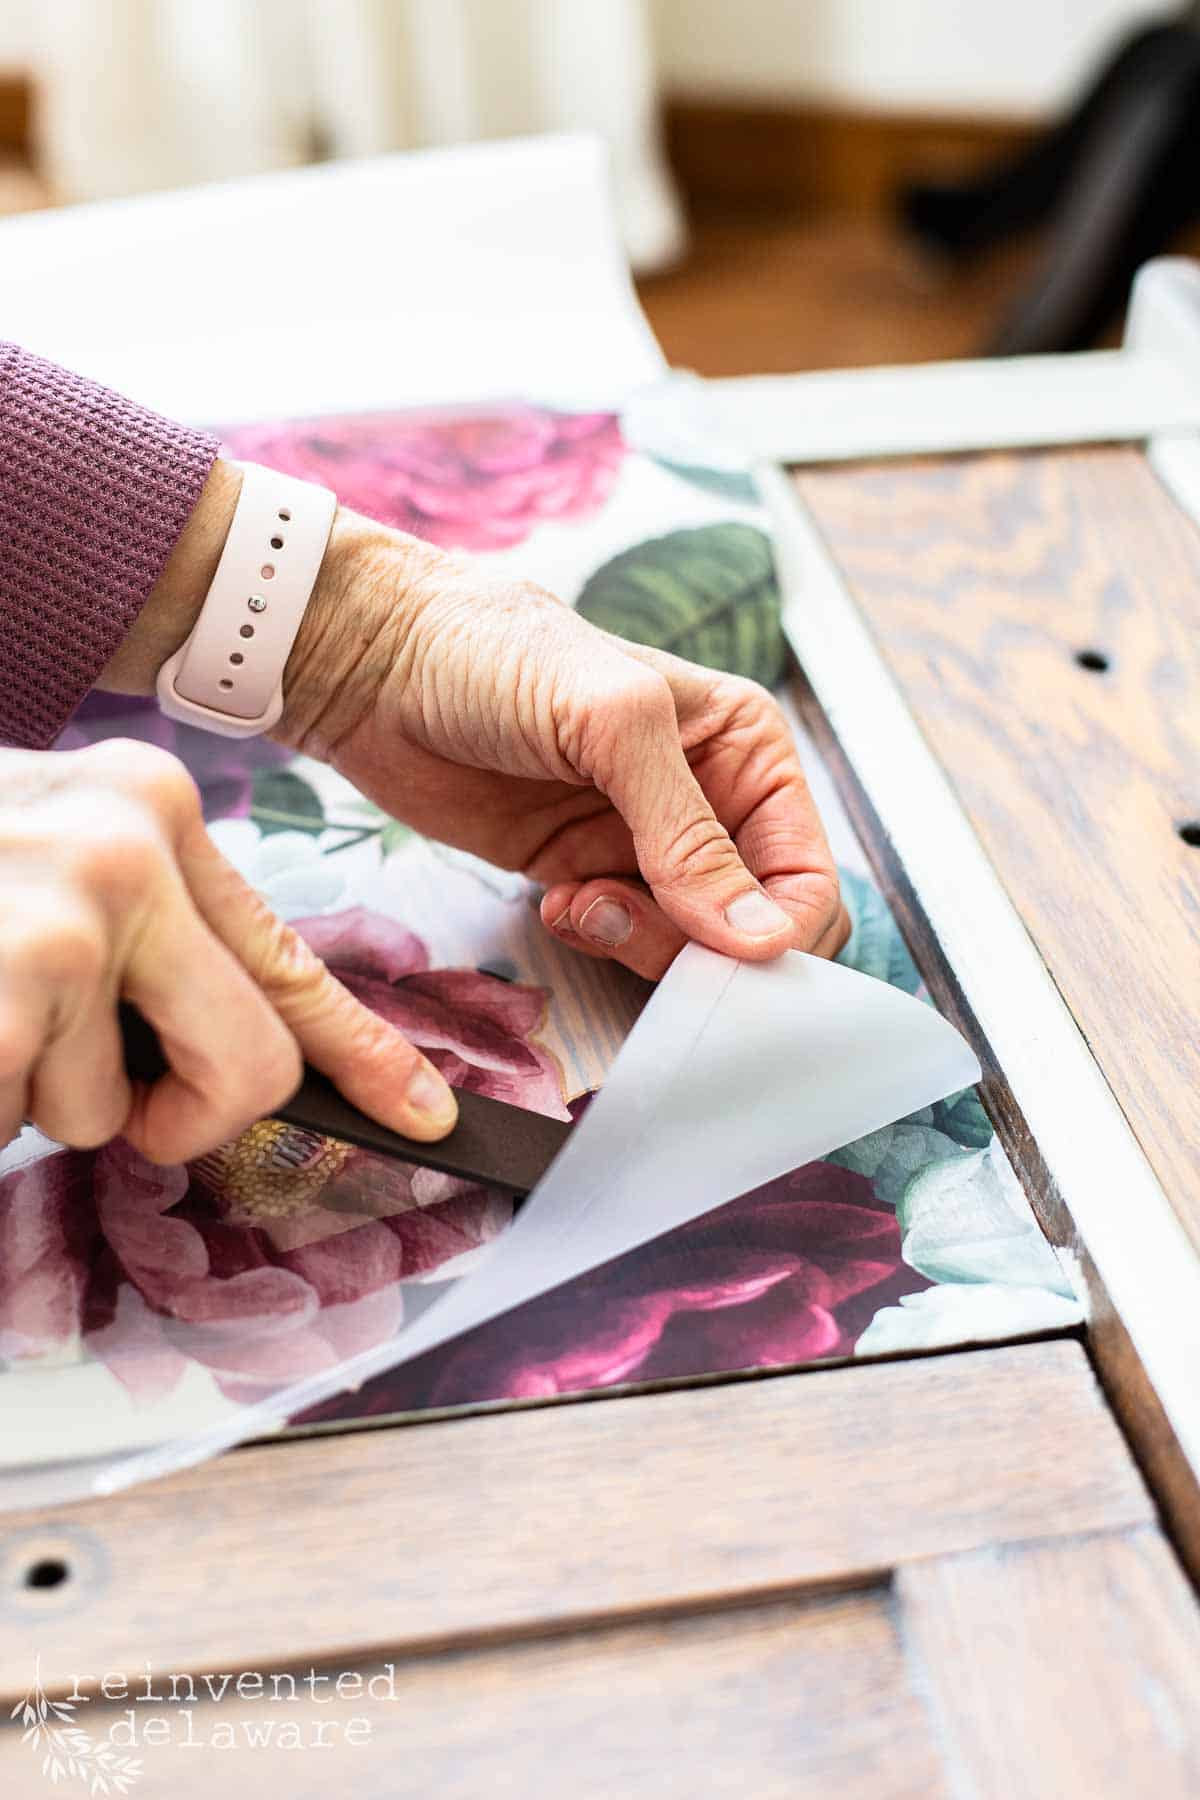
apply a furniture transfer design
Adding a gorgeous transfer design to your furniture piece will truly customize it. There are so many options to choose from. I chose Floral Romance.
I’ve created a YouTube video for you to see how I applied it but I am still editing the video! Check back here within the week and I will link it! If it’s your first time applying a transfer, this video will be a huge help to you!
In the meantime, you can visit some of my other posts showing how to apply furniture transfers. Tap any of the images below.
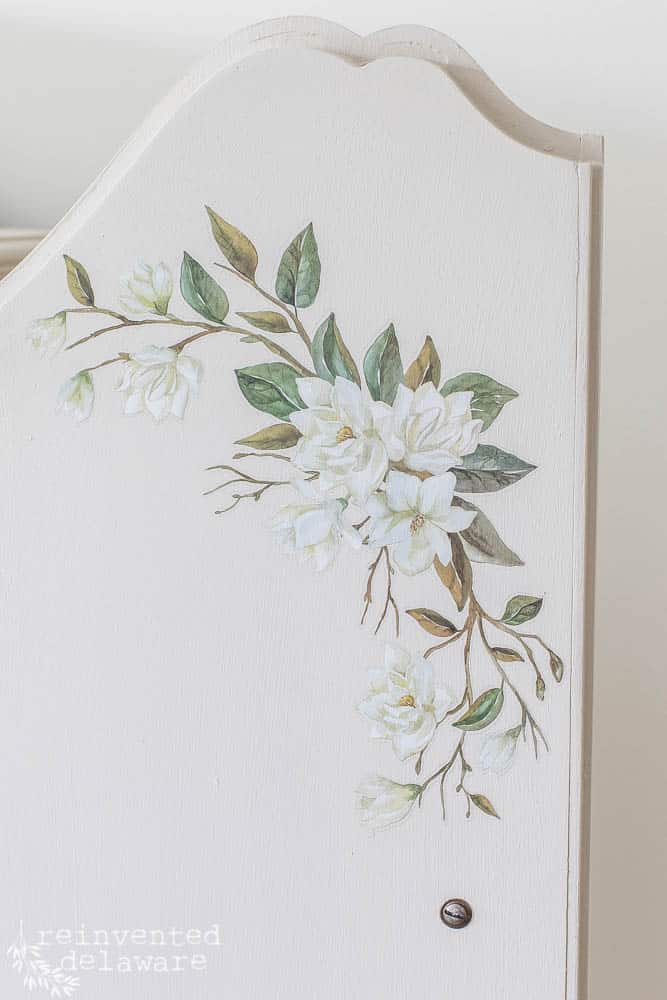

Here I am showing briefly how I applied this gorgeous transfer to this washstand.
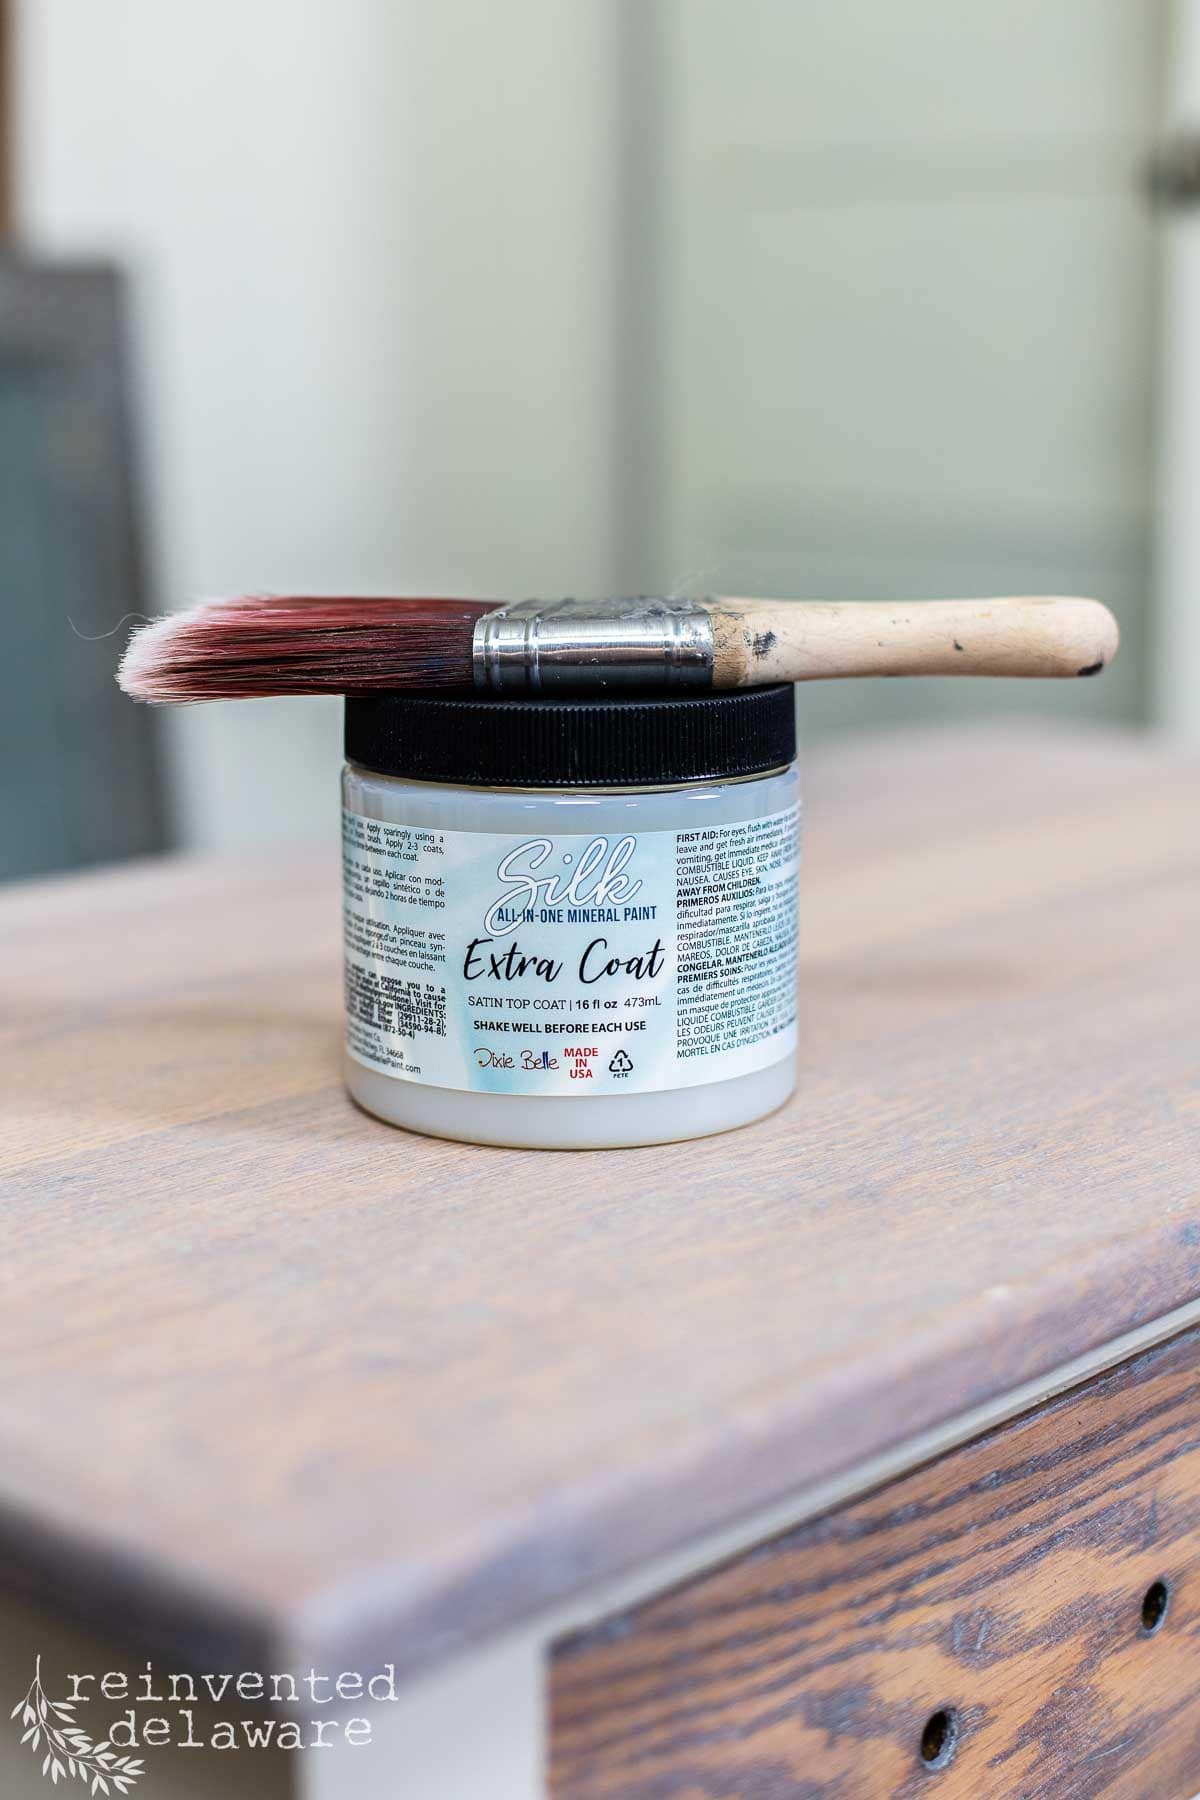
apply topcoat for durability
Silk All in One Mineral Chalk Paint includes a top coat but I like to add an additional layer of protection using a Clear Coat sealer. It’s easy to apply with an angled mini paintbrush.
I applied the sealer to all of the surfaces. This additional sealer will seal in the transfer as well as create a durable finish on the wood. Extra Coat is the best sealer for Silk Chalk Mineral paint.
You could also use a coat of clear wax over the surfaces. Dark wax could be used to age the piece. Apply the furniture wax with a quality wax brush for the best results.
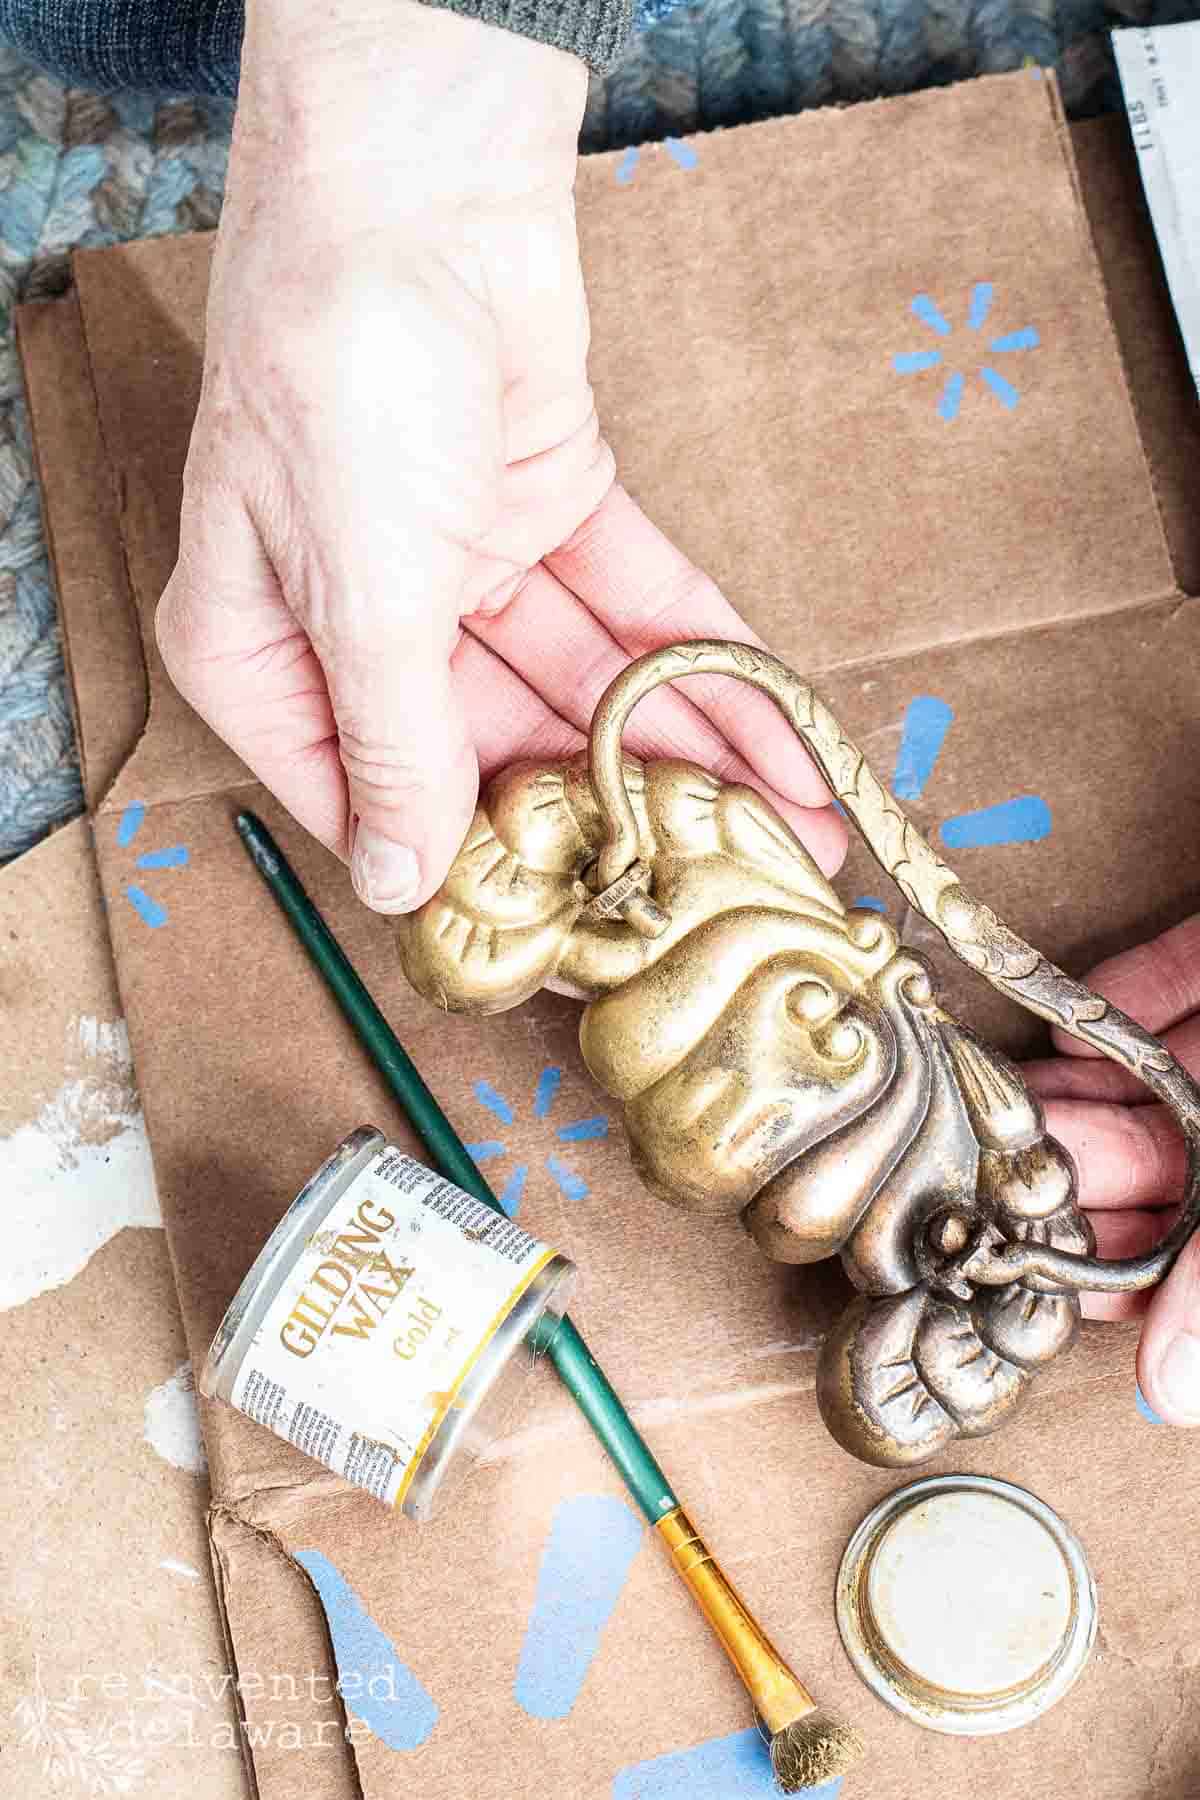
replacing or updating the hardware
Do you love antique drawer pulls? It’s one of my favorite details on old furniture pieces. I was fortunate to have all of the hardware for this little washstand/mini dresser. All they needed was a good cleaning and a bit of gold gilding wax. Simple apply the gilding wax with a small brush, allow to dry and lightly buff. It will dry to a hard finish that will last for years.
If you don’t have gilding wax, you could spray paint the metal hardware in a pretty antique gold color. You could also visit your local Hobby Lobby and buy new hardware. They have an amazing selection of reproduction furniture hardware as well as glass knobs that look great on antique washstands.
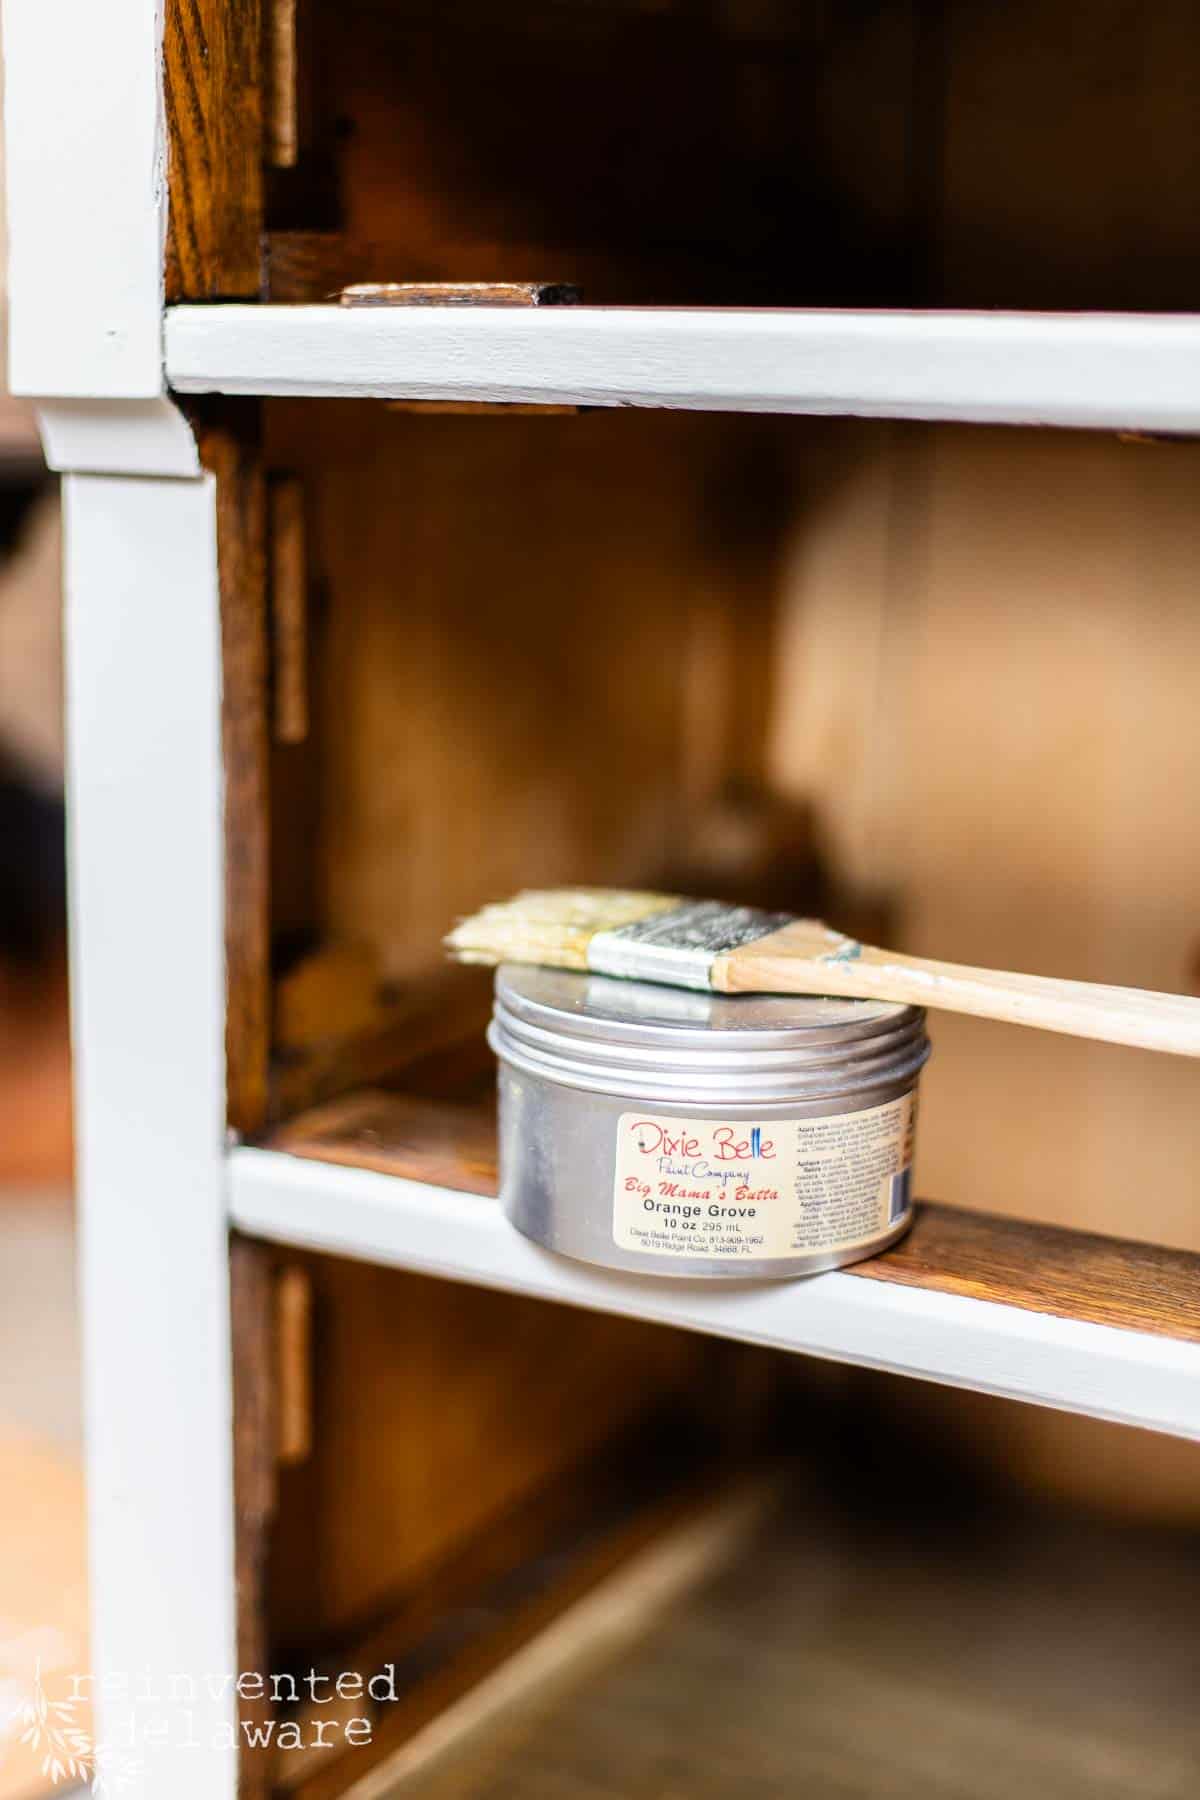
add a fresh scent to old wood furniture
We have one last detail to add to this sweet washstand makeover! The smell! haha! The truth is, old furniture can smell musty. In my Free Guide to Furniture Makeovers post, I show you how to clean your furniture to remove the smell.
You can also add a scent to the furniture by using this amazing, sweet-smelling product called Orange Grove. Apply it to the interior of the piece with a chip brush. It nourishes the wood as well as making it smell fresh!
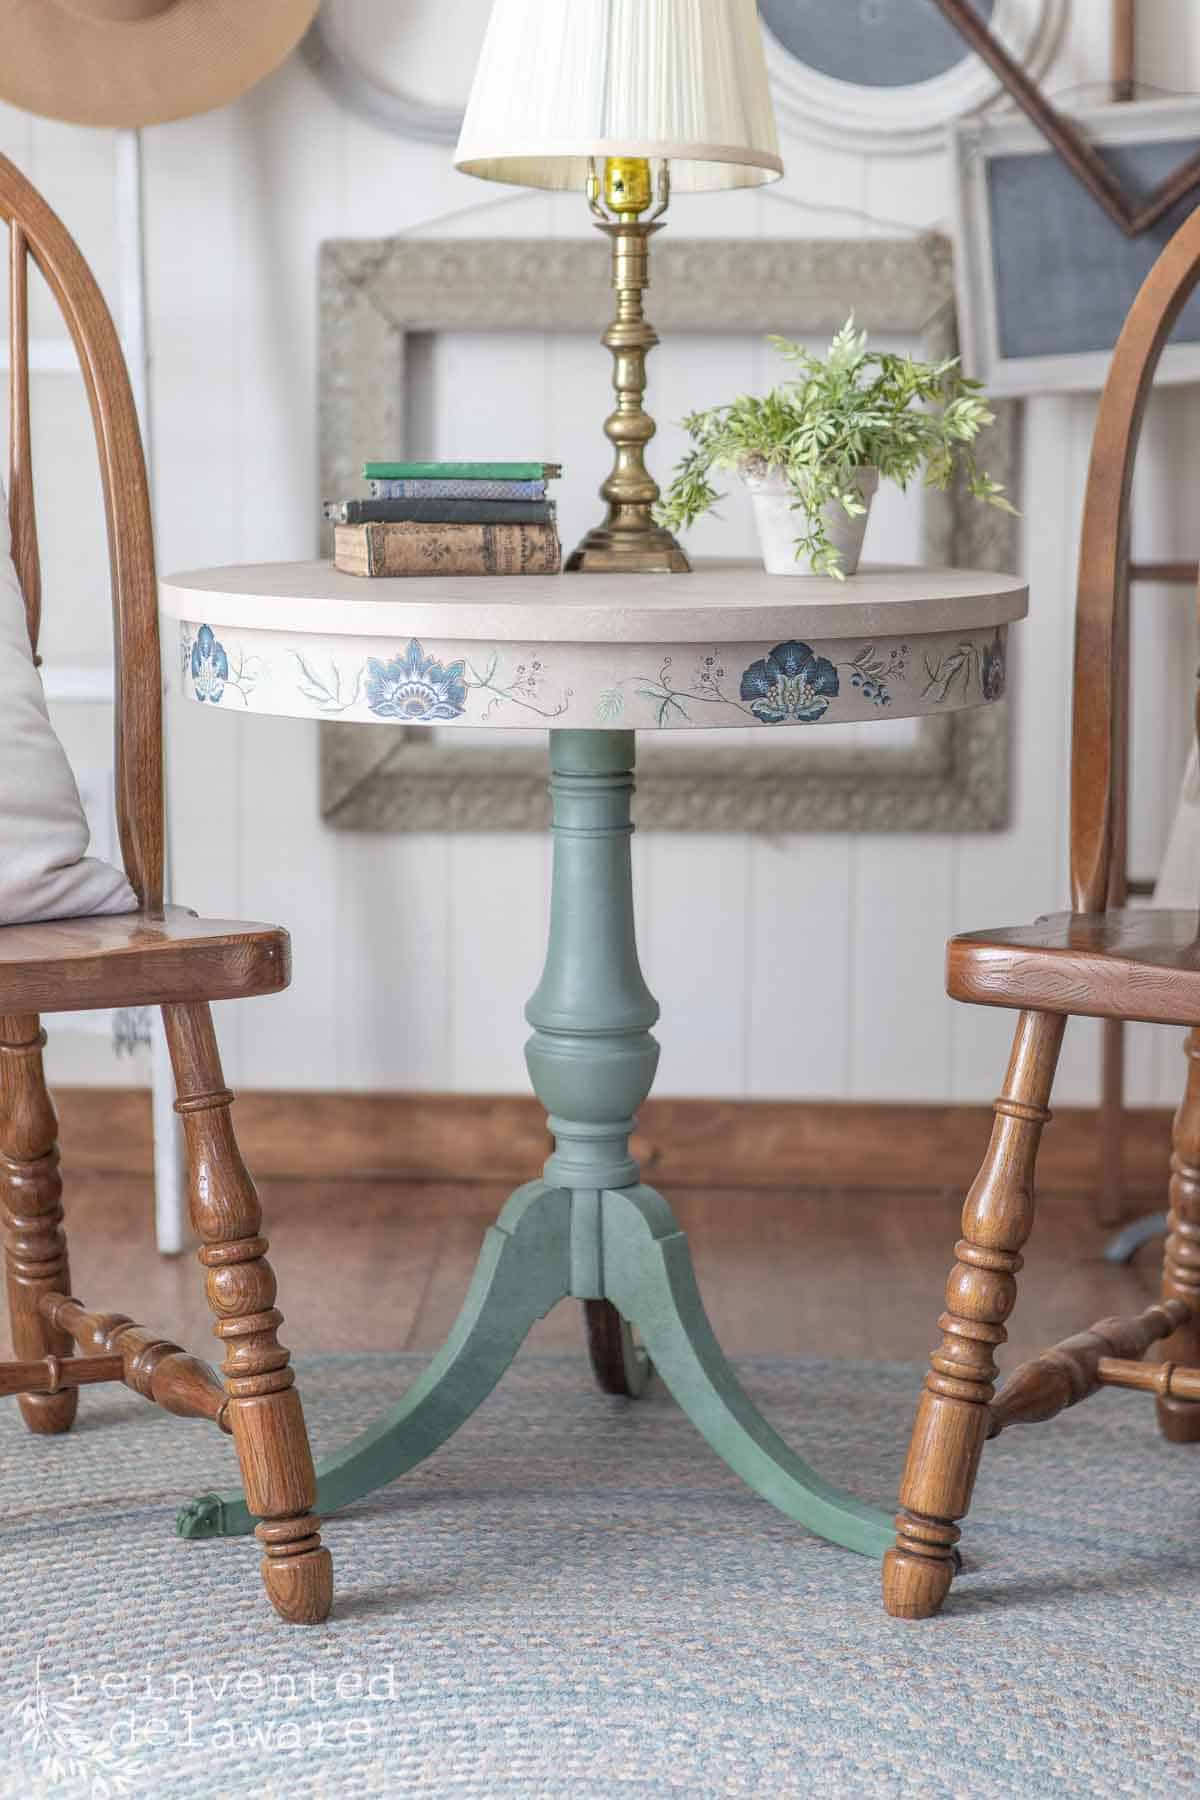
styling and staging your furniture
Now that the piece is finished, move it into the room it will live in and decorate it!
accessorizing the piece
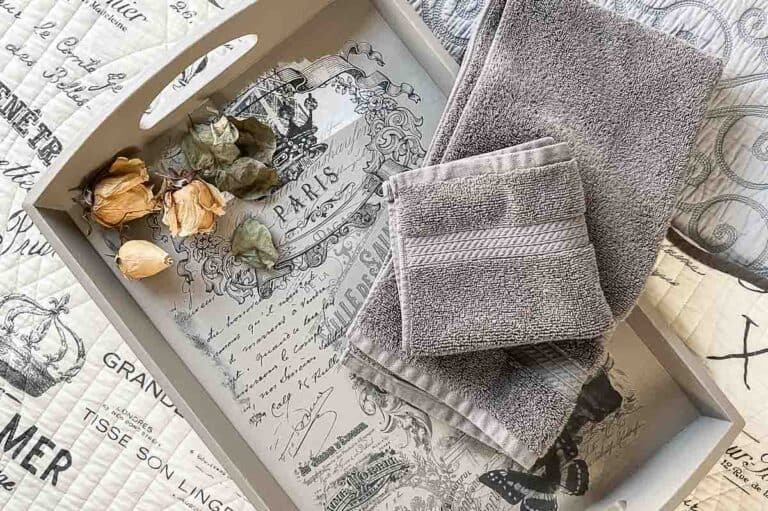
Add a lamp if the rooms calls for it. I’ve added a stack of vintage books as well as a thrift store faux plant I made over. The area behind the door houses guest towels since this washstand goes in one of our guest bedrooms.

choosing the right location
You can use your furniture piece in whatever room you choose. A small washstand like this would work well in a little girl’s room next to her bed. She could also use it as her own little dresser. Wouldn’t that be adorable?
An antique washstand also makes a great nightstand in a bedroom. We use a pair of washstands for this purpose as part of our master bedroom furniture pieces.

maintaining your painted furniture
Taking care of the furniture your just spent time on will be well worth it! Don’t neglect all of your hard work!
regular cleaning
Simply wiping down the furniture pieces with a damp-almost-dry microfiber cloth will be sufficient. Do not use silicone-based furniture polish like Pledge. That will create a build-up over time that you will have to deal with later.
By the way, you can see in the image below that we cut a scrap piece of wood and attached it to the back to replace the missing harp. Hubby cut a scrap of wood using the bandsaw and I painted it to match.

touch-ups over time
It’s a good idea to keep a bit of the paint in a small jar tucked away in the furniture piece (or somewhere out of children’s reach) for touch-ups. Use a small artist’s brush on the area and allow it to dry.
chalk paint tips and tricks
- If your furniture piece is dark or could have bleed-through issues and you are choosing a pure white chalk paint color, be sure to seal the original finish with 2-3 coats of Bonding Boss to prevent any mishaps.
- Avoid using regular latex paint meant for painting interior walls on furniture. Choose a paint specifically for furniture for the best results. Chalk paint is an excellent choice for furniture makeovers.
- When using wood filler on a furniture makeover, be sure to sand it down to a smooth surface before applying the primer and paint.
- Homemade chalk paints can be used on furniture. There are no guarantees since there are variables to consider. Test your own chalk paint before applying it to an antique piece of furniture.
- Apply chalk paint with smooth and even brush strokes using a good quality synthetic paintbrush. You can lightly spray the paintbrush to help avoid brush marks.
- Seal the chalk paint using furniture wax or a water-based top coat. This will seal in the paint and eliminate the chalky appearance of the paint once it is dry. If you like the flat look of dry chalk paint, seal it using a flat water-based top coat.
YouTube Video Tutorial
Here is a video showing your the step by step process to give this washstand a gorgeous makeover! Tap below to watch!

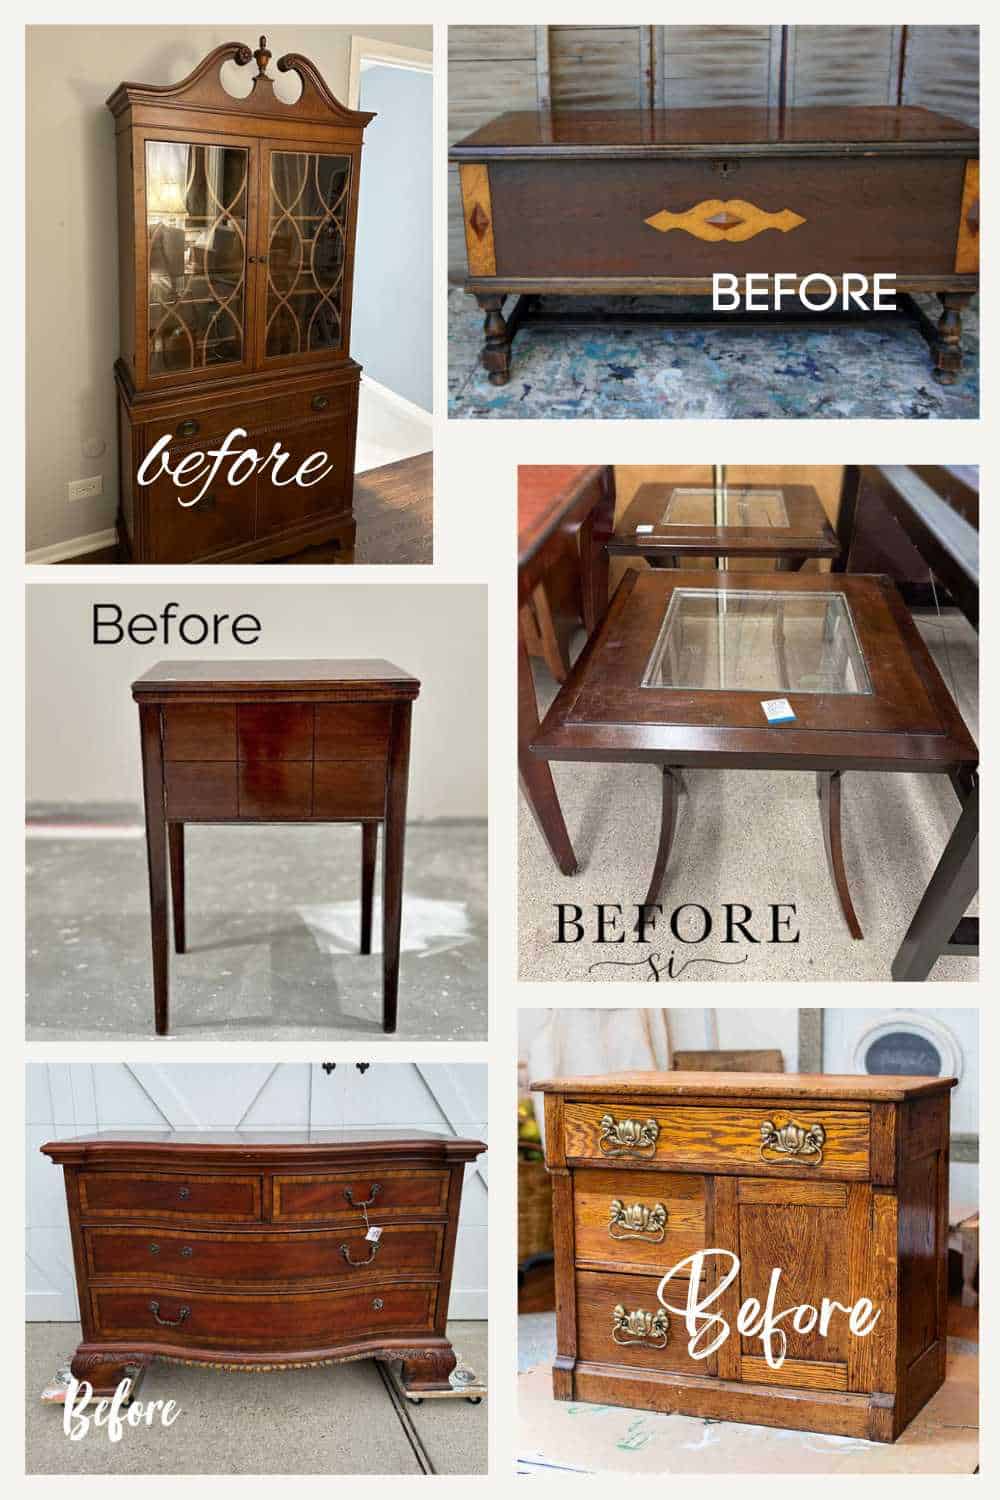
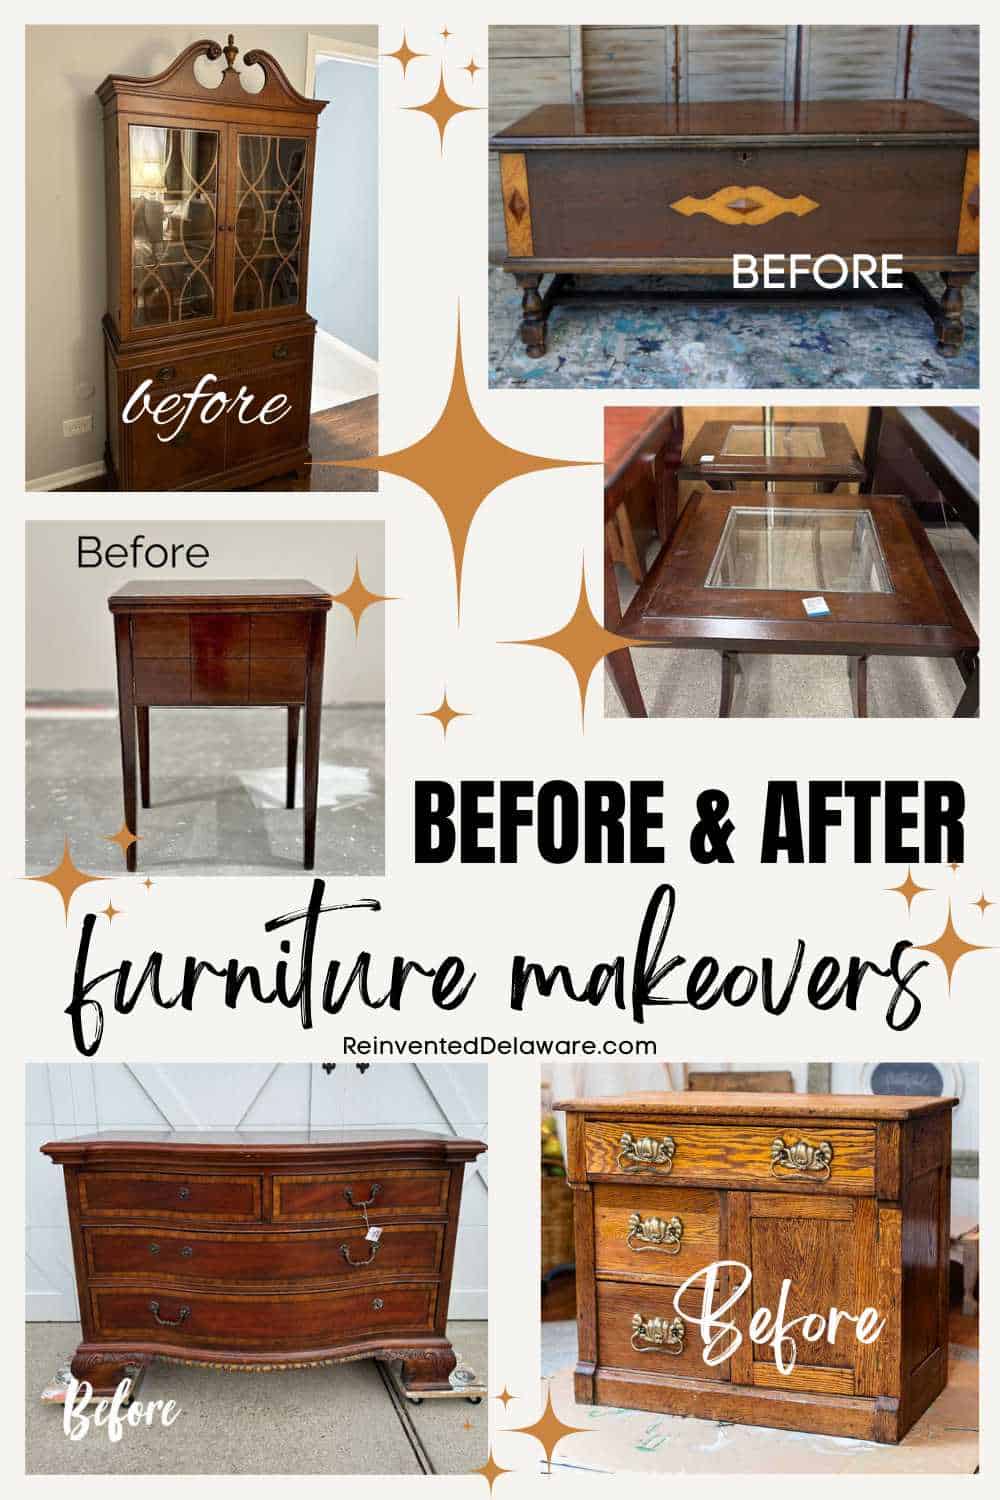
more furniture makeovers and a giveaway!
It’s Time for a Giveaway!
Dixie Belle is hosting an amazing giveaway for my readers! They are offering a $200 spending spree on their website to six lucky winners! Enter by following the directions below! Good luck!
Some of my blogging friends and I got together to share our furniture makeovers Dixie Belle heard about it and wanted to offer our readers an exciting giveaway! Thanks, Dixie Belle for sponsoring this amazing giveaway!
Here are the details and important information to enter:
- You can enter the giveaway on each blogger’s post to maximize your chance to win.
- There will be one winner with EACH blogger! A total of 6 winners!
- The giveaway runs from March 19-March 26, 2024
- The winner will be randomly picked and announced on Tuesday, March 26th here on the blog. The winner has 48 hours to claim their Dixie Belle Giveaway before another winner is selected so be sure to check back!

- Follow the directions that each blogger gives in her post. It’s easy to do and includes options like visiting their Facebook page, commenting on their blog post, and visiting Dixie Belle on Instagram. How easy is that??? 😉
- Visit their blogs to see their amazing talent and creativity
- Enjoy the posts and be inspired to create something beautiful using the gorgeous Silk Chalk Mineral Paint National Parks Collection from Dixie Belle!

here are the talented bloggers:
Simply tap on their blog name above to go to their posts so you can enter to win!
enter the giveaway here!
a Rafflecopter giveaway
Thanks for joining our journey!
Thanks so much for joining us for this post! Join our journey so you don’t miss any of the fun projects, tutorials, and inspiration that we share with you each week! You can follow us on Instagram, Facebook, and YouTube. We share even more inspiration on Pinterest!
click below to purchase supplies!
Visit my Amazon Storefront!
Click the button below and head over to our online shop on Amazon!


Cindy Rust
Cindy has been decorating her home with thrift store finds for 40 years. She is an avid thrift store shopper who loves to makeover the items she finds into vintage-inspired home decor and furniture. When she isn’t thrift shopping or painting a piece of furniture, you can find her making homemade butter, working in her garden, or painting with watercolors.

Grey Chalk Paint for Furniture Makeovers
Equipment
- shop vac
- paint brush
- microfiber cloths
Materials
- TSP Alternative Cleaner
- Water Misting Bottle
- Wood Filler optional
- Bonding Boss Primer
- Silk Mineral Paint – Glacier
- Synthetic Paintbrush
- Floral Romance Transfer
- Gilding Wax
- Extra Coat Topcoat
- Orange Grove Scented Salve
Instructions
- Thoroughly clean the furniture piece with a damp cloth and TSP cleaner in a spray bottle. Wipe off the residue with a clean wet cloth.
- Fill any scratches with wood filler (optional). You can leave the dents and scratches if they create an authentic age.
- Lightly scuff sand the wood. Wipe off sanding dust with a dry microfiber cloth.
- Apply 2-3 coats stain stain-blocking primer with a synthetic paintbrush to prevent tannin bleed-through. Allow primer to dry for a couple of hours between coats.
- Apply two coats of Silk Mineral Chalk paint in your desired color. Allow the paint to dry between coats.
- Use a white-washing technique on the drawers, door, and top to create a unique look.
- Apply a furniture transfer of your choice to the furniture piece.
- Apply two coats of Extras Coat topcoat over the transfers, especially on the top of the furniture piece.
- Use Orange Grove salve to reduce the old furniture smell on the interior of the cabinet.
Notes
- If your furniture piece is dark or could have bleed-through issues and you are choosing a pure white chalk paint color, be sure to see the original finish with 2-3 coats of Bonding Boss to prevent any mishaps.
- Avoid using regular latex paint meant for painting interior walls on furniture. Choose a paint specifically for furniture for the best results. Chalk paint is an excellent choice for furniture makeovers.
- When using wood filler on a furniture makeover, be sure to sand it down to a smooth surface before applying the primer and paint.
- Homemade chalk paints can be used on furniture. There are no guarantees since there are variables to consider. Test your own chalk paint before applying it to an antique piece of furniture.
- Apply chalk paint with smooth and even brush strokes using a good quality synthetic paintbrush. You can lightly spray the paintbrush to help avoid brush marks.
- Seal the chalk paint using furniture wax or a water-based top coat. This will seal in the paint and eliminate the chalky appearance of the paint once it is dry. If you like the flat look of dry chalk paint, seal it using a flat water-based top coat.
What a pretty makeover! I love the florals. My favorite color is Glacier.
I’m loving Glacier too! It’s a great light colored gray that would look good anywhere!
I really like grey furniture! It’s a nice backdrop for transfers and accessories alike.
I enjoy following your blog and seeing the projects before and after! Beautiful work and informative as well.
Thanks for following along Karen! I’m so thrilled you find inspiration here !
The sequoia color is the one that stands out the most to me. Love them all though. I do admit though that I do have a hard time painting wood furniture. A thrift piece though is one that I could – as long as it isn’t in the best condition. I do love watching all of you paint them – I have painted a few – but love how you do yours.
I go back and forth between painted and natural wood finishes. But since I like change so much, I know that I can remove the paint if I want. For me, that’s part of the fun! Thanks for you kind words. They brought a big smile to my face! 😊
What a sweet little washstand. I love the beautiful transfer that you used. It really did give it an entirely different look! We both live in Delaware! I live near S. St. Georges! I am pretty new to the furniture refinishing game, but I love your pieces. I always get new inspiration!
Omgoodness, I just crossed the St Georges Bridge a couple of weeks ago! That’s so awesome that you live in Delaware too! I’m so glad you enjoyed the furniture makeover today!
👍
Wow!
Thanks Pam!
Beautiful and unique makeover. And I love the extra tips on using chalk paint.
so glad you found the tips helpful Kat!
I want to paint my black kitchen cabinets, black again. Do I need to do anything other than clean them good? (I am using Dixie Bell chalk paint.)
Hi Donna! Give the cabinets a really good cleaning to remove any grease or grime that naturally happens in all kitchens. If you preveiously used wax to seal them, remove the wax before cleaning. Then clean them well. If you didn’t use wax, you can paint with more Dixie Belle. I’m thinking of painting my white cabinets using another Dixie Belle color too! Happy Painting!
Thanks for the info!
You are welcome Melinda!
Good work!!!
I want to try Dixie Belle products!
You will love Dixie Belle products! The paints are amazing!
Interesting and unique!
Thanks! I’m so glad you enjoyed the project!
I just love the colors in the National Park Collection but have to say that Sequoia is my favorite. Love your transfer on that piece.
Sequoia is gorgeous! I’m hoping to use it soon!
Very pretty! Love all the new paint colors!
Me too! Dixie Belle does a great job in formulating colors!
Colors are gorgeous!
Yes they are! Thanks for checking out the post!
Fun makeover, not the usual cookie cutter look. Love the colors!
Thanks Rebecca! The washstand looks great in our guest bedroom!
Luv all the information you put on today for using the Dixie Bell. Thats helps me on what I need to finish up a furniture
Repair
That’s great Donna! Good luck with your furniture project!
Hi Cindy! Thank you for all the tips and tricks you’ve put into this blog post! I’ve never used Dixie Belle Paints, but I’ve been wanting to try it out! This would be the perfect opportunity!
I think my most favorite color from the National Parks Collection is Acadia, but they’re all beautiful, rich colors!
Acadia is gorgeous!! Thanks for stopping yb Tabatha😊
Hi, I just love that transfer you used. Piece looks amazing.
That transfer is on sale too! Check out the link and grab one!
I look forward to emails and learn new ways to redress furniture.
Thank you for your ideas, Cindy.
That’s a sweet thing to say Cathy! Thanks for your support!
My favorite paint color is Acadia……
Omgoodness, that color is gorgeous!!
My favorite color is Glacier, a lovely soft versatile shade of grey. Wonderful post. Thank you for the guidance & tips.
You are welcome Pamela! I’m so glad you found this post helpful!
Beautiful makeover! Love how you didn’t cover all the wood.
Thanks Mary. I love wood and painted surfaces together too!
I love the way you have some painted surfaces and some whitewashed.
Wood tones and painted surfaces look so good together! It’s one of my favorite ways to makeover antique furniture 😊
This makeover puts a smile on my face because it’s soooo YOU! I’m in love with everything you did Cindy… the wash, color, and transfer is so warm and charming! XOXO Pinned!
That’s a sweet thing to say Denise! Thanks for your encouraging words! 🥰
WOW! It’s beautiful.
Thanks so much! 😊
I love the whimsy of this piece now! And what a fantastic idea to use a pair of washstands as night tables…the height is perfect! XOXO
Washstands make the perfect nightstands! I would have them in every room if I could!😊
I love the new Smoky Mountain color!
That color is amazing!! I want to paint something with it!
Love this project! Thanks for sharing the process.
You are welcome Robin! Thanks so much 😊
Never in a million years would I have conceived of this unique transformation! The wood grain was a bit overwhelming in its original form, but you’ve managed to retain just enough of it to make it really special. All the different elements work together in such a harmonious way. I love it! Thank you for sharing! What a showpiece!
The orange was definatley overpowering! I knew we had to tone it down. Whitewashing is such an easy way to do it! So glad you enjoyed the project. Thanks for your kind words 😊
What a beautiful job you did. Love the gorgeous transfer. Brought it to life for sure.
Thanks Cindy! The transfer really made this makeover unique! 😊
My gracious! Such a beautiful makeover- I want it ! Such beautiful colors, I am really loving acadia!
Acadia is a beatiful color! So glad you enjoyed the washstand makeover
Thank you for all of your detailed instructions that even us newbies can follow.
You are welcome Donna! I’m so glad it was helpful!😊
Beautiful!
Thanks Shari!
Looking forward to trying Silk line, such lovely colors!
You will love the Silk line of paints Cheryl! The paint is so easy to work with 😊
So pretty. I love refinishing furniture with chalk paint too.
my favorite color is Smoky Mountains
Thats a gorgeous color!
Chalk paint makes furniture makeovers so easy!
I love the whimsical vibe of the piece 💜
Thanks Stacye! It was fun to work on too!
My favorite Dixie Belle National Parks Collection Color is glacier.
I love Glacier! It’s a lovely almost-white gray!
All of the colors are so pretty but I love Sequoia Silk the most.
So many people are loving that color!
I love washstands, too. I have one sitting in the garage that needs painting so this really inspired me. My favorite color is Glacier.
Yay! I’m so glad you found inspiration for your washstand makeover! Search my site for even more washstands. They are my favorite furniture makeovers!
I love washstands, too! I have one sitting in the garage so now I’m feeling more motivated to get to work on it. My favorite color is Glacier.
I love the quite cove Dixie bell color & the washstand turned out beautiful!!
Quiet Cove is gorgeous!! Thanks for your kind words about the washstand!
Thank you for the tips on using chalk paint.
You are most welcome Suzanne! Glad you found the tips helpful!
I love the Smoky Mountains color.
Gorgeous, gorgeous color!
So pretty! I love the gold on the hardware!
It’s so easy to update hardware with the gilding wax!
Great job. You always have unique ideas
Thanks for the kind words Heather!
I love the new colors
Me too! It’s hard to choose a fave!
This washstand is gorgeous! Thank you for sharing your talent! Sequoia is my fave.
Thanks Sherri! Sequoia is gorgeous. I just used it today.
Wow! What a transformation! I love the gray chalk painted look paired with the floral transfer! Fabulous work! Pinned!
Thanks Natalie!
Love all the helpful information that you give on your projects
I love the Glacier by Dixie Belle. It’s crisp and clean. Beautiful on bedroom furniture. Easy to use.
We think alike Karen! Dixies Bellehas amazing products
What a great furniture transformation, Cindy! I’m always inspired by your DIY projects. My favorite DB color is Smoky Mountains!
Smokey Mountains is gorgeous! I just painted my craft table with it. Now the craft table lives at my daughters house. She loves it too!😊
Can I just say “Amen” to paint that has built in PRIMER and SEALER??? It just makes life better all the way around. Love how the wash stand turned out! I particularly love the combination of natural wood with some painted sections! Pinned.
Yes and yes to primer and sealer built in!! Thanks for pinning Anna!
My favorite is Smoky Mountains. (Not a bit influenced by my love of the mountains themselves.)
Haha! I just used smoky mountains on my craft table makeover. It is gorgeous. You can see it in my recent blog post 😊
Very, very beautiful transformations! You truly have a talent for this! I love and miss you aunt Cindy and thank you for your blogs!
Hi Ryan! We miss you and love you too! Thanks for stopping by🥰
Wonderful article and beautiful piece, Cindy! I can’t wait to try the new color, Smoky Mountains — I don’t live very far from them! 🌄
You are a lucky girl to live near the Smokey Mountians! I just used that color on one of my latest projects – a refresh of my craft table. You can see it in my recent blog post 😊
I’m not crazy about the National Parks Collection colors but I guess Glacier or Badlands would be my favorites. I have tried the new bonding Boss…so glad they did this! I love redoing old furniture and it’s such a time saver!
Bonding Boss is an amzing product Susan – you will love it!😊
Oh gosh Cindy, your post is full of such great tips!!! I really needed those. And you know your washstand turned out adorable!
Oh gosh Cindy, your post is full of such great tips!!! I really needed those. And you know your washstand turned out adorable!
Hard to pick a favorite, but for my next project, I think I NEED Quiet Cove!
Thanks Diane! I just used Quiet Cove in my last project – it’s gorgeous!
Cindy – I just love the three different applications: paint, wood, and transfers. What a fun piece. You are so creative!
Thanks Lynn!😊
Beautiful makeover! Thanks for the wonderful step by step details!
You are welcome Erin!😊
Glacier is my favorite nationalparks color
It’s a gorgeous color! I just used it on a little thrift store wooden tray makeover project. Check out my latest blog post to see it!
I love washstand but I don’t usually paint them. Your turned out really pretty.
Thanks Cheryl!😊
Very beautiful!
Thanks!
I love Glacier. Thanks for the tutorial! I can’t wait to win so I can start painting!
Glacier is a gorgeous color for sure!
Cross country East to West! Dixie Belle Silk National Park Collection colors I am intrigued by are Smokey Mountains & Acadia
I used Smoke Mountains on a project just the other day and it is gorgeous!
Really like
Thanks Rhonda!😊
Beautiful transformation!
Love the new National Park colors
The colors are gorgeous!
Was looking for a vintage green to paint my first piece of furniture. I think I found it in the National Parks Collection of the Silk paint. Thank you for all the wonderful information Cindy.
I hope you find just the right color! I used Smokey Mountains today and it is a gorgeous deep green/blue just like the smokey mountains 😊
I’m so excited about this giveaway. I’m new here. I have been wanting to try Dixie Belle paints for a while now. I am in the process of building a bedside table and putting the finishing touches on it. Then to choose a color. There are so many wonderful colors. Your table turned out amazing!!
Thanks Ellen! Your project sounds amazing – give Dixie Belle a try. The paint is amazing!!😊
Love the pease love the white wash
Thanks Cheryl😊
Beautiful makeover. Thank you for sharing!
Thanks Janes😊