
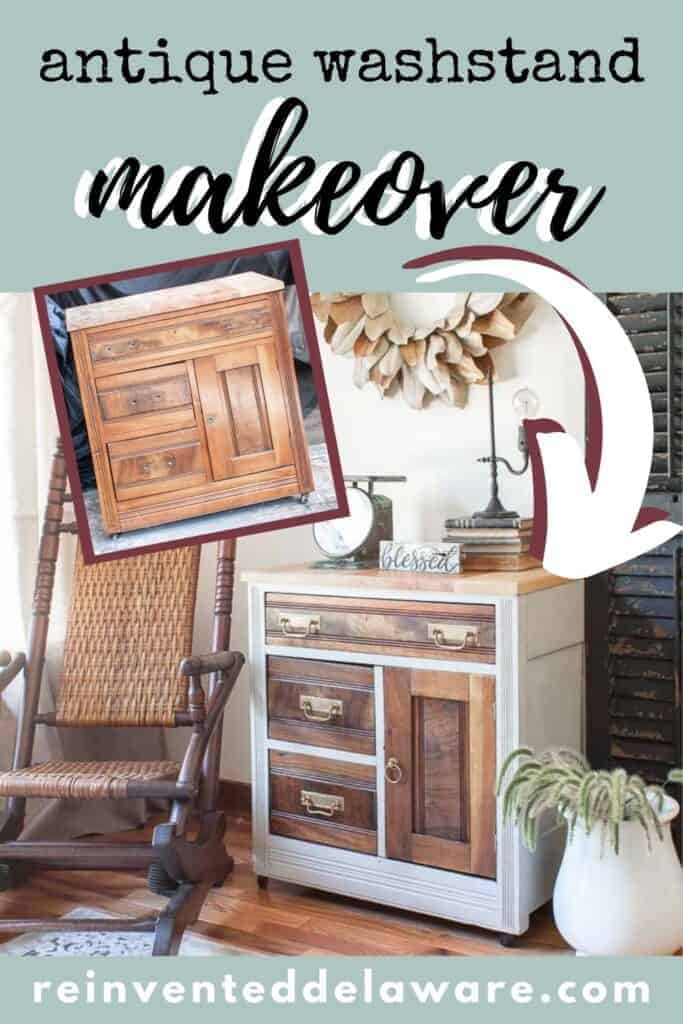
Easy Antique Washstand Makeover
Are you looking for an easy antique washstand makeover? I’ve got one just for you! You’re going to love the reveal!
The following post may contain affiliate links. That means if you click and then buy something, I will make a small commission at no additional cost to you! Thank you for supporting my blog. full disclosure here.
how to refinish an antique washstand
You have heard me say it before. Washstands are my favorite antiques. They’re small and compact and can be a quick and easy furniture makeover.
Like this one, we found it at a small antique shop at a really great price. The marble top was missing so we got a steal on it for around $30!
Hubby built a reclaimed lumber top and we were good to go!
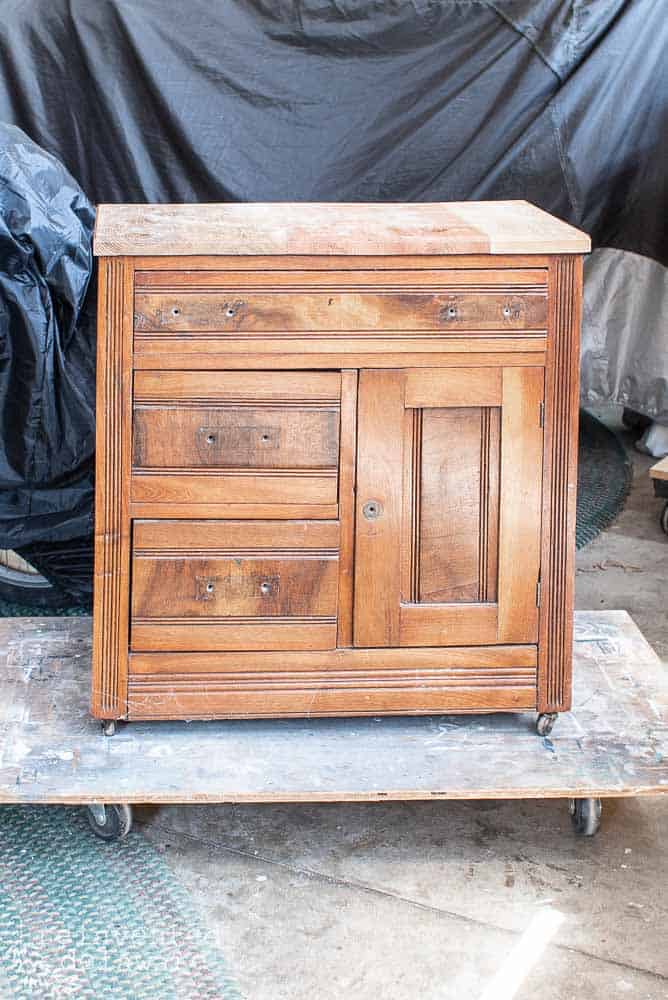
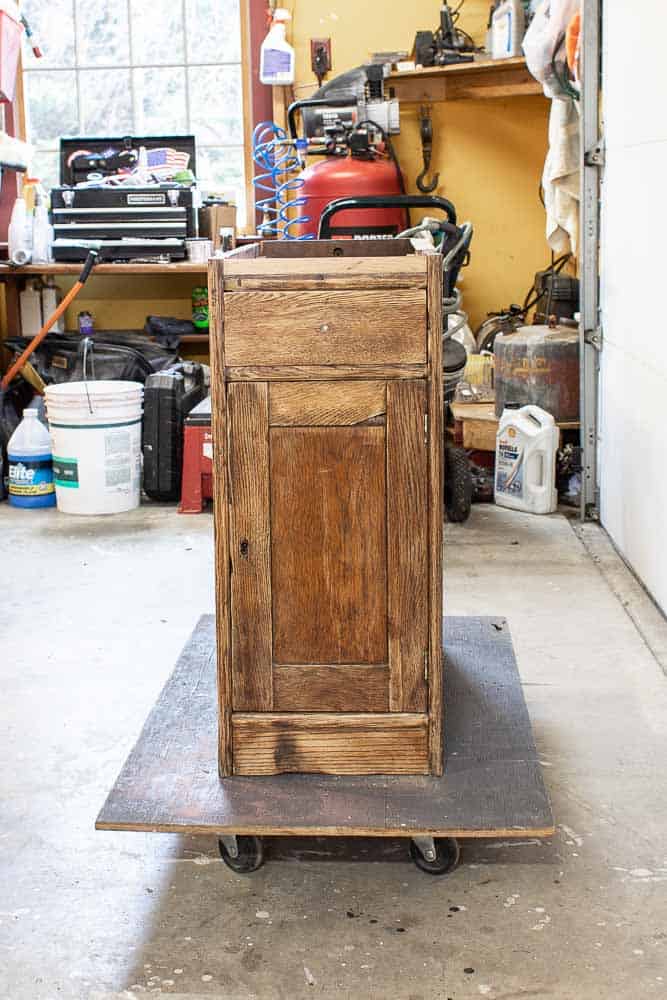
When beginning a restoration like this antique washstand makeover, I always turn the piece to expose the bottom.
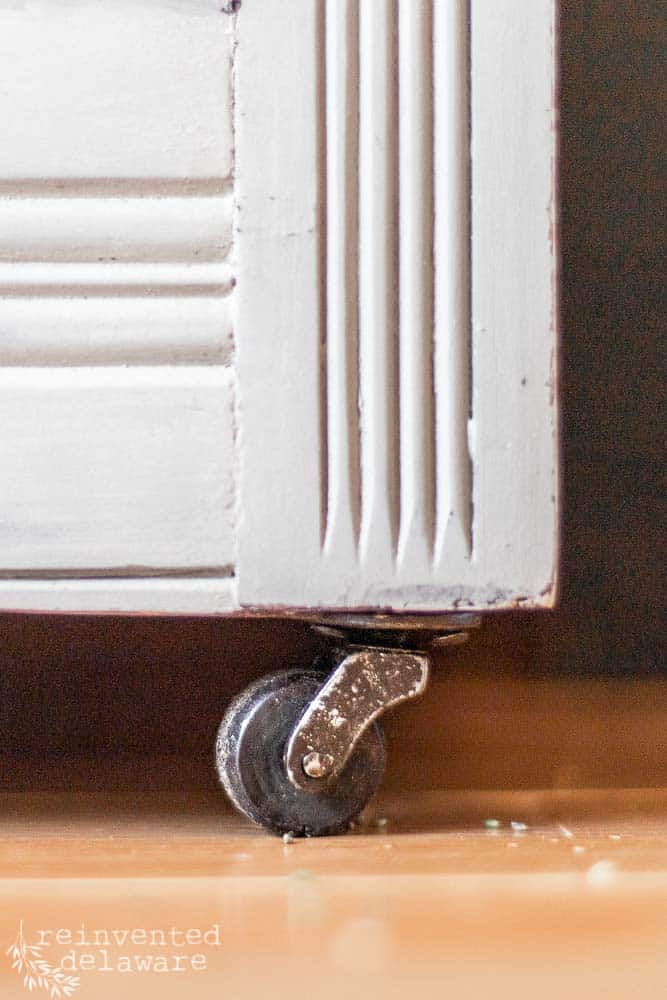
The casters were all there and in pretty good shape.
Yeah, I look at a scene like the one below and I think it all looks good! Cobwebs can’t hold a candle to my shop-vac!
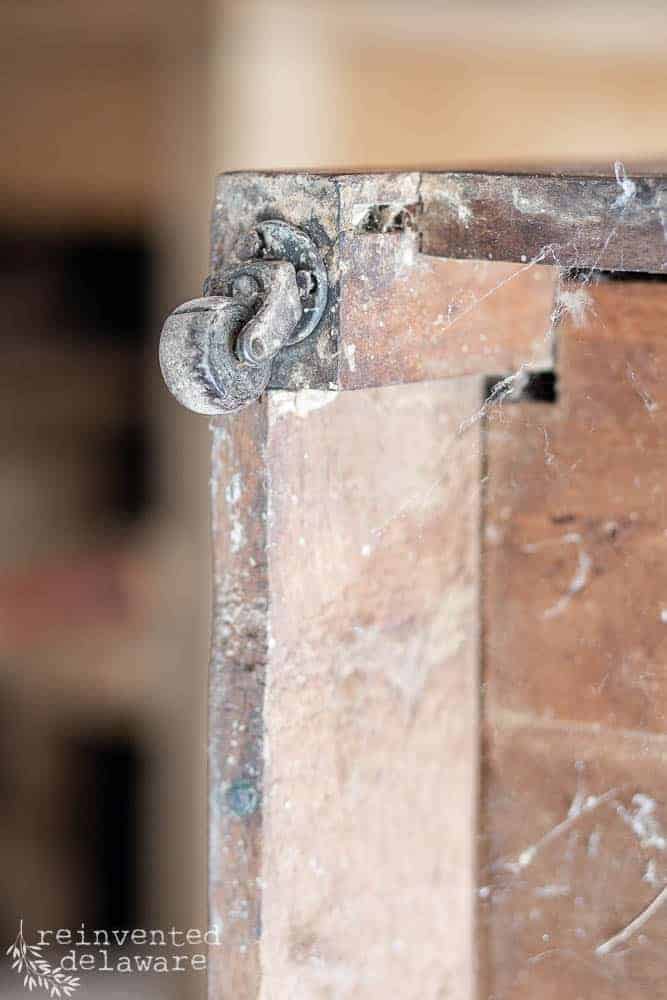

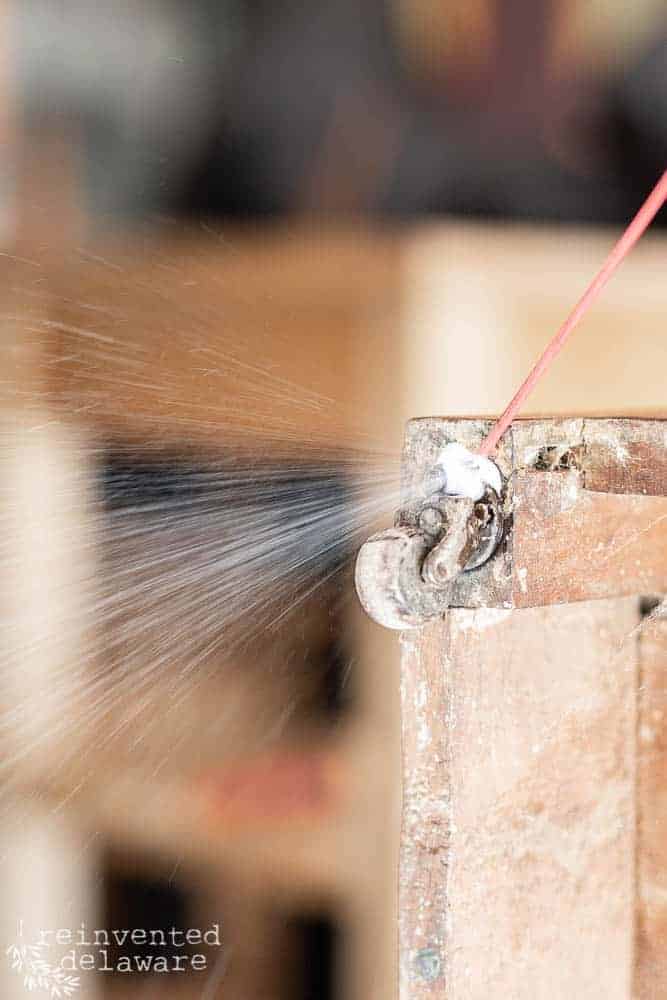
The wooden casters were stuck so I pulled out the WD-40.

I was careful to spray away from the body of the washstand because WD-40 is oil-based. Even though I would thoroughly clean the piece, I didn’t want to add to my work!
The WD-40 loosened the wooden casters without any problems. A wire brush removed any rust that was on the metal part of the casters.
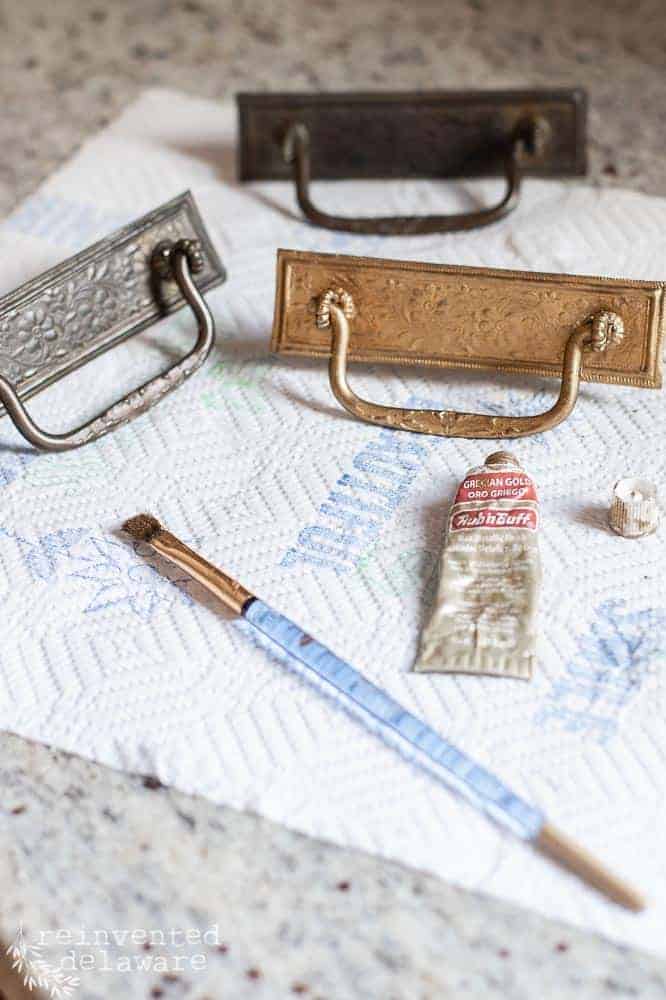
how to restore drawer pulls
Next up was to work on the drawer pulls. Below you can see the three stages of the restoration.
In the image below, you can see one of the pulls in the back – see the dark drawer pull in the back. That’s what the pulls looked like when I removed them.
The silver-ish drawer pull on the left of the image is what they looked like after scrubbing them with a small stiff scrub brush and Bar Keepers Friend.
The gold-colored drawer pull is the result of one application of Rub-n-Buff in Grecian Gold that I applied with a small paintbrush and then buffed with a blue shop towel.
Gorgeous isn’t it?? It’s like an antique piece of jewelry!
how to scuff sand
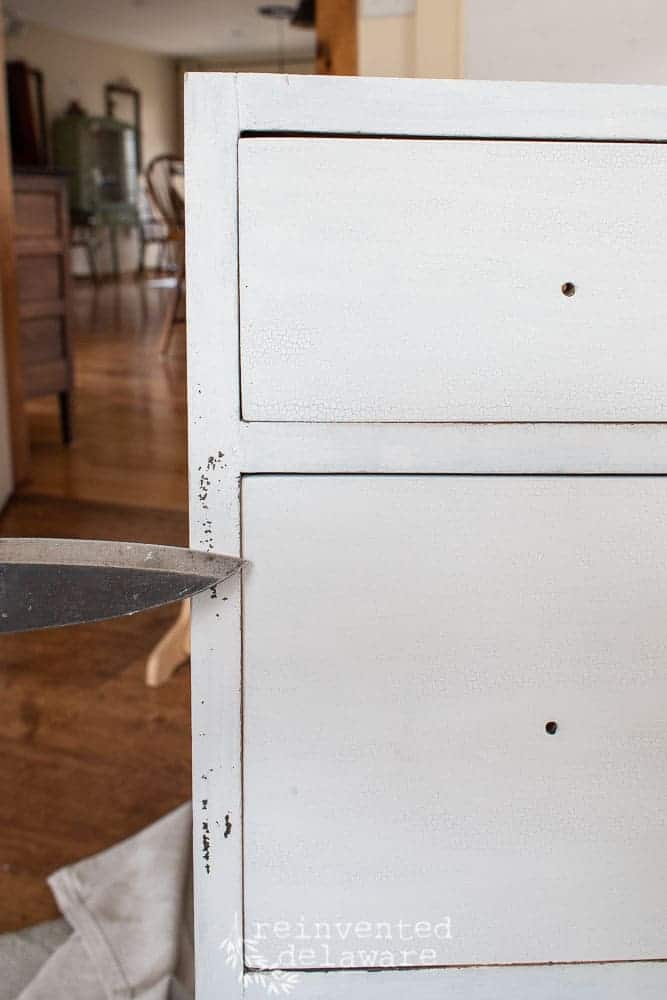
While the drawer pulls were off of the antique washstand, I scuff sanded the wood body of the piece.
Here is a quick video to show you the process using my DeWalt Orbital sander suited up with 220-grit sandpaper.
The video is only about 2 minutes but in real life, the sanding took about seven minutes! Super quick!
I used a fine-grit sanding sponge to get into the corners the sander can’t reach.
painted antique washstand
After sanding, I used the shop vac to get most of the dust and the cobwebs off. Then a quick wipe down with a microfiber cloth to get any remaining dust.
Finally, a good cleaning with Simple Green and hot water and I was ready to paint!
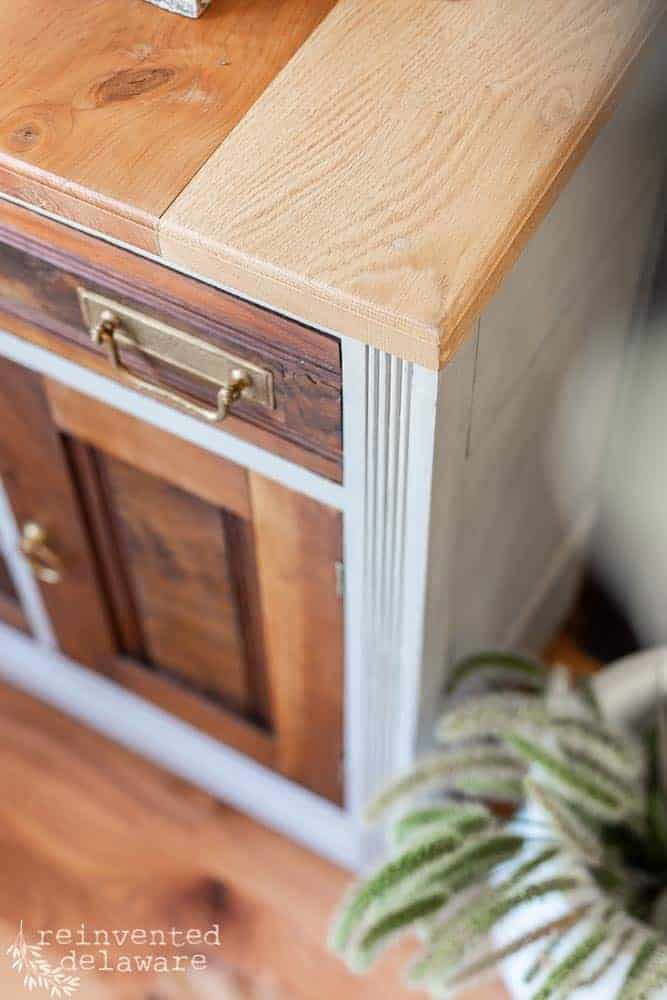
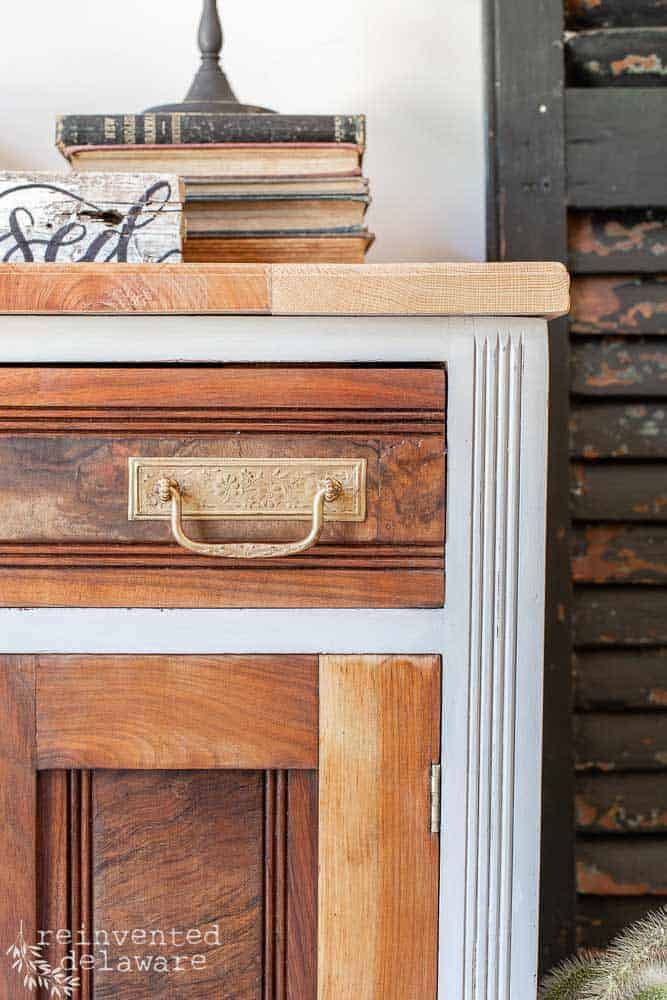
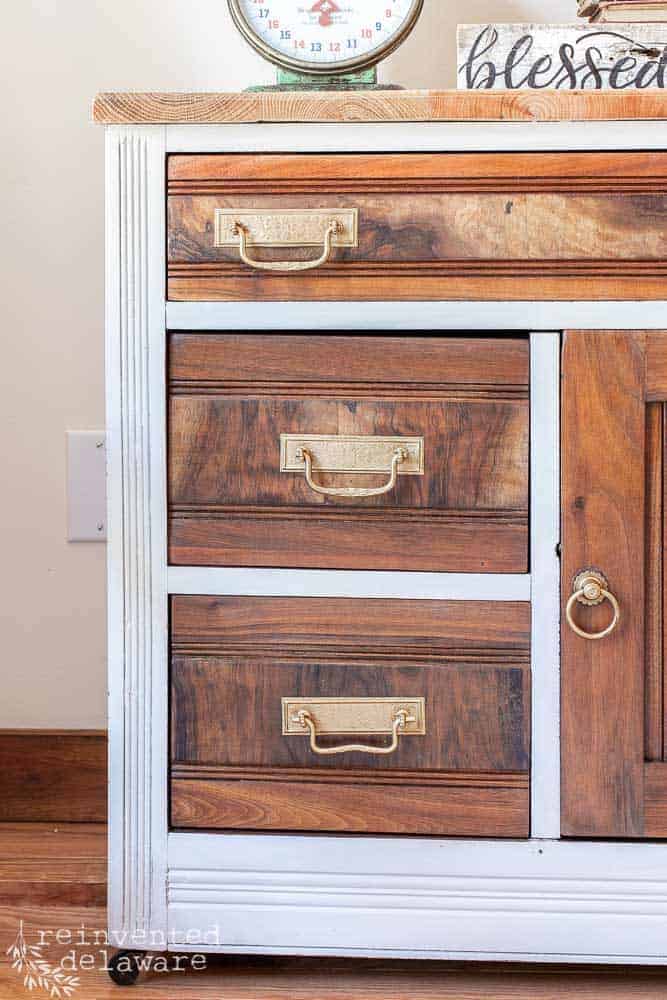
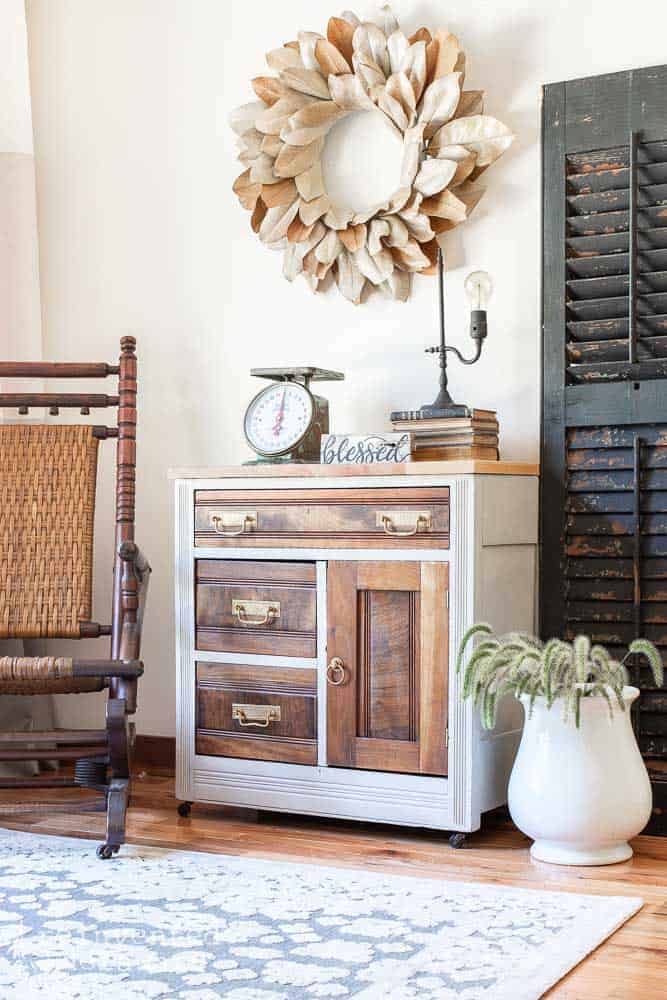
The antique washstand was painted in a custom mix of Miss Mustard Seed Milk Paint in Ironstone and Schloss. The drawer fronts were left in their natural state.
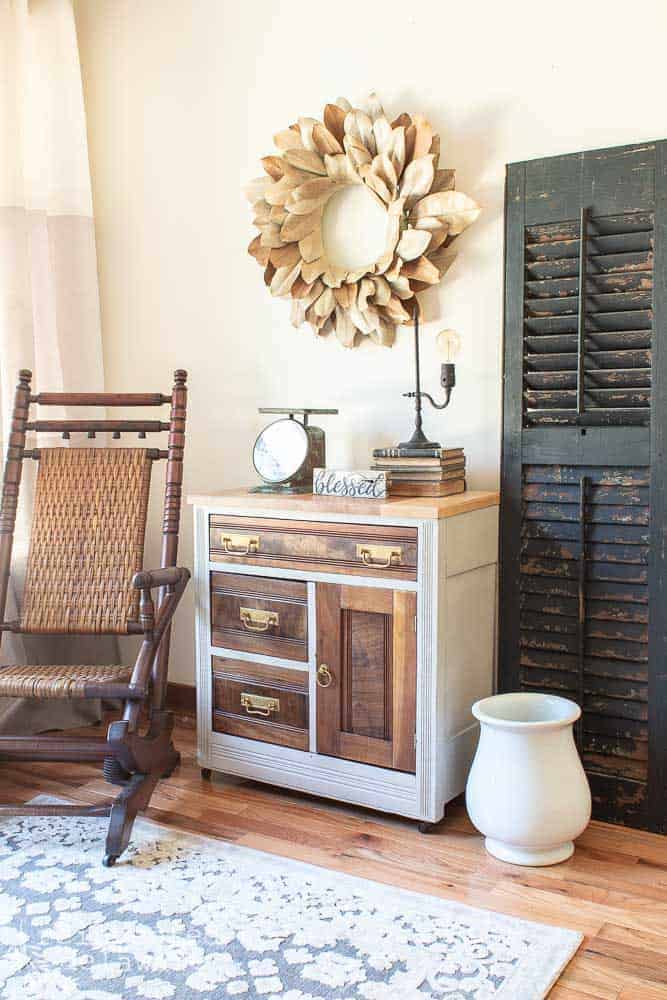
The whole piece (except for the top) got a coat of Miss Mustard Seed Hemp Oil.
Don’t you just love the two-tone look of this antique washstand makeover? The drawer fronts were so pretty in their natural coloring. Look at the grain detail – each drawer is just a bit different!
reclaimed lumber top
Let’s chat about the top. The marble was missing on this antique washstand and that’s one of the reasons we got such a deal on it.
Hubby collects reclaimed lumber (we have stacks and stacks of this lumber in one of his workshops!) and he looks forward to using it in projects like this.
He has a technique to join the wood sections and then he attaches them to the tops of many of our pieces.
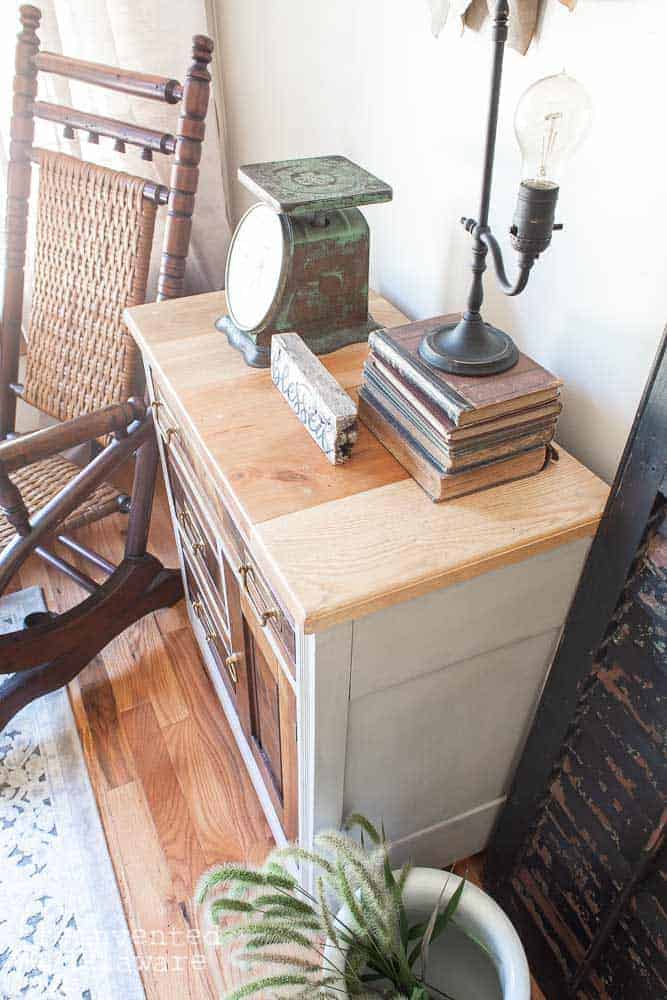
The tops are a piece of work in themselves. Look at the different wood tones and grain patterns the reclaimed lumber makes!
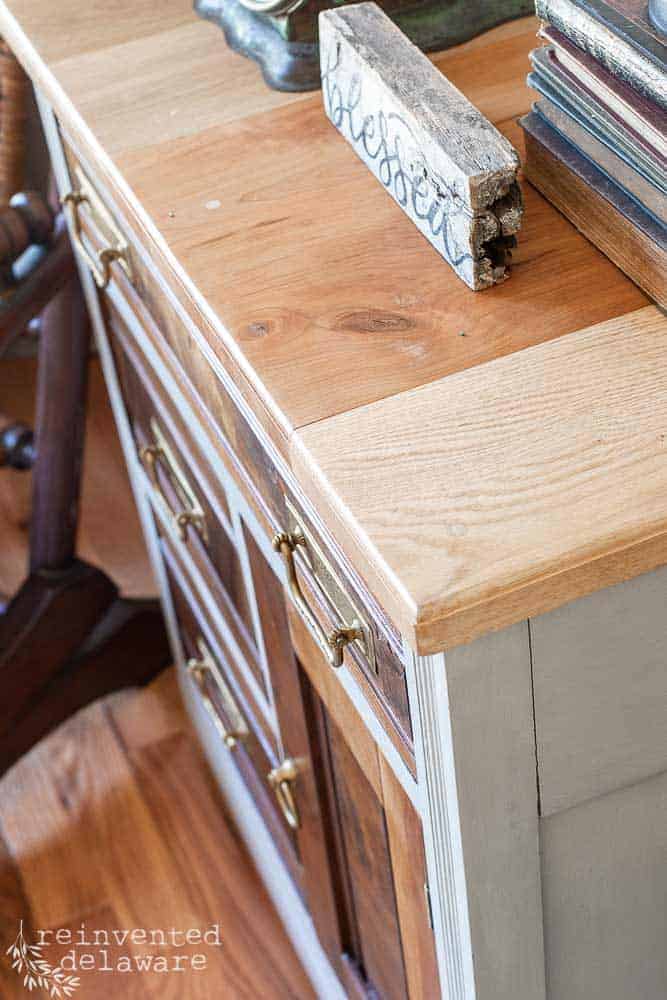
The tops need a bit more durability than the sides of the washstand, so I used General Finishes High Performance Top Coat in Flat on the top.
Three coats with light sanding between coats will protect the top of this washstand for years!
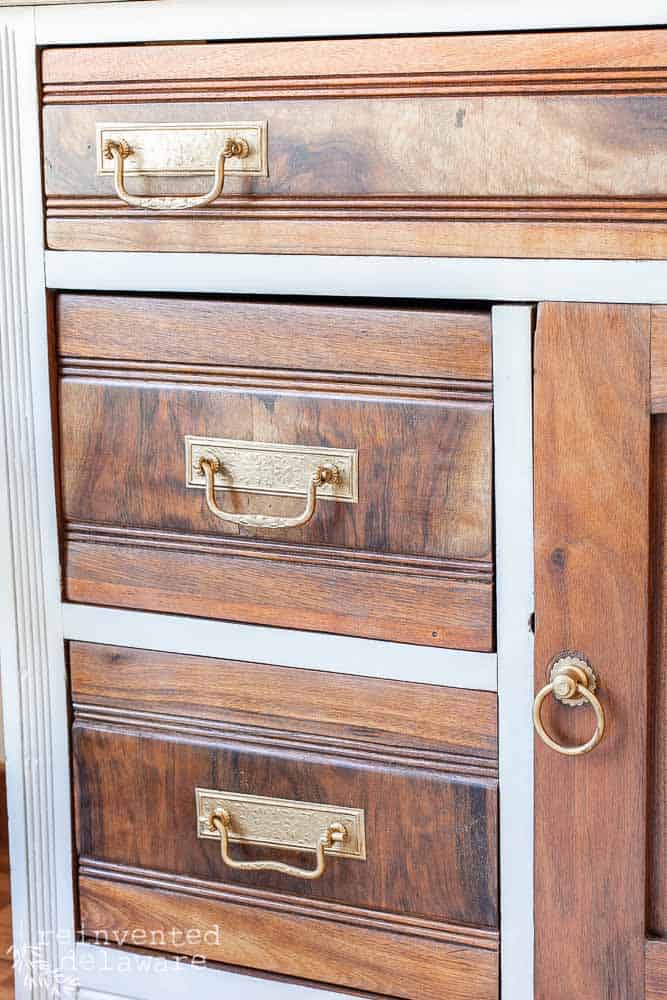
Knapp joinery
Be still my vintage lovin’ heart!! Look at those drawers!!
Knapp joinery makes my heart skip a beat.
Just kidding.
No, I’m not!! I mean look at the side of those drawers!!
We give them a nice sanding during the scuff sanding stage of the project. Then a good coat of hemp oil to bring the wood’s color to life and show off the gorgeous details!
storage solutions
These adorable antique washstands have plenty of storage between the drawers and the little cabinet area that many of them have.
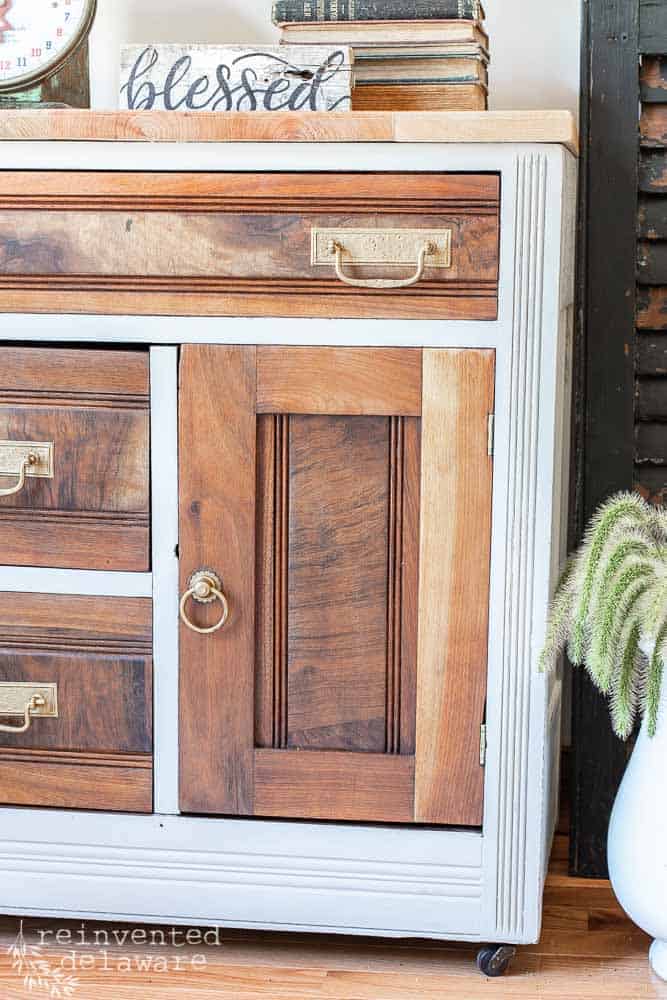
Hubby likes to add a little shelf to them for added storage and organization.

lovely details
Remember the little bit of effort we put into the drawer pulls?
I’d say it was well worth it!
The drawer pulls and the door pull in the Grecian Gold looked so good with the wood tones, don’t you think?
You might notice the bottom drawer pull is just a bit different than others. That one was missing. The backplate was in one of the drawers when we got the piece but the pull itself wasn’t.
Fortunately, I am a drawer pull collector and found one in my collection that was close enough! We just added a bit more to the story of this piece!
The casters cleaned up nicely and are all in working order. The casters make rearranging a room so easy!
I say, let’s put casters on everything!!
Well, at least on furniture!!
practical use for an antique washstand
This piece was sold to an older couple that needed a side table with storage for their sitting room. The drawers are perfect for things like remotes and magazines.
I hope you enjoyed this easy antique washstand makeover! And I hope you are inspired to tackle your own projects!
thanks for stopping by today
We would love you to join our journey over on Instagram and Facebook! You can also find more inspiration on our Pinterest page! We’re always pinning fresh ideas!
Feel free to pin any of the images in this post for your own reference! And share them on Facebook for your friends to see!
looking for more ideas?
Until next time…


Cindy, the wash stand turned out beautiful. I love the combination of stained and painted. It looks so refresh!
Thanks Tammy! Wood and painted surfaces for the win!!
I love it!!! you both did an amazing job on this gorgeous piece! Thank you so much for sharing.
I have just the marble top. I’m trying to figure out if I should keep looking for or just turn the top into some type of shelf.
Thanks – I’m so glad you enjoyed the post. Are you saying you don’t have the washstand base cabinet? Try lookind at an auction. We often see just the base cabinet without the marble top all the time! I hope you find one. Thanks for stopping by!🤩
Cindy,
The wash stand turned out beautifully! The hardware is amazing.
Hugs and blessings to you.
My heart skipped a beat when I saw that knapp joinery too!! I love the two tone; tuned out so beautiful!
Kanpp joinery is my love language Sara!! 😂😂 Thanks for your kind words!
As soon I saw your antique wash stand makeover, I knew it was exactly what I had in mind! I have a washstand that was passed down from generation to generation. It has never been repurposed, just repaired. My question is in regard to the painted portion. Can you give me more details on how you did the custom paint with the two colors? Thanks so much!
Hi Julie! I’m so glad you found this post helpful! Mixing the colors couldn’t be easier when using milk paint. I used colors I had on hand (a white and a gray) and then tested it on a little corner of the washstand. Mix the dry milk paint powder and then add the water. If you don’t like the results, add a bit more of the lighter or darker color depending on your preference! Give it a try, I’m sure you will love the results!