
How to Make a Repurposed Seed Spreader Planter
This easy DIY upcycled container garden idea is an easy project that will only take a couple of hours to complete. A repurposed seed spreader is the sweetest container garden for a patio or front porch.
upcycled grass seed spreaders
This type of broadcast spreader was used to spread grass seed or granular fertilizer on your medium-sized lawn. It could also be used for large areas like our yard.
In fact, my hubby makes it a practice to use a newer version of a fertilizer spreader for our yard at least a couple of times each season. It’s a great way to get his walk in for the day!
This type of spreader has a regulator near the handlebar to adjust the spreader settings depending on how much of the contents you want to spread.
The following post may contain affiliate links. That means if you click and then buy something, I will make a small commission at no additional cost to you! Thank you for supporting my blog. full disclosure here.
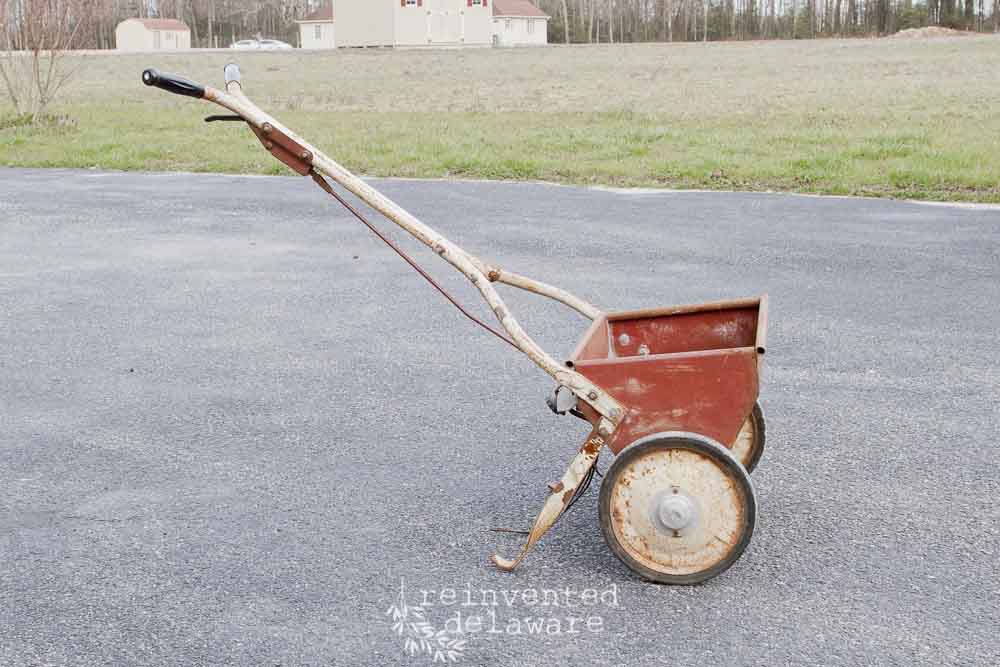
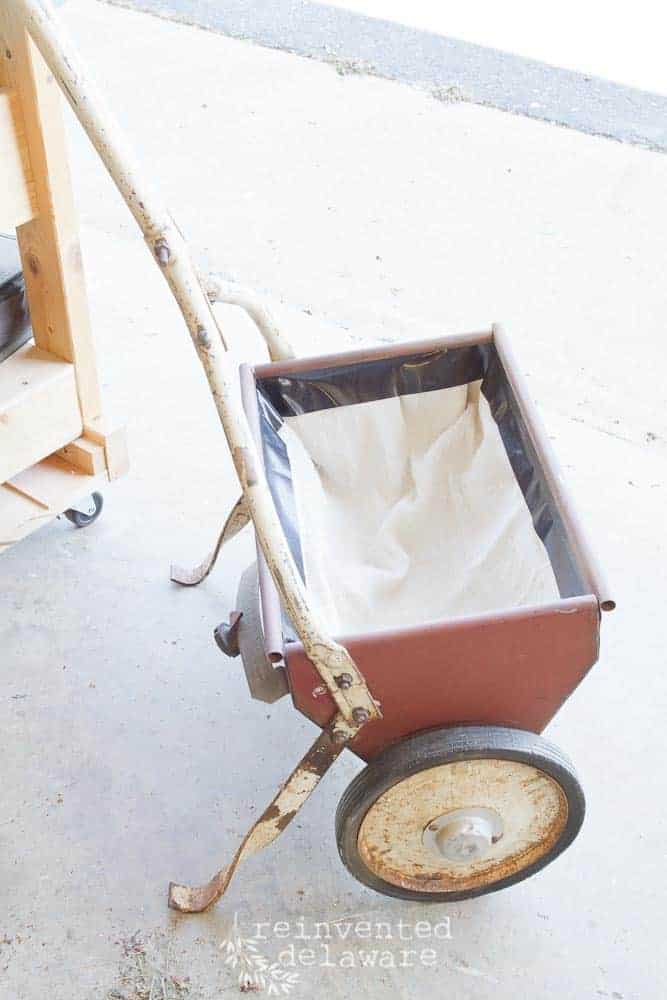
vintage seed spreader
These lawn seed spreaders also have metal legs that help them to stand upright to make filling with seed or fertilizer easy.
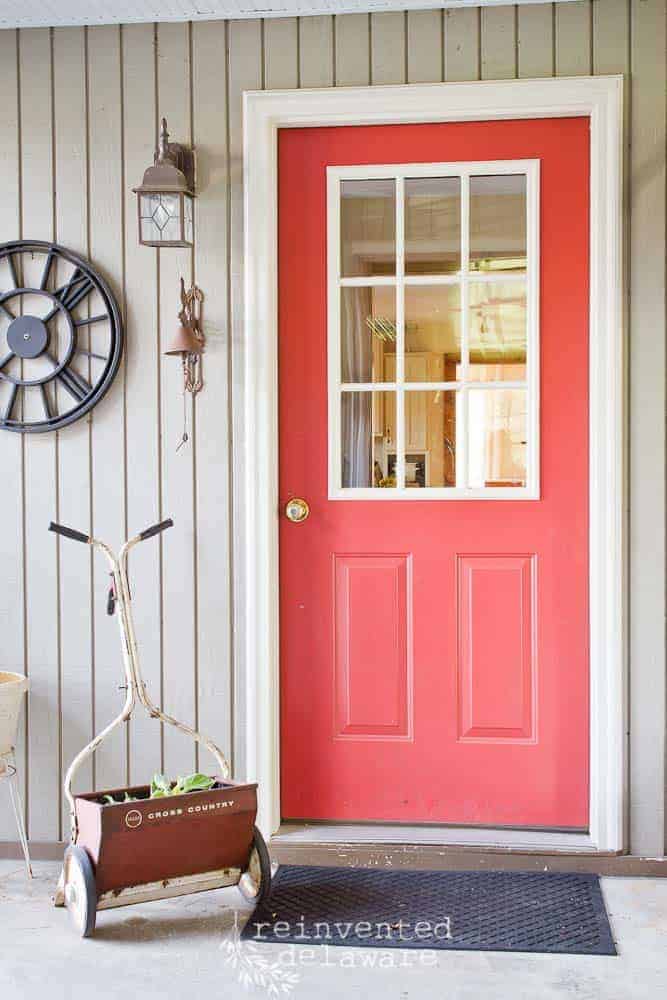
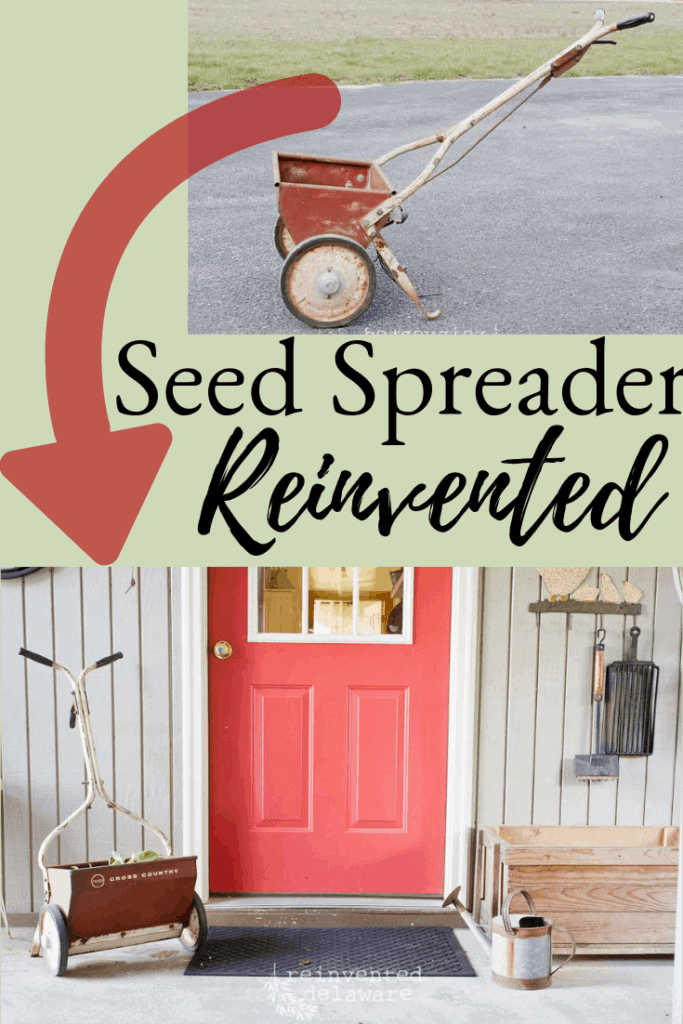
We saw this drop spreader at the auction for a reasonable price and I knew right away it would be an adorable container garden for a front porch or on our breezeway near our back door where our reclaimed wood fence sign hangs!
I also knew that the handle stuck out too far and would take up unnecessary space on a patio or porch. That was a problem that we had to fix on this repurposed seed spreader.
YouTube video
Watch this little YouTube short to watch the process. Tap below to watch!
step by step – how to repurpose a seed spreader
Let’s go over each step for this easy DIY container garden project. Supplies that I used will be listed near the bottom of the post.
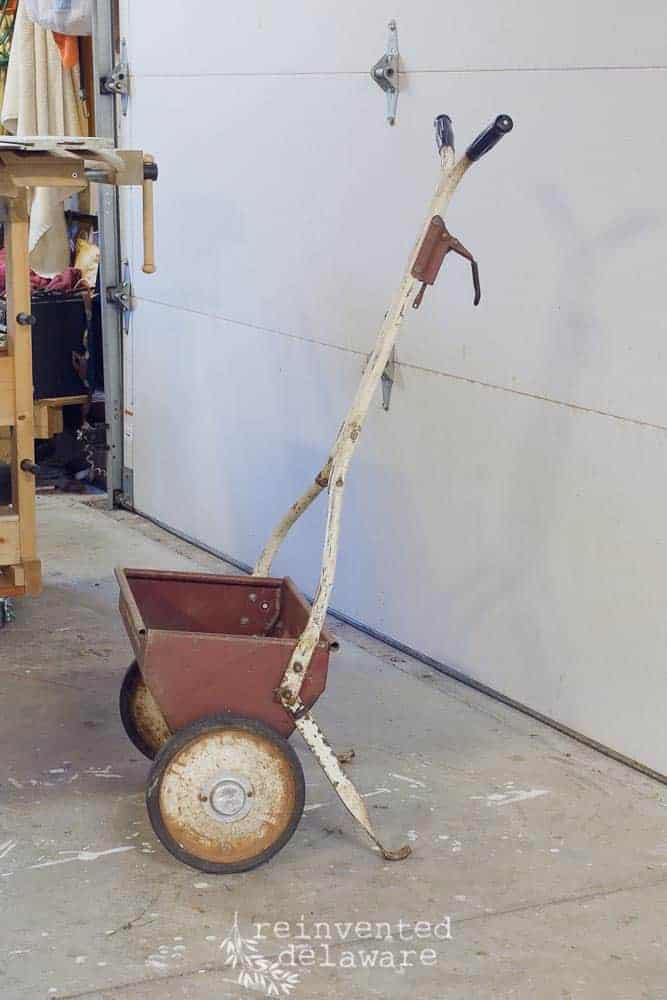
step one – adjust the handlebar
The first step is to adjust the handlebar on these lawn seed spreaders. The handle is meant to be pushed so the angle of the bar sticks out. You could leave it as is but it will take up more floor space.
My hubby just loosened the bolts and adjusted the handlebar in a more upright position. He also had to remove the regulator I mentioned earlier. The cable wouldn’t loosen enough to extend the handlebar so he removed it.
After loosening the bolts, he readjusted the handlebar to my liking and then tightened the bolts again. The look of the seed spreader is basically the same but it will take up much less space.
Even though this spreader didn’t have an adjustable arm support, we made it happen with a turn of a bolt and some willpower!

step two – remove the rust and seal the exterior
The seed spreader naturally had some rust. This seed spreader probably dates back to the 60s or 70s.
Cleaning off the bits of rust was easy. I used a worn-down piece of sandpaper from my orbital sander wrapped around a worn-out sanding sponge and went over the whole piece.
The sanding sponge offers flexibility around some of the curves and such. My goal wasn’t to completely remove the rust, but only to give it a good once over.
Then I used my shop vac to remove the loose dust and wiped it down with a damp cloth. When the seed spreader was completely dry, I sprayed a couple of coats of clear topcoat in a flat finish. The flat finish keeps the original look and still protects it from moisture.
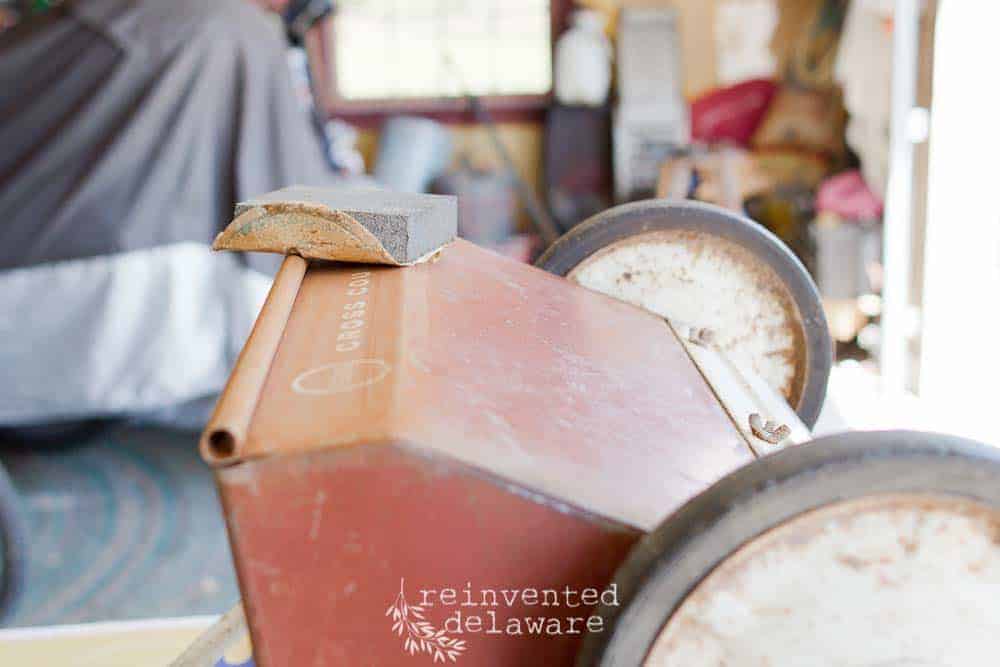
A good vacuuming with the shop vac and then a couple of coats of a spray clear topcoat and I was ready to prep it for plantings!
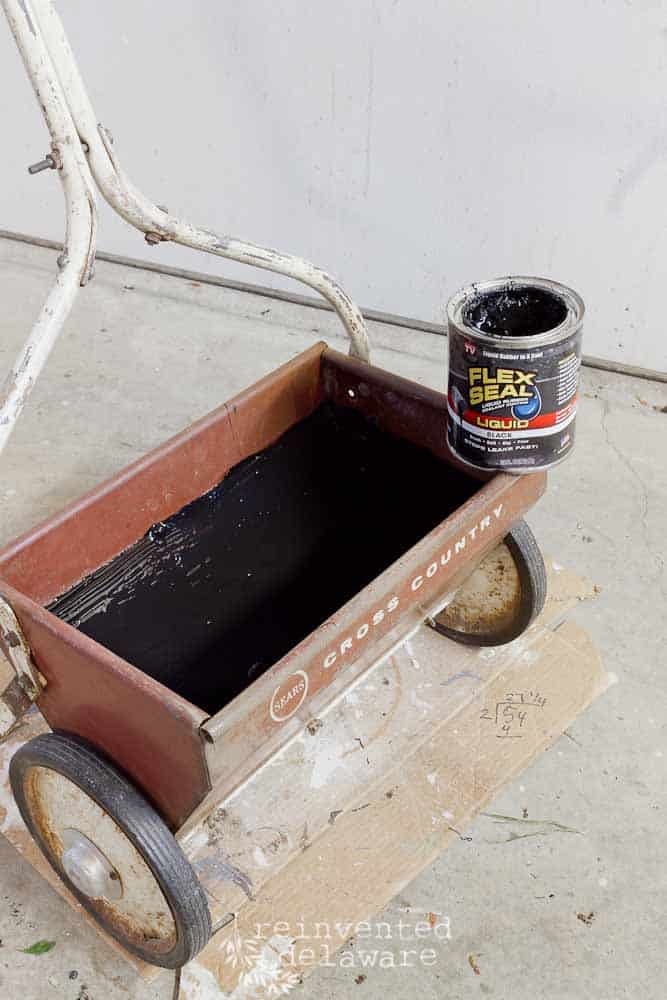
step three – seal the interior of the spreader
The next obstacle was a way to prevent further rust on the interior of the seed spreader. I knew it was unrealistic to completely avoid rust, but I wanted to do what I could.
We have used Flex Seal on a couple of other projects so I thought it would work well. The instructions say it will work on metal!
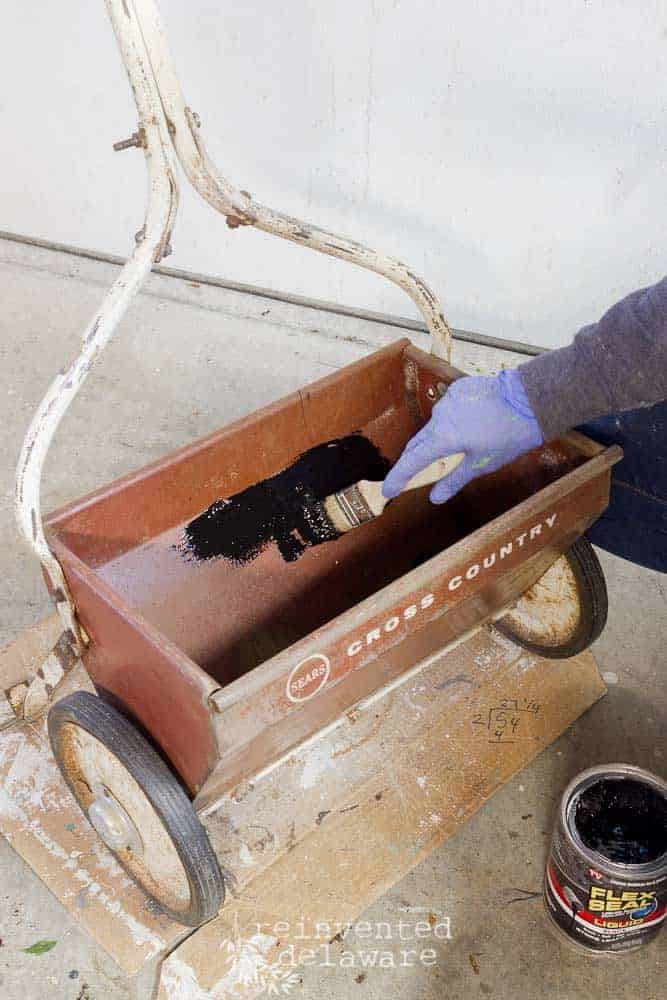
I applied one thick coat with a disposable chip brush to cover the interior of the seed spreader. It is best to use a disposable chip brush and gloves so that you can toss everything in the trash.
The Flex Seal dried overnight and was completely dry by the next day when I was ready to figure out a way to contain the dirt I would be adding.
step four – create a container garden
I am notorious for using what I already have on hand so when I thought about lining the inside, my first thought was landscape fabric. But I didn’t have any.
An empty fertilizer bag or grass seed bag might have worked also. They are usually made of breathable fabric similar to a tarp. But I didn’t have one!
About this time in a project, I often take a walk around my workshop or sewing and craft room and think as I look at my supplies on hand. Wa-la – I had a leftover piece of drop cloth from another project!
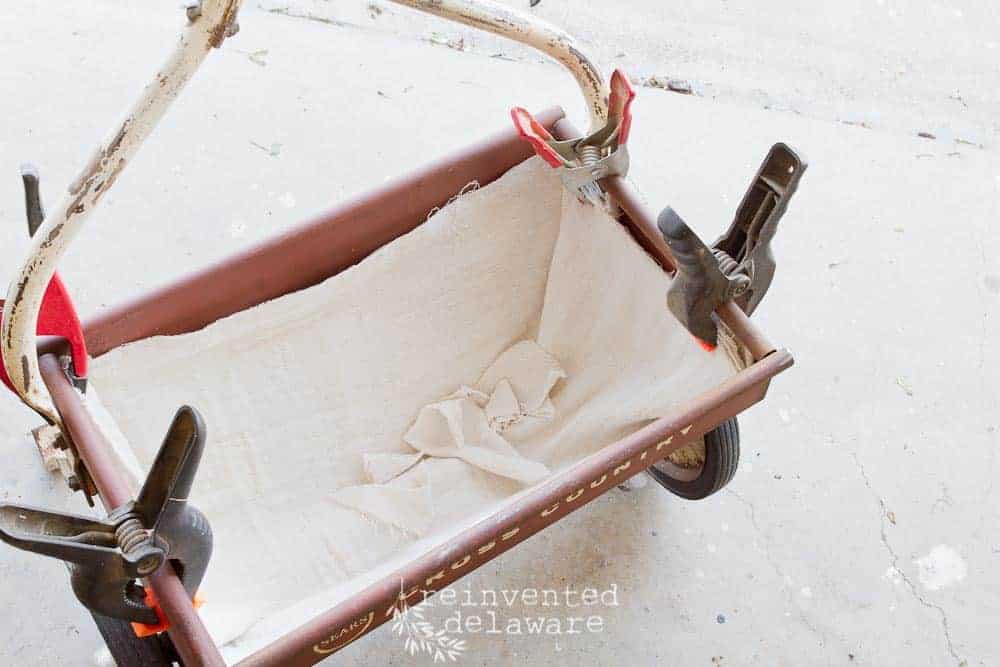
The dropcloth would hold the wood chips and soil perfectly.
It was easy enough to form the small piece of dropcloth to the interior of the seed spreader. I used clamps as extra hands to hold it in place.
Gorilla Tape is strong and waterproof/water-resistant and I knew it would hold the liner in place.
Handy tip: shop auctions and estate sales
seed spreaders can be found at yard sales, estate sales, and auctions. be sure to check your local area for these kinds of sales!
Keeping the tape on the roll, I taped small sections at a time being sure to catch the fabric and stick it to the metal.
This took some patience. Gorilla Tape sticks to everything and especially hands!!
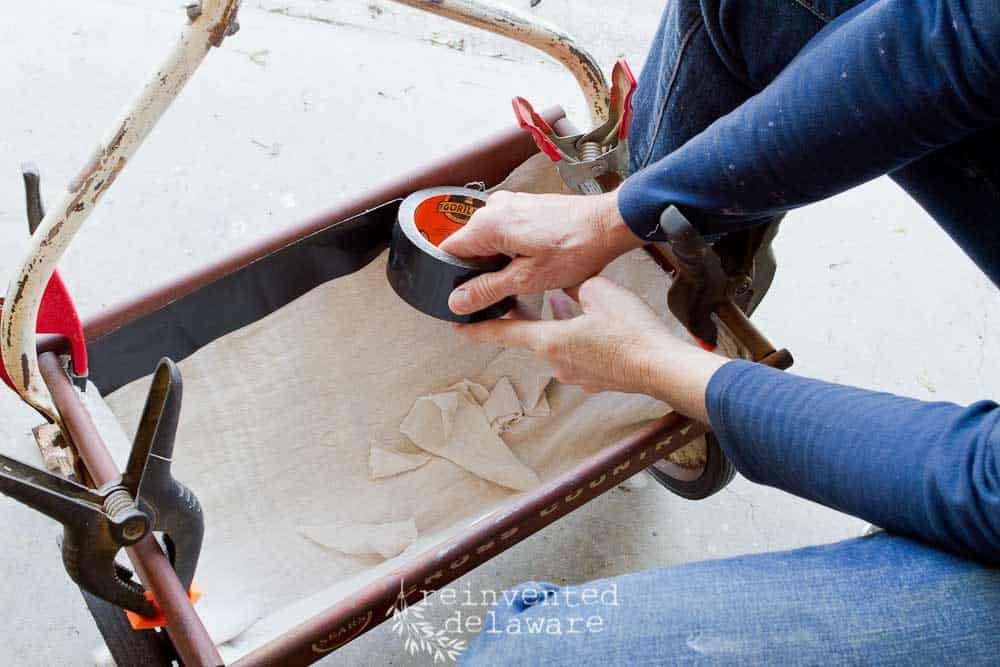
As I moved around the top edge of the seed spreader, I realized the fabric might sag when I added the dirt and the plants. There is a mechanism that turns when the wheels turn that helps to disperse the seed. Sorry, but I didn’t get an image of that. I was concerned that the fabric could get tangled in it.
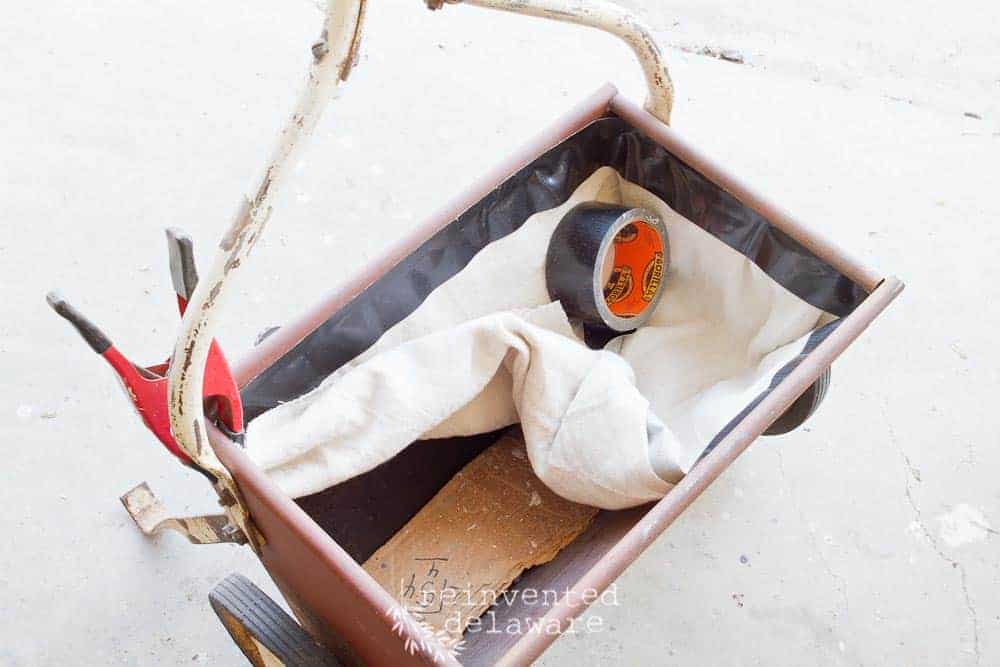
I pulled back one corner and added a piece of cardboard I had on hand. That would add some stability to the liner. Then I resumed taping the dropcloth to the interior of the seed spreader.
DIY container garden
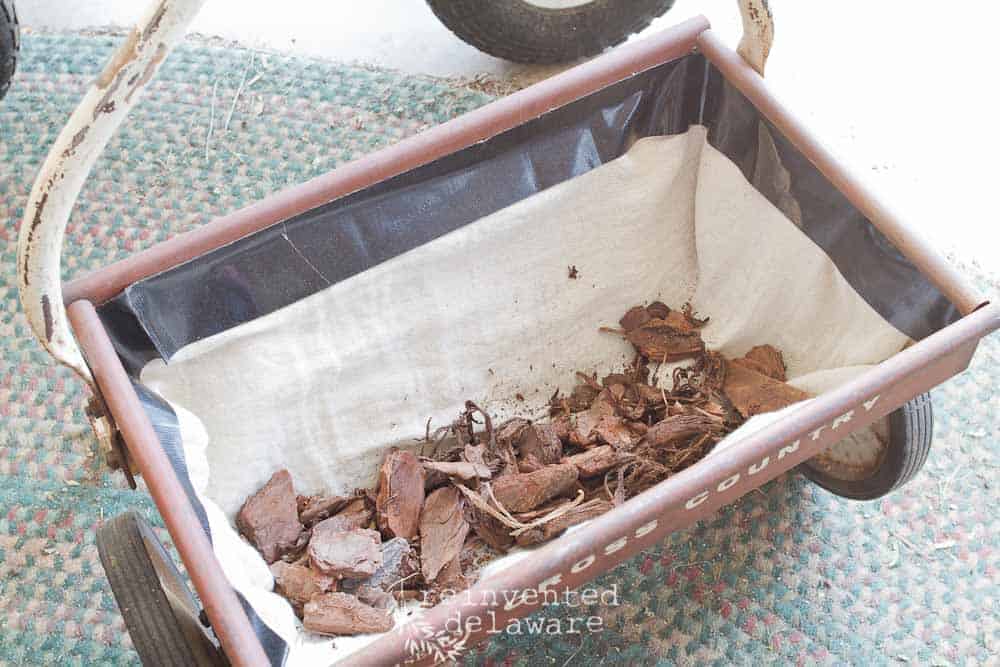
Here is the interior of the seeder all ready for dirt and plants!
A layer of mulch or large wood chips will help to retain water. A couple of handfuls from our landscaping was just enough!
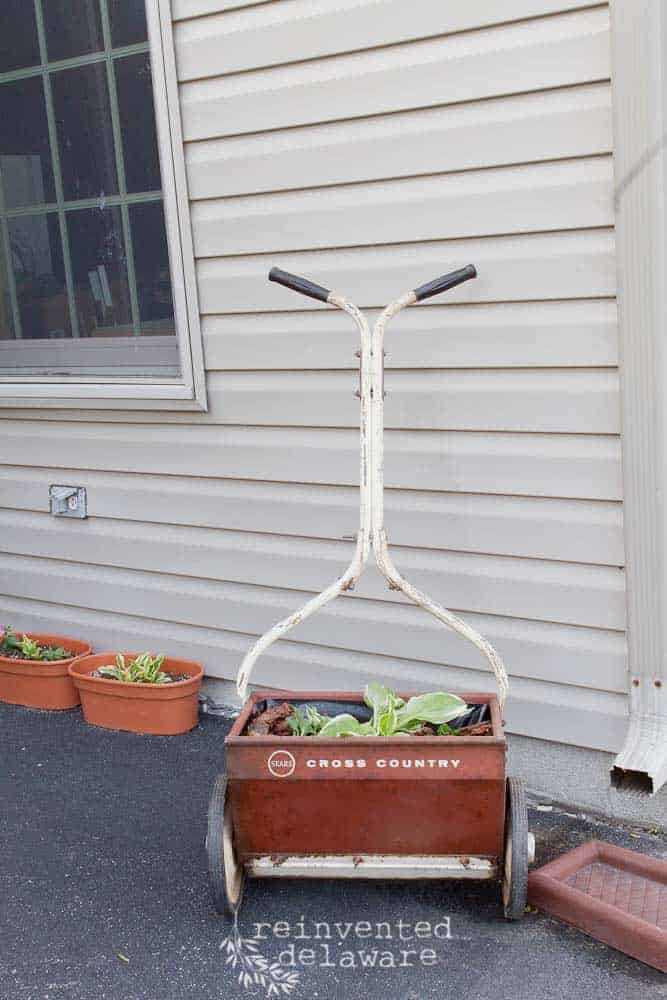
Then I added some garden soil and filled it almost to the top, leaving room to add plants.
I added some annual petunias and a hosta from our yard. The plants are small now but before you know it, they will fill out nicely! And the hosta will come back year after year!
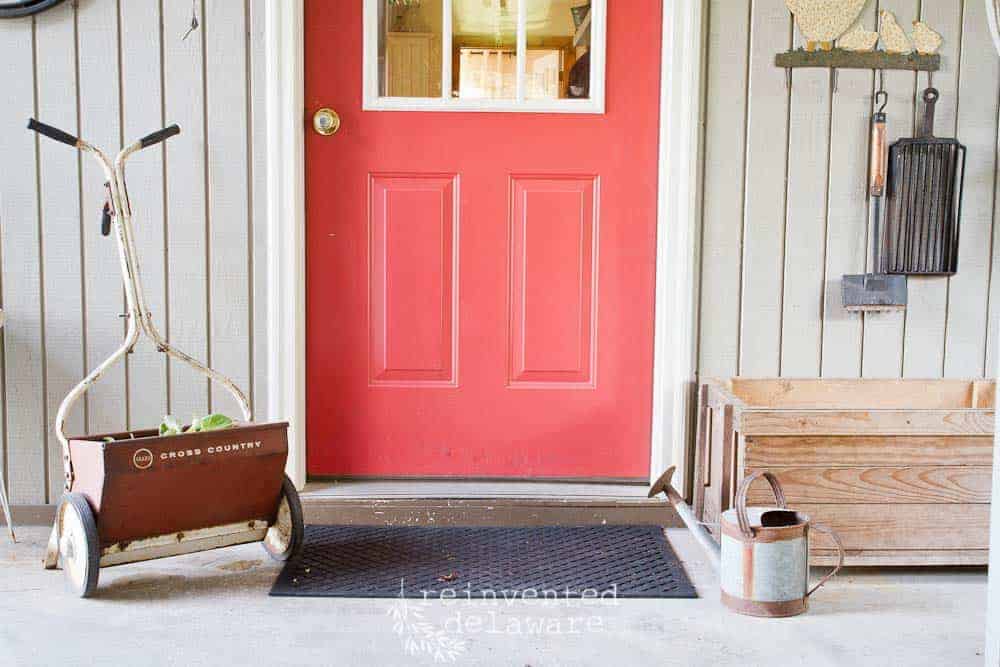
Isn’t this repurposed seed spreader container garden adorable here at our back door? It’s the perfect place since it is near our upcycled garden tool organizer and other gardening supplies!
Did you notice the logo on the seed spreader? Sears Cross Country! I love glimpses from the past like this!
supplies:
- Flex Seal
- chip brush
- landscape fabric
- Gorilla Tape
- spray clear coat
- mulch
- garden soil
- plants of your choice
You are probably just itching to find one of these and make this repurposed seed spreader container garden for your home!
My friend Pam from House of Hawthornes made over an adorable seed spreader for her garden. You will love the colors!
Be sure and pin this so you are ready to go when you find your own seed spreader! Follow us on Pinterest for more ideas!
Thanks for stopping by! We love to share our projects with you on Instagram and Facebook.

Visit my Amazon Storefront!
Click the button below and head over to our online shop on Amazon!

Hey Cindy!
This seed planter turned container garden is too cute and such a neat idea! I think it looks adorable on the porch by the door. One more thing I’m going to have to be on the lookout for. 😉
>>> Kim
Thanks Kim! I’ll keep putting out ideas and reasons to go thrifting ??
Such an adorable idea, Cindy! Love it! I pinned!
Thanks my friend!!
Cindy, Thanks so much for sharing your projects…you have such great ideas. Love all of your finished things,keep up the great work.
Thanks For your encouragement and for following along!
Omg 5his is adorable luv. Thanks for sharing??
Thanks Ann!! And thanks for inviting me to link up!
Cindy this is such a fun idea. I’m so glad you joined us this week?? Pinned
Thanks Ann!! And thanks for pinning??
What a fun upcycle, Cynthia! This is just the cutest idea!
Isn’t it a cutie? So glad you enjoyed the post Janet 😊
Clever and cute! Pinned!
Cindy, this is EXACTLY how I would repurpose a seed spreader–love it! Great find! Blessings, Cecilia @My Thrift Store Addiction