
Upcycled Thrifted Breadboard – DIY Christmas Decor
If you’re looking for a fun and budget-friendly way to add charm to your holiday decor, this upcycled breadboard DIY project is perfect for you! With some creativity and decorative transfers, you can easily transform a thrifted breadboard into a unique piece that will brighten up any space.
Today’s project is perfect for beginners. You will find inspiration to breathe new life into an old item you find at the thrift shop. This is a fun way to incorporate eco-friendly, thrifted home decor into your holiday celebrations.
In this tutorial, I’ll show you step-by-step how to repurpose a vintage or thrift store breadboard using simple materials. Let’s get started!

The following post may contain affiliate links. That means if you click and then buy something, I will make a small commission at no additional cost to you! Thank you for supporting my blog. full disclosure here.
This post is sponsored by Dixie Belle. All opinions are my own!
creative upcycle idea for Christmas decor
Upcycling items you find at the thrift store is a great way to decorate your home for Christmas. DIY projects can become a holiday tradition for you and your family. We’ve made many projects for our home decor over the years.
Even though my children are grown and gone, I continue to upcycle and repurpose our tired Christmas decor.
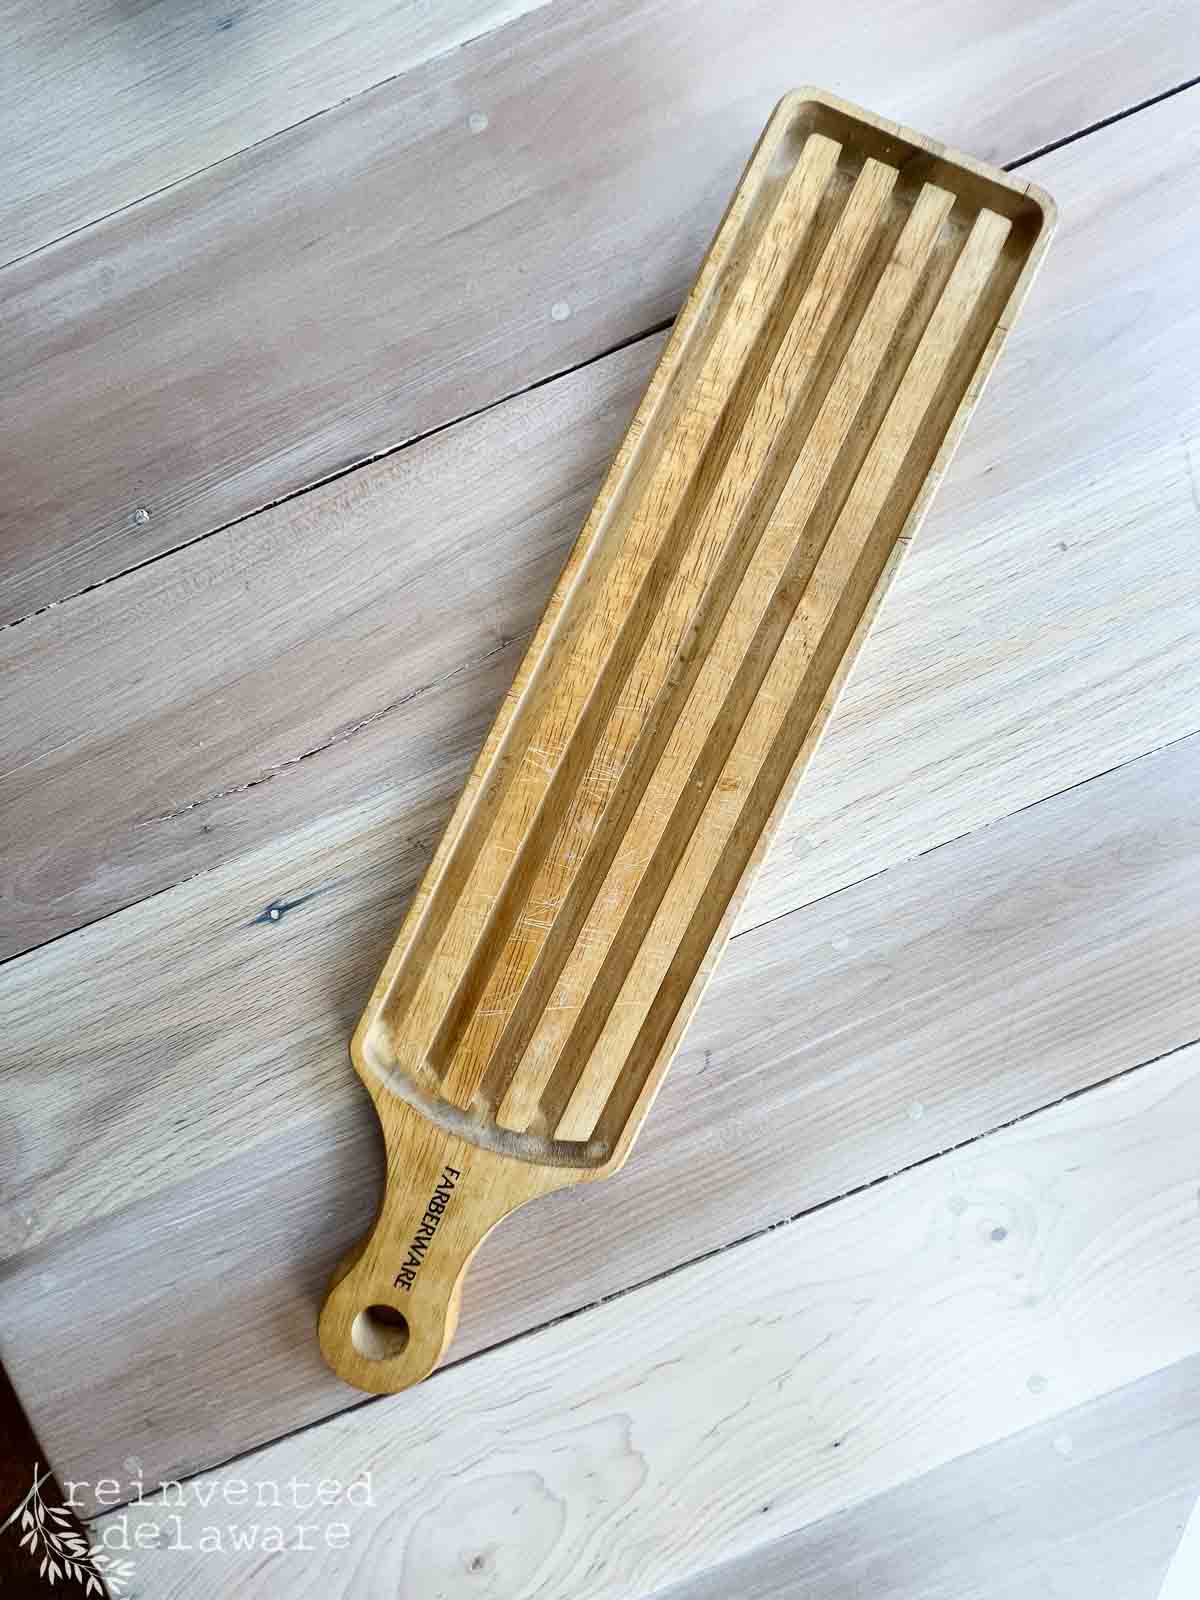
I often head to our local thrift stores to find unique pieces to upcycle! The wood section at any Goodwill Thrift Store is usually stocked with items that people have gotten tired of or stopped using.
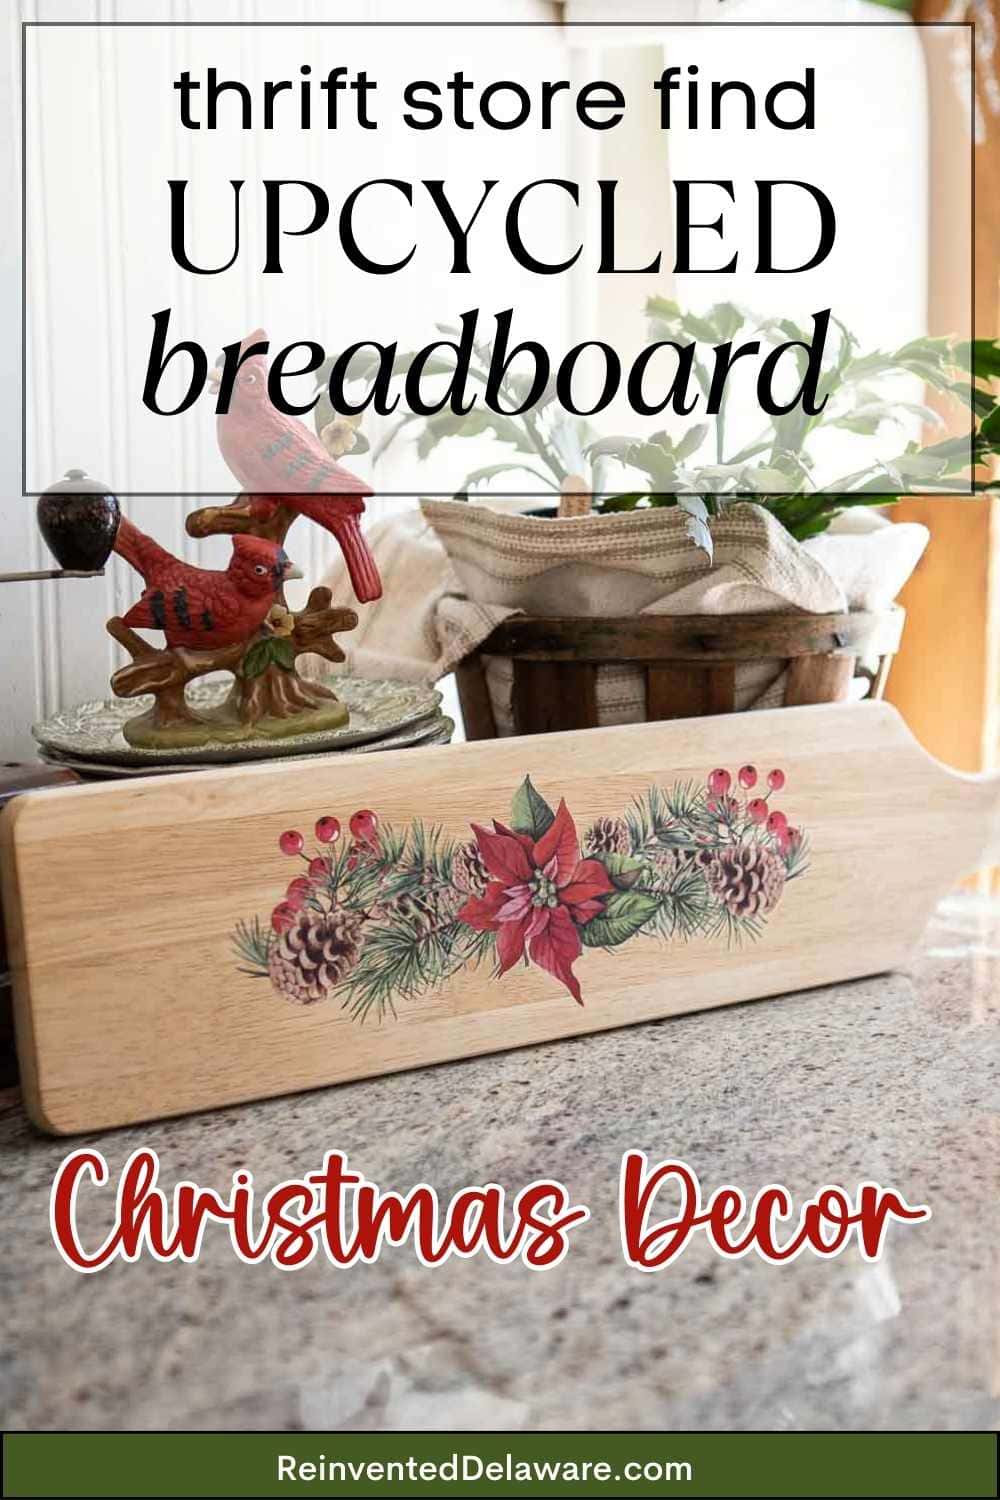
Like the wooden cutting board I found while out thrift shopping recently, the long and narrow shape caught my eye and I knew I could do something with it!
supplies for this vintage breadboard project
You will only need a few tools and supplies to give an old cutting board a makeover. You may already have some of the supplies at hand so there will be little additional cost for you!
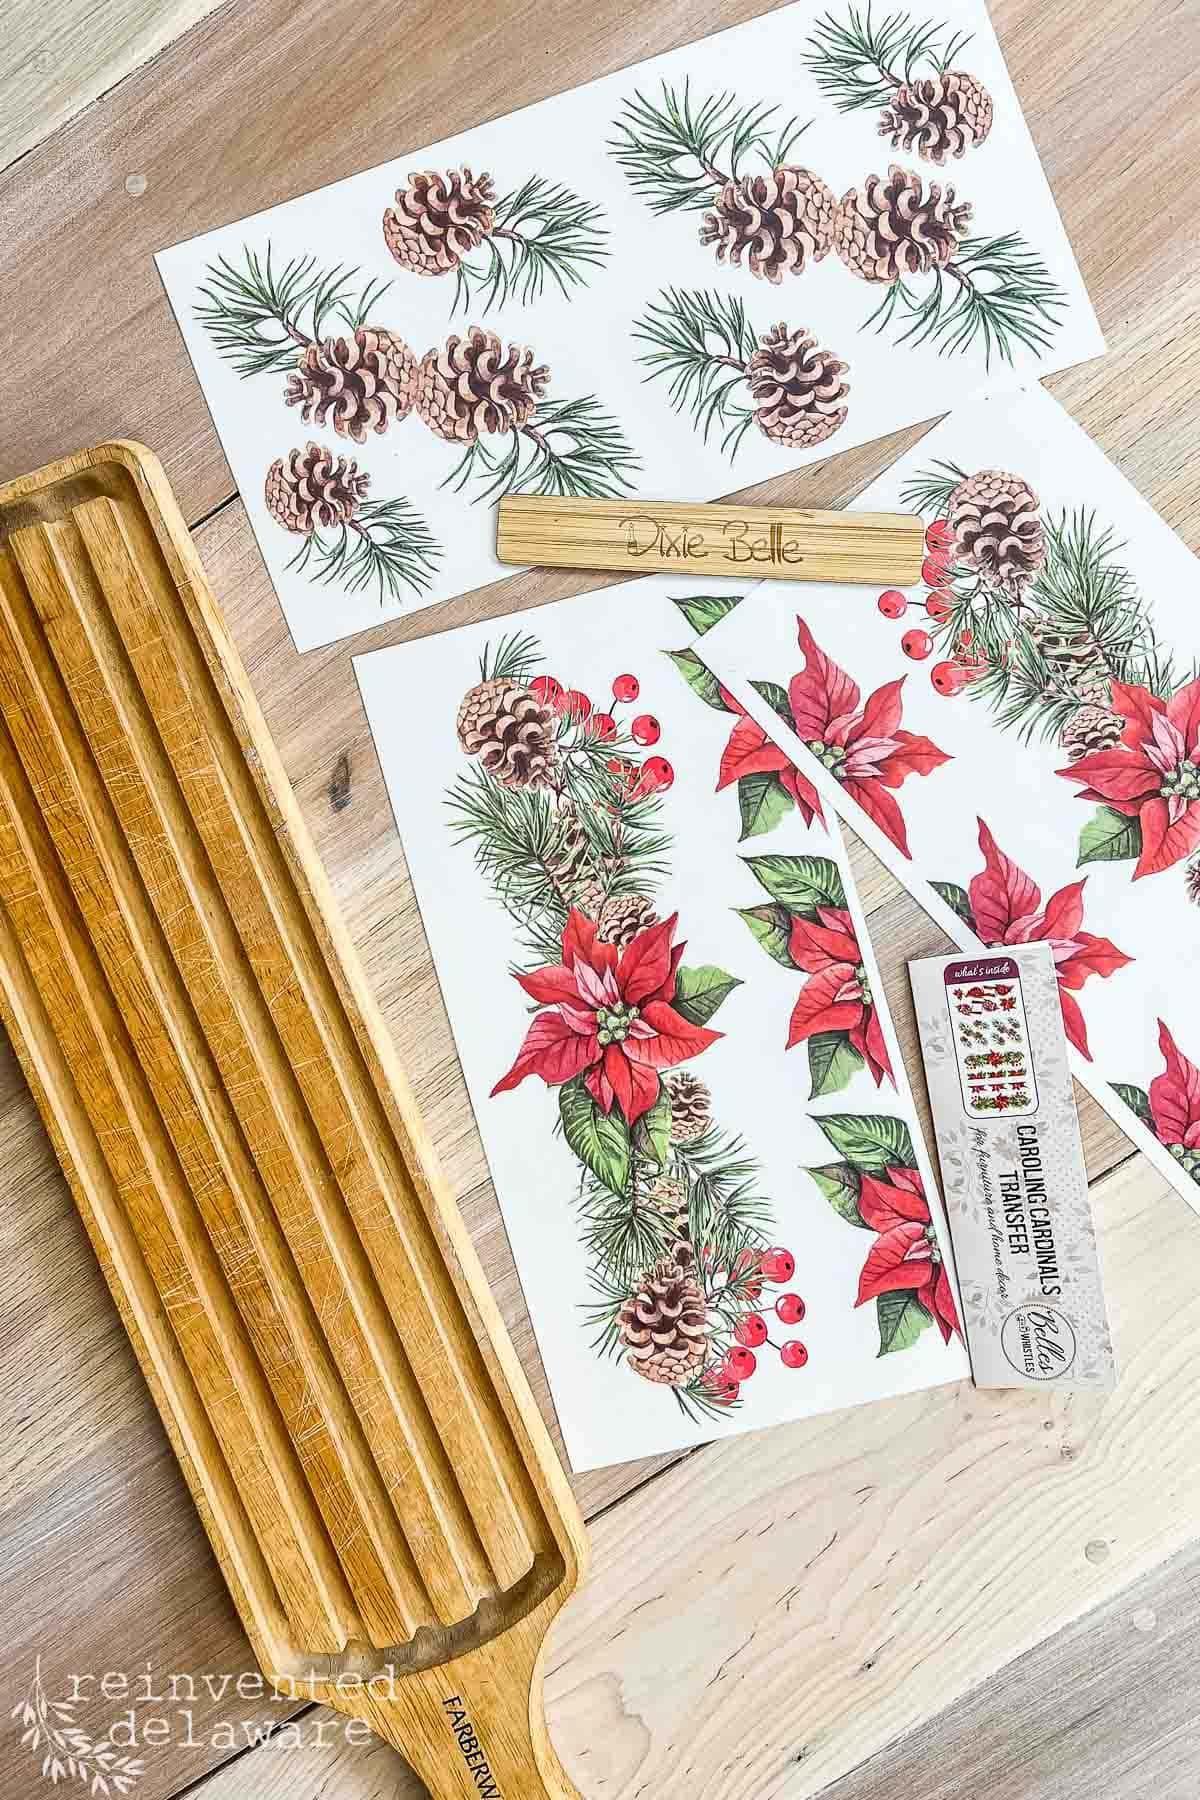
The fun part is choosing your favorite transfer. I love the one I chose – it’s so festive and can be used for the winter season as well as for Christmas.
Here are the supplies I used:
- thrift store cutting board
- 150 grit sandpaper (option to use a power sander)
- cleaning cloth
- transfer (I used Caroling Cardinals)
- Spray Wax
Handy tip: Shop Often!
Be sure to visit the wood department of the thrift stores you shop at! You can find cutting boards for just a few dollars each!
step by step tutorial
I’m chuckling at the phrase ‘step-by-step tutorial’ because this project is so simple I don’t even think you need directions!
I’ll go over the steps just in case you haven’t used a transfer before. You’ll be a pro in no time! Once you have used one, you will want to embellish more thrift store finds with them!
step one: clean the breadboard
To clean the used breadboard, simply scrub it with a solution of course salt and lemon juice with hot water. Allow the wooden breadboard to dry completely before applying the transfer.
You can use dish soap if you like but the salt and lemon juice solution will remove any leftover food particles. Do what you feel is best to clean the board from the previous owners!
step two: sand the wooden board
Once you clean the board, you may like the farmhouse style look of a used cutting board with all of its markings. If so, leave it as is!
Or you may want to create a new appearance on the cutting board. Give the old cutting board a good sanding with a power sander like an orbital sander using a 150-grit sanding disc.
This is the fastest way to smooth the board from any previous use. I like to use my orbital sander in my outdoor workshop because it stirs up a ton of dust!
You can also use sandpaper and sand it down by hand. Be sure to remove the sanding dust after the sanding process.
Whether you use a power sander or if you sand it by hand, be sure to sand the sides of the cutting board as well as the handle. Breadboards come in different shapes so yours may not have a handle.
thanks for being here!
I hope you are enjoying this project! Let me know if you have any questions. Or leave me a comment to tell me about your project and ideas!
thanks, Cindy 😀

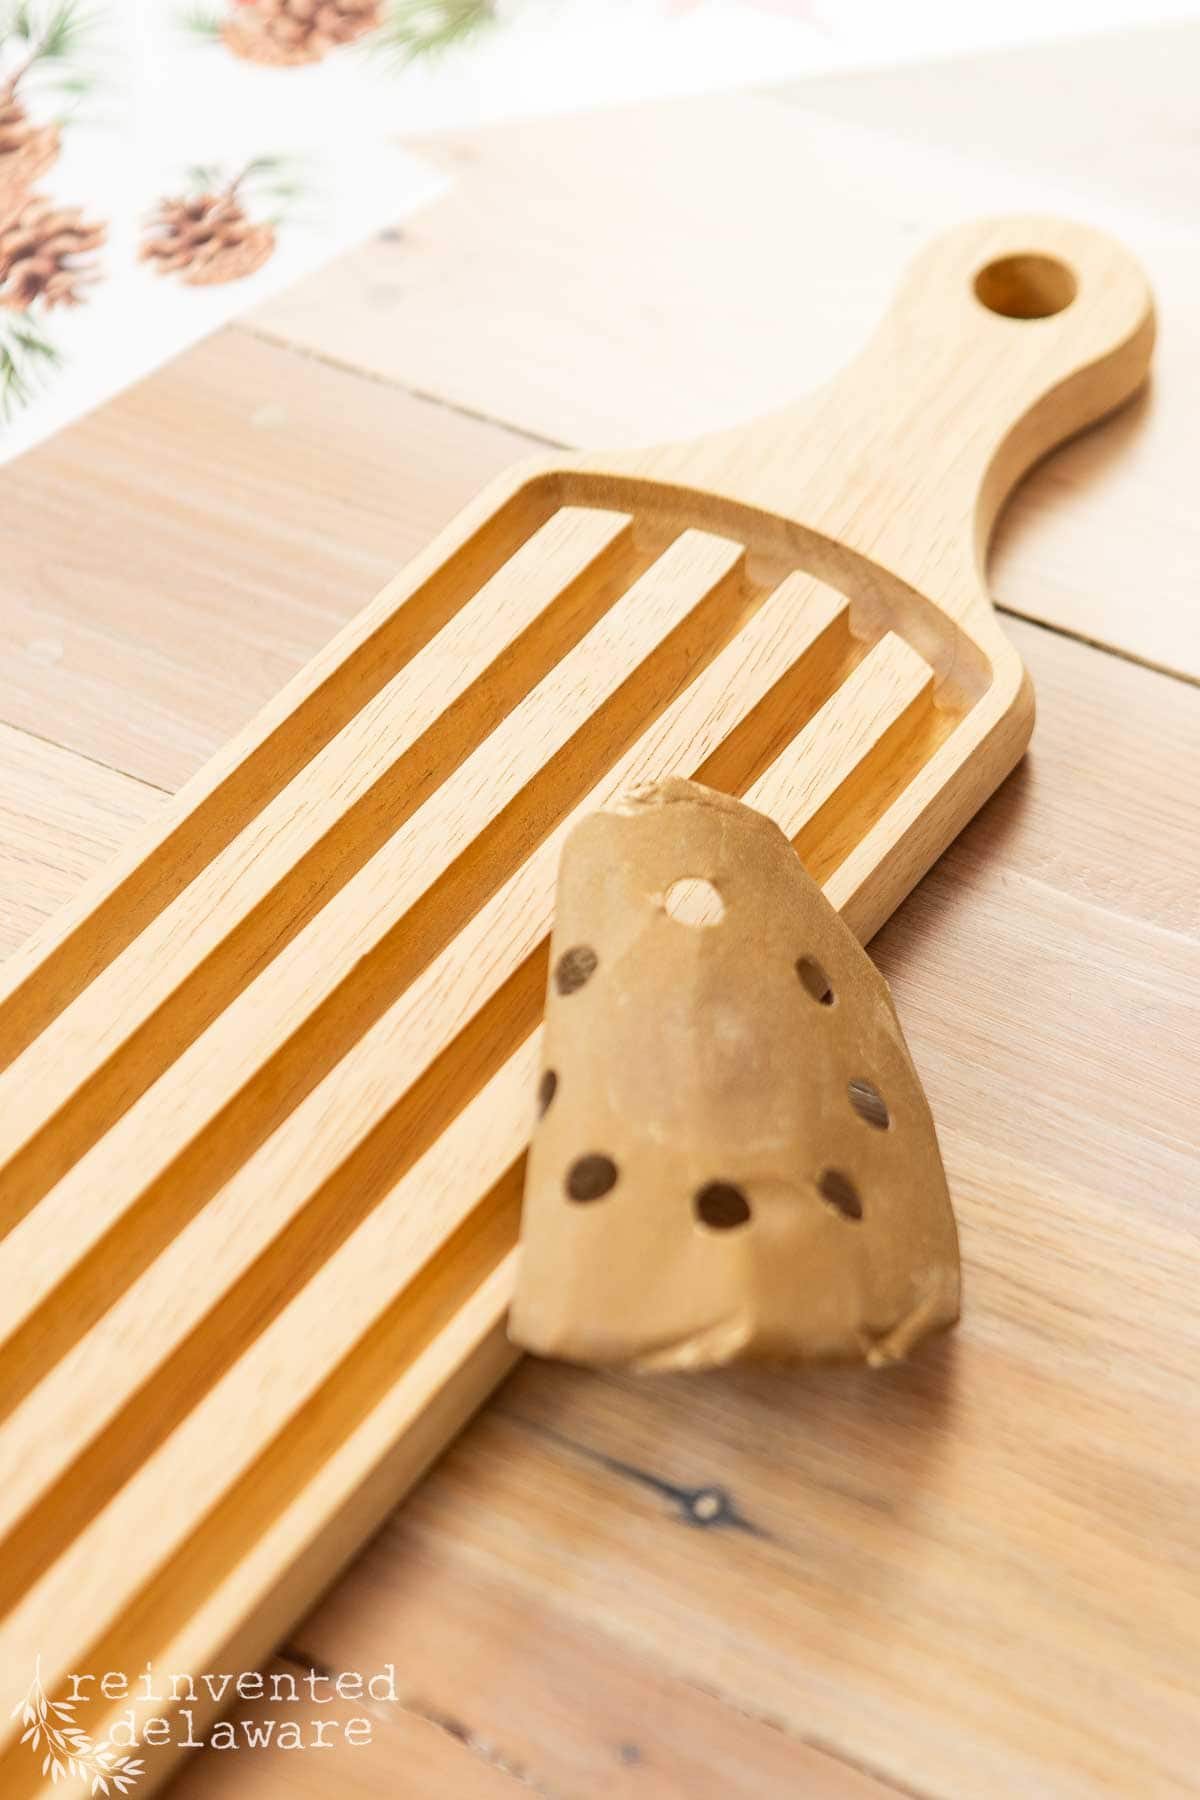
step three: apply the transfer
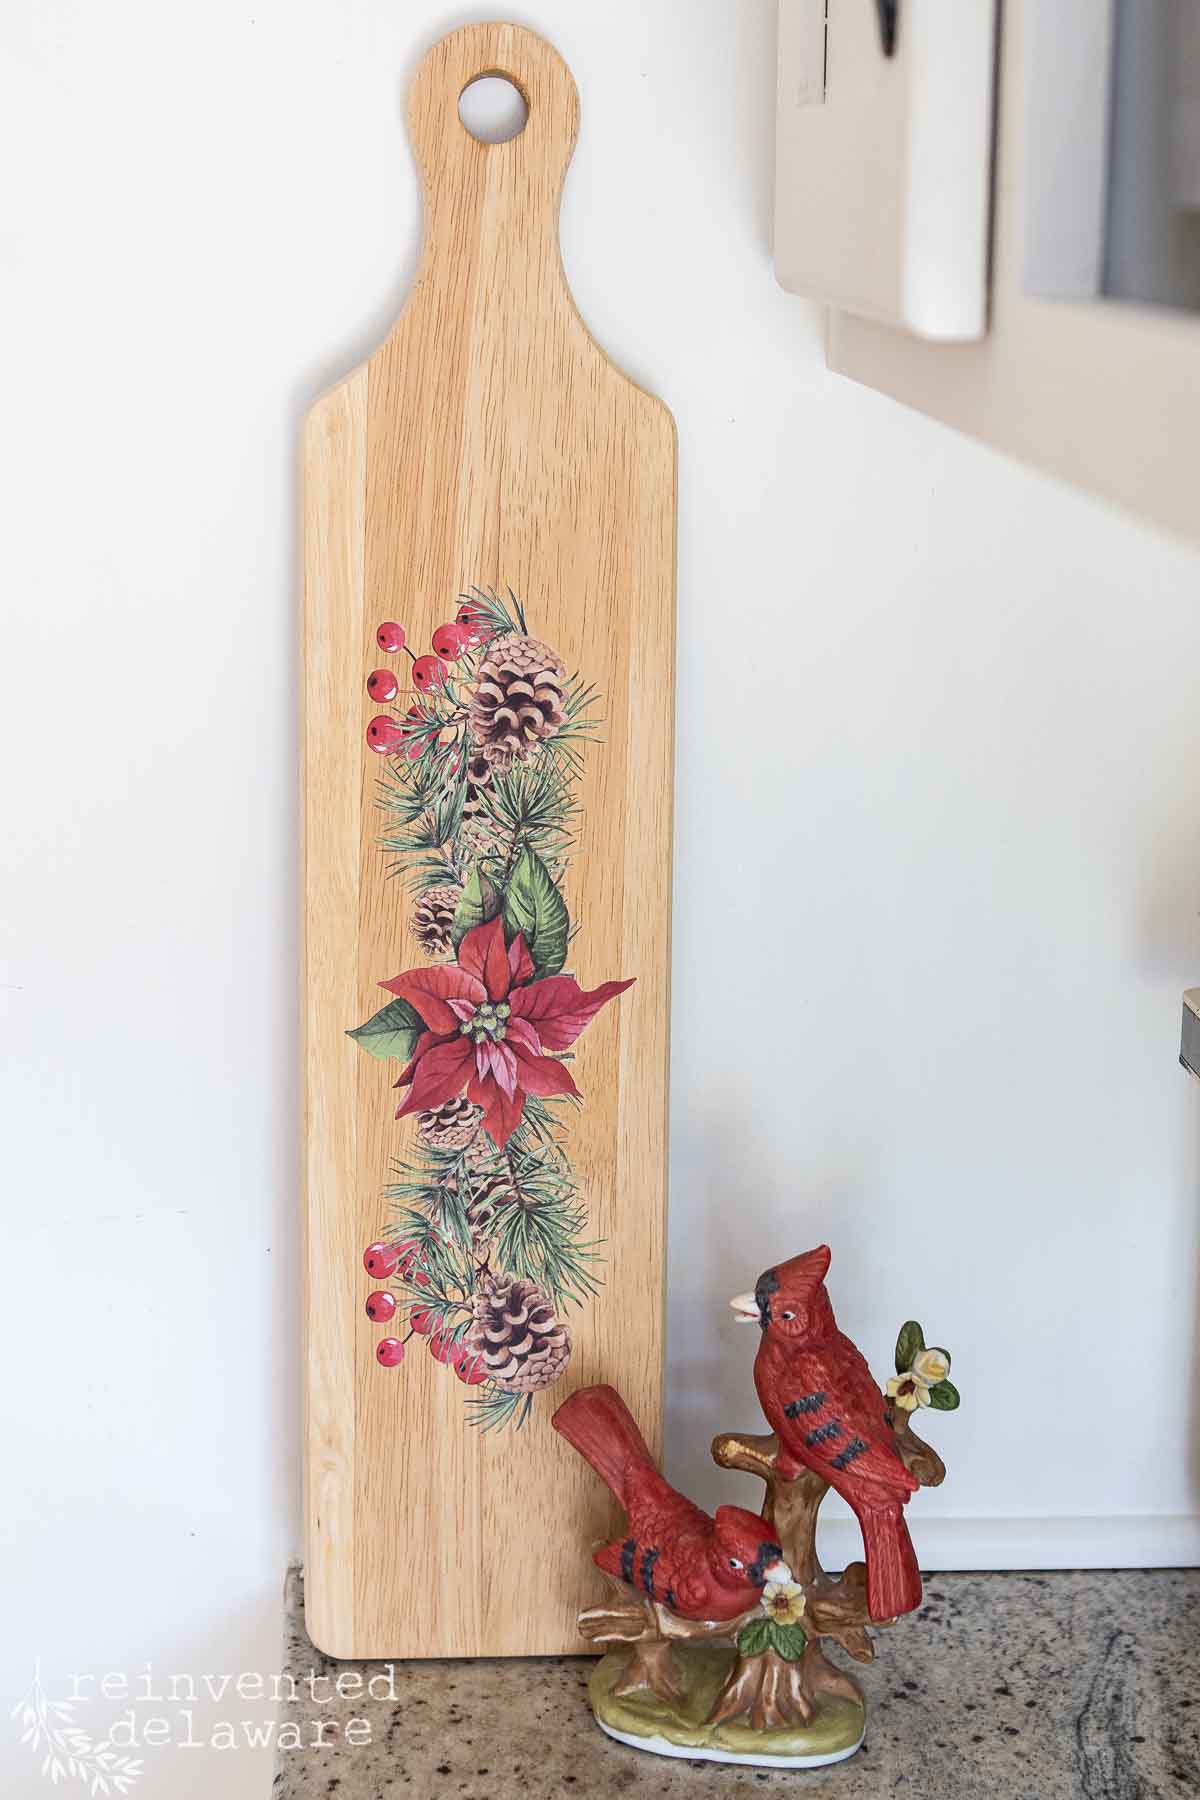
Once the cutting board is clean and sanded to your liking, it’s time to apply the transfer. It’s fun to sift through transfers and find just the right one to fit your board.
The breadboard I found at the thrift store is the perfect size for a long baguette. The bread can be cut on the side with the grooves that will catch the bread crumbs.
The other side is perfectly flat and is just the right size for one of the transfers I had on hand! By the way, I have more Christmas decorating projects for this transfer.
There are so many ways to use it! Stay tuned for those projects coming soon! You’ll see a sneak peak of that project below!
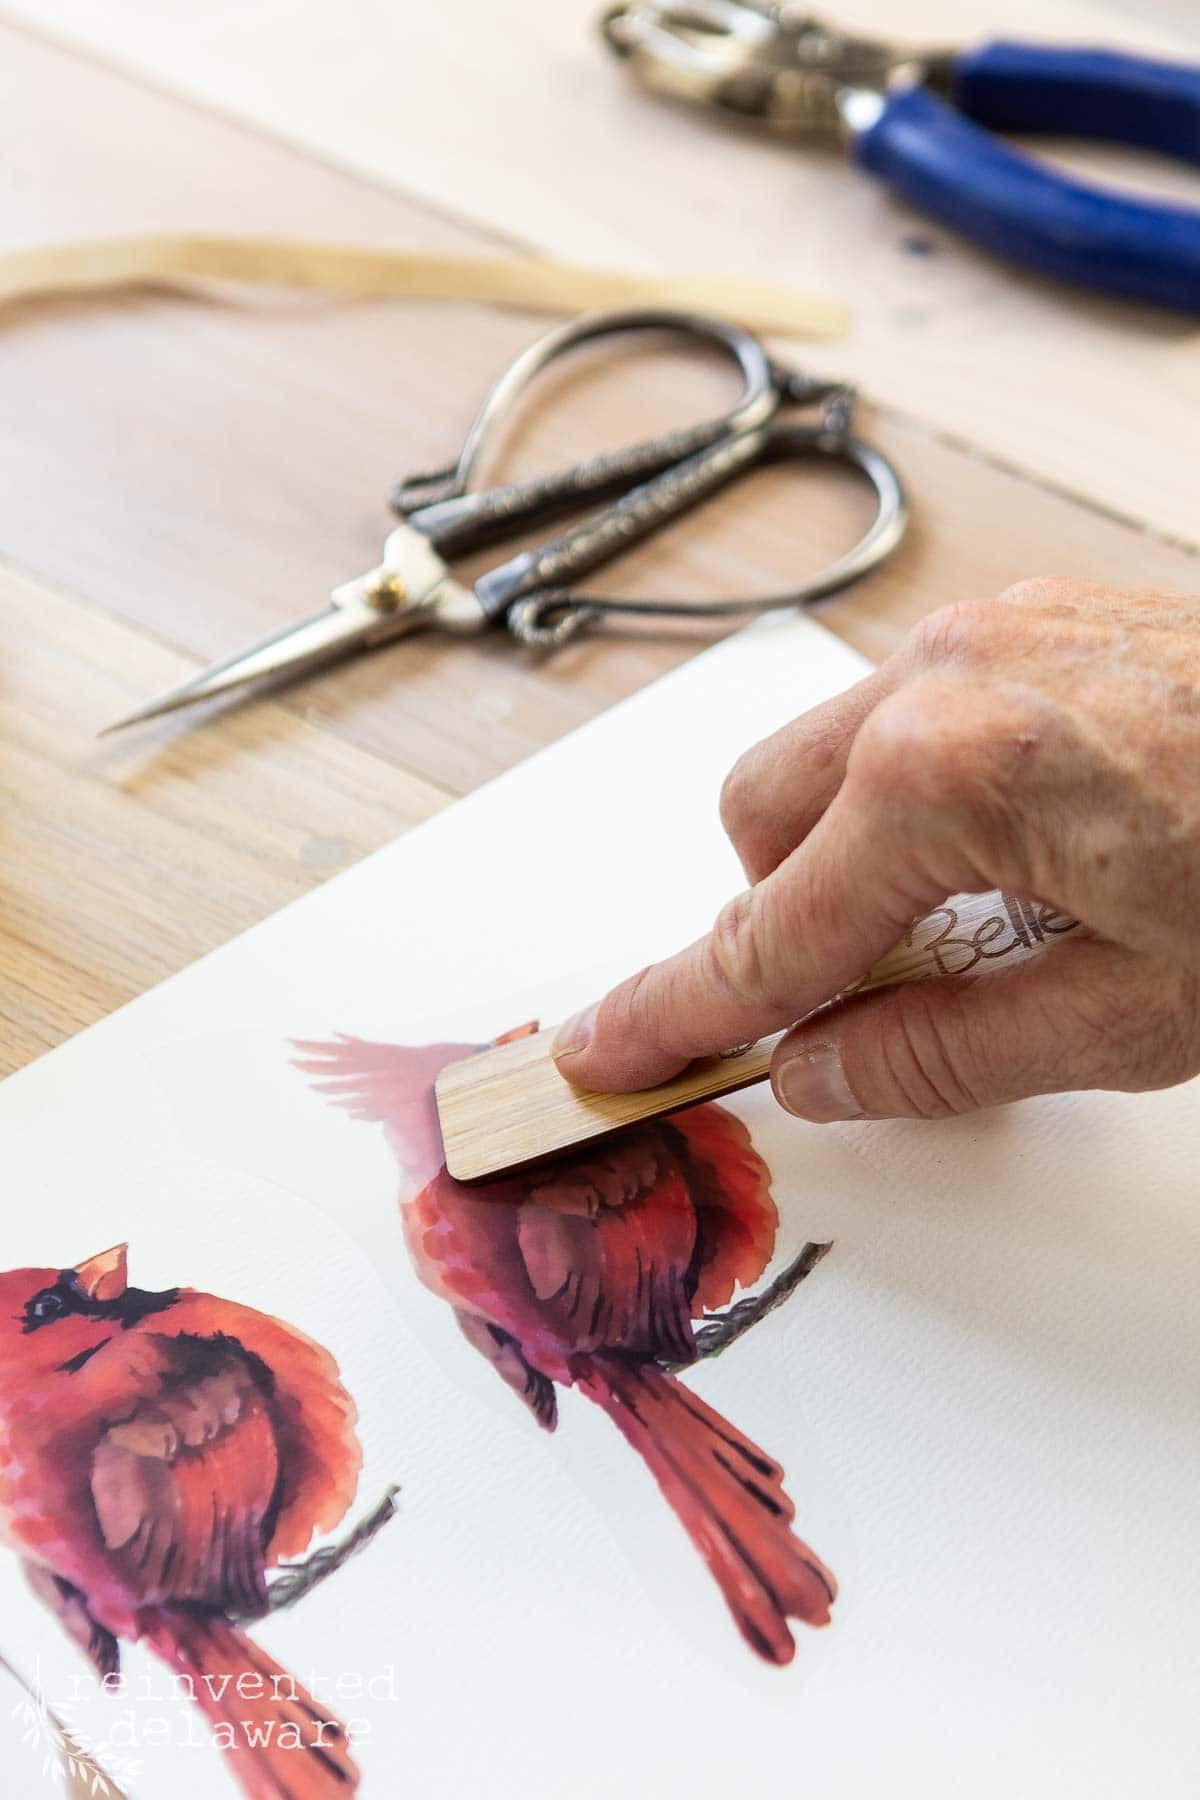
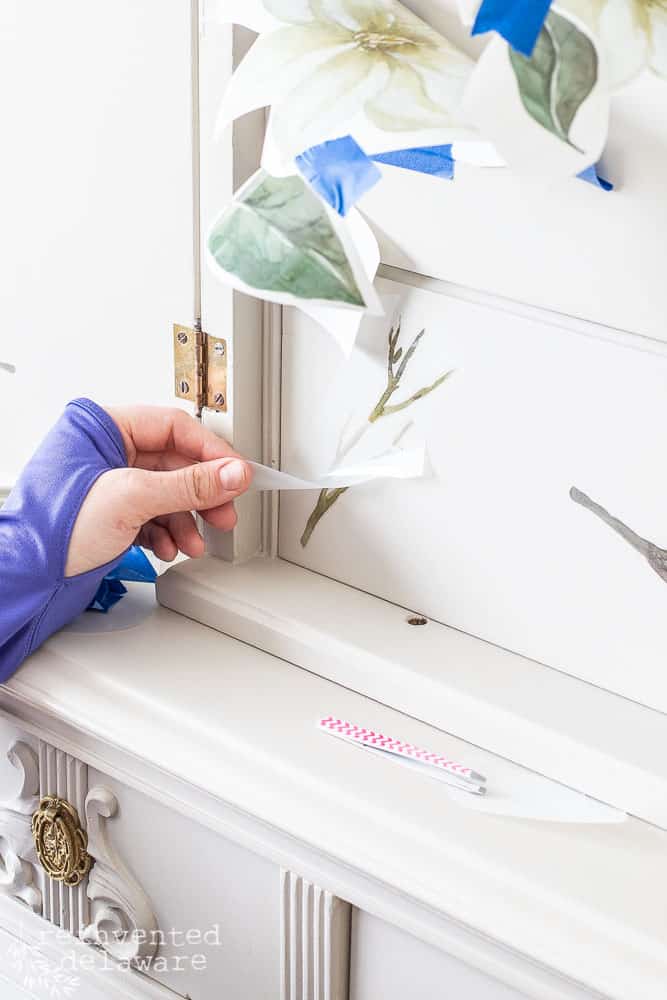
- Cut the design from the main sheet while keeping the backing sheet intact.
- Next, place the transfer in the spot where it looks best on the piece. Lift the transfer remove the white backing sheet and apply the transfer to the surface.
- Use the wooden stick that comes with the transfer and rub it across the design. The design will begin to adhere to the surface.
- Lift the clear top sheet as you go to make sure the transfer is completely applied to the surface. If a spot is missed, lay it back down and rub over that area again until it is completely transferred.
- Lightly burnish the design using the clear sheet. This helps the transfer design to adhere completely.
Below are examples of how to apply the transfers.
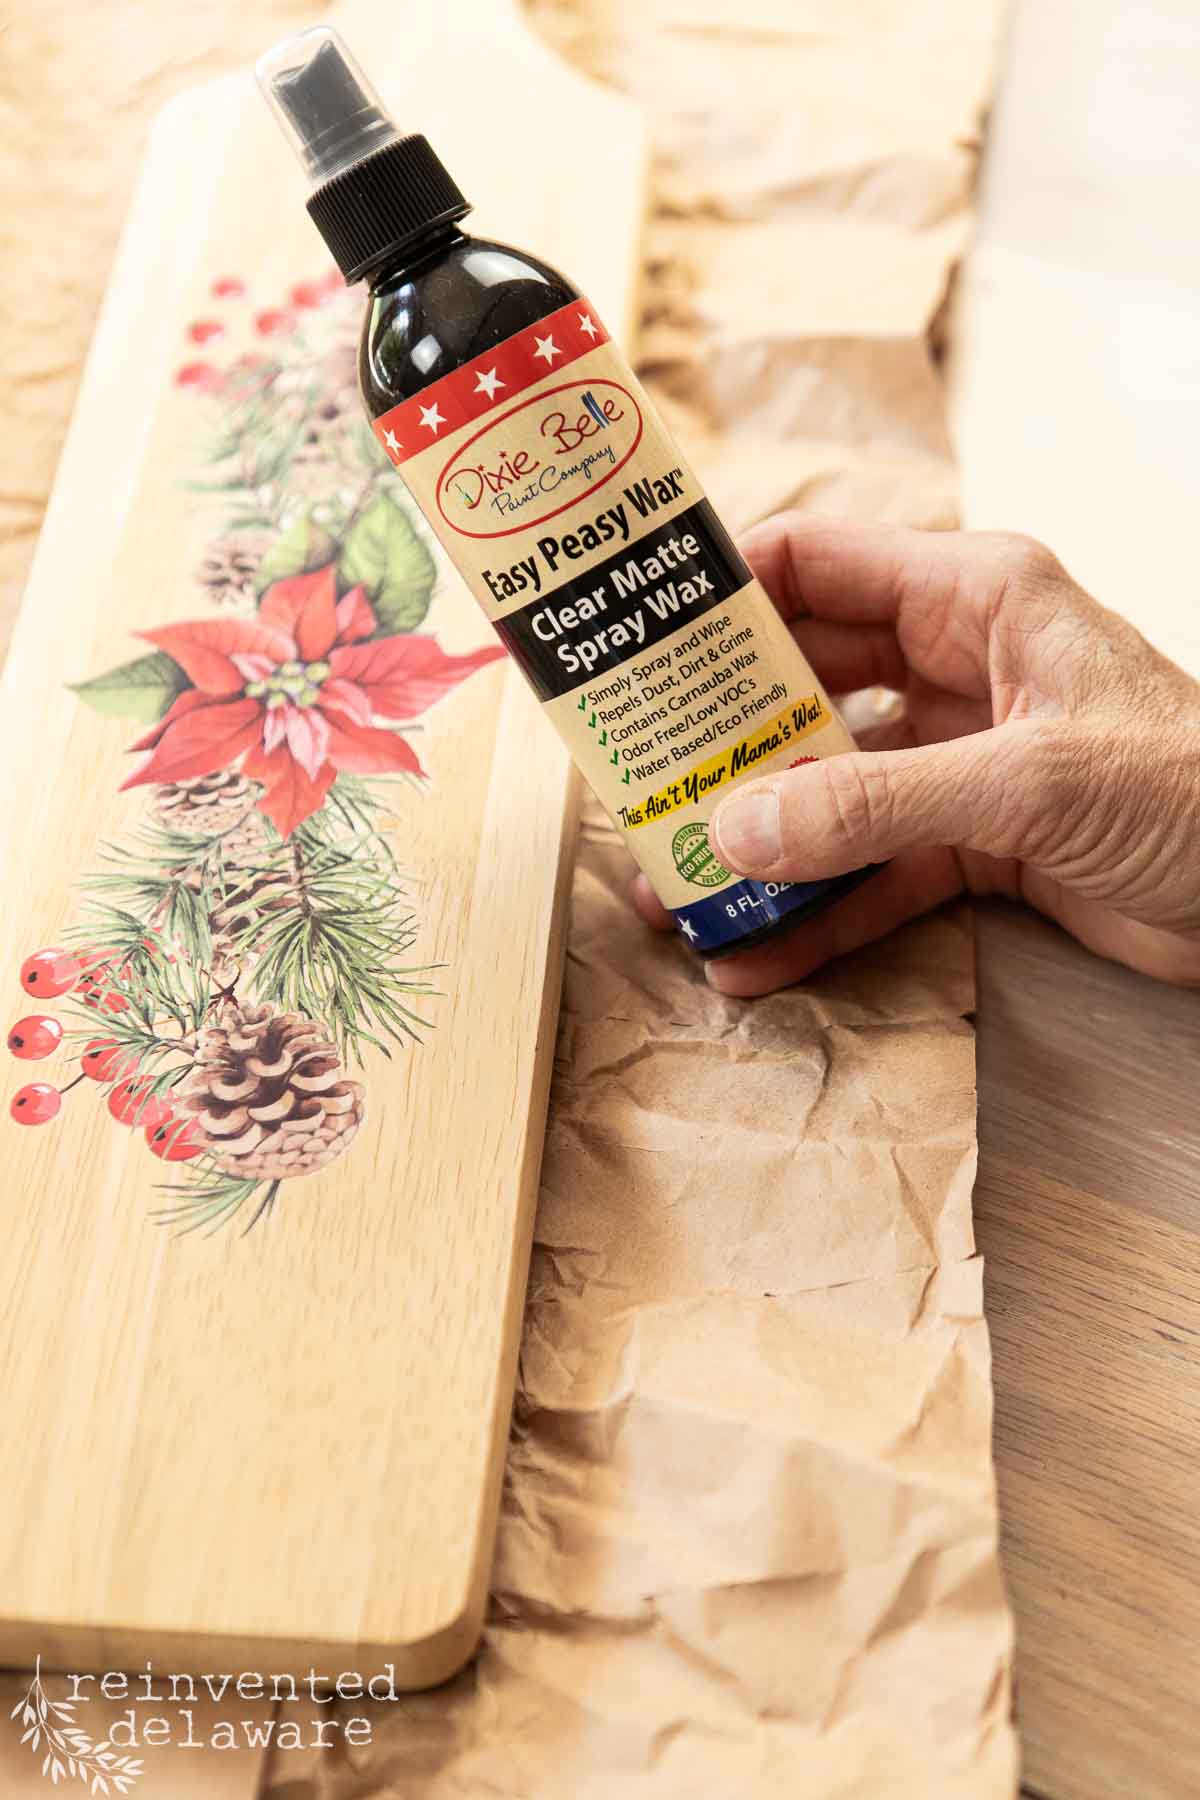
step four: seal the breadboard
The next step isn’t completely necessary but it’s always a good idea to seal in the design. It’s so easy with spray wax! Shake the bottle, spray onto the surface, and wipe away the excess!
I repeated this several times to make sure I had good coverage. Allow the spray wax to dry completely!
cutting board care
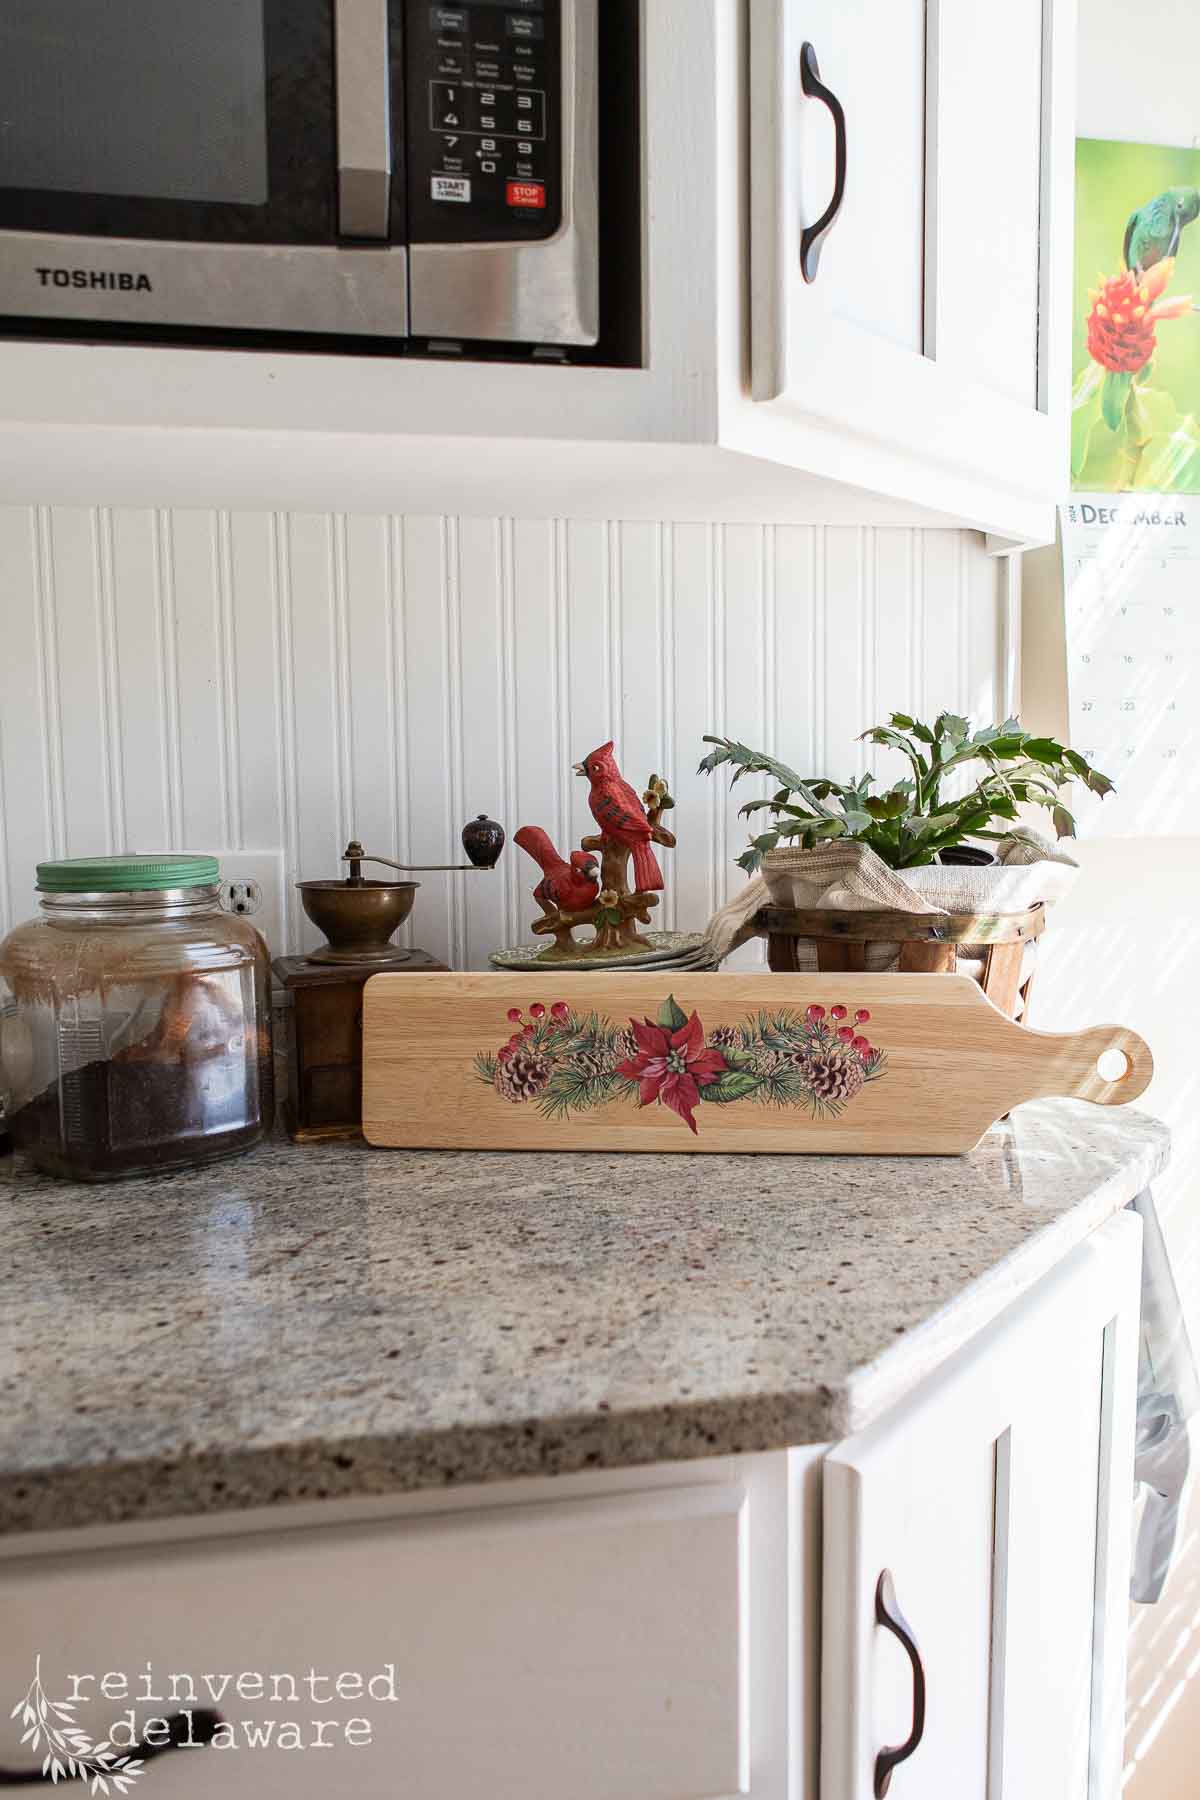
This breadboard will only be used on one side – the grooved side. Otherwise, it will be a decorative element in our kitchen.
If you decide to use a cutting board that has a transfer on it, I recommend you protect the wood by using clear plastic wrap or parchment paper.
Our board looks lovely sitting on the counter, don’t you think? It would also look pretty hanging on a hook on our kitchen wall!
If you would like more information about caring for a cutting board that gets a lot of use, tap the button below!
The amazing thing about this transfer is that there are so many sections that can be used on several different projects! If you have a vendor booth where you sell your upcycled and repurposed home decor pieces, this transfer will take you far!
By the way, wouldn’t this breadboard make a great gift for a friend who loves to cook?

I still have several projects lined up for the rest of the designs in this transfer set including a serving tray, a sweet garland, and even Christmas ornaments that could double as gift tags!
I can’t wait to share those ideas with you!
YouTube video
Stay tuned because I have a video demonstrating how I upcycled this breadboard along with several other Christmas decor projects! Subscribe so you don’t miss it!
Coming Soon!
more projects to come!
how to display your upcycled breadboard
Let’s chat about some ways to display and use your newish breadboard!
- hang on the kitchen wall for a decorative accent during the holiday season
- place several breadboards in varying sizes together on the kitchen counter, leaning them towards the backsplash for a farmhouse or cottage look
- add knobs as ‘feet’ to create a riser
- use parchment paper to protect the transfer side of the board and use it as a charcuterie or butter board for your guests
- upcycle several cutting boards to give as gifts
more decorative transfer ideas for your project
I’ve gathered some additional transfer sets that would work for this project. Some are seasonal while others could be used year round.
Tap the link to shop and have fun sifting through the designs!

Recreate and Decorate
Join the Facebook Group and Share Your Projects With Us!

supplies
- 150-grit sandpaper
- power sander (optional)
- cleaning cloth, coarse salt, lemon juice
- decorative transfer (I used Caroling Cardinals)
- Spray Wax
- thrift store cutting board, breadboard
Thanks for joining our journey!
Thanks so much for joining us for this post! Join our journey so you don’t miss any of the fun projects, tutorials, and inspiration that we share with you each week! You can follow us on Instagram, Facebook, and YouTube. We share even more inspiration on Pinterest!
click below to purchase supplies!
Visit my Amazon Storefront!
Click the button below and head over to our online shop on Amazon!


Cindy Rust
Cindy has been decorating her home with thrift store finds for 40 years. She is an avid thrift store shopper who loves to makeover the items she finds into vintage-inspired home decor and furniture. When she isn’t thrift shopping or painting a piece of furniture, you can find her making homemade butter, working in her garden, or painting with watercolors.
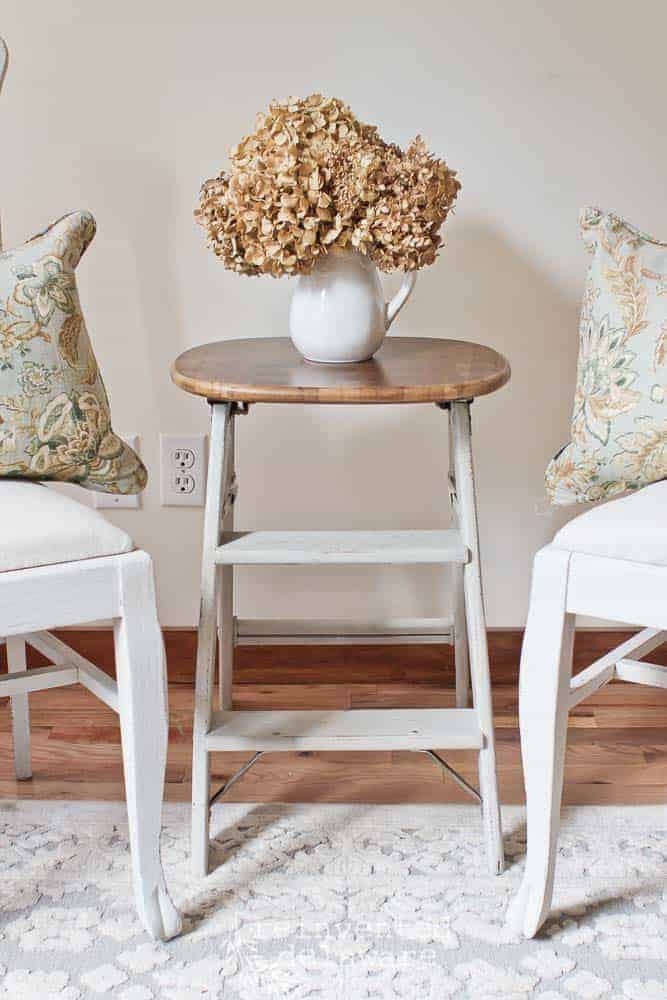
Old Step Ladder & Cutting Board Upcycle
Add a thrift store cutting board to an old step ladder to create this adorable side table!
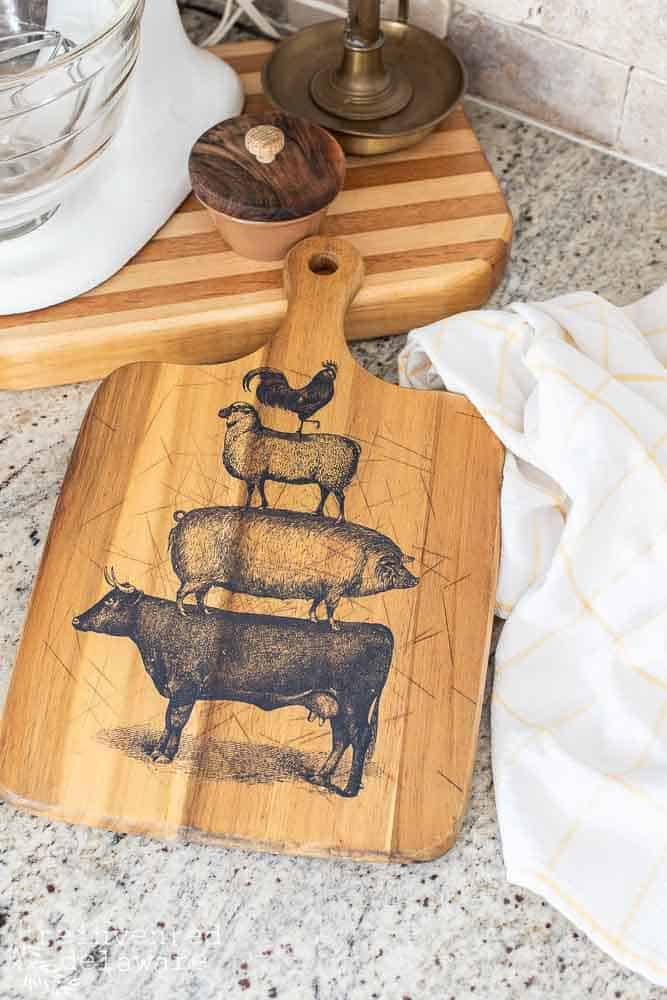
Repurposed Thrift Store Finds
Enjoy inspiration for more upcycled thrift store items including this cute cutting board!
Upcycled Breadboard DIY Project
Equipment
- 1 thrift store wooden cutting board
- 1 hand sanding tools
- 1 power sander this is optional!
Materials
- spray wax
- decorative transfers of your choice
Instructions
- Clean the breadboard or cutting board with a solution of hot water, lemon juice and salt. Scrub thoroughly and allow to dry.
- Sand the wooden cutting board either by hand with sandpaper or by using a power sander. Wipe away the dust created by sanding.
- Apply the decorative transfer: Cut the design from the main sheet while keeping the backing sheet intact.
- Next, place the transfer in the spot where it looks best on the piece. Lift the transfer remove the white backing sheet and apply the transfer to the surface.
- Use the wooden stick that comes with the transfer and rub it across the design. The design will begin to adhere to the surface.
- Lift the clear top sheet as you go to make sure the transfer is completely applied to the surface. If a spot is missed, lay it back down and rub over that area again until it is completely transferred.
- Lightly burnish the design using the clear sheet. This helps the transfer design to adhere completely.
- Seal the wooden breadboard with a couple of coats of spray wax allowing the wax to dry and cure for 2-4 weeks.


Hi Cindy, my name is Delores “aka” Dee-Dee. I love the way you decorated your Garden she shed, it looks so cozy, warm and inviting. I always wanted a garden she shed of my own. Maybe next summer it will happen. You had given me great and inspiring ideas.
Thanks, Dee-Dee
I’m thrilled that you find inspiration her Dee-Dee! Hopefully you can have a garden shed next summer too!