
How to Convert an Old Dresser into a Bathroom Vanity
Are you looking for a unique and stylish way to update your bathroom? If so, consider repurposing an antique dresser into a bathroom vanity! This is a great way to add character and charm to your space, and it can also be an affordable project.
In this blog post, we will walk you through the process of transforming an antique dresser into a bathroom vanity. We will cover everything from choosing the right dresser to cutting the sink hole and installing the plumbing.
can I turn a dresser into a bathroom vanity?
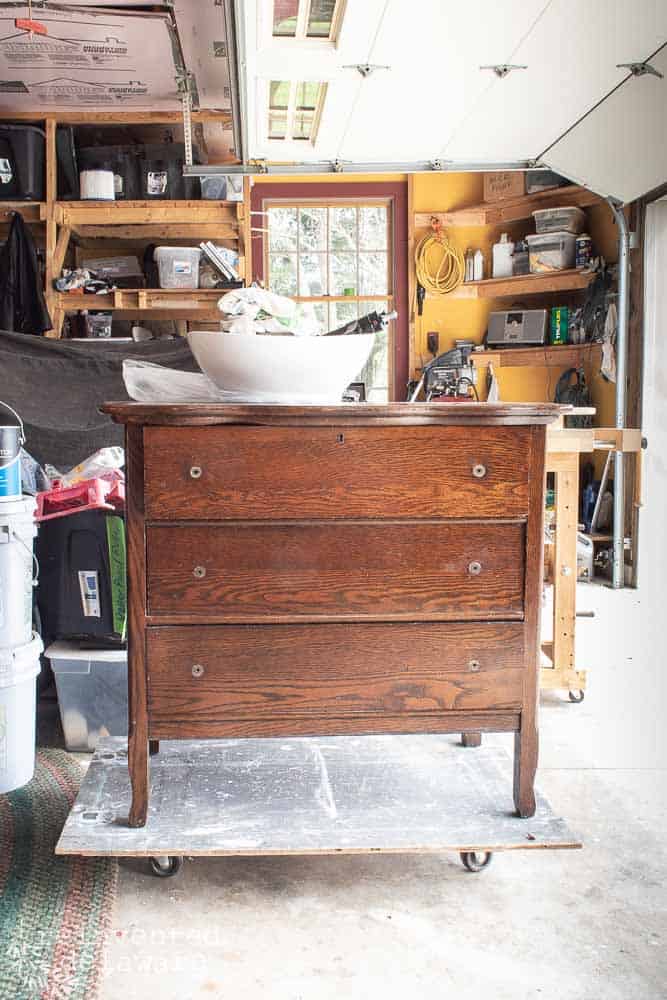
One of our local customers asked if we could convert a vintage dresser that she had into a bathroom vanity for their home.
Bathroom vanities can be tricky so I ran the idea by my hubby before agreeing to the project.
Doing the work was not a problem by any means. If you saw our laundry room makeover you would understand what I mean! He even turned a china cabinet into a laundry room sink and cabinet about 6-7 years ago!
step-by-step process
This step-by-step process might vary from dresser to dresser. Use this tutorial as a guideline for your own dresser vanity makeover!
remove the old finish from the entire dresser
The first step was to remove the old finish on the antique oak 3-drawer dresser. I only had to do this step on the top since the body of the dresser would be painted. The top of the dresser would be natural wood.
Antique dressers can have a variety of finishes including old paint, shellac, and varnish.
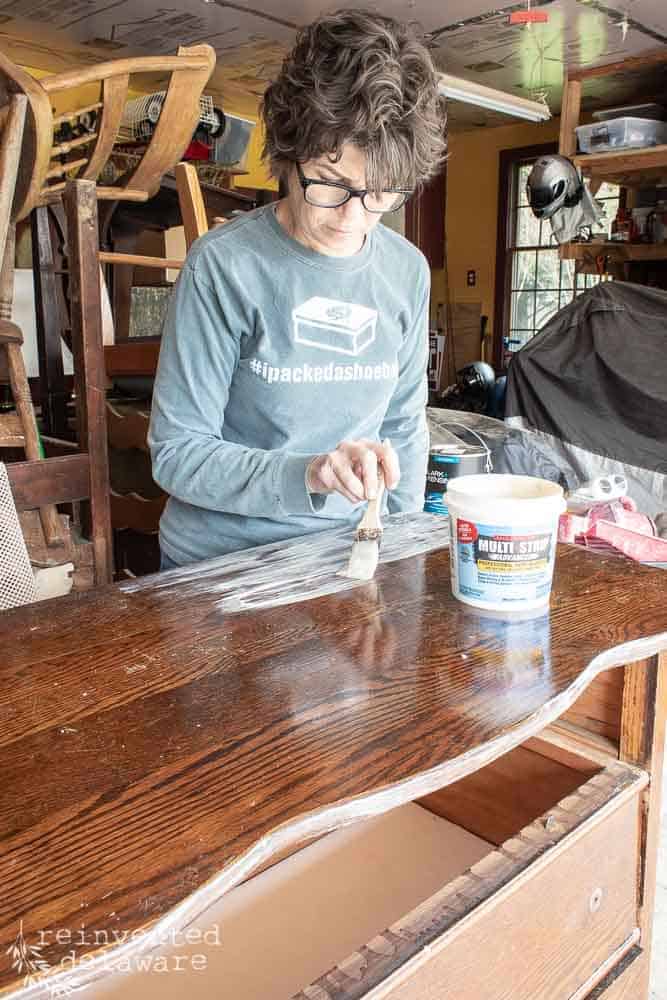
One thick coat of Multi-Strip Advanced was all this top needed. I allowed the Multi-Strip to sit on the top for about an hour.
Then I used a 3″ putty knife to scrape it off. I kept a small Amazon box close by to put all the scrapings in.
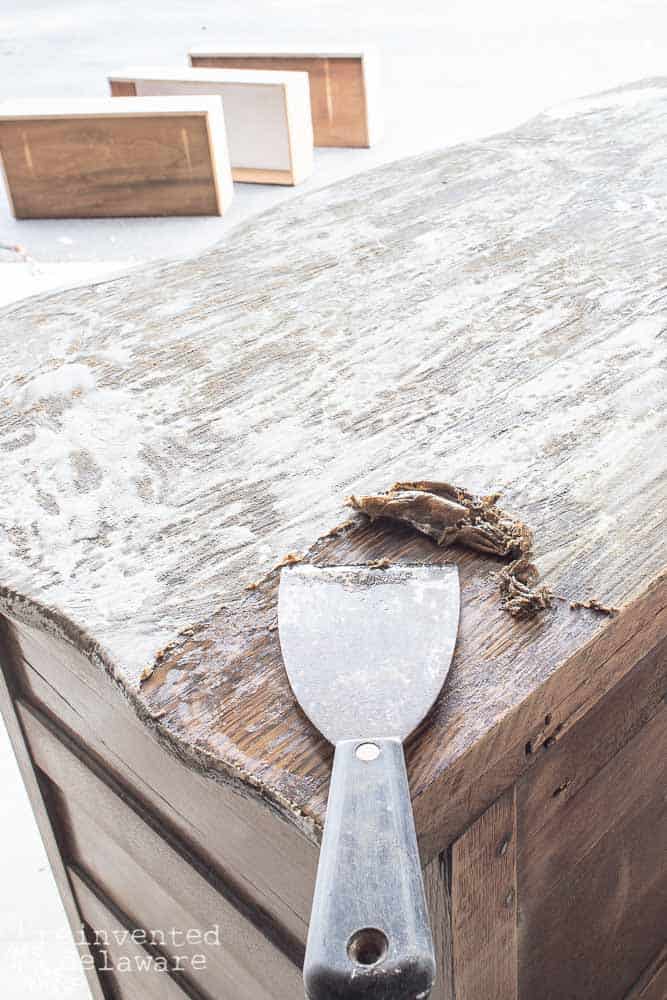
Once all of the stripper and old finish were removed, I pulled out my DeWalt Orbital Sander and 150-grit sanding disc and got down to business.
This step went fairly quickly. I switched out the 150-grit for 220-grit sandpaper and sanded the whole piece. That helps to eliminate swirl marks that the orbital sander can create.

prep the wood for paint
After a good cleaning with my usual method, I applied one coat of primer I had on hand. It is from Ecos Paint and I had Gray on my workshop shelf.
I love this primer. It is super thick and environmentally friendly, has no fumes, and is even safe for children!
You could also use my other favorite primer, Zinsser Synthetic Shellac-Based White Primer.
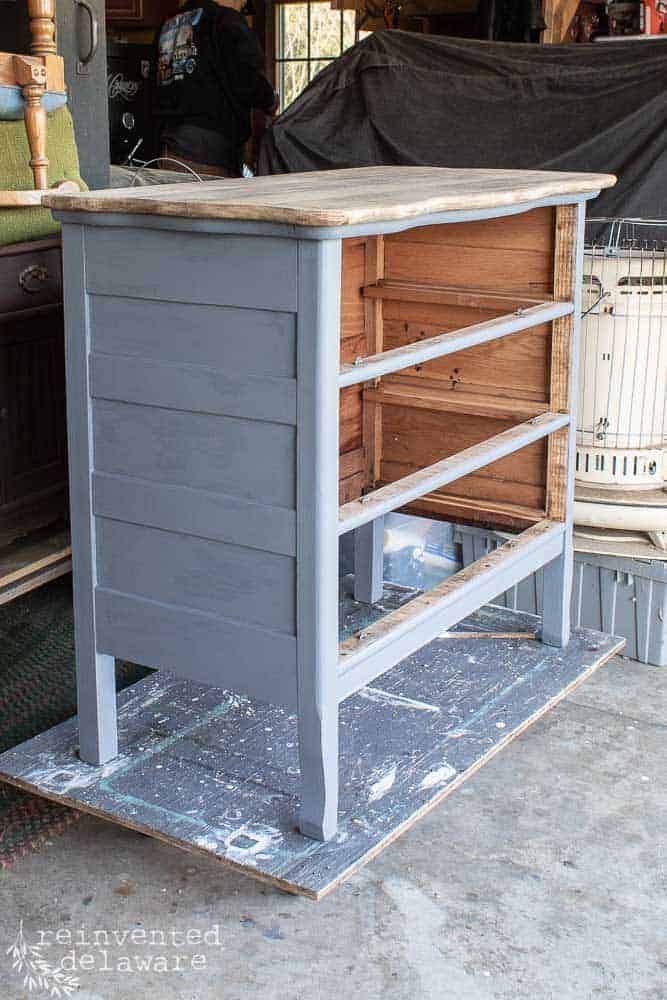
The frame and the drawer fronts were primed in no time!
Here’s a painting tip: after the piece was primed and painted, I used the sander to clean along the edges where the paintbrush spilled over. Look closely and you will see bits of the primer on the inside of the frame. I’ll take care of that at the end of the project!
best paint for antique dresser vanity
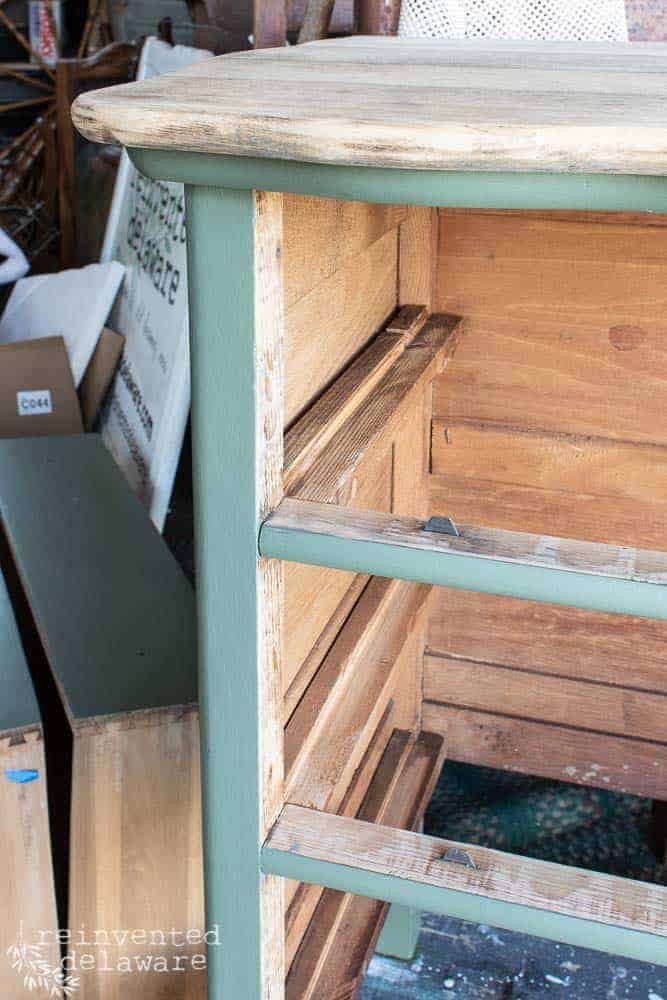
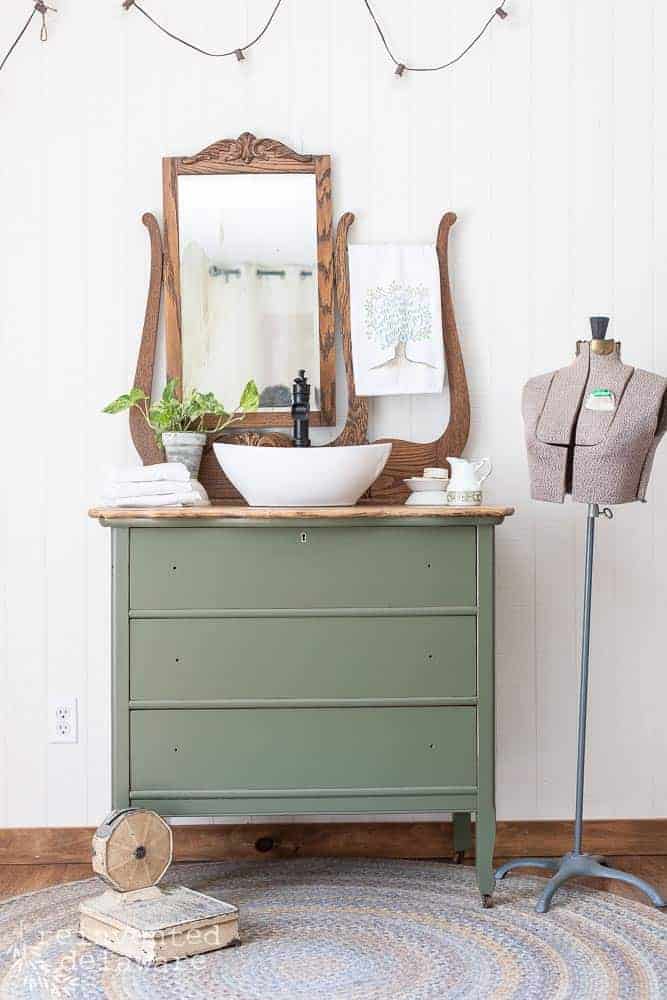
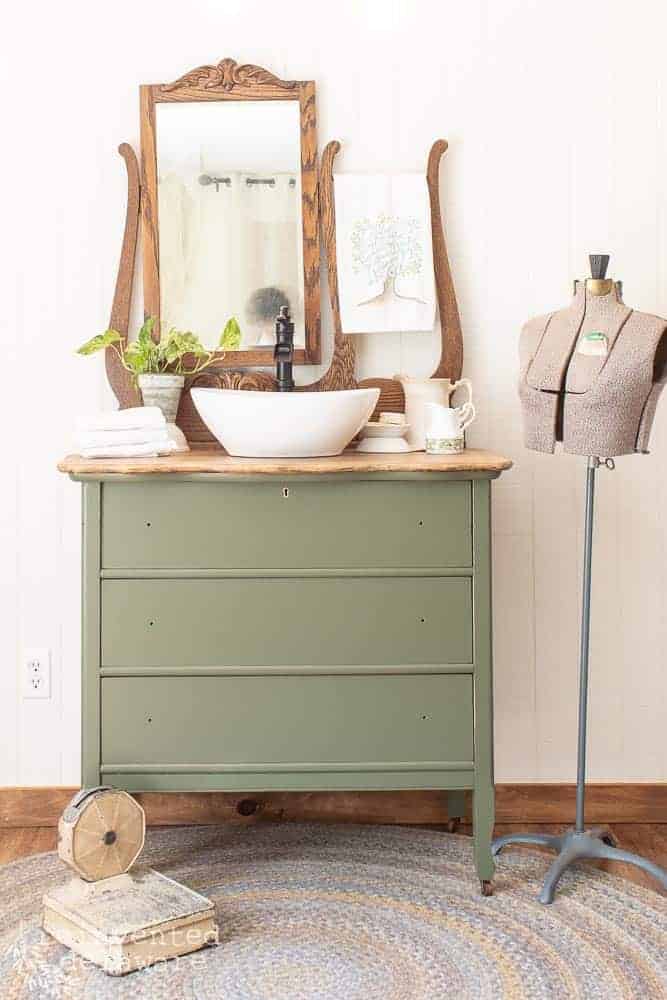
Our client picked out Fusion Mineral Paint in Bayberry. A fresh coat of paint can do wonders to a thrifted dresser or one found on Facebook Marketplace. Two coats were all this repurposed dresser vanity needed! I know it’s not a vanity yet, but it will be soon!
This paint is super durable and has a top-coat built in so I knew it would be perfect for this DIY bathroom vanity.
My favorite Zibra Paintbrush called the Palm Pro worked beautifully on the drawer fronts. I used the Zibra Square Brush for the framing and the sides. It is the perfect paintbrush for the narrow frame and the inset sides of this antique dresser.
prep dresser for bathroom sink
It was a lovely Saturday morning when hubby was able to work on his part of this project: cutting the holes for the sink drain and a small hole for the faucet.
We decided on the placement of the sink and the faucet. This type of sink would look best centered from side to side and from front to back.
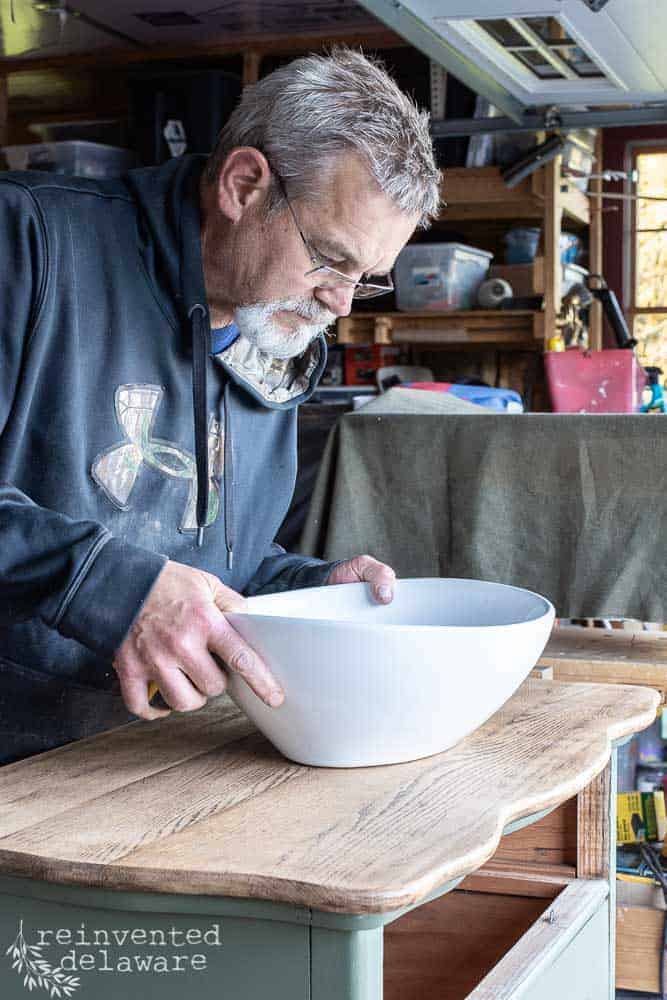
We left it that way for a while to be sure it was exactly where it looked best. If you decide to turn a dresser into a new vanity, be sure to place the sink where you want it and then think about it for awhile. Once the sink hole is cut in the top of your dresser wood top, there is no going back!
**We doubled checked ourselves when placing the new faucet thinking about how the water would come out of the faucet. We placed it in a way that wouldn’t create too much splashing.
Once we were sure of the placement, we marked the spots with a pencil. The image below shows the circle we drew using the drain hole in the sink.
The faucet hole is marked by a tiny pencil line towards the back.
drill holes for drain lines
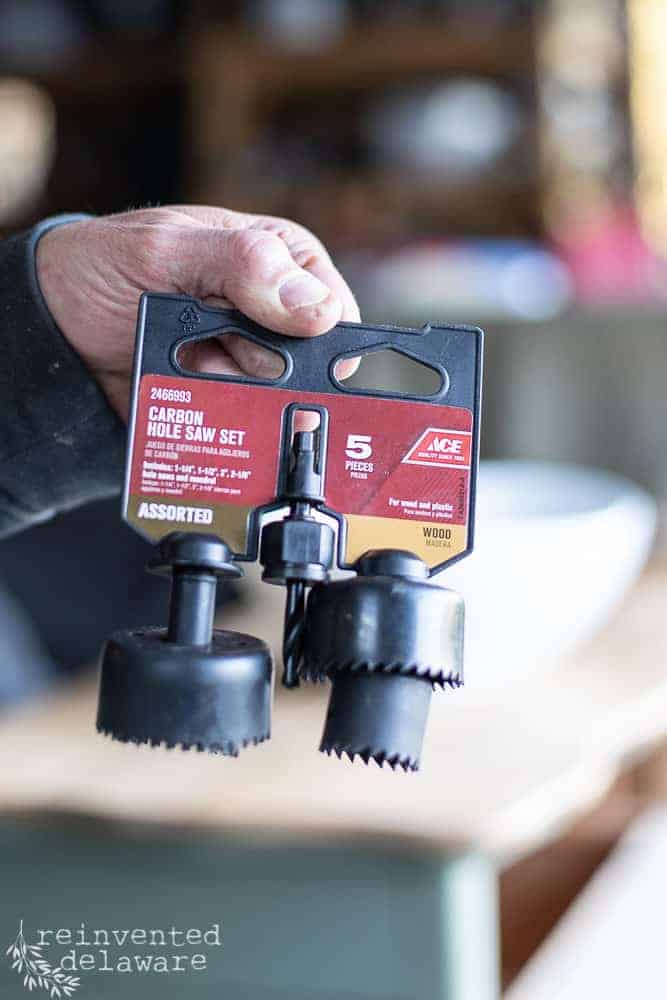
Hubby used this Carbon Hole Saw Set to drill the holes.
This tool for the drill is a must! The hole for the sink and faucet is fairly large and the set he purchased had a large bit.
Let me mention that these bits can dull quickly. Especially if you are using it on hardwood like 1″ thick oak.
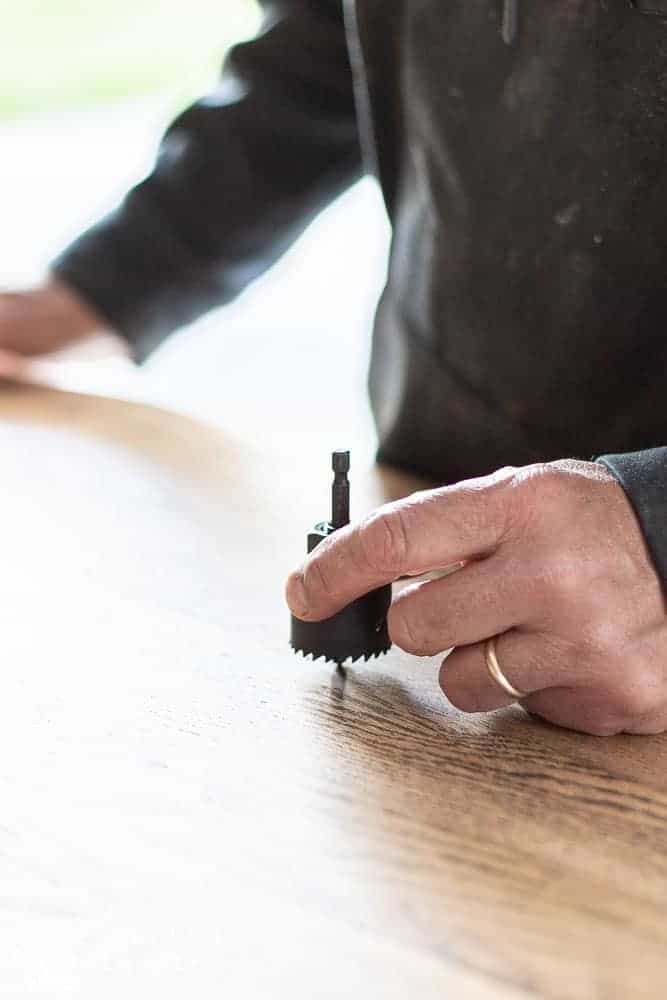
The drill bit has a center with a pointed end. That end goes in the center of the area that was marked for the drain and the faucet. This helps to line up the large drill bit with the marked hole.
The center part of the bit also helps to steady the spinning drill bit as it enters the wood. Hubby used an electric-powered drill, not a cordless one. The extra power from the electricity comes in handy 😉
If you do not have access to this kind of hole saw bit set, drill a hole in the center of the markings for the sink and faucet holes. Use that as an entry point for a jigsaw blade on your jigsaw. Cut around the markings slowly being careful to stay on your pencil lines.
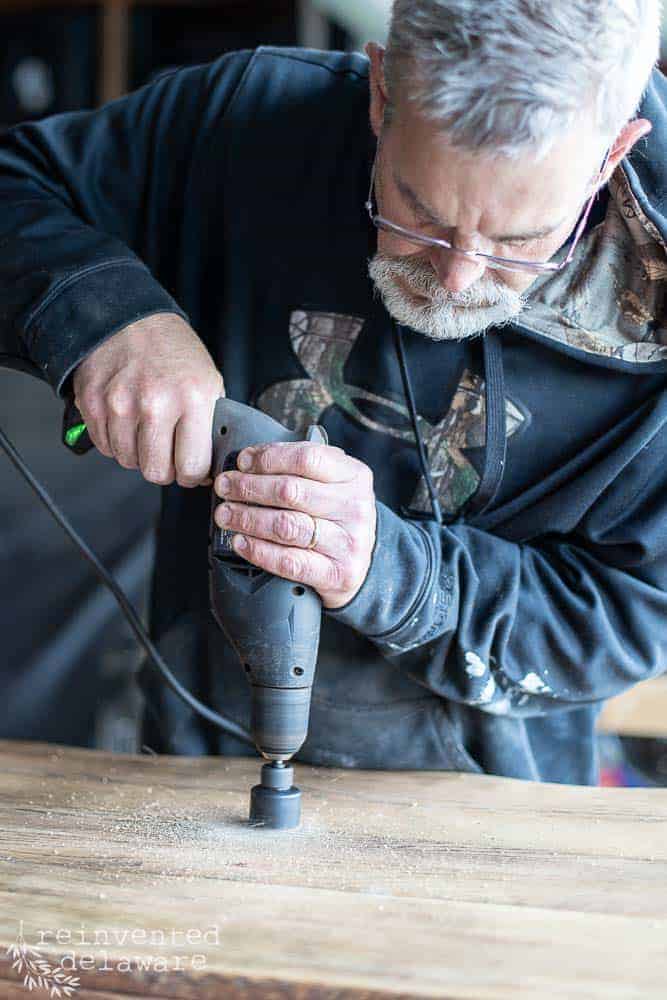
I stood and watched (and snapped a few photos!) and let me tell you, burning wood from a power drill/bit set has a weird smell!
Burning you ask??
Yes! That drill bit is spinning so fast on that oak wood that it creates friction and begins to burn! It doesn’t actually reach a flaming point but I do think I saw a little smoke!
The bit itself is very hot when the drilling is finished – be careful if you use this tool!
The following post may contain affiliate links. That means if you click and then buy something, I will make a small commission at no additional cost to you! Thank you for supporting my blog. full disclosure here.
supplies

modify a drawer for plumbing
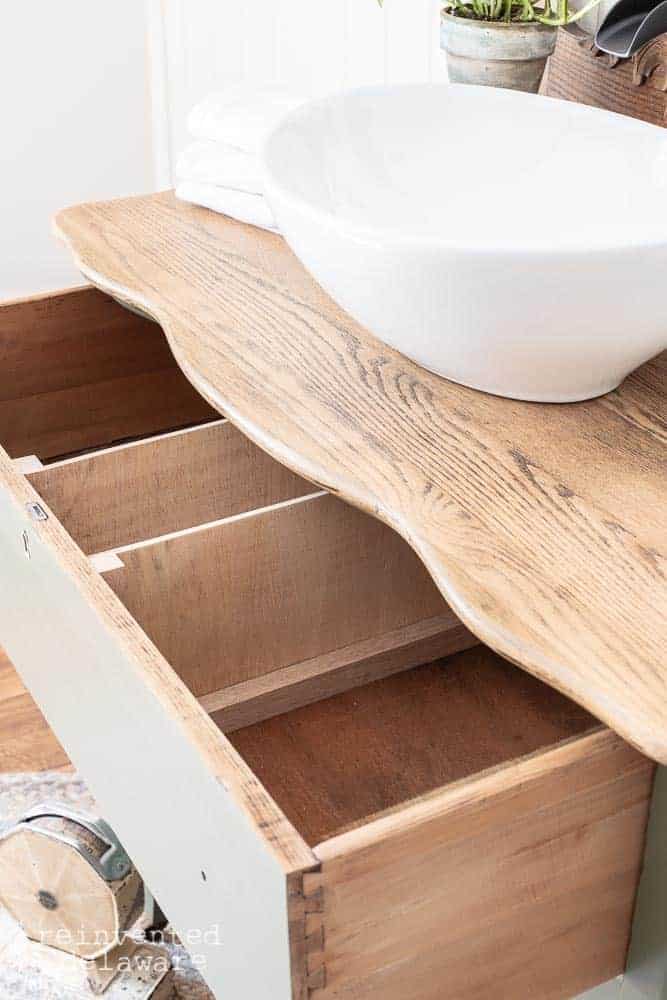
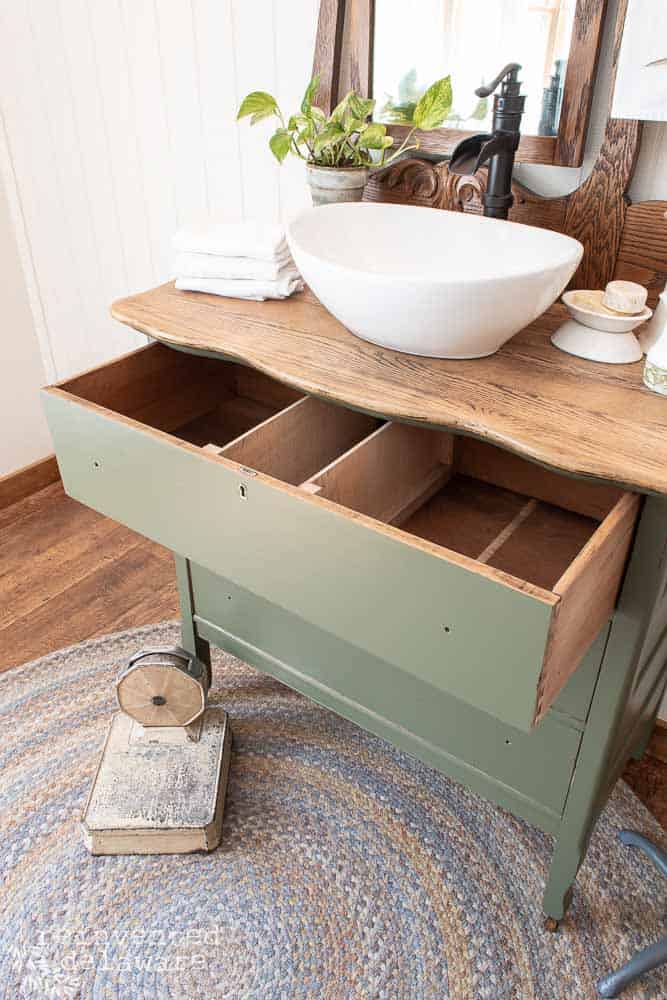
The other part of the project Hubby completed was modifying the top drawer for the plumbing down below. This left the middle drawer and bottom drawer available for storage.
If you find the perfect dresser for this project, check the dresser drawers and how they are configured. You might have to alter more than one drawer to accommodate the plumbing lines.
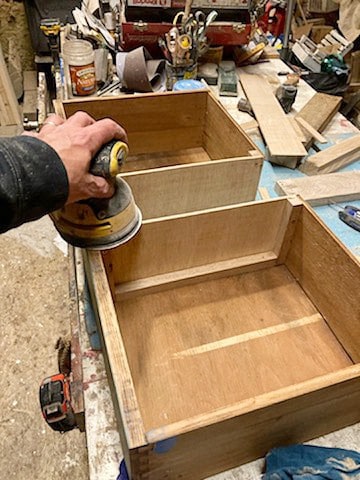
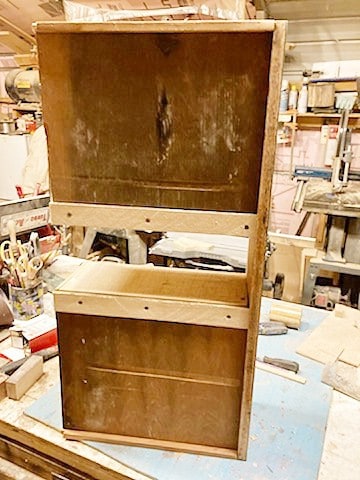
My hubby knows a bit about plumbing and knows how to reconfigure the drawer for the water lines. First, he removed the bottom of the drawer. Then he cut a section away from the back of the drawer. There was no need to touch the drawer face. Then he recut the bottom pieces to fit the new drawer configuration.
The center section of the drawer is completely open so that the plumbing pipe, and drain pipe will fit. It’s easier to look at the images than it is to put it into words so he grabbed a couple of pics with his iPhone! He used scraps of lumber to create what you see in the images.
Our client has hired a plumber to install this repurposed dresser/bathroom vanity in her guest bathroom so we did not attach the drain, sink, or faucet.
If you know how to install your own plumbing, then you understand about caulking, sealing, and attaching the plumbing parts of this project!
dresser vanity hardware
You might be wondering where the drawer pulls are for the front of the dresser. Our client is searching for just the right ones!
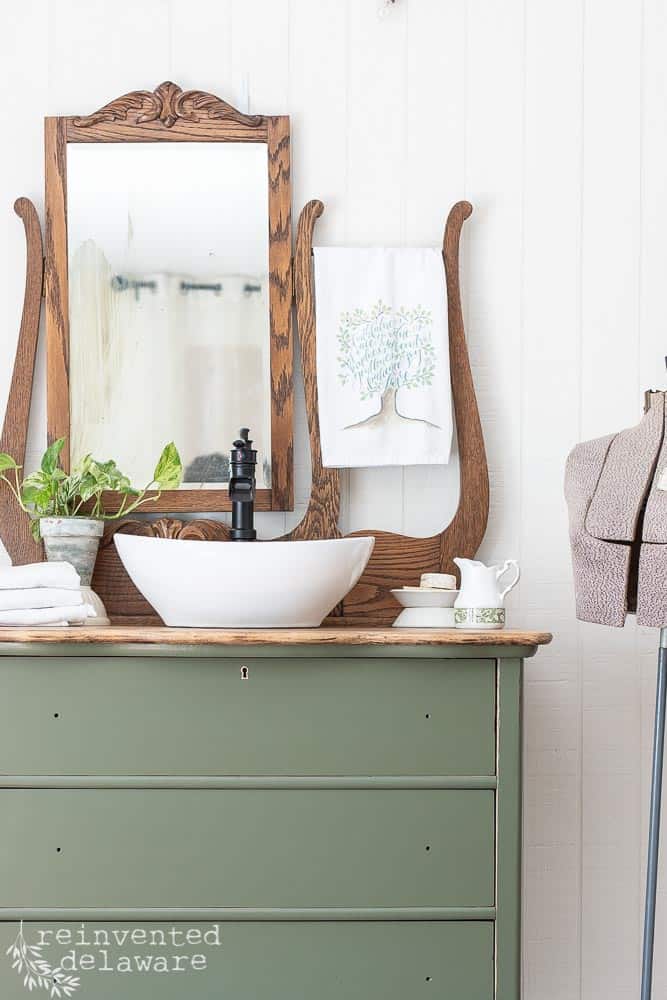
You also might notice the mirror on top of the vanity. It is from another client. She offered this vintage oak mirror to us and we said yes very quickly! If you don’t have a mirror like this one, keep your eyes open at antique stores and local thrift stores.
thanks for being here!
I hope you are enjoying this project! Let me know if you have any questions. Or leave me a comment to tell me about your project and ideas!
thanks, Cindy 😀

antique dresser mirror
This gorgeous mirror hasn’t been touched yet. I only cleaned it so that I could stage it for this post. Isn’t it gorgeous??
Our client is deciding if she wants it for this
What do you think? Should she have us finish the mirror in the same way we finished the top of the oak dresser?
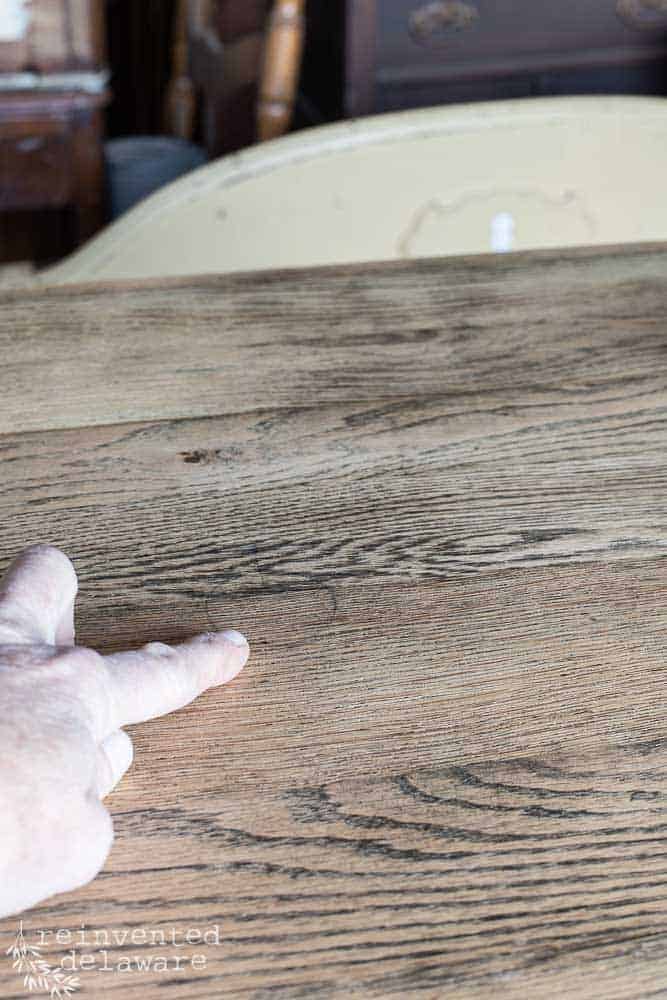
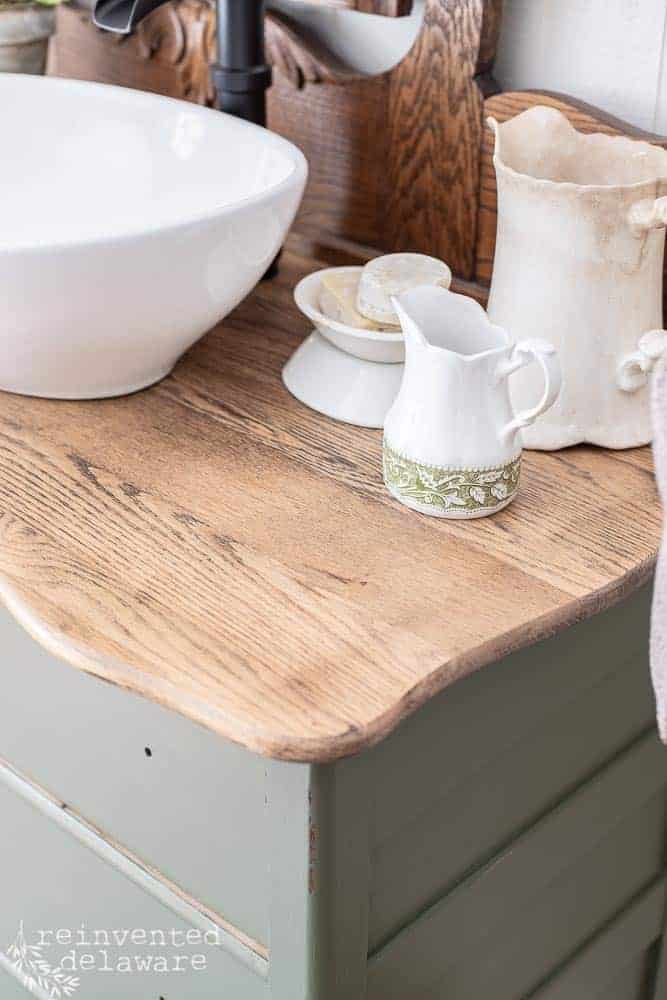
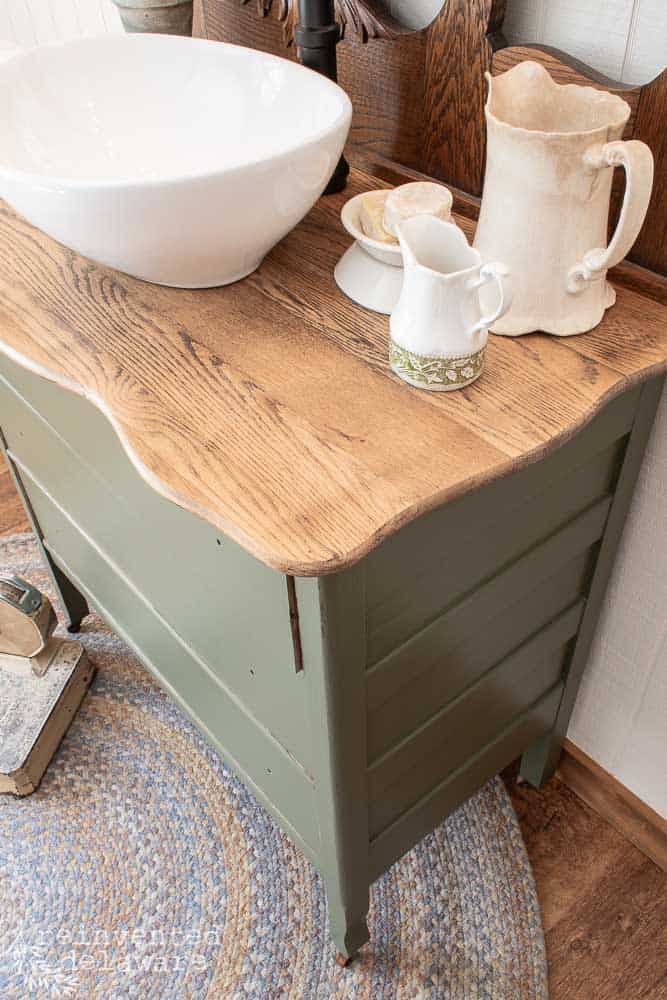
restored wood finish
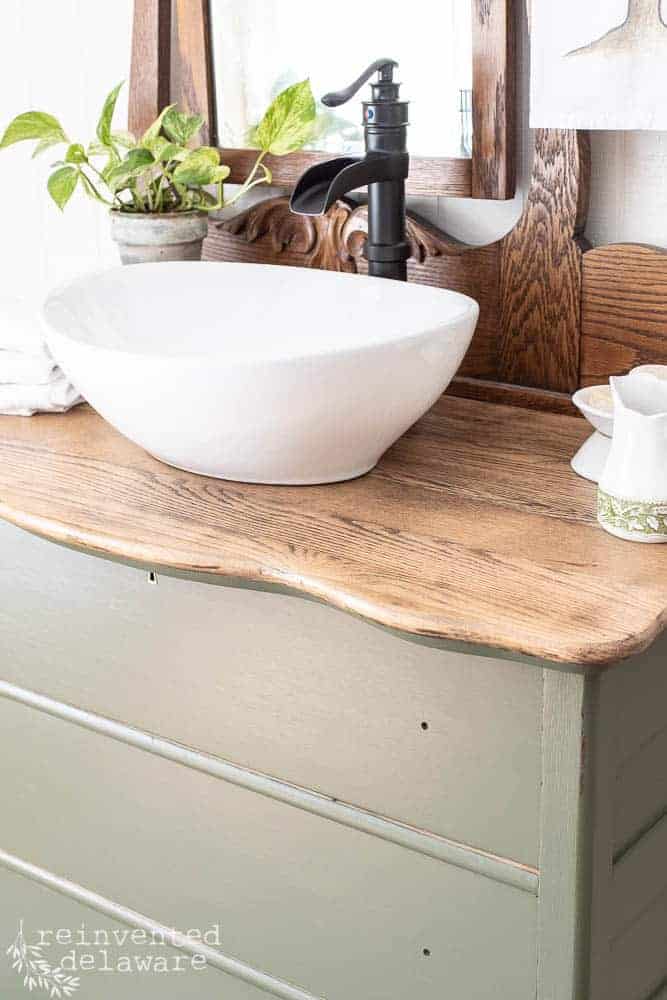
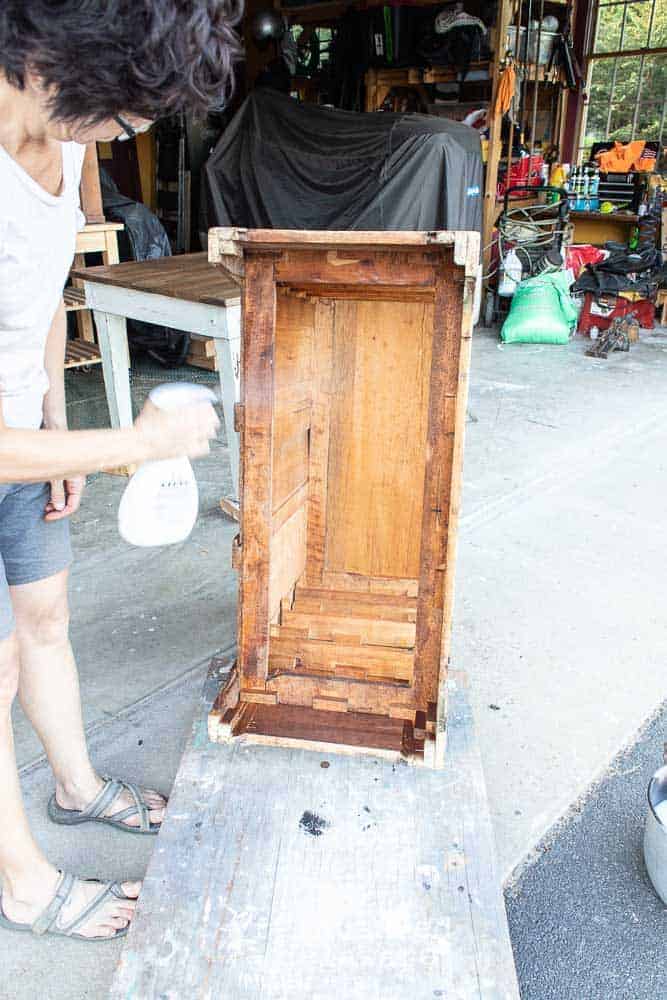
Here is a close look at the restored top. We completely removed the old finish and then applied four coats of General Finishes High-Performance Top Coat in Flat. I did a light sanding between coats and allowed plenty of drying time between coats. I also applied a couple of coats of polyurethane to the back of the dresser for added protection.
It looks like a buffed wax finish, doesn’t it? And it’s as smooth as butter! I love the look of real wood for a counter top!
You cannot replicate the look of old oak. The wood ages so beautifully. All it needed was protection to prevent water damage. General Finishes High Performance will protect this piece for years.
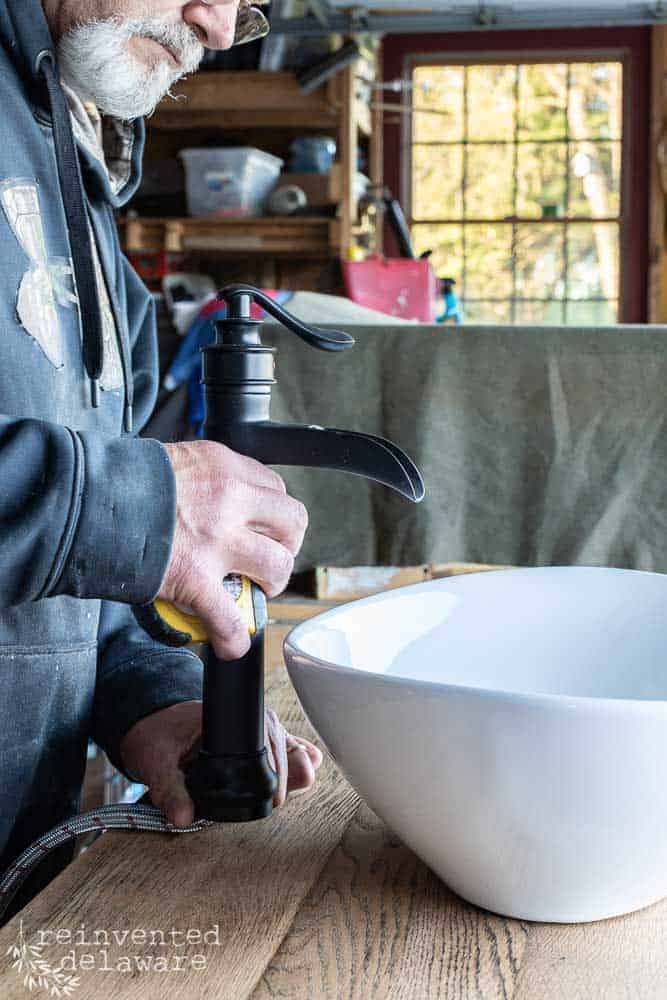
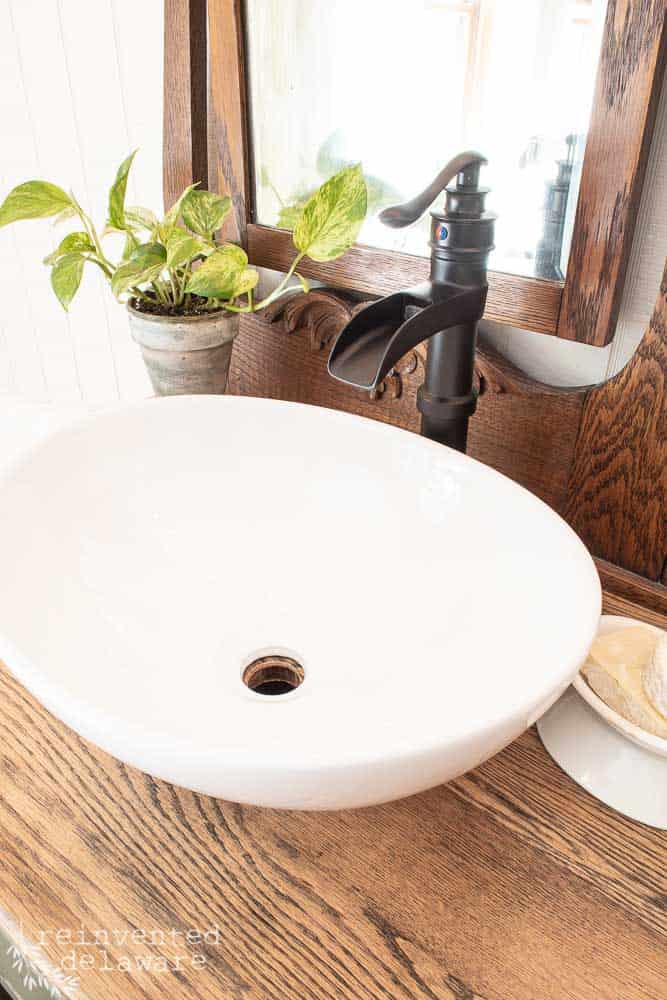
the perfect sink and faucet
I haven’t even mentioned the gorgeous vessel sink and pump-style faucet our client selected! It looks like an old-fashioned ironstone bowl and water pump!
Even without all the new hardware, this gem is a beauty! Our client’s guests will make excuses just to go see it in their guest bath!
what are your thoughts?
Let me know your thoughts about this makeover! Also, what do you think our client should do about the mirror? Should she use this one or look for another?
Comment below and let’s let her hear our thoughts and ideas! She’ll be reading this post!


Thanks for joining our journey!
Thanks so much for joining us for this post! Join our journey so you don’t miss any of the fun projects, tutorials, and inspiration that we share with you each week! You can follow us on Instagram, Facebook, and YouTube. We share even more inspiration on Pinterest!
Until next time…


Cindy Rust
Cindy has been decorating her home with thrift store finds for 40 years. She is an avid thrift store shopper who loves to makeover the items she finds into vintage-inspired home decor and furniture. When she isn’t thrift shopping or painting a piece of furniture, you can find her making homemade butter, working in her garden, or painting with watercolors.
That vanity is what dreams are made of. I pinned this for my future home! Amazing mirror idea!
Yay!!! Thanks so much for pinning! I hope you can use this idea for your home one day!
Wow 🤩! Another amazing post with great information. Thank you for sharing. I love the color of the vanity. Your husband is also talented!!
Awe thanks Anna! Our client absolutely loved the vanity! And I think she is getting the mirror too!!
Cindy — you and hubby are so darn creative….and skilled!! I love the look and function of that cute piece. I’ve always wondered how a dresser drawer is modified to fit the supply lines and drain pipe. Awesome tutorial!
He’s the one with the skills! It’s amazing how much he can do and if he can’t, he learns how! Thanks for the encouragement my friend!!
Oh I have always wanted to do this! Your steps are so clear and concise. Definitely saving to reference for later.
Woohoo!! I would love to see your finished project!
Another outstanding project. I have a hard time deciding which picture I want to Pin. My husband has those hole drill things in his tools too. Love this so much!
Nothing like giving old pieces new life in my book.
Yes!! Giving new life to vintage pieces is so rewarding!!
Amazing! I repurposed a vintage dresser for my bathroom vanity as well. I love all of the storage as well as the style.
Hugs to you.
Hugs to you too my friend! Thanks for stopping by Renae!
I love this entire project! It’s giving me inspiration in one bathroom remodel…and I love that mirror. I’ve never seen one with a towel rack. So unique! Great job!
That mirror has my heart! I would have kept it but my client loved it so much and I am pretty sure she will purchase it to go with the vanity :). Yay for your own vanity project!!
This is absolutely gorgeous, Cindy! I did this in our guest bathroom too. I love the colour you chose for yours, so relaxing, perfect for a bathroom!
The color is my new favorite!! Bayberry from Fusion. And it went on so easily!! Thanks for stopping by!
I really want to do this! I was just thinking about it this morning. Thanks so much for sharing your process. I’ll be pinning for later so I can refer back to it. I really love the colour you chose.
Yay!! I would love to see your finished vanity!! Be sure to let me know when you get it finished!
Love it! I love repurposing dressers into vanities and I absolutely love vessel sinks and waterfall faucets❤
Yay!! You have done this type of project too! I will hop over to your blog and check out your site Thanks for stopping by!
You did an amazing job on this project. Your client has to be thrilled with the end result.
She was thrilled!!
Gorgeous, gorgeous, gorgeous! I am envious of your skills.
O Golly, that’s so sweet of you to say, Kim! Have a great day!
Cindy, i love this make over including the mirror.
Me too Linda! And I think the client will be getting the mirror to go with the vanity dresser!
Absolutely stunning! This piece is really beautiful. But perhaps the most useful thing about this post is your wonderfully detailed description of your process. I think it’s really helpful that you include the brand names and specific products and colors that you use in your projects, and this post is a perfect example of the generous way you share your talents. I’m sure your client is delighted, and she should be. And that mirror! The addition of the towel rack is ingenious.
Thanks for the kind words! We try our best to explain the process of our projects so that others can do similar projects for their homes! I agree 100% about that mirror!! I almost kept it but our client fell in love with it so it’s going to be hers! Thanks for stopping by today Debbie!
What was the height on this vanity?
Hi Rhonda! I am not exactly sure of the measurement of the dresser – it was about waist height. Sorry I can’t be more exact! It was a custom piece we did for a client. If you are interested in doing this type of project, I encourage you to find a dresser that comes to a height that you would be comfortable with as a vanity. Happy Reinventing!😊
I’m really confused as to why you painted it? It was such beautiful wood.
Hi Anita! This piece was a custom piece for one of our local clients. She wanted the dresser painted and converted to a bathroom vanity and we aim to please! Some pieces need paint and some don’t. She felt this piece needed paint 🙂 Thanks for stopping by!
It’s what is in right now plus the contrast is nice. Too much wood can’t over power the small space. Water off the wall would have been good too. We did that with our dresser conversions in a few design jobs in Delaware and Md. easier to clean easier to change out the vanity if it ever needs a refresh.
I agree about the contrast of wood and paint. I love the look of both!
I love the vessel sink you used. It’s perfect for that vanity. Can you tell me where it was purchased? I’m getting ready to turn a sideboard into a vanity and love this look.
Thanks,
Jenny
Hi Jenny! Our client purchased the sink and I think she found it on Amazon. If you do this project, be sure to measure, measure and measure again so that you get the correct size sink. I have included links within the post – just under the image showing my hubby drilling the hole in the top of the dresser! Good luck with your project and feel free to reach out via email with any questions – I will try to help you the best I can!
Love this old fashioned look! Great repurposing job:) Love the green with the white sink and wood top; great combo!
Thanks Lora! Our client was thrilled with the outcome!
Love this! I’m thinking about doing something similar in our master bath but having a hard time figuring out how high the dresser needs to be ?
Sorry for my delayed response Tina! The best way to determine this is to check the height of your dresser to the height of your current bathroom vanity. That will be the best place to start. From there, decide if you wan’t it higher or lower. Hope this helps!
We do this a lot in our designs and rehabs but we use water off the wall. We’ve done it in a few Reno’s on Delaware and Maryland.
Love the idea of water off of the wall! That would look amazing with this style of vanity!