
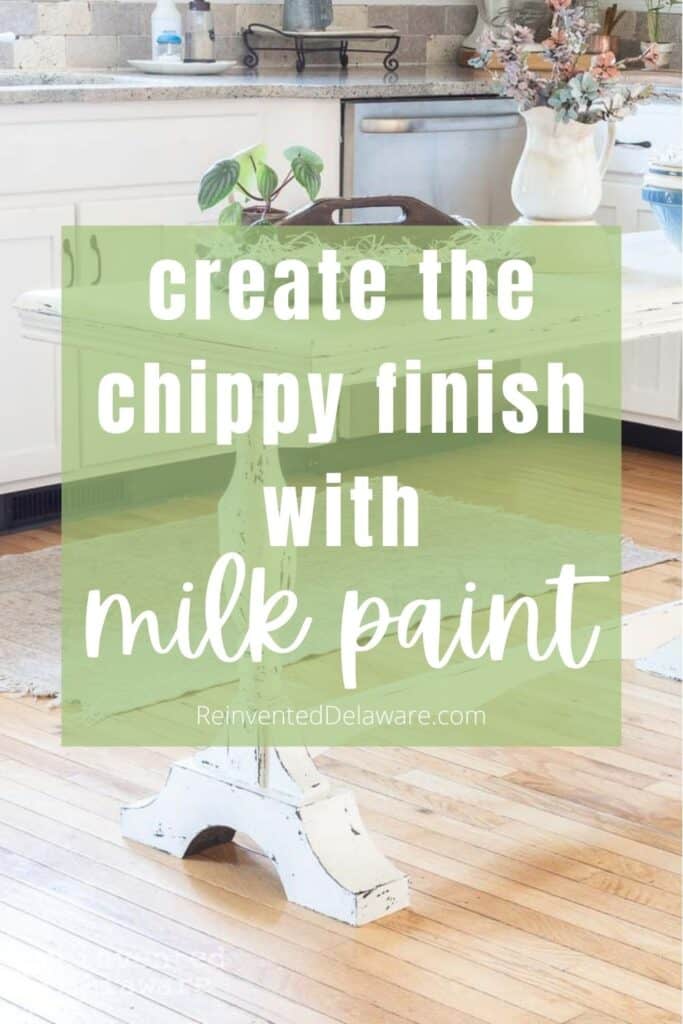
How to Milk Paint Furniture
Learning how to milk paint furniture is easier than you think! This tutorial will show you how to paint this table with milk paint!
The following post may contain affiliate links. That means if you click and then buy something, I will make a small commission at no additional cost to you! Thank you for supporting my blog. full disclosure here.
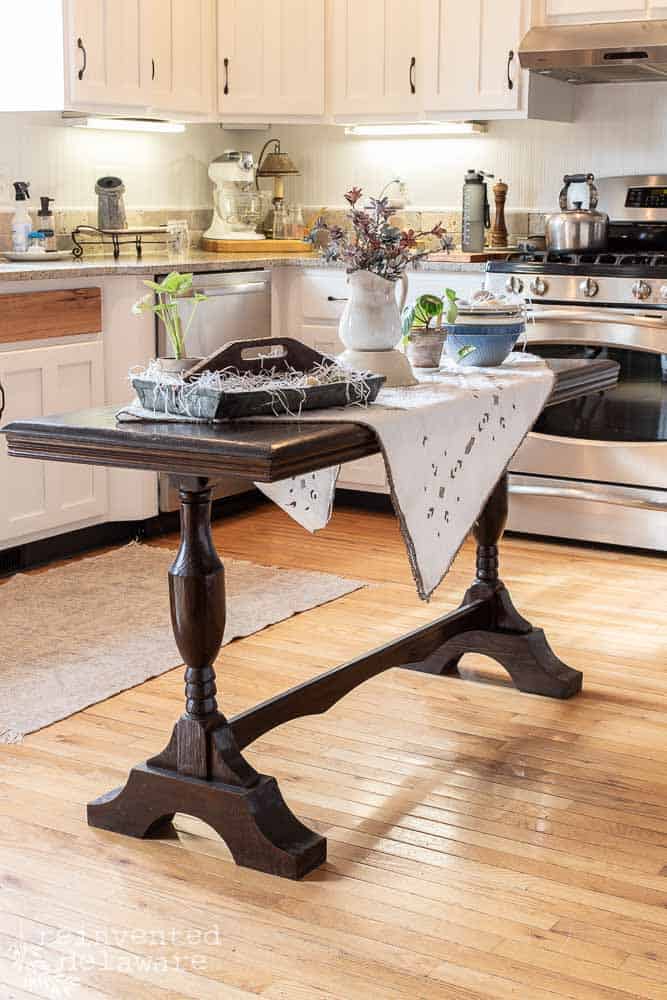
milk paint furniture

milk paint furniture before and after
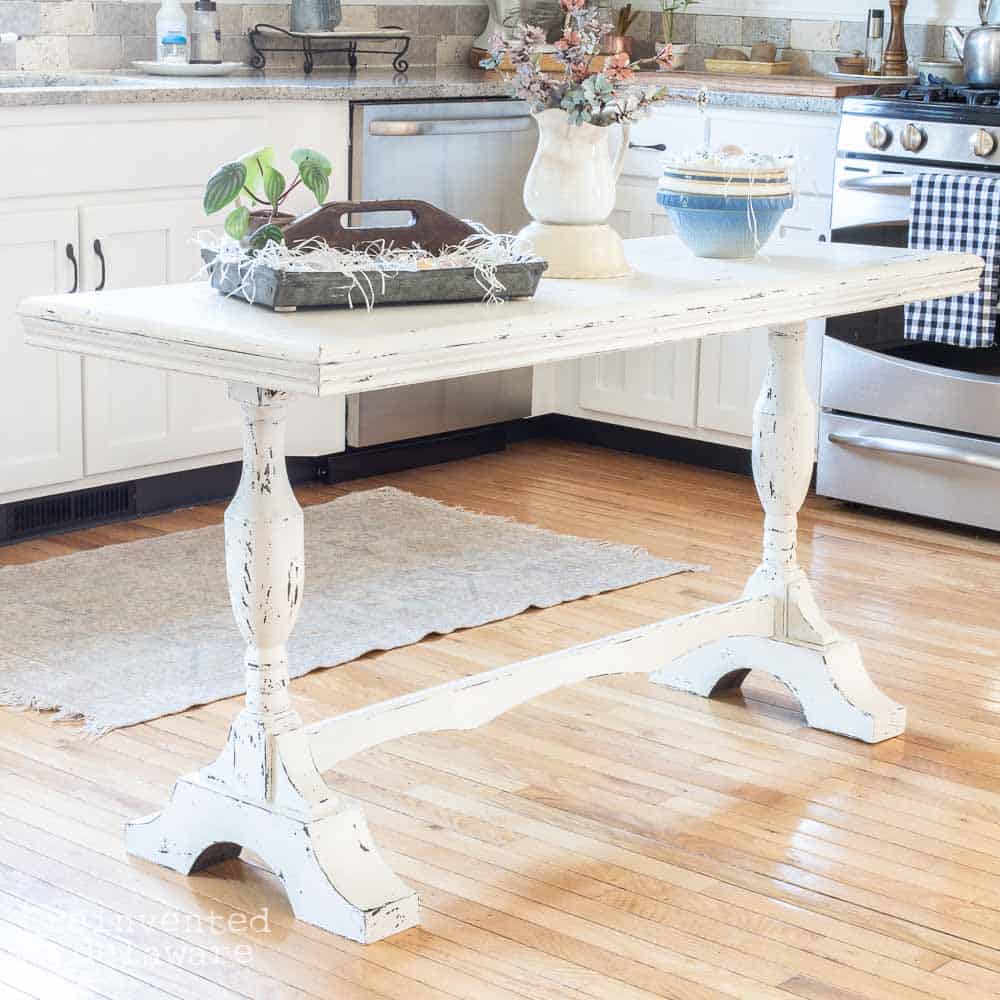
You are never going to believe what my hubby paid for this table!
Two buck-a-roonies! Yep, two dollars! $2!!!
When he came home with it from the auction, he said that he thought I would love it because it’s my style.
That’s what 39 years of marriage will get you! You know what the other loves!
how to prep furniture for milk paint
A couple of weeks ago, I shared the step-by-step process to prepare a piece of furniture for the chippy and crackly finish that we love so much here at Reinvented Delaware.
You can read the full tutorial on Miss Mustard Seed’s Milk Paint blog. They have kindly invited me to share projects over there periodically. Be sure to subscribe to their email so you don’t miss any of the tutorials that guest bloggers share! You can sign up for their email on the home page – CLICK HERE and then scroll down just a bit to sign up!
The prep post also has a YouTube video to show you the whole project that I filmed in my kitchen!
Click below for the full tutorial on prepping a piece for milk paint!
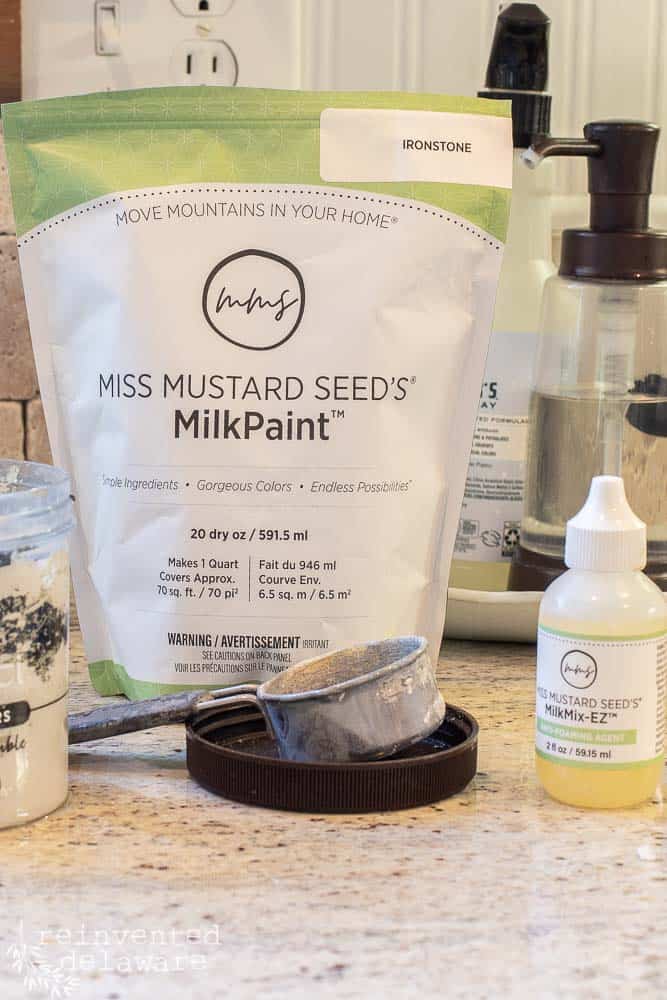
Let’s go over the supplies you will need for this project.
list of supplies:
- Ironstone milk paint
- MilkMix EZ
- MilkCoat Top Coat in Matte
- chip brushes
- R.A.D. Sanding Pads
- blue applicator sponge

how to mix milk paint
Mixing Miss Mustard Seed’s milk paint is so easy! It is mixed at a 1:1 ratio of dry milk paint to water. Meaning, that if you use 1/4 cup of dry milk paint powder you use 1/4 cup of water.
The dry milk paint powder has been re-formulated and it mixes easier than ever. Add the water to a container first, then add the powdered milk paint. Then give the mixture a good stir. You can also add MilkMix EZ if the paint gets foamy. The foam doesn’t bother me but I must admit, the MilkMix EZ helps the paint to mix a bit faster.
Completely mix the paint and then allow it to sit still for a few minutes to give the dry milk paint and water time to thoroughly combine. This only takes 10-15 minutes.
Here is a video I recorded about mixing milk paint a couple of years ago. The milk paint formula was a little different then but the concept of mixing the paint is just about the same.
You will notice that I added the dry milk paint powder first and then the water. The paint still mixed up just fine!
The latest on Youtube:
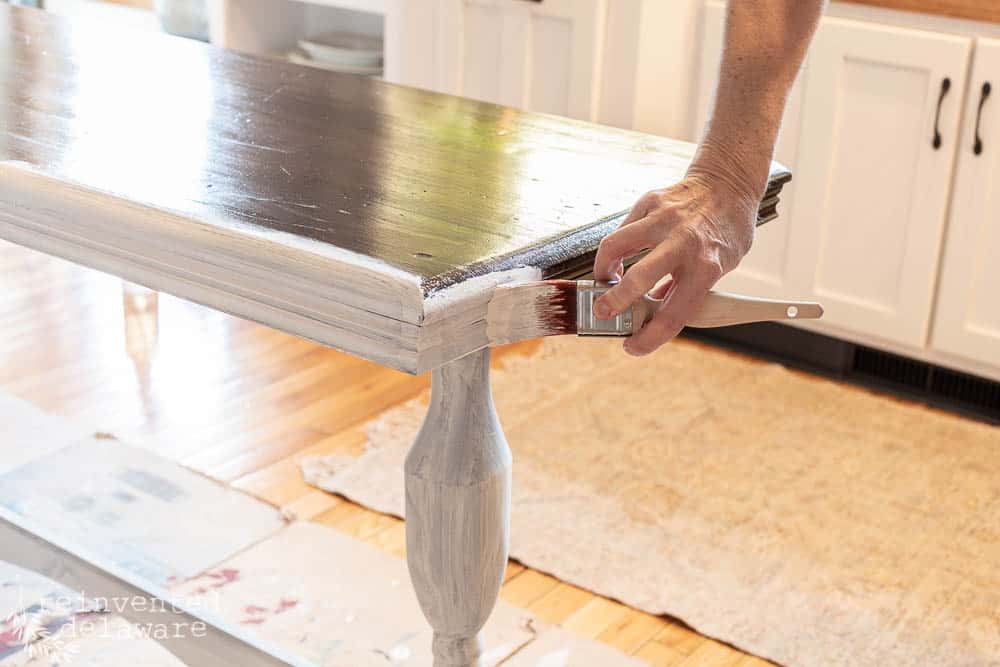
how to milk paint furniture
Once the milk paint has sat and absorbed the water completely, it’s time to paint! Let me mention that milk paint is much thinner than conventional furniture paints like chalk mineral paints.
It is more of the consistency of milk. And since it is thinner paint, you won’t have to worry about brush strokes. Seriously, no brush strokes at all!
It’s crazy how this thinner consistency paint adheres to surfaces so well!
See how the surface of the communion table is shiny? You’ll understand why after you read my post over on Miss Mustard Seed’s blog. Click the button below to see the post!
how long between coats of milk paint?
Milk paint is a fast-drying paint. On a warm day, it will dry really fast. On a cooler day, the dry time lengthens.
Generally, a 30-minute dry time can be expected. Usually, by the time I apply the first coat, it’s time to start on the second coat.
Painting with milk paint is fast and that’s another reason I love it!
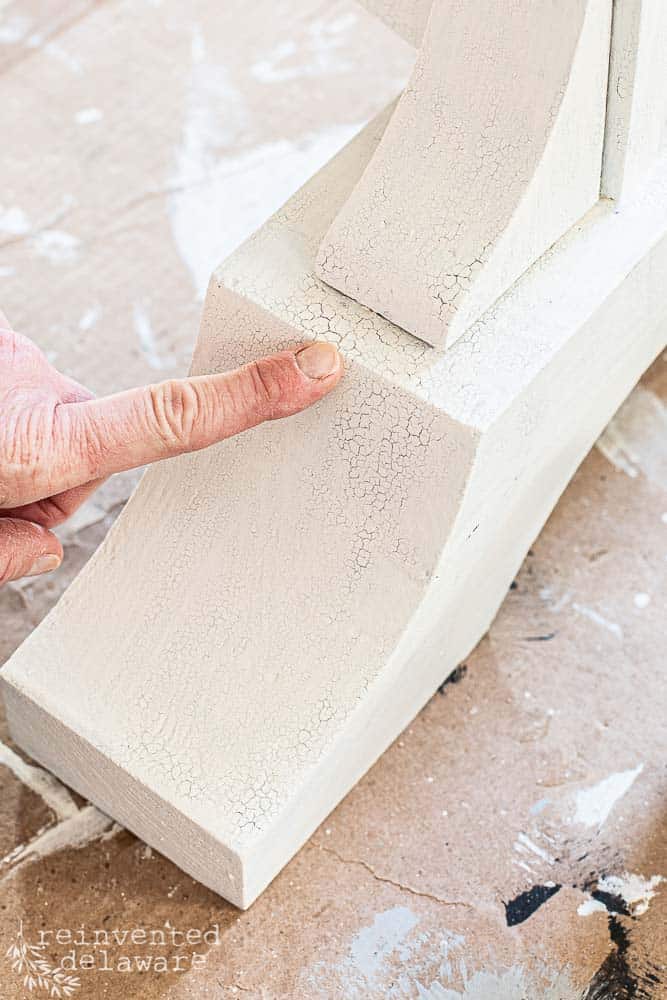

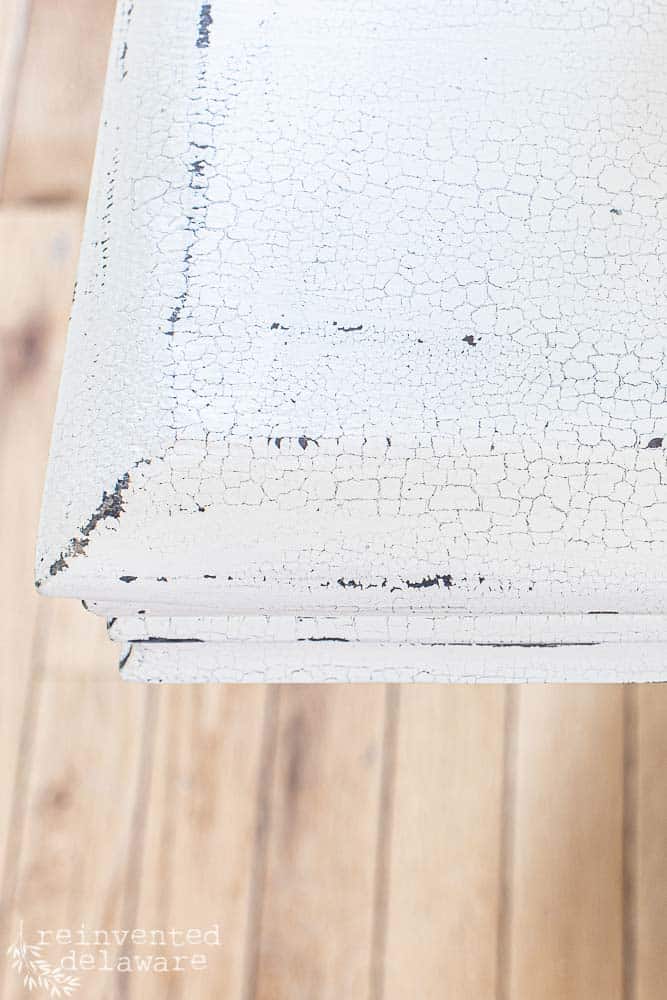
Can you see the crackle appearance happening in the images above? That’s the result you will get using the method I describe over on Miss Mustard Seed’s blog,
When it’s time for the second coat, just paint right over the crackling and chipping like normal. The crackling and chipping will continue to work their magic!
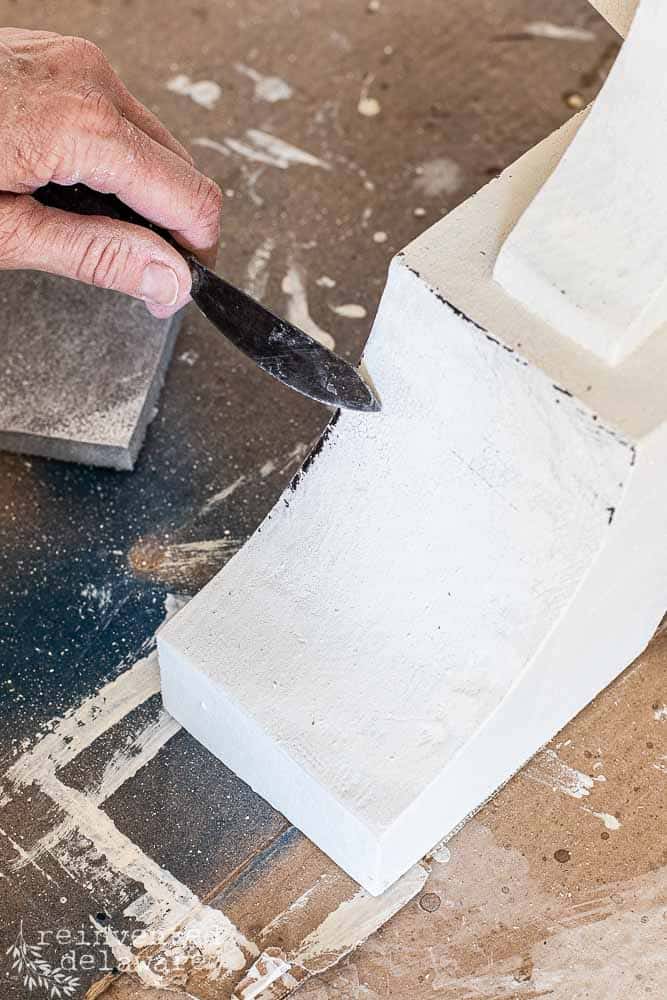
Handy tip: Knife Distressing
Knife distressing has been the method I have used to create this gorgeous vintage farmhouse look on furniture for years. I keep a couple of old knives in my workshop that I use just for distressing. You can find these knives at thrift stores very easily!
distress milk paint
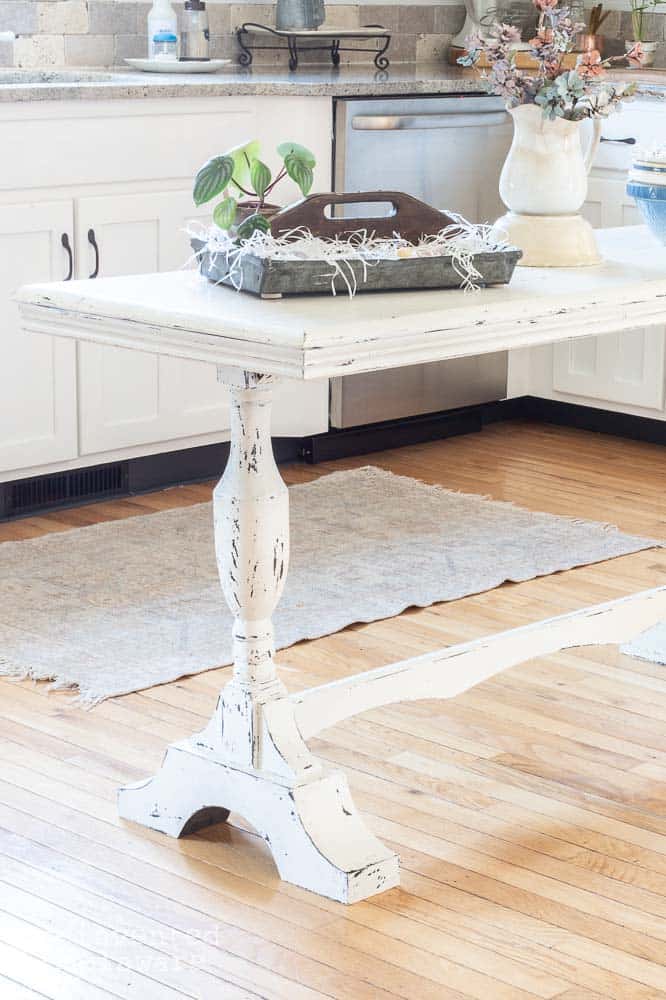
Distressing milk paint with this method is scary and fun all at the same time! Knife distressing is simple and easy on milk paint. I just gently scrape the paint away in the areas that would naturally be worn like around the feet of this communion table.
A quick motion with the knife around the high places on the piece will create an authentic chippy finish that compliments the crackle finish.

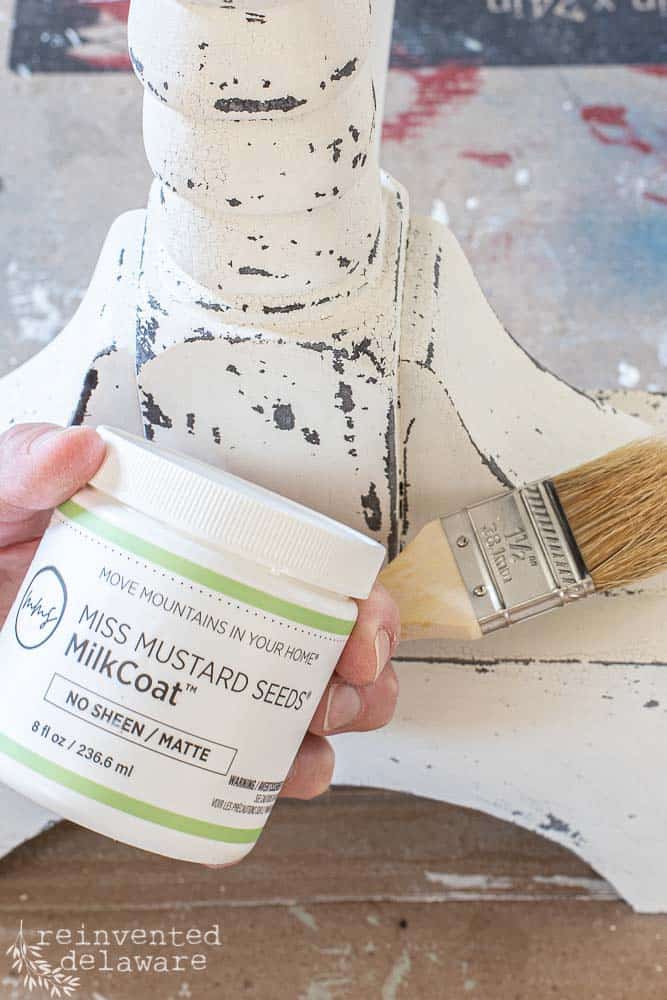
top coat for milk paint
There are several ways to seal milk paint. For this communion table, I thought it best to seal it with Miss Mustard Seed’s MilkCoat. It provides a durable finish for pieces that will have heavy use. This communion table is acting as a kitchen island in our home so I wanted the finish to be durable.
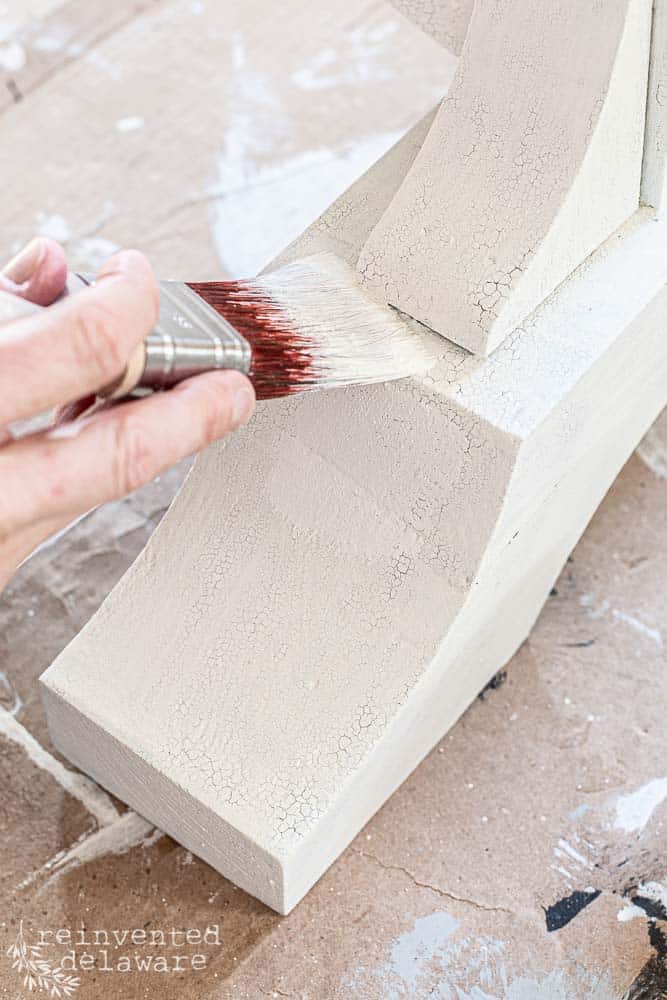
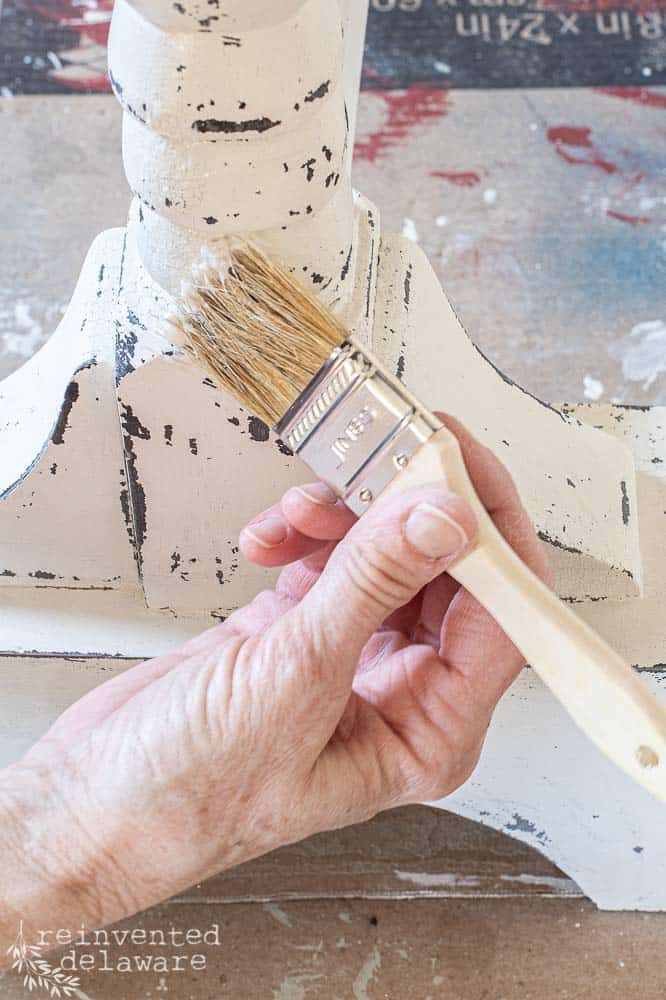
MilkCoat has a thick consistency – think of room temperature butter. It goes on smoothly with a chip brush for areas with details like the legs and apron on the communion table.
To apply the Milk Coat on the flat top surface, I used a blue applicator sponge. I wiped the sealer in one direction on the table and then when it was dry, I applied it in the opposite direction. The cross-hatching adds just a bit of texture to the flat surface.
You can watch the video linked above to see how I applied the top coat.
chippy and crackle finish with milk paint
Omgoodness, this finish makes my heart go pitter-patter! Don’t you love this old-world finish on furniture?
To me, this is a timeless look. The vintage and antique styles will always be in fashion!

painting with milk paint
Wasn’t that easy?? You can find an old piece of furniture that might not be antique, and create a piece like this for under $50!
I encourage you to go out to auctions, estate sales, yard sales, and thrift stores and find these pieces! All they need is a little attention and love and wa-la, you have a beautiful piece that you helped to create!
more inspiring posts using milk paint!
Milk paint is one of my favorite paints to use so I gathered up a couple of posts that you might be interested in!
Click the images below to be inspired!


Pin the image below to your home decor and furniture boards! Just click the pin button at the top left corner!
Thanks for joining our journey!
Thanks so much for joining us for this post! Join our journey so you don’t miss any of the fun projects, tutorials, and inspiration that we share with you each week! You can follow us on Instagram, Facebook, and YouTube. We share even more inspiration on Pinterest!
use code: 10OFFRD at checkout and save 10%!
Visit my Amazon Storefront!
Click the button below and head over to our online shop on Amazon!


Oh wow! That table is gorgeous, Cindy, and the chippy paint is icing on the cake. I LOVE milk paint. Pinned. xo 😘
Milk paint has my heart too Do! Thanks for stopping by my friend 🥰
Oh my goodness! This table is amazing! Such a great find. Hugs to you.
I could hardly believe what hubby paid for it! Have a great day Renae!🥰
What a deal! You did a great transformation job and I love it’s new use in your kitchen!
Thanks Kathy! I’ve already put this table to good use with an Instagram Live we did the other night on soap making! Thanks for stopping by😊
I love what you did with this table! MMSMP is so awesome to use, too. Great job, Cindy!
Thanks, Kim – milk paint creates a lovely vintage look!😊
Can you believe I have never tried milk paint! Your table looks so fabulous, I’m going to have to look more into this! Thanks for the great tutorial! Donna
If you love a chippy paint finish, you will love using this paint! Thanks for stopping by Donna😊
Your tutorial was so detailed, and I love how the table turned out.
Thanks, Janet! I appreciate you stopping by 😊
This is such a great tutorial and the table is just stunning!!
Thanks, Kristin! 😊
Great tutorial somany great tips and the finish is awesome.
Glad you enjoyed the tutorial on milk paint, Anita!😊 Thanks for stopping by!
I have a very similar table, but it was not $2! What a score. Love how you gave it new life with the milk paint and it looks fab in your kitchen Cindy.
Thanks, Marie! I could hardly believe the table was only $2!😊
What a gorgeous milk paint transformation. I have some milk paint but was too nervous to use it, but after seeing your table I have to try it out.
You should give milk paint a try especially since you have it on hand! It’s a great way to create a chippy finish!😊 Thanks for stopping by Kippi!
I love this it’s a beautiful piece. I like the curves so much. You give great tutorial as always.
So glad you enjoyed the post Cindy! I’m enjoying the table in our kitchen – it’s not often I actually keep the projects we make!😊
It looks amazing, Cindy! I enjoyed reading your tutorial. Milk paint is probably the one product I have never used before.
Omgoodness, you have to give it a try! This is one of my favorite paints to use!
First – I love your You Tube video for this project. It really conveys the information well. I love the tip for using Shellac – definitely trying that! Thank you for inspiring us Cindy. Another amazing project.
Shellac is so easy to use and it’s a great sealer that allows the dark wood to show through chippiness and crackling. 😊
Knife distressing looks like such a good method, more control than paper, going to try this. Thanks for sharing!
It’s a fun technique to use especially if you like chippy paint finishes! Thanks for stopping by Rachel!
This is a wonderful Tutorial Cindy, I did not know about the milkcoat, I think I need to put this on my dining room table, it is getting a lot of ware and needs some additional protection.
I can’t wait to ready your post on the chipy white look as well.
MilkCoat is a great sealer for milk paint. I think you will love using it! Thanks for stopping by Wendy!😊
My husband found me a solid wood dresser for $7 once – you have me beat. Love husbands who gets us.
Seven dollars? That’s amazing Rosemary! Thanks for stopping by 🙂