
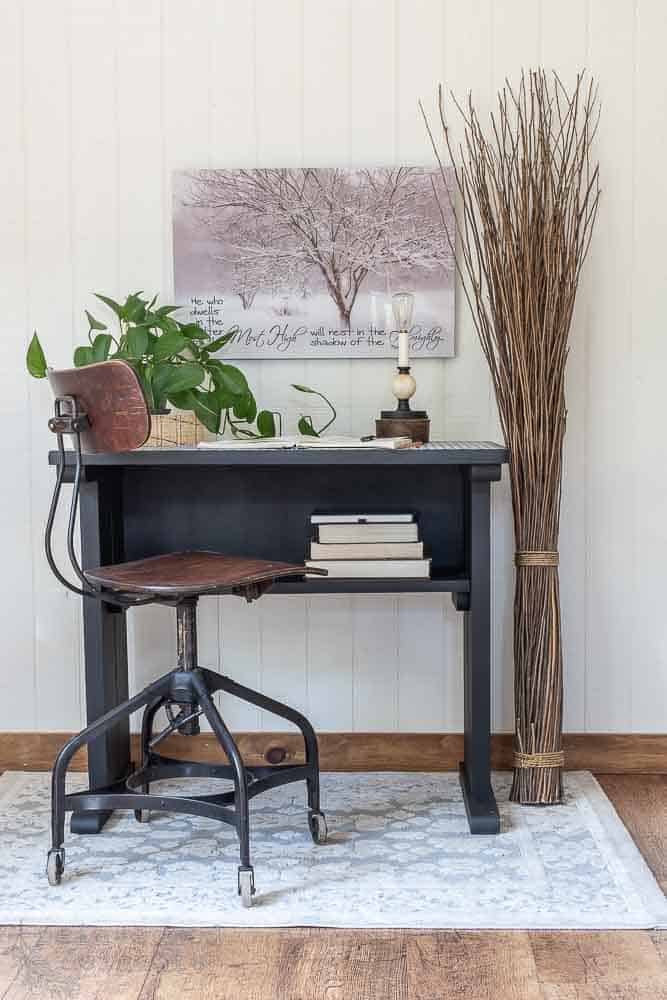
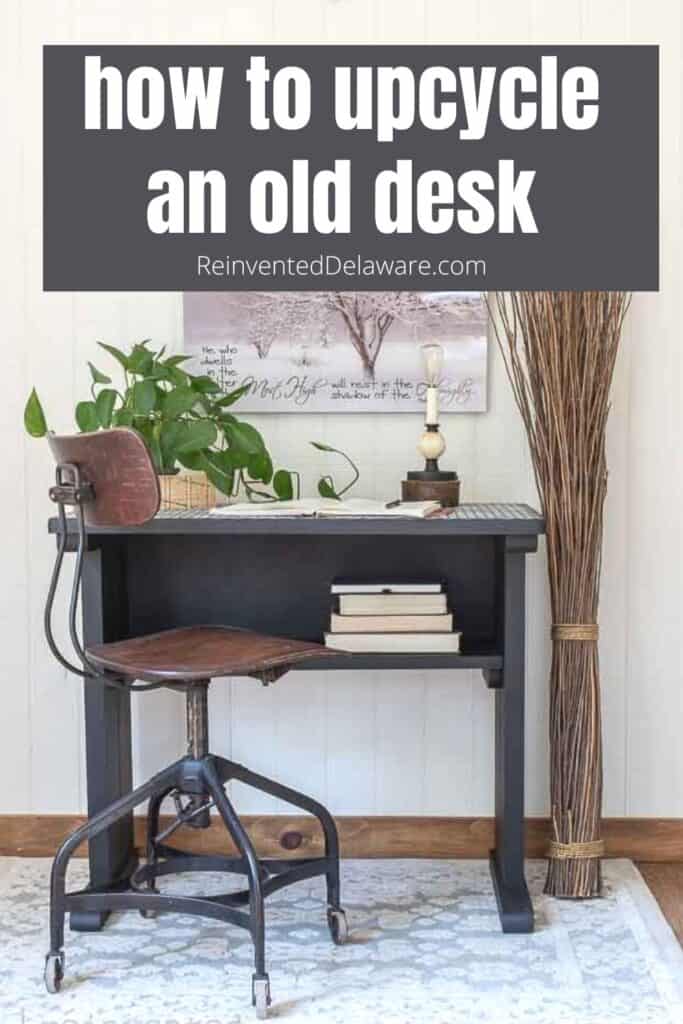
How to Upcycle an Old Desk with Chalk Paint and a Stencil
Learning how to upcycle an old desk is one of the most rewarding and budget-friendly DIY projects you can take on. With just a coat of chalk paint, a stencil, and a few simple supplies, you can transform a tired thrift store find into a stunning piece of furniture. This upcycled desk makeover uses Dixie Belle Chalk Mineral Paint in Caviar – a rich black that works with any home decor style. Whether you’re creating a home office nook or just want to give an old piece new life, this step-by-step tutorial makes it easy for beginners!
This post is sponsored by Dixie Belle. All opinions are my own!
The following post may contain affiliate links. That means if you click and then buy something, I will make a small commission at no additional cost to you! Thank you for supporting my blog. full disclosure here.
where to find an old desk
This old desk has been sitting in my inventory for quite some time – and honestly, I don’t even remember exactly where I found it! If I dig deep enough into my memory bank, I think we picked it up at a yard sale, or maybe it was a thrift store find. 😉 Who knows! What I do remember is that I only paid $2 for it! If you are not sure where to start looking for pieces to upcycle, I have a whole guide on thrift shopping for home decor that will have you finding hidden gems in not time!
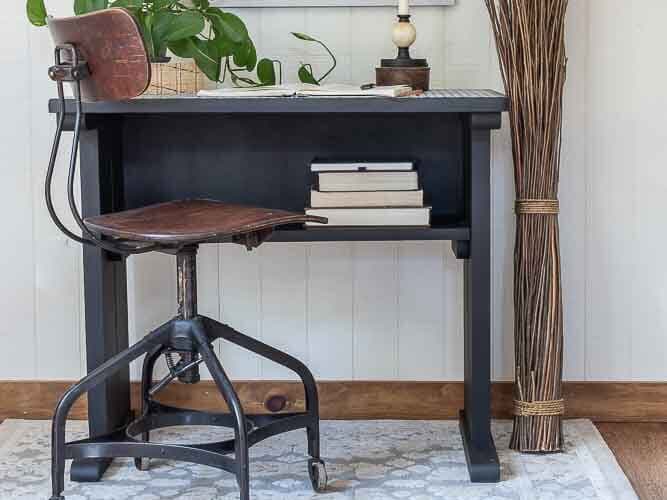
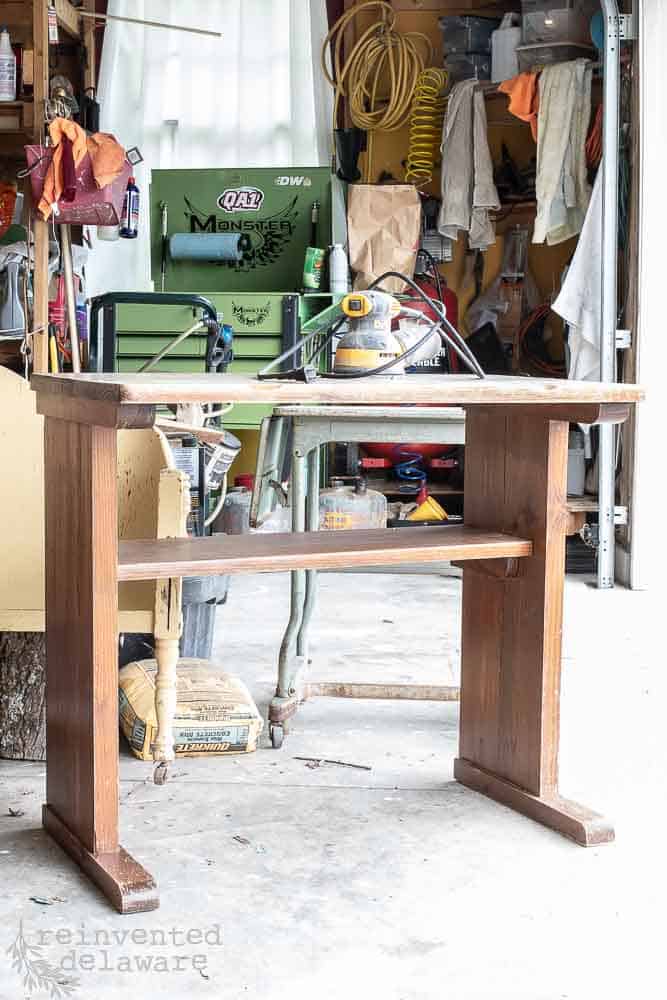
This old writing desk is super heavy and looks like it might even be handmade – it is definitely well built! It was pretty dirty and missing the back piece behind the shelf, but both of those things are an easy fix. A little elbow grease and a fresh coat of chalk paint go a long way when you are ready to upcycle an old desk and give it a whole new life!
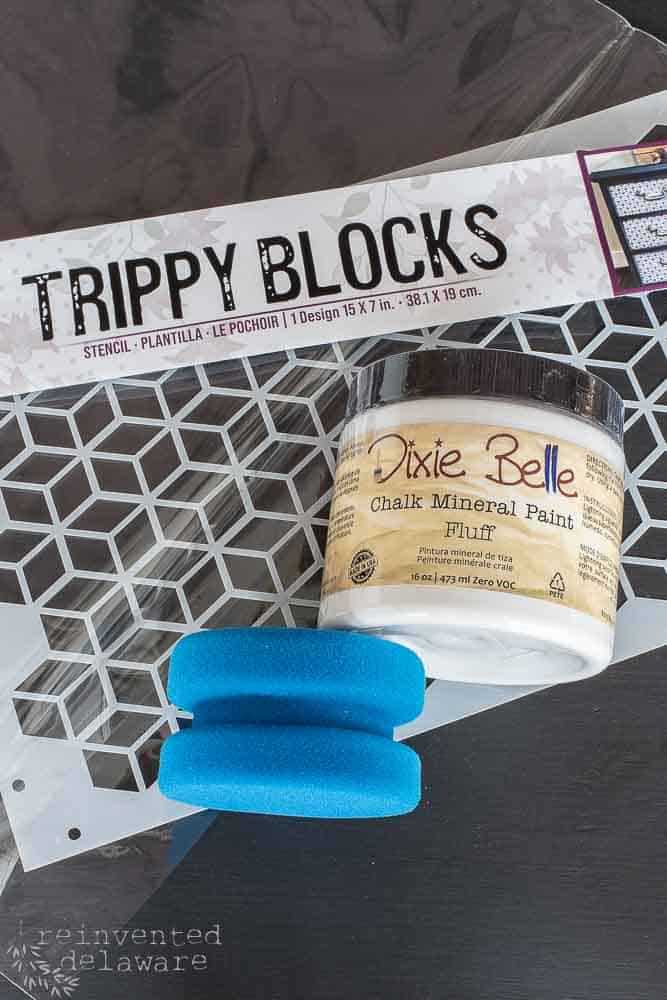
supplies for your chalk paint desk makeover
Here is everything you will need to get started on a thrift store desk makeover like the one I did. I use Dixie Belle Chalk Mineral Paint for almost all of my furniture makeovers, and it never disappoints. The quality is outstanding, and it is so easy to use – even if this is your very first DIY desk furniture makeover!
- orbital sander
- sanding discs
- sanding block
- White Lightning Cleaner
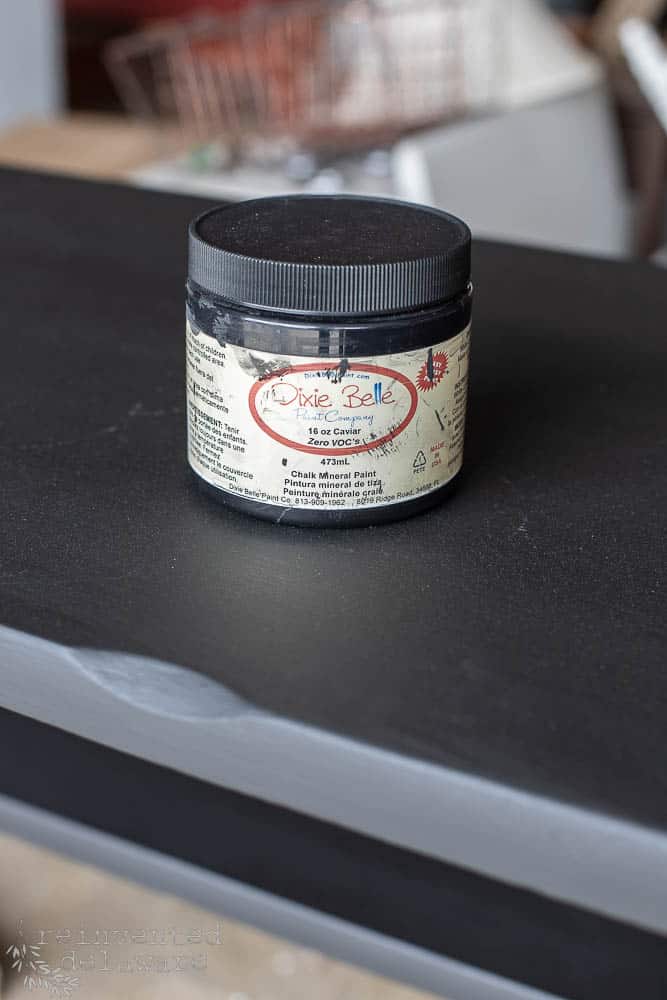
- Caviar Chalk Mineral Paint
- Fluff Chalk Mineral Paint
- Trippy Block stencil
- sponge applicator
- synthetic paintbrush
- furniture wax
- wax brush
- shop vac
how to upcycle a desk: step-by-step tutorial
We will go over each step in this upcycled desk project in detail, but here is a summary of what we will be doing to give old desk a gorgeous new look:
- vacuum and wash the piece
- replace the missing back piece
- apply chalk paint
- use a stencil to create the design
- seal the piece with furniture wax
How to prep an old desk for painting
The first step in almost every DIY desk furniture makeover is to clean the piece really well. Thrift store and yard sale finds are always dirty and grimy, so I like to use a TSP alternative cleaner like White Lightning to get the job done right.
Start by giving the desk a good vacuum with your shop vac – seriously, this is one of the most-used tools in my whle workshop! Once the loose dirt and dust are gone, mix White Lightning with water according to the directions on the container and wipe the whold desk down with amocrofiber cloth. Go back over it with clean water to remove any residue, then allow it to dry completely.
Now that the desk is clean, it is time to use 220-grit sandpaper to lightly scuff up the surface. You can use an orbital sander with sanding discs, a sanding sponge, or good old-fashioned sheet sandpaper and your hand! The goal is to give the surface a little “tooth” so the chalk paint has something to grip onto. Some furniture makeover folks say scuff sanding isn’t necessary with chalk paint, but my preference is always to do it- it is the best way to get excellent adhesion and a finish that will last!
How to apply chalk paint to a thrift store desk
It’s finally time for the fun part of this project! Oh, who am I kidding? I love every single part of an easy chalk paint desk makeover project like this one! If you have ever wondered how to paint furniture black with chalk paint, this is the same technique I use every single time, and it never disappoints.
Before you pick up your brush, make sure you stir the paint really well. The contents of mineral chalk paint need to be fully mixed before you start, so don’t skip this step!
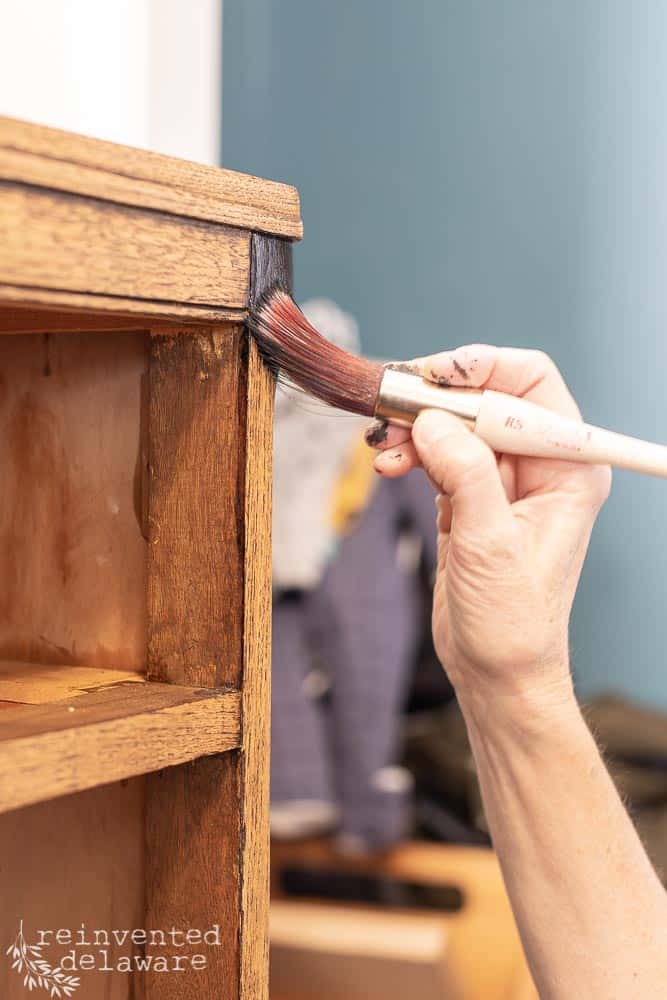
Apply the first coat using a good-quality synthetic paintbrush with even strokes. For a perfectly smooth finish without brush strokes, try misting a little water onto the brush or directly on the surface before you paint. It helps the paint level out beautifully!
I used Dixie Belle’s Caviar for the old desk transformation – it is a true, rich black that will go with absolutely any home decor style. Once the first coat is dry, apply your second coat the same way. Allow the paint to dry completely between coats. Waiting is the hardest part, I know, but it’s so worth it!
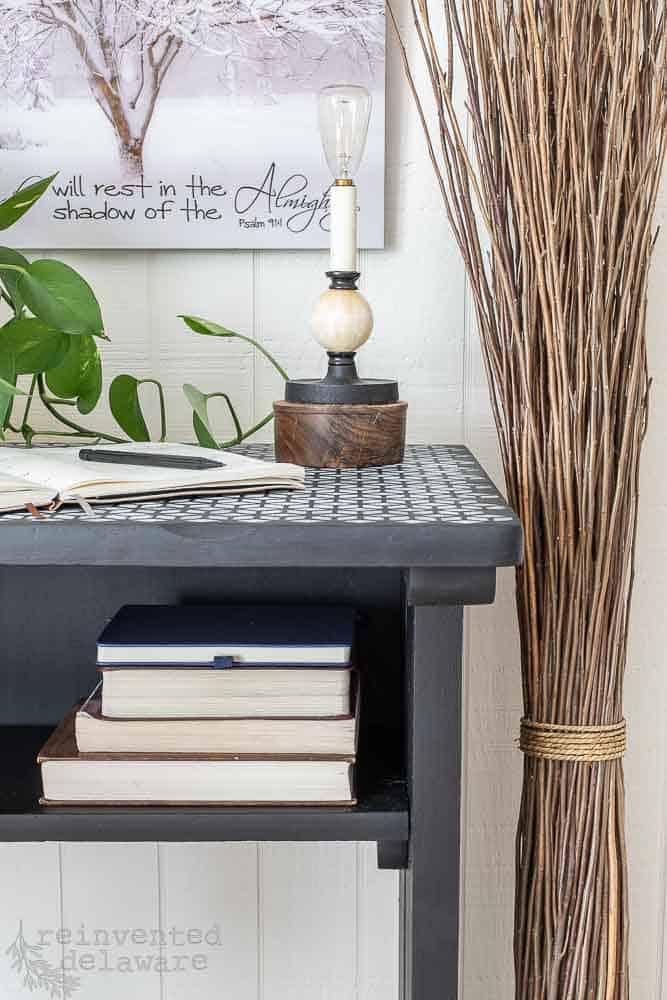
how to stencil a desk top: easy DIY idea
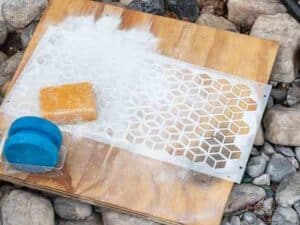
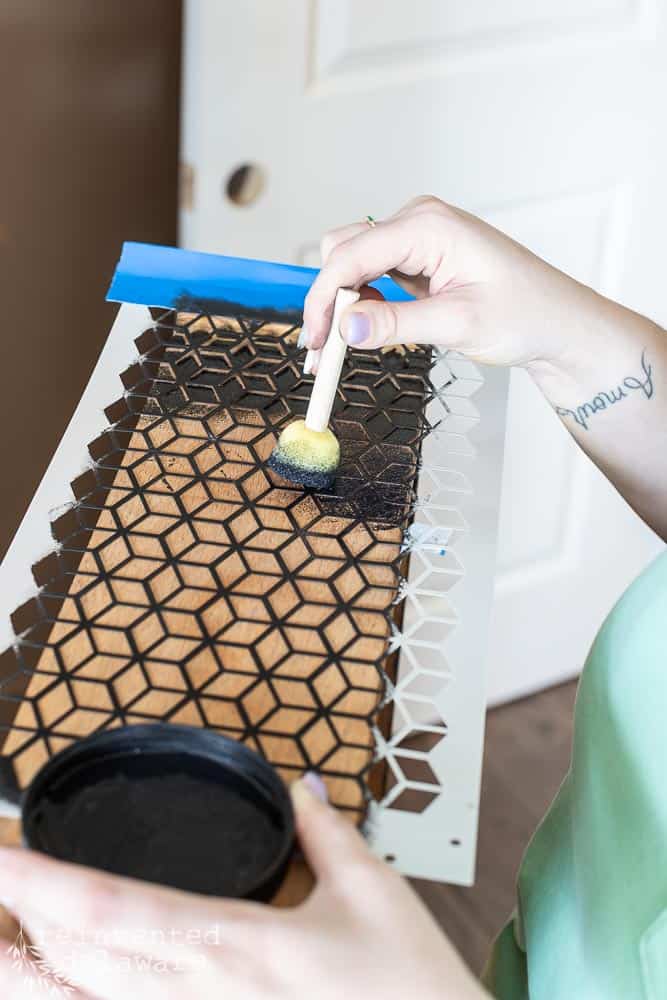
Now let’s really give this old desk a new life with a stenciled design on the top! The stencil I chose for this calk paint desk makeover has a modern geometric look that is a little outside my comfort zone, but my hubby needed it for his classroom and I think it is just perfect for that space.
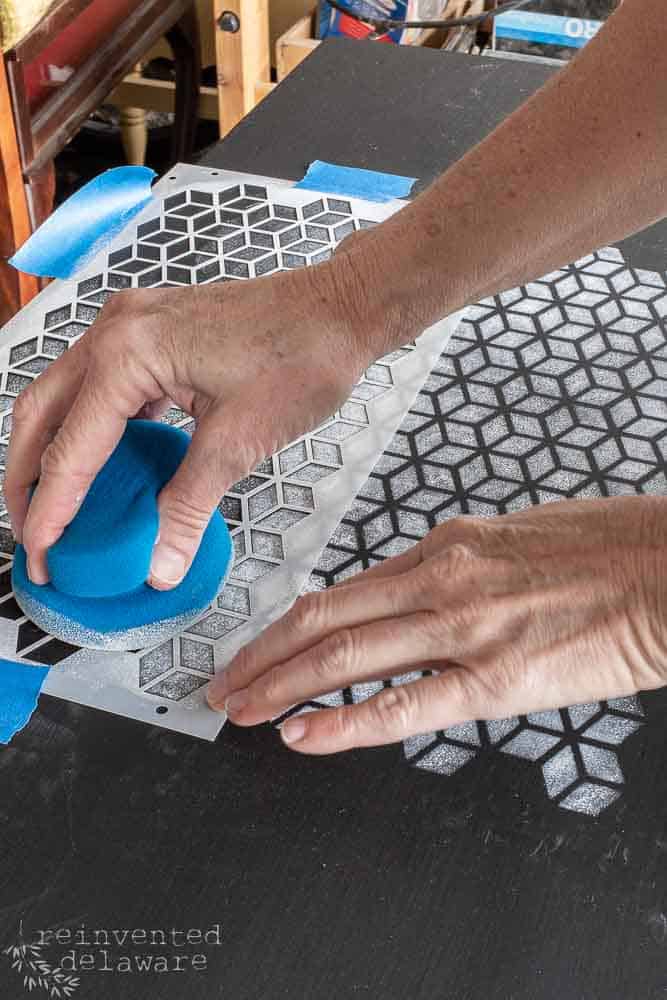


Before you commit, do a dry run to see how the stencil fits on the desktop. Even with an all-over design, you want to make sure the pattern doesn’t fall off the edges in an awkward way. I decided to center the design, so I lightly marked the center of the desktop with a pencil at the front and back, found the center of the stencil, lined everything up, and used masking tape to hold it in place. Then I worked from the center outward toward the edges.
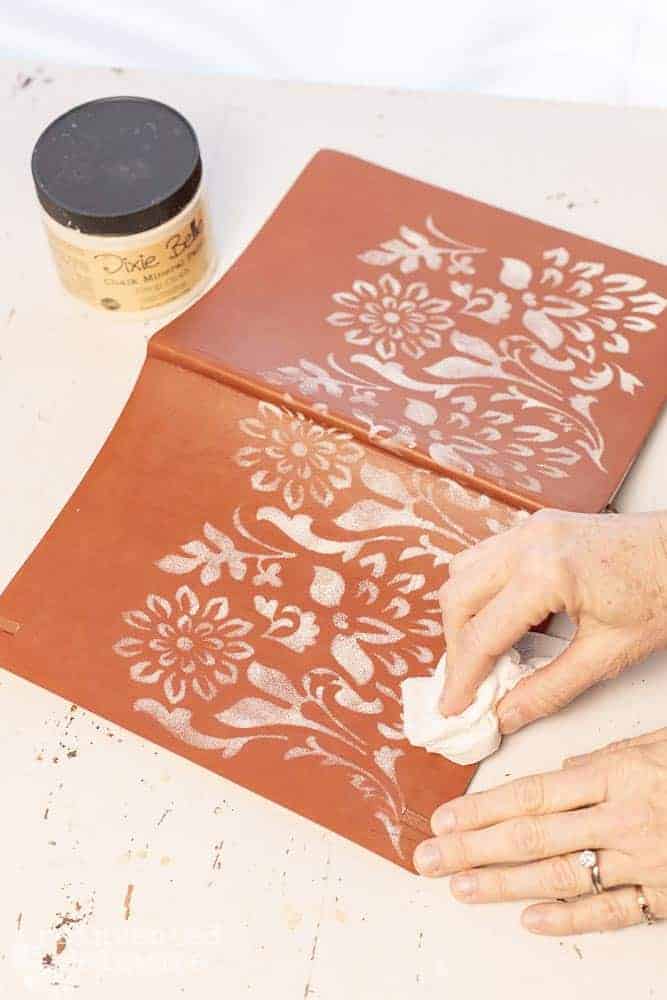
Dip your sponge applicator into the Fluff (white) chalk paint and offload most of the paint onto a paper towel before you start pouncing it onto the stencil. This is the most important tip for stenciling furniture – thin, light coats prevent the paint from bleeding under the stencil and keep those edges crisp and clean! The paint dries fast, so once the first pass is done and before moving the stencil, go ahead and add a very light second coat.
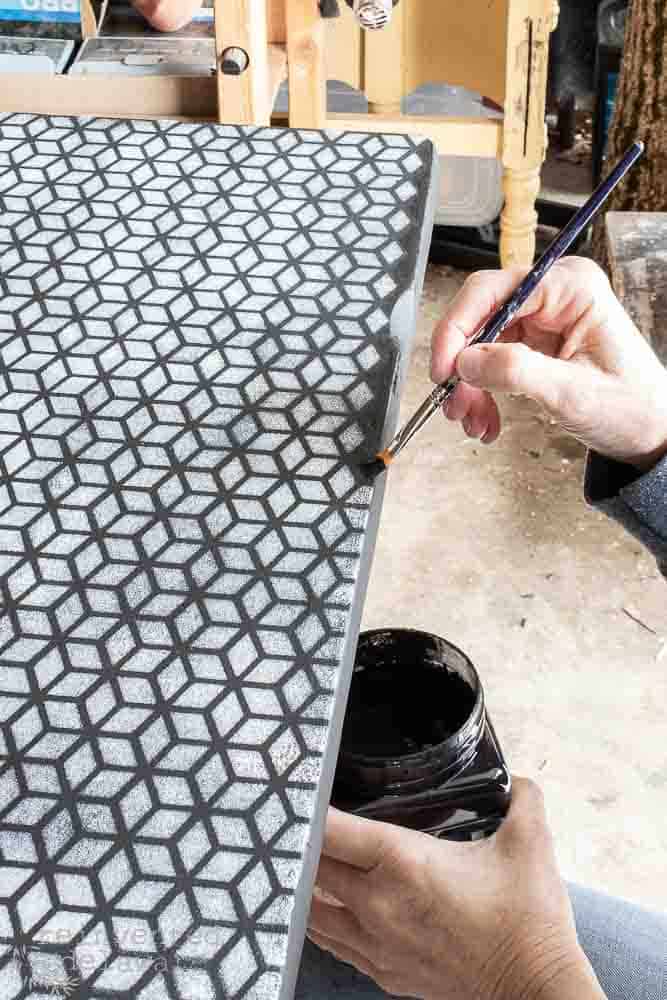
To tidy up the outer edges of the desk, use a small artist’s brush to paint over any stenciled areas that spilled off the edge. This little finishing touch gives the whole piece a polished, professional look!
how to seal a chalk paint furniture makeover
You can seal your upcycled desk project with your choice of sealers and topcoats, but I decided that furniture wax was the perfect option for this piece. Since the desktop won’t see heavy daily wear – hubby is using it to hold supplies for his high school classroom – wax is an idea finish.
Wax is so easy! Apply the wax with a wax brush using circular motions, then buff it back with a soft cloth or a blue shop paper towel. I love using the disposable shop towels for this because I don’t have to worry about cleaning them afterward. The wax gives the desk a beautiful, subtle sheen and protects all of that gorgeous chalk paint work underneath.
Handy tip: Clean your stencil!
Be sure to clean your stencil well so you can use it for years! Hot soapy water and a Scrubby Soap pad will easily remove the paint! Do this on a flat surface so you don’t mess up the edges of the stencil design.
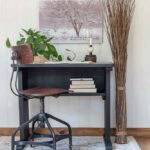
the before and after: old desk transformation
Wasn’t that one of the easiest chalk paint desk makeovers you have ever seen? If this has you itching to tackle your next project, go check out my favorite before-and-after furniture makeover ideas – there are over 35 transformations there to keep you inspired!
Dixie Belle chalk paint makes this kind of old desk transformation so approachable – even for the total beginner! The paint quality is outstanding, and the results are just stunning every single time.
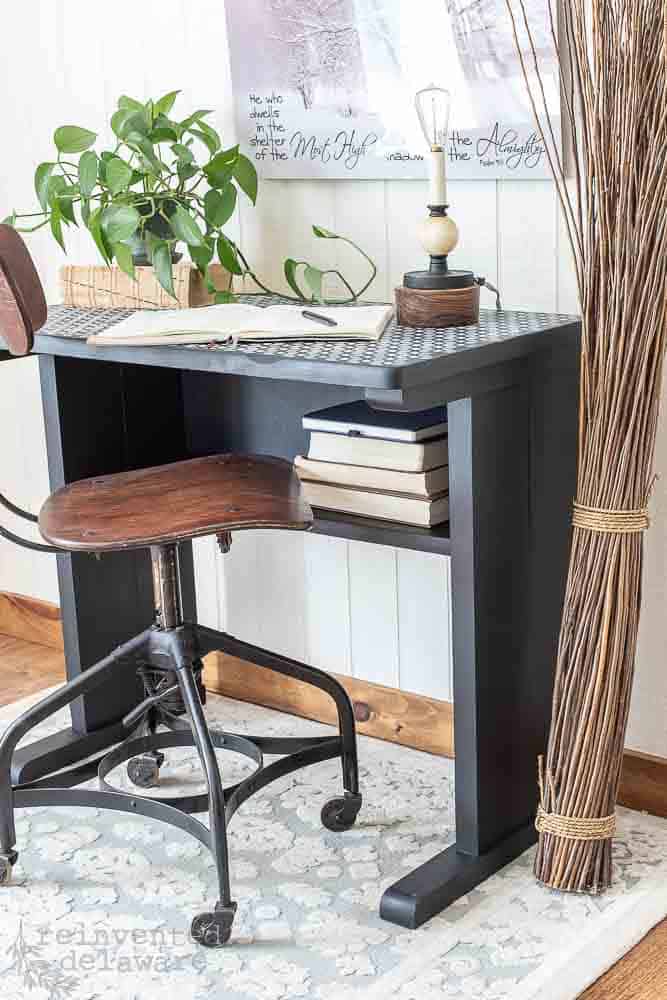
This upcycled writing desk would work beautifully in a small space like the corner of a living room or a dining room, especially if you work from home. Pop your laptop on the desk during the day and tuck it away on the shelf below when your workday is done! Or if you have a larger area to create a dedicated home office space, this repurposed desk project would look absolutely gorgeous there too.
Have you tried a thrift store desk makeover before? Tell me about the upcycle project you have planned next – I would love to hear about them!

more DIY upcycled furniture ideas with chalk paint
This chalk paint and stencil technique doesn’t have to stop with a desk makeover! Once you see how easy it is to upcycle an old desk, you are going to be looking at every piece of furniture in a whole new way. Here are some other furniture pieces that would love a little upcycled makeover magic:
- a new desk from the big box store – you could stencil over an existing surface with mineral chalk paint and a pretty design!
- an antique writing desk that sits on your lap and stores writing supplies
- a dressing table painted in feminine colors and stenciled with this Fairies stencil in a contrasting color for a little girls’ room
- a thrift store dresser painted in blue and then stenciled with a safari design for a little boys’ room
- console tables painted in a light color and then stenciled in a dark color using a damask design for a french country look
- a dresser painted and only the drawer fronts stenciled
- an entryway table painted in a white color with black paint used with a buffalo check stencil to create a farmhouse look on the top piece of the table
other DIY stenciled projects
There are so many ideas popping into my head! Stencils are a great way to give an old piece of furniture a new lease on life! The next time you are out, you will probably be on the lookout at thrift stores, yard sales, or maybe even the side of the road to find just the right piece to use this technique on!
Here are some of the stencils that could be used in the DIY painted projects mentioned above. You will love the designs!
more inspiring posts!
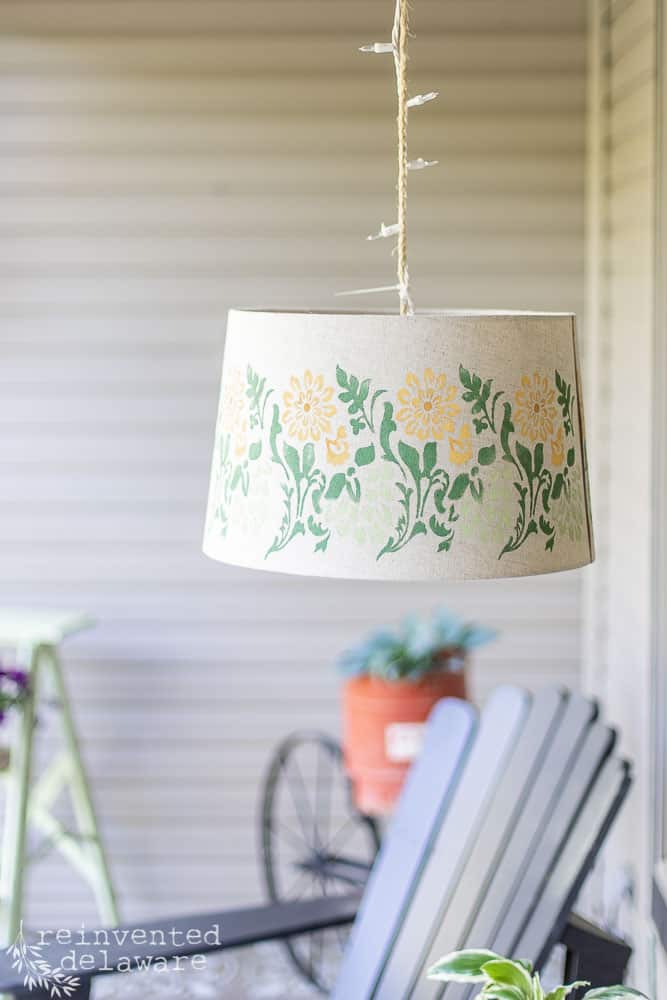
Stenciling is an excellent way to give just about anything a fresh new look! A tote bag, the sides of drawers, a hanging lampshade, and even a journal!
Click any of the images below to see each DIY project!
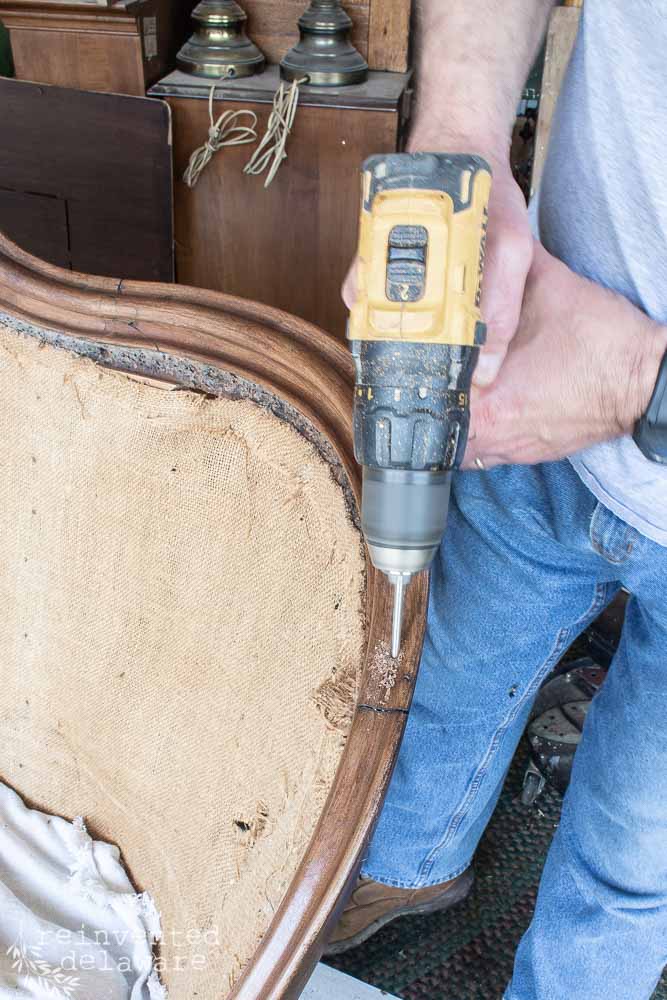
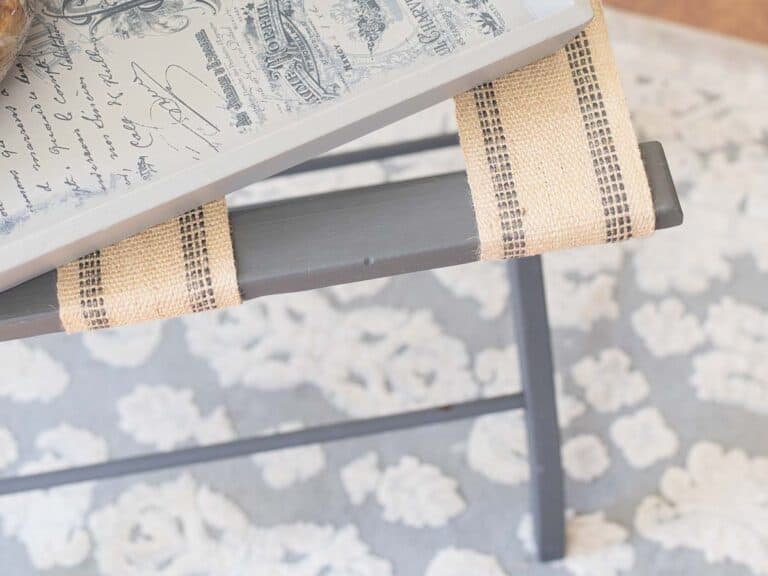
Oops, I almost forgot to tell you that my hubby cut a new piece of luan wood to fit the back area behind the shelf! I painted it black to match and he attached it with small nails.
Hope you enjoyed this project! Thanks for stopping by today!
While chalk paint is known for its excellent adhesion, scuff sanding with 220-grit sandpaper is recommended for the best results. It gives the paint more “tooth” to grip and helps the finish last longer.
Chalk mineral paint, like Dixie Belle’s Chalk Mineral Paint, is ideal for furniture makeovers. It’s easy to apply, dries quickly, and doesn’t require a primer on most surfaces.
Offload most of the paint from your sponge applicator before pouncing it onto the stencil. Apply thin, light coats and let each coat dry before adding another.
Wax is a great option for desks that won’t see heavy daily use. For a high-traffic surface, consider a clear topcoat finish for added durability.
Thrift stores, yard sales, Facebook Marketplace, and even curbside finds are great sources. You can often find solid, well-built pieces for just a few dollars!
Absolutely! This chalk paint and stnecil method works beautifully on dressers, console tables, entryway tables, nightstands, and more!

Thanks for joining our journey!
Thanks so much for joining us for this post! Join our journey so you don’t miss any of the fun projects, tutorials, and inspiration that we share with you each week! You can follow us on Instagram, Facebook, and YouTube. We share even more inspiration on Pinterest!
click below to purchase supplies!
Visit my Amazon Storefront!
Click the button below and head over to our online shop on Amazon!
How to Upcycle an Old Desk with Chalk Paint and a Stencil
Equipment
- orbital sander
- Sanding Block
- shop vac
- Small Artist's Brush
- Synthetic Paintbrush
- wax brush
- Water Misting Bottle
Materials
- Old Desk (thrift store, yard sale, Facebook Marketplace
- 220-grit Sandpaper
- White Lightning Cleaner (TSP Alternative)
- Chalk Mineral Paint in Caviar
- Chalk Mineral Paint in Fluff
- Sponge Applicator
- Masking Tape
- Furniture Wax
- Microfiber Cloths or Blue Shop Towels
Instructions
- Step 1 – Find Your Desk: Head to your local thrift store, yard sale, or check Facebook Marketplace for an old desk with good bones. It doesn't need to be pretty – just sturdy! I paid $2 for mine and it turned out to be one of my all-time favorite furniture makeovers!
- Step 2 – Clean the Desk Thoroughly. Give the desk a good vacuum with your shop vac to remove loose dirt and dust. Mix White Lightning with water according to the label directions and wipe down the entire piece with a microfiber cloth. Rinse with clean water and let it dry completely before moving on.
- Step 3 – Scuff Sand the Surface: Using 220-grit sandpaper on your orbital sander or by hand with a sanding block, lightly scuff the entire surface. This gives the chalk paint something to grip onto for a finish that will last for years. Vacuum away any dust when you're done!
- Step 4 – Apply the First Coat of Chalk Paint. Stir your Caviar Chalk Mineral Paint really well before you start – don't skip this step! Apply the first coat with a good-quality synthetic paintbrush using smooth, even strokes. For an ultra-smooth finish, lightly mist the surface or your brush with water before painting. Allow it to dry completely.
- Step 5 – Apply the Second Coat of Chalk Paint. Once the first coat is fully dry, apply a second coat of Caviar the same way. Two coats give you that rich, beautiful, true black coverage that makes the stencil design really pop!
- Step 6 – Plan and Secure Your Stencil. Do a dry run with the stencil first to plan your placement on the desktop. Lightly mark the center of the desk with a pencil, line up the center of the stencil, and secure it with masking tape. Working from the center outward gives the most balanced, professional look!
- Step 7 – Stencil the Desk Top: Dip your sponge applicator into the Fluff (white) chalk paint and offload most of the paint onto a paper towel before pouncing it onto the stencil. Less is more here – thin, light coats prevent bleeding under the stencil. Allow to dry, then apply a light second coat before moving the stencil to the next section.
- Step 8 – Touch Up the Edges: Using a small artist's brush, touch up any stenciled areas that spilled over the edges of the desk for a clean, polished finish. This little step makes such a big difference!
- Step 9 – Seal with Furniture Wax: Apply furniture wax over the entire desk using your wax brush in circular motions. Buff back with a soft cloth or a blue shop paper towel. The wax protects your beautiful finish and gives the piece a gorgeous, subtle sheen!
- Step 10 – Clean Your Stencil. Don't skip this last step! Wash your stencil with hot soapy water and a Scrubby Soap pad on a flat surface. This preserves the edges and keeps it ready for your next project. A clean stencil lasts for years!
Notes


Cindy Rust
Cindy has been decorating her home with thrift store finds for 40 years. She is an avid thrift store shopper who loves to makeover the items she finds into vintage-inspired home decor and furniture. When she isn’t thrift shopping or painting a piece of furniture, you can find her making homemade butter, working in her garden, or painting with watercolors.


I’ll take a $2 SCORE any day. The desk is super cute and I really like the addition of the stencil on top. Pinned! Thanks for sharing.
xo 😘
You and me both! $2 is hard to beat! Thanks for pinning my friend🥰
That desk looks amazing! I usually do not like stencils, I think they are dated but this desk is beautiful
I agree! The stencil design is so cute and it fits the look that is popular right now! Thanks for stopping by Debbie!😊
Cindy,
Hi I’m new here. Love the desk. One of these days I have a few items to tackle so I can’t wait to explore your site more☺️ Where did you get that beautiful picture above the desk?
Thanks for joining us here June! Feel free to look around the blog – we are loaded with tutorials and projects! The image you see is one that I captured on a snowy day in our yard. It’s printed on metal and it’s one of my faves! Thanks for asking!
Cindy, the desk turned out really nice. I love the stencil and the color Caviar.
Thanks Tammy – Caviar is such a rich color!
What a cute desk! I love the stencil you used and how you paired it with that awesome desk chair!
That desk chair gets a lot of use – It sits at my sewing table in my craft room. Thanks Donna!
I love the new look, Cindy! I don’t think I would have given that desk a second thought if I saw it in a thrift store. The transformation is very inspiring! I’m looking around my house right now to see where I can use that Caviar color — so pretty! Thanks for sharing your expertise prep and painting tips.
Keep looking Karen – you’ll find something to paint in that color! Thanks for stopping by 🥰