
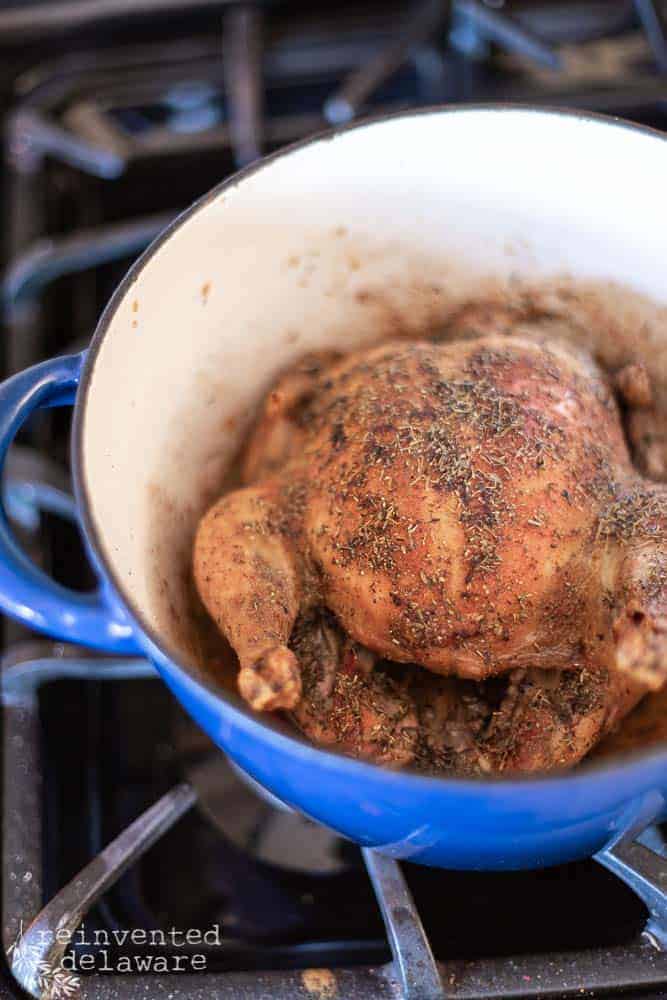
Instant Pot greek Yogurt – Easy Homemade Recipe
If you have an Instant Pot sitting on your counter, I have exciting news for you — you can make the most incredible homemade Greek yogurt right in that pot! I had no idea this was even possible until a few years ago, and now I make a fresh batch every single week. Just two ingredients, a little patience, and you end up with thick, creamy, probiotic-rich Greek yogurt that is so much better than anything you will find at the grocery store. And it costs a fraction of the price! Keep reading, and I will walk you through every single step.
The following post may contain affiliate links. That means if you click and then buy something, I will make a small commission at no additional cost to you! Thank you for supporting my blog. full disclosure here.
greek yogurt vs plain yogurt: what’s the difference
Do you love plain yogurt or Greek yogurt? Did you know that you can make your own yogurt with a gallon of milk? I had no idea until I looked into it several years ago. Up until that point, I had been purchasing store-bought yogurt! And it can be pricey not to mention it can have ingredients I am not interested in putting into my gut!
That’s when my love for homemade yogurt began. Making Greek yogurt from scratch is easier than you ever imagined!
Hubby had already purchased an Instant Pot for the two of us a couple of years ago. We’ve enjoyed using it. I will share some other recipes I have made in the instant pot later in this post.

how to make instant pot greek yogurt step by step
But yogurt in an instant pot? Who’da thunk it!! And it couldn’t be easier!
This recipe needs to be started early enough in the day to allow time for the yogurt to process in the instant pot. The batch I make takes nine hours so I like to get this started no later than 9 am. That allows plenty of time to do the last step in this process. We’ll get to that step soon enough!
heat the milk
The first step is to pour your gallon of milk directly into the inner pot of the instant pot. My instant pot holds a full gallon of ultra-pasteurized milk with plenty of room to spare. BTW, we don’t have access to raw milk like so many people do who make homemade yogurt. We buy the milk from the grocery store and so far it has worked well for us.
After pouring the milk into the instant pot, click the Saute button and set the timer for 24 minutes. Yep, that’s the magic time to bring the milk up to temperature in order to kill any bad bacteria.
Even though the milk is ultra-pasteurized, I just want to be sure. There are many people who skip this step and use the cold start method. I’m not familiar with that method and I don’t mind making the yogurt by the boil method that I have been doing since the first time I made this recipe.

skip the lid!
Anyway, here is a little tip about whether or not to put a glass lid on the instant pot when making this yogurt: Don’t do it! Especially if you plan on walking away from the instant pot!
That’s exactly what I did this time! The timer went off while I was in the back of the house and I didn’t hear it! Agh!!
As a side note, do not use the instant pot lid that comes with this pressure cooker!!

The whole milk boiled over and the foam went everywhere! I probably lost about 1/2 cup of milk. When I started my next batch of yogurt, I did not put a lid on the pot and it all worked out fine.
In the meantime, I learned how to take apart my Instant Pot and give it a good cleaning! I am learning that when the instant pot beeps, I should come running to the kitchen!
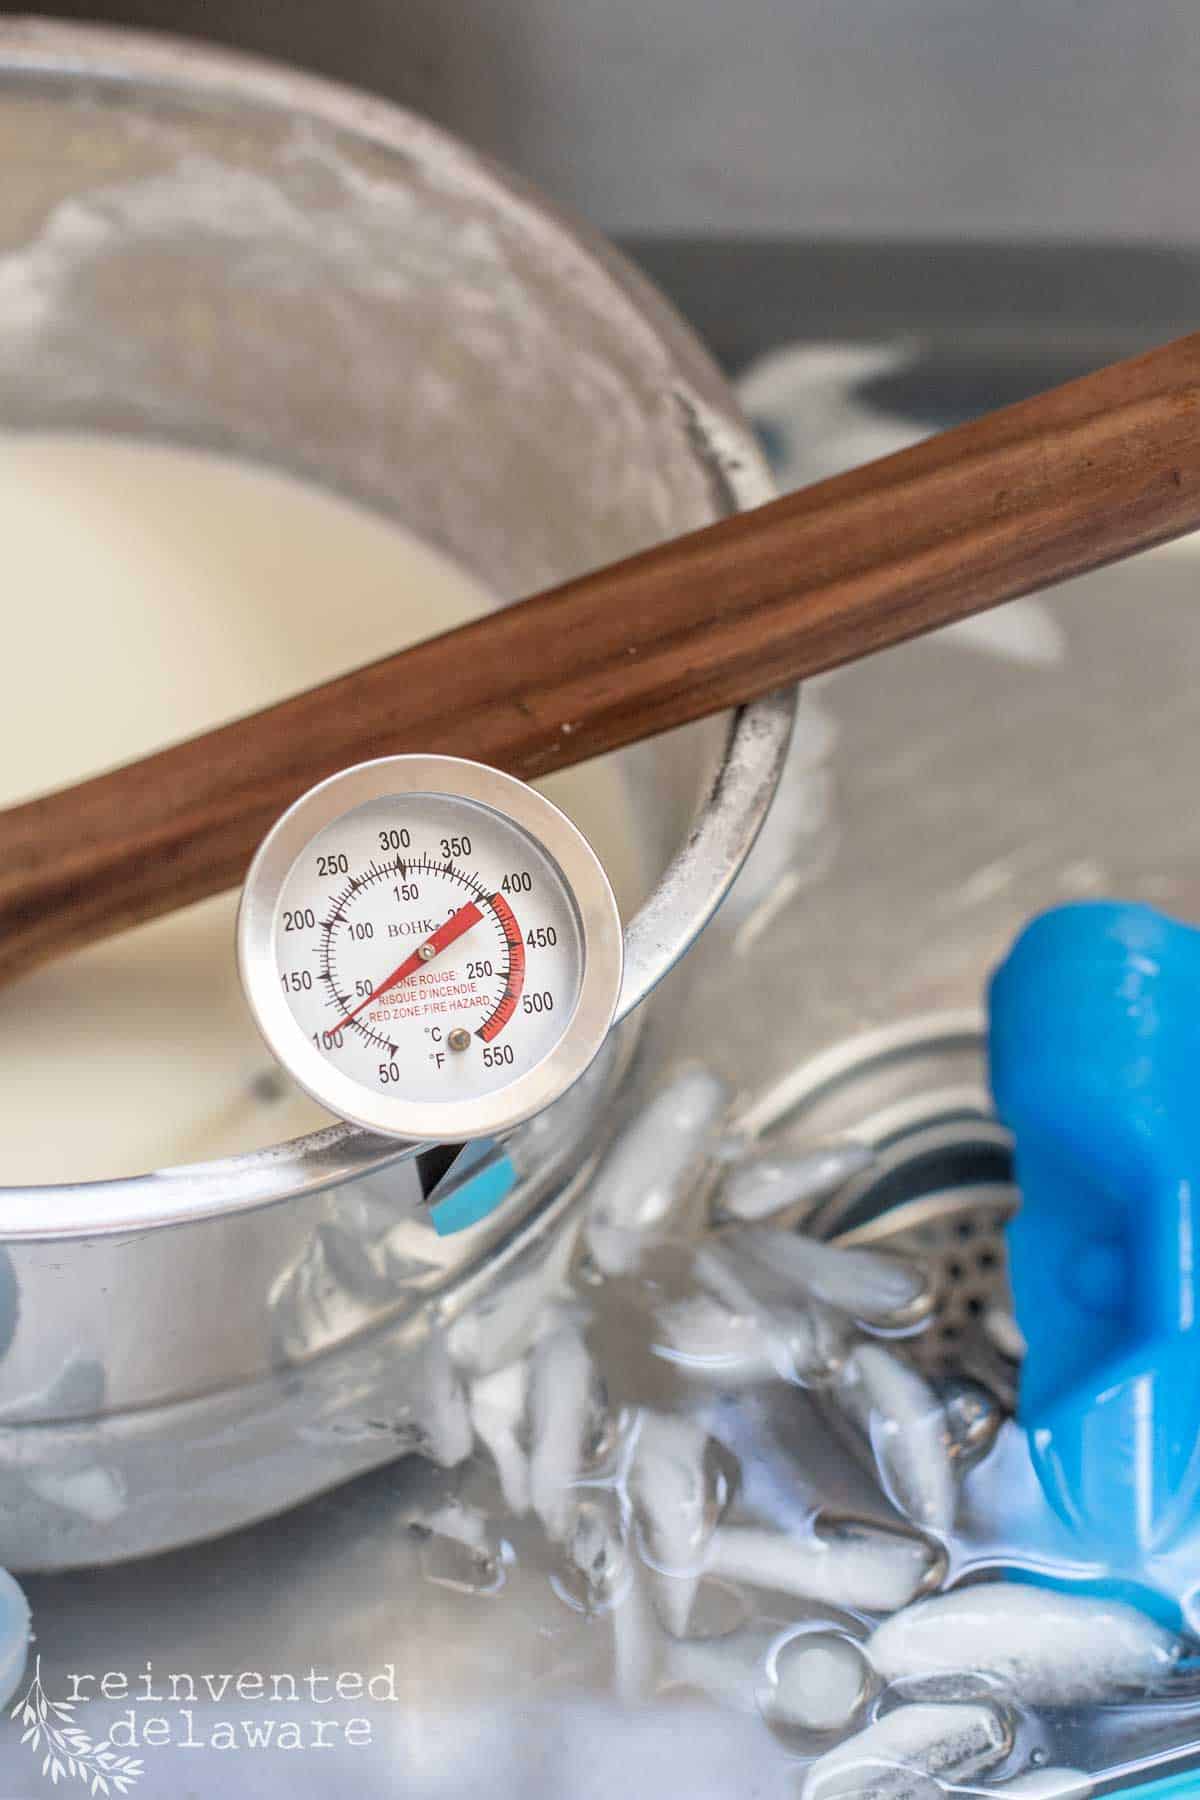
use a candy thermometer with clip
Use a candy thermometer with a clip to keep an eye on the temperature. I have found this is the easiest way to know what the temp is during the 24 minutes of heating time.
Once it reaches 180* then it is time to move to the next step. You will also need to skim off the milk – a thin film will develop on the surface.

cool the milk
It is necessary to cool off the heated milk before adding the live cultures to it. We will talk more about the yogurt starter I use but first, let’s chat about cooling the milk down. This is necessary so that you do not kill the good bacteria in the yogurt starter culture.
Our kitchen sink is large and perfect for this step. You can also use a standard-size sink so long your inner pot of the Instant Pot fits in it. I fill the sink with cold water, all of the ice in our freezer and several ice packs my hubby uses for his packed lunches.
Then I place the inner pot into the sink. For best results, keep the running water away from the pot! You don’t want to add water to the regular milk! This homemade yogurt with whole milk is what give you that thick, creamy texture and we don’t want to mess that up with even a drop of water!
Allow the milk to cool down to 115*. I keep the clip-on thermometer in the pot. This step takes about twenty minutes. Just enough time to unload and reload the dishwasher from breakfast!
Or maybe start a load of laundry!
Or make homemade butter! (Let me know in the comments is you would like me to show you how to make homemade butter in only 10 minutes!)
Can you relate to working on several household chores at once? That’s how we get things done, right??

add live cultures
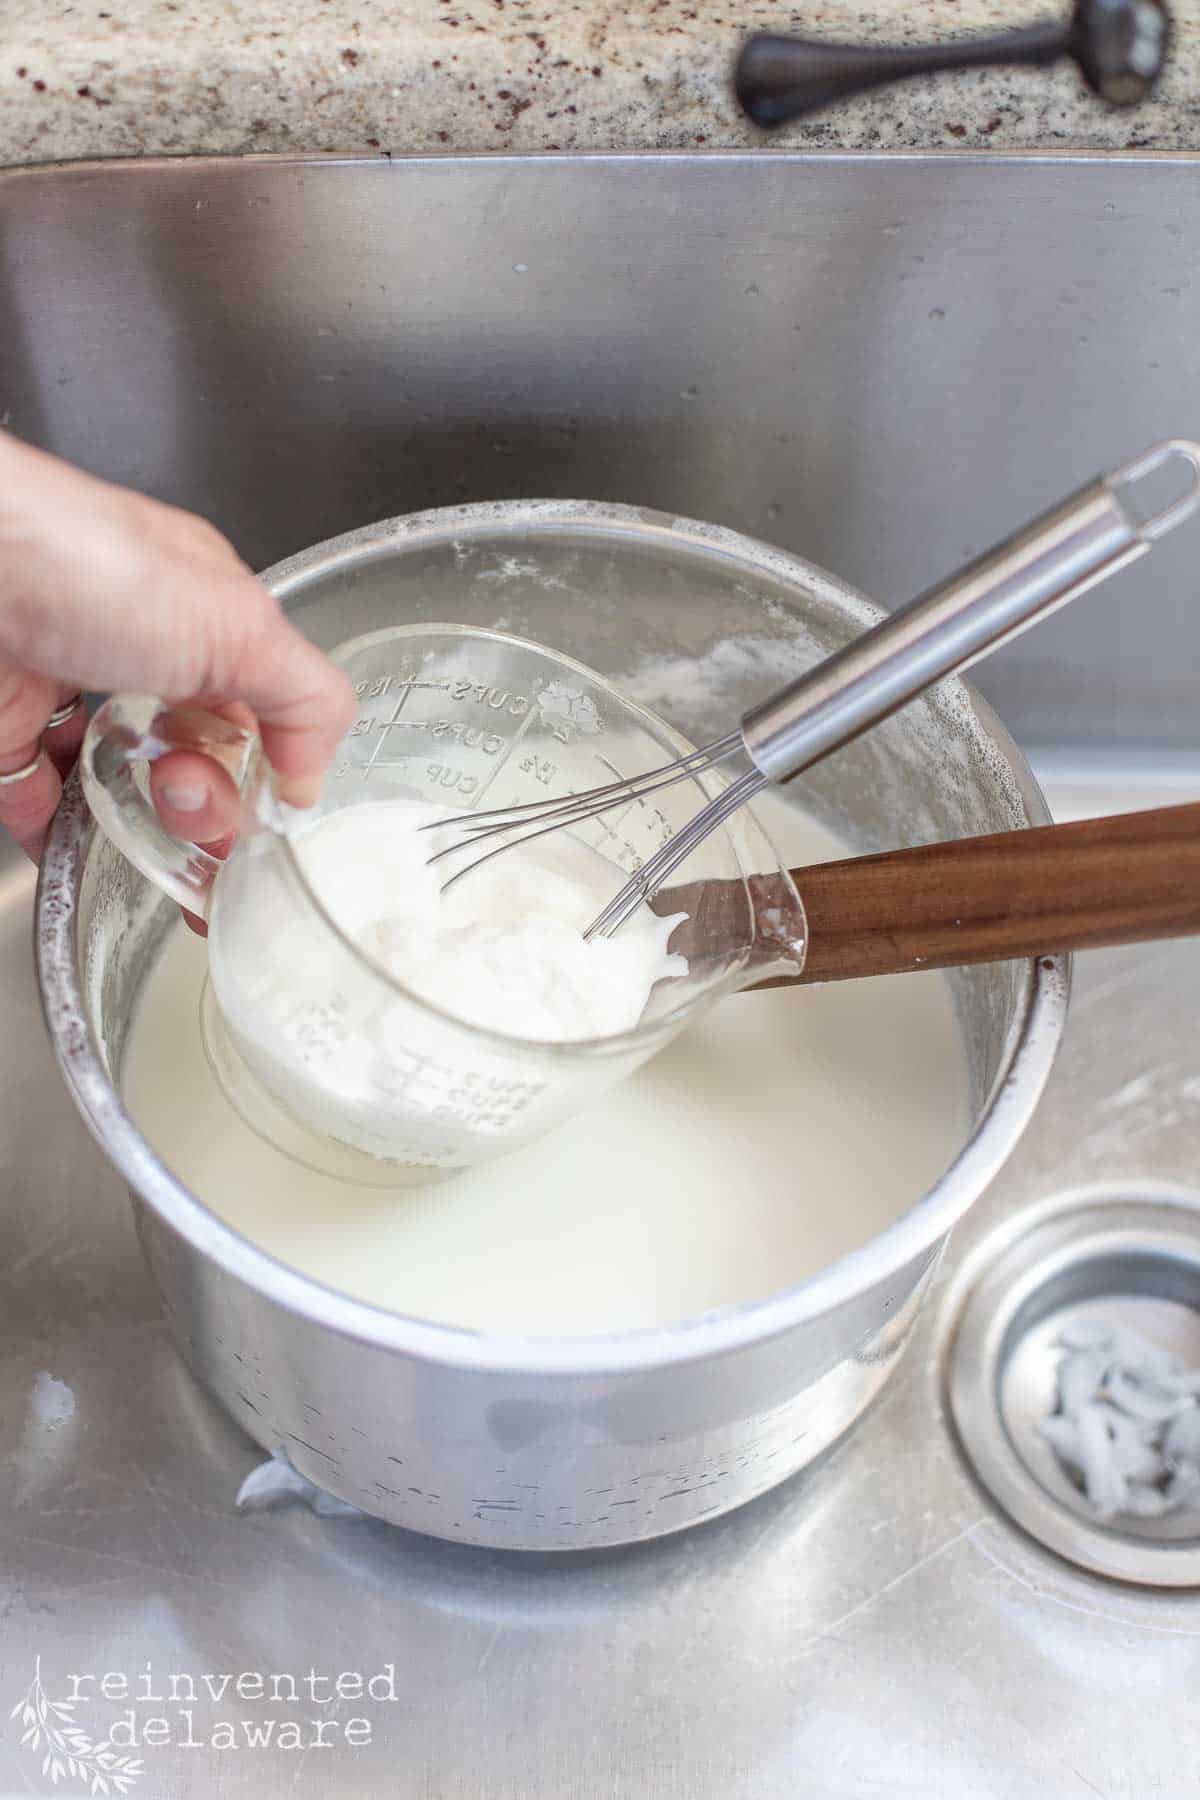
Once the milk has cooled to 115*, it’s time to add the live active cultures. Some recipes will use a yogurt starter. I haven’t tried that yet but I have used store-bought whole milk Chobani Greek Yogurt. Before I made homemade yogurt, this was my Greek yogurt of choice.
Chobani is packed with live cultures like lactobacillus Bulgaricus, S. Theremophilius, and L.Acidophilius. Those are a lot of big words that basically say, “Good for your gut!”
You could mix the store-bought yogurt directly into the warm milk but I like to incorporate it by first adding the 1/2 cup of yogurt to a measuring cup and then adding some of the warm milk to it. Then I use a whisk and blend the two before pouring it completely into the instant pot. Be sure to give it a good stir once it is in the pot.
use the yogurt setting
Place the pot back into the base of the Instant Pot, tap the yogurt button, and let it go! Actually, we like a tangier yogurt so I set the timer for 9 hours. Eight hours is the default yogurt setting so you will have to adjust this if you want yogurt with more tang. Place a glass lid on top since there is no chance it will boil over.
The final product after the yogurt function has finished is not a thick Greek yogurt yet. In order to achieve a thicker yogurt like Greek yogurt, it will need to be strained. This is another simple step!
You could use the yogurt as is. We like thick, creamy Greek yogurt so we go the extra step!
strain the yogurt
When I first started making my own homemade yogurt, I used a flour sack towel to strain it. But then I found this container on Amazon. This yogurt strainer made clean-up so easy!

All you do is pour the regular yogurt into the strainer, put the lid on, and stick it in the fridge! The next morning you will have thick yogurt that is packed full of protein and gut-healthy probiotics! Your gut will love you for this plain Greek yogurt addition to your diet!
leftover whey
Lets’s chat about the leftover whey. See the yellowish liquid in the large container? That’s the whey. The yogurt strainer has separated the whey from the yogurt. The longer you strain the mixture, the thicker your homemade yogurt will be.
We usually leave the yogurt to strain overnight and then scoop it into a large 1/2-gallon glass jar. We like the wide-mouth Mason jars for this.
The whey can be used in any recipe that calls for water like homemade bread or smoothies. It will add fermented, nutritional value to foods. We mostly use it on our outdoor plants. It’s a great fertilizer!


how to make your homemade greek yogurt extra creamy
If your homemade Greek yogurt is too thick, simply stir a little bit of the whey back into the yogurt until it reaches the creamy yogurt texture you like. I have even added the leftover buttermilk from making homemade butter to the yogurt. Or add some heavy whipping cream for the creamiest yogurt!
Buttermilk makes the most delicious creamy Greek yogurt I have ever had! I have also added half and half creamer to the yogurt. This is another great option to create a creamier yogurt. Neither is necessary, it is completely your preference!


Do you think you will try this simple method to make your own homemade yogurt? We make two batches each week. Hubby and I both have yogurt at breakfast and then again in the evenings instead of ice cream. We are of a certain age that we need to pay attention to our health.
other recipes using the instant pot
The instant pot isn’t just for yogurt! I’ve been making all sorts of dinner goodness in it including, weeknight chili, homemade spaghetti sauce, and soups.
ways to serve homemade greek yogurt (toppings and ideas)
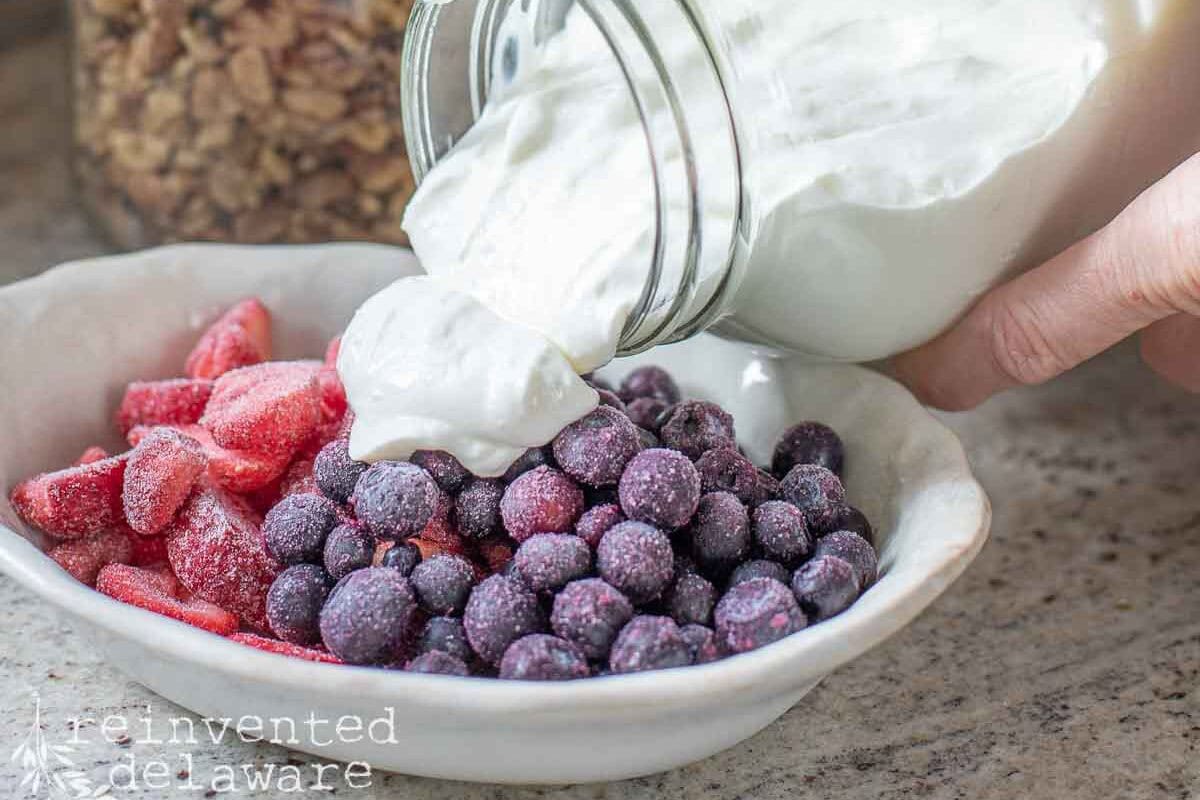
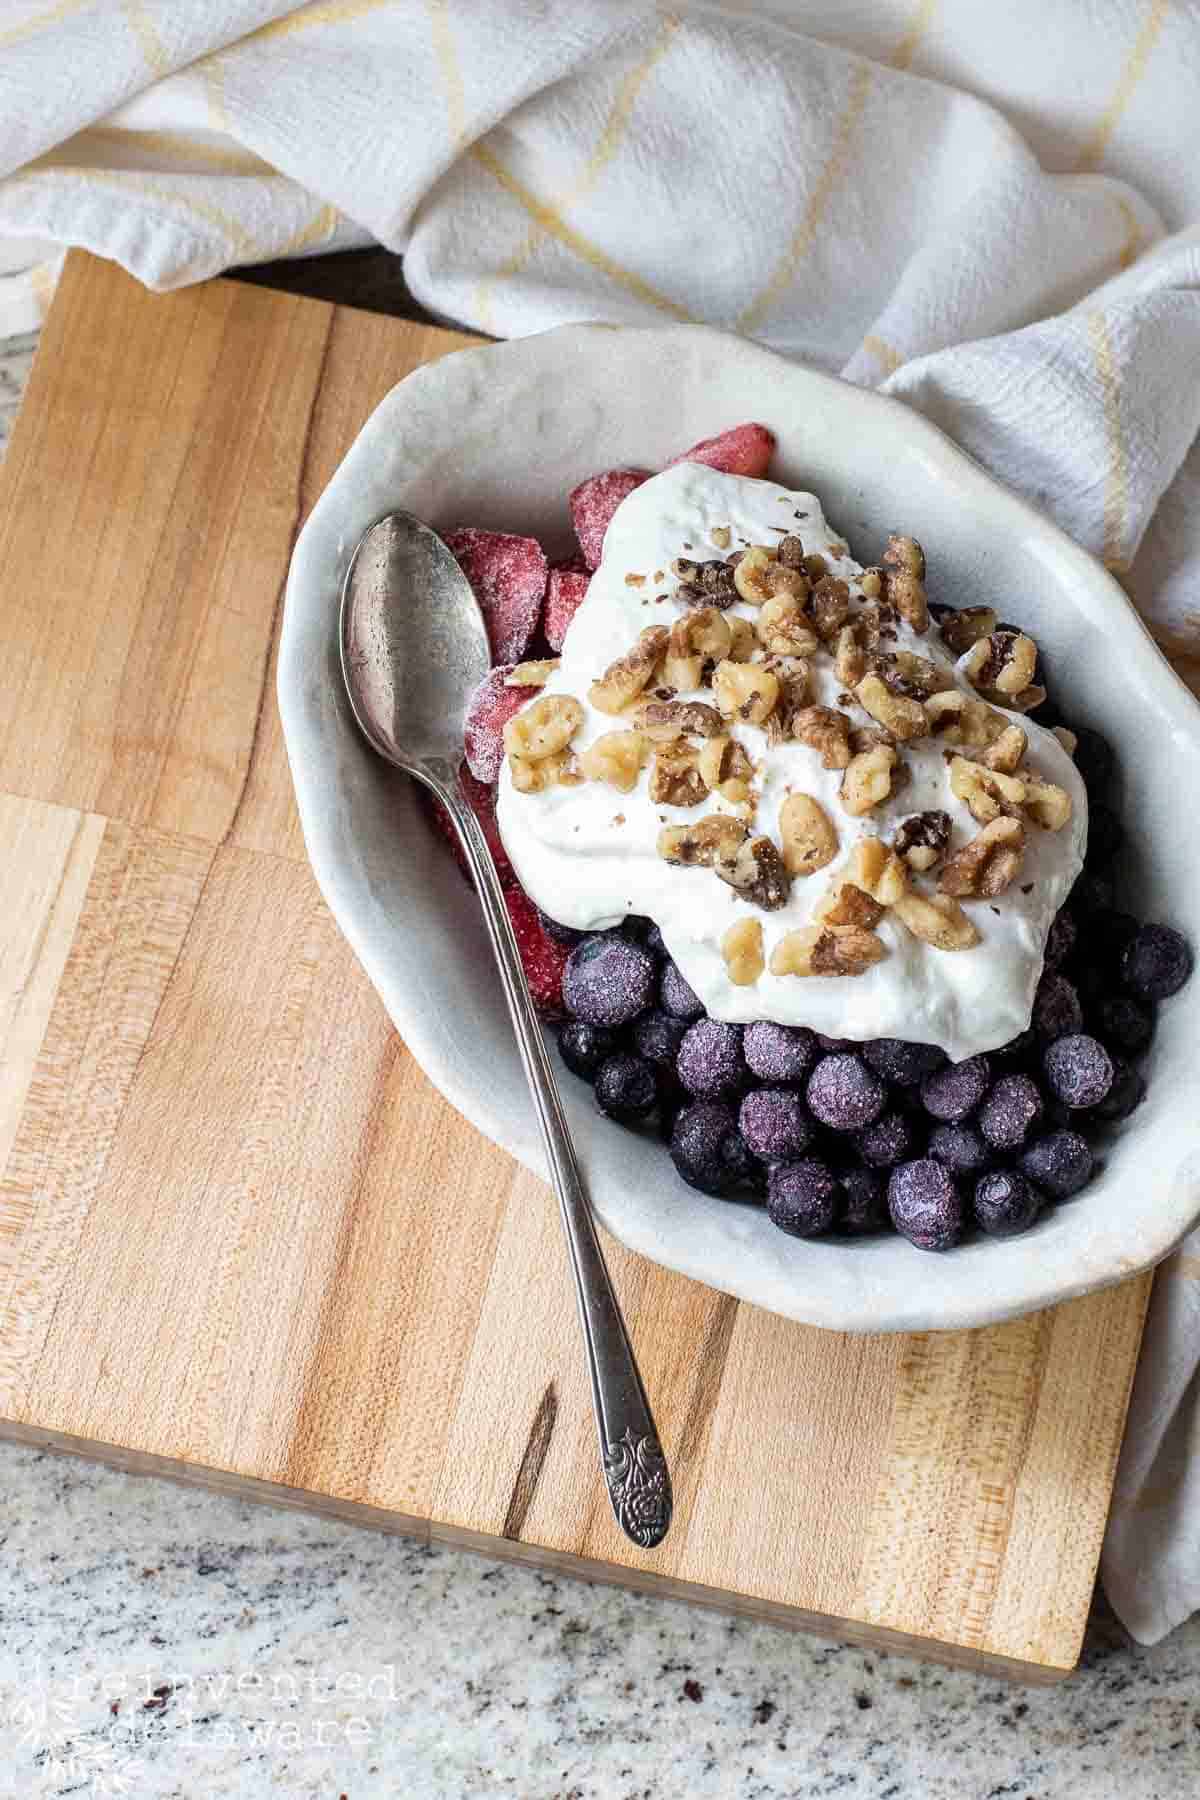
This amazing yogurt is tasty with fresh berries, frozen berries, vanilla extract, or another flavored extract that you like. Add the Greek yogurt to a small bowl, plop a few berries on top, and sprinkle slivered almonds on top and you have a delicious dessert!
This is my go-to healthy breakfast every single morning. How delicious does this homemade yogurt look??
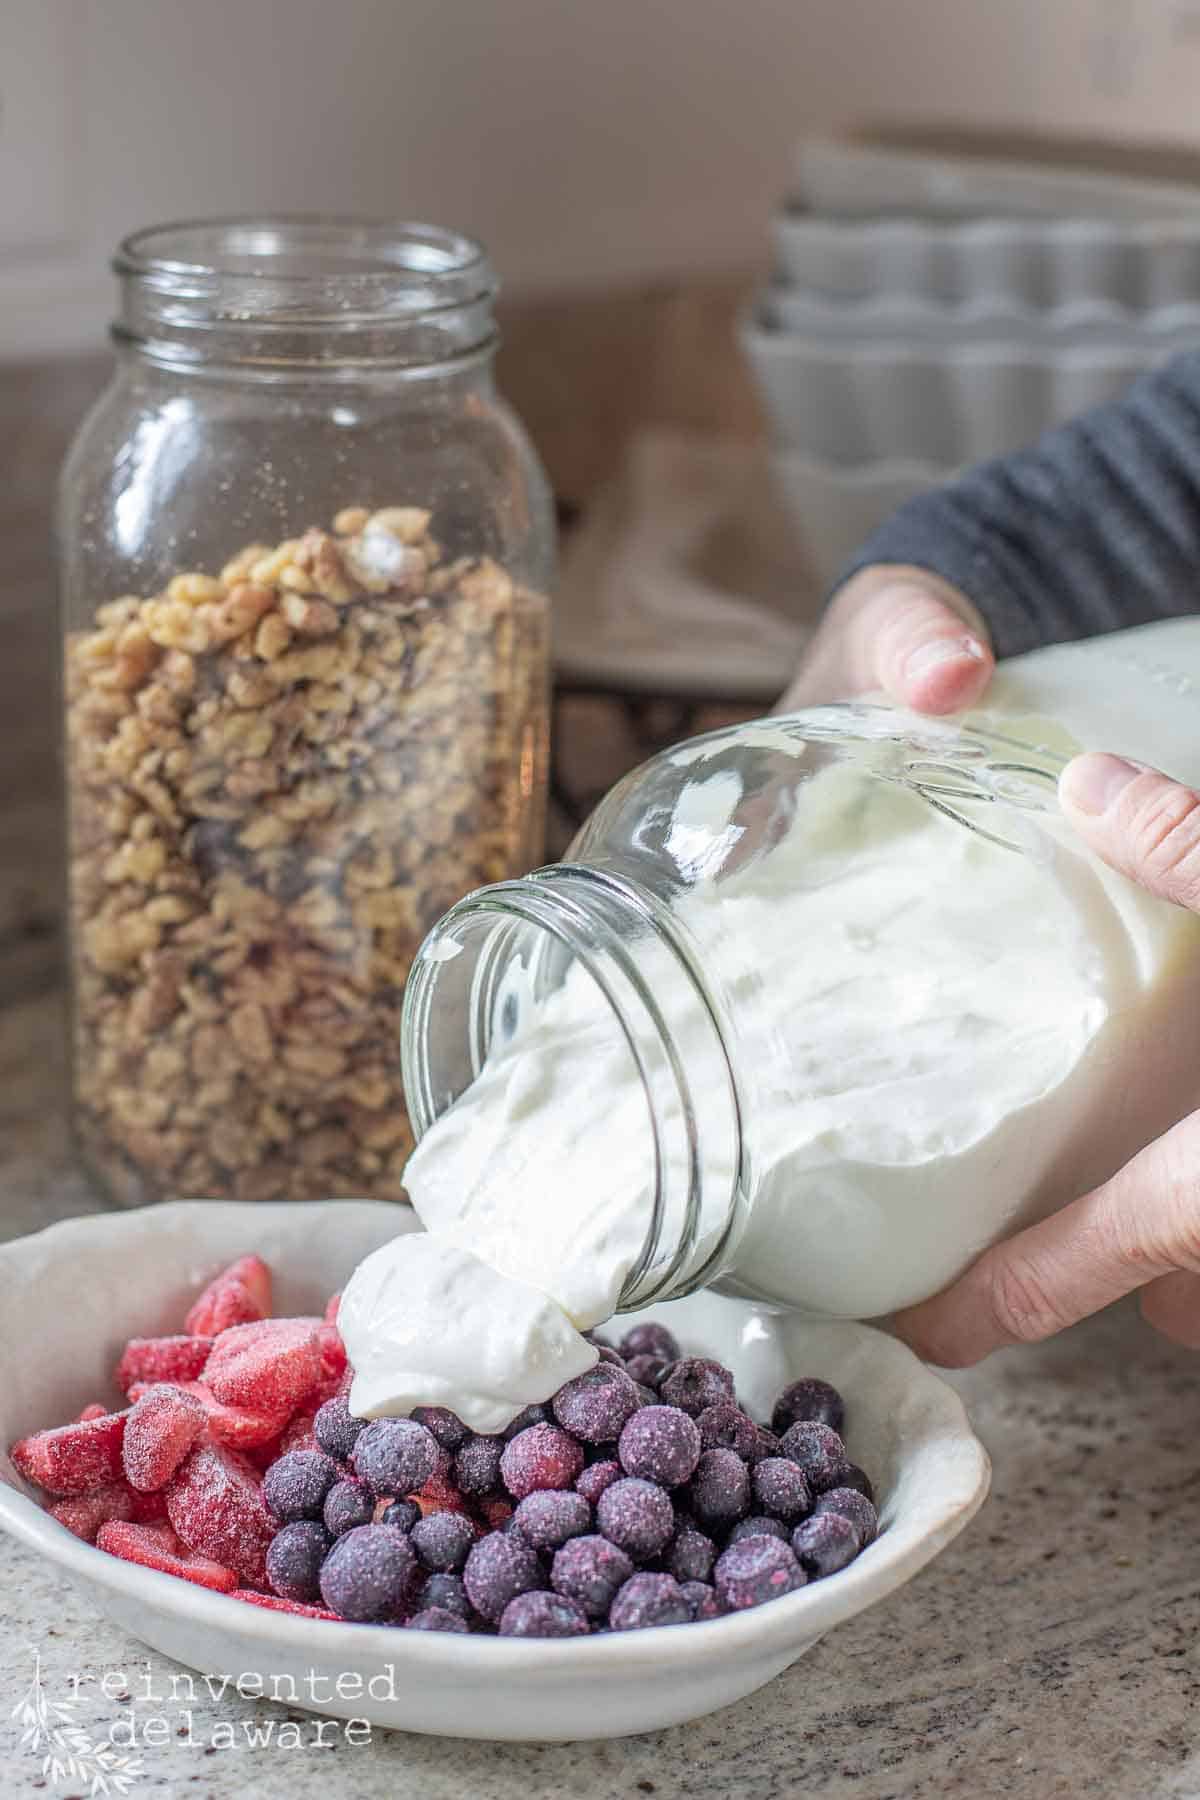
This delicious yogurt is also good in smoothies. I have a smoothie 2-3 times each week for breakfast. The rest of the mornings, I have homemade Greek yogurt as you see in the images.
This homemade yogurt would also be amazing in a frozen yogurt dessert! I have even used this yogurt when making homemade salad dressing for my arugula, pecan, and Pear salad recipe!
homemade yogurt recipe creamy and delicious
Let me know what you think of the easy homemade instant pot yogurt recipe! Especially if you give it a try! Save this post on your Pinterest board so that you can find it anytime!
bonus tip!
One final tip: as soon as you have scooped your yogurt into its storage jars, wash the yogurt strainer right away! If the yogurt dries on the mesh, it is incredibly hard to scrub off — milk-based products have a way of sticking to everything. A quick rinse while it is still fresh makes cleanup a breeze.
frequently asked questions about Instant Pot yogurt
The brand doesn’t have to be Chobani – I just happen to love it and always have it on hand! What does matter is that whatever yourt you use has live, active cultures. Look for strains like Streptococcus thermophilus and Lactobacillus bulgaricus on the label. Fage, Stonyfield, and other plain whole-milk Greek yogurts all work well. Just make sure it’s plain with no sweeteners or fruit added, and that it’s as fresh as possible – the closer to the “best by” date, the weaker the cultures can be.
We go through ours in about a week – hubby and I both have it at breakfast and again after dinner – so I can personally vouch for one week of freshness! Most sources agree that homemade Greek yogurt stored in a sealed glass jar will keep for up to two weeks in the refrigerator. I like using wide-mouth Mason jars because they seal well and make it easy to scoop. As a general rule, if it smells off or looks watery in an unusual way, trust your gut (pun intended) and start a fresh batch!
Runny yogurt is the most common hiccup, and there are a few possible causes. First, check that your milk cooled to 115*F before you add the starter – too hot and you’ll kill the cultures, too cool and they won’t activate well. Second, make sure your starter yogurt was fresh and had active cultures listed on the label. Third, and this one surprised me when I first learned it,” don’t bump or move the Instant Pot during the 8-9 hour incubation – jostling it can break the bonds the cultures are forming! Finally, if the yogurt is set but still thinner than you’d like, just strain it longer. The more whey you drain off, the thicker your final Greek yogurt will be.
You can, but I always recommend whole milk for the creamiest, thickest results – and that’s what I use every single time. The higher fat content is what gives this yogurt that rich, satisfying texture. If you use 2% milk, you’ll get a decent yogurt, though it will be a bit thinner. Skim milk tends to produce a noticeably runny yogurt that doesn’t strain up as nicely. If you need a lower-fat option, my best tip is to still use whole milk and simply eat a smaller portion – you’ll enjoy it alot more!
Yes! This is one of my favorite things about making homemade yogurt – it keeps giving. After straining, simply set aside 1/2 cup of your fresh yogurt in a small container and pop it in the fridge. Use it as your starter the next time you make a batch within the next 5-7 days. You can also freeze a few tablespoons in an ice cube tray for future batches – just thaw it in the fridge before using. One thing to keep in mind: after a few cycles of using homemade yogurt as your starter, the cultures can weaken over time. If your yogurt starts coming out thinner than usual, it’s time to grab a fresh container of store-bought yogurt to start again.
Don’t throw it out! The yellowish liquid you strain off is whey, and it’s full of nutrients. We use ours in a few different ways: stirred back into the yogurt to adjust the thickness, added to smoothies for an extra protein boost, used in place of water when making homemade bread, or poured onto our outdoor plants as natural fertilizer – they love it! You can even pour the leftover whey over your compost pile for an added punch for your garden plants!
Do not throw it out! I actually tested this in my own kitchen because I wanted to give you a real answer — and I am so glad I did. A watery, unset batch of yogurt is absolutely fixable, and the rescue process is easier than you might think.
Here is exactly what to do:
Pour the unset yogurt back into the Instant Pot inner pot. Yes, all of it — even though it looks like warm milk right now, do not discard it.
Reheat it using the Sauté function until it reaches 215°F. Use your candy thermometer here just like in the original recipe. This step kills off any weak or inactive cultures and gives you a clean slate to start the culturing process again.
Let it cool back down to 110–115°F, just as you did in the original recipe. Do not rush this step — adding your starter too soon is one of the most common reasons a batch fails in the first place!
Add a fresh ½ cup of plain Greek yogurt starter — and this time, use a brand-new container from the store. If your original starter was old or the cultures were weak, that is most likely why the batch did not set. A fresh starter gives the rescue batch the best possible chance.
Run the yogurt setting again for 8–9 hours and resist the urge to peek or move the pot!
When I tested this rescue method, my batch set up beautifully the second time around — thick, creamy, and just as good as a fresh batch. See the photo below!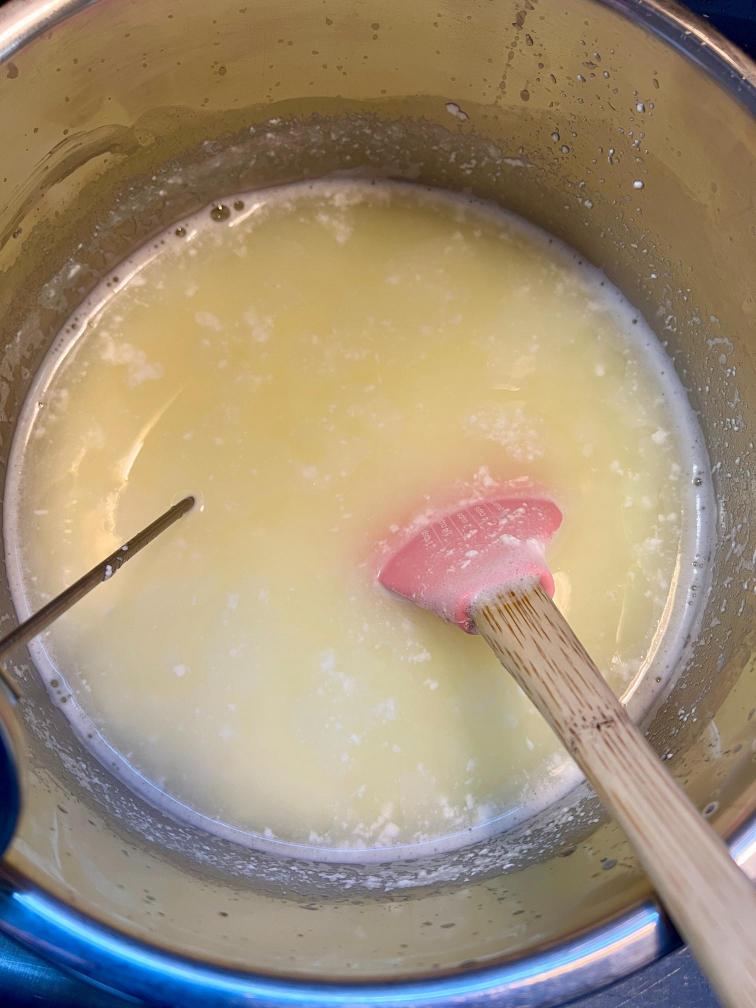


shop for yogurt-making supplies!
Here are some of the supplies you will need to make this recipe. I couldn’t find my exact yogurt strainer (it’s no longer available!) but here are some you can check out!


Easy Homemade Greek Yogurt in an Instant Pot
Equipment
- Instant Pot
- Yogurt Strainer
- measuring cup
- whisk
- large wide mouth mason jars
- candy thermometer with clip
Ingredients
- 1 gallon whole milk
- 1/2 cup store-bought greek yogurt (Chobani)
- yogurt starter of choice (optional as substitute for Chobani)
Instructions
- Pour whole milk into inner pot of Instant Pot.
- Heat milk to 180* using the saute function (approx 24 minutes)
- Cool milk in a sink filled with cold water, ice, and ice packs. Cool to 115*. (approx 20 minutes)
- Whisk 1/2 cup of store-bought greek yogurt into the milk.
- Place the inner pot back into Instant Pot. Set yogurt function for 8-9 hours depending on desired tanginess.
- When the Instant Pot timer beeps, pour the yogurt into the yogurt strainer and place it in the fridge overnight.
- The next morning, lift the strained yogurt out of the yogurt strainer and set aside. Then pour the leftover whey into a separate jar.
- Scoop the yogurt out and back into the large part of the yogurt container. Add some of the whey back into the yogurt and stir to desired consistancy.
- OPTIONAL: Instead of adding the whey back into the yogurt, stir in some heavy cream, half and half creamer or buttermilk to create the creamiest texture to the yogurt!
Notes
Big Little Lies – book review
This month, the virtual book club chose a book called Big Little Lies. The book went on to become a Netflix series. I had never heard of the series and we don’t watch Netflix. We are so old school!
Anyway, I listened to the book. Well, I listened to the first third of the book. Now, don’t judge me but after the third abcde…. f-bomb, I decided not to listen to the rest of it! I told you, I am pretty old school!
I can tell you that outside of the language, the storyline seemed interesting up to that point. It’s about four women who become unlikely friends. They meet through their kid’s kindergarten class and develop friendships.
They each have their own storyline going on and the author does a great job of intertwining their lives. It eventually leads to a surprise murder. I won’t spoil it for you but I can tell you that the other ladies in the Virtual Book Club said that it was hard to put the book down!
Be sure to read their posts and get their take on the whole story!
I was inspired to share a recipe I have made many times based on the fact that the ladies in Big Little Lies often met at a coffee shop. Greek yogurt parfaits and smoothies are popular at coffee shops so my recipe seems fitting!
Lynn from Living Large in a Small House
Erin from Erin Evolving
Crystal from Sweet Valley Acres


Thanks for joining our journey!
Thanks so much for joining us for this post! Join our journey so you don’t miss any of the fun projects, tutorials, and inspiration that we share with you each week! You can follow us on Instagram, Facebook, and YouTube. We share even more inspiration on Pinterest!
click below to purchase supplies!
Visit my Amazon Storefront!
Click the button below and head over to our online shop on Amazon!

Cindy Rust
Cindy has been decorating her home with thrift store finds for 40 years. She is an avid thrift store shopper who loves to makeover the items she finds into vintage-inspired home decor and furniture. When she isn’t thrift shopping or painting a piece of furniture, you can find her making homemade butter, working in her garden, or painting with watercolors.


This looks delicious Cindy. I have made yogurt in the past but not in an Instantpot. I received one for Christmas years ago but honestly, I am afraid or pressure cookers so we gave it to our kids. They love it.
Have a happy and safe Memorial Day weekend.
Homemade yogurt is so easy to make in an instant pot. The yogurt setting doesn’t use the presser feature so it’s all safe. BTW, using the instant pot is the easiest pressure cooker I’ve ever used. I have an old-fashioned one that is a little scary 🙂
I never would have thought of trying to make my own yogurt – you are amazing!!! I bet your body is thanking you for eating so healthily! I am so sorry to hear that the book turned you off. I wish so much that TV shows, series and movies would go back to swearing free. It really adds nothing to a movie and the funny part is whenever we watch a movie or TV show that doesn’t have swearing we always remark on it afterwards as so nice. I understand how you feel.
I think you’ve finally convinced me to purchase an Insta-pot! I have Greek yogurt for breakfast every morning. Love your simple, easy-to-use directions.
This sounds amazing Cindy, I will have try. I will be sure to not put the lid on :)))
Love this idea! I heard you mention “butter” in a recent video and started to search for that. I found the Greek yogurt and another mention of the “butter”, but can’t find any instructions for the butter. Big YES on adding that for us. 😊 If it’s here, I can’t find it anywhere.
Hi Kim! The butter recipe isn’t here on the blog or on my YouTube channel yet! I have it in the works so stay tuned! 🙂 Thanks for searching for it!
Can I get nutrition information for this made from scratch Greek yogurt? How does straining off the whey affect the calories, protein, and carbs. She is on very stringent nutrition guidelines and I wanted her to be able to choose stevia and flavors that she wanted not only what she can find.
Thank you,
Vickie
Hi Vicki, I don’t know the science behind how straining the whey off alters the calories and other nutritional information but I did find an article that might be helpful to you. I will email it to you directly and I hope you find it helpful!
Hi Cindy, just found your directions for making yogurt. I have been using my Ninja Foodi to make yogurt, it is so good! It’s even easier than the Instant Pot but I think the newer models of the IP have the same “Yogurt” button. I just put my milk in, I use whole milk. Turn the dial to “Yogurt” and it brings the milk to the proper temperature, then switches to “Cool” (at this point I take the liner out of the pot with the milk in it and cool it down as you do) then when it’s cooled to 115 degrees I add my store bought yogurt (my newest batch I used Fage) and then turn it to “ferment” and it finishes the batch. After that first batch I will use a third of a cup or so of my homemade yogurt as the starter for the next batch. We love it so much and will often eat it as breakfast or dessert with a drizzle of real maple syrup and my homemade granola, yum!
Your method sounds similar to mine! We make yogurt every single week and we love it too.Hubby and I both eat it for breakfast and then it is our treat after dinner with berries and almonds or walnuts. Sooooo good!! And its good for our guts! Thanks for sharing about the Ninja Foodi! I haven’t heard of that. Have a great day and happy yogurt making!
I love this recipe for making your own yogurt! I love to eat yogurt and always want the healthiest option. Definitely trying this!
You will love this yogurt Michele! super easy to make and so healthy!
Hi! Thank you for the detailed and easy to follow steps for making a yogurt in the instapot. I will try this soon. Wondering how long is this yogurt good for in the fridge? I was also thinking of making yogurt based popsicles for my kids:)
Hi Carmen! We use the yogurt by the following week so I cannot attest to how long it would last in the fridge. It’s probably best to make the amount you could use in one week so that you know it is fresh! The popsicles sound amazing!
Hi Cindy,
Does the brand of starter yogurt need to be chobani for the recipe to work?
Hi Sophie! The brand does not have to be Chobani. Just be sure the yogurt you use has active, live cultures. Look for Streptococcus thermophilus and Lactobacillus bulgaricus. Let me know if you have anymore questions!😊