
Fold Down Desk | The During
Today we are talking about furniture repairs! I will share how I made a few simple repairs to this fold down desk to make it more stable and useful!
where we left off
Do you remember where we left off with this fold down desk in the last post? The piece was sanded and cleaned. Our client decided to go with the restored natural wood look so we did some more sanding!
I also forgot to mention in the last post that all the hardware was removed so that I could do a thorough job of sanding.
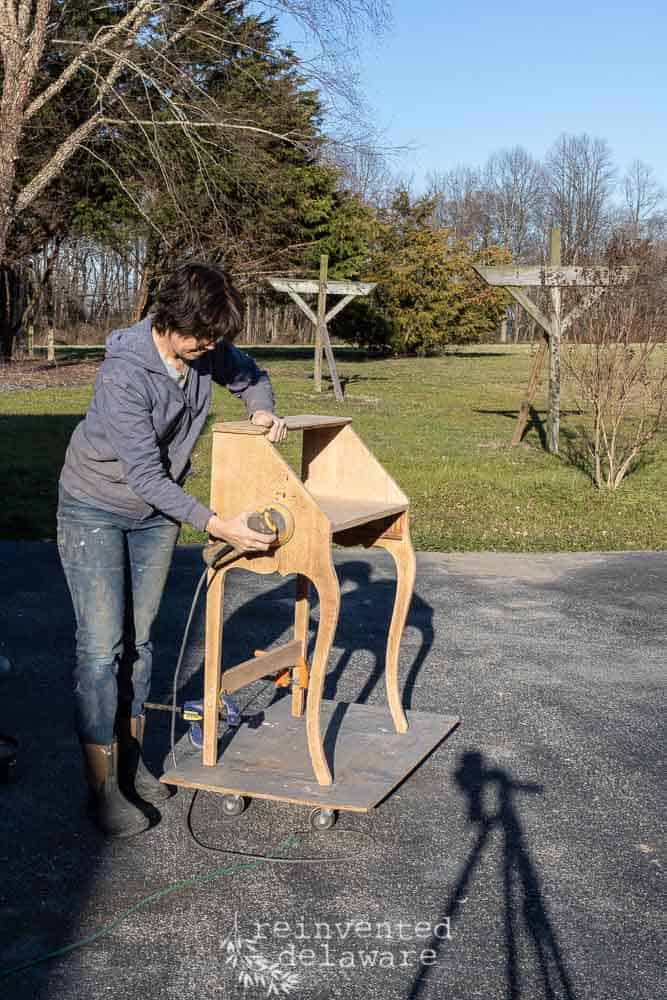
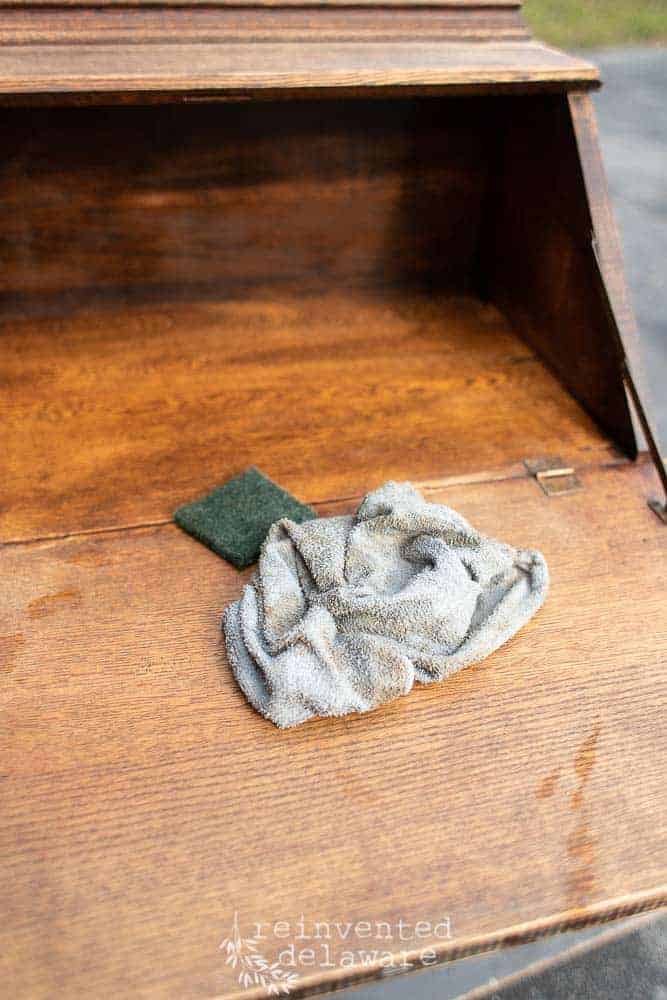
I can’t tell you how thrilled I was that she decided on natural wood!! Look at it so far!
first repair
Let’s move on to the three repairs we had to do to this fold down desk to make it more useful and stable for our client.
First up, the single desk drawer. We see this problem all the time in vintage and antique furniture. The bottom section of the drawers are often loose. This is an easy fix that anyone can do! Here are the supplies I typically use:
- the drawer (that’s obvious!)
- wood glue – I like Titebond III
- small tack hammer
- small nails or the original nails
- rubber/wood mallet
Most drawers have a groove that the bottom piece fits into. See it here? I slid the bottom section out from the front towards the back, almost all of the way out. You might have to do a bit of shimmying to the board to get it to slide out.
Then I added a bead of glue in the groove that the bottom piece fits into. Here I am putting the glue into the front groove. I also put a bead of glue into the groove on each side of the drawer.
Have a damp paper towel handy to clean up any glue that runs out of control as you move the drawer around to access the grooves.
The next step is to tap the bottom piece from the back end, tapping so that the bottom piece moves toward the front. I tapped a little on each side, back and forth from side to side, to gently ease the bottom board in place.
Tap until the bottom piece is all the way in the front groove.
The drawer on the fold down desk still had it’s original nails so I used them. I also ran a bead of glue where the bottom piece would touch the back piece. Using the small tack hammer, I hammered each nail back in.
If you do not have the original nail, you can use very small nails to do the same. Keep in mind the thickness of the back section of the drawer that you will be nailing into. Often that board is 1/4″ thick or less so you don’t want a huge nail! Just tap the new nail into the original hole left by the previous nail!
You can use a clamp on this back section if the nail doesn’t hold it securely.
second repair
The next repair is specific to this fold down desk but the method can be used on similar problems.
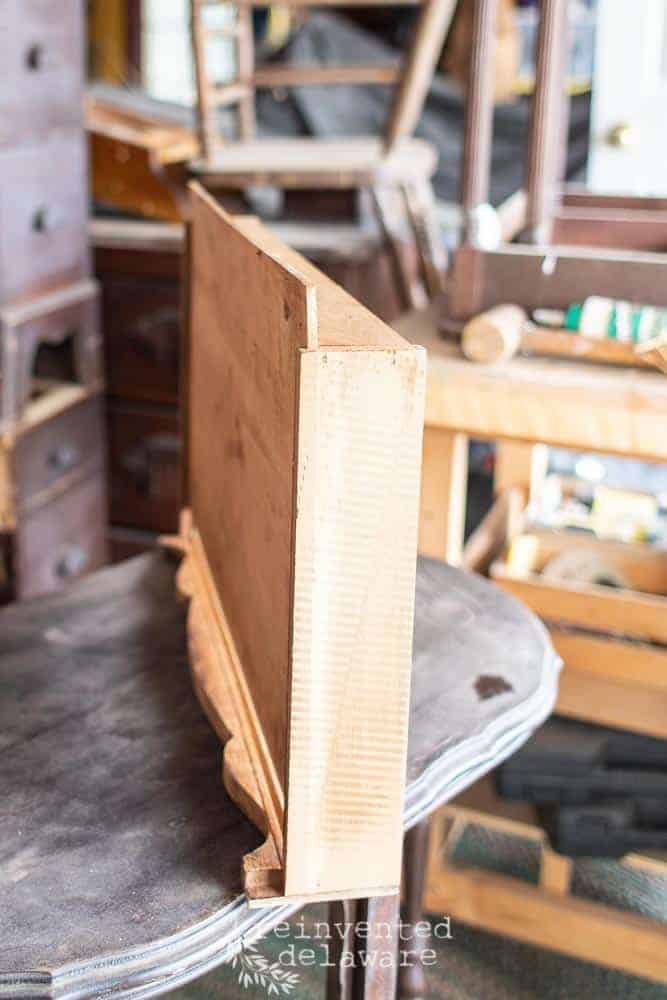
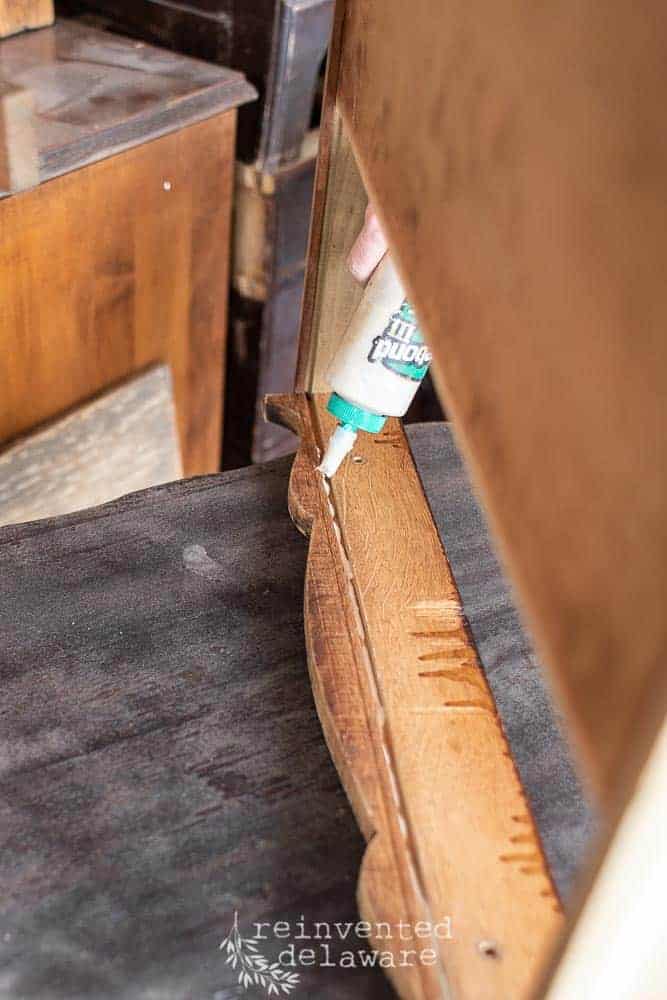
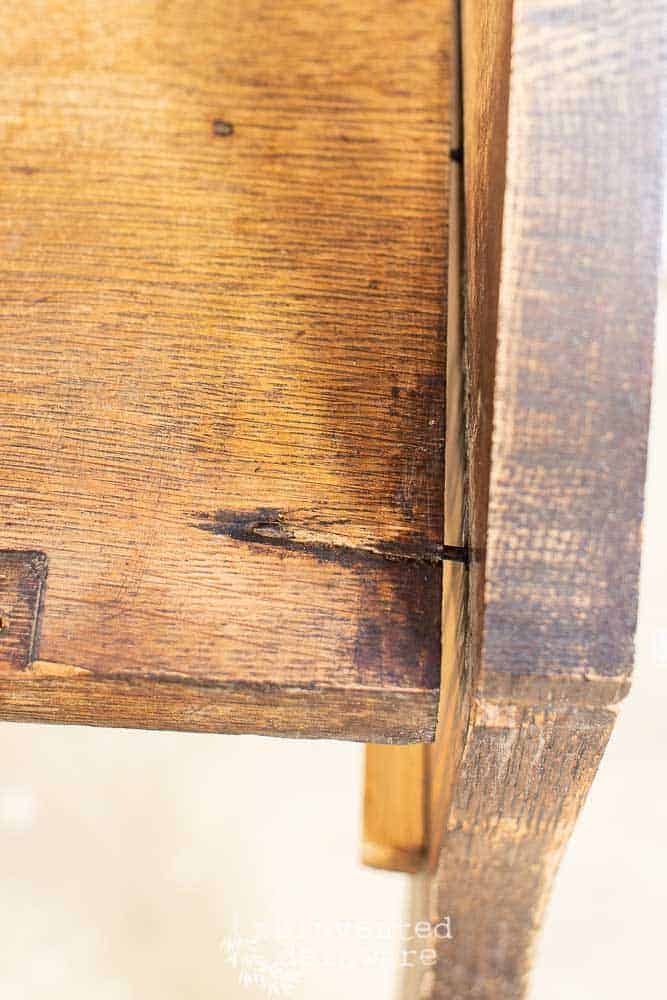
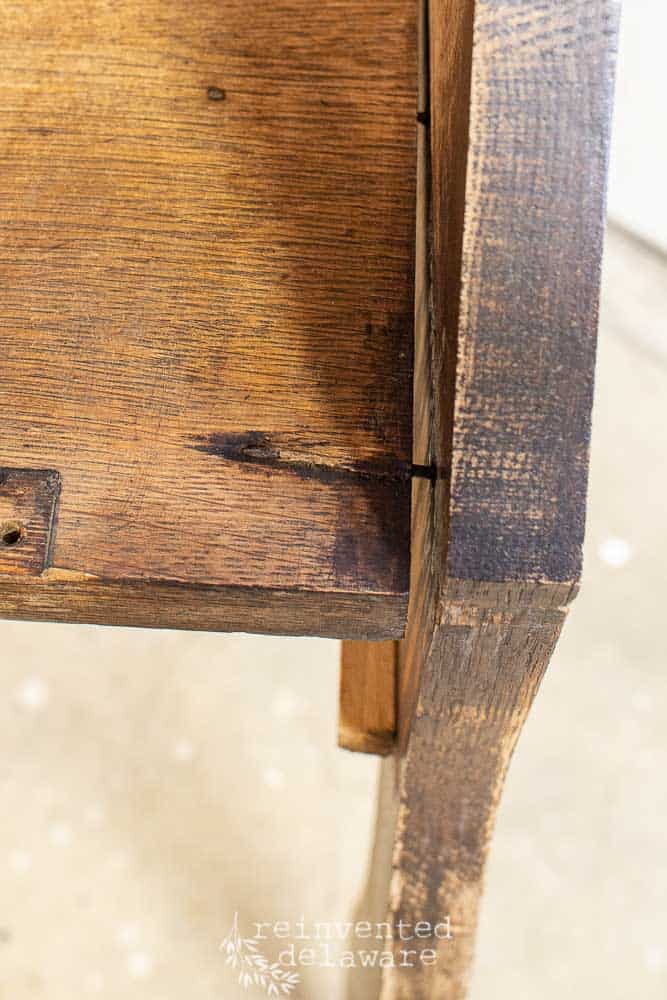
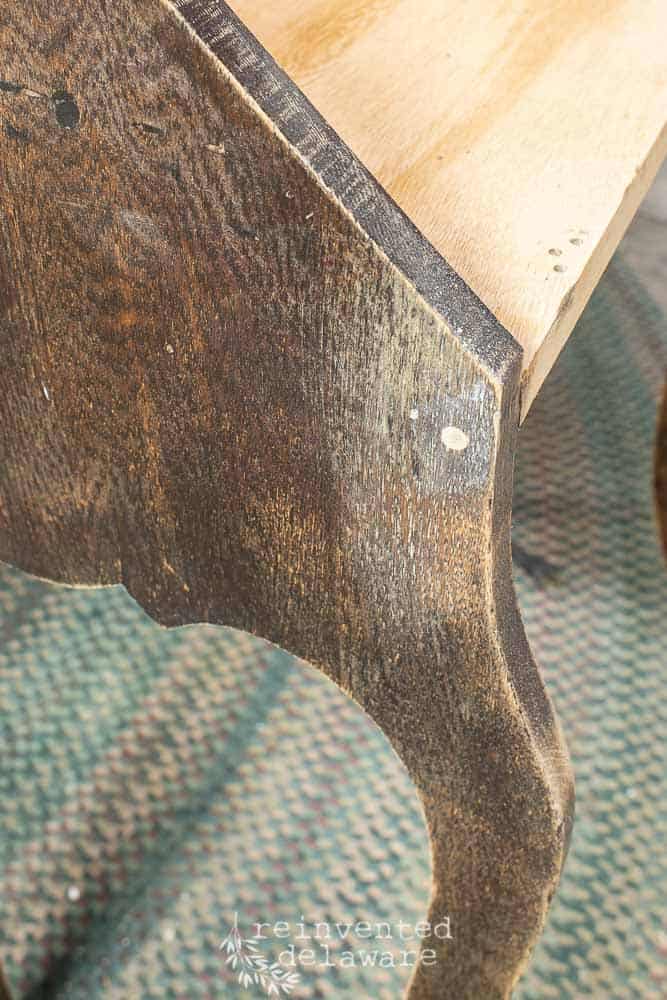
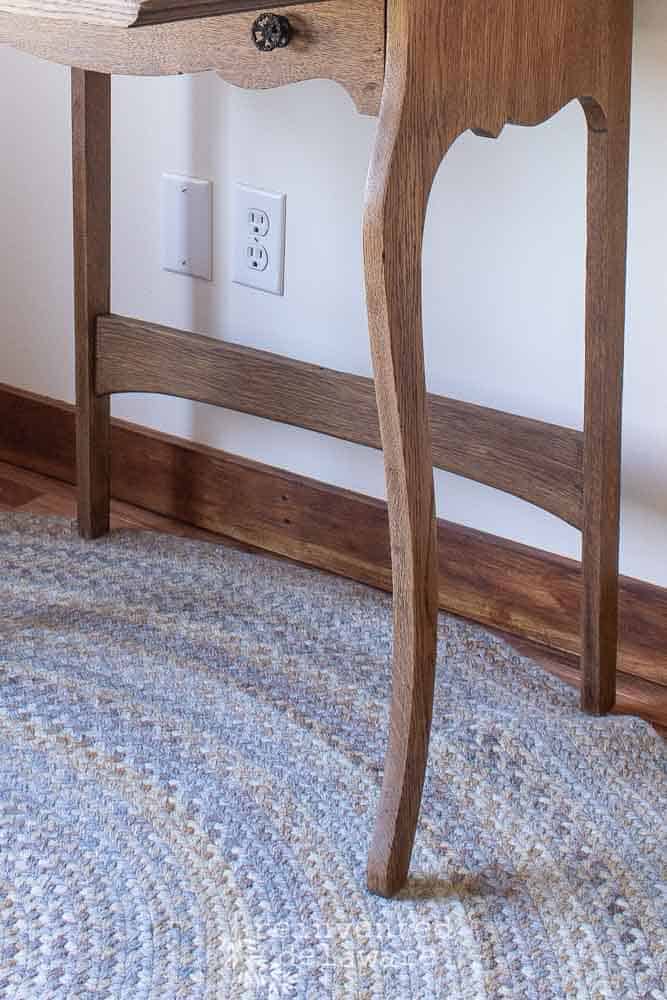
There was 1/2′ gap between the desk surface and the side of the fold down desk. See here?? Let’s take a closer look….

Now can you see it? The gap gradually improved towards the back of the piece but close to the front, it was definitely a problem.
It looks as though someone tried to repair it. See how the nail point is coming out of the top of the surface? When the original repair was made, the nail must not have been level, causing it to come out on the top of this section of wood.
Here is my guess as to how this gap problem came to be. Remember in the first post I mentioned that there had been dowel rods that connected the two front legs and the two back legs? Those rods would have been a support for the legs and without them, the legs would have too much movement, creating the gap.
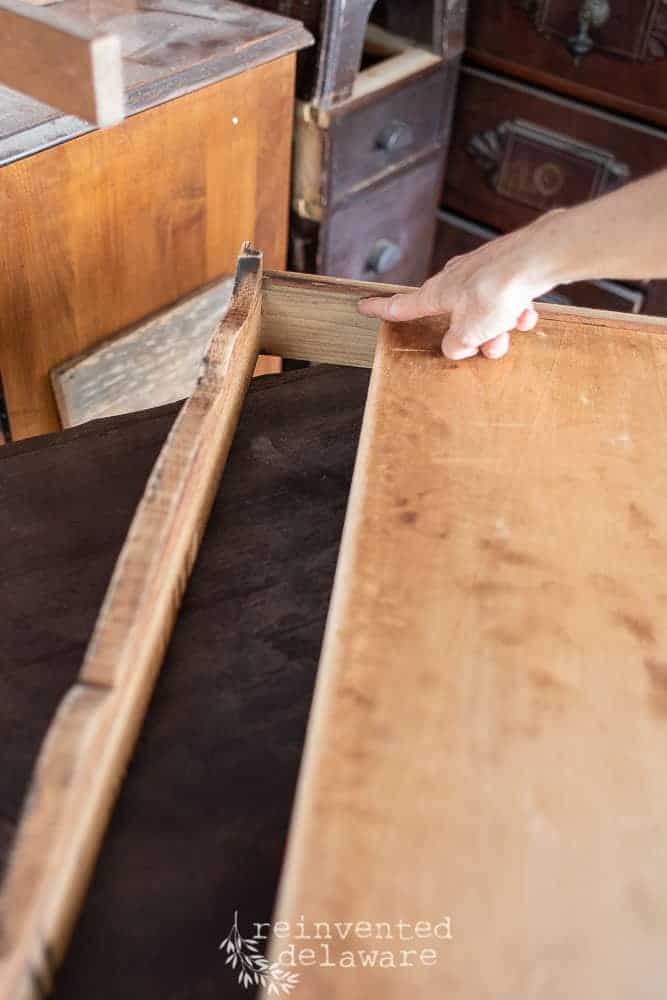
You can also see towards the back of the fold down desk that there is another nail. See the little dark spot towards the top/middle of the image below?
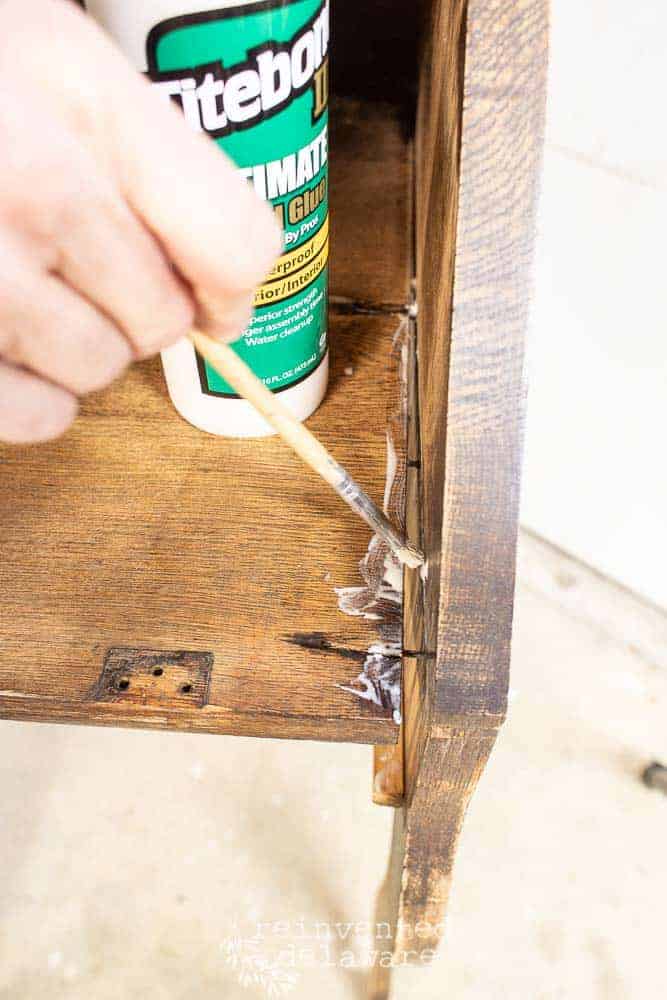
I got a bit ahead of myself with this repair and decided to glue the sections that would come in contact with one another and then hammer the existing nail back in. I added a clamp and thought, “I’m done.”
hubby says it won’t hold!
Or so I thought! Hubby got home from work and told me that it just wouldn’t hold securely over the years. We strive for quality work here in our biz and that includes repairs! Sure, we could have sent this piece on its way and not worried about the next few years for this fold down desk. But we want our pieces to last!!
Fortunately, the glue was not completely dry by the time my hubby saw it! All I had to do to create the gap again was a few taps with my mallet. We also used a nail punch (also called a nail set) to tap the old nail out. The tool looks like this:
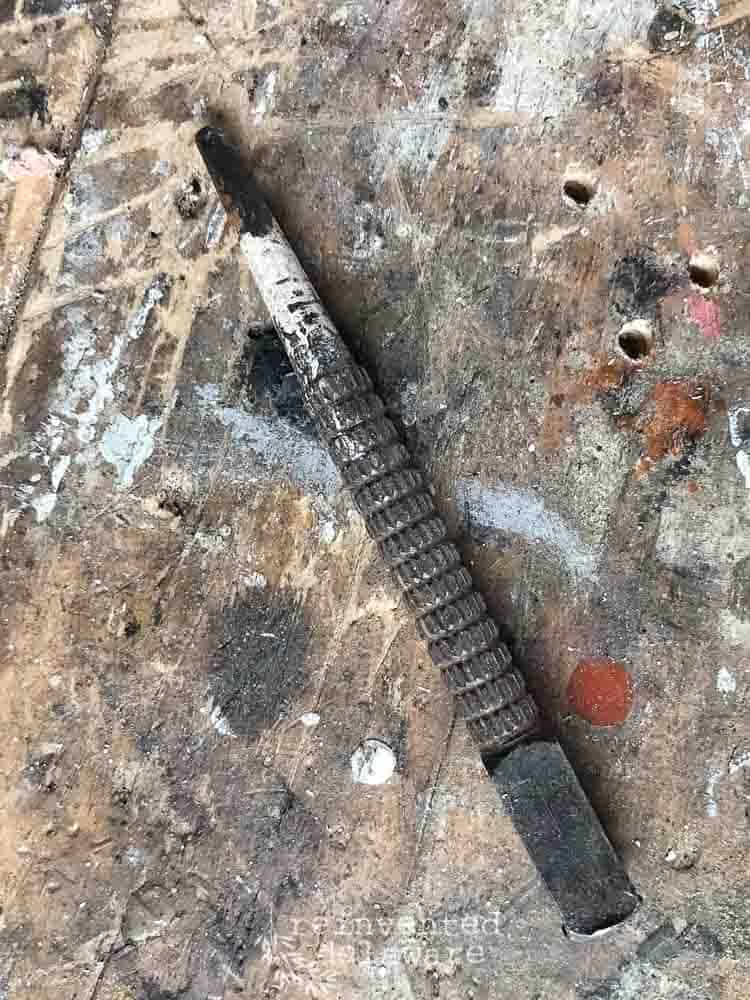
I placed the nail punch on the pointed end of the nail and with a hammer, carefully tapped until the nail came out of the other side. I backed out most of the nail then used the claw end of the hammer to remove the nail completely.
We decided that a wood screw would work best in giving this ‘joint’ strength. But we didn’t want the head of the screw to show. This type of drill bit will drill the size needed for the screw but also a bit larger to accommodate the head of the screw. It will countersink the screw so that the screw head will not be on the surface.
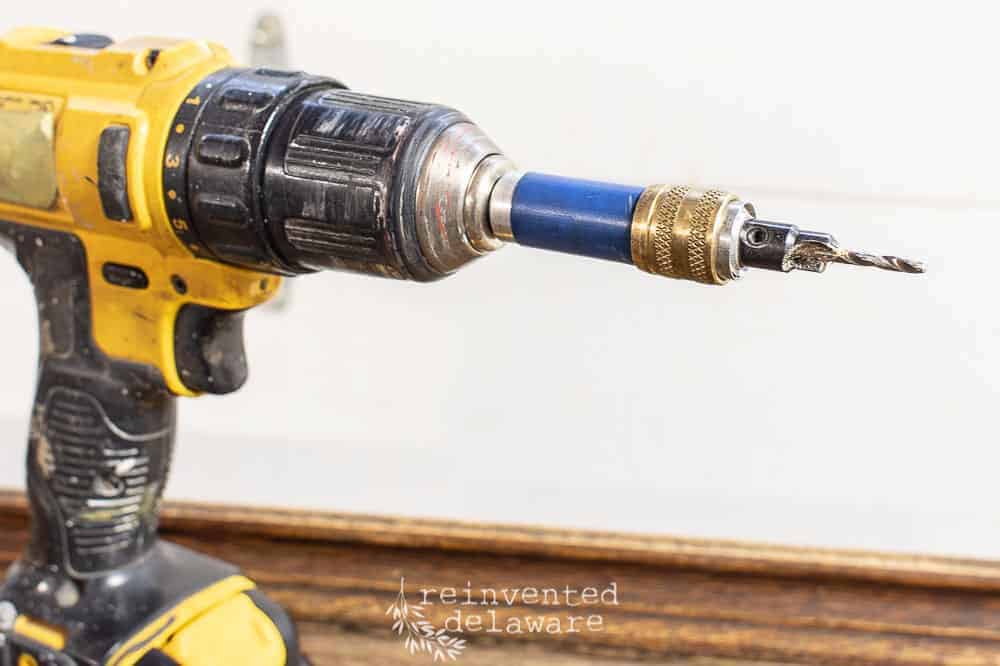
You can see here that the wider part of the drill bit is cuts a bigger hole than the screw requires. It makes a nice little hole for the screw head to recess in.
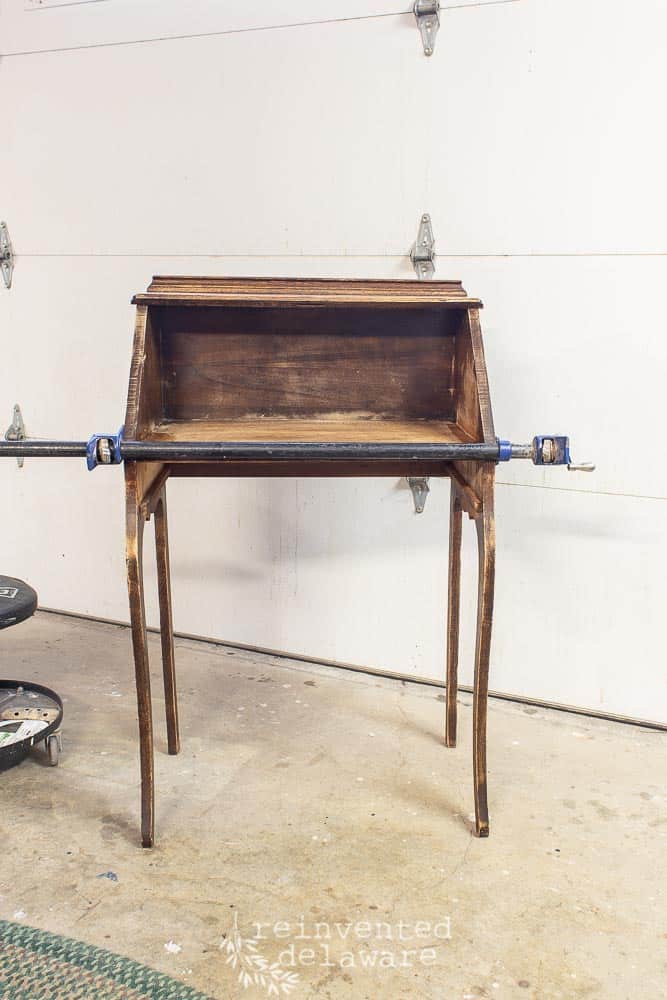
I used this large clamp to hold the sections tightly while attaching this screw.

After attaching the wood screw, I filled the holes with wood putty and sanded it smooth. No more screw heads!!
I also used wood filler on the inside where we removed the nails.
The screws will hold this desk together much better than nails! Thanks to my hubby for the recommendation!! I have a great co-worker!
third repair
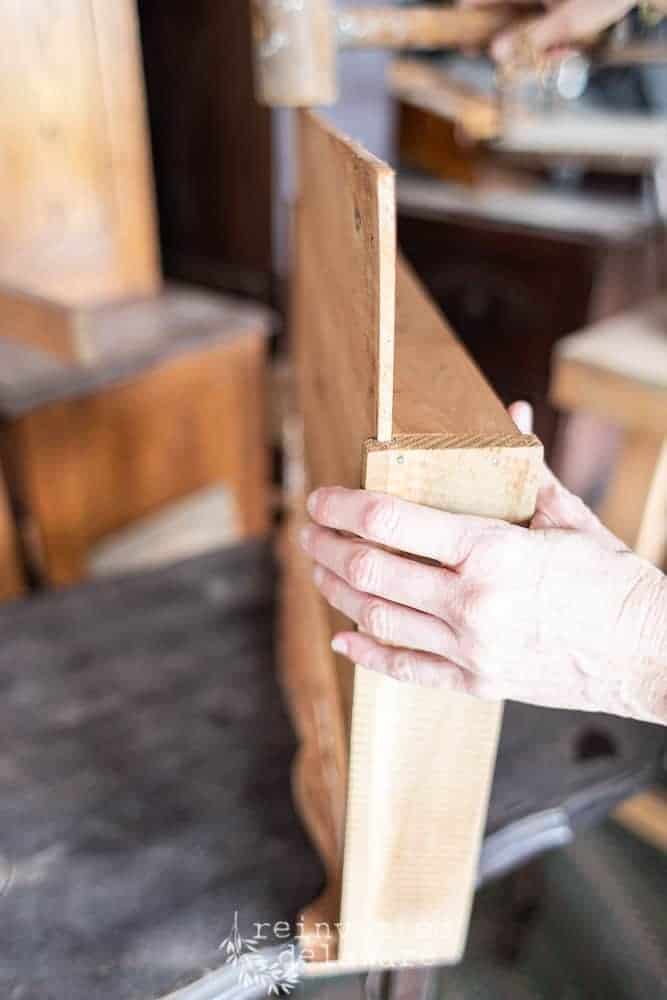
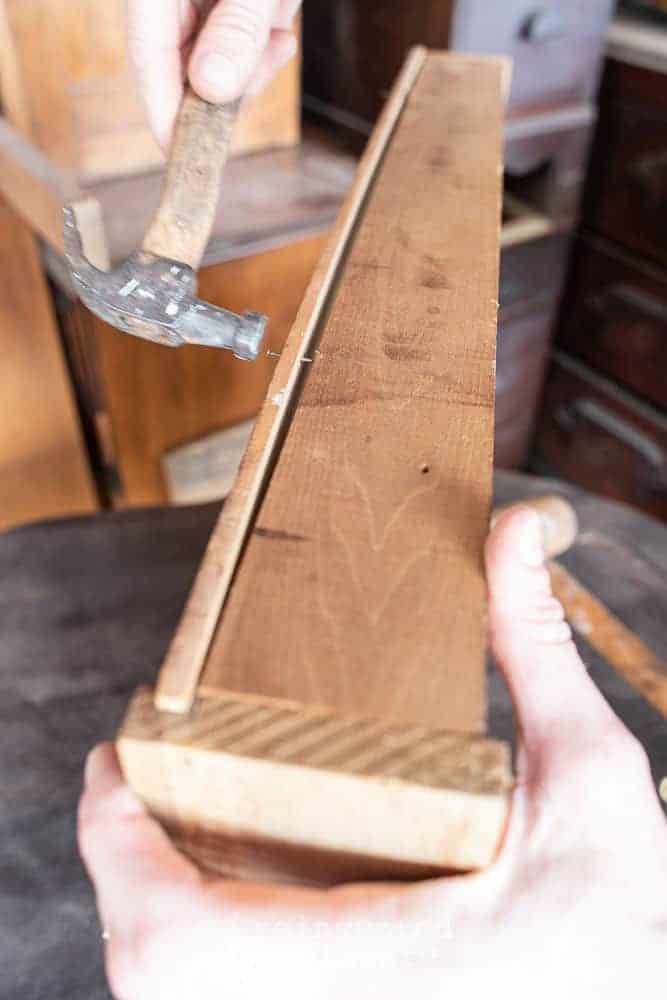
We made this last repair to create more stability for the piece. See that board between the two back legs? That was a section of wood from the roll top desk project!
I should say ‘projects’ because we have made several amazing pieces of furniture from one roll top desk! Here are some links to see those projects:
- Custom Cabinets from a Roll Top Desk
- Repurposed Roll Top Desk Sofa Table
- Lining Drawers of Antique Furniture
spare parts
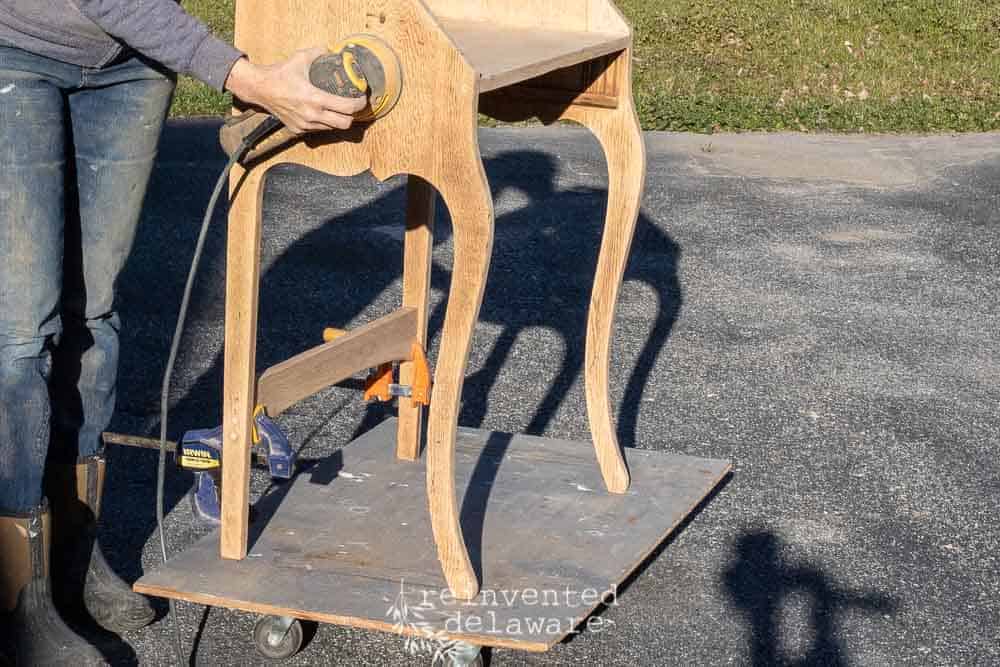
We like to save sections of old furniture just for this reason! The roll-top desk was oak so I knew this leftover section would be perfect. We measured between the two legs on the back of the desk close to the top of the desk – where the drawer slides back. If you measure towards the bottom of the legs, you may not get an accurate measurement. It’s important to have the correct measurement to create a stable and square finished piece.
We cut it to the correct size and then attached it the same way we made the previous repair! Easy fix! You could also use a new piece of oak from the lumber store if you don’t have random furniture parts laying around your workshop!
thanks for stopping by!
That’s it for today! The three repairs that we made on this fold down desk were simple yet give this desk stability and made it very useful for our client!
I can’t wait to show you the finished project! I will share all the pretty after pics in the next post! Subscribe so you don’t miss any of our tutorials and projects!
Join our journey over on Instagram and Facebook where we show behind the scenes of our work in real-time! Follow along on Pinterest for more inspiration and feel free to pin any of the images in this post for future reference. Any questions? Ask away in the comments below!
Love the progress and can’t wait to see the finished project. Fun to know that another piece of the roll top desk will be in my house! ?
So glad you are enjoying the process of your desk!! How cool is that – you will have another part of the roll top desk in your home!!
Hi Cindy! I’m really glad I received this post. I have this exact secretary that I purchased from the Restore and it is going to take some love to repair. Those long curvy legs are wobbly and I had no idea what to do. Thank you for showing me. Definitely going to Pin.
Thanks, Cheryl! If you run into any questions, send me an email! I’ll help the best I can 😊
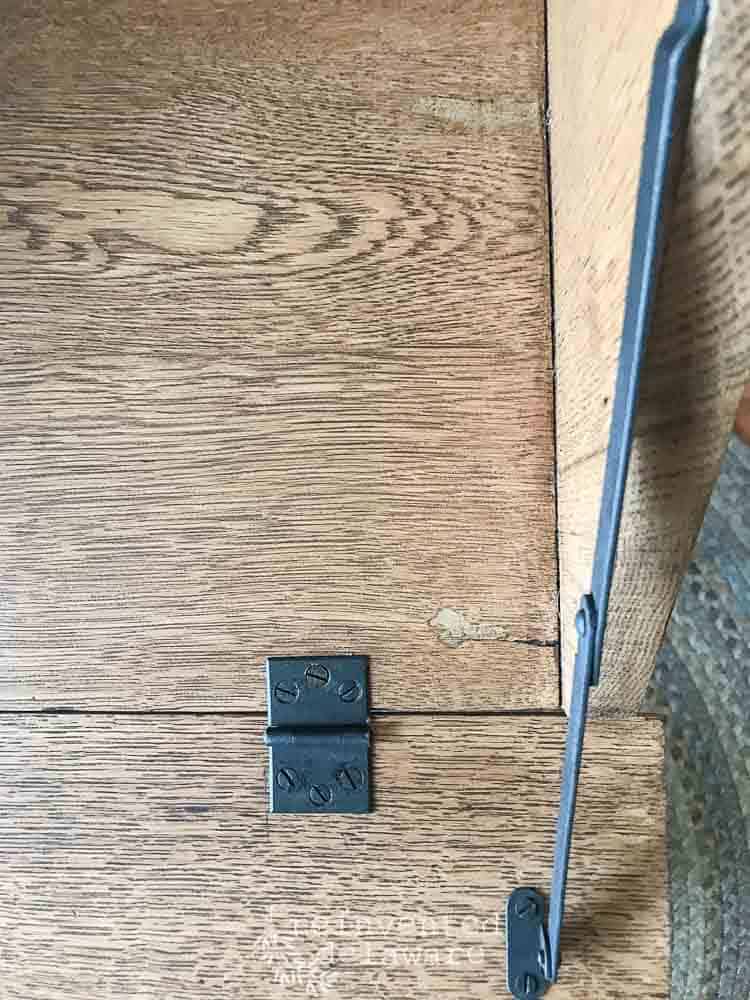
Where do I get the drop down side hinges/stays? I have a desk like this but the stays have been removed.
Hi Antonia! Sorry for my delayed response. Here is a link to a similar hinge. It isn’t vintage but it’s a good starting point. Check out Etsy and search for this style of hinge if you are looking for a vintage piece.https://www.rockler.com/sugatsune-nsdx-10-adjustable-soft-down-drop-front-support