
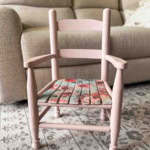
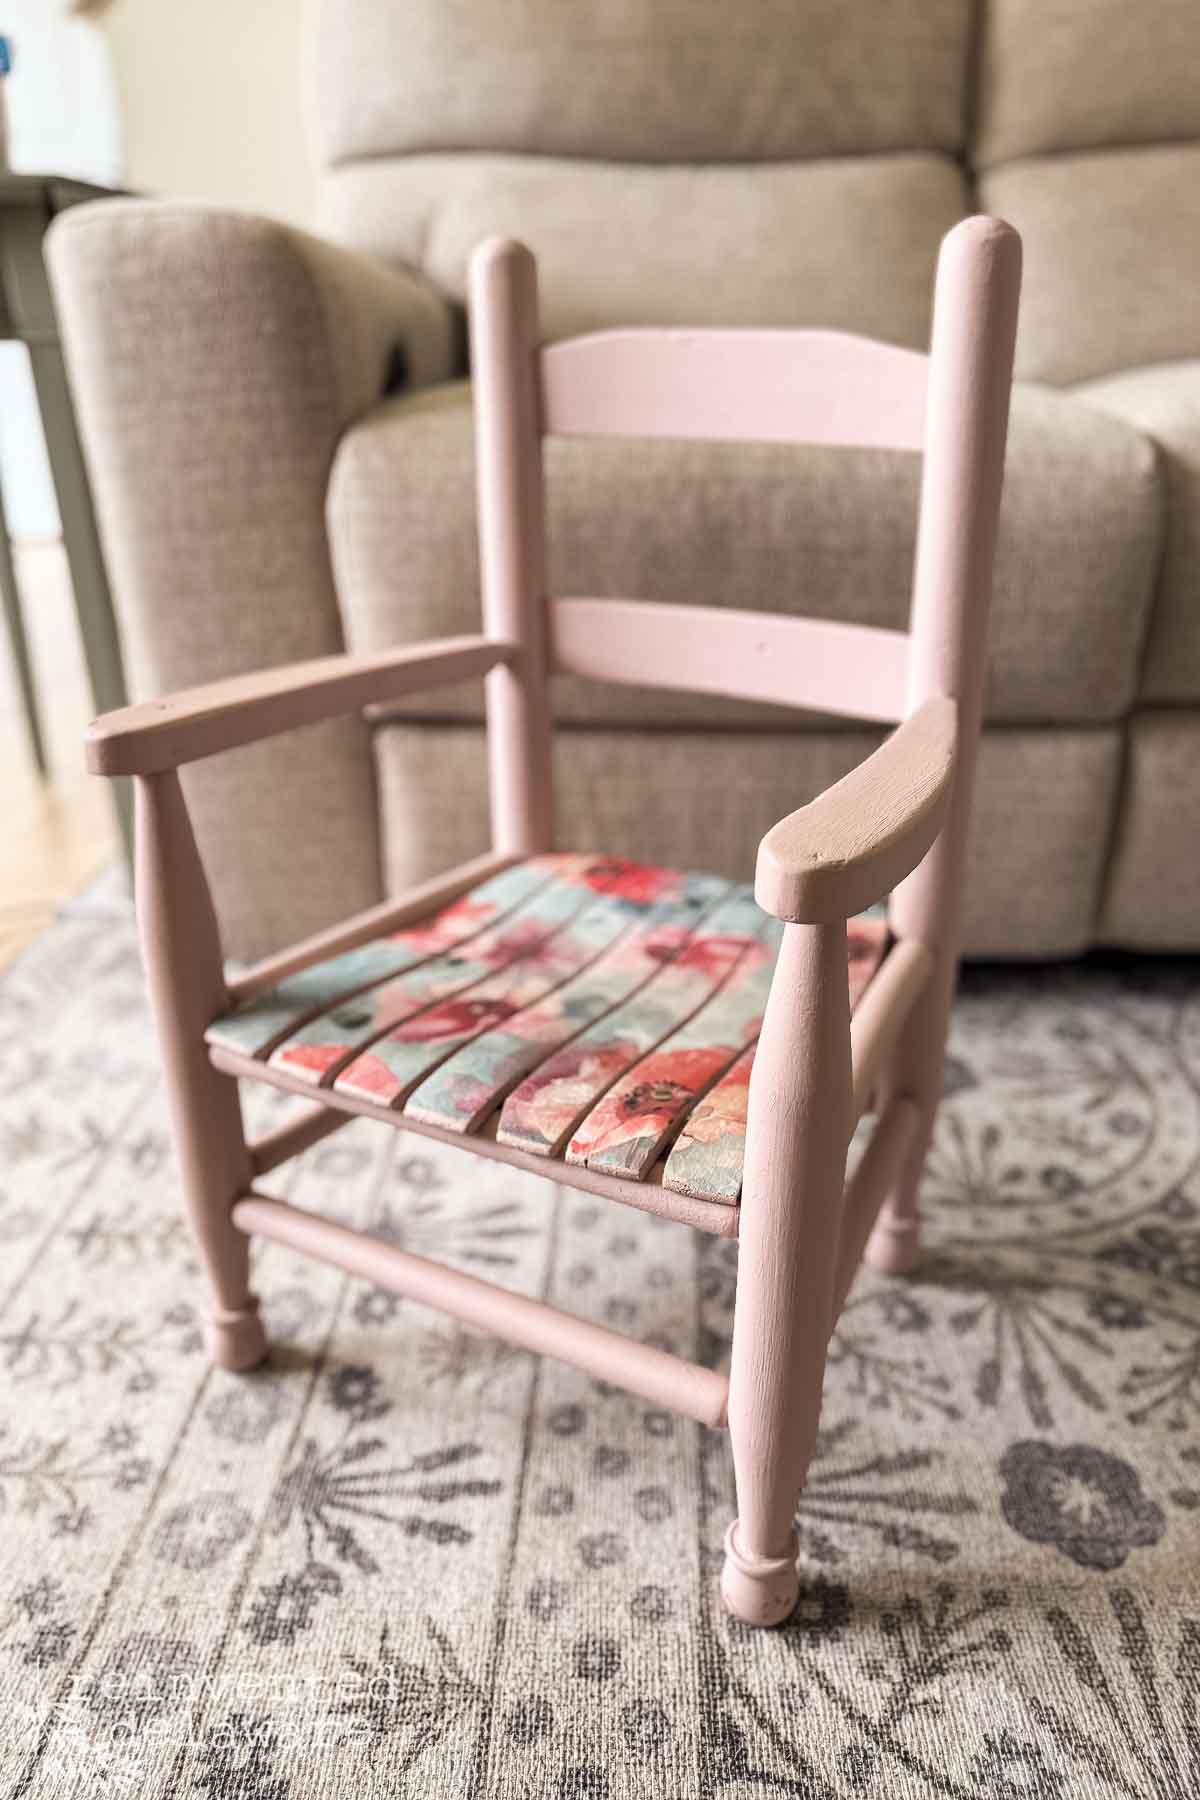
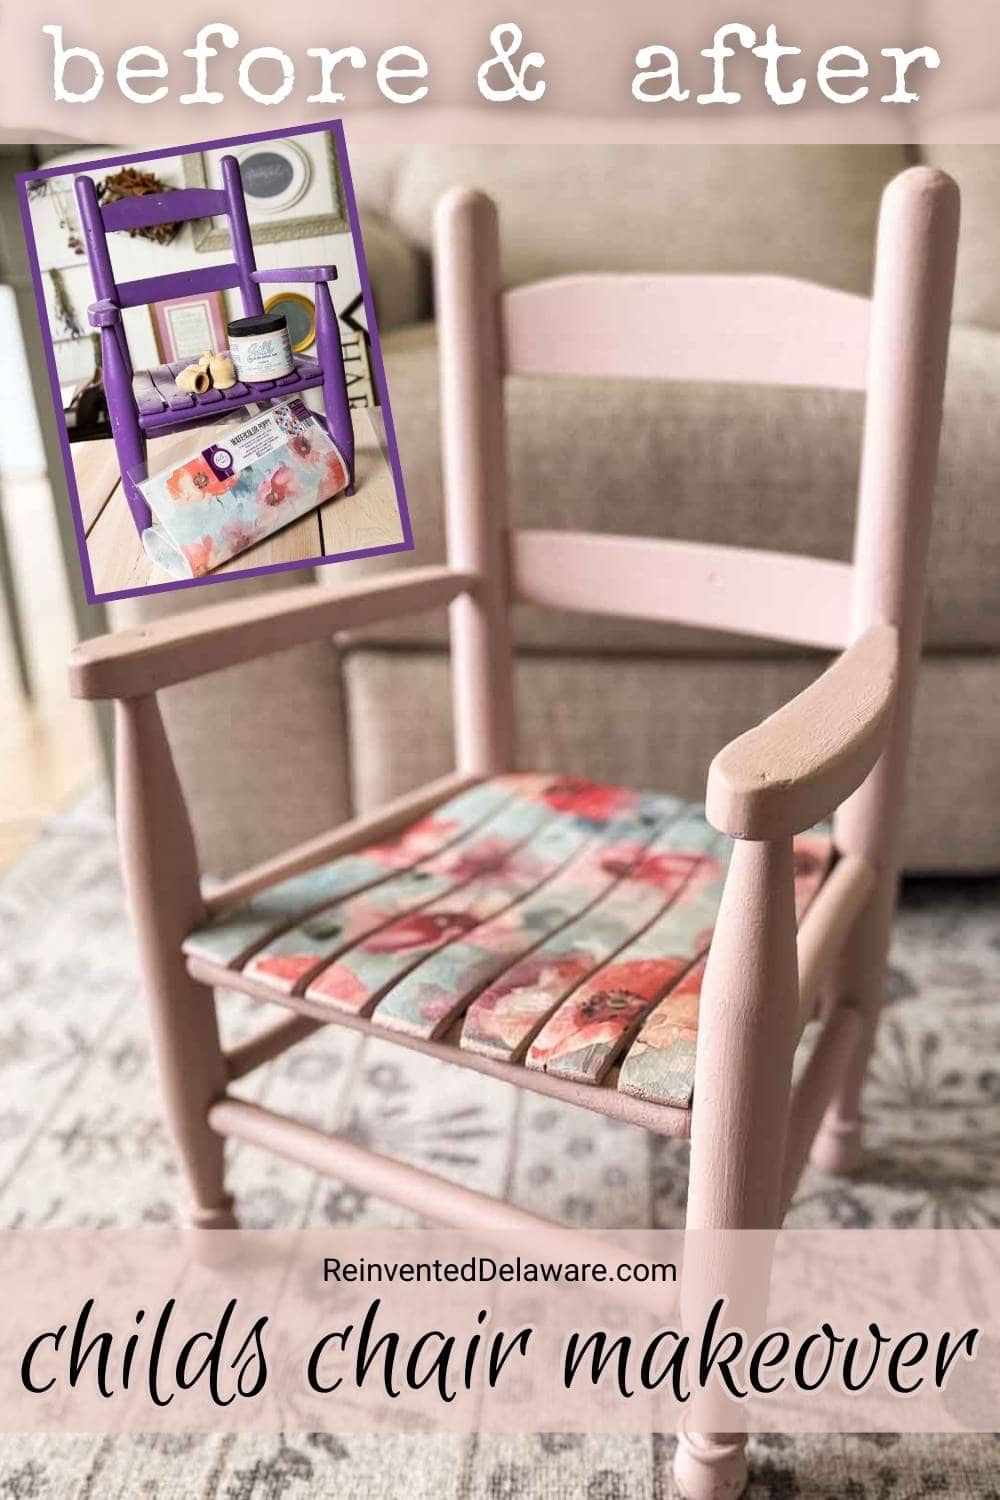
Upcycled Childs Chair: A Thrift Store Decoupage Makeover
You won’t believe what a little love (and decoupage) can do! This upcycled child’s chair started its journey as a freebie from a thrift store donation pile. My husband was offered the piece, and we immediately saw the potential to create something special. Get ready to see how we transformed this forgotten find into a treasured piece of kid-friendly decor.”

Upcycled Child’s Chair with Decoupage Paper
Materials
- childs wooden chair found at thrift store or yard sale
- microfiber cloth & TSP cleaner
- chalk paint (I used Conch)
- paintbrush
- clear top coat
- decoupage paper see suggestions in the post!
- utility knife
Instructions
- Clean: Thoroughly clean the chair.Sand: Lightly sand if the finish is shiny.Paint: Apply 2 coats of chalk paint.Apply Decoupage:Apply a thin coat of clear topcoat to a section of the chair.Smooth decoupage paper onto the wet topcoat.Let dry completely.Trim: Carefully cut away excess paper.Seal: Apply a coat of clear top coat over the decoupaged areas.
Notes
- Smooth decoupage paper from the center out to avoid wrinkles.
- Save any torn pieces of decoupage paper; you can reattach them with clear top coat.
The following post may contain affiliate links. That means if you click and then buy something, I will make a small commission at no additional cost to you! Thank you for supporting my blog. full disclosure here.
This post is sponsored by Dixie Belle. All opinions are my own!
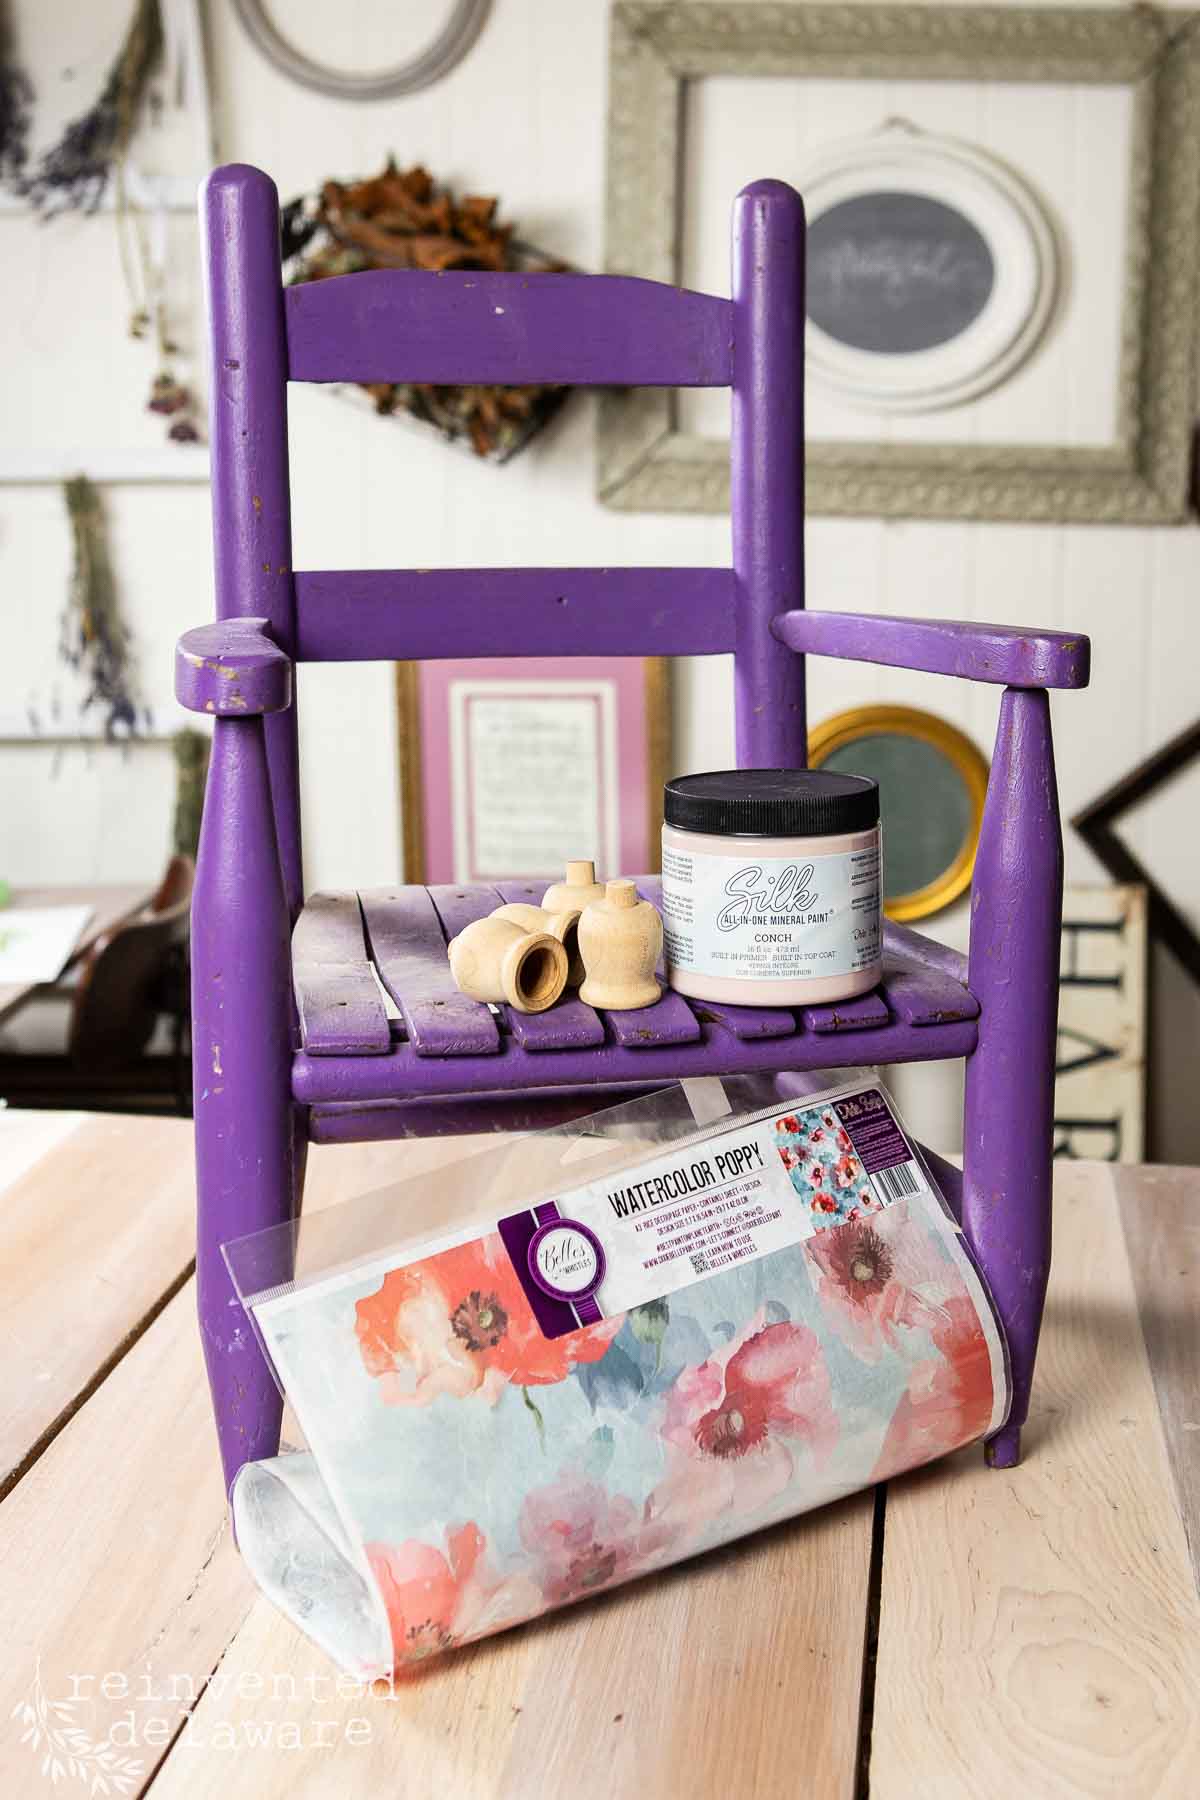
Gathering Supplies for Your Upcycled Chair
Here are the supplies you will need if you are lucky enough to find an old child’s chair like this one that you would like to breathe new life into. Tap the red links to shop!
- microfiber cloth & TSP Alternative cleaner
- sandpaper (if needed for shiny surfaces)
- Silk chalk mineral paint (I chose the color Conch)
- Watercolor Poppy decoupage paper
- Clear Top Coat in Flat
- paintbrushes
- small utility knife
- small wooden pieces to replace missing feet
The Charm of Upcycled Finds
Finding old furniture and home decor pieces is my passion! There are so many benefits to bringing beauty back to forgotten treasures that were once loved by someone.
This child’s chair was no different. Someone loved this chair and bought it for a little one in their life. That child loved and used it so much that it broke! By the looks of it, this child’s chair had actually been a child’s rocking chair. The legs were short, and the ends of the legs were shaped so that they would fit into the runners of a rocking chair. I was thrilled to save it from the landfill!
Upcycling and repurposing old furniture is also a budget-friendly way to decorate a home. Over the years, we have saved thousands of dollars with our DIY projects!
Plus, creating has such benefits for the soul. It feels good to repair and makeover an older piece of furniture. Our granddaughter is using this chair, and she will have the memory that her PopPop found it and MiMi fixed it up just for her! It’s a great way to add a personal touch and create family heirlooms.
Be sure to shop your local thrift stores to find pieces like this little chair!
Step-by-Step Guide: Creating Your Upcycled Child’s Chair
This is such an easy makeover! You can use this technique on any chair you find to create a beautiful look for your home!
Preparing the Vintage Chair
As with any furniture makeover project, the first step is always cleaning the piece. You might be thinking the first step is to sand the wood furniture, but if you do that, you will grind the dirt into the wood and risk a lasting finished result.
Paint won’t adhere to oils, and over time, they can break down the paint finish.
thanks for being here!
I hope you are enjoying this project! Let me know if you have any questions. Or leave me a comment to tell me about your project and ideas!
thanks, Cindy 😀

So before you grab the sandpaper, scrub the furniture thoroughly! I like to use a TSP alternative to clean the piece, along with a microfiber cloth. Mix the TSP powder with water, spray it on, and use a damp microfiber cloth to wipe away the dirt and grime.
Once the child’s chair is clean, grab a clean, damp microfiber cloth and wipe away any TSP residue.
If the original finish is shiny, you can lightly scuff sand it. This helps with paint adhesion. If you use chalk paint like I did, you can skip this step!
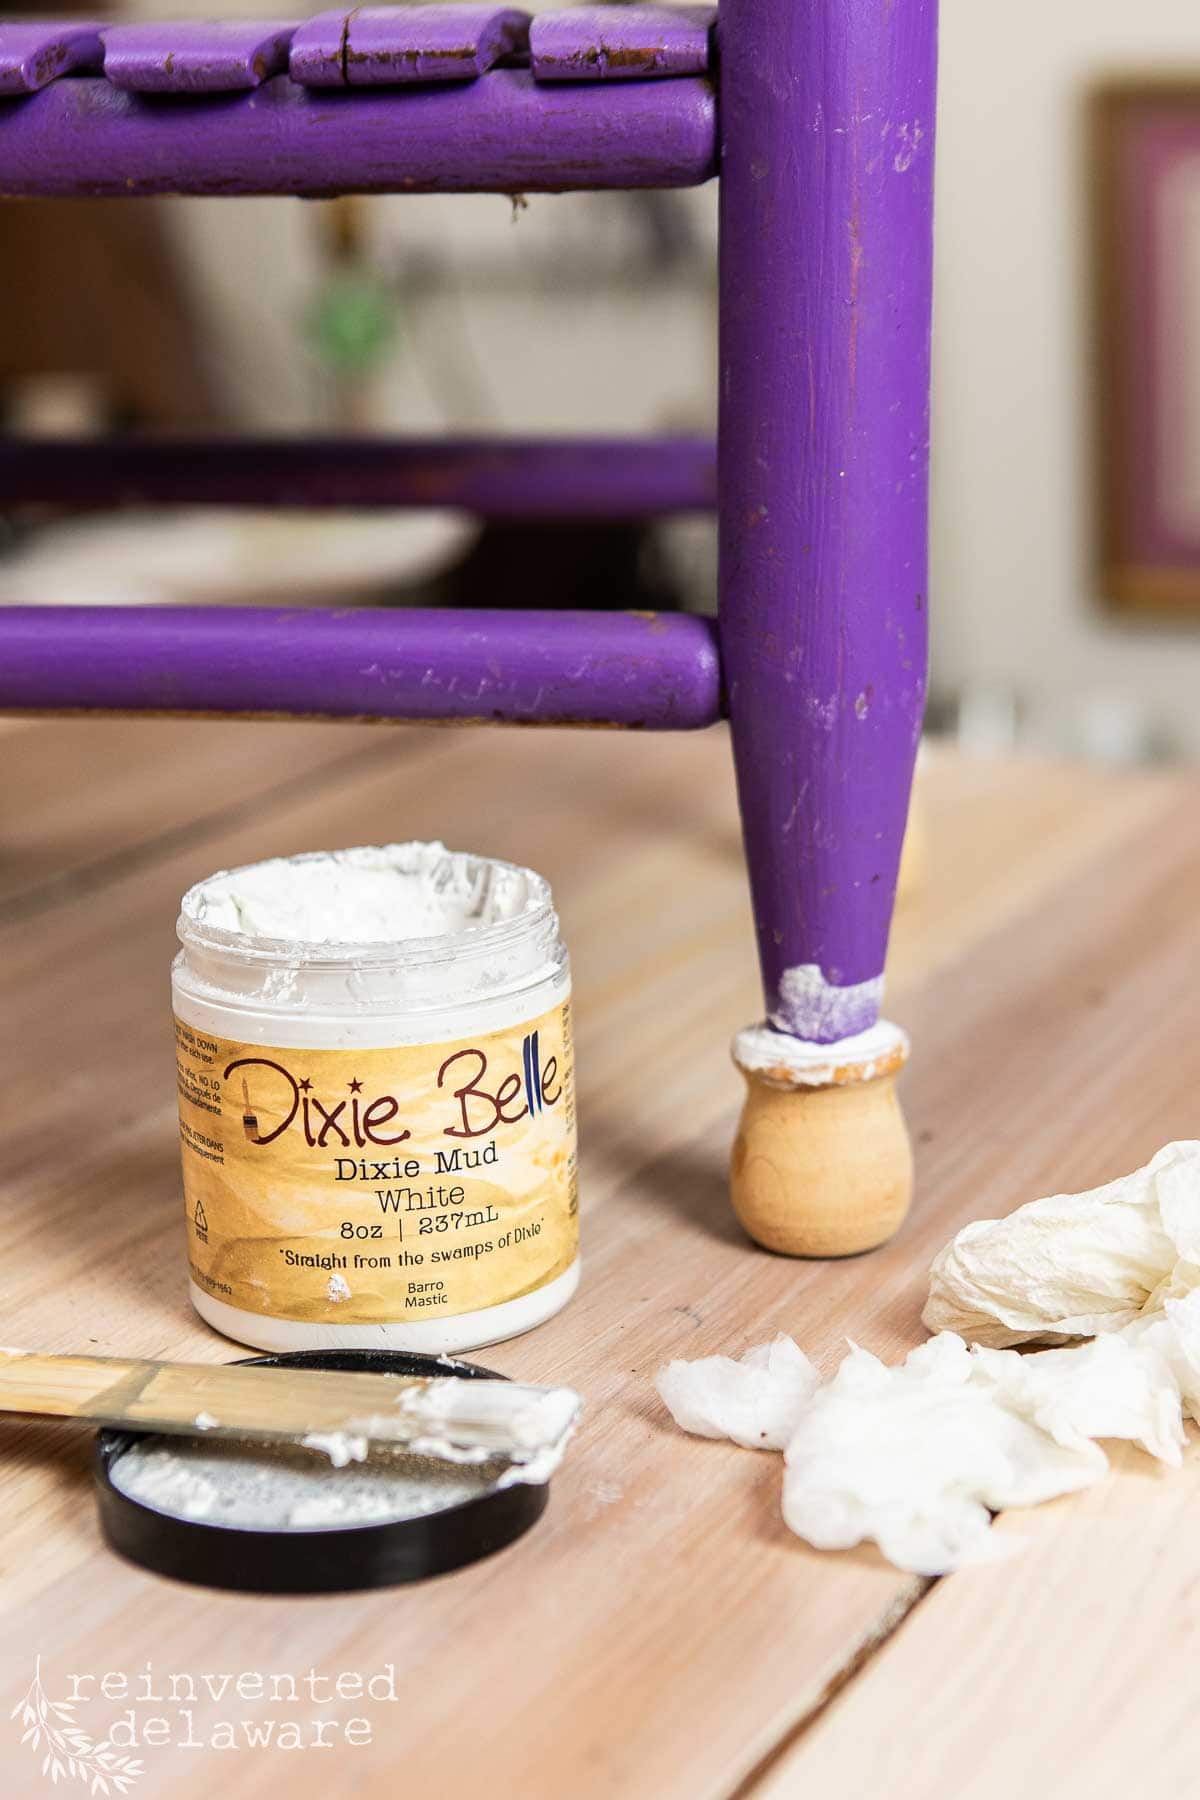

Since the runner was missing on this chair, I used small wooden candle cups as feet on this chair. They are secured with Dixie Belle Mud – a strong wood filler. This is optional!
Paint the Child’s Chair
My favorite part of any furniture makeover is painting! Do you love to hold a paintbrush as much as I do? It’s a great time to think, to listen to an audiobook or podcast, or catch up with a friend on Facetime!
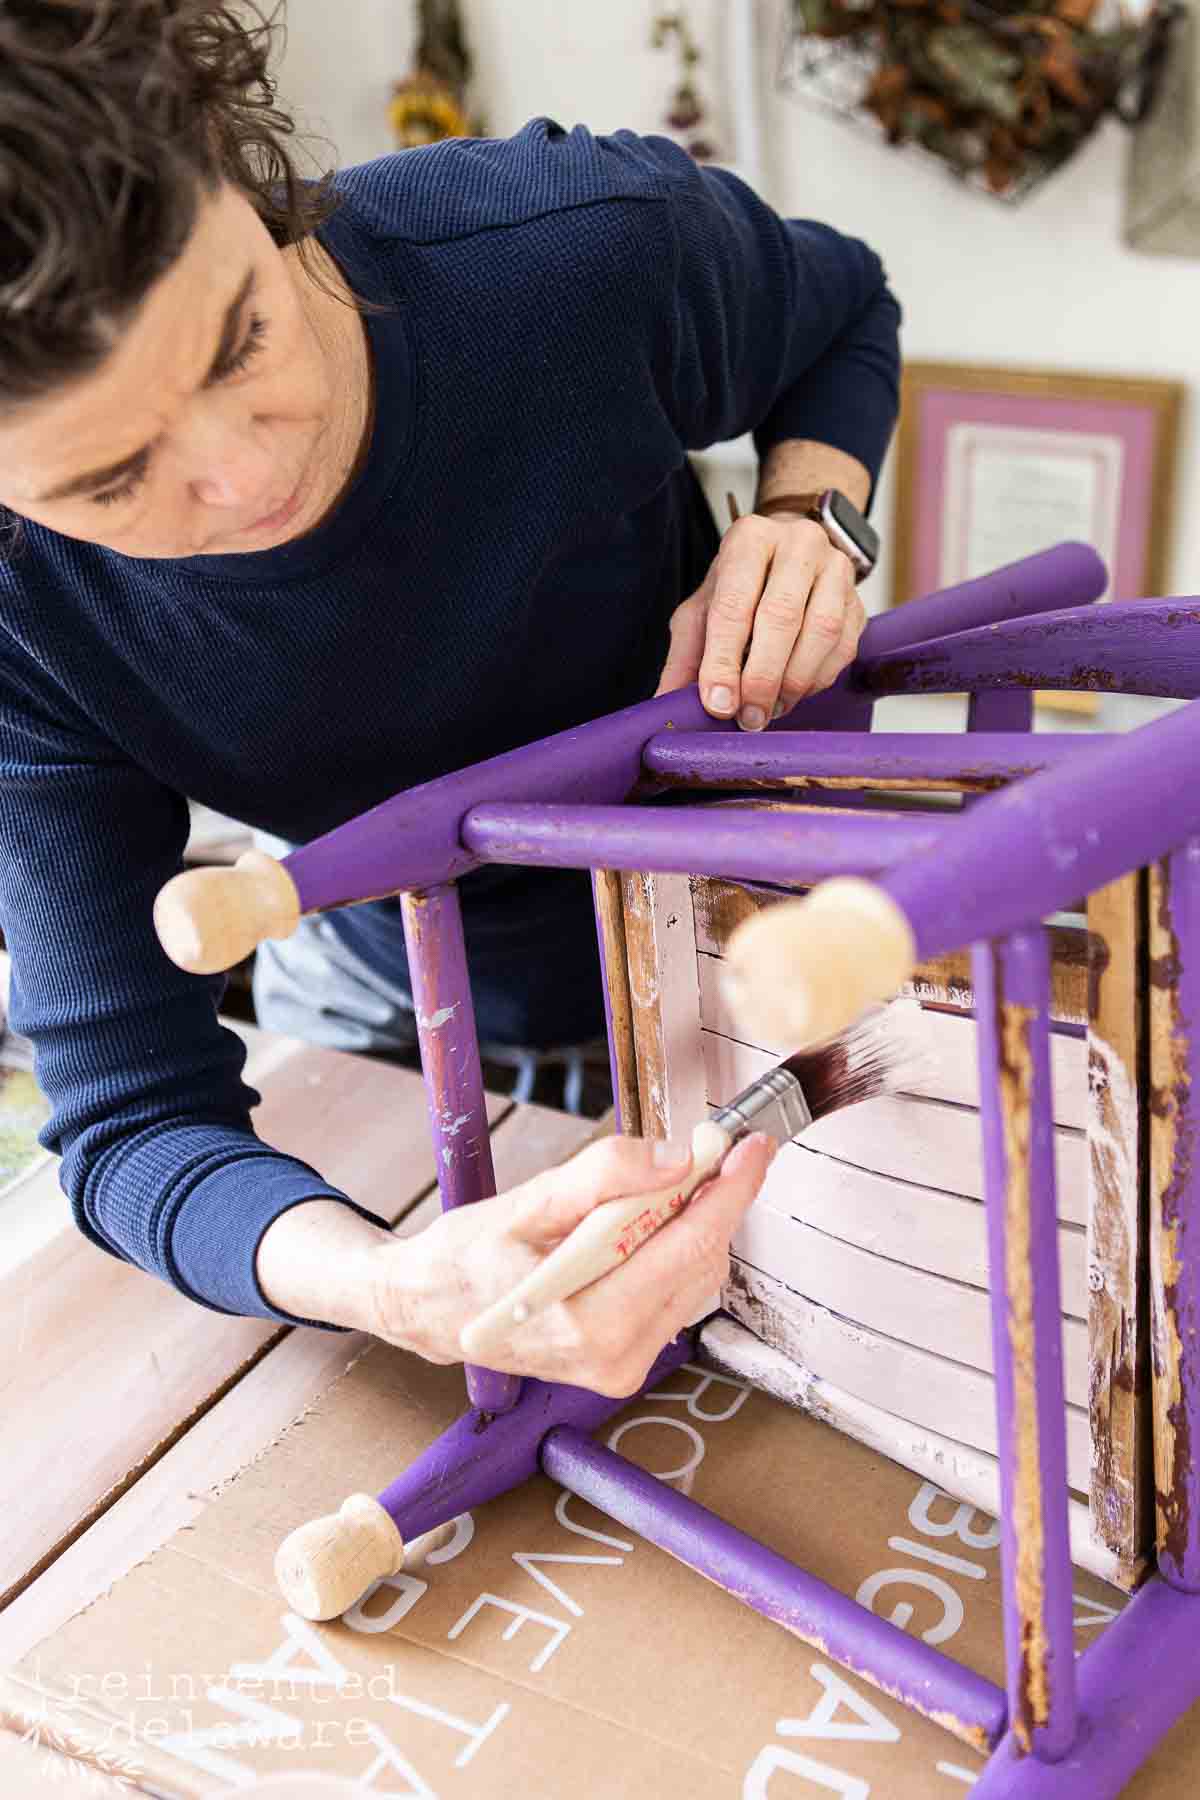
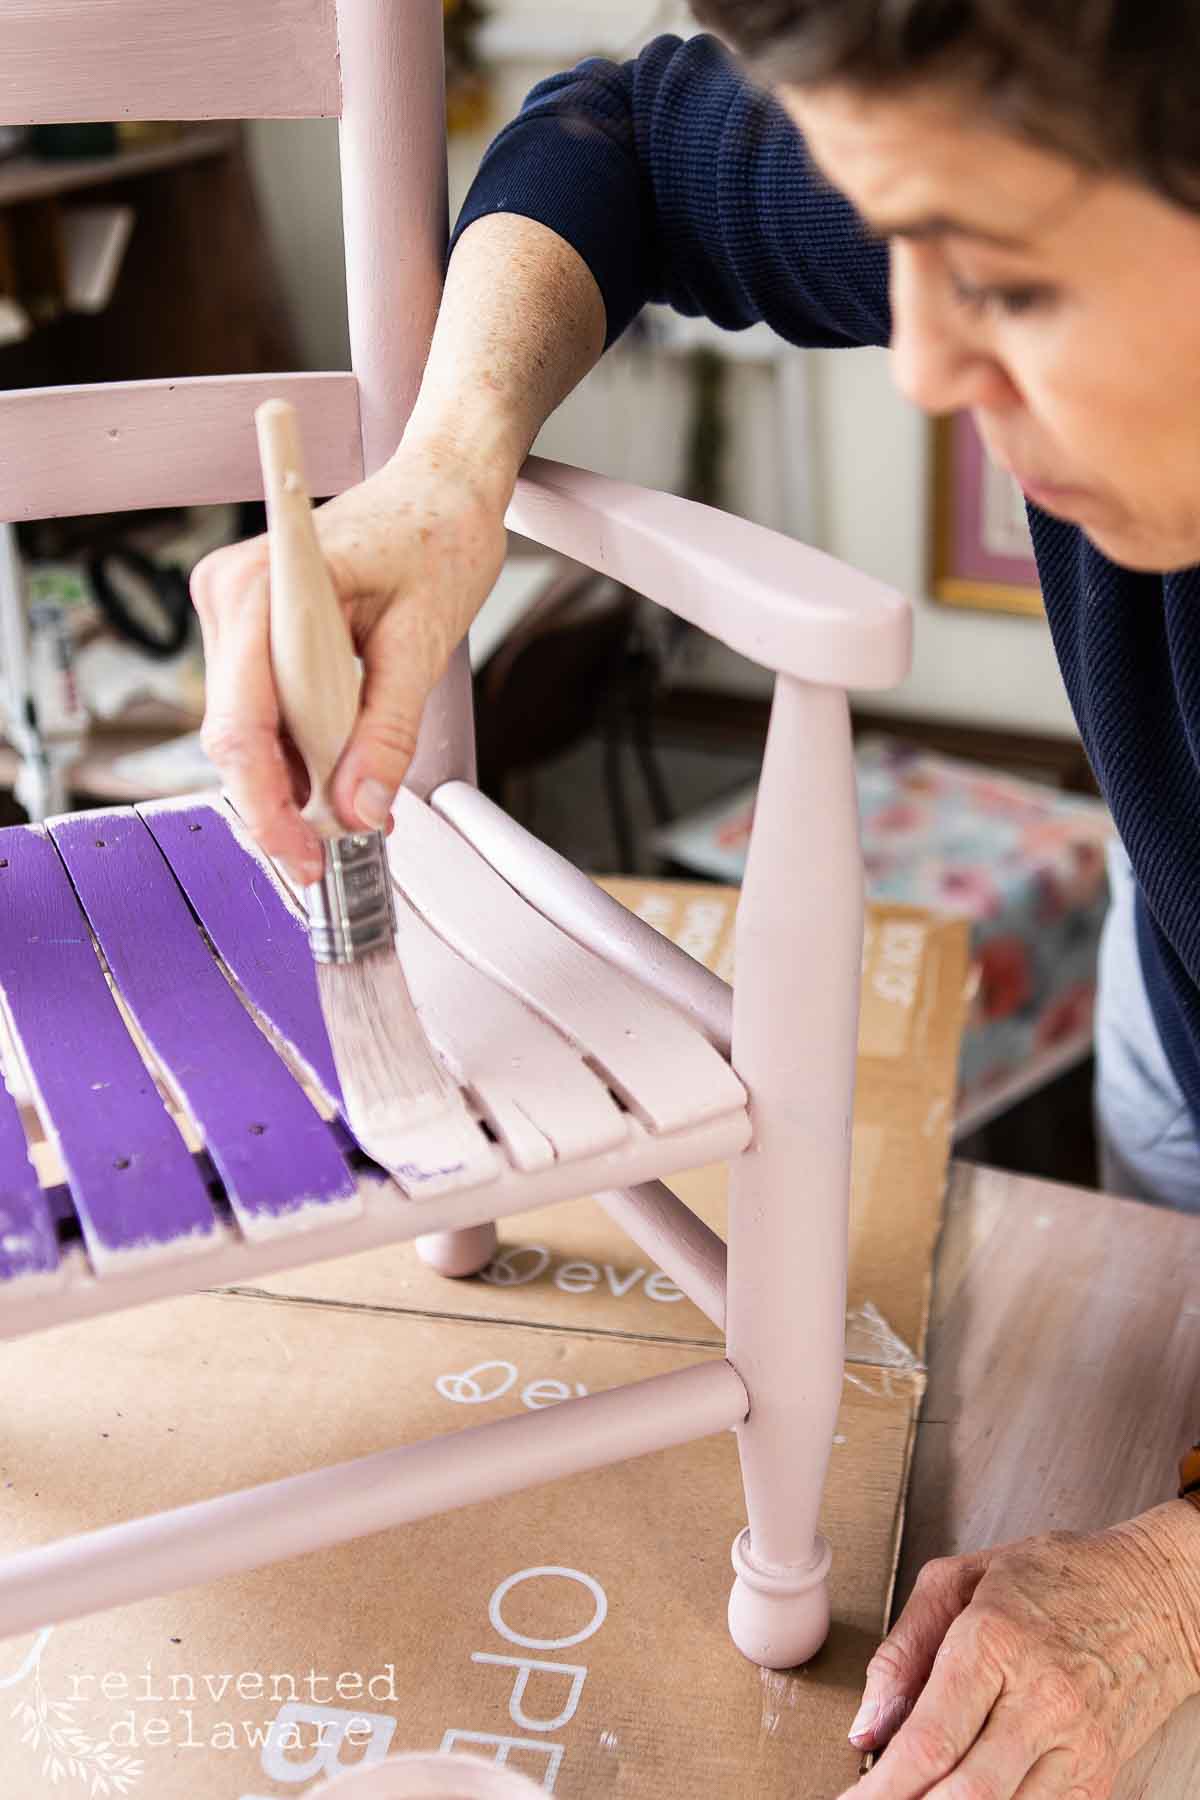
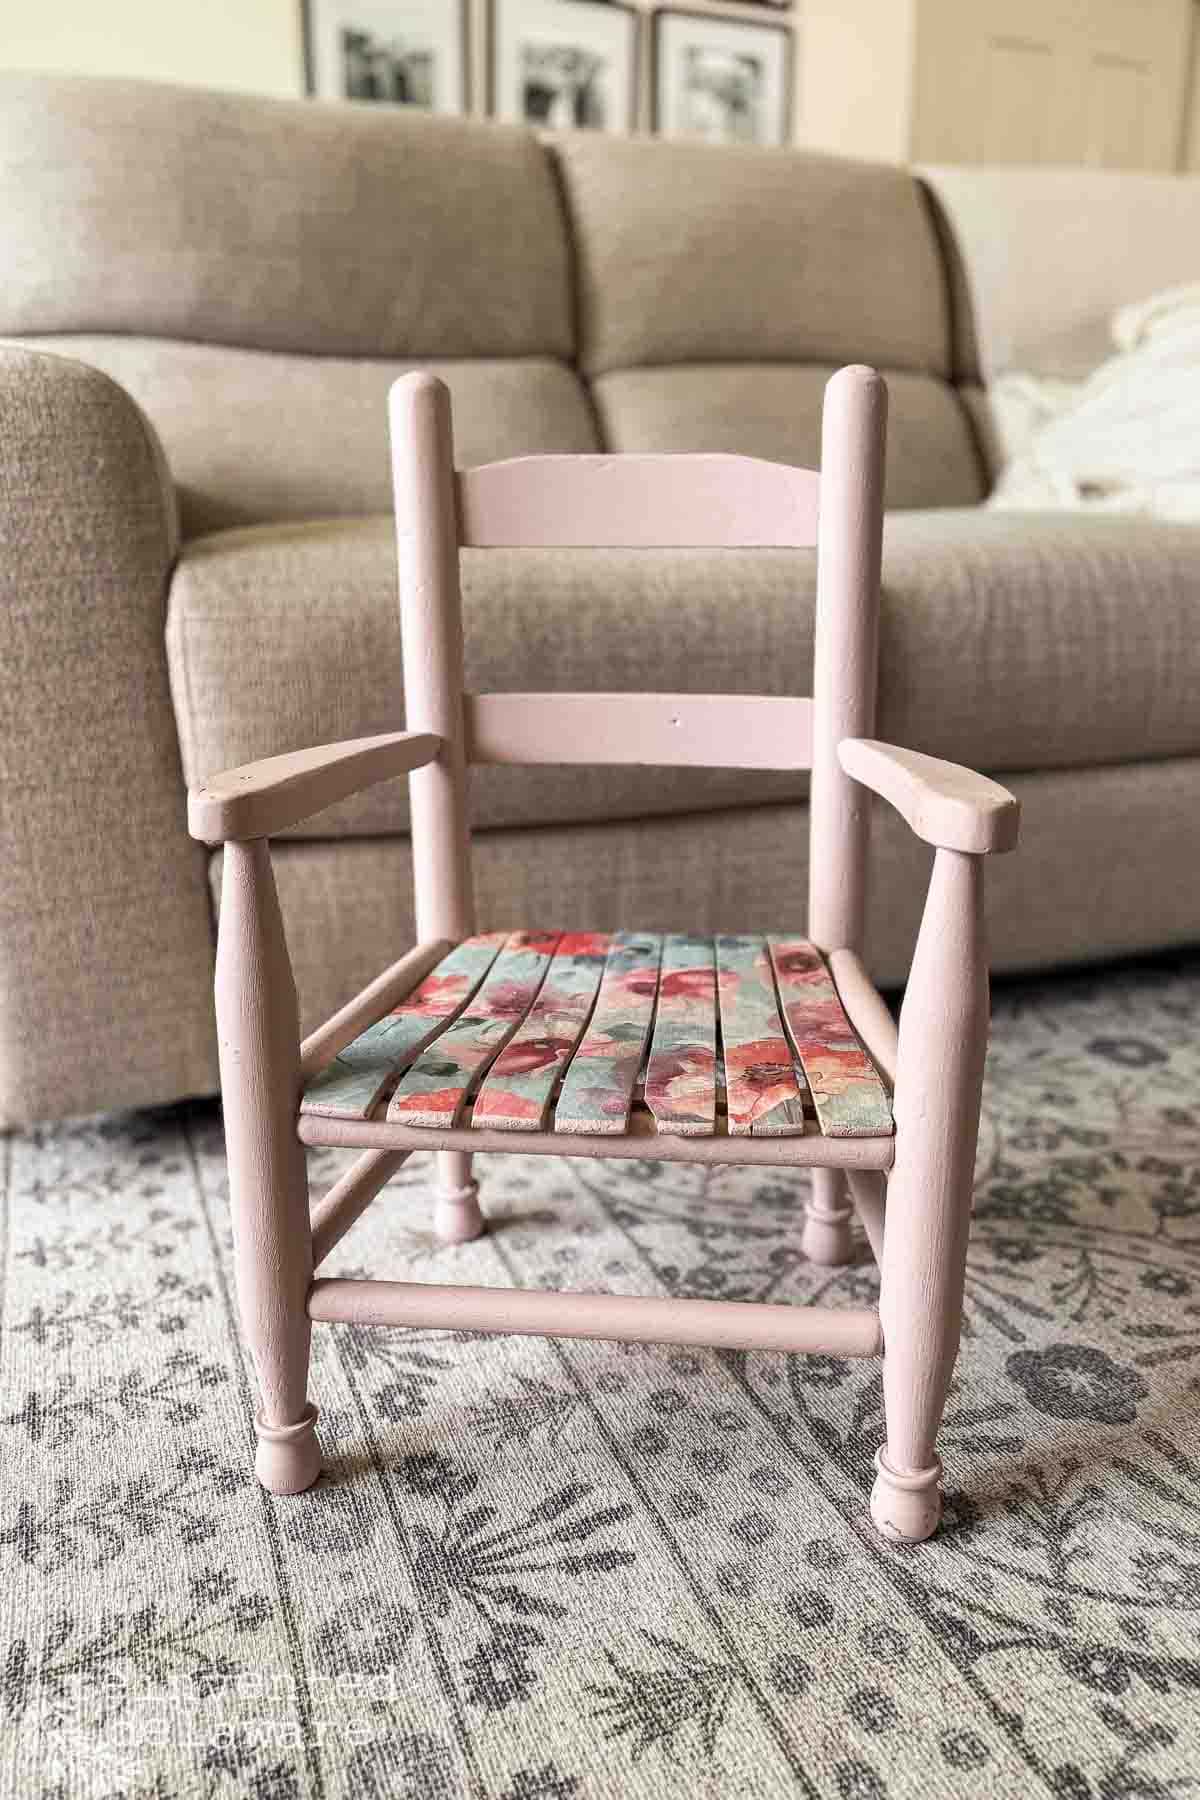
I applied two coats of Silk Chalk Mineral Paint to this adorable child’s chair. Drying time was quick, so I didn’t have to wait too long between coats. I worked on other projects while the paint dried.
Here is a helpful tip when painting chairs: always paint the underside of the chair first. Simply flip the chair upside down and paint to your heart’s content. Then flip the chair right side up and finish the painting.
You will be amazed at the complete coverage this simple trick accomplishes! No more missed spots!
Applying the Decoupage Paper
Did I say painting was my favorite part of a furniture makeover? Well, applying decorative touches like decoupage paper comes in a close second!
It’s super easy to apply decoupage paper. The hardest part is choosing which pattern you want to use!
This chair was headed to one of our granddaughters, so I wanted a feminine look. I chose Watercolor Poppies because they are bright and cheerful, just like our little granddaughter!
Once the paint was completely dry, I applied a thin coat of clear top coat. Yep, clear top coat can act as an adhesive, so you don’t need additional supplies!
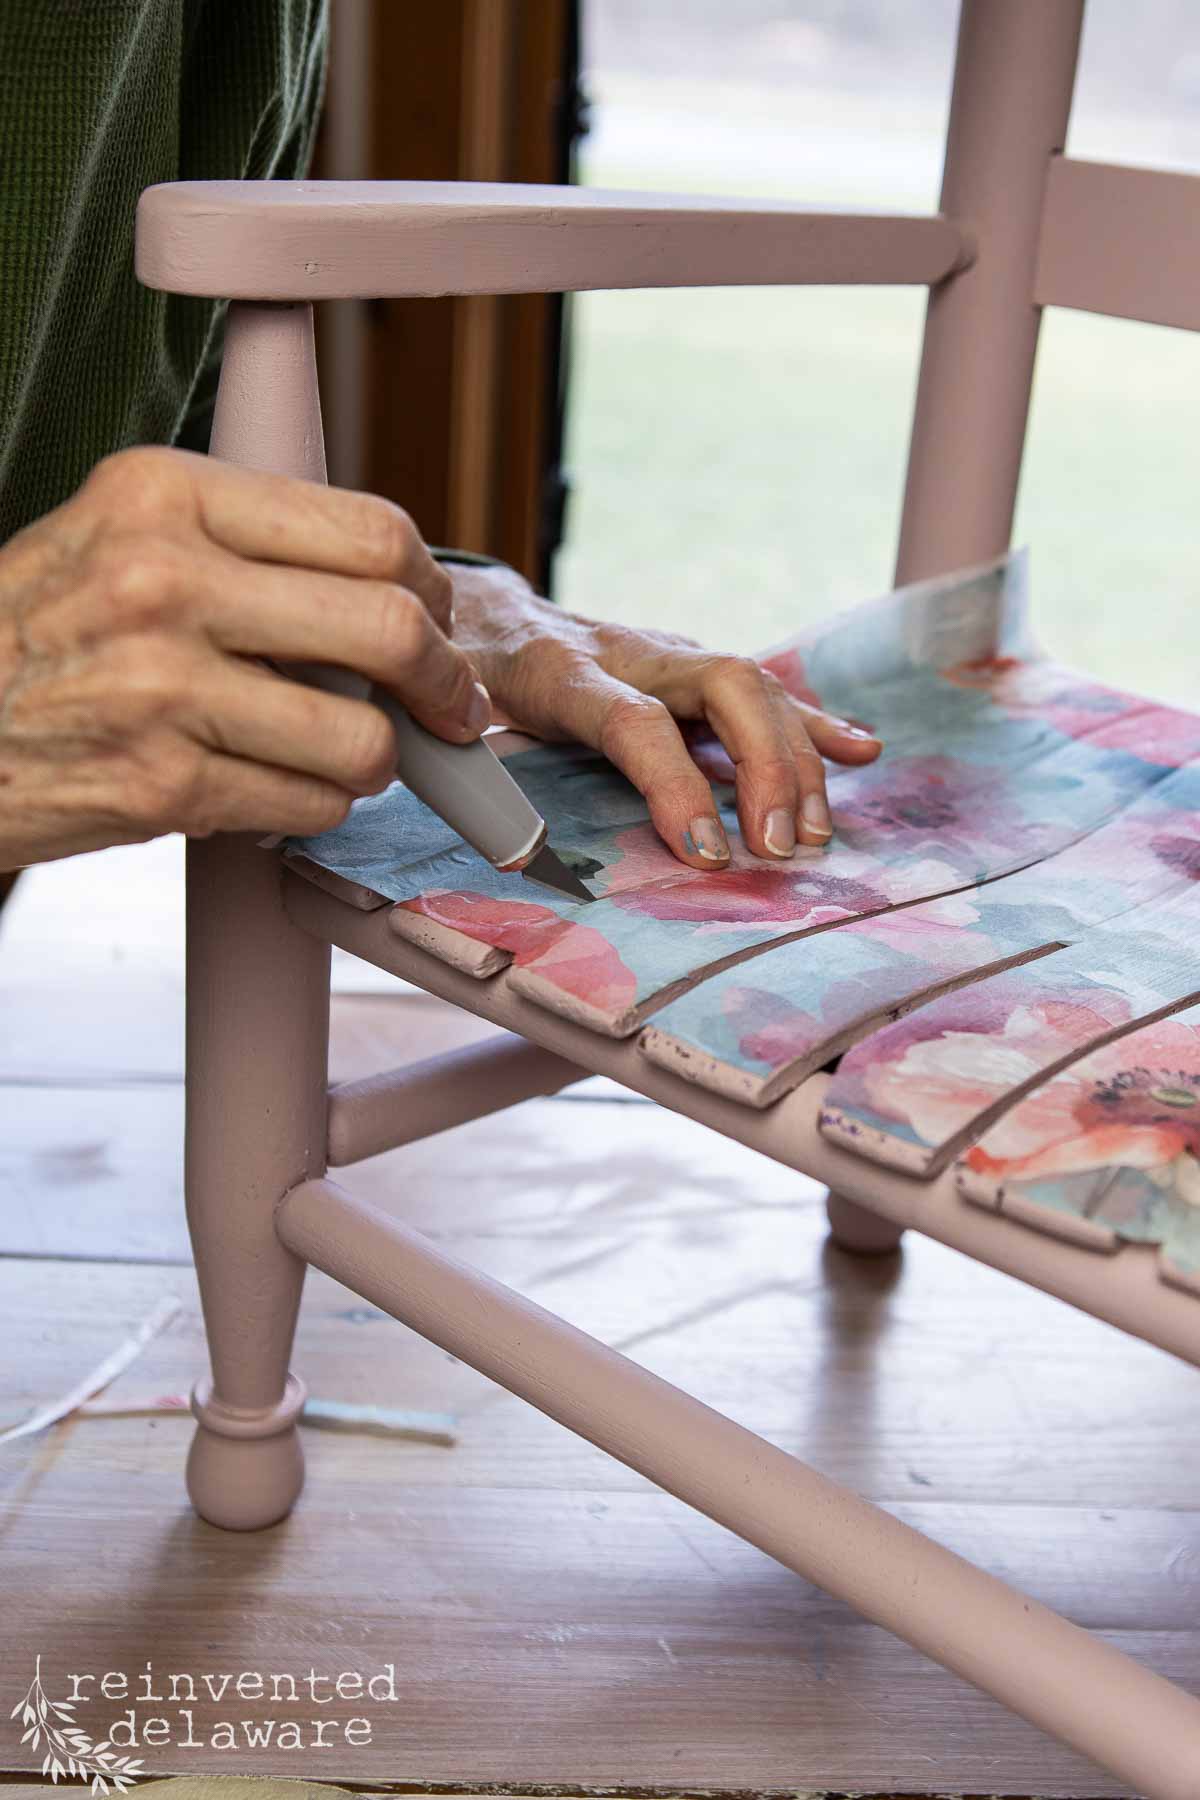
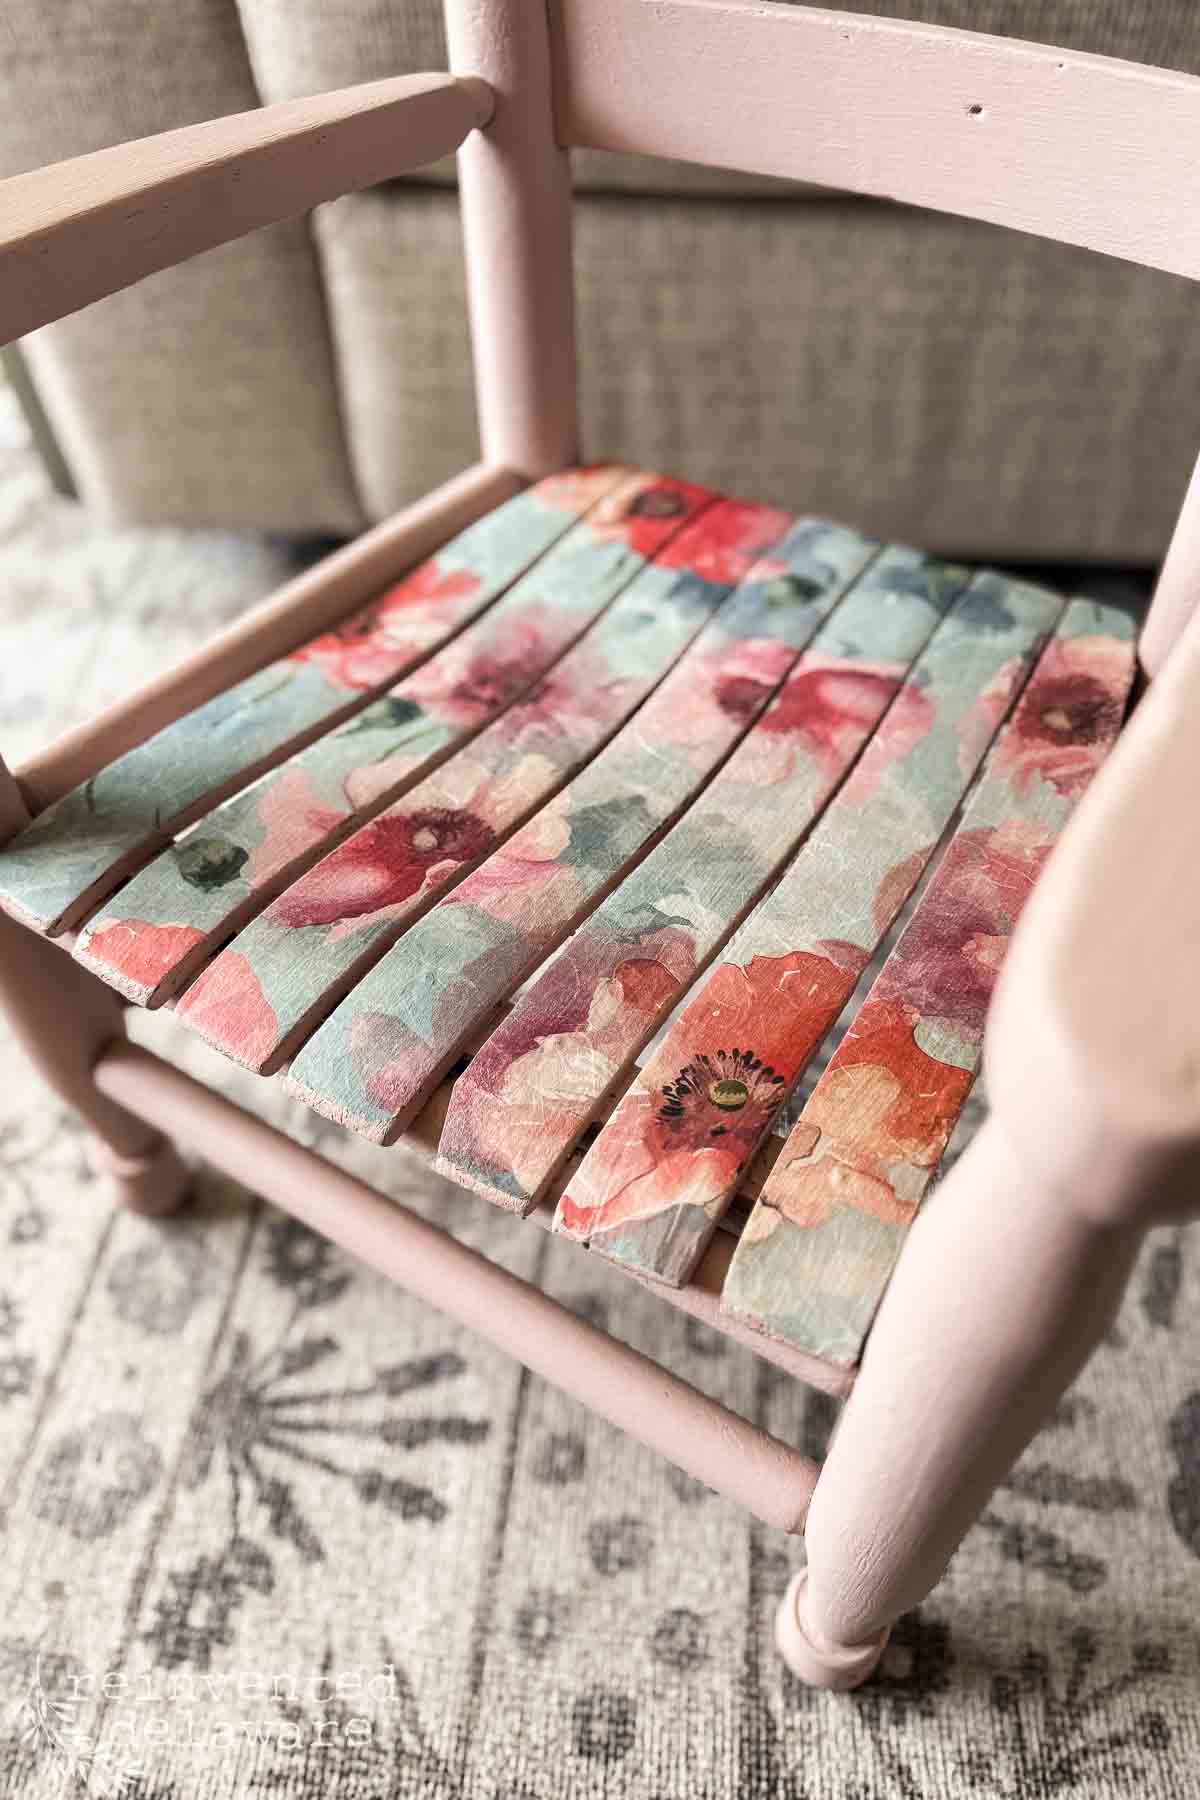
While the top coat was still wet, I carefully laid the decoupage paper down on the surface, smoothing it out as I went.
I allowed the decoupage paper to hang over the edges just a bit so that I knew I would cover the surfaces well. A small utility knife came in handy while working around the legs.

Tips for avoiding wrinkles and bubbles:
- Work in small sections: Apply the clear top coat (or Mod Podge) to a small area at a time. This prevents the adhesive from drying out before you can apply the paper.
- Smooth from the center out: When placing the decoupage paper, start smoothing from the center and work your way out towards the edges. This helps to push out any air bubbles.
- Use bunched up saran wrap to smooth out the paper. It won’t stick to the decoupage paper making it easy to smooth out the bubbles.
- Cut slits for curves: If you’re decoupaging a curved surface, make small slits in the paper to help it conform to the shape without wrinkling.
- Apply even pressure: Avoid pressing too hard, as this can tear the paper. Apply even, gentle pressure to smooth out the paper.
Read more about using decoupage paper on furniture by tapping the button below1
Finishing Touches for Your Upcycled Child’s Chair
The decoupage paper needs to be completely dry before cutting away the excess. This helps to prevent tearing. Using the utility knife, I carefully cut away the excess paper between the slats of this ladder-back child’s chair.
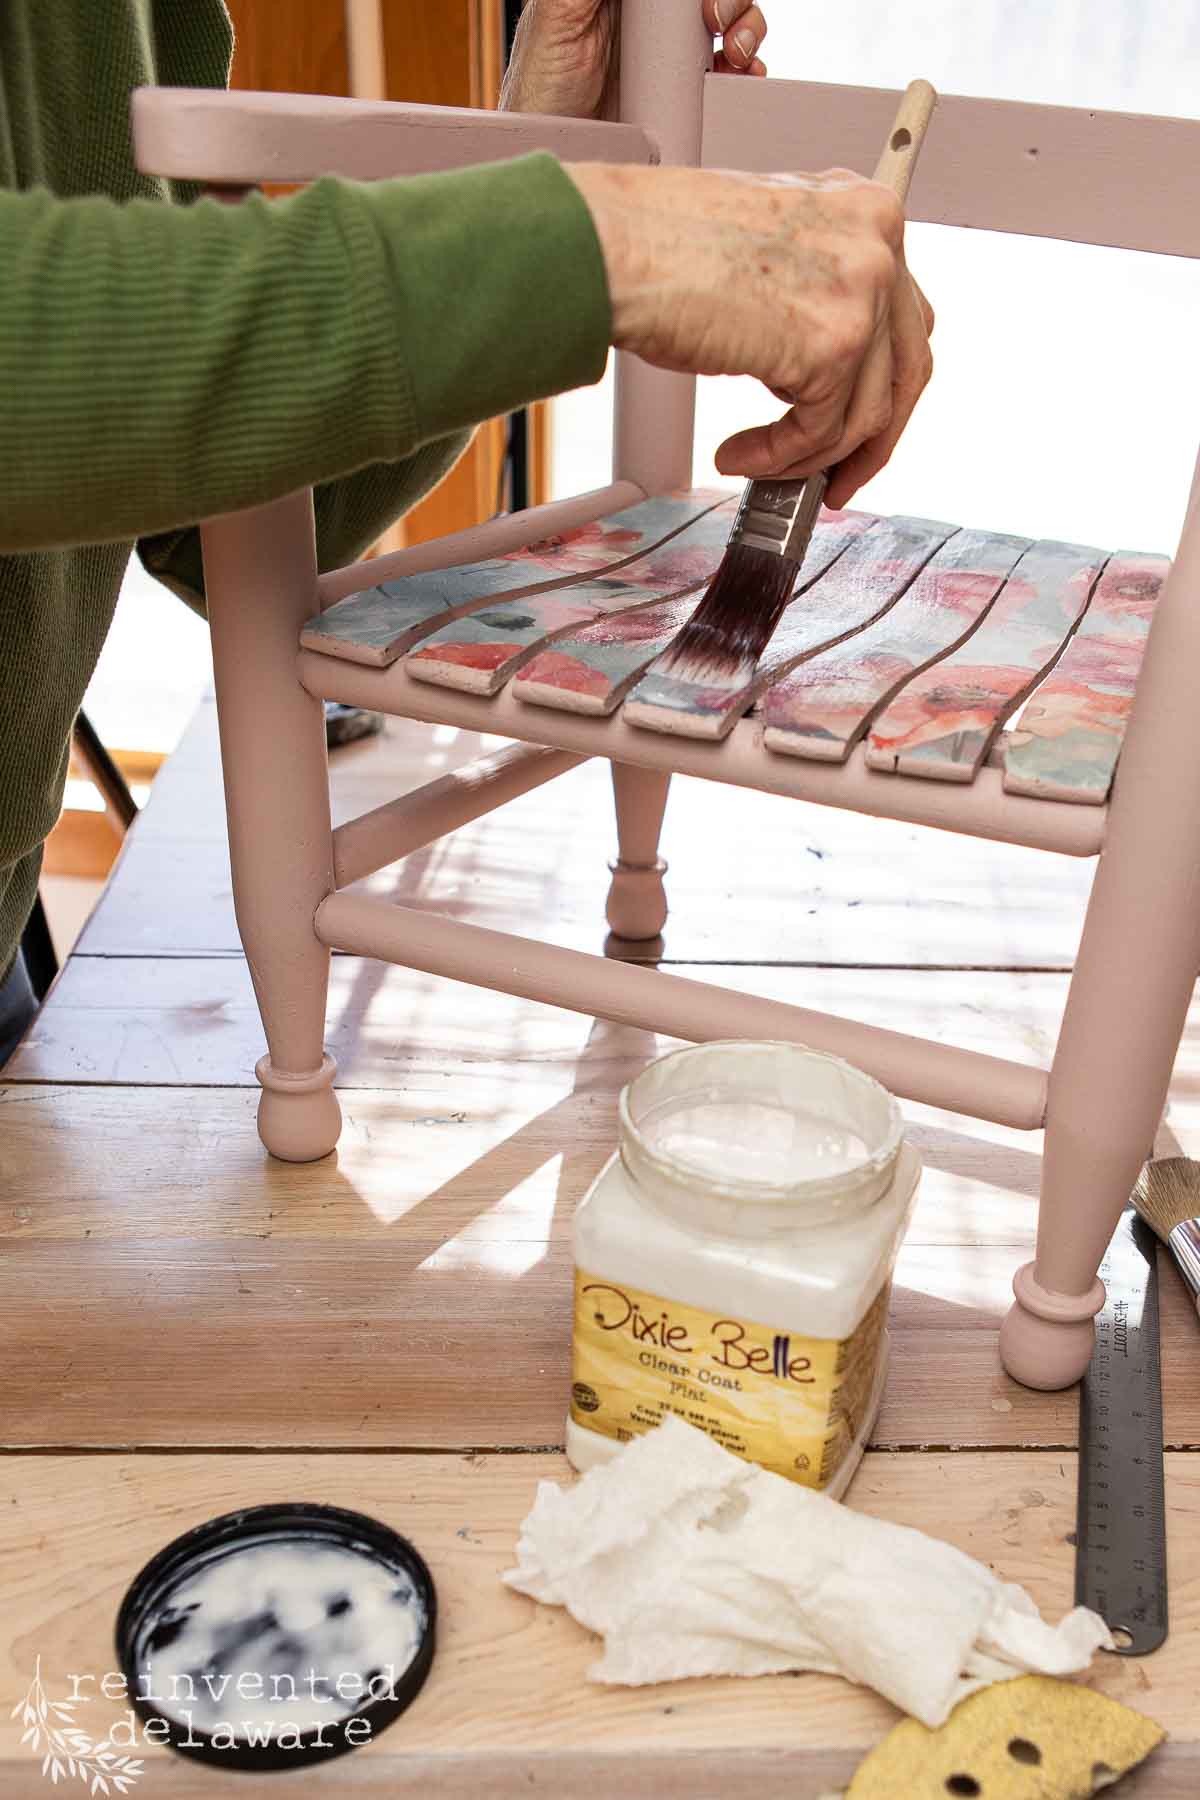
Once all of the excess decoupage paper was removed, I applied one coat of clear top coat over the seat area. The rest of the chair doesn’t need to be sealed since Silk Paint has a built-in sealer!
Here is another tip for you! If the paper tears while you are cutting away the excess, save it! You can reattach the torn section with the clear top coat! You can see more about adding decoupage paper to childrens toy furniture in my post about the cutest repurposed toy cabinet!
Design Inspiration: Upcycled Child’s Chair Ideas
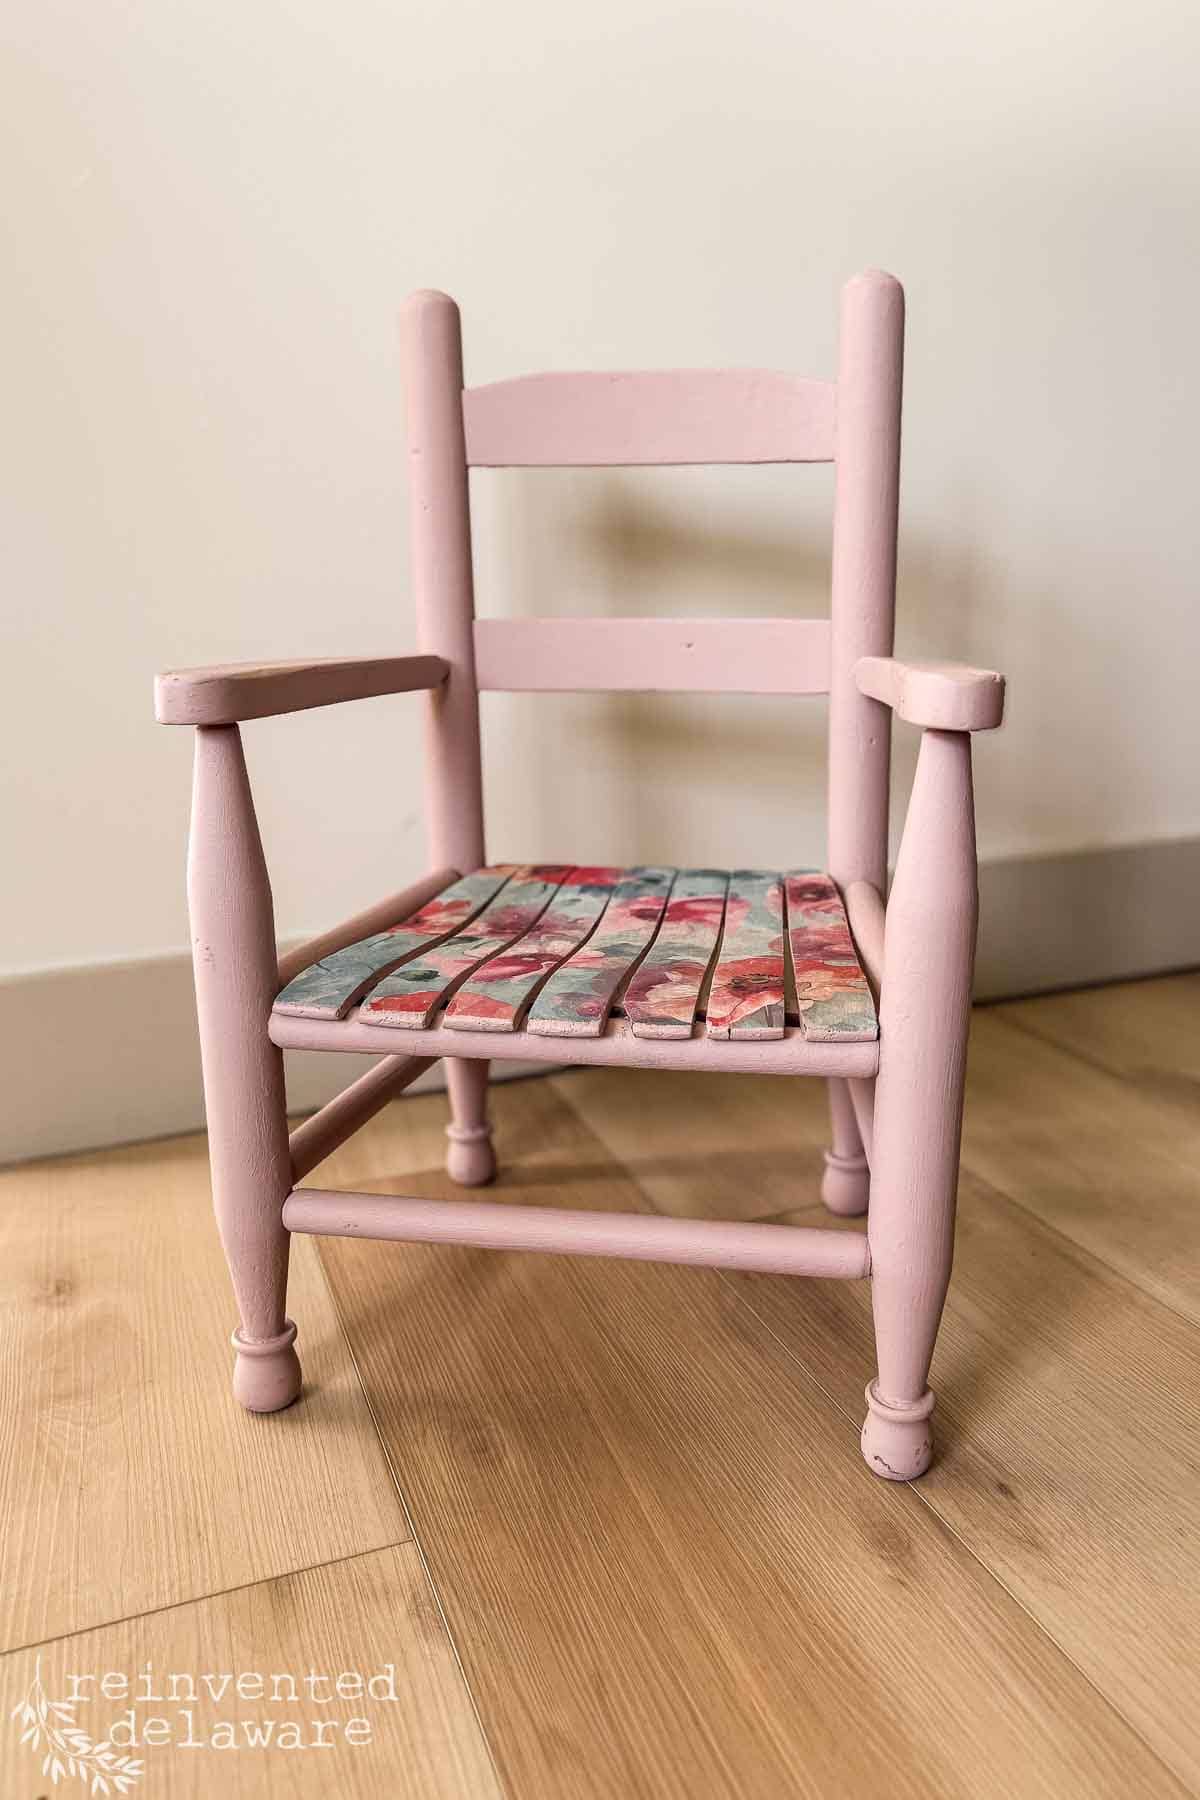
Isn’t this chair adorable? Our granddaughter is enjoying it! Her mom says she loves to sit in it while she watches Miss Rachel on TV!
A child’s chair like this would look adorable in a playroom or in a child’s room as well. This chair would also make a great gift for a new mom. She could use it in the nursery, and then when the baby is toddler age, she would have her own little chair!
You can choose decoupage paper to go with the look of the room, then choose the paint color to match. There are so many choices of paper. You can see more options to choose from below. You will also see link buttons below the samples! Simply tap to shop!

When you purchase decoupage paper from Dixie Belle, you can find coordinating paint colors easily. The decoupage paper is designed with Dixie Belle paint colors in mind.
YouTube video
BTW, if you would like to watch the video that includes this chair makeover project, tap below!
More Upcycled Furniture Ideas from Reinvented Delaware
Be sure to visit more posts here on the blog! You will find inspiration in the furniture makeovers category.
Also, I created a YouTube video that includes this upcycled child’s chair along with several other projects that I am sure you will enjoy!
Recreate and Decorate
Join the Facebook Group and Share Your Projects With Us!

Thanks for joining our journey!
Thanks so much for joining me for this post! Join my journey so you don’t miss any of the fun projects, tutorials, and inspiration that I share with you each week! You can follow me on Instagram, Facebook, and YouTube.


Cindy Rust
Cindy has been decorating her home with thrift store finds for 40 years. She is an avid thrift store shopper who loves to makeover the items she finds into vintage-inspired home decor and furniture. When she isn’t thrift shopping or painting a piece of furniture, you can find her making homemade butter, working in her garden, or painting with watercolors.
click below to purchase supplies!
Visit my Amazon Storefront!
Click the button below and head over to our online shop on Amazon!


Hi Cyndi,
Hi Cindy,
That chair is adorable, perfect for a little girl.
I have a question as to how you might choose between a milk paint and chalk paint. I’ve loved some of the pieces you have done in the past with milk paint. I have a very old china hutch that I feel screams for milk paint, but I’ve never done that large of a piece with milk paint.
Would you care to share any thoughts with us about choosing either paint?
Thanks, Jill
Jill, that is an excellent question! I just added it to my list of blog posts I should write. For now, I would say, choose the paint to will give you the finish you want. I love the chippy look on antique pieces especially. If I want less chippy finish, then I choose chalk paint. The two paints are soooo different! this chair in particular was better suited for chalk paint since it will be used alot by a sweet little girl. Hope this helps! I will get on that post asap!