
DIY Upcycled Beverage Cart Design Inspiration
This fun diy project will guide you to create a stylish upcycled beverage cart! These creative upcycling ideas will inspire you!
Ready to roll out some serious style? This fun DIY project will guide you step-by-step to create a unique and stylish diy upcycled beverage cart. Add a touch of to your home with this creative upcycing idea! Plus you will have a useful furniture piece to boot! Let’s get upcycling!
The following post may contain affiliate links. That means if you click and then buy something, I will make a small commission at no additional cost to you! Thank you for supporting my blog. full disclosure here.
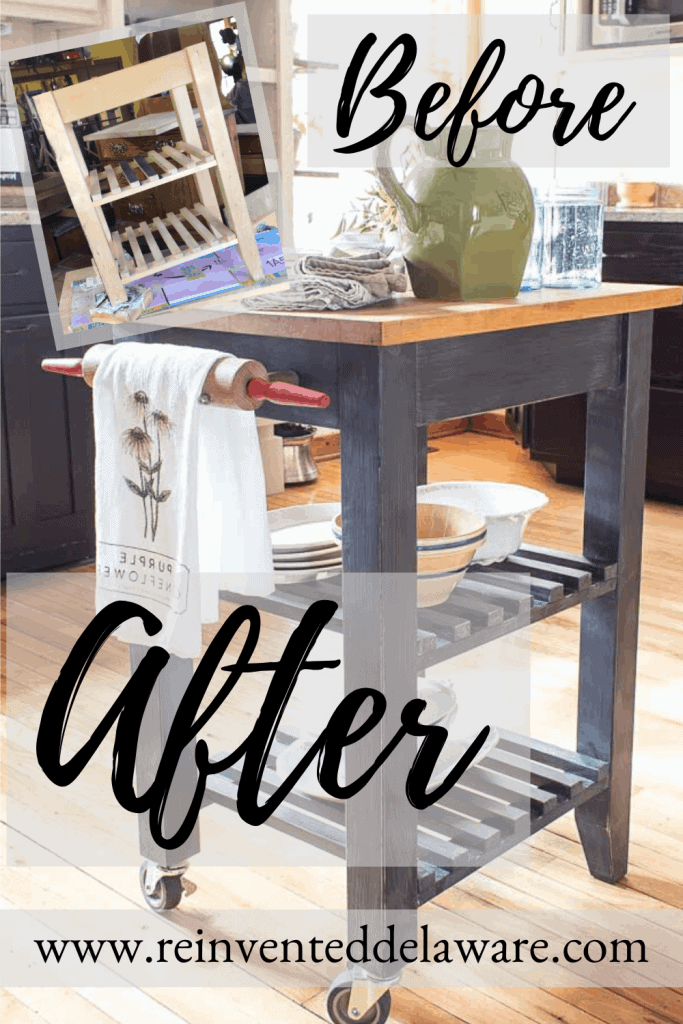
upcycled beverage cart
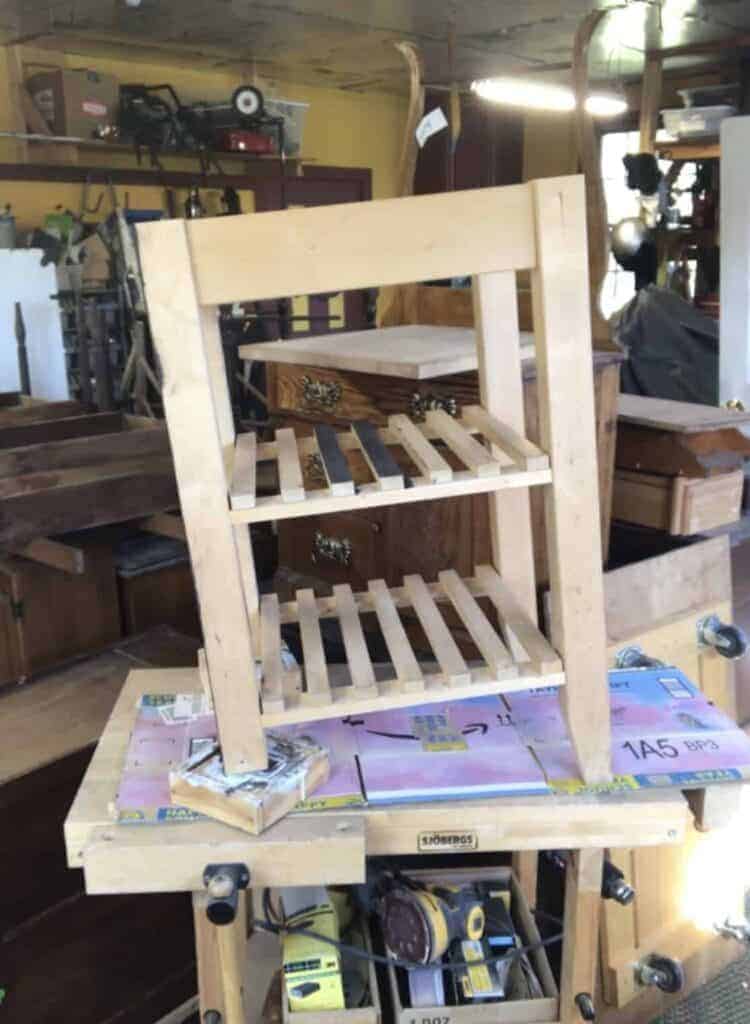
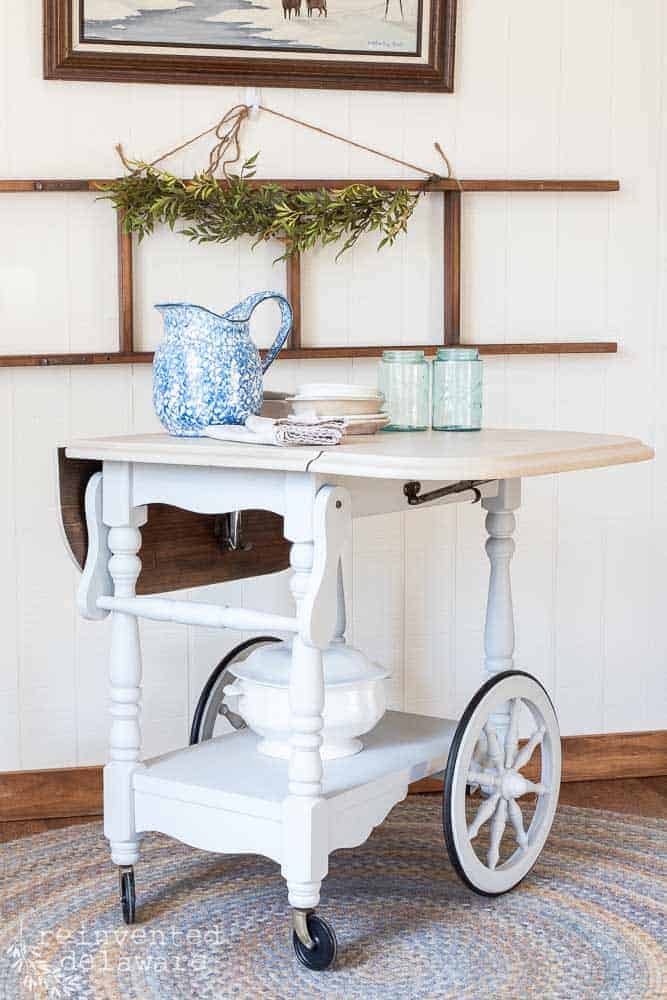
One of our customers stopped by to pick up a hand-built cabinet that she had ordered a few weeks ago and had a little peek into my workshop. Her eyes went directly to a small kitchen cart on wheels that was turned upside down and sitting on top of the huge pile of projects I have stored in the workshop.
She has an eye just like me! I can walk into a thrift store, an auction, or a yard sale and spot certain pieces that I know have potential.
This custom client is no different.
She immediately asked what my plans for this upcycled kitchen cart were and when I said I thought of painting the base of it in black, she said, “Sold!
upcycle an old cart: step by step guide
Let’s go over the steps I took to upcycle this thrift store cart on wheels.
choosing the right cart
You can find different styles of a bar cart while shopping at your local thrift store, garage sale or an auction. Look for a beverage cart that is sturdy and would be an easy upcycle piece without a lot of needed repairs. Don’t worry about stains since they can be cleaned.
Look for a cart that will suit the needs of your own diy bart cart. This upcycled bar cart will be used as a small kitchen island. It could also be used as a hot chocolate bar, a coffee bar or a cold beverage bar for the summer.
Here are some design and functionality aspects to consider:
- an area for linens, shakers or coffee cream & sugar bowls
- drawers or shelves to hold vintage glassware like coffe cups or wine glasses
- space for tall bottles, silverware and warm drink mixes
- a removable tray for serving (optional)
prepping the diy bar cart
The first step is to prep the bar cart for paint or stain. That means it needs a thorough cleaning. Do not skip this step! It will insure a better finished result if you remove the years of grime on a thrift store find!
I scrubbed this wooden cart using the garden hose and Simple Green. Once I scrubbed it completely, I rinsed it with the hose and allowed it to dry completely in the sunshine.
If you do not have a way to clean using this method, simply give it a good cleaning with warm soapy water and a microfiber cloth. Wipe the piece down with a clean cloth and clear water to remove the soap residue.
sanding and painting the wood
Hubby removed the top butcher block section and ran it through the planer. If you do not have a planer, you could also sand the top down to bare wood using an orbital sander.
He also removed the casters. They had a rubber section around the wheel and most of it had dry-rotted and fallen off. New locking casters were ordered right away!
Start off by sanding using a 100 grit sanding pad on an orbital sander. Gradually sand back down to a 220 grit sandpaper. Wipe away the dust with a dry microfiber. A shop vac is handy for this step too!
thanks for being here!
I hope you are enjoying this project! Let me know if you have any questions. Or leave me a comment to tell me about your project and ideas!
thanks, Cindy 😀

The base of our vintage cart will be painted so all I needed to do was give it a good scuff sanding using a 180 grit sanding block. Then I wiped away the dust.
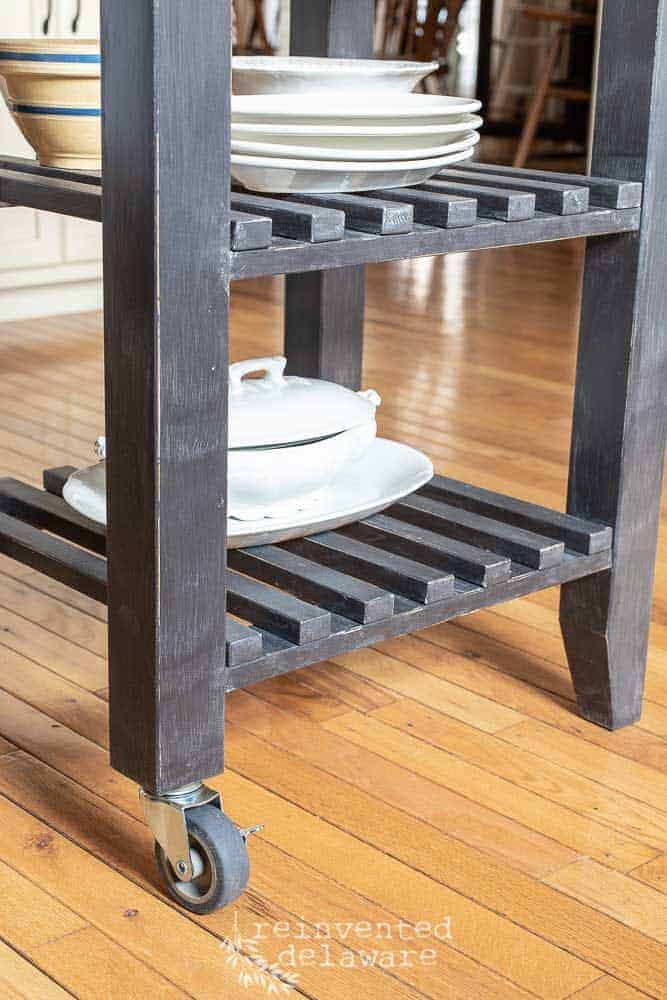
Next, I painted the base of the cart using milk paint. I chose a beautiful black called Typewriter. The wood needed two full coats of paint.
Once the paint was completely dry, I sealed the milk paint with two coats of top coat in a flat finish. This will seal the paint and make it stain and water resistant. I do not recommend leaving this cart outdoors in the weather.
add unique vintage kitchen accessories
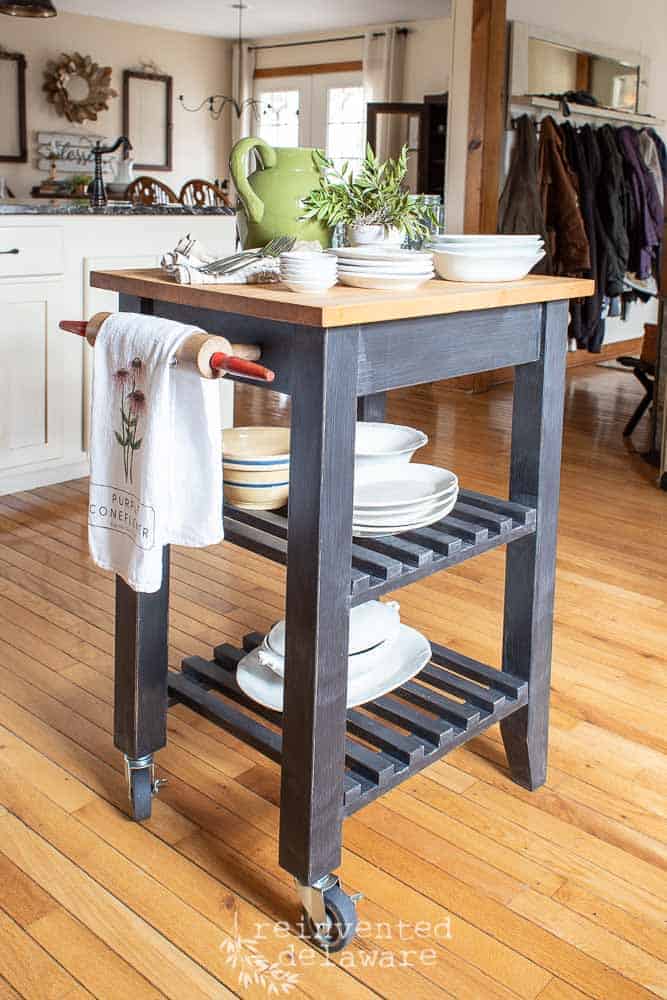
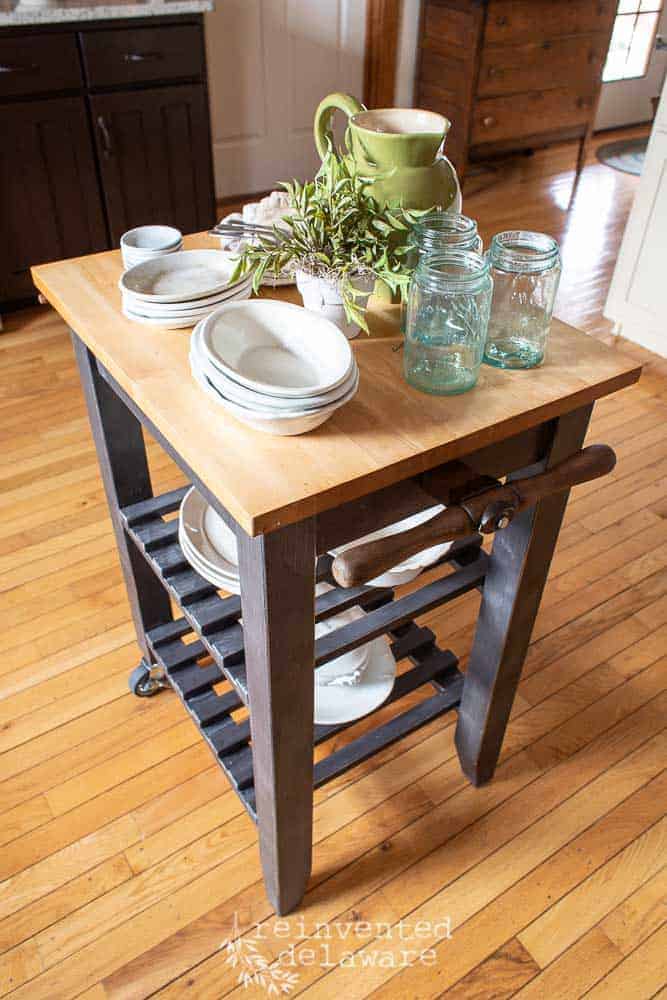
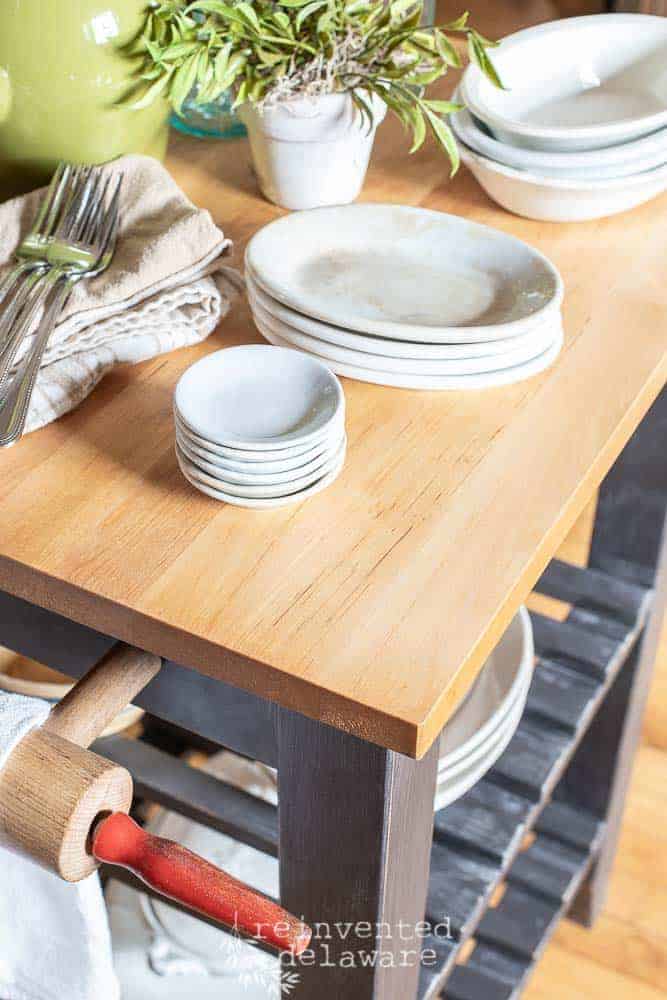
Before we added the finishing touches to this diy wood bar cart, hubby reattached the wooden butcher block top. It simply screws in from the underside. He applied a food safe butcher block conditioner made by Howards to the top so it can be used without worry of chemicals!
Next we attached heavy duty casters to replace the plastic casters that came with the cart originally. When you replace casters on the bar cart you are working on, be sure that they are the correct size so that the cart will be level!
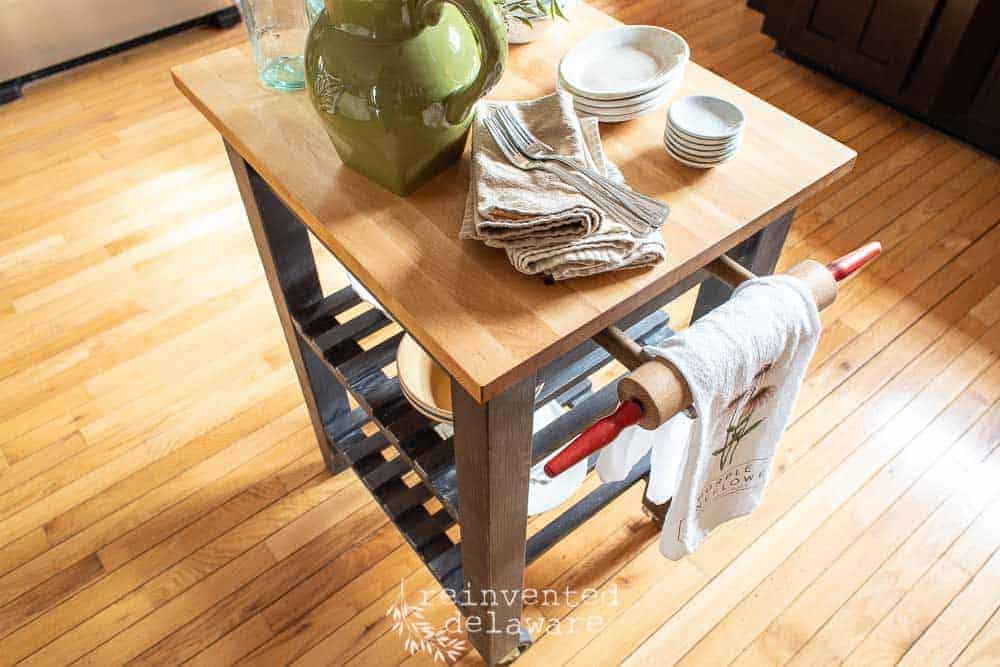
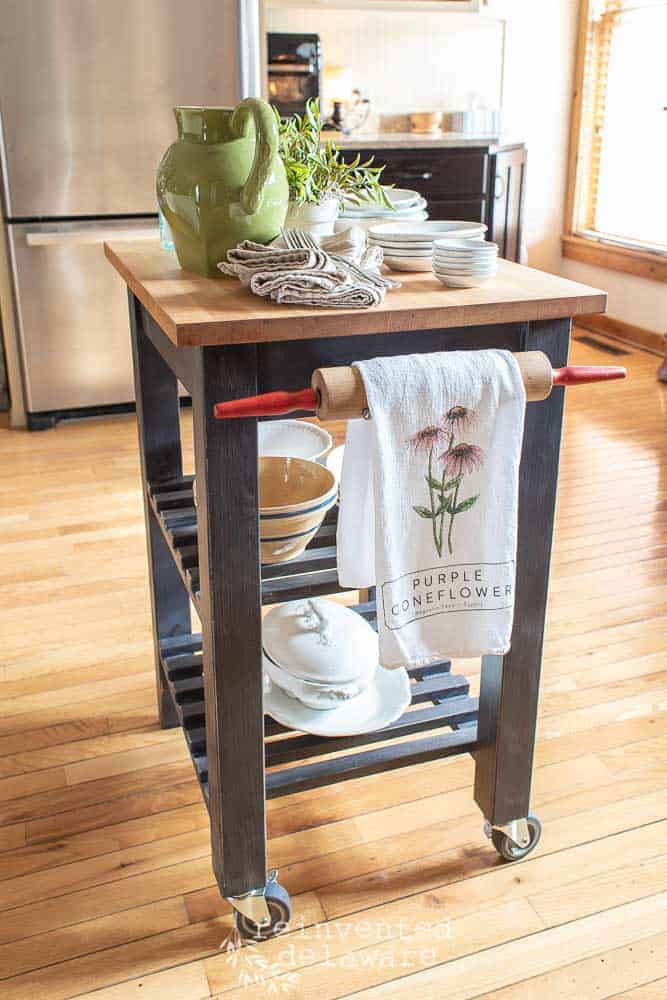
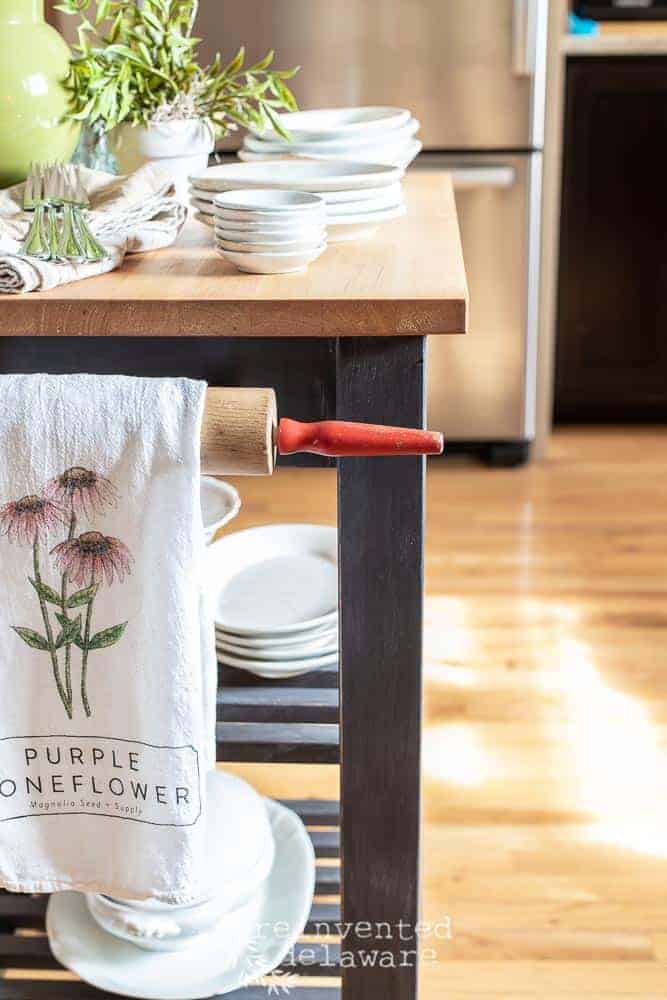
We also added a hanging towel holder by using a vintage rolling pin! A dowel rod acts as the bracket to hold the rolling pin. You can see in the image that a bolt runs through the rolling pin, into the dowel rod and through to the interior of the cart where it is secured with a heavy duty bolt.
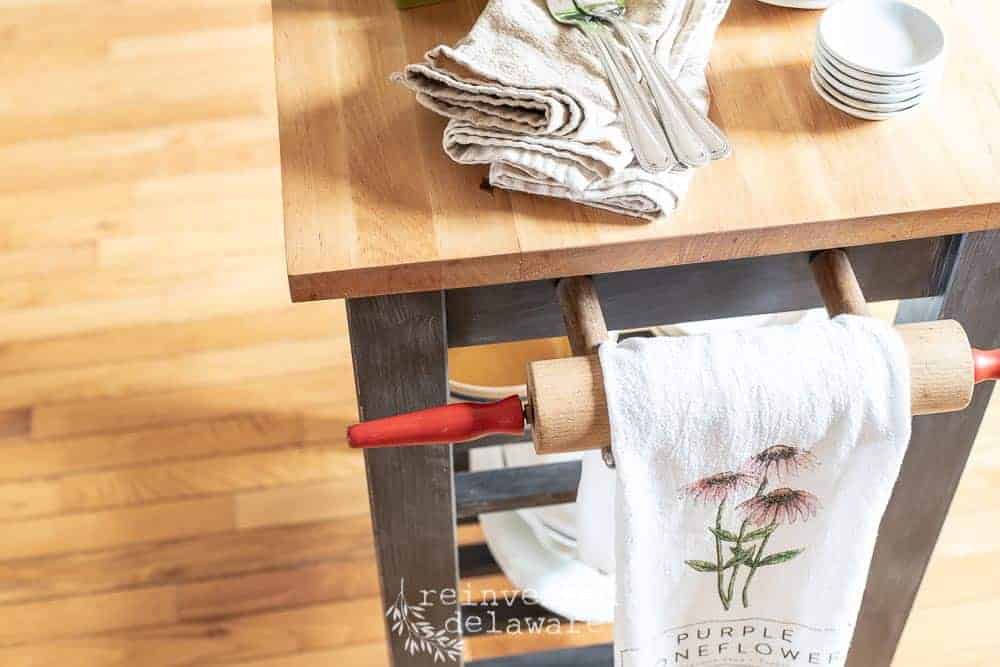
Using the cut off dowel rods is a great trick when attaching items that don’t have their own hardware!
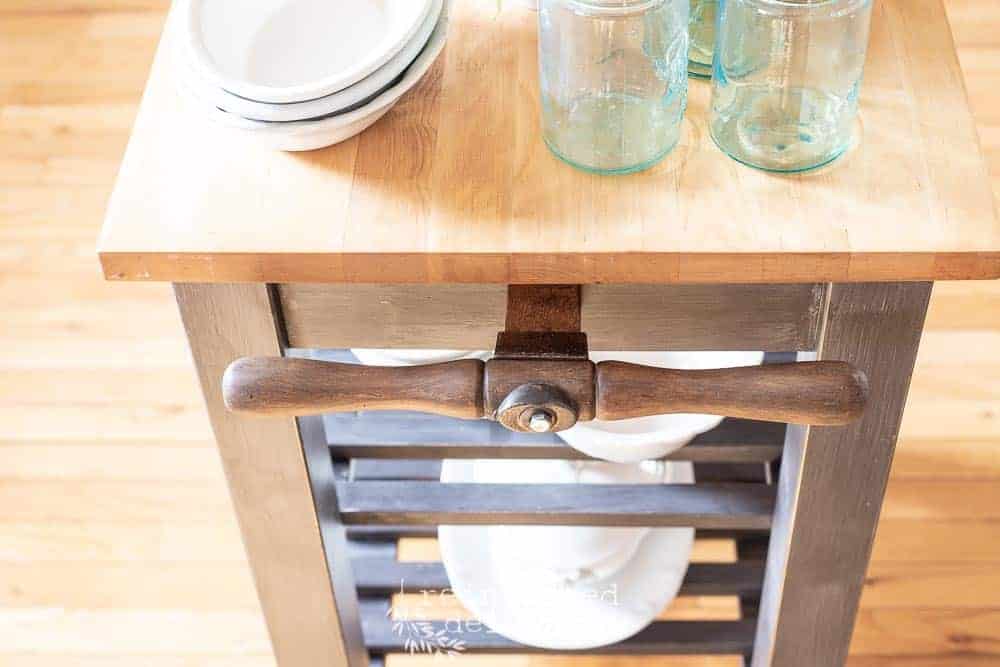
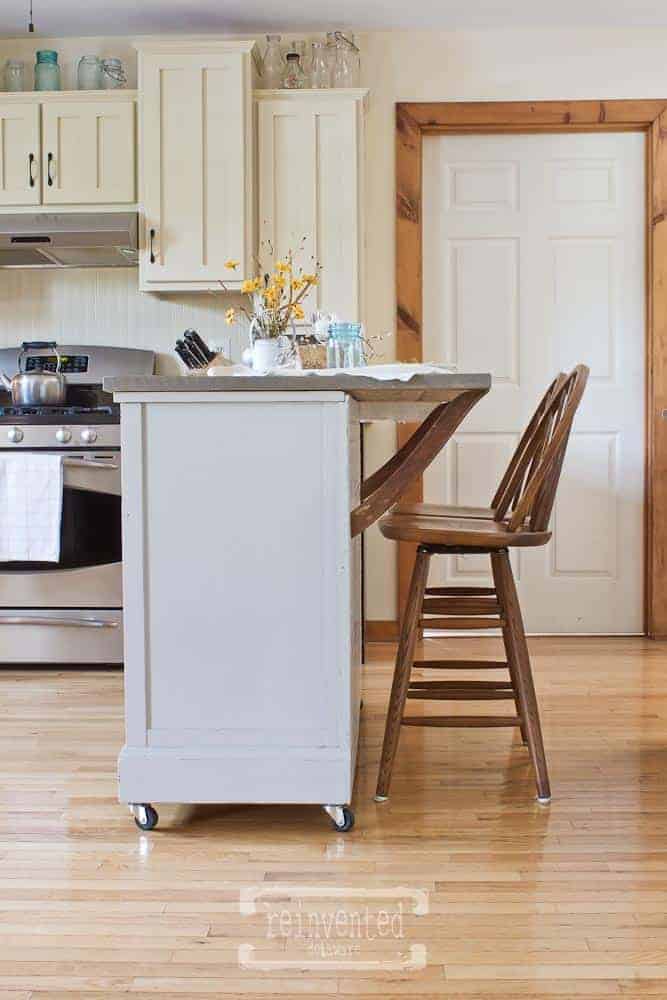
The next unique vintage piece we added is a handle from an old garden tool. Using the same dowel rod trick, we attached this handle. It’s the perfect solution for moving this cart around indoors or outdoors! Plus we love the added touch of upcycled vintage pieces!
YouTube video
Here is a quick video showing and explaining the process I took to restyle the base of this kitchen island.
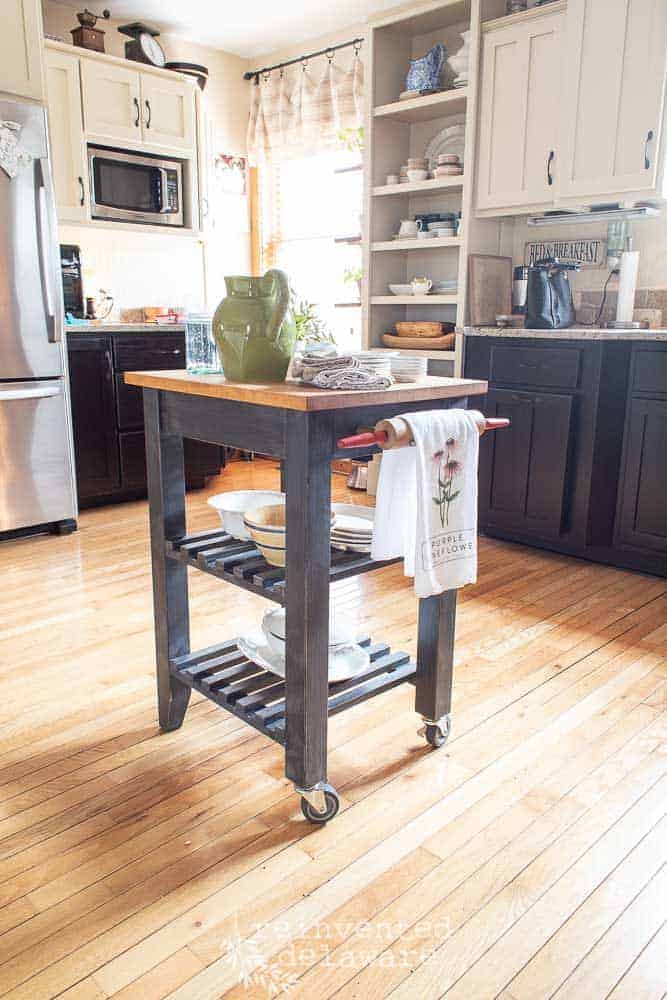
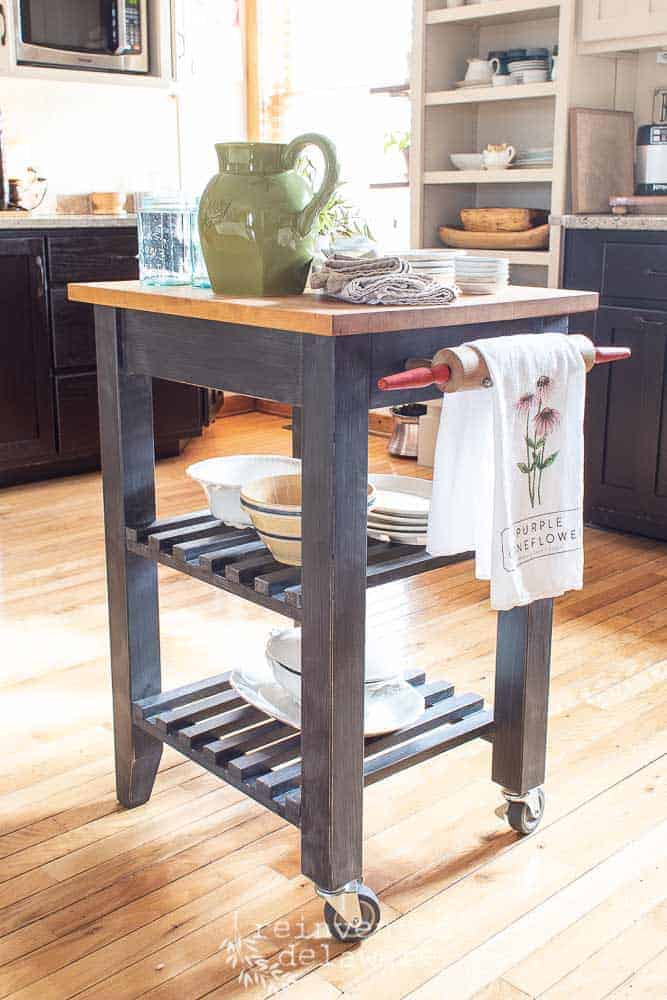
vintage bar cart
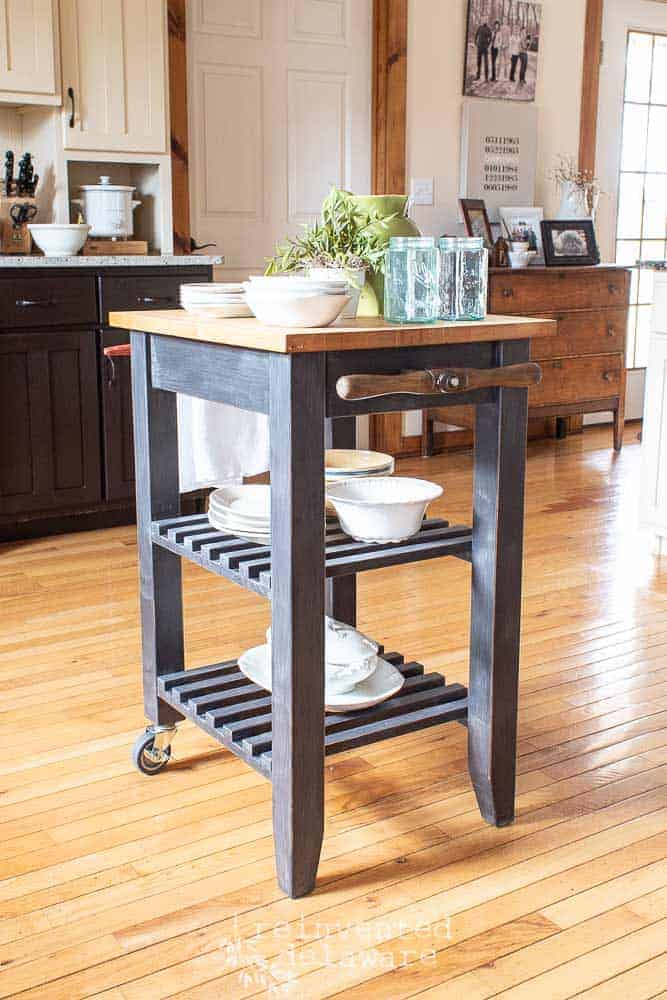
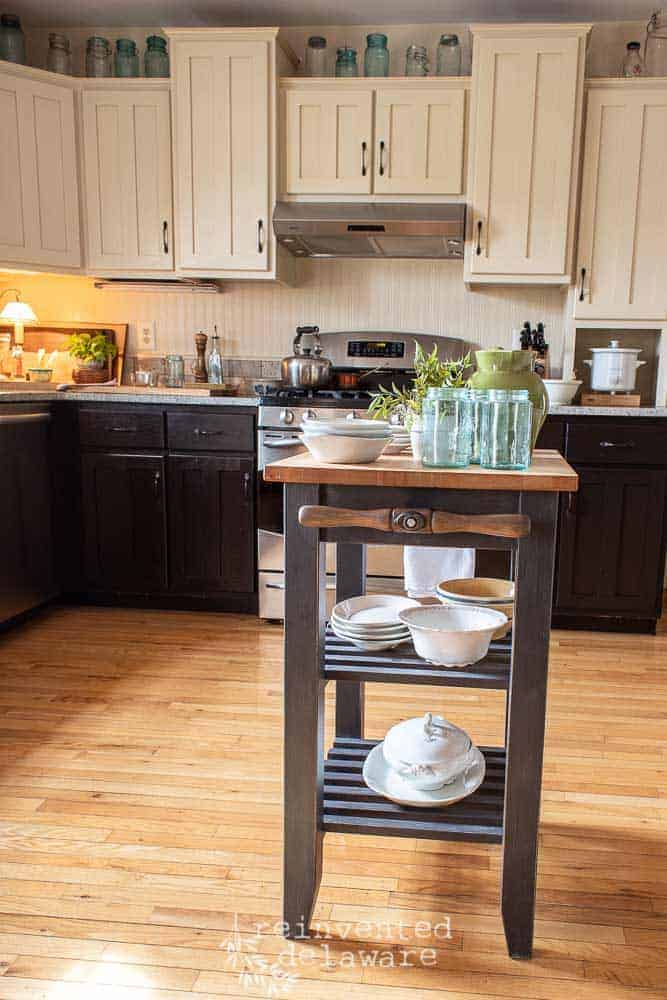
And here is the completed project! Isn’t it next level? Miss Mustard Seed Milk Paint in Typewriter sealed with General Finishes High Performance in Flat gives the finish a charcoal-ish gray color that will be durable because of the polyurethane topcoat. I love the visual texture it created!
This cart will get a lot of use! It’s not only to serve alcohol! Here are some ways you could use this cart:
- Use the industrial bar cart on your back porch next to your grill for food prep.
- Serve chilled drinks using the top as the spot to hold a cold beverage dispenser with a spigot.
- The cart could be used as a mobile coffee or hot chocolate station for your guests near an outdoor fireplace or fire pit.
- Serve wine or cocktails storing all the supplies on the cart.
- Use this as an outdoor bar cart to serve desserts to your guests!
more inspiring posts
Here are some more posts that I know you will enjoy! Just click the image to see the full post 🙂

more bar cart makeover closeups!
supplies
Here are some items you might be interested in after seeing this adorable wooden kitchen cart.

Recreate and Decorate
Join the Facebook Group and Share Your Projects With Us!

thanks for joining the journey!
Thanks so much for joining me for this post! Join my journey so you don’t miss any of the fun projects, tutorials, and inspiration that I share with you each week! You can follow me on Instagram, Facebook, and YouTube.


Cindy Rust
Cindy has been decorating her home with thrift store finds for 40 years. She is an avid thrift store shopper who loves to makeover the items she finds into vintage-inspired home decor and furniture. When she isn’t thrift shopping or painting a piece of furniture, you can find her making homemade butter, working in her garden, or painting with watercolors.
I LOVE everything about that little island! The style and size would be perfect for a small kitchen….like mine. I’m inspired!
Thanks Karen!! Check out your local thrift stores and maybe you will find one similar! Let me know if you do find one – I would love to see it!
Absolutely love how this turned out! The black base, the rolling pin, the storage and a butcher block…what more could one ask for something useful in a kitchen!! And it rolls…perfect!! By the way, I think the handle to move it might have been off an old push mower from back in the day? Maybe? Anyway, whatever it was, it’s a perfect addition to move it around. Great project!!
Thanks so much for your kind words! That kitchen island has been one of my fave upcycled projects to date! As for the handle, you just might be in to something!! I remember those old lawn mowers and I remember handles just like the one on the island on those mowers! Thanks so much for stopping by!
Such a great remake. I love the rolling pin as a towel rack. How clever. Pinned!
Thanks for pinning Janet! It was such a fun project to work on 😊
Love how you styled this Cindy! Thanks for sharing at Vintage Charm!
I love this project so much, Cindy! Especially that genius rolling pin idea; I’m totally stealing that idea for my kitchen at some point!
I’m so glad you like that idea!! You are free to steal from my ideas anytime at all!! 🙂
Cindy,
This is so clever. I love the rolling pin and garden handle you added. I’m sharing on Sunday’s Dirt Road Adventures. Love it.
Omgoodness, Rachel thanks so much for sharing this project!
I love the upcycle, especially the paper towel holder!
Isn’t that a fun towel holder? So glad you enjoyed the project😊
Cindy, this island turned out over the top amazing. The color, the butcher block top to the fun details on each side to hang towels. Great project and so glad you found a home for it. Your work is beautiful.
Yes, that little kitchen cart found a home before I ever started working on it! Our client is thrilled with it! Thanks, my friend!🥰