
Vintage Buffet Kitchen Island
Have you ever run across an awesome piece of furniture
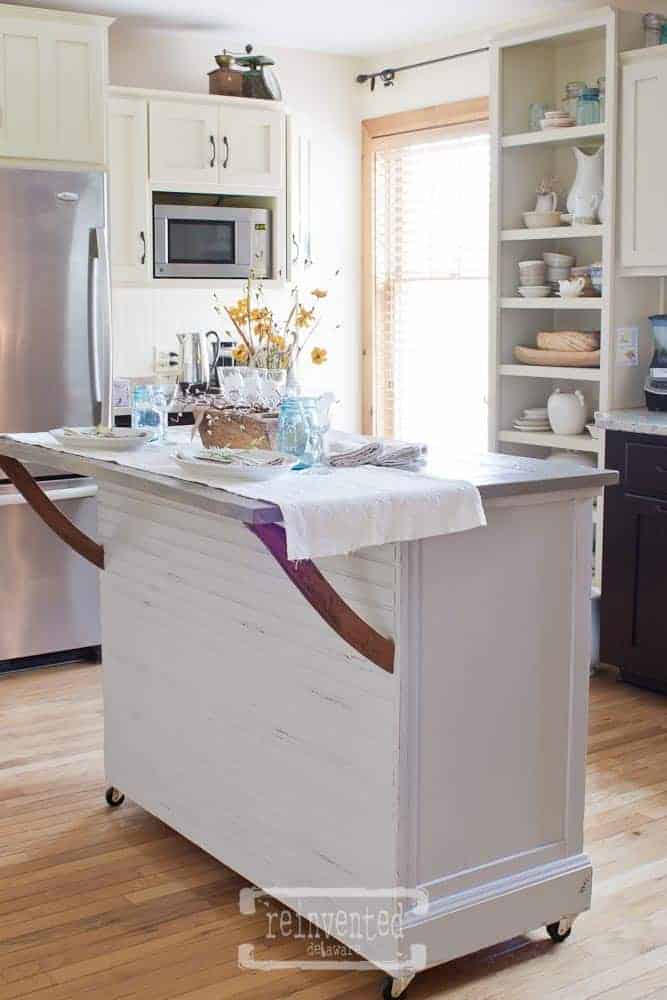
that you would love to own but is not practical in your home? Today, I want to share with you how to take a vintage buffet and convert it into a useful kitchen island with a bar top for your home!
Let’s get started!

Some of the furniture pieces from years gone by
are just not practical in today’s style of home decor. Here at Reinvented Delaware we love to dream up new ways to use these gorgeous vintage furniture pieces in our homes of today.
This buffet is the perfect example. Most of us no longer have or want a formal dining space in our homes. Many new homes have the open concept living areas instead of separate kitchen, dining and living areas. And with the popularity of DIY programs like Fixer Upper, many homeowners have converted their living areas to the open concept.
Our own home underwent a transformation several years ago. Although I do not show the process of the transformation, it is still fun to see! Check it out!
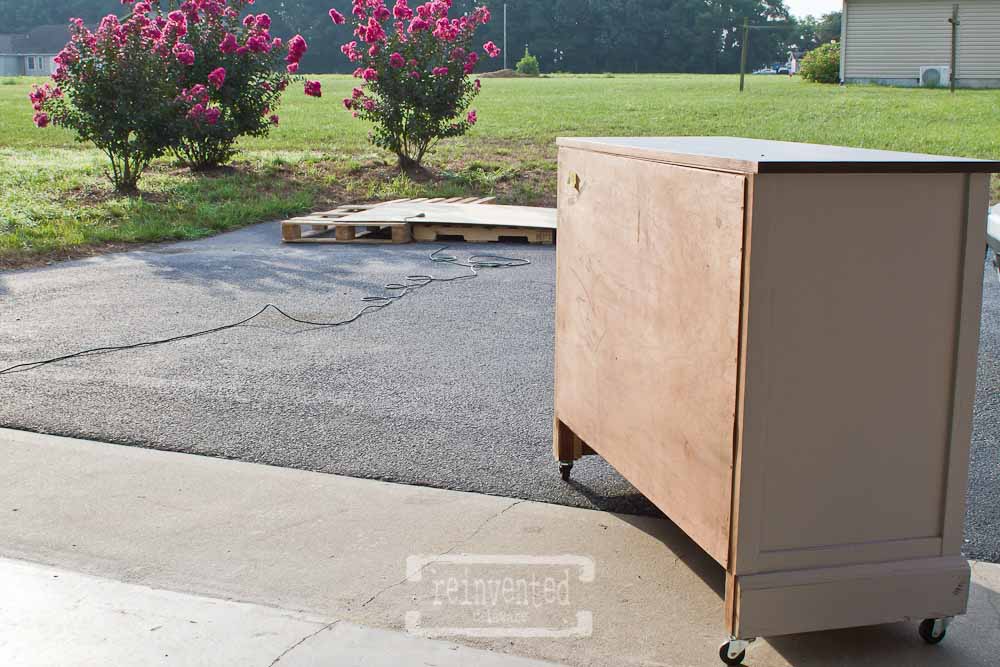
We found this buffet at a yard sale.
They were also referred to as credenzas and sideboards and they were used to store dishes and flatware. Kitchens back then didn’t have the cabinetry like we do now so they needed places to store their kitchenwares. We attached casters to the bottom so that it would be easier to move around while I worked on it.
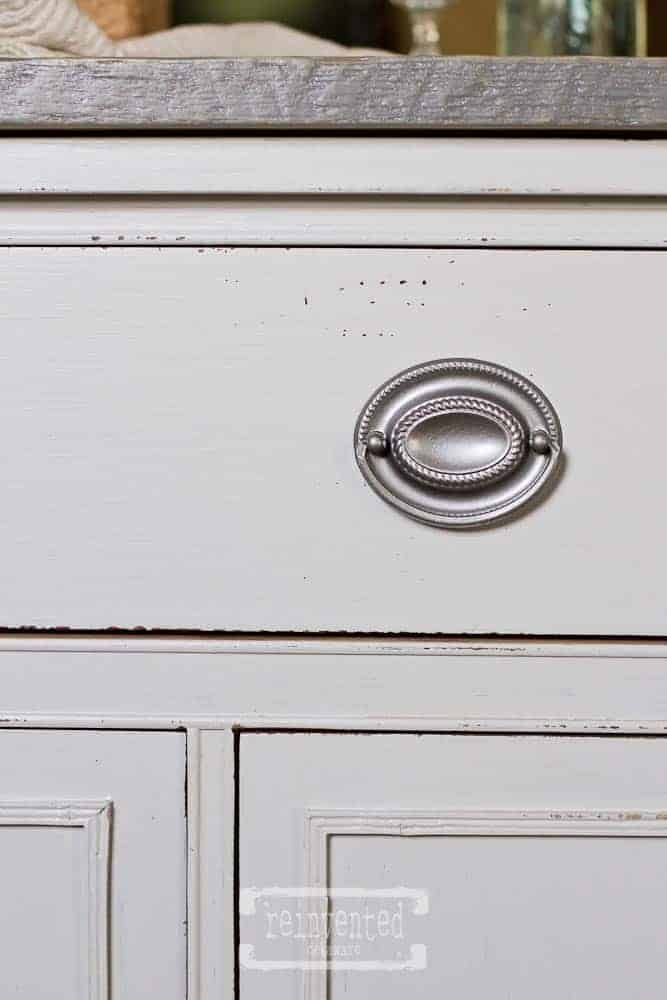
This one in particular has my favorite style of drawer pulls – Hepplewhite, named after a cabinetmaker in the mid 1700’s.
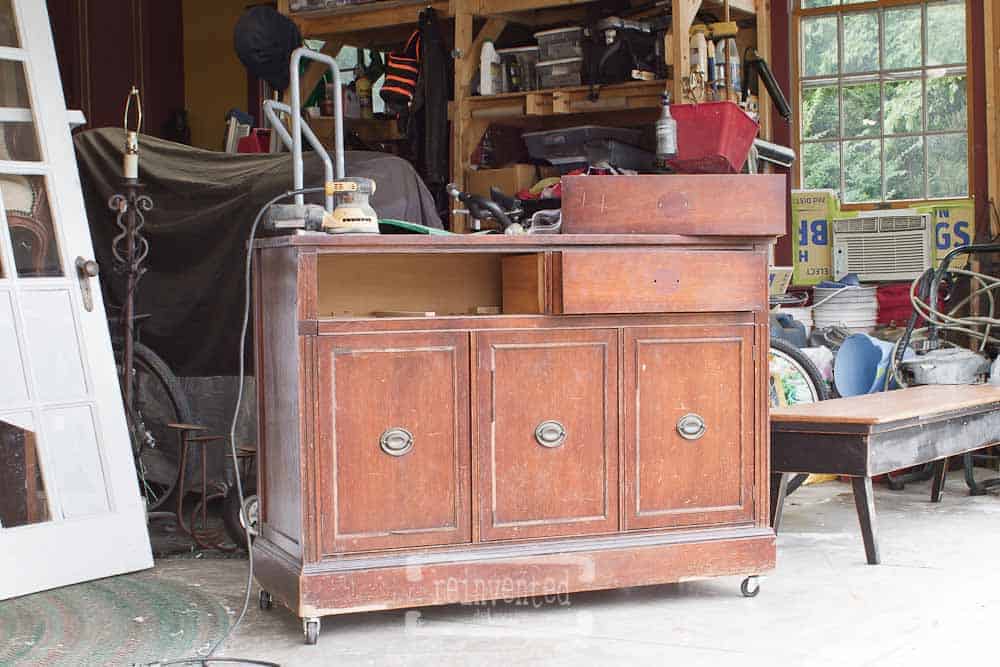
A good sanding was in order for this piece.
I like to run the sander over each piece that I am working on so that I can give the furniture piece a good once over. It is a great way to see if any repairs need to happen. I was really lucky with this piece – there was only a small spot of veneer missing on the lower left front. I glued down the loose ends but did not repair the whole area. When it is distressed, the differences in texture will really show up :). We also had to replace some of the trim pieces on the front of each cabinet door.
At first, the plan was to use this piece as a store counter. A local shop owner needed a place to check out her customers and asked if I would keep my eye out for a furniture piece that would suit her needs. She ended up having a store counter custom built to fit a specific area in her shop. So we had to put our thinking caps on for this buffet!
My hubby thought of making it a kitchen island!
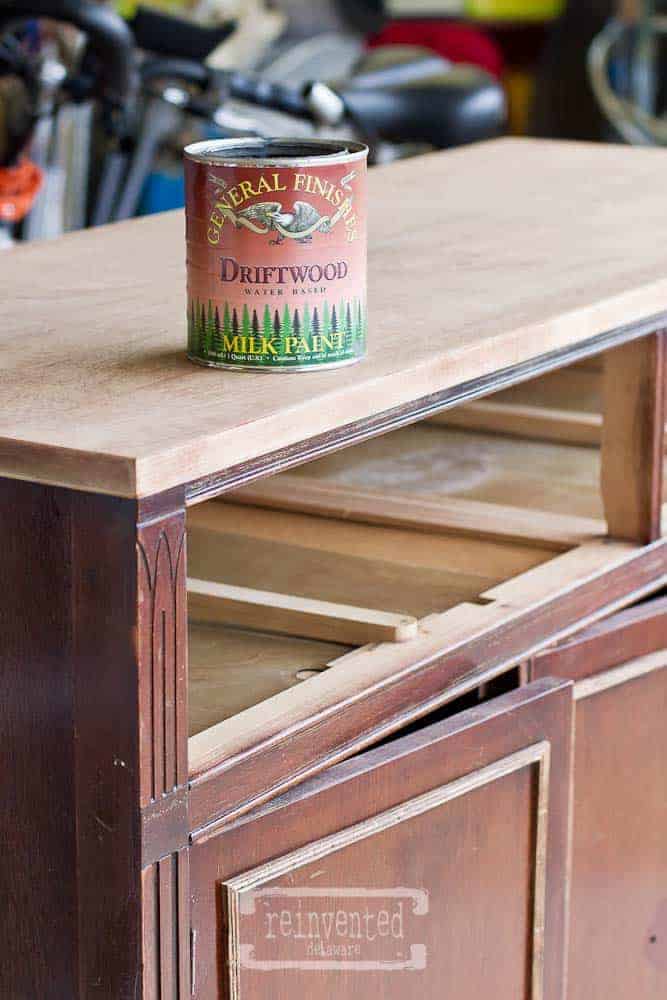
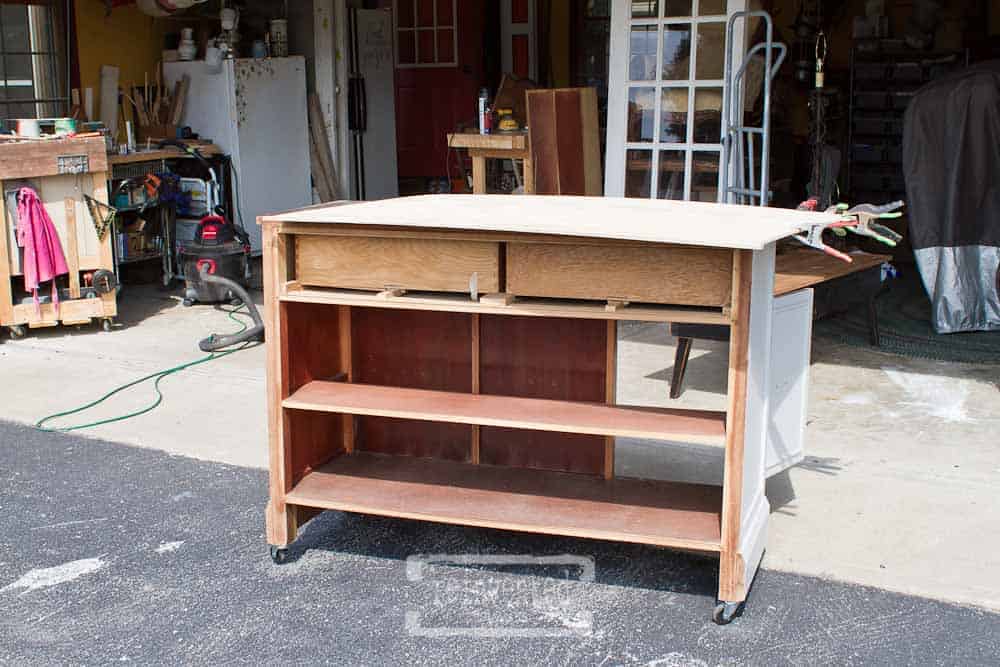
I fell in love with that idea! I had already stripped off the existing finish and sanded down the top of the buffet but we knew that would not be a suitable top for a kitchen island that would get lots of use. At least I had some time to think and plan while I sanded ;).
I will post about taking the cabinet top down to bare wood in a future post but for now let’s keep moving!
While hubby worked on his idea for the top of the buffet/kitchen island,
I continued to work on the rest of the cabinet. I decided to paint it in General Finishes Milk Paint in Driftwood. It is a dark gray tone that would cover the original dark stain of the buffet and reduce the orange tones in the wood.
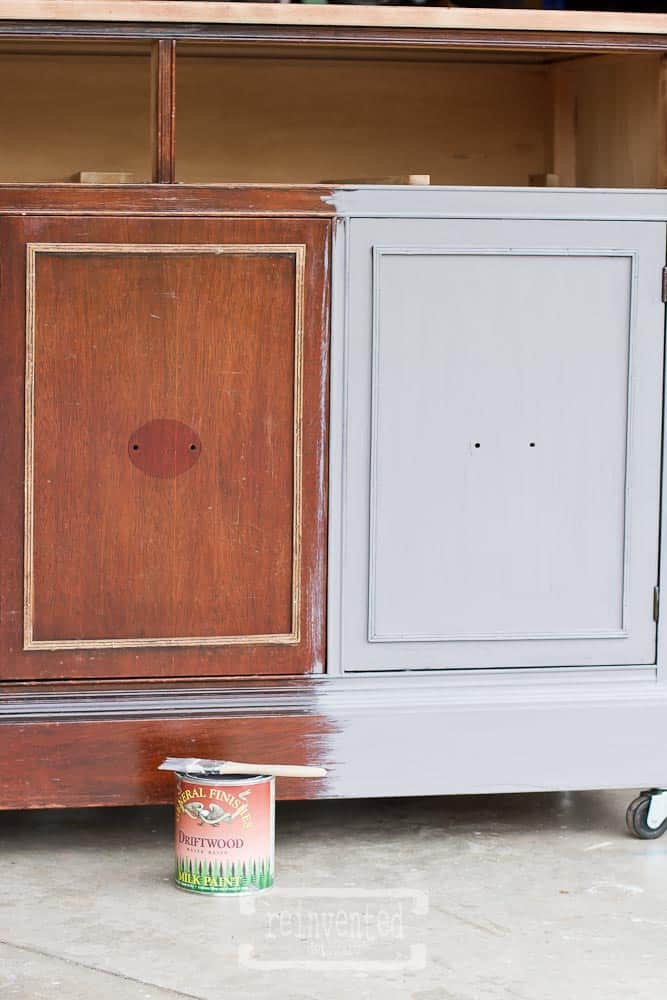
The milk paint covered the buffet in just one coat
but once I painted the whole piece, it just seemed to dark. At this point of the project, I knew what the top would look like and realized the dark gray would not compliment the top that hubby was working on.
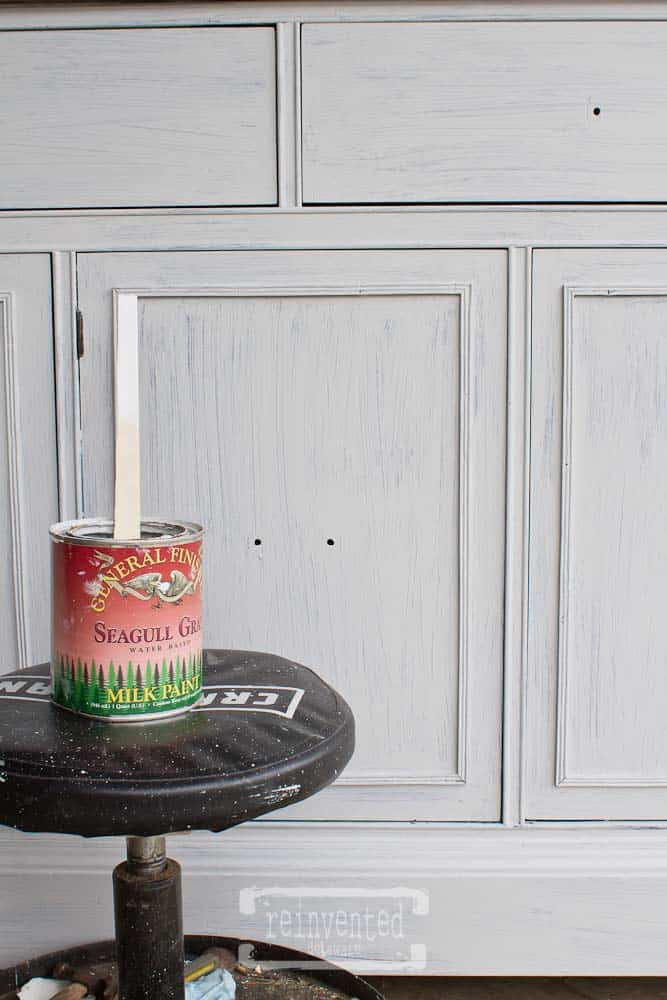
Back to my stash of paint and I found General Finishes Milk Paint in Seagull Gray, a much lighter shade of a gray that would compliment the hand built top for the kitchen island. Two coats covered it perfectly. Here is the first coat!
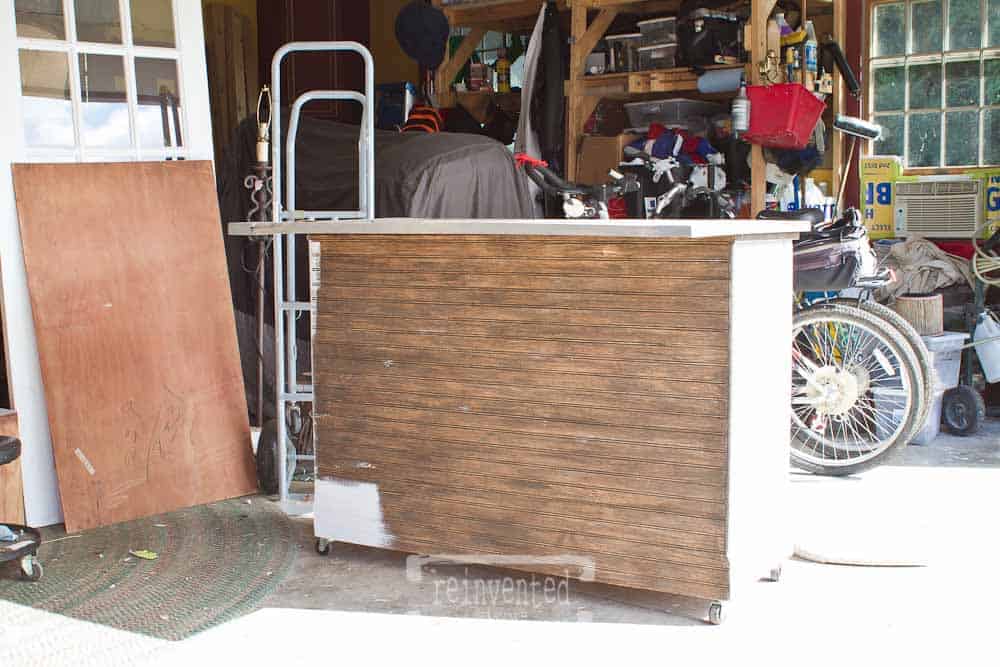
The back of this buffet
would not typically have been seen when using the piece of furniture. The back of it would have been up against a wall. But since this is going to be a kitchen island, all the sides had to be pretty to look at. Also, the back side of the buffet is the side that the top will overhang for seating.
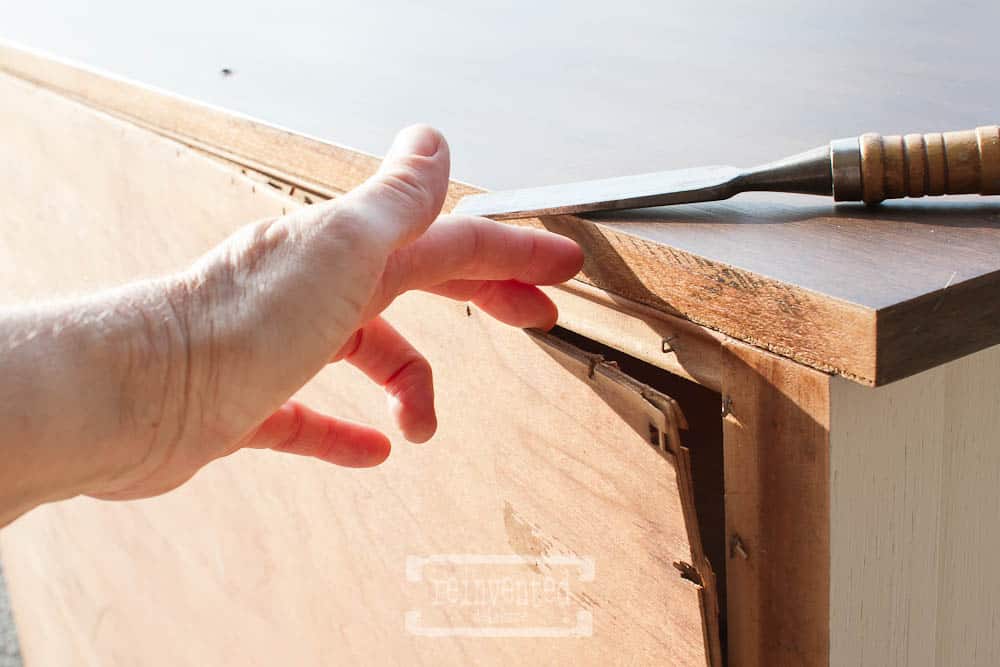
Removing the sheet of plywood is fairly easy
I used a chisel to loosen the board at each staple then I used pliers to remove the staples. We saved this wood backing because it comes in handy for our other projects like our chalkboards.
This gives a great opportunity to sand the interior. I will give it a thorough cleaning at the the end of the project also, but it is much easier to sand without the backing!
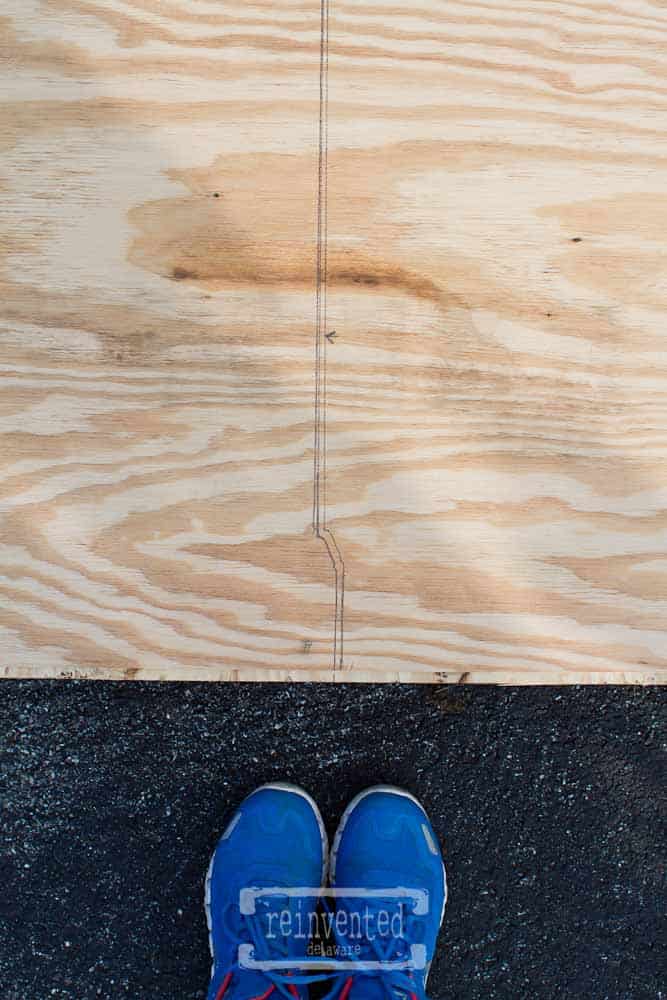
We laid the buffet on its back on top of the bead board.
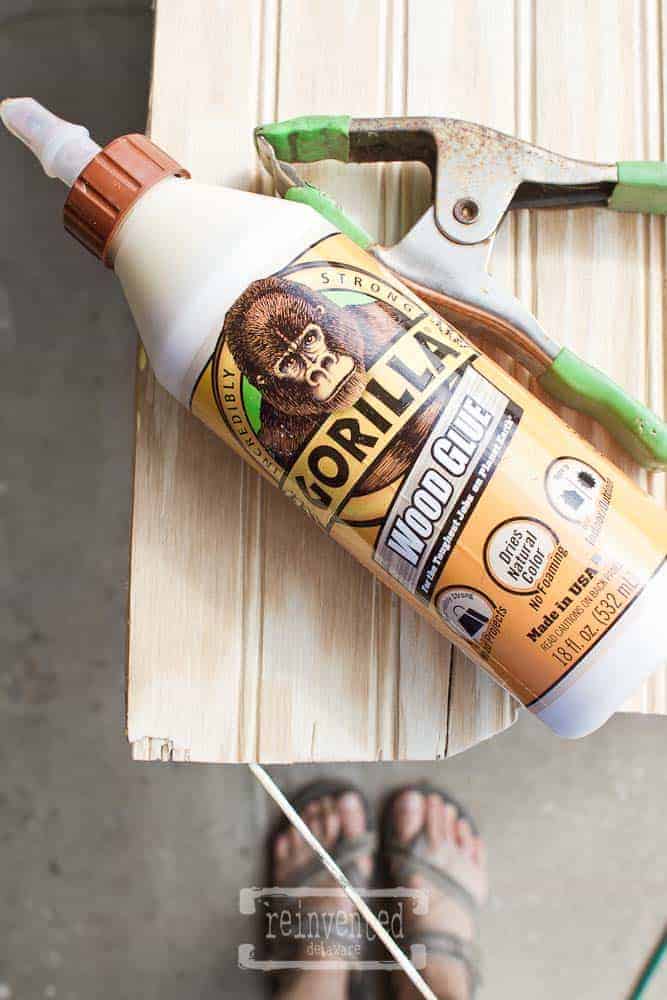
Using a pencil, we traced around the the shape of the buffet. Hubby used a jigsaw for the cuts.
Even though he was careful, some of the layers of the beadboard separated from the vibration of the jigsaw. A bit of Gorilla Wood Glue and squeeze clamps easily fixed the problem. If you use this glue, be sure and wipe away any glue that squeezes out with a damp shop cloth.
I sanded the interior of the beadboard panel and stained it. It will be visible from the inside and I wanted to remove the newness of the wood. 😉

The front of the bead board
also needed to be stained so that when I distressed it, the dark wood would be exposed rather than new, raw wood. After the stain was completely dried, I used a beeswax stick and rubbed it on the areas that I wanted to show through after distressing the piece. This creates a resist that the paint will not stick too.
Then I painted the back to match the front in General Finishes Milk Paint in Seagull Gray. Two coats covered the back perfectly!
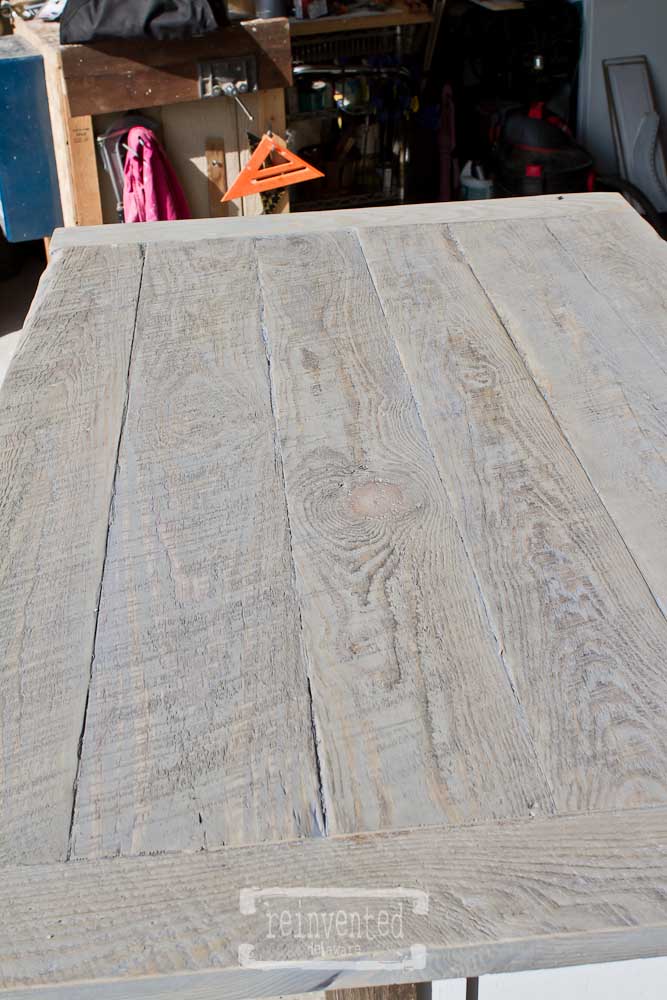
Hubby brought the newly built island top over to my workshop
and I was totally blown away by how gorgeous it was! He had dismantled pallet wood and built this beautiful top with bread board ends. The pallets were not the common pallets we so often see for free everywhere. Instead, they were pallets from a lumber store that were were used for heavy loads of wood. The pallet wood was extra thick – about 1 1/2″ – thicker than most pallet wood planks.
After the top was built, he sanded it. He was careful not to take the sanding too far so that the saw marks, divettes and imperfections would still be a part of the island top. He was careful to remove any splinters or snags that might get caught on a cleaning cloth.
He stained it using Varathane Wood Stain in Weathered Gray. Then he lightly sanded it again to bring out some of the natural color of the wood. I am in love with the top of this kitchen island!
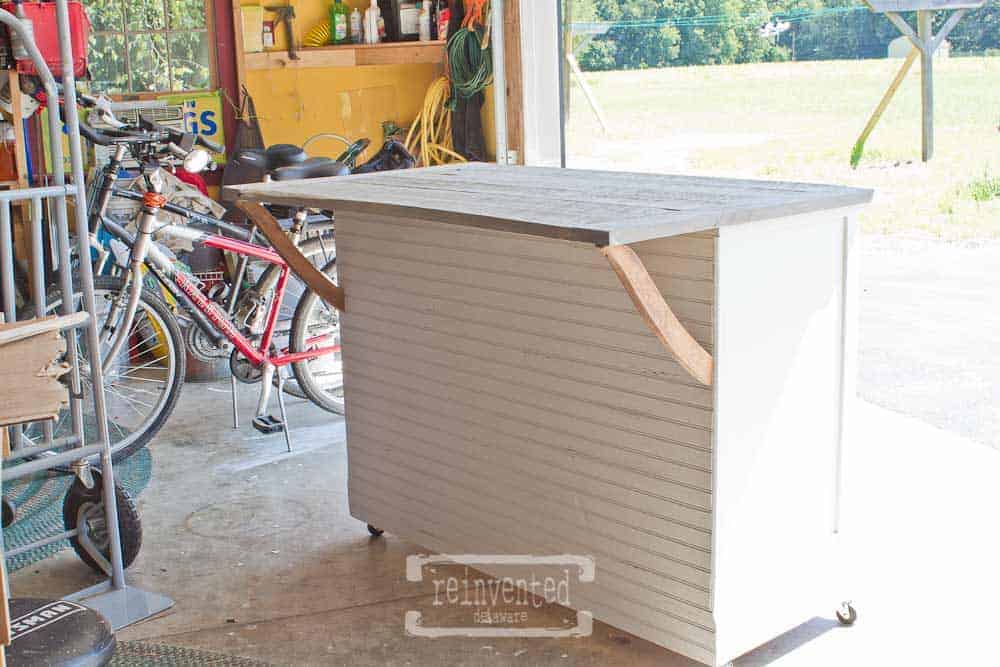
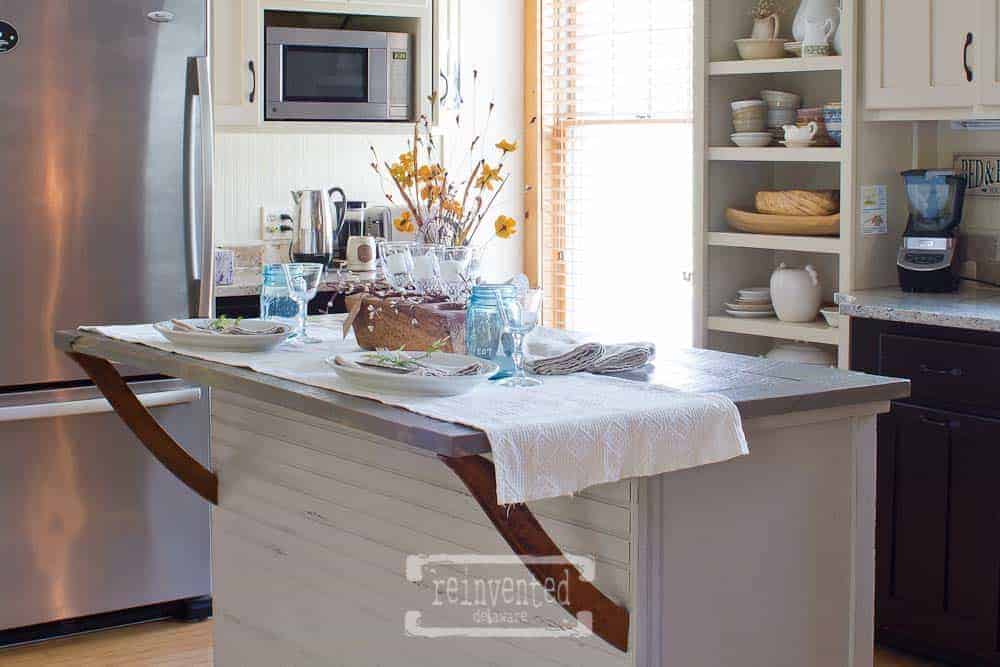
We needed braces to support the wood top
so we got a bit creative. Here’s the back story, I save pieces of disassembled furniture. Weird, I know. But in this instance, I was really excited when I realized that we could use the rockers from an old rocking chair as brackets to support the top. We held them up in the area where the pieces could be used to support the top, marked them and then cut them using a small handsaw. Hubby used a pocket-hole jig and some screws to attach the new ‘braces’ to the top and to the back of the kitchen island.
The gorgeous Hepplewhite drawer pulls did not clean up as well as I like. Spray painting was my only option. I will share the how to’s on that process in a future post!
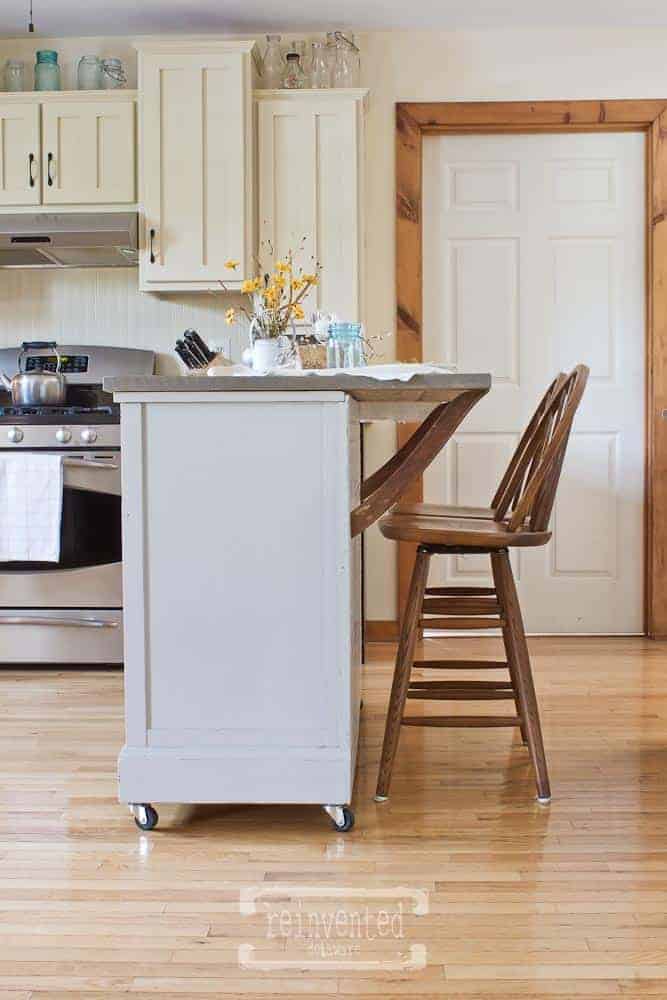
And here it is! A gorgeous and useful kitchen island with a bar top!
A couple of coats of General Finishes High Performance in Flat on the whole piece was the final touch. I did put an additional few coats of the the clear coat on the top for added protection since it will get a lot of use.
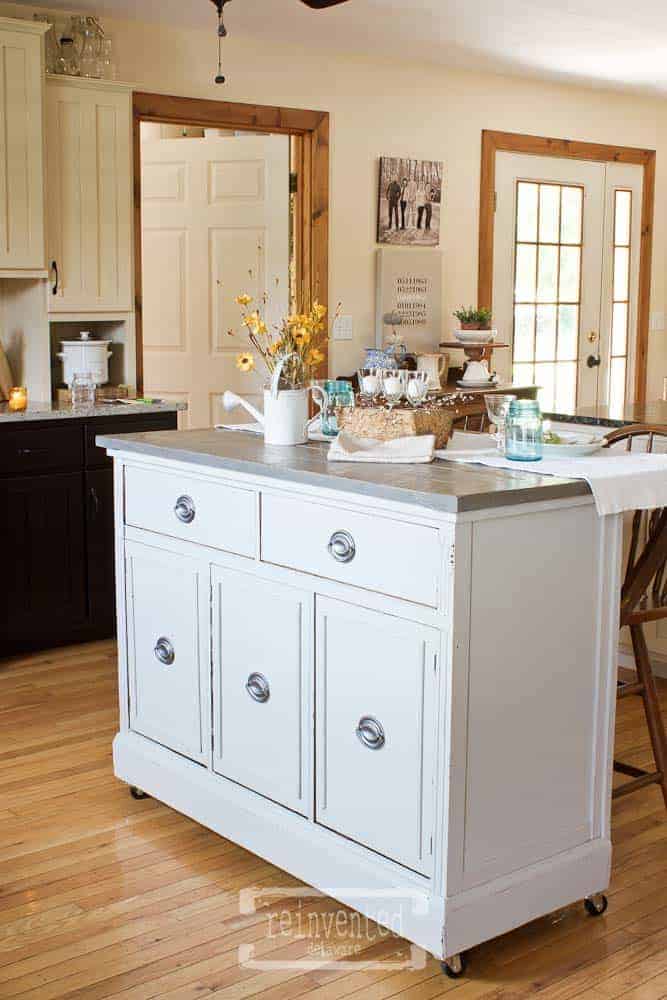
The kitchen island is on locking casters
which will make it super easy to move around! This is a great feature – it can be moved if need be and then locked in place. This kitchen island is not only for the kitchen but it could also be in a family room for movie viewing and snacking or in a sunroom for a quaint dining space!
I put our wood bar stools with it but I think a metal style of barstool would look even better!
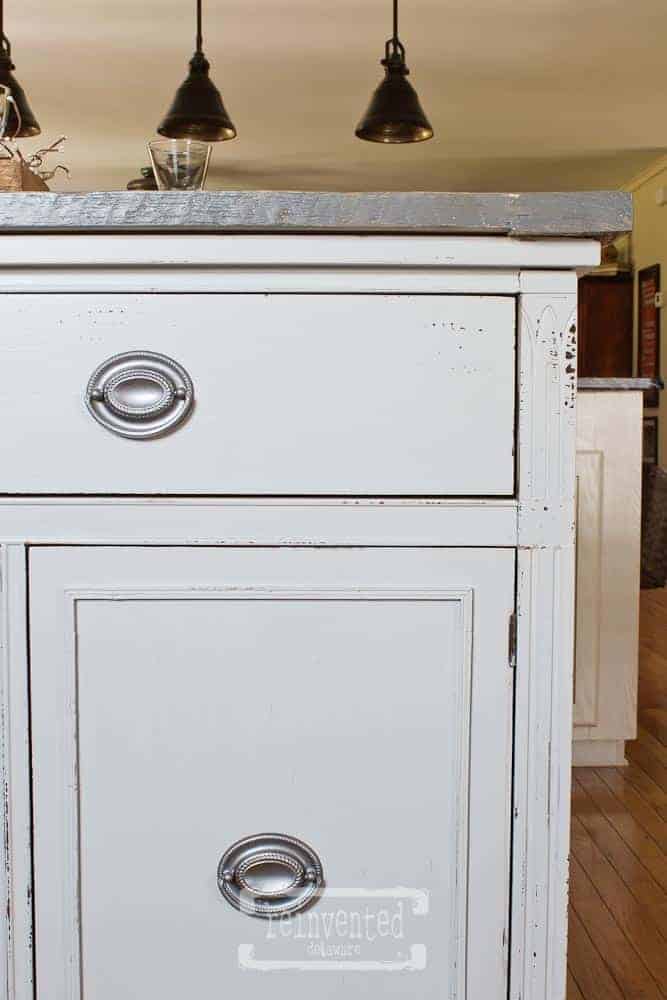
Here are some of the lovely details of this buffet turned kitchen island. Lovely distressing…
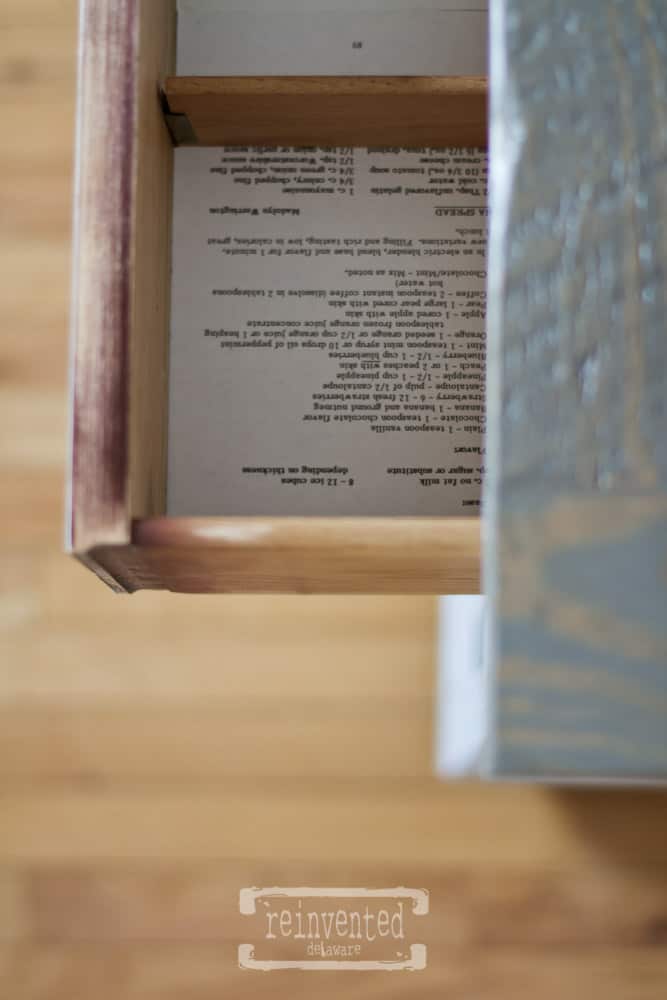
Vintage cook book page drawer interiors…
(learn how to do this easy project here!)
Gorgeous kitchen island top with all the saw marks….

Taking an outdated, no longer used piece of furniture
and turning it into a gorgeaous piece of furniture that also has such a wonderful purpose is so rewarding! We are taking the old and discarded and transforming it into new and useful!
Thanks for tuning in for this tutorial!
I hope you found this tutorial helpful! Let me know what you think of the buffet/sideboard/credenza turned kitchen island with bar top in the comments!

You did a great job!
Wow, what an amazing transformation!! You and your hubby are clearly a great team!
Thanks Debbie!!