Easy DIY Gift Ideas for Christmas
This handmade gift idea is easy and fast to make not to mention, inexpensive! Your friends and family members would love to receive this DIY gift for Christmas!
The following post may contain affiliate links. That means if you click and then buy something, I will make a small commission at no additional cost to you! Thank you for supporting my blog. full disclosure here.
This post is sponsored by Dixie Belle. All opinions are my own.
DIY gift idea for Christmas
Handmade gifts have been one of my Christmas traditions for years. My hubby and I have made countless easy DIY Christmas gifts since we married.
Handmade gifts make the perfect gift. They add a personal touch to the gift-giving experience for both parties, the giver and the receiver. DIY wood projects are gifts that can be customized to deepen the gift-giving tradition.
The handmade wood signs I will be showing you how to make today fall into the category of woodworking gift ideas but don’t involve expensive power tools like a router table or chop saw and can be done by crafters of all skill levels.
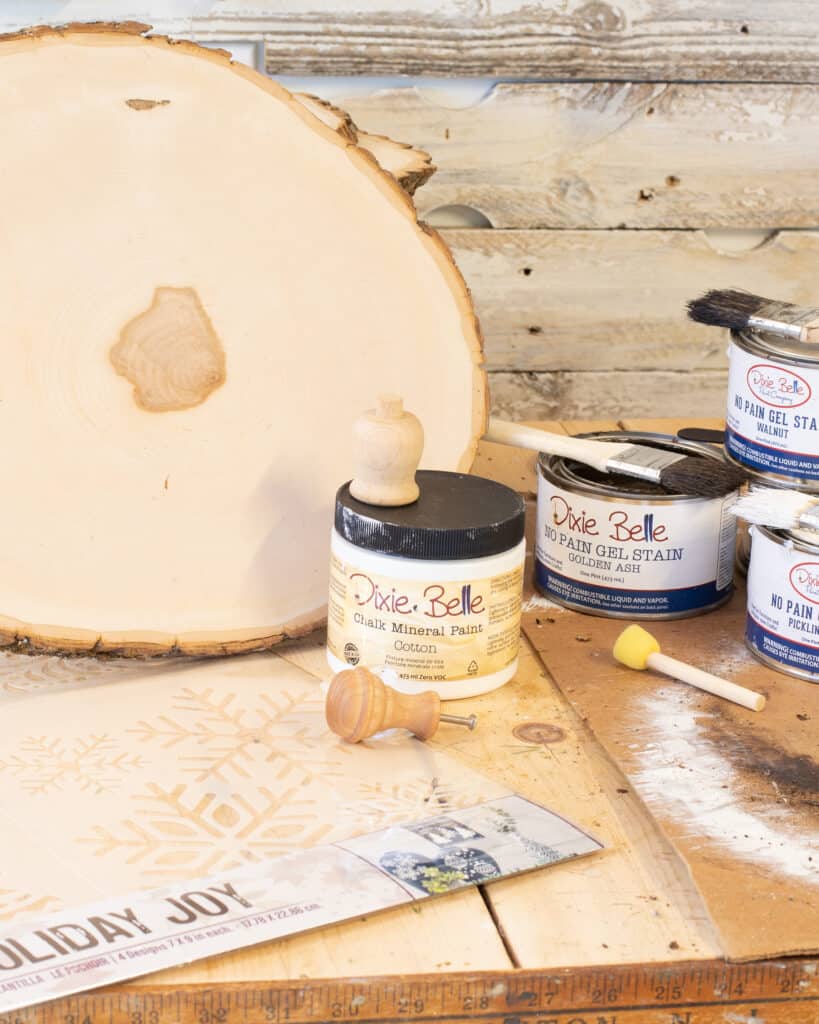
In fact, you don’t even need project plans! All you need are basic tools like a power drill/driver, paintbrushes, wire cutters, and pliers. I’ve got the easy steps all covered in this post and the YouTube video later in this blog post!
supplies for DIY wood gift
These handmade Christmas gifts did not take me a lot of time. In fact, it took me under six hours to make all fifteen all while taking photos and recording video for this post! I’m sure you will zip up this project in no time!
Let’s go over the supplies you will need for this great gift idea.
- 12-14” wood slices
- Christmas stencils
- Wood stain
- White paint
- Top coat
- Synthetic paint brush
- Disposable chip brushes
- Blue shop towels
- Wire and screws for hanging
- power drill driver
- quick flip drive
- Wood feet for riser option
- Cabinet door handles for tray option
These handmade wood gifts start out with wood. That’s kind of obvious!
I decided to use high quality precut wood slices that I found on Etsy. Etsy is a great place to find these wood slices. This whole box of 15, 12-14” wood slices cost under $57 and shipping was free! That works out to be $3.80 each. I could hardly believe it when I did the math!
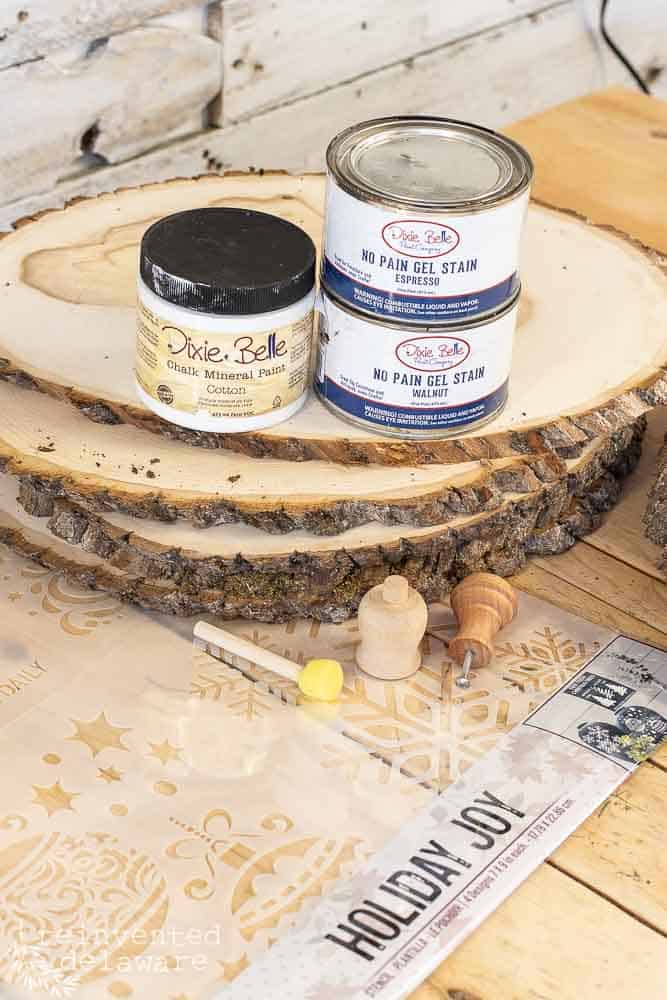
You might already have some of the supplies on hand to make these unique gifts especially if you are a crafter. Stencils and paint are common things to find if you have made other wooden gift ideas or woodworking projects.
If you do that makes this wonderful gift idea a great way to save money this holiday season. We all need to save a little money this year, don’t we?
step-by-step instructions
The first step is to inspect the pieces of wood when they arrive at your home. Mine were in perfect condition so I didn’t have to do anything to them. You might want to lightly sand both sides of your wood slices with 220-grit sandpaper then dust them off.
BTW, if you have scrap wood laying around that is the right size for your stencil, by all means, use it as an easy way to save even more money!
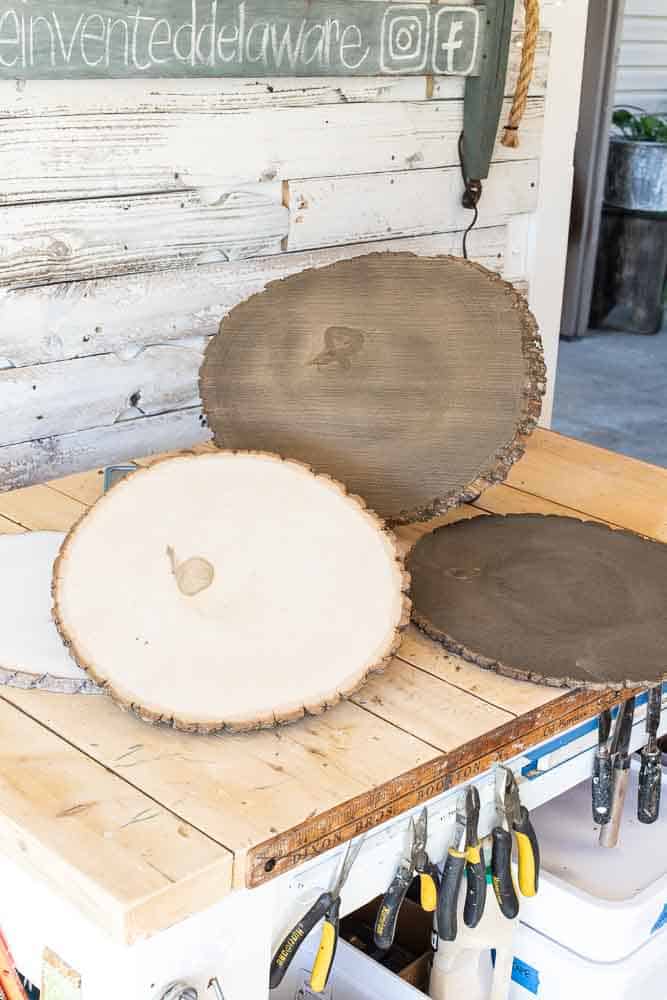
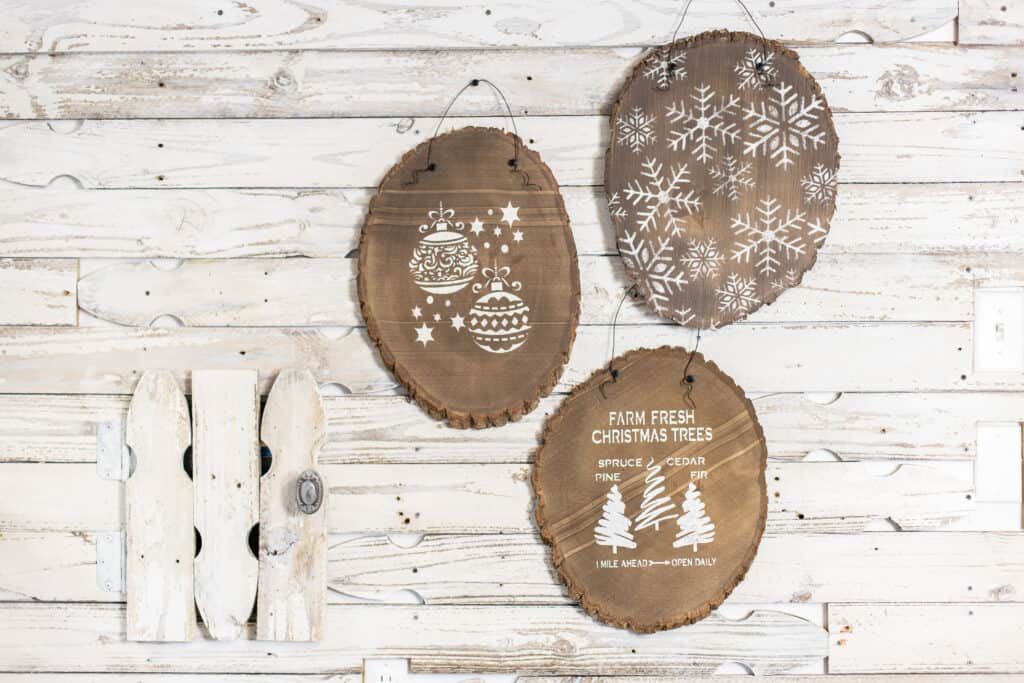
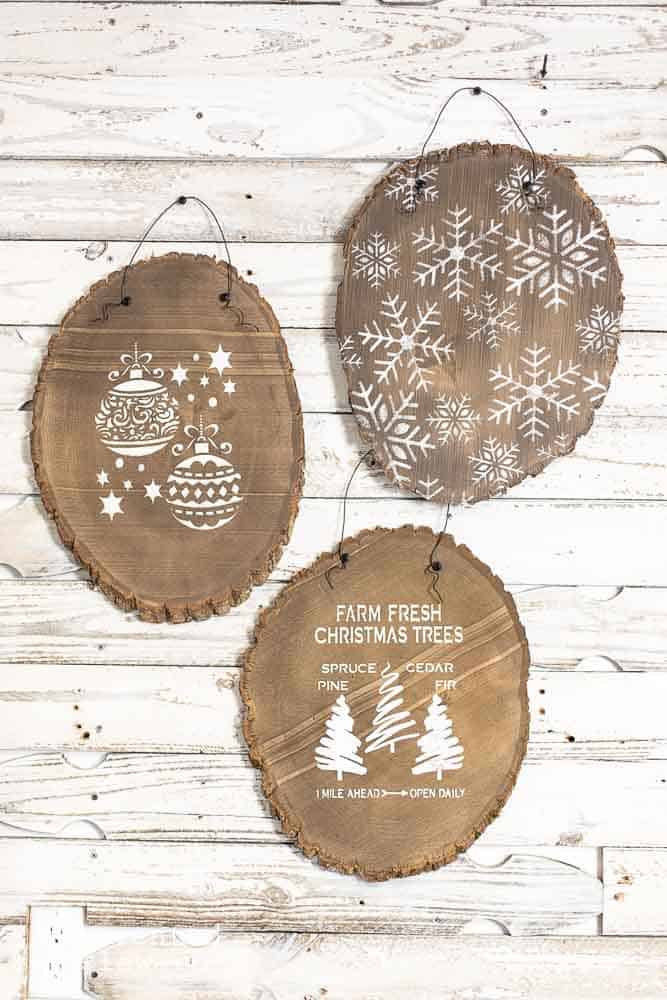
The next step is to stain the wood. I used a variety of stain colors to achieve different looks for my homemade gift idea. The choice of the stain color is up to you. You can see that using a dark stain with white paint has a lot of contrast. The white stained wood with white paint has a more subtle look.
Hopefully, seeing the fun way I used stain color and paint color will help you decide the look you want for your handmade holiday decor gift idea.
The gel stain is easy to apply. I used a disposable chip brush to apply the stain and then wiped it back with a blue shop towel.
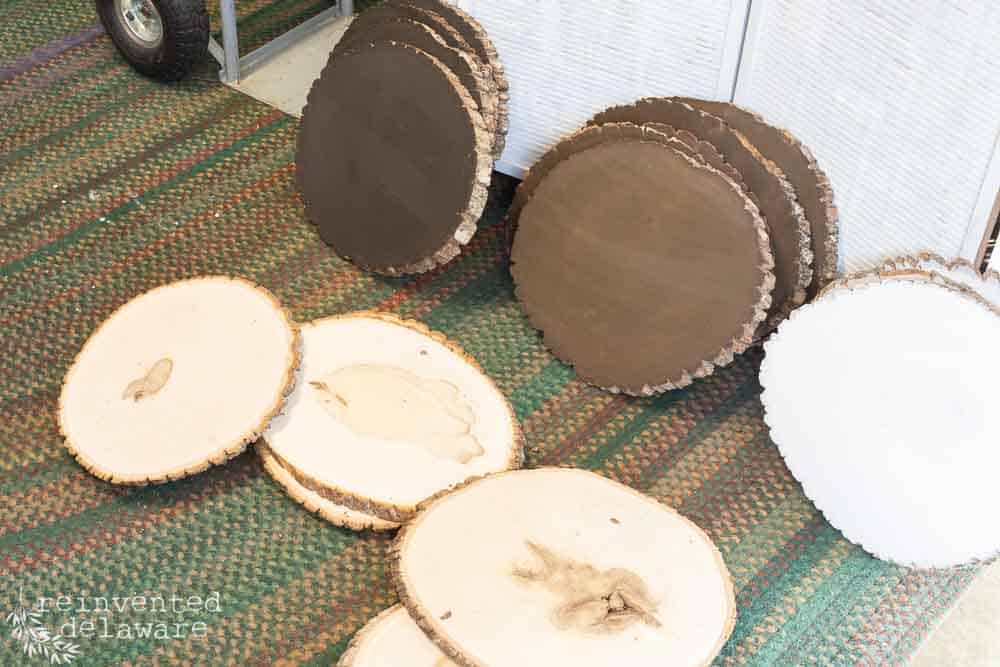
You can apply the stain to both sides if you like. Doing this will make the stenciled sign dual-purpose. Making this handmade gift idea for more than one season will be appreciated by the gift recipient!
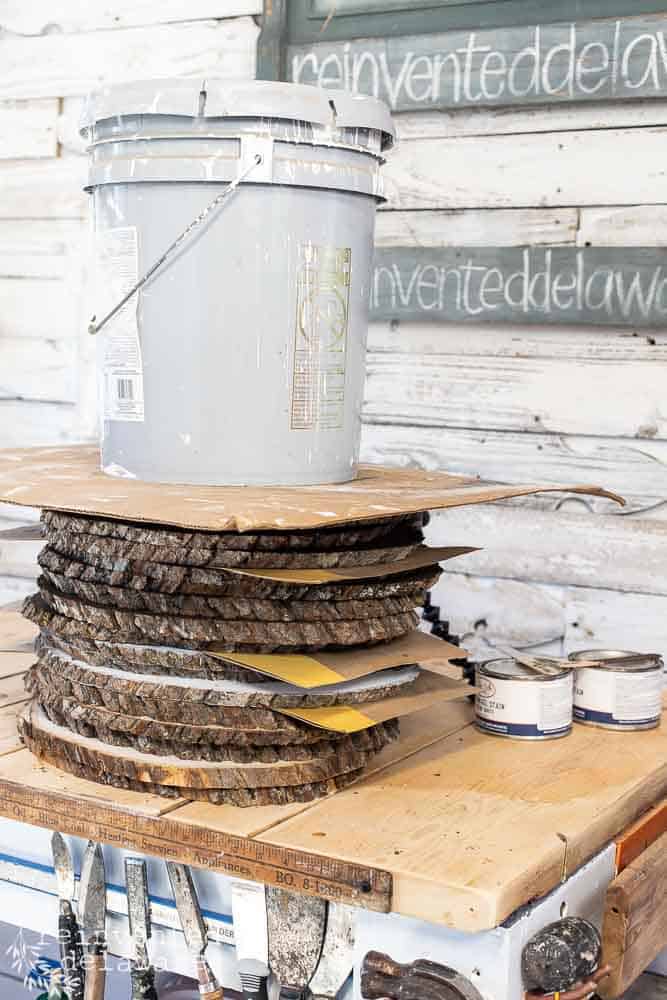
You can see in the image above that I also stacked the stained boards on top of each other and then I placed a full 5-gallon bucket of paint on top. I let it sit like this overnight to flatten out the wood slices. Remember that wood is a natural product and can move depending on the humidity in the air.
Allow the stain to dry overnight. You should have seen my workshop! I had wood slices all over the place!
how to stencil a wood sign
Grab your stencil of choice and the white paint and let’s stencil. Many of you have probably made many stenciled projects over the years, but allow me to go over the basic steps for stenciling.
First, line up the stencil so that it is pleasing to the eye. You can measure for accuracy if you want or just eyeball it as I did. You can also use painter’s tape to hold it steady.
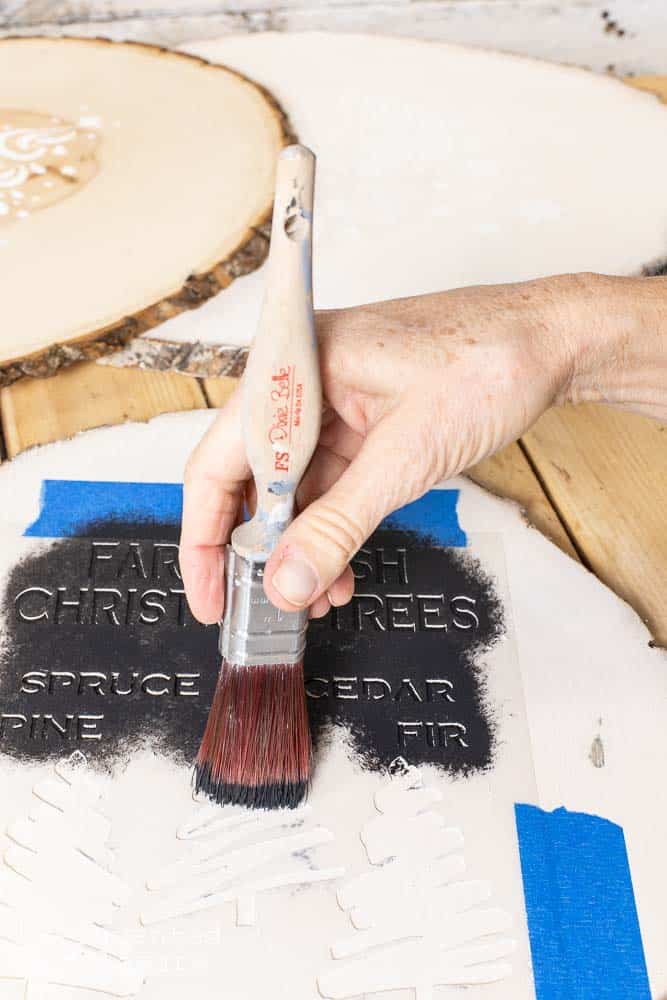
Next, load your synthetic paint brush with a small amount of white paint then offload most of it onto a paper plate, paper towel, or even the lid of the paint jar.
Dab the paintbrush onto the open areas of the stencil with quick up and down motions, just barely tapping the surface of the stencil. The key is to not have too much paint on the brush that can bleed through the backside of the stencil.
Use a dabbing motion all over the stencil, reloading and offloading the paintbrush as you cover the area. Do not use brush strokes since that will make the paint seep underneath the stencil.
Allow the paint to dry thoroughly and then give the front and back two coats of clear to seal the paint and the wood.
easy Christmas wood crafts
Next, let’s make these wooden gifts useful for your family members, friends, and others.
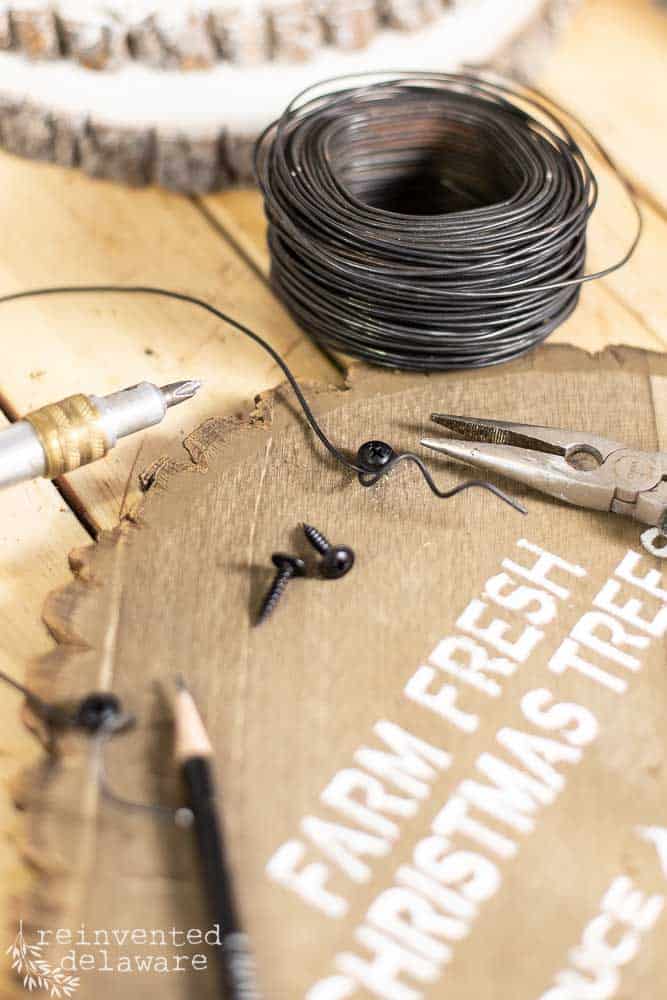
Use heavy wire and black truss head screws to make an easy hanger for these DIY wood slice holiday signs.
Handy tip: Work in Batches!
It’s easiest to batch work the steps of this project. For instance, stain all of the boards first. Then complete the stenciliing. The last step is sealing the pieces. Batch working makes the project move along quickly!
You could also make these into risers. For some reason, I’m hooked on riser projects lately. People love them! Use E6000 glue to attach four wooden feet. Really, these are little wooden door knobs but they can be used as risers too.
Another one of my fun DIY gift ideas is to use cabinet drawer pulls on either end of the wood slices to create a serving tray! Wouldn’t that be so pretty and useful?
Here are several drawer pulls I found online that I think would work well. Be sure to recess the screw head beneath the surface of the wood on the backside so it doesn’t damage whatever surface this tray sits on. This quick flip drive tool on the end of your power drill/driver will help you with that little task.
handmade Christmas gift ideas
Let’s think of people on your gift list who would love to receive this inexpensive handmade gift for Christmas:
These are the obvious people who would love to receive a wood sign:
- Family member
- Friends and neighbors
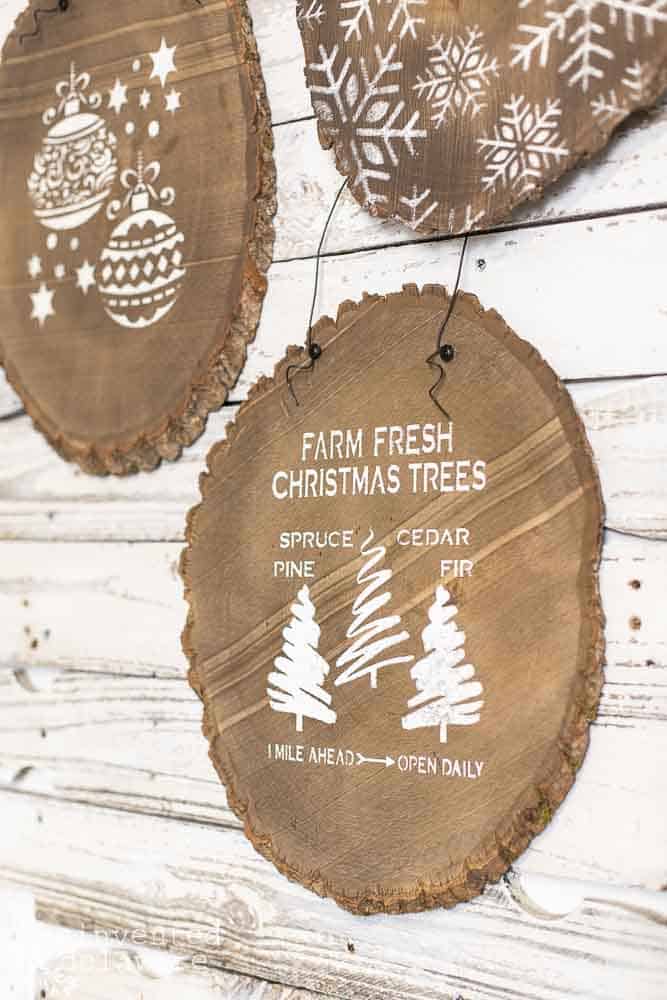
And here are some other people who would be blessed to receive one:
- Your pastor
- The mail carrier
- Neighborhood Waste collector
- Your boss
- Your co-workers
easy DIY Gift Ideas for Christmas
I would love to hear what you think about this easy gift idea! Drop a comment down below and let me know which of the three ways to use this wood slice project you like best!
Let’s spread some holiday cheer this year and make a wood sign like these for those special people in your life.


YouTube Video just for you!
Click the image below to watch the YouTube Video I created for you!

Thanks for joining our journey!
Thanks so much for joining us for this post! Join our journey so you don’t miss any of the fun projects, tutorials, and inspiration that we share with you each week! You can follow us on Instagram, Facebook, and YouTube. We share even more inspiration on Pinterest!
click below to purchase supplies!
Visit my Amazon Storefront!
Click the button below and head over to our online shop on Amazon!








I LOVE these, Cindy!!! They are so simple but are SO pretty!! I love the white paint on the wood….such a gorgeous combination for the Christmas season!
The white paint on the dark background is one of my faves too Rachel 😊
I love these. Suer cute.
Thanks, Renae!😊