
Affordable Natural Wood Finish: A Secretary Desk Makeover
Transform a vintage secretary desk with this step-by-step restoration guide. Learn how to strip, sand, and apply natural finishes for timeless beauty.
The following post may contain affiliate links. That means if you click and then buy something, I will make a small commission at no additional cost to you! Thank you for supporting my blog. full disclosure here.
a natural wood finish
Creating a natural wood finish on solid wood furniture like an antique oak secretary desk is growing in popularity. These gorgeous antiques can be found in other types of wood including mahogany, maple, walnut and cherry.
The techniques to acheive a natural wood finish will be the same but depending on the type of wood, the results can look very different.
In this tutorial, we will walk through the step by step process to bring back the beauty of this antique secretary desk made from solid oak.
supplies
Let’s look at the supplies you will need to restore the finish on a high-quality wood furniture piece like this antique desk. I will be sharing the products I used as well as options you can choose depending on your preferences.
- Simple Green cleaning solution
- orbital sander with sanding pads from 100-220 grit
- furniture and cabinet scraper tools
- sandpaper in various grits from 150- 220
- wood glue
- furniture clamps in various sizes
- scrap wood as needed
- shop vac
- clear top coat in flat
- hemp oil
- furniture salve
- Rub n Buff in the desired color
- optional: clear furniture wax
step by step guide for a natural wood finish
Let’s get down to the nuts and bolts of this antique desk makeover!
step one inspect for repairs
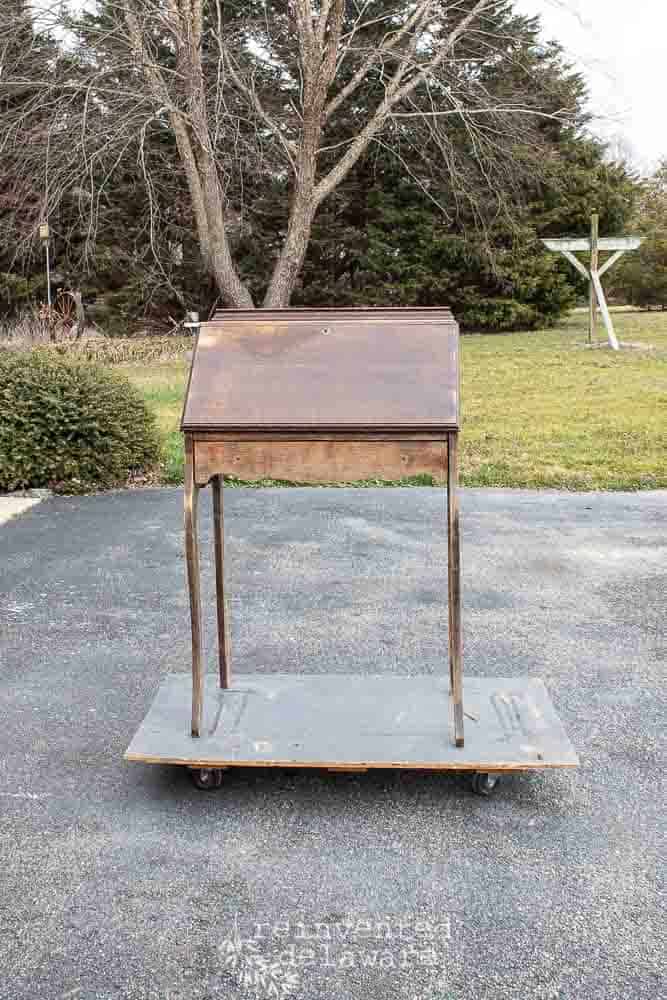
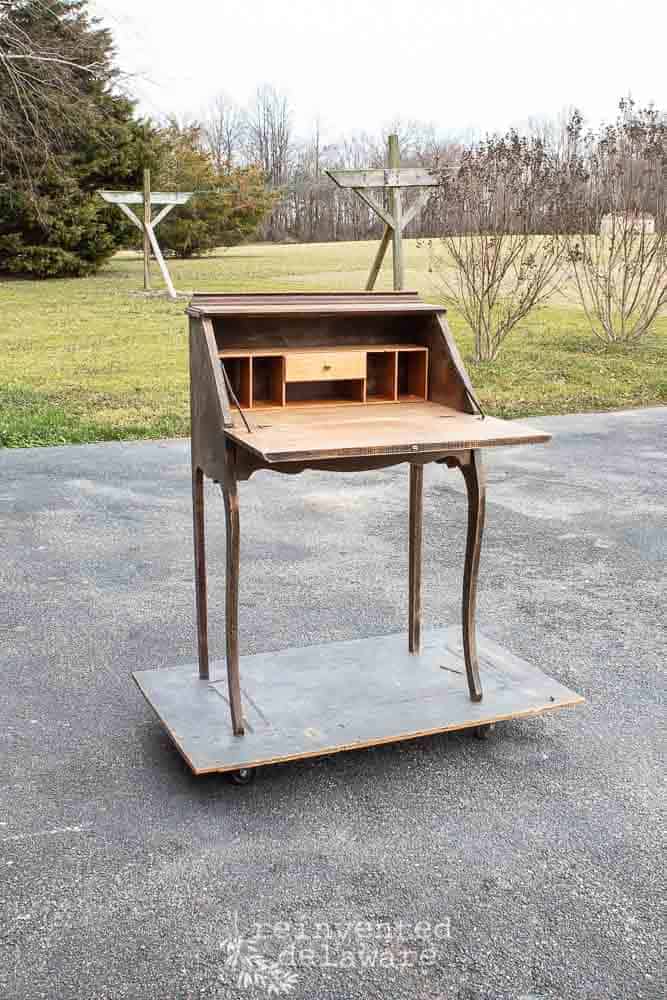
The first step with an old piece of furniture like this drop-front desk is to inspect for repairs. More than likely this desk has been well used over the years.
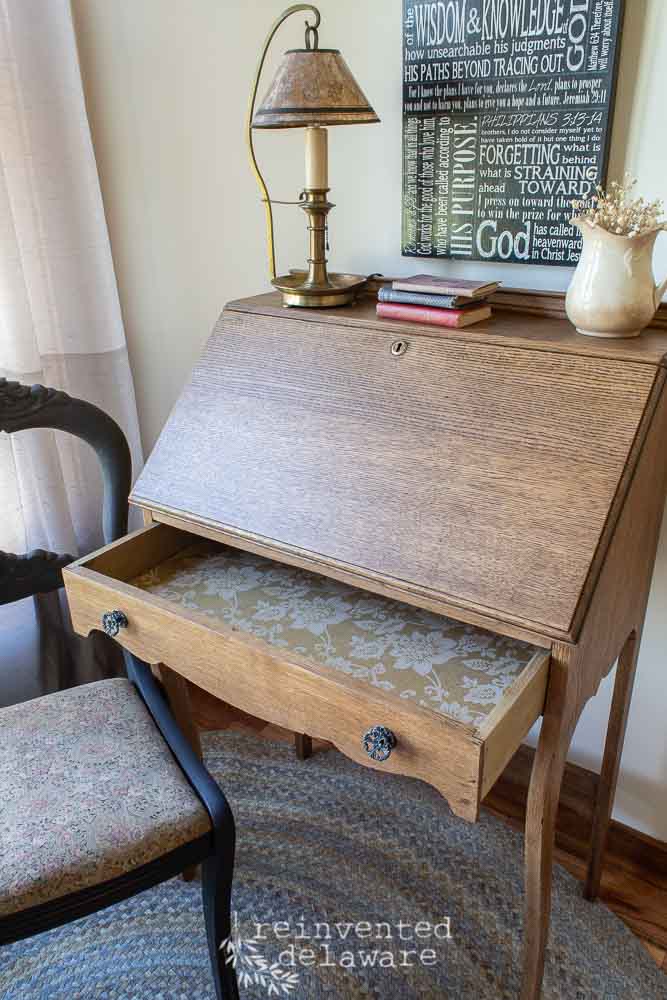
While you are inspecting the piece for repairs, remove the hardware. Drawer pulls, hinges and knobs can be cleaned and updated separately from the piece of furniture.
Here are some possible repairs to look for:
- wobbly legs
- broken drawer slides
- broken or loose drawers
- loose desktop
- damaged compartments in the storage area
- missing parts like shelves in the interior
- missing brass hardware like drawer pulls
I have many blog posts sharing how to make a variety of furniture repairs. You will find a wealth of experience and information in these posts. Simple type ‘repair’ in the search field below to find many furniture repair tutorials!
If you do not find the answer, please feel free to reach out and ask me! I would love to help you with your next furniture repair!
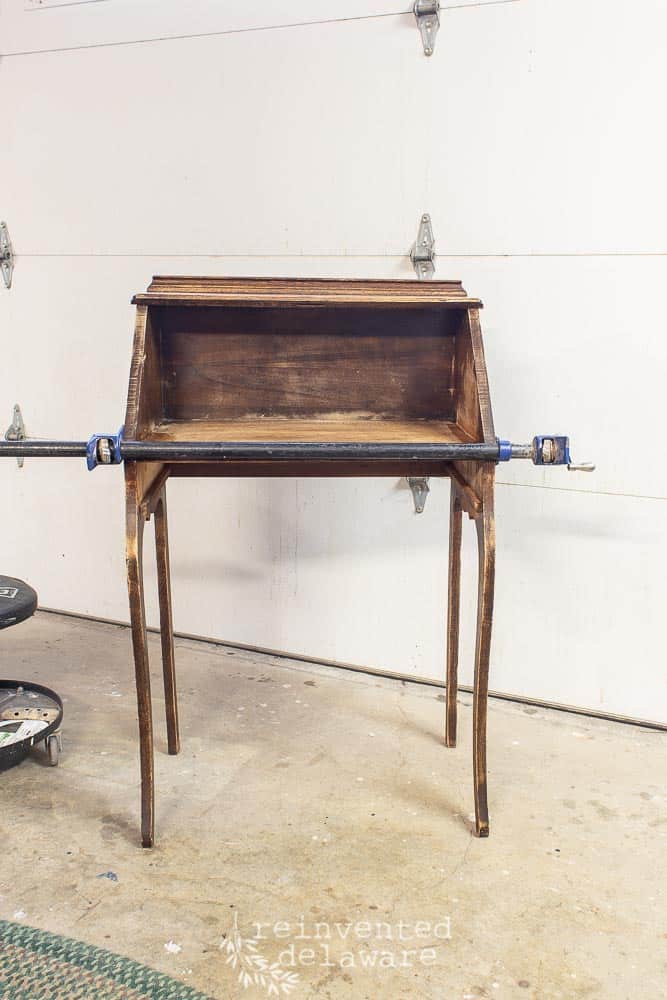
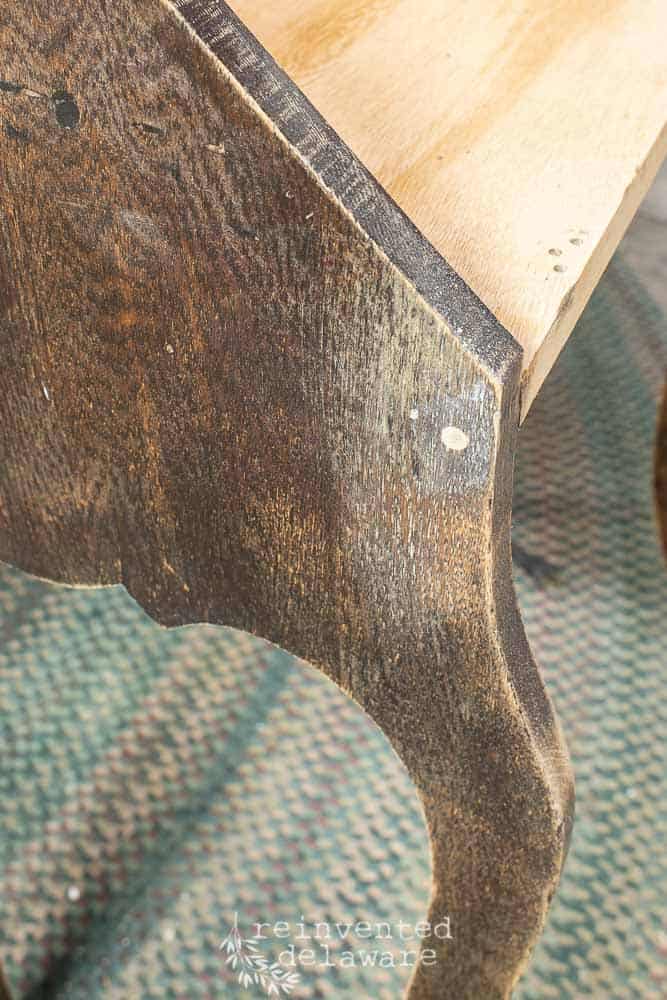
Here is a sampling of the repairs we made to this gorgeous desk. The drawer was re-glued, the writing surface was strengthened, and an addional piece of wood was attached to the back legs.
You can see more detail about these repairs by clicking the button below.

step two prepare the surface
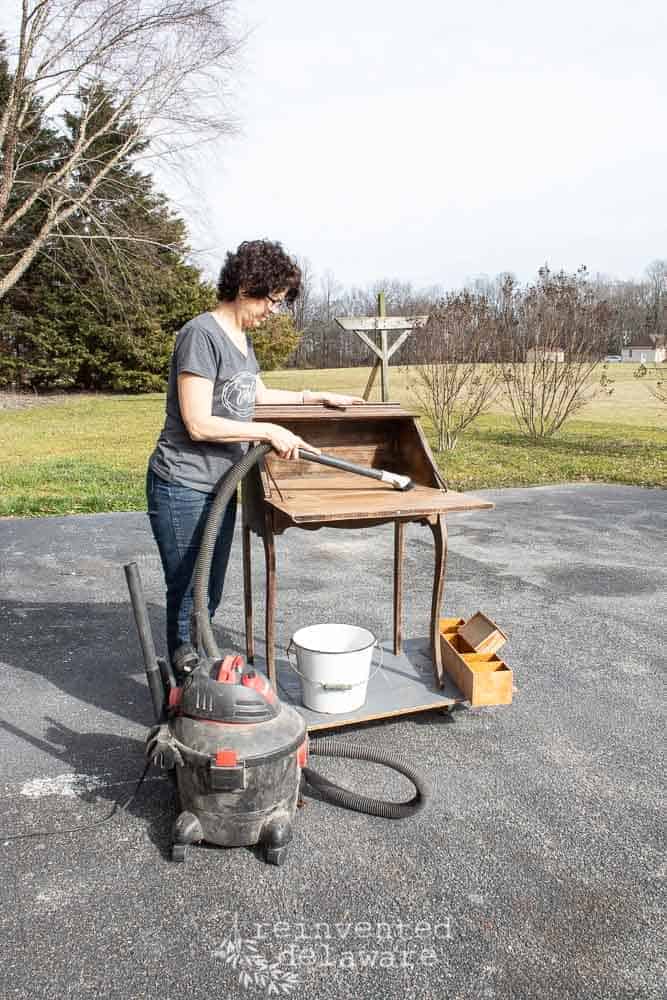
Once all of the repairs are completed and the glue is thoroughly dried, it is time to clean the piece. Give the old desk a good vacuuming with the shop vac if you haven’t already.
clean the old furniture
Using a bucket of soapy water made from an eco-friendly cleaner like Simple Green, scrub the entire piece. I like to do this step outside on a sunny day. A scotch brite pad is very helpful in scrubbing off the years of use and old cleaning products. The scrubbing action along with soap removes the grease and oils that accumulate on old furniture.
Wipe the piece down with clean water. Then allow the old desk to dry thoroughly in the sun. This also helps with old musty furniture smells.
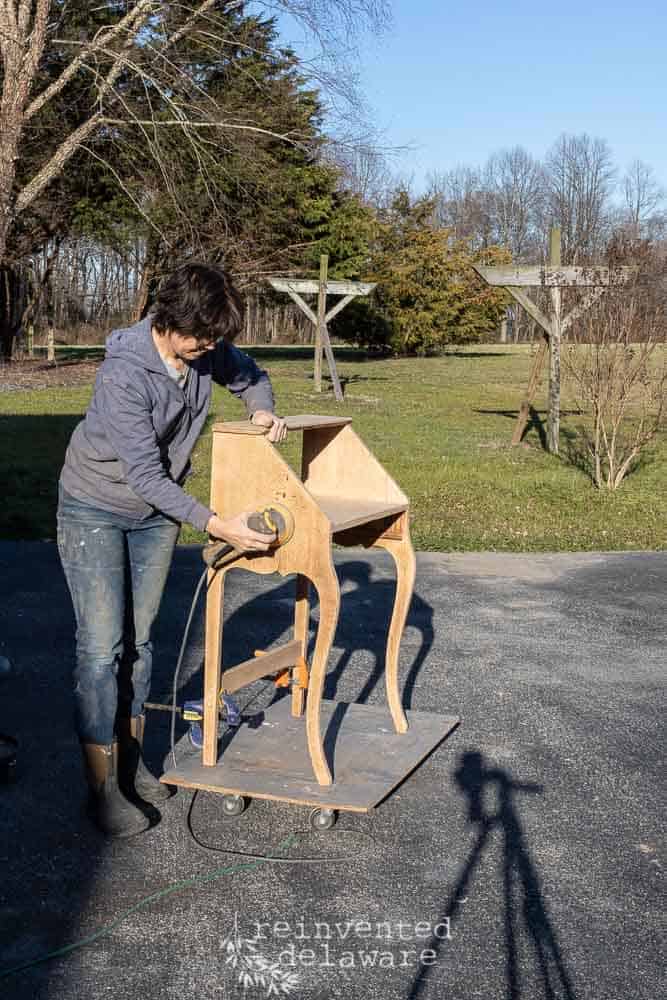
sand the antique drop-front desk
Next grab your power orbital sander loaded with a 80 or 100 grit sandpaper. Sand the entire piece to remove all of the old finish. You can use paint and varnish stipper if you like. Although I have used finish stripper on other furniture makeovers, it’s not my preference. Use what you prefer!
Move the sander along the grain of the wood. Once the bulk of the finish is removed, change the sanding disc to a finer grit like 150 grit. Go over the whole piece again then change the sanding disc to 220 grit. The finer grit of this sanding disc will help to remove the swirls caused by the orbitall sander.
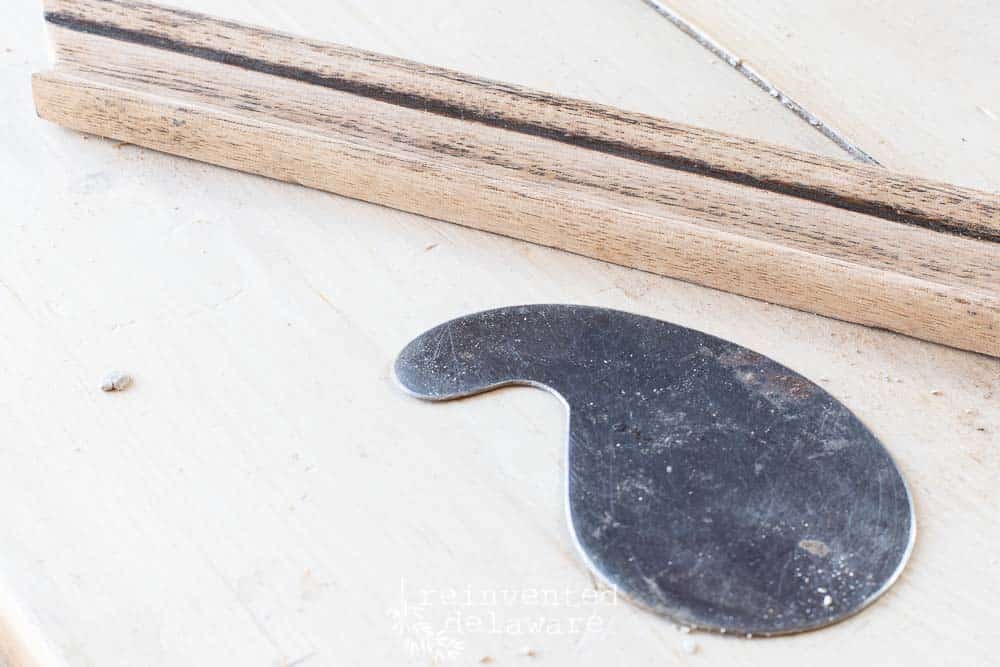
The final steps to complete the sanding process is to break out the hand sanding tools. Sheets of sandpaper or the use of a sanding block in various grits will be so helpful when getting into the corners and the enclosed hutch storage area of the desk.
Cabinets scrappers are extremely helpful in removing the old finish from the curvy decorative areas on the trim or edges of the furniture. Take you time and get the feel of using these tools. They gently scrap away the old worn out finish. This will take some time and patience but it is well worth the effort!
Once the piece has been cleaned and then sanded, be sure to wipe down the piece one last time with a dry microfiber cloth to remove the dust residue left by sanding.
You can see the full process of prepping the surface by clicking the button below.

step three apply the finish
The last and final step is usually the fastest! It’s the part we all look forward to as furniture makeover enthusiasts, right? But keep in mind, the final results all depend on the repairs and prep work being completed correctly! I encourage you to take your time with the first two steps to ensure a beautiful result!
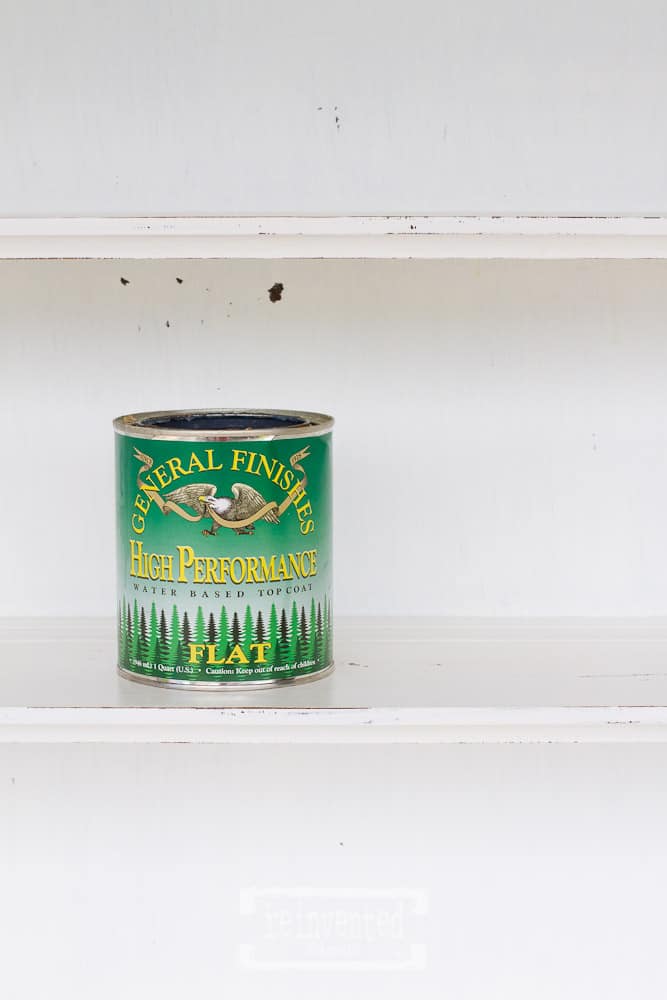
poly top coat
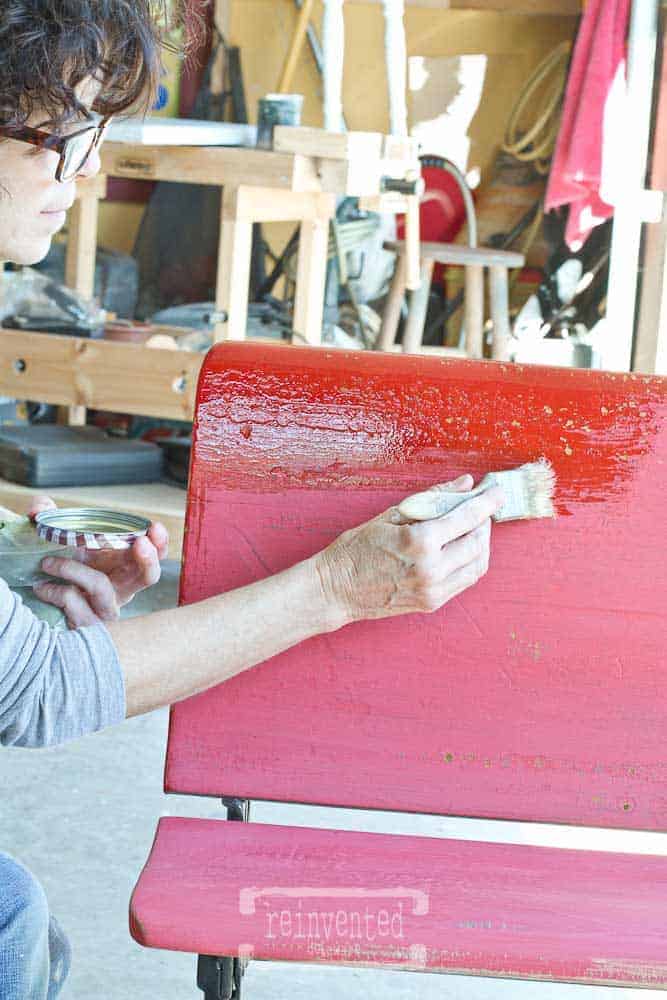
I chose to use a flat clear top coat by General Finishes called High Performance in the flat finish. I applied three coats waiting at least two hours between coats. Take your time applying the top coat using brush strokes in the direction of the grain. Allow the maximum drying time before applying the next coat.
The beauty of a flat finish is that it creates the look of a hand-rubbed wax finish with the durablility of a polyurethane topcoat. This finish is truly amazing!
furniture wax
Another option is to wax the wood surfaces. Waxing is a wonderful option to create a natural wood look. The oils in furniture wax cure to a hard surface with a slight sheen. Keep in mind that the piece will have to be re-waxed periodically depending on how often this piece will be used.
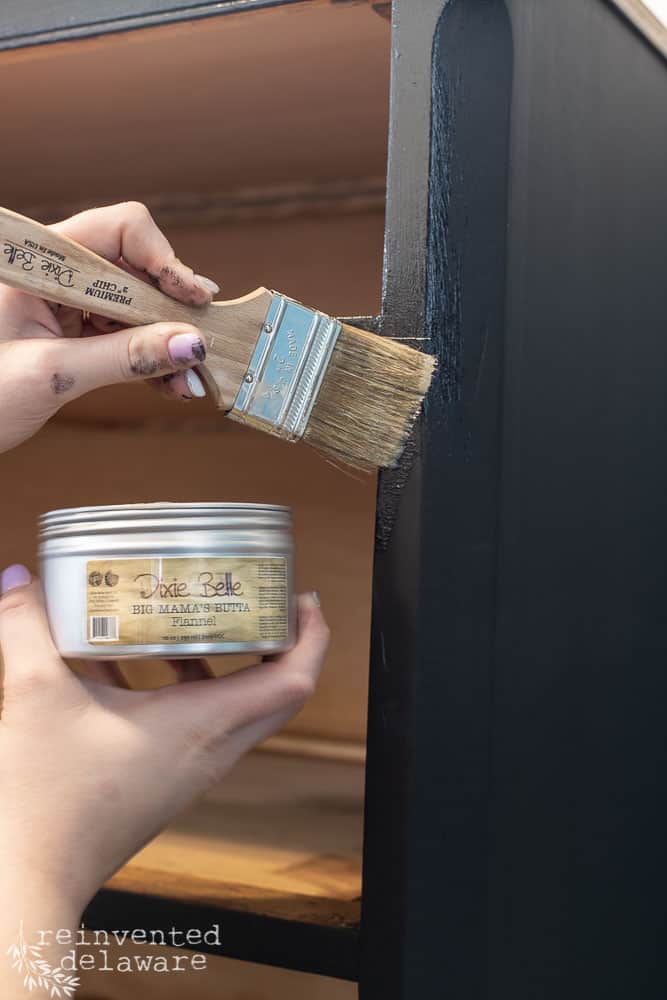
hemp oil or furniture salve
You can also use natural wood oils including hemp oil or furniture salves that include oils and carnauba wax. I recommend Miss Mustard Seed Hemp Oil and Dixie Belle’s Big Mama’s Butta. Both of these products produce amazing results!
Hemp oil has the consistancy of olive oil. Simply apply it with a natural bristle chip brush and wipe away the excess.
Furniture salve is thick like butter. The furniture salve is applied with a chip brush. Work it into the wood surfaces, allow it to soak in then wipe away any excess.
You can see samples of each of these products below. Even though some of the surfaces have been painted, the finishes can be applied to natural wood surfaces with amazing results!
step four replace the hardware
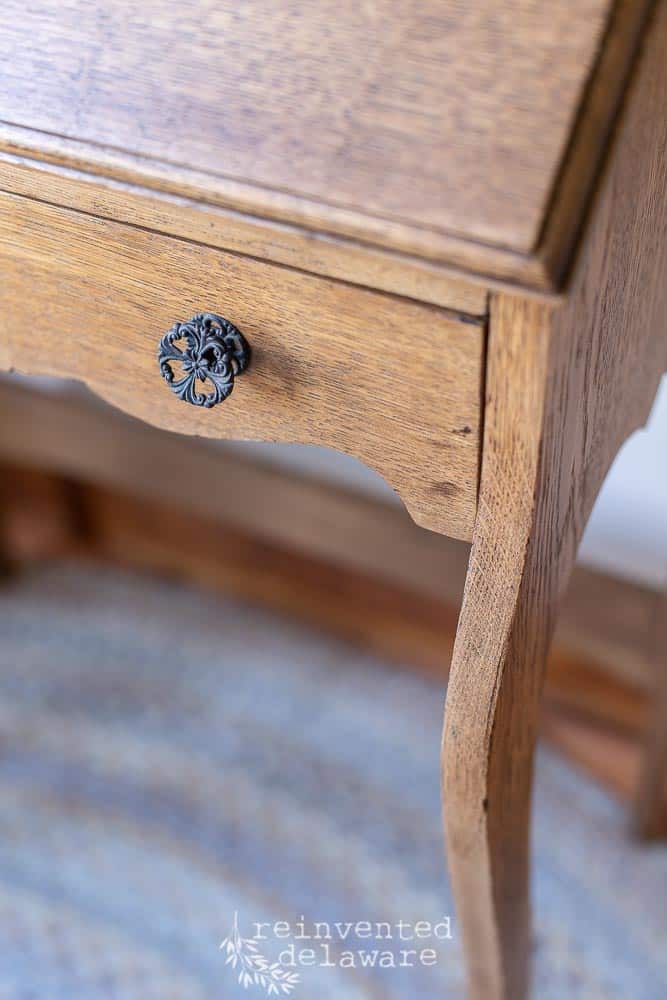
The last step in this furntiure makeover is to replace the hardware. If you need to purchase new hardware like drawer pulls of hinges, look for hardware in a vintage and antique style to go with furniture piece. This keeps the authenticity of the piece consistant.
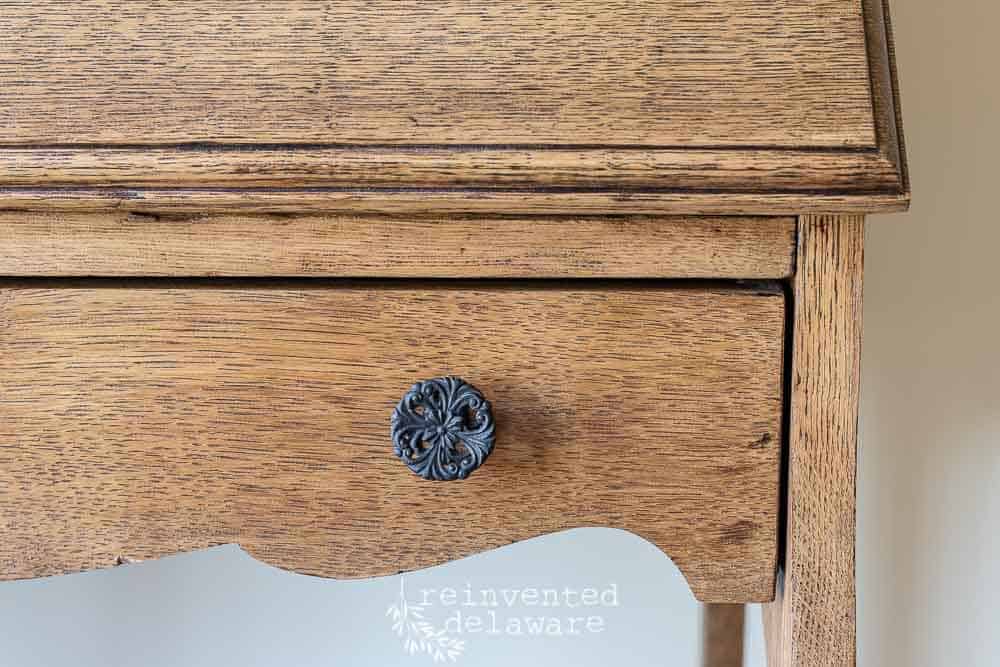
I used Rub n Buff on the original hardware and got beautiful results. The color I used is called Ebony. Rub n Buff comes in several colors so have fun choosing the color that goes with your antique furniture! It applies well with a small artists paintbrush. Allow it to dry and then put the hardware back on the piece.
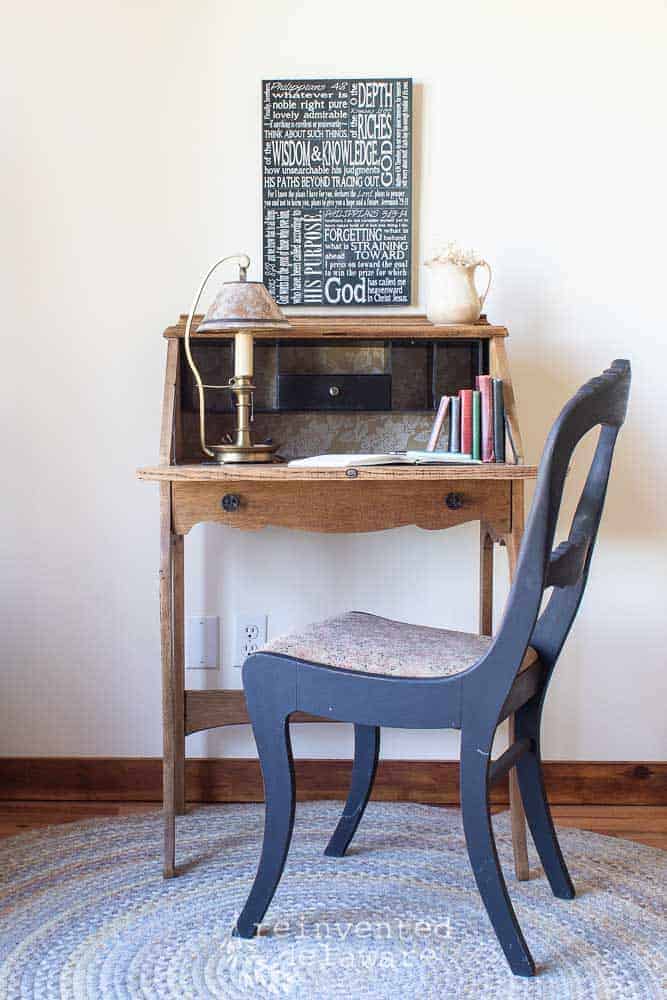
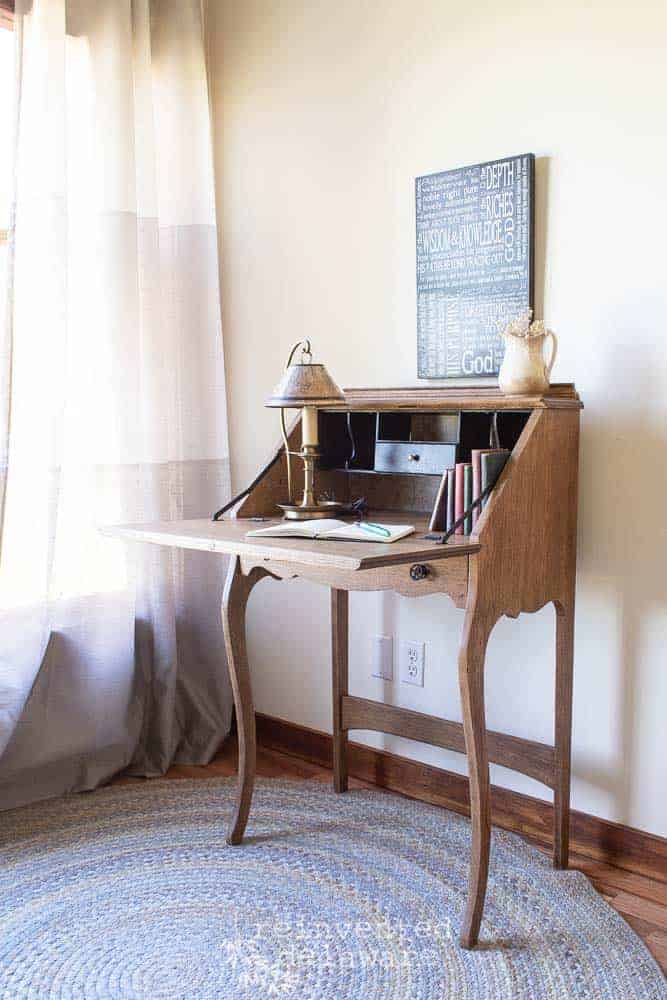
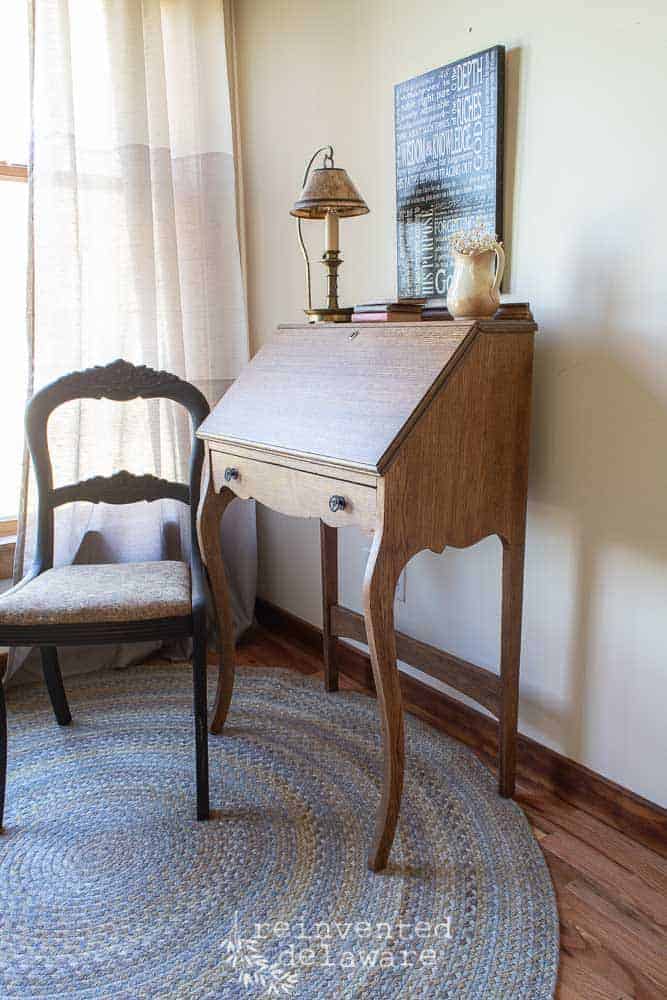
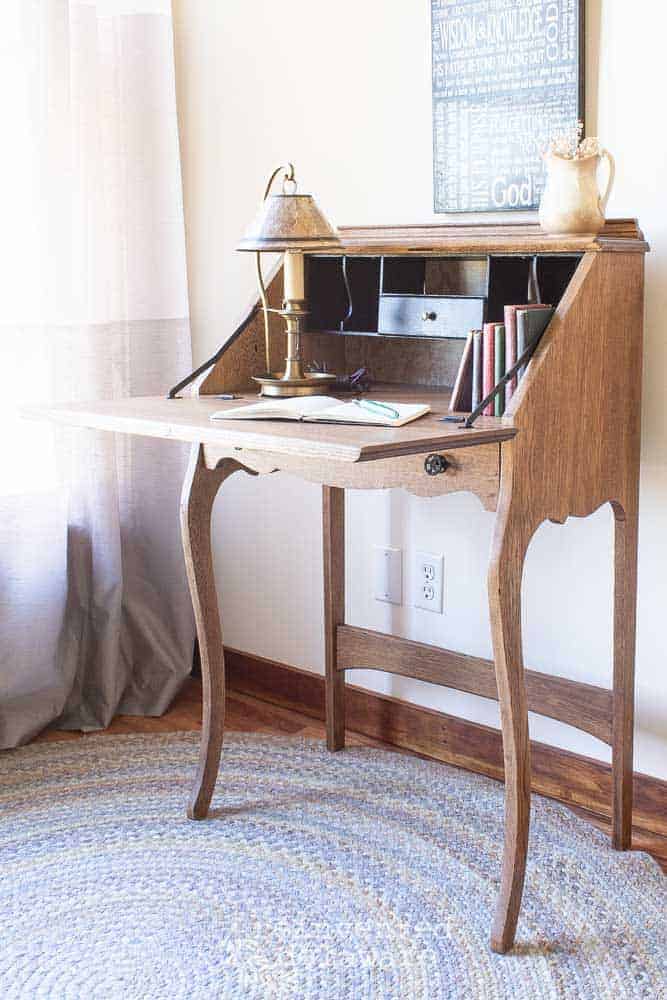
antique oak fold down desk makeover
With some patience, time and a solid piece of furniture with good bones, you can breath new life into an old fold desk like this one!
decoupage paper details
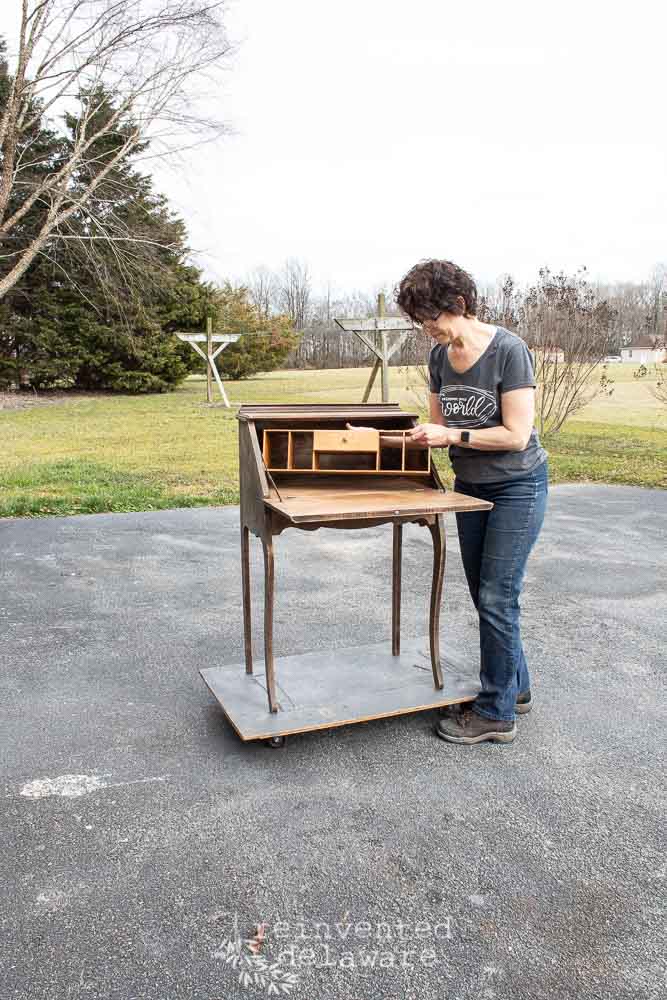
I also chose to cover the backboard of the desk. The backboard was made of poplar and had been stained dark. Poplar can have a greenish tinge to it so I knew this would be the perfect solution. I used heavy wrapping paper as my decoupage paper.
Using the same paper, I lined the interior of the large drawer. This is an easy way to to give a clean look to sometimes messy old drawers!
thanks for being here!
I hope you are enjoying this project! Let me know if you have any questions. Or leave me a comment to tell me about your project and ideas!
thanks, Cindy 😀

The process is easy. All you need is decorative paper, Mod Podge, an Exacto knife, and something to smooth out the paper. Here is a little video with step-by-step instructions that will help you cover the back of the furniture as well as line the drawers.
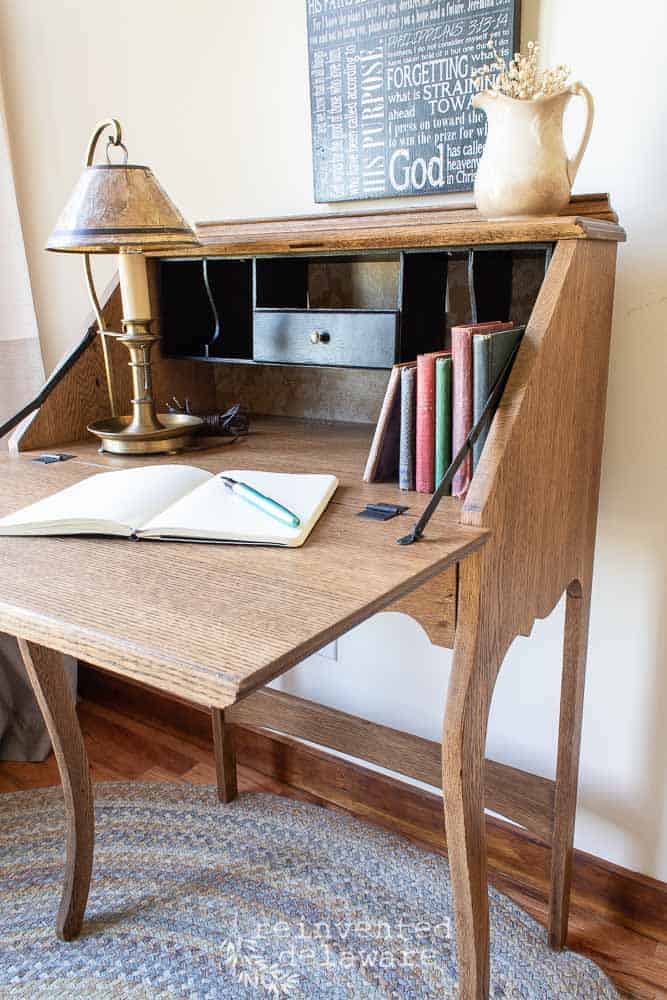
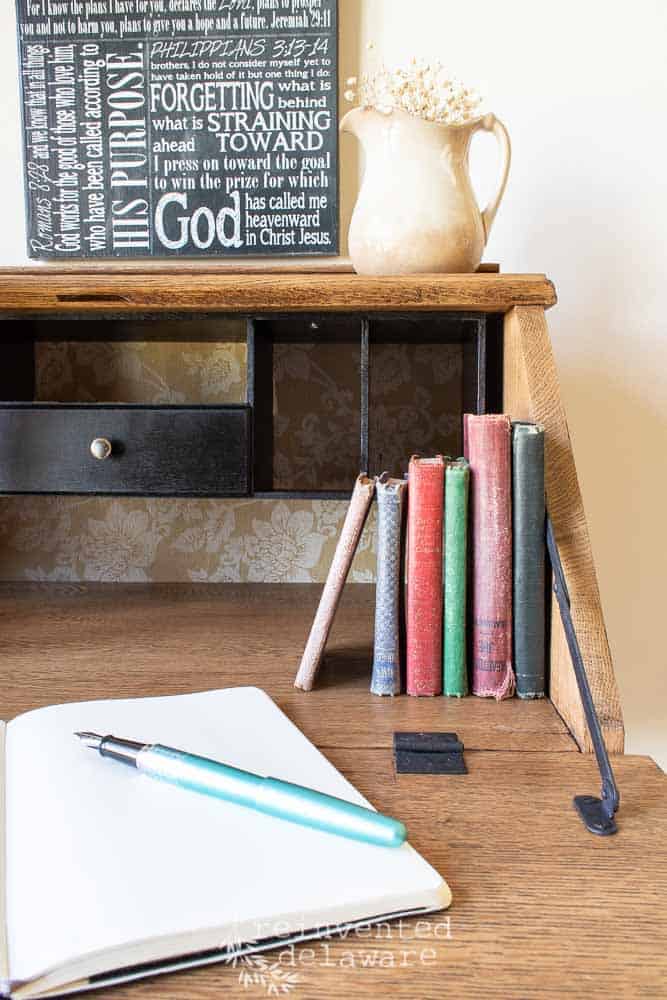
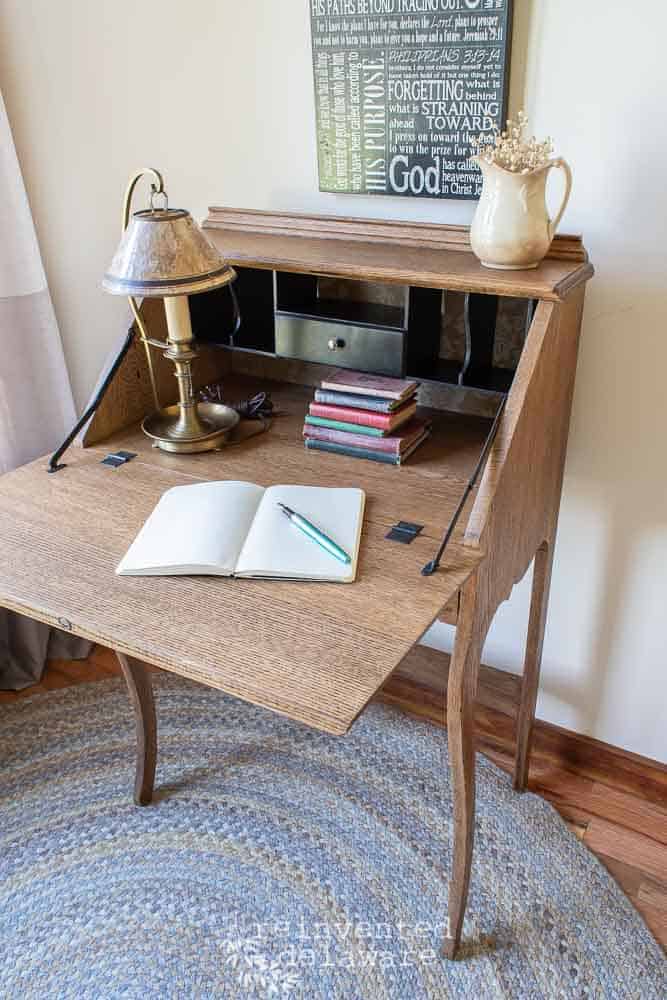
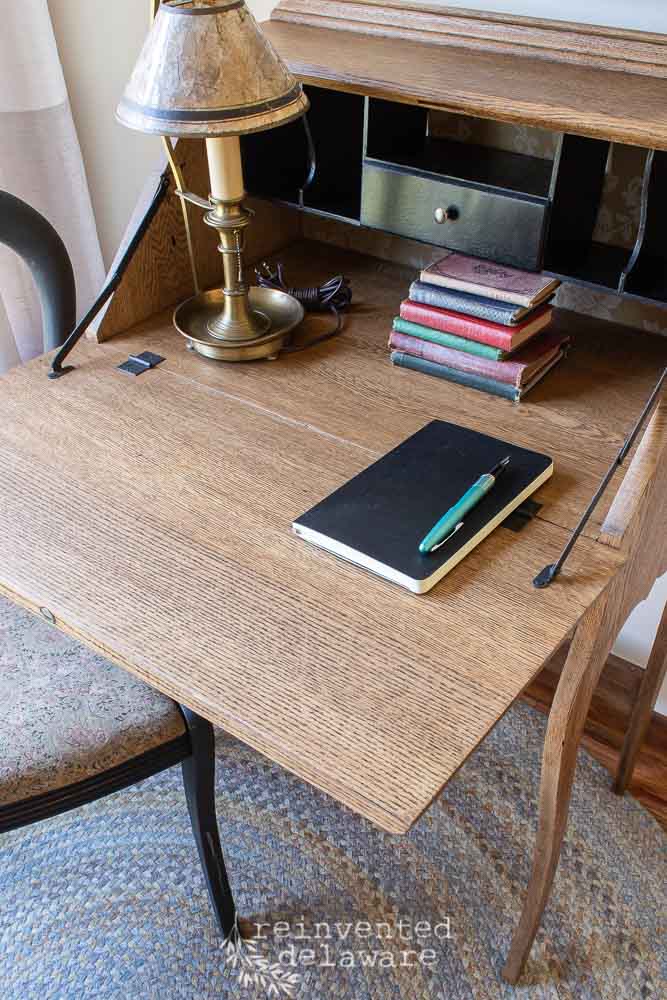
updated storage area and desk organizer
The storage organizer needed to be refreshed so I applied two coats of black spray paint. It created a clean look and was much faster to complete than using a paint brush!
Remember how I mentioned the gorgeous grain patterns found in oak wood?? Just look at it!! See why it is my favorite type of wood for furniture??
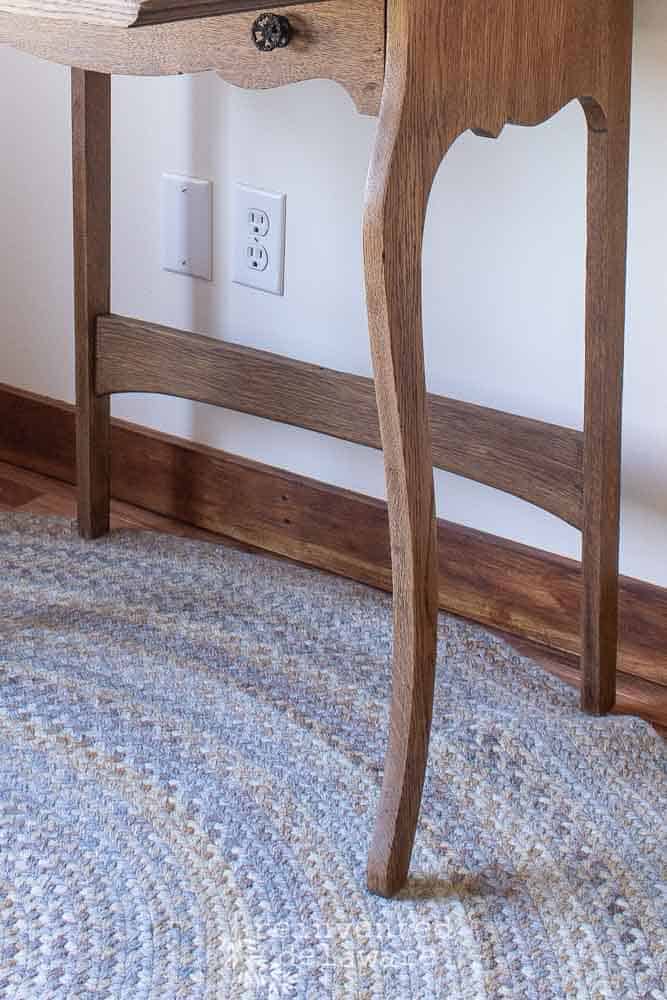
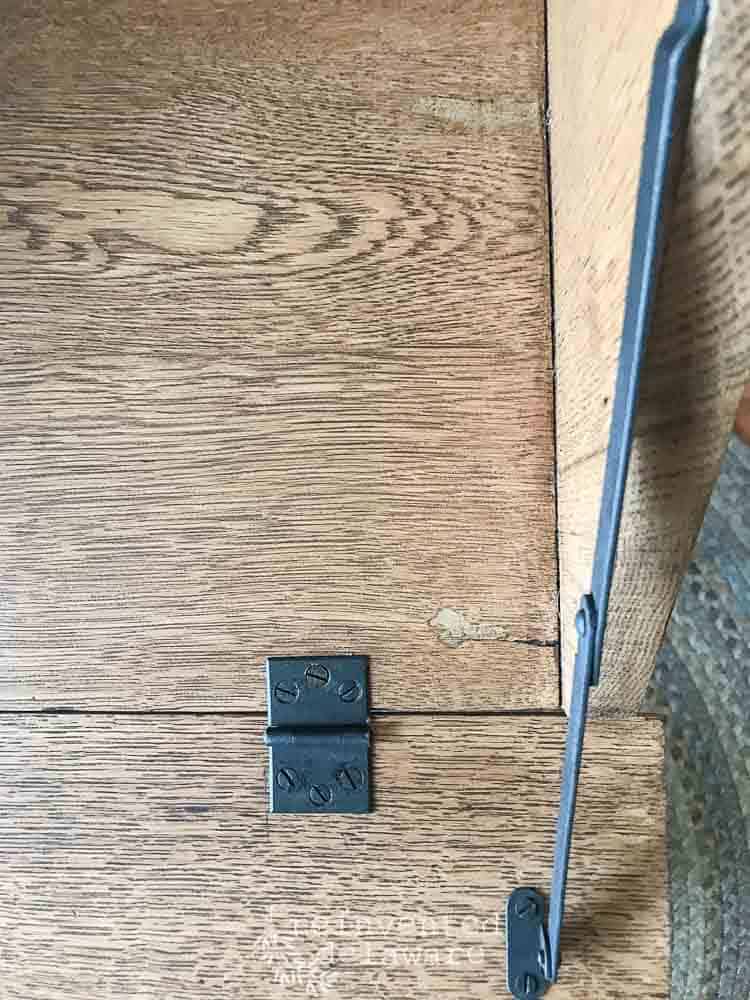
additional sturdyness
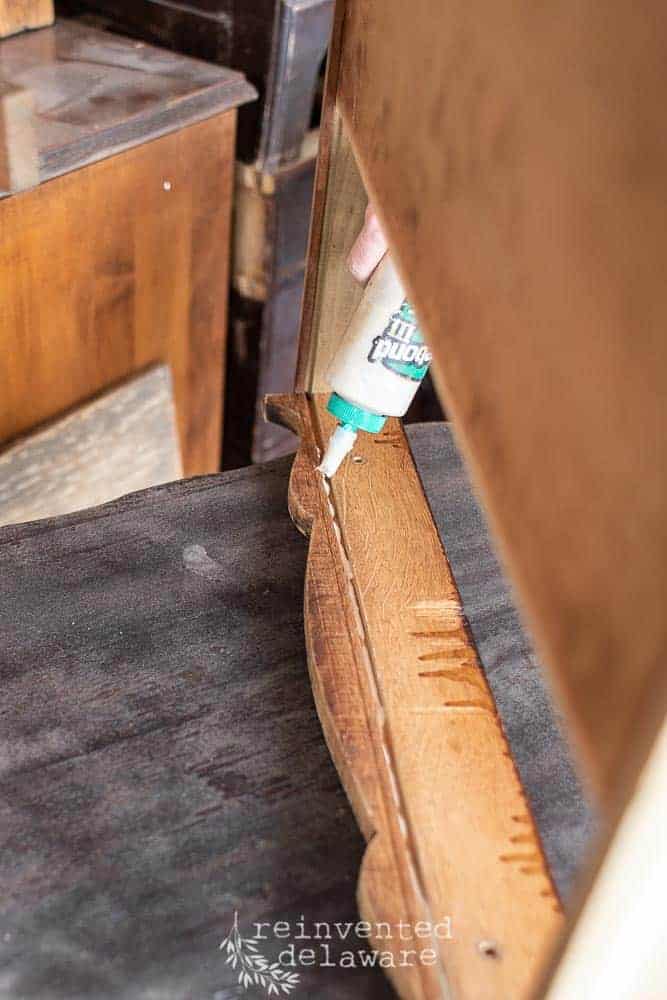
The bottom piece between the two back legs on this antique oak fold-down desk was missing and needed to be replaced. You would never even know that it wasn’t there originally! We save bits and pieces from other furnture makeover projects so we often have spare parts.
The section that we added the back two legs of this desk was the back splash of a small dresser. I can’t remember what happened to that small dresser but we ended up with this little piece! It is solid oak so it works perfectly to stablize the back of this adorable flip down desk.
It is attached with wood glue and wood screws. The finish is the same as the rest of the desk.
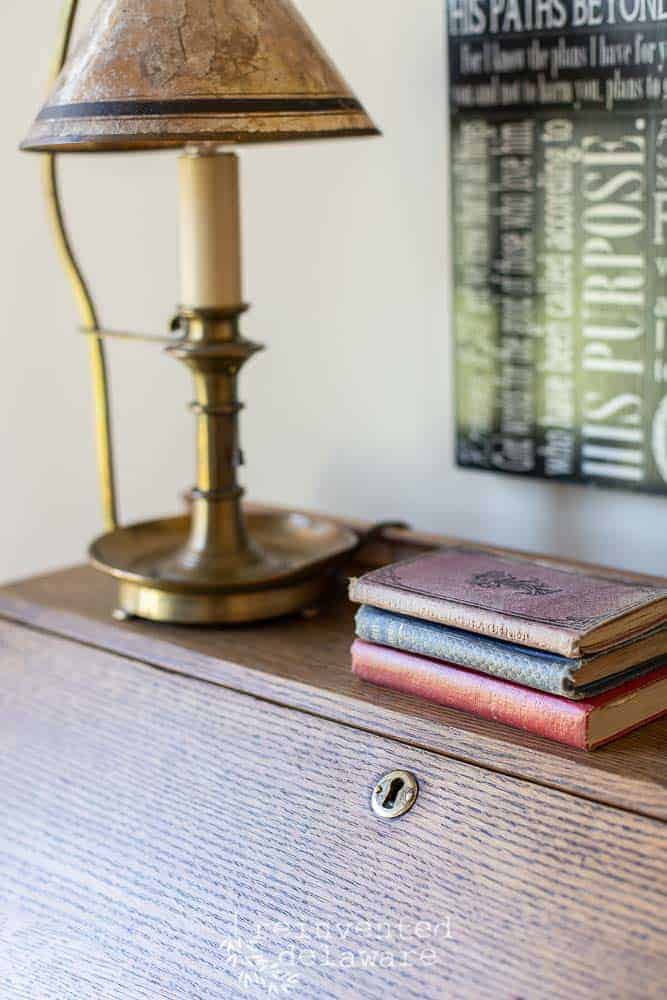
vintage hardware
The antique oak fold-down desk did not come with a key. I just cleaned up the lock and let it be. Back in the day, important papers could have been locked up in the desk. Now we just store all our important documents on external hard drives!
The hardware was so lovely on this piece! All it needed was a quick wire brushing and then a bit of Rub ‘n Buff in Ebony.
Rub ‘n Buff comes in small tubes in a variety of colors. In my opinion, it creates a more authentic and vintage feel to the hardware. Much better than spray paint!
natural looking wood finish
This desk was a labor of love! And honestly, the labor wasn’t all that bad! The finished antique oak fold-down desk looks so amazing now!
This is a custom piece for a client. She has had this desk for years and years and wanted to restore it to it’s original look. She was so pleased when she picked it up!
so glad you stopped by!
Thanks so much for stopping by! I really appreciate your time reading our tutorials! Stay in the loop by subscribing to our email list! Promise I won’t share your email with a soul – it’s just between us friends!
Follow along our reinventing journey on Instagram and Facebook! We love to share the tutorials of many of our projects and we love to ask your opinions on our recreations! Pin any of the images to your DIY furniture boards on Pinterest!


Cindy Rust
Cindy has been decorating her home with thrift store finds for 40 years. She is an avid thrift store shopper who loves to makeover the items she finds into vintage-inspired home decor and furniture. When she isn’t thrift shopping or painting a piece of furniture, you can find her making homemade butter, working in her garden, or painting with watercolors.
Recreate and Decorate
Join the Facebook Group and Share Your Projects With Us!


Cindy, this looks gorgeous! ? Cant wait to bring it home! Thanks so much for all your hard work!
You are most welcome Linda!! I can’t wait for you to see it! Take care?
Your work is always so inspiring to me and this transformation is no exception.
I am so glad that you are saving old and neglected items and bringing them back to life!!!!!
Me too Maria! I hate to see the beautiful pieces tossed aside. Thanks for stopping by today 🙂
Who is the desk manufacturer? Do you have measurements or any sort of plans. Love how it turned out I’d like to make one
The piece did not have a makers mark so I am not sure of the history or anything else about this gorgeous desk. It belonged to one of our clients and had been in her family for years. Best of luck finding some plans. You could possibly search on Etsy for secretary desk plans. Just a thought!
Cindy- I absolutely love how this desk turned out. The finish is perfect. Like you, I also like to use General Finishes products. Finally, paper pattern for the lined drawer is adorable.