
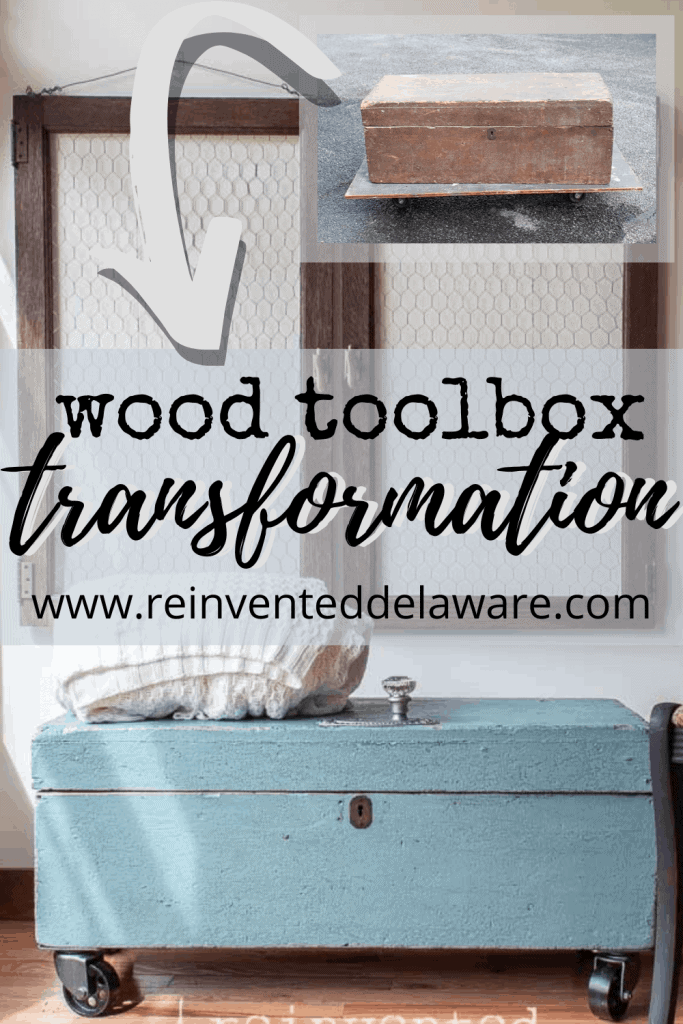
Wood Toolbox Decorating Idea
This post will show you a wood toolbox decorating idea you will love. It’s an easy makeover that will be a gorgeous and useful piece for your home! Let’s get started!
THIS POST HAS BEEN UPDATED
As an Amazon Affiliate (and other companies including Miss Mustard Seed’s Milk Paint), we earn a small commission on products sold through affiliate links. Your purchases through those links help to support this blog at no additional cost to you. In purchasing the supplies we use and recommend via our links, you help to support the free tutorials we offer you and our other readers. Thank you so much! Read my full disclosure here.
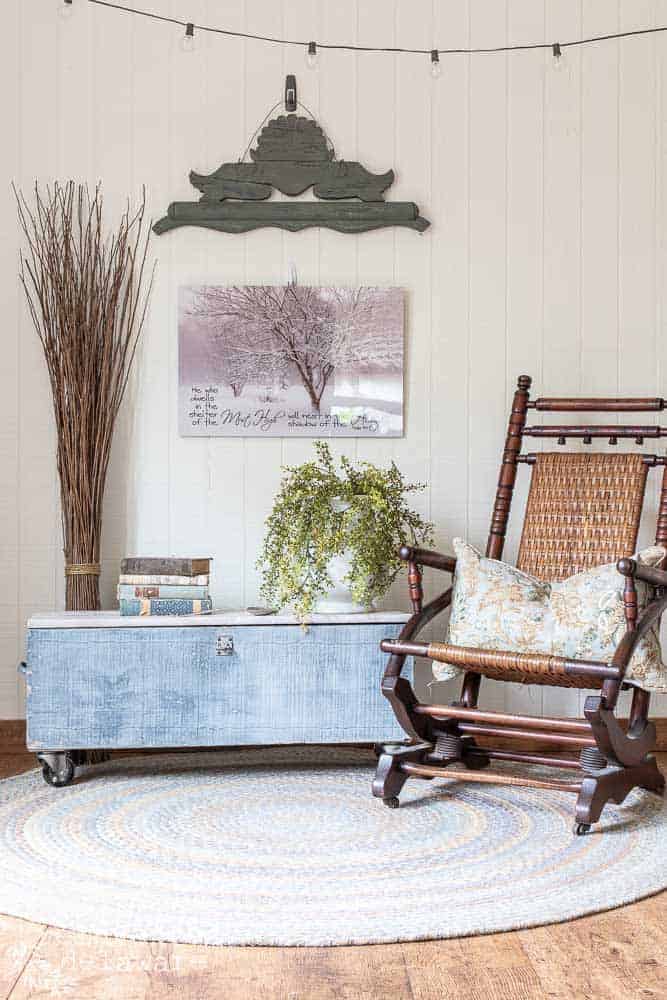
wood toolbox decorating idea
Auctions are one of our favorite places to find amazing antique and vintage pieces. Wood toolboxes can be found at most auctions. This wood toolbox was under $10 because it was pretty dirty and worn-looking. It was also filled with leftover tools, screws, nails, and gunk in the bottom.
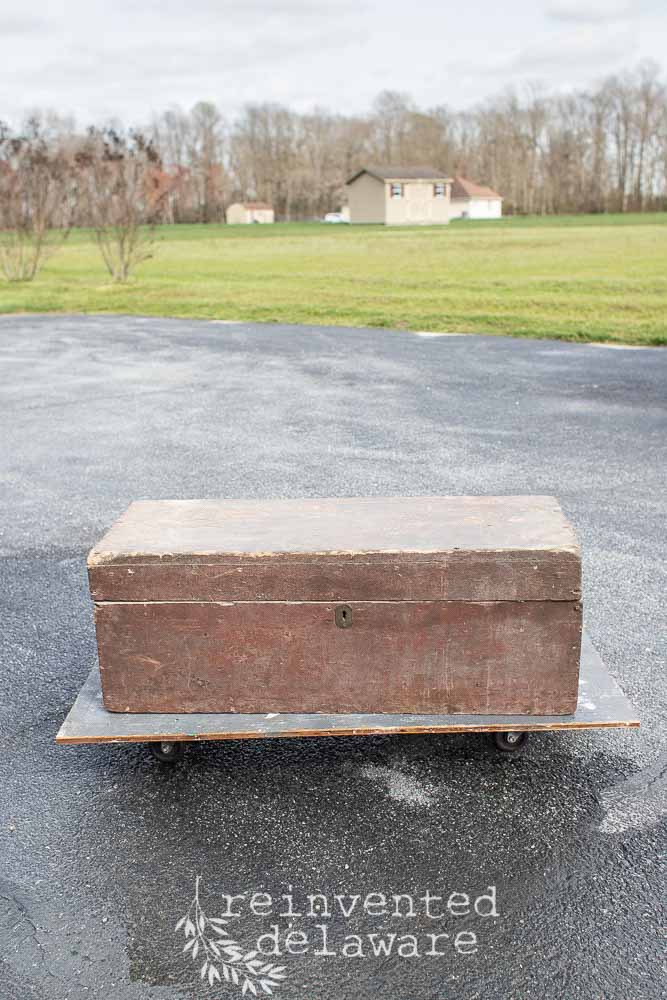
antique wooden carpenter toolbox
As soon as I decided to work on this project, I asked my followers on Instagram what they thought I should do with it. I asked questions like:
- should we paint the wood box or leave it natural
- what kind of legs should we add, hairpin legs or casters
- what color should the wood toolbox be painted
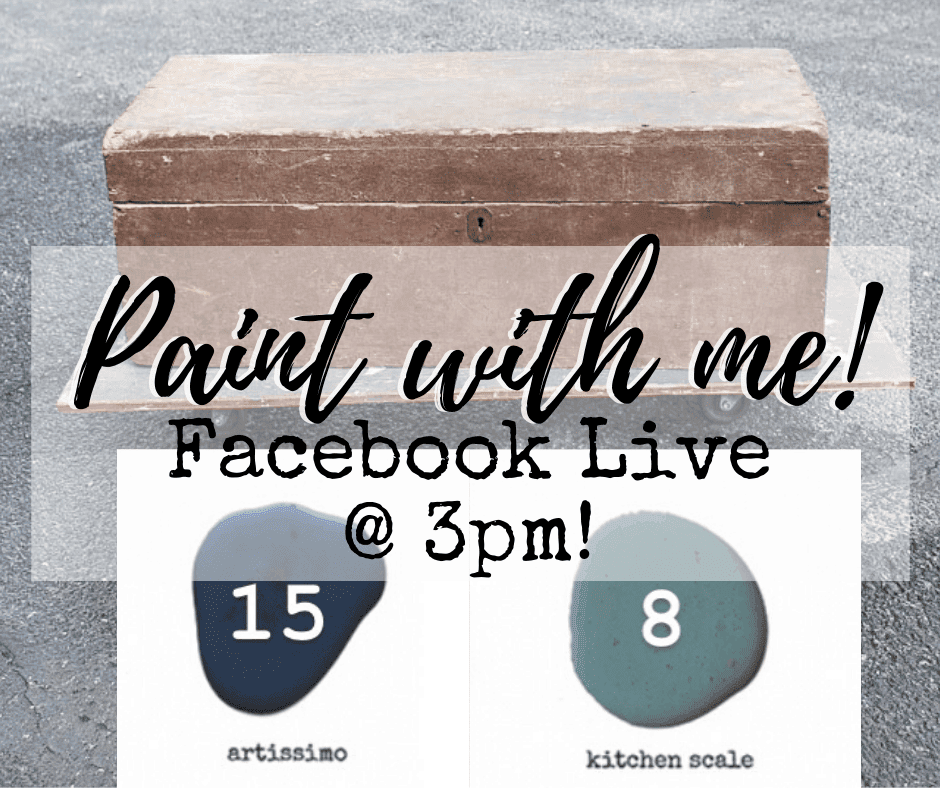
We even did a Facebook Live with you so you could watch the wood toolbox get painted!
I was thrilled with the interest y’all had in the details of this box! My followers really got into the whole process! It was quite a lively discussion over on the socials!
We have completed many wood toolbox projects over the years and it was fun to have you help out with the decisions!
list of supplies:
Use the links below to purchase some of the supplies for this project! You are helping to support this blog and all the free tutorials we offer here! Thanks so much!😊
- Zinsser Clear Shellac
- Simple Green
- casters
- Rustoleum spray paint in Soft Iron (find at your local hardware store)
- Scotch Brite pad
- scrub brush
- Frogtape
- chip brush
- shop vac
- hose
- power drill driver
- drill flip drive unit
- nitrile gloves
- Miss Mustard Seed’s Milk Paint in Teal Ocean
- clear coat in flat (Miss Mustard Seed’s Milk Coat in Flat is amazing!)
purchase Miss Mustard Seed’s Milk Paint supplies here!
how to clean an old wooden toolbox
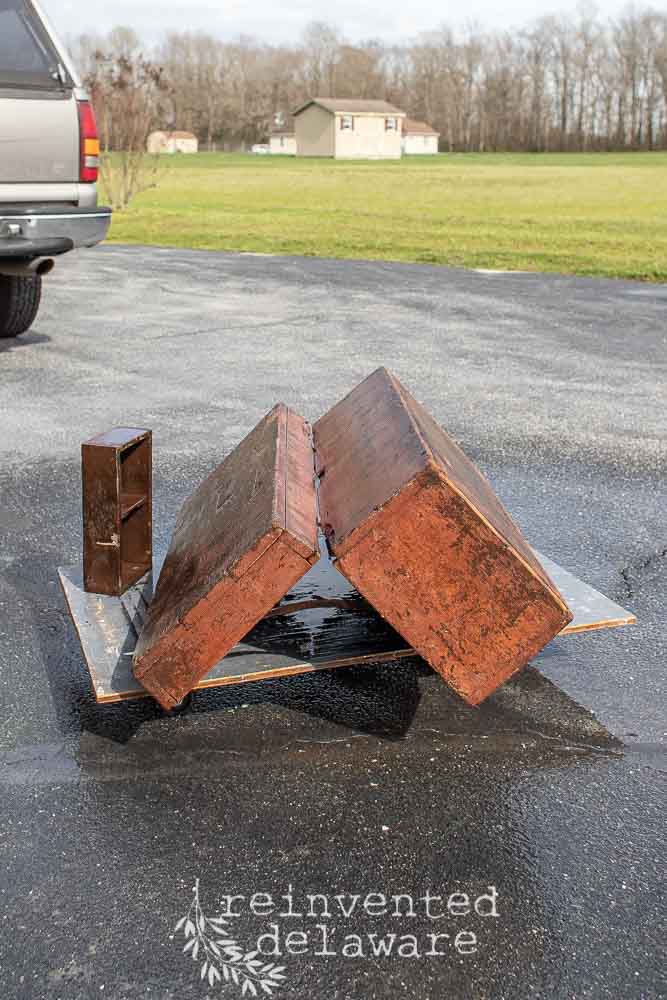
Let’s talk about some of the steps that it took to prep this piece for paint before we look at the decorating ideas for this wood toolbox.

A good vacuuming with the shop vac was in order. Then a good scrubbing with a solution of hot water and Simple Green.
The day was sunny and gorgeous outside so after the scrubbing, I set the wood toolbox outside in the sun to dry.
When the wood toolbox was completely dry, I applied two coats of Zinsser Clear Shellac to seal in any oils or stains that might bleed through.
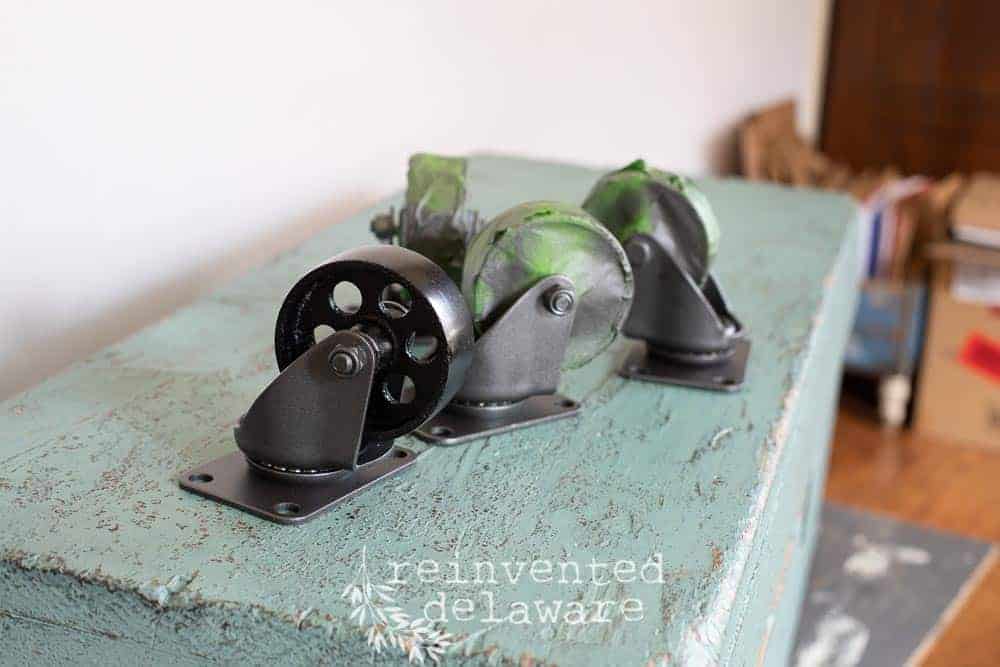
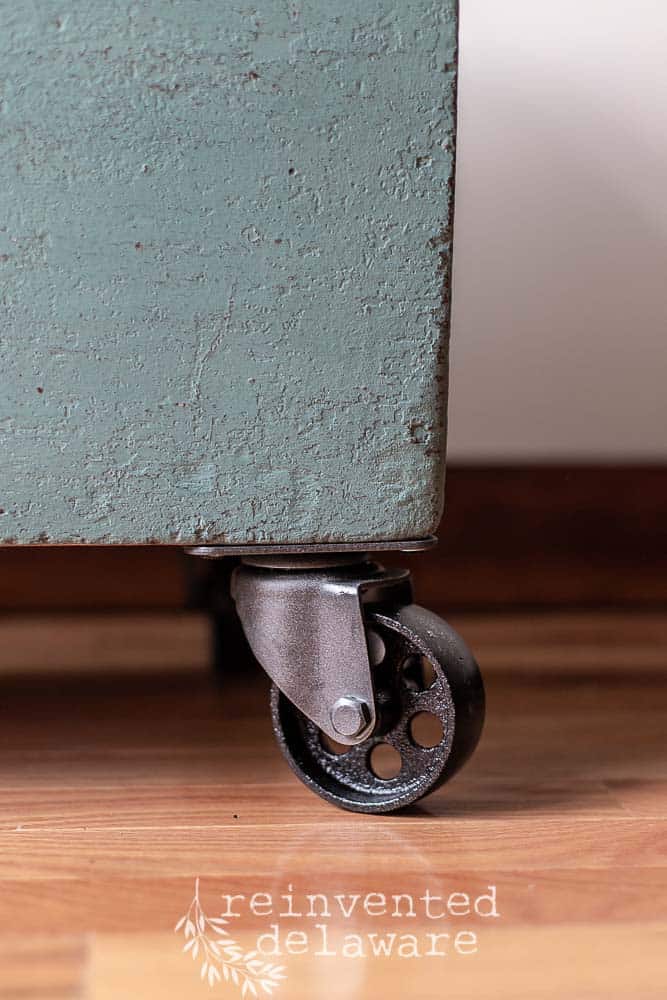
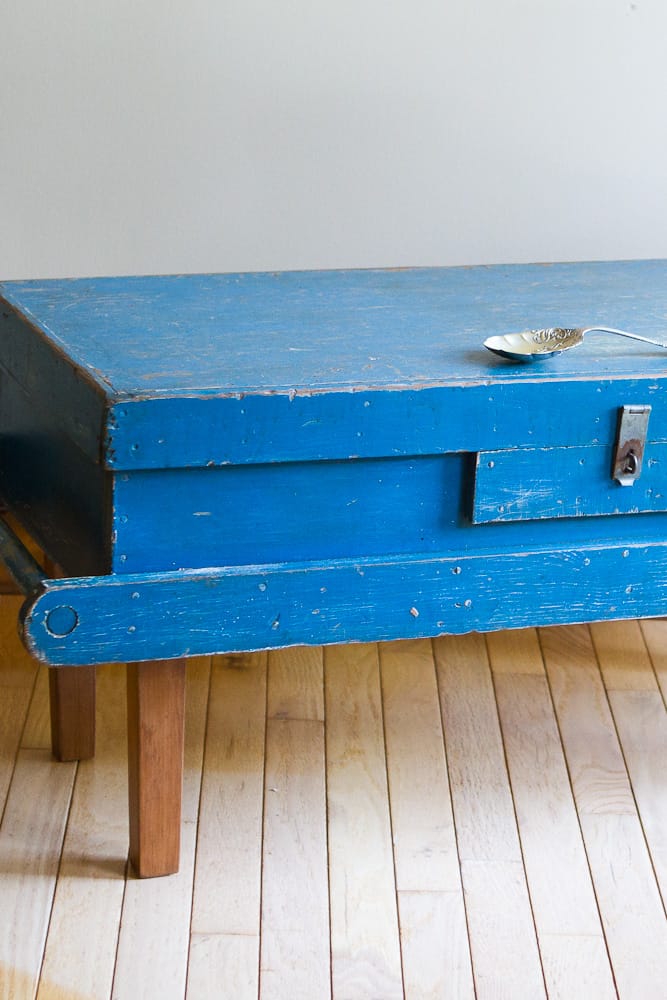
faux antique casters for furniture
The next step was to change the look of the industrial-style casters I found online. The casters were reasonably priced but had a shiny and new silver-ish metal that I am not a fan of.
Let’s fix that!
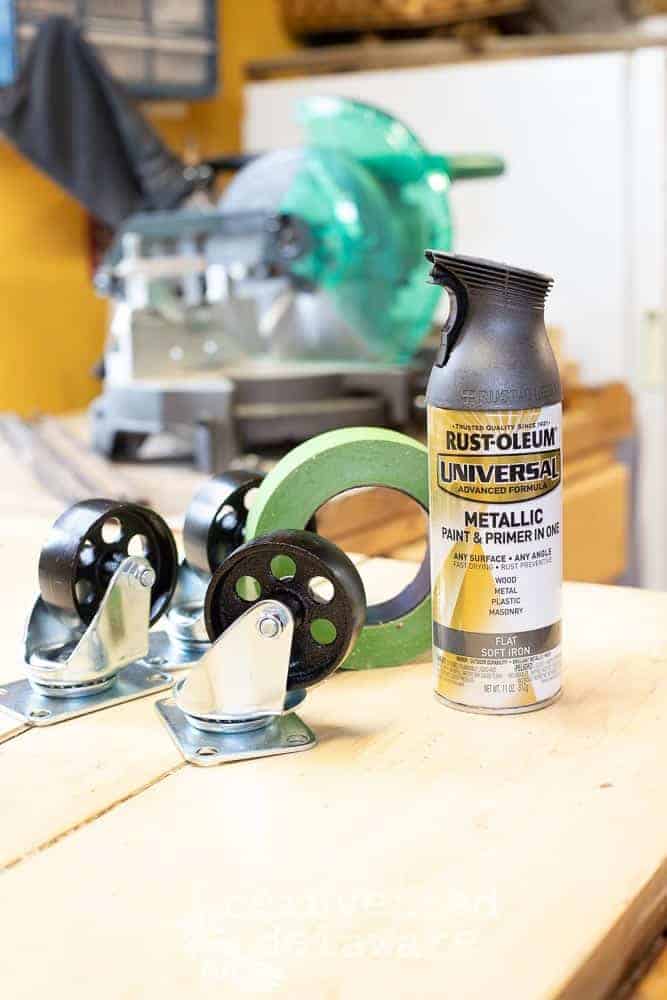
Rustoleum Metallic Paint and Primer in Flat Soft Iron to the rescue! I love these hammered finishes that Rustoleum offers. They come in a ton of colors. We purchase them at our local hardware store.
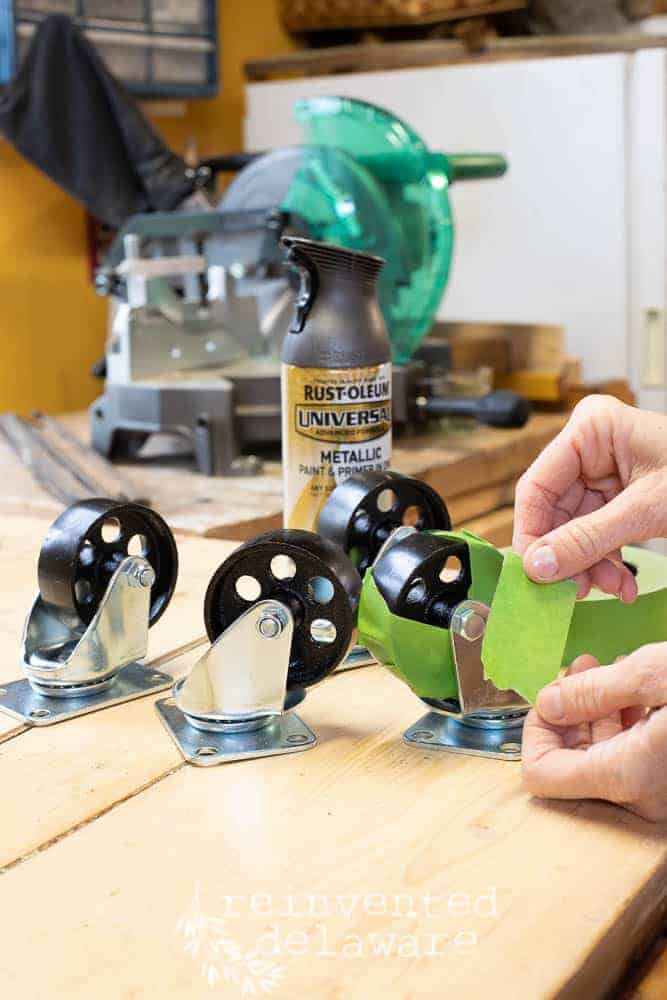
Taping is necessary so that I don’t get paint on the wheels. The paint could cause the wheels to not turn as easily as I wanted.
Using small sections of green Frog Tape, I taped all the way around on both sides of the casters. This step takes some time but it is so worth it for a professional look.
After applying the tape to both sides, I also added tape to the flat part of the wheel that will touch the floor. Thoroughness is super important when it comes to taping!
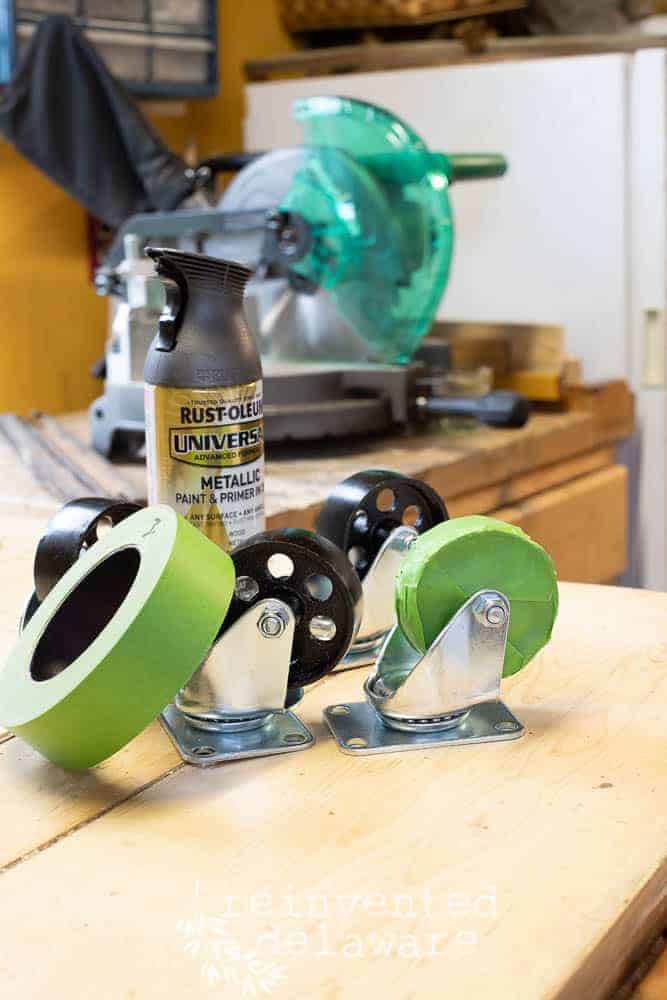
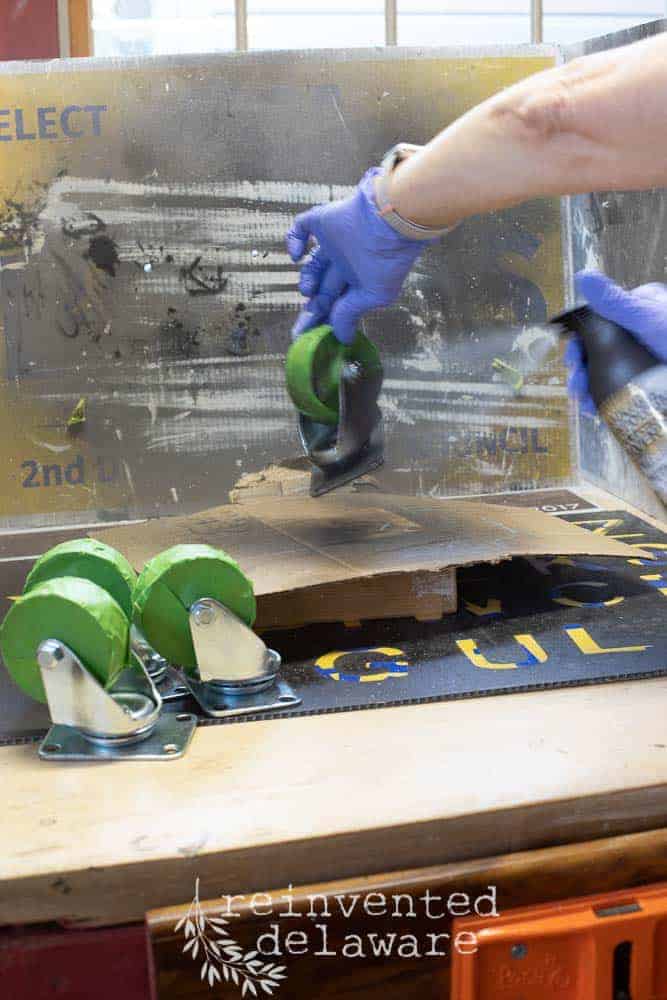
If you spray paint, you know how important gloves are as well. I have had times when I thought, “I don’t need gloves for this quick spraying project!”
And believe me, I always regret it!
In hindsight, I should have taken off my watch. Agh!
Pull the tape off when the spray paint has completely dried and wa-la, vintage-style casters!
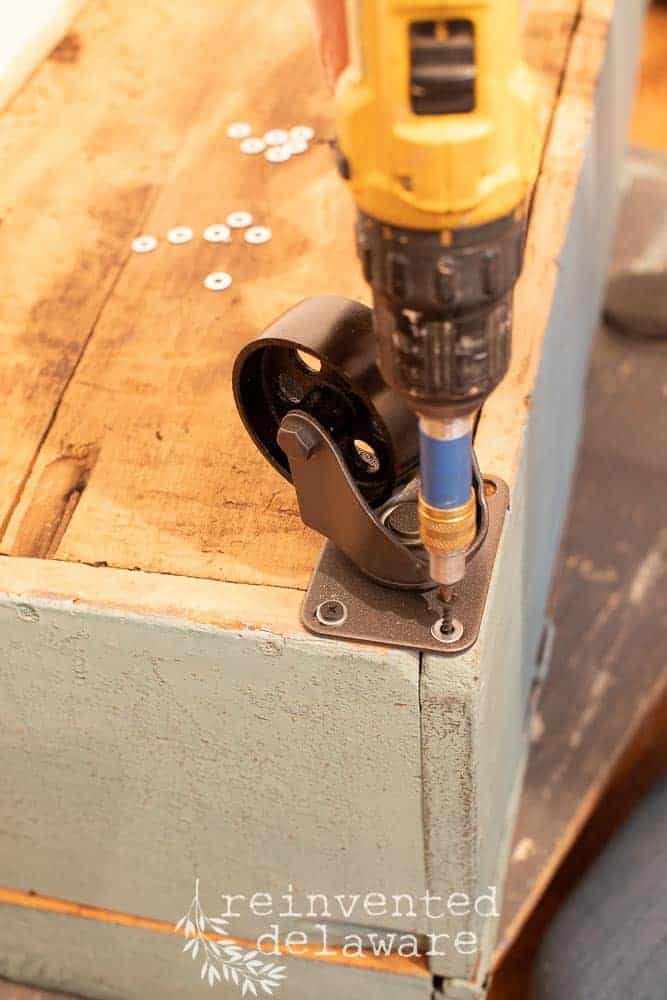
attach the caster wheels
Each corner of the wood toolbox will need a caster. Pre-drill the holes with the drill flip drive bit on the power drill. This tool is so handy if you don’t have two drills set up – one with a drill bit and the other with a driver bit. The drill flip drive bit switches out very easily. This is a must-have tool in the workshop.
You will notice I also used small washers because the screw heads were a bit small for the pre-drilled holes in the casters.
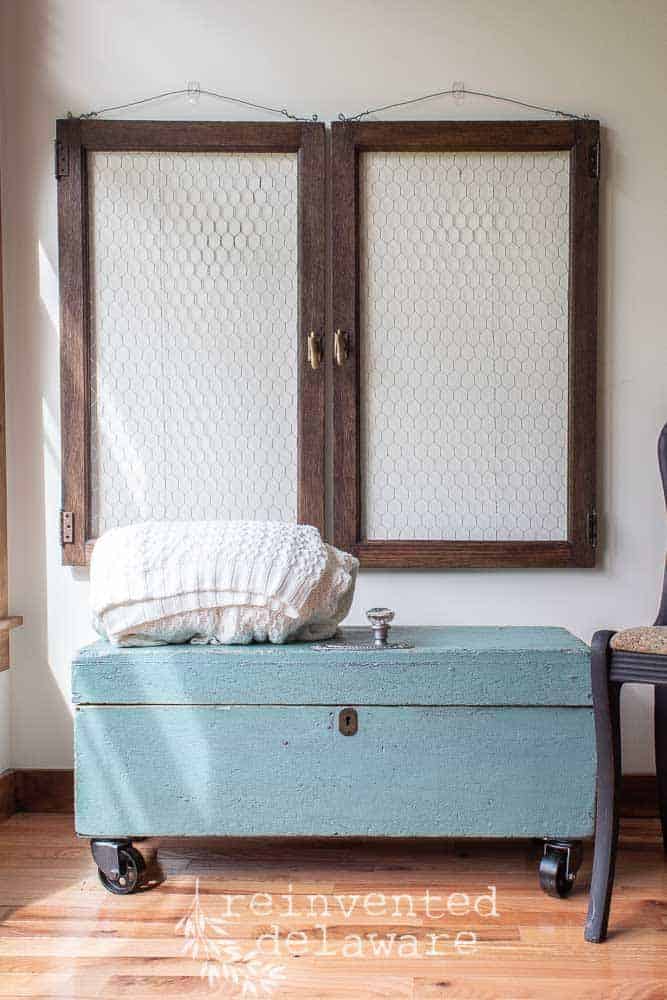
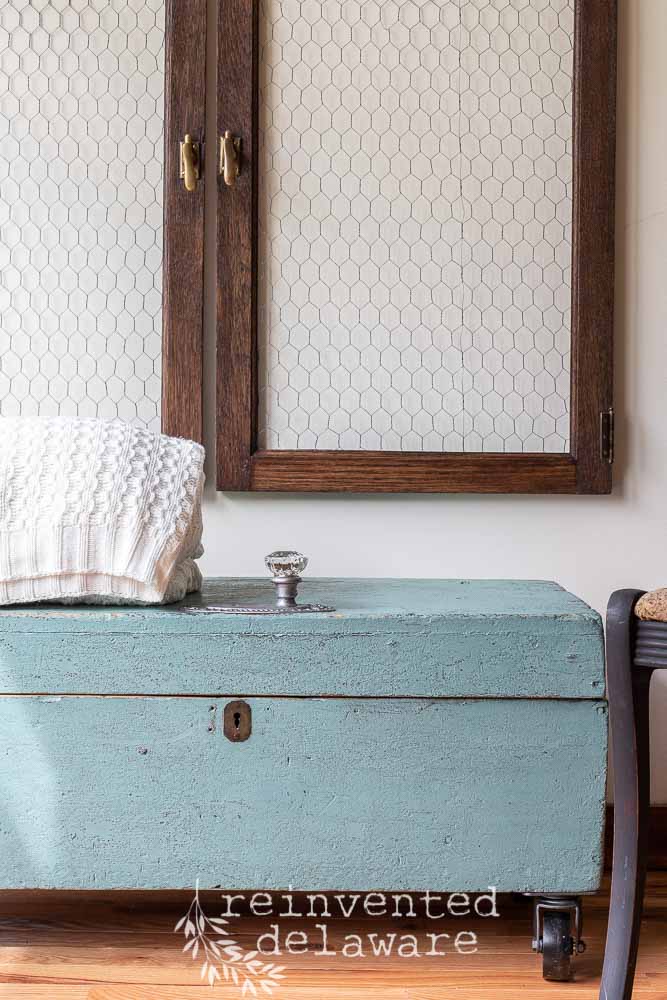
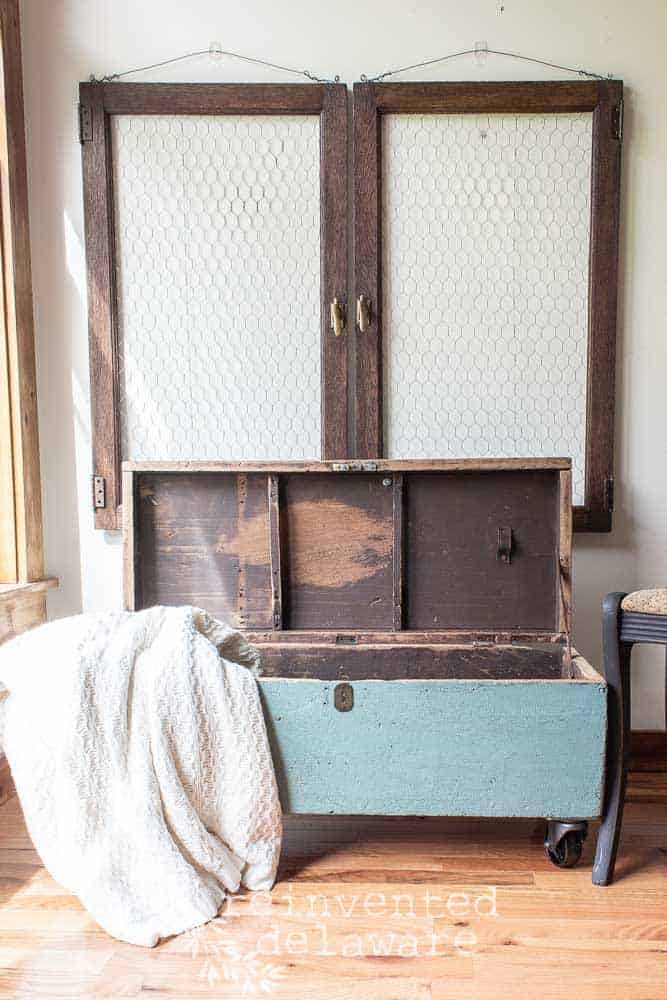
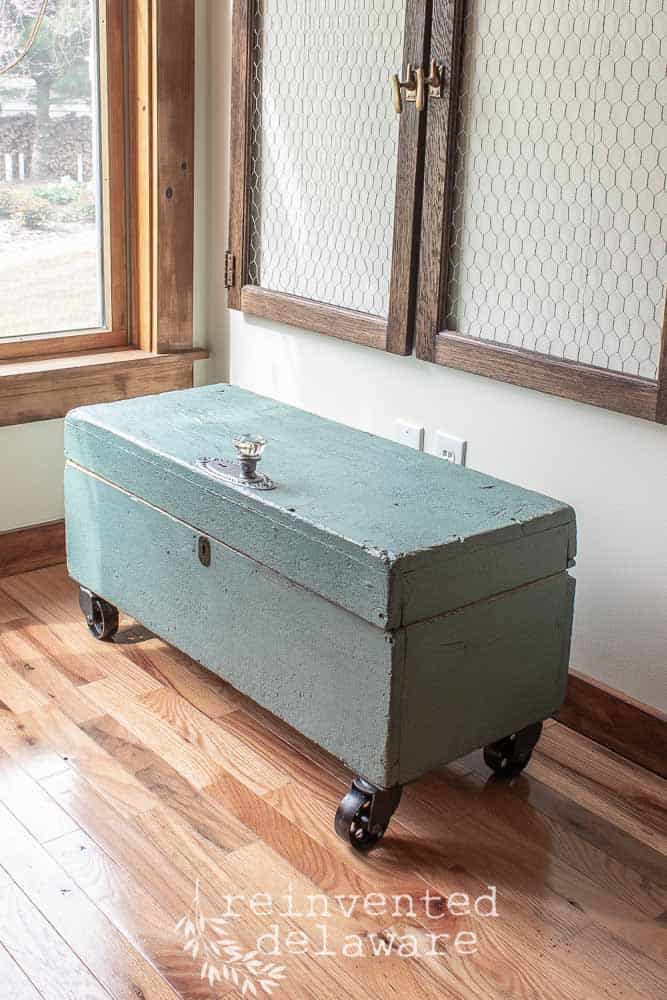
old wooden toolbox color reveal!
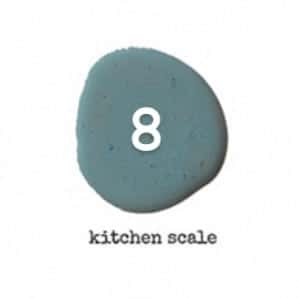
Remember I took an Instagram poll to find out what color the wood toolbox should be painted? I first asked which color from the many gorgeous colors Miss Mustard Seed’s Milk Paint has and y’all narrowed it down to just two colors, Artissimo and Kitchen Scale (now called Teal Ocean)
This paint goes on beautifully. You can watch the painting in my Facebook Live replay 🙂

Miss Mustard Seed’s Milk Paint
So what do you think of your choice?? I absolutely LOVE it!!
The piece is sealed using two coats of General Finishes High Performance in Flat. I love this stuff! Super durable, easy cleanup, and low on sheen!
UPDATE: Miss Mustard Seed’s Milk Paint offers a lovely low-sheen topcoat that is super easy to use! It’s called Milk Coat and comes in three sheens: high, low-sheen, and no-sheen.
how to decorate a wood toolbox
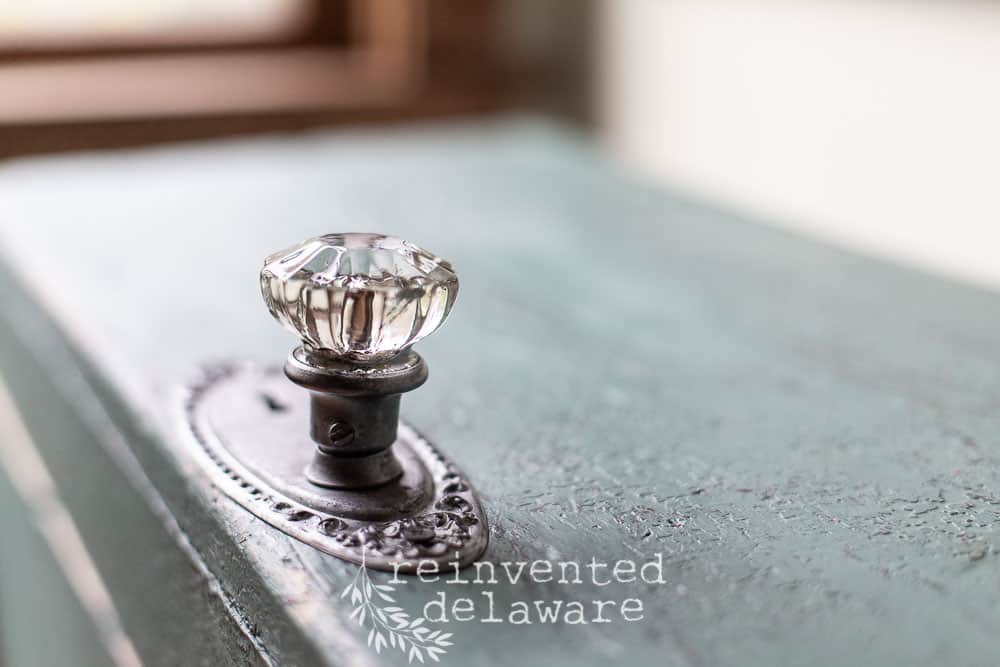
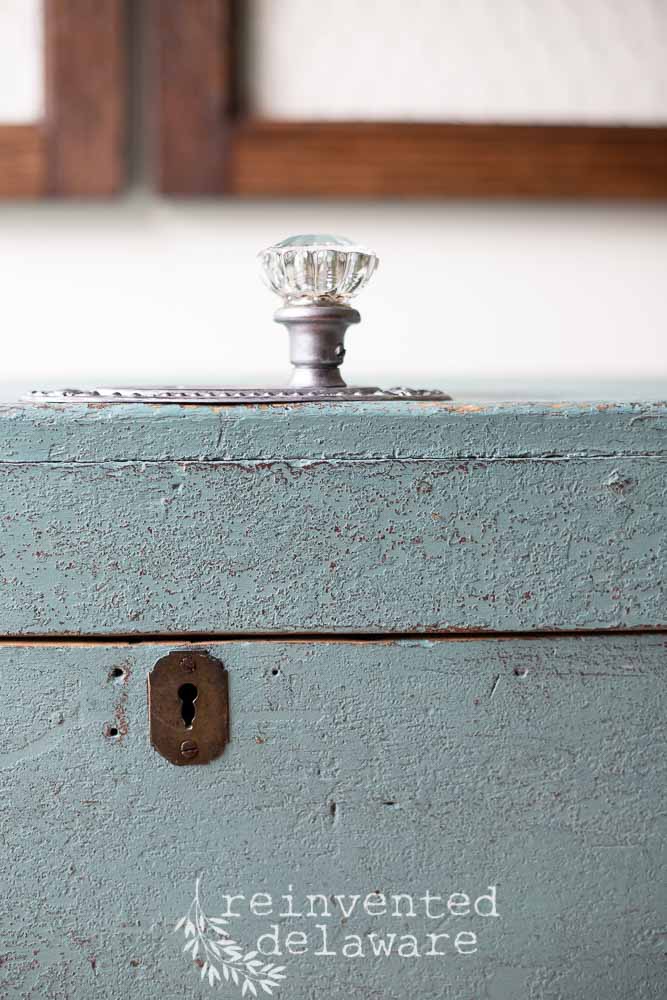
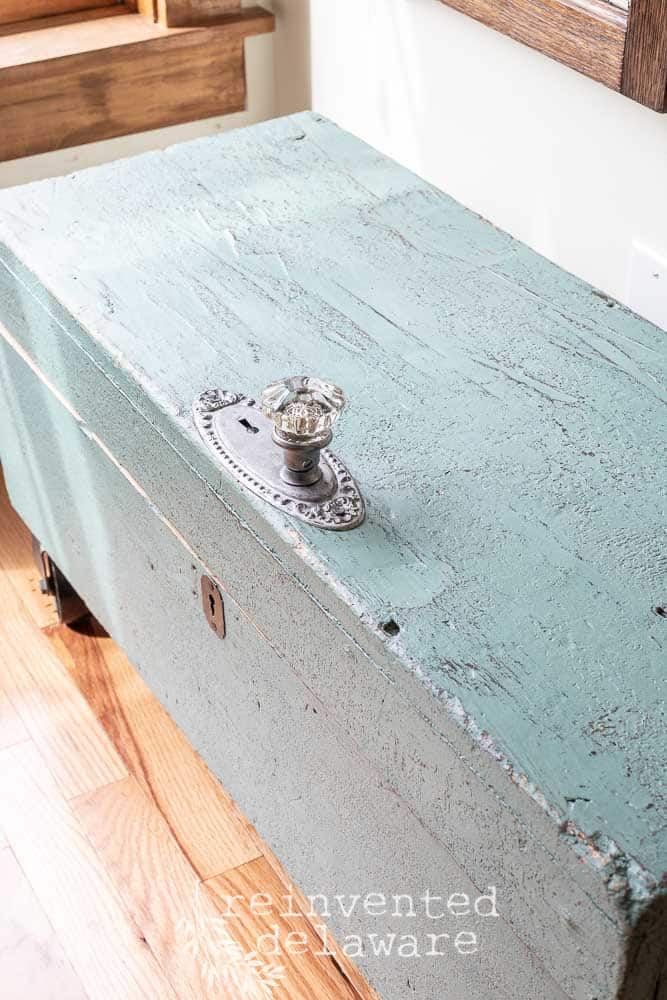
My collection of mismatched and lost hardware is ever-changing so I love digging around in my supply box to see what I have. I added an antique glass doorknob and a backplate for the top handle.
The contrast between the pretty glass doorknob and the utilitarian wood toolbox is right up my alley!
The hardest part of adding a doorknob to a piece like this is finding the right size bolt that will fit a square-shaped hole in the doorknob. Go to your local hardware store with the doorknob and the clerks can help you find the right size bolt.
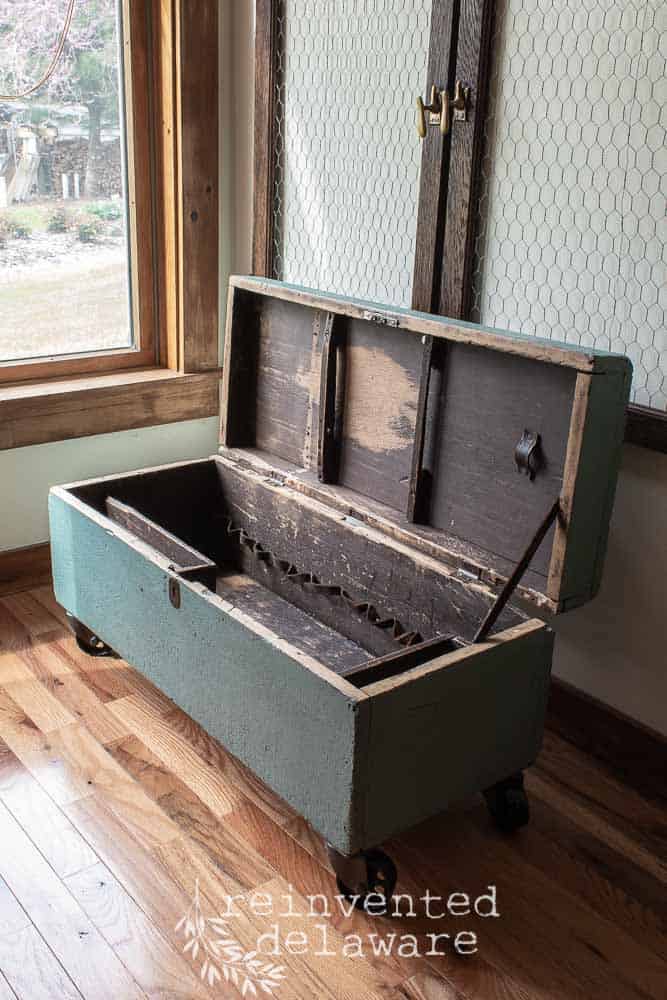
old wood toolbox storage ideas
Look at all of the storage this wood toolbox has! Can you think of some things to store in this wood toolbox?? Here are some of my ideas:
- board games
- extra blanket or pillows in a guest room
- art supplies, coloring books, crayons, paints…..
- seasonal clothing
Wood toolbox decorating idea and storage?? It’s a win-win in my book!
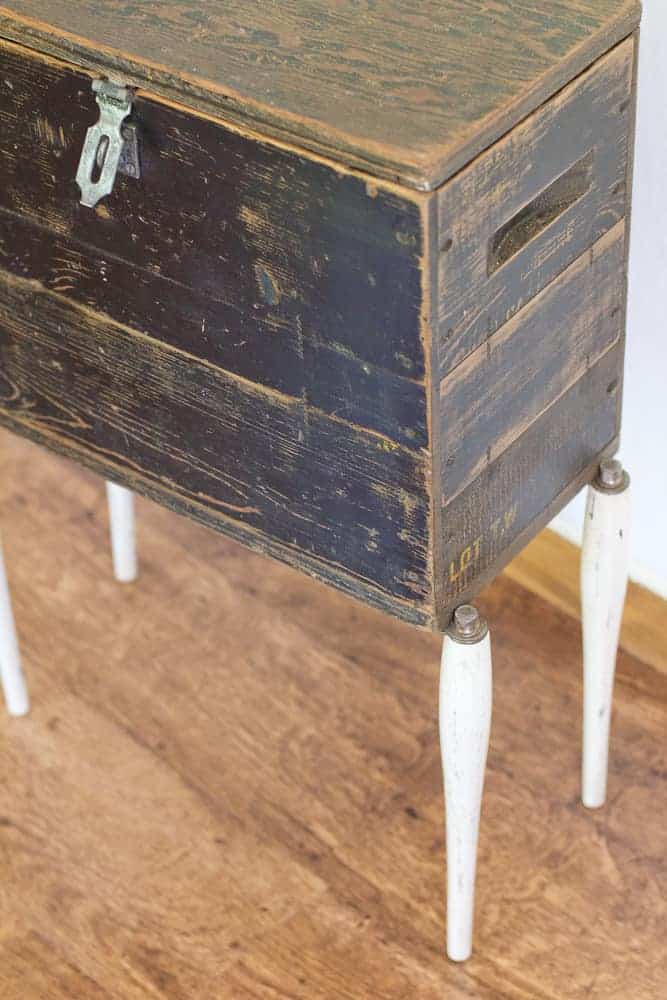
vintage wood tool chest
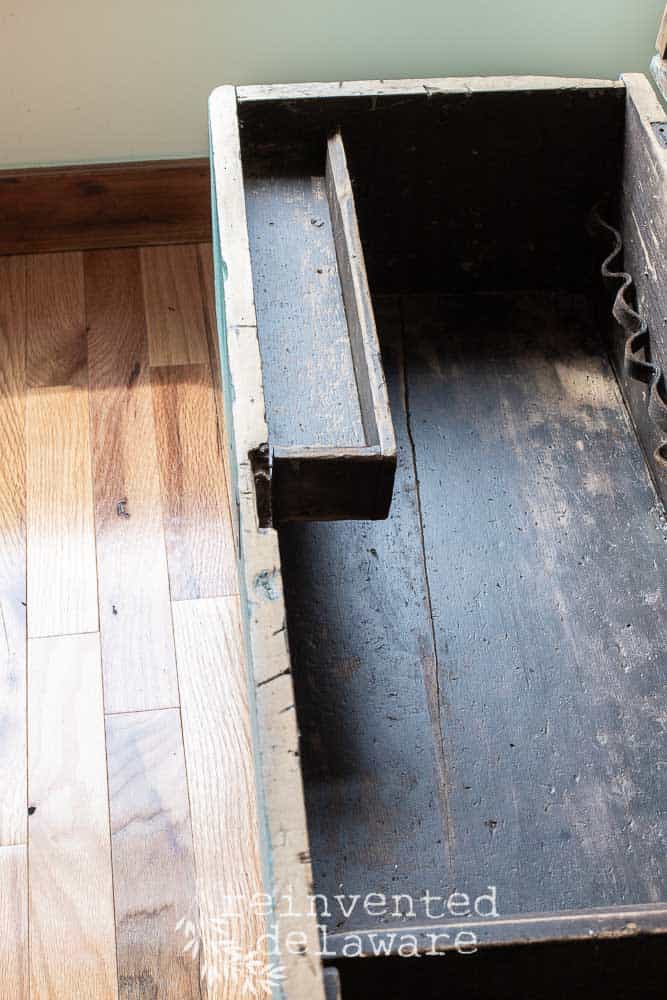
See the inside of the lid of the box? The interior of this wood toolbox has built-in little cubbies that could hold small things. This wood toolbox isn’t just for decorating ideas – it’s also a useful piece for the home!
We left the slats of wood that would have held hand saws in place.
And check out that little piece of leather on the right side!
And that long strip of leather on the back of the interior? Those loops would have held screwdrivers, small hammers, and other hand tools!
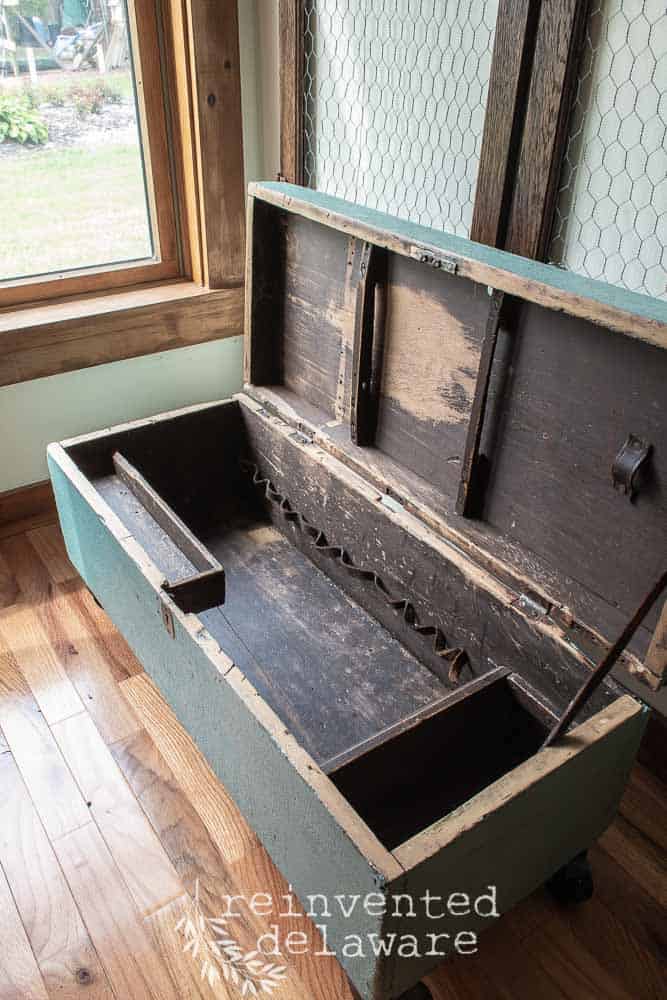
See what I mean about the little cubbies inside this wood toolbox? Aren’t they the cutest??
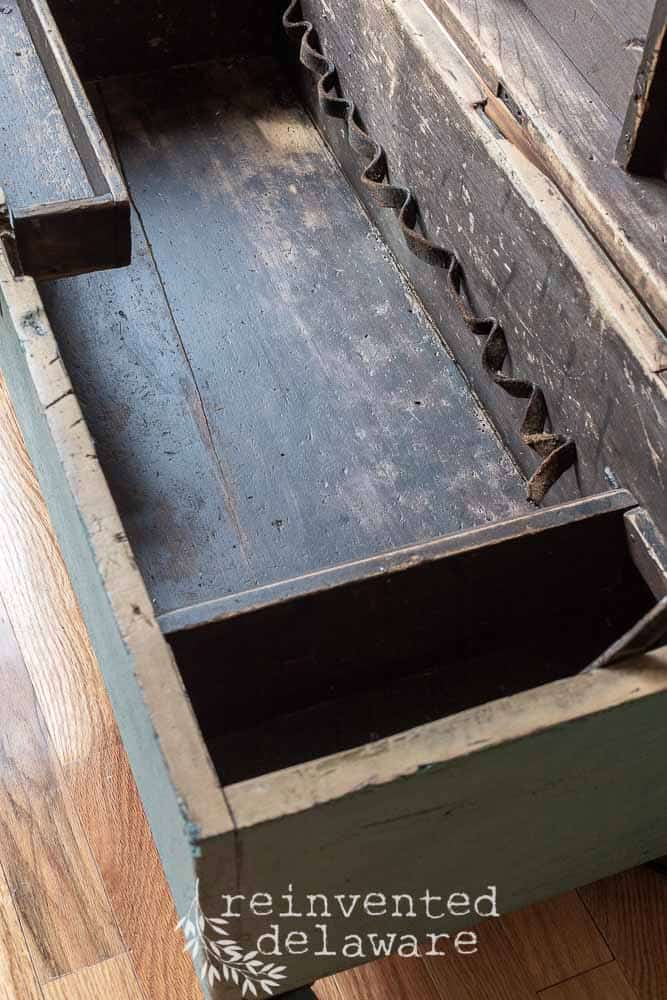
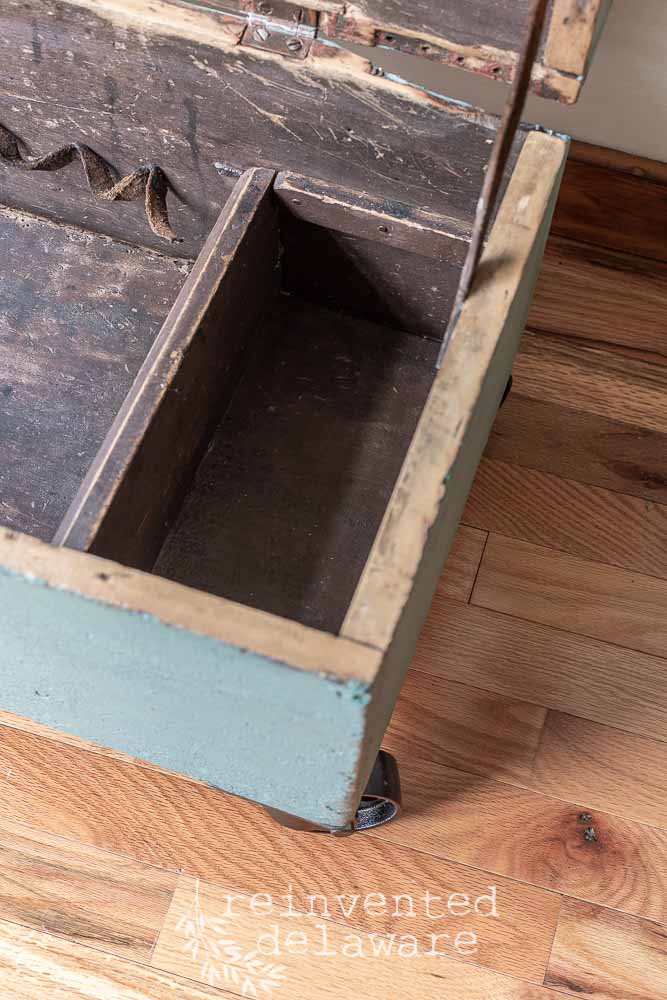
repurposed old wooden toolbox
The ‘hinge’ is a piece of leather too!
Don’t you just love the ingenuity of days gone by?
People just used whatever they had on hand. In fact, that small loop on the back looks like a piece of a belt doesn’t it?
putting casters on furniture
Remember all of the time we took in taping the casters? It was well worth it, don’t you think?
yay for your opinions!
This was such a fun project to do with my followers! Thanks to each of you for offering your input!
If you want to join in the decision-making process, follow along over on the socials. We love Instagram and Facebook.
And of course, Pinterest is a great place to save all the inspirational ideas! Join us over there too! Feel free to pin and share any of the images! We really appreciate it!
thanks for stopping by!
Thanks for stopping by today! I hope you have enjoyed this tutorial.
And I hope you come across an old wooden toolbox that you can transform for your home! Let me know if you do — I would love to hear about your project!
Just for fun, let me know in the comments where you would use this wood toolbox in your home!
more wood tool box decorating ideas:
Click any of the images below to see another amazing wood toolbox decorating idea!
supplies you might need:
Click the image to purchase! Thanks for supporting me by buying supplies through my links 🙂

join our journey
I hope you enjoyed this free tutorial! Join our reinventing journey on Instagram, Facebook, and YouTube! We are also on Pinterest pinning fun inspiration throughout the week!

Love the color! …and the glass handle, and the castors….very pretty. I watched your FB video about how you paint with Milk Paint. Thanks for all of the tips you share. I would have commented but my Facebook page and I are not friends — some weird glitch, again.
Carry on, Cindy! I enjoy watching and reading how you transform your furniture finds.
Karen, you are such an encourager!! Thanks for your kind words! Honestly, FB and I are not exactly BFF’s. ?
I love this so much! I also enjoy all the different spray paint offered today.
I missed your Facebook live. I will visit though. You share great paint tips.
Pinned
Thanks for pinning Cindy! I appreciate it so much! 🥰
Loved watching this transformation! I really like the color, and that antique knob is perfect! Have a great week! Donna
Thanks Donna! I’m so glad you enjoyed the post! Have a great week 🥰
I love this idea. I inherited a big ole red toolbox that this would work perfectly as. Thank you for the tutorial. 🙂
You are welcome Cindy! I hope you get to give your toolbox new life!