
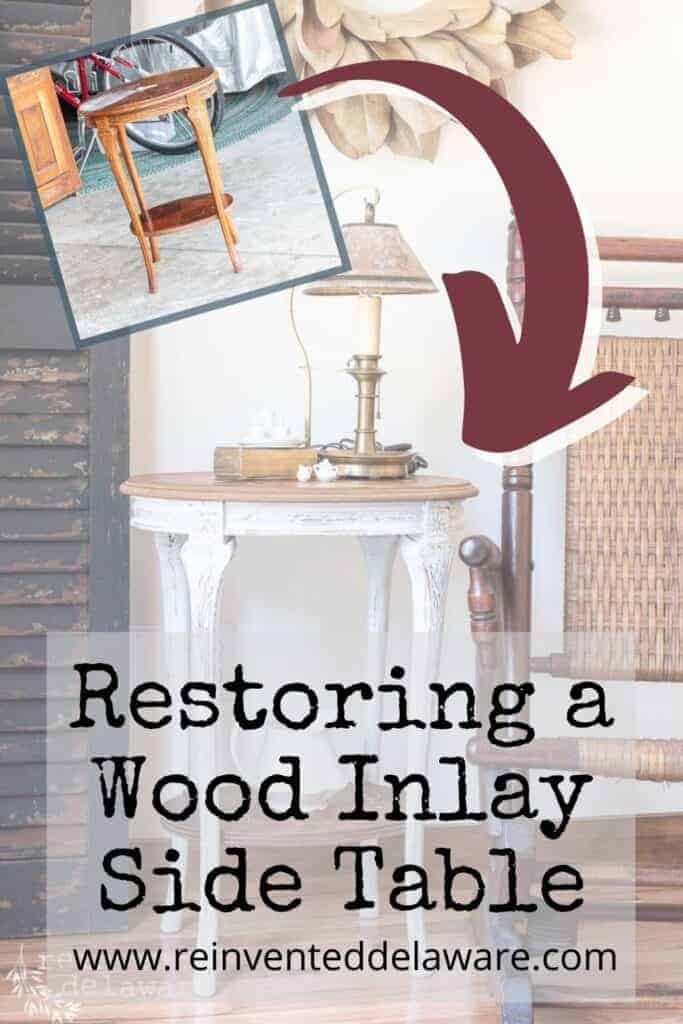
Restoration of Furniture | Wood Inlay Side Table
If you are nervous about the restoration of furniture with a wood inlay, don’t be! It’s not as scary as you think! With minimal supplies, time and elbow grease, you will have a beautifully restored wood inlay table!
The following post may contain affiliate links. That means if you click and then buy something, I will make a small commission at no additional cost to you! Thank you for supporting my blog. full disclosure here.
wood inlay restoration
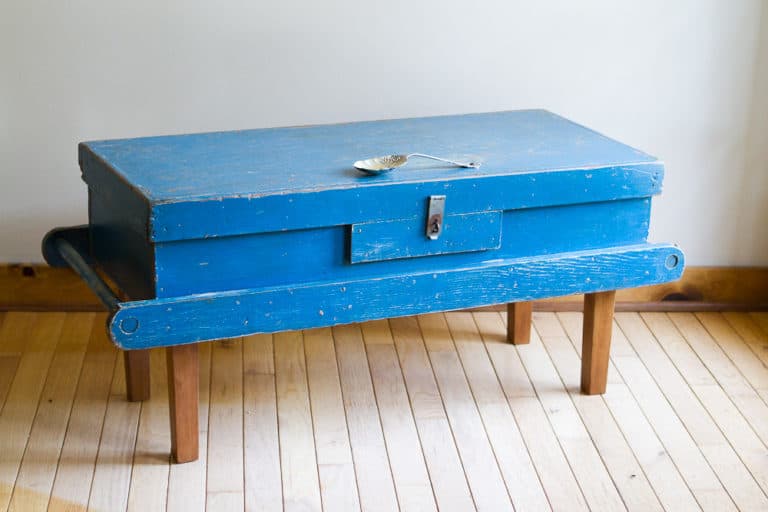
It had been a day of thrifting and antiquing when I walked into Habitat ReStore and there sat this sweet little side table for $10
Yepper! $10!
I could hardly believe my eyes!
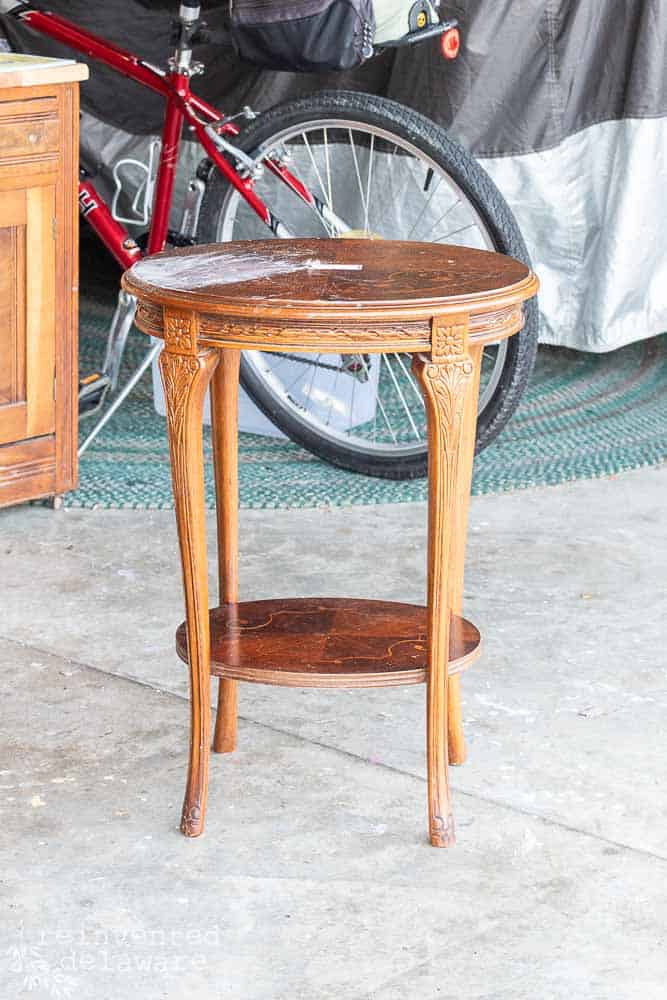
No structural issues at all.
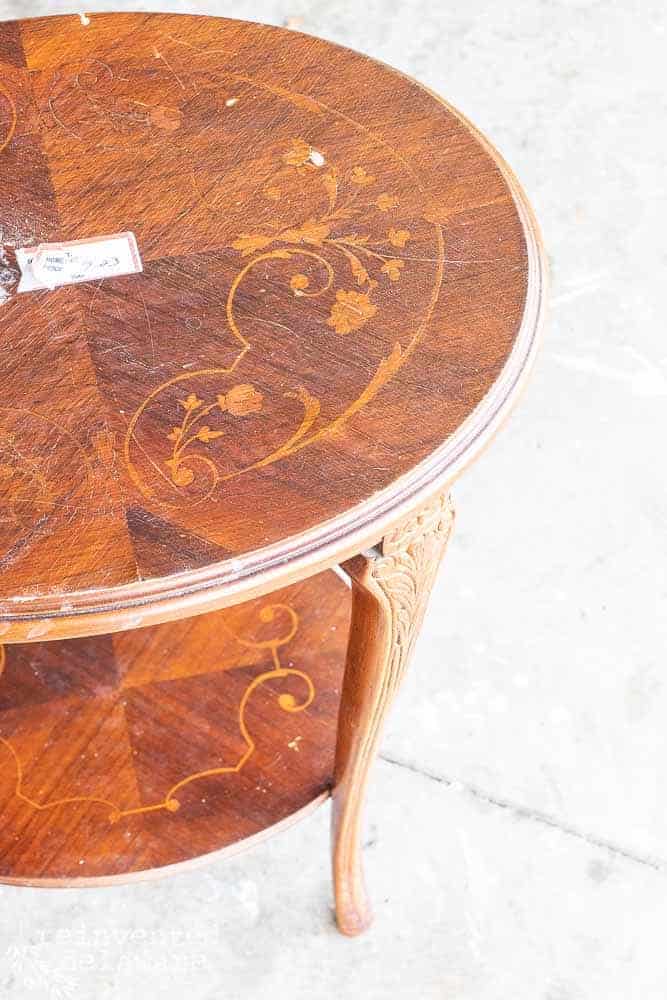
Just some minor scratches and a store price sticker stuck smack in the middle of the wood inlay side table.

easy way to refinish furniture
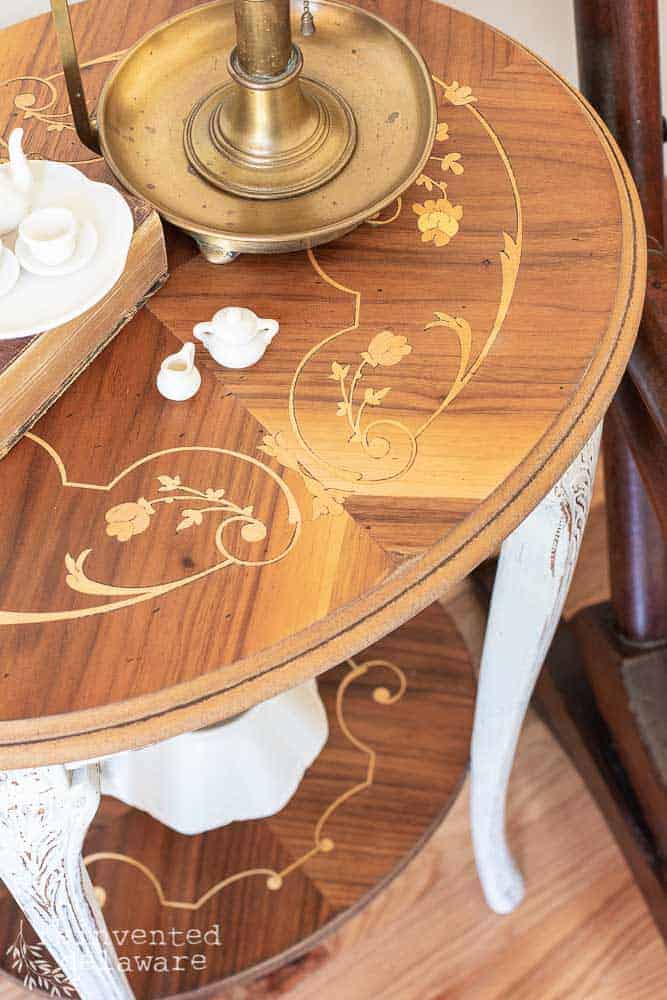
The details of the wood inlay were hardly visible but I had a hunch that this would turn out beautifully with a bit of sandpaper, time, and elbow grease.
After removing the sticker with Goo Gone, I washed the piece down with a solution of hot water and Simple Green. This is a great time to inspect further for any damage.
Zero. Nilch. Nada. None.
Absolutely no damage on this sweet side table!
Woohoo for easy projects!
All I needed to do was patiently and lightly sand the top to expose the wood inlay.
My trusty DeWalt Orbital Sander and my Black and Decker Palm Sander would stay tucked away on the shelf because that would be too much power for this project!
furniture restoration tips
I pulled out a 220-grit sanding sponge. This task wouldn’t be quick but it would be the safe way to sand off the old finish.
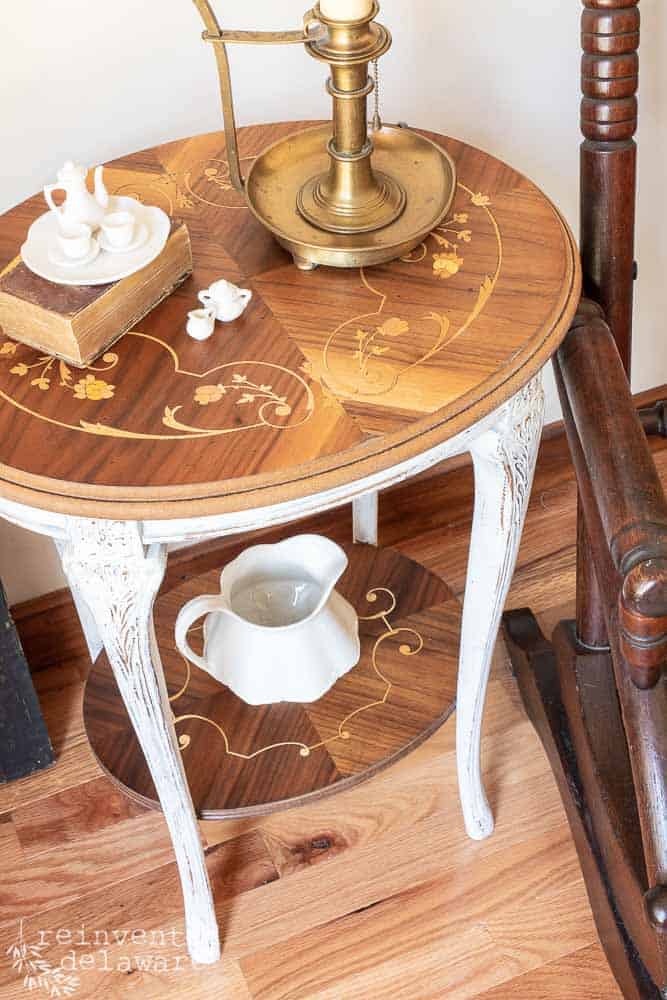
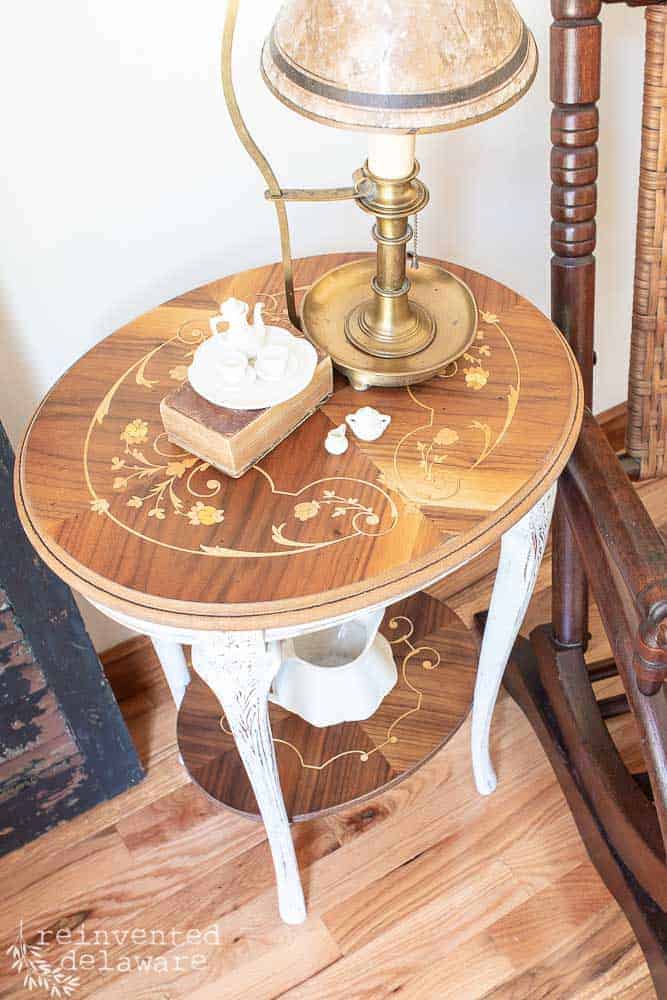
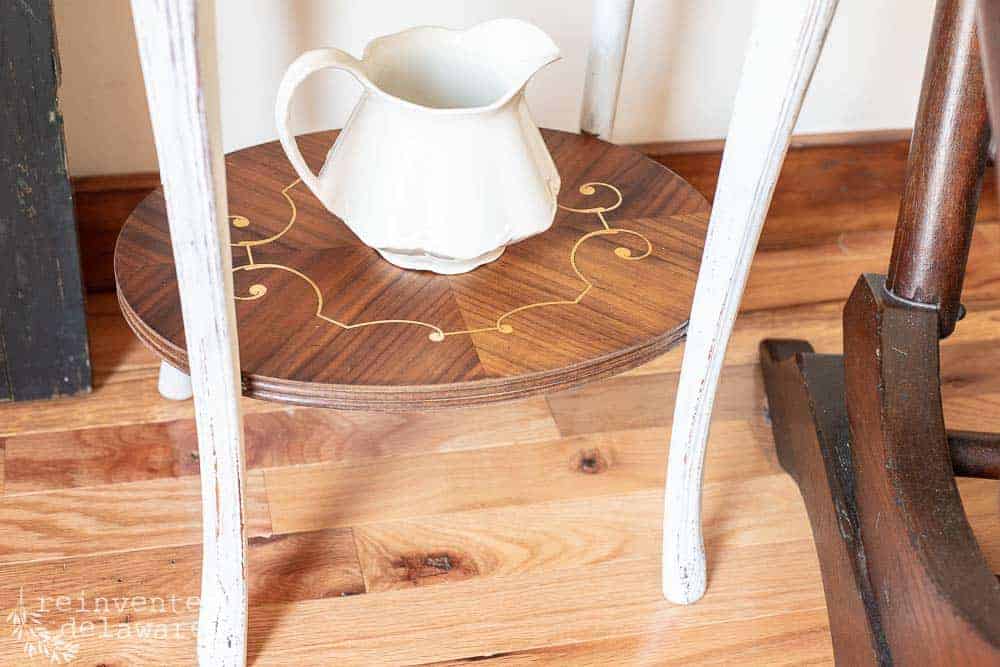
The table not only had a beautiful and intricate wood inlay, but it also had a wood grain pattern in the veneer.
So I sanded in the direction of the grain on all four sections of the table.
And then I mixed up some milk paint.
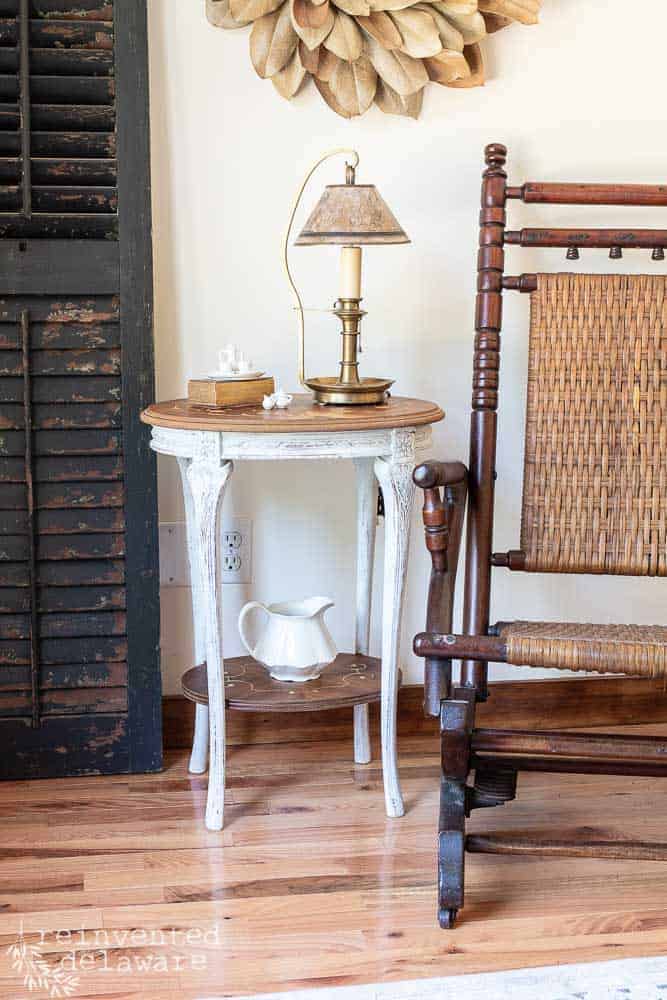
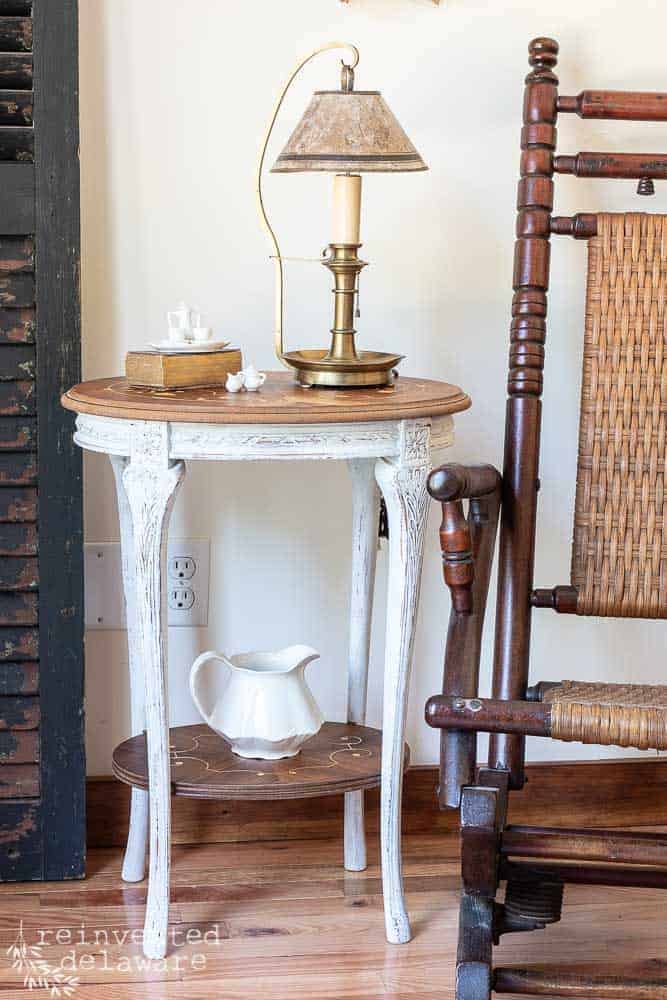
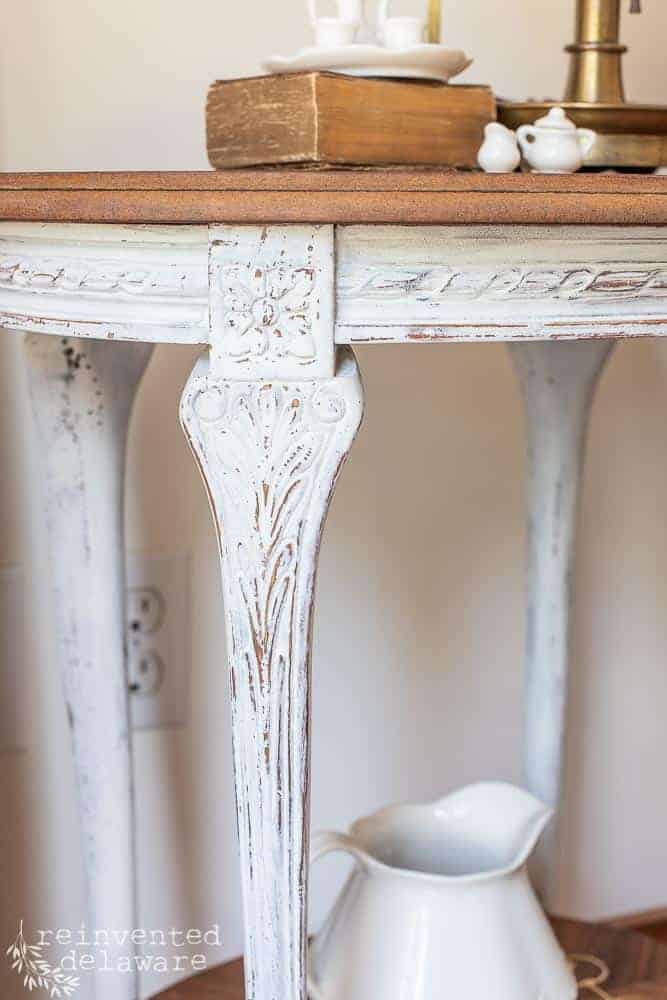
Miss Mustard Seed Milk Paint in Ironstone is by far one of my fave colors and I knew it would be lovely with this table.
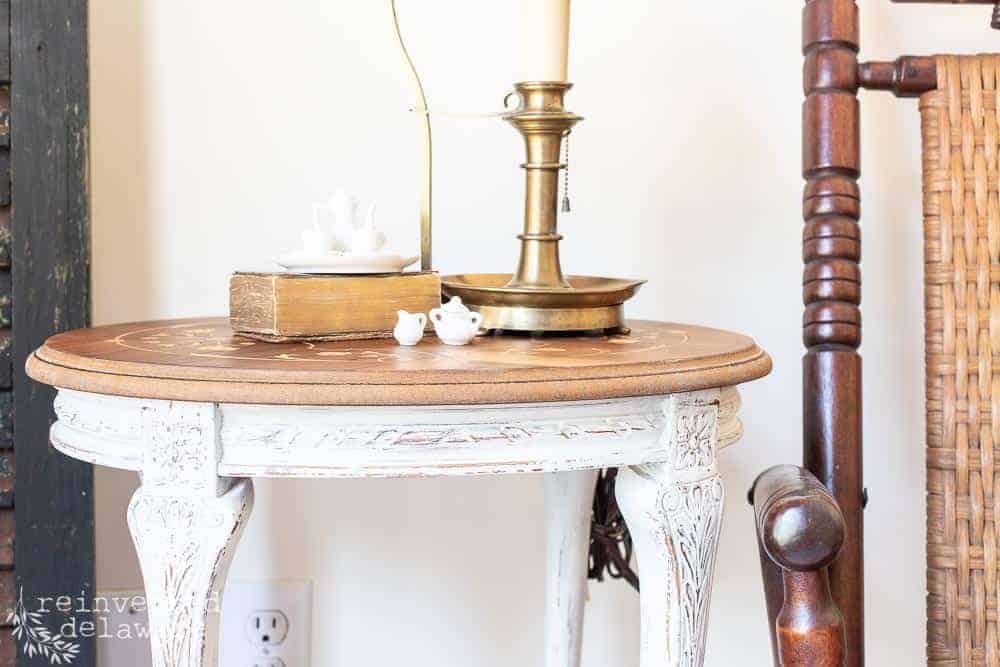
The apron and the legs had the perfect amount of carved detail that is shown off with the chippy effect that milk paint creates.
antique furniture restoration
The bottom shelf was prepped and finished in the same way I restored the top.
After two coats of paint and the chipping was complete, I waxed the whole surface with Miss Mustard Seed Furniture Wax. I did the top and the shelf first and then finished off with the painted areas.
A blue shop towel is perfect for buffing the wax.
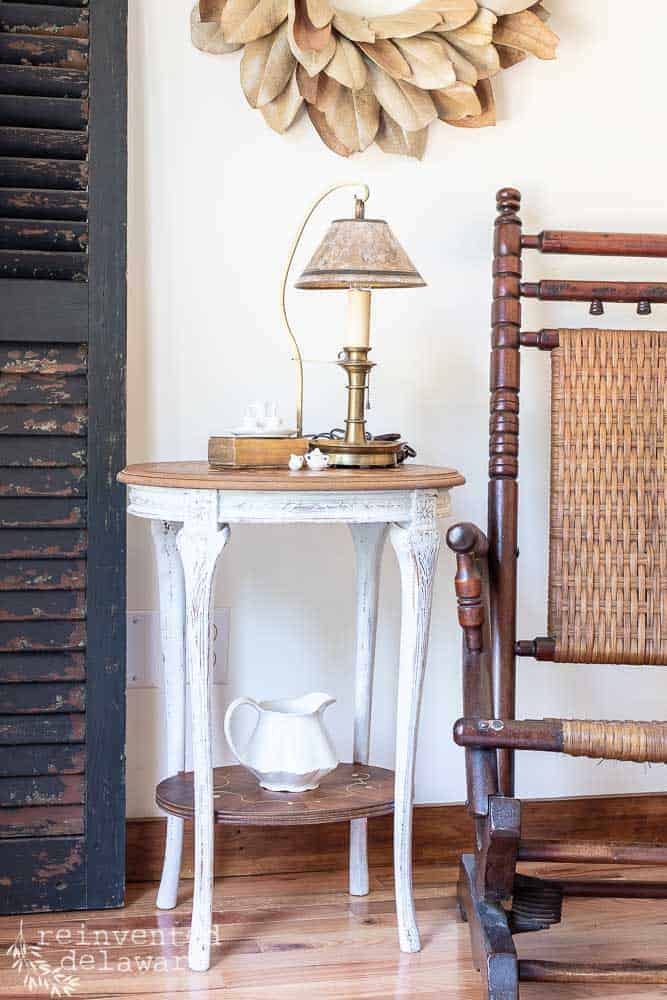
Isn’t she the sweetest little side table?? Add a brass lamp, a vintage book, and a mini tea set and you have an adorable vintage farmhouse look!
easy restoration!
Now that’s what I call an easy makeover! Searching for home decor and furniture pieces is fun and when you find a project that only needs a few supplies, a little time, and some patience, well, that’s what I call a good day!
And it wasn’t scary at all!!
Pin the image below to your furniture restoration boards! You just might come across a sweet little table like this one that needs some love!
join our journey!
Thanks so much for joining me today for this quick and easy furniture restoration project! I hope you come across a few of these quick projects for your home!
Thanks so much for joining us for this post! Join our journey so you don’t miss any fun projects, tutorials, and inspiration we share with you each week! You can follow us on Instagram, Facebook, and YouTube. We share even more inspiration on Pinterest!
Until next time…

Looks STUNNING Cindy! Nice job 👊 I’m definitely inspired.
Thanks for stopping by Anna!
What a great find! It cleaned up beautifully.
Thanks Marie! It was such a fun surprise to find too!
I have a rocker like the one in the picture. I’m not sure of it’s age; it belonged to a much older aunt and uncle. I should have a closer look at it and replace the seat and back.
Yes, replace the fabric! It will make a world of difference! Thanks for stopping by 🙂
What did you do to the shelves after you sanded them?
Hi Keta, I used Miss Mustard Seed furniture wax in clear on the wood inlay sections of this table. It really brings out the wood grain beautifully. 😊