
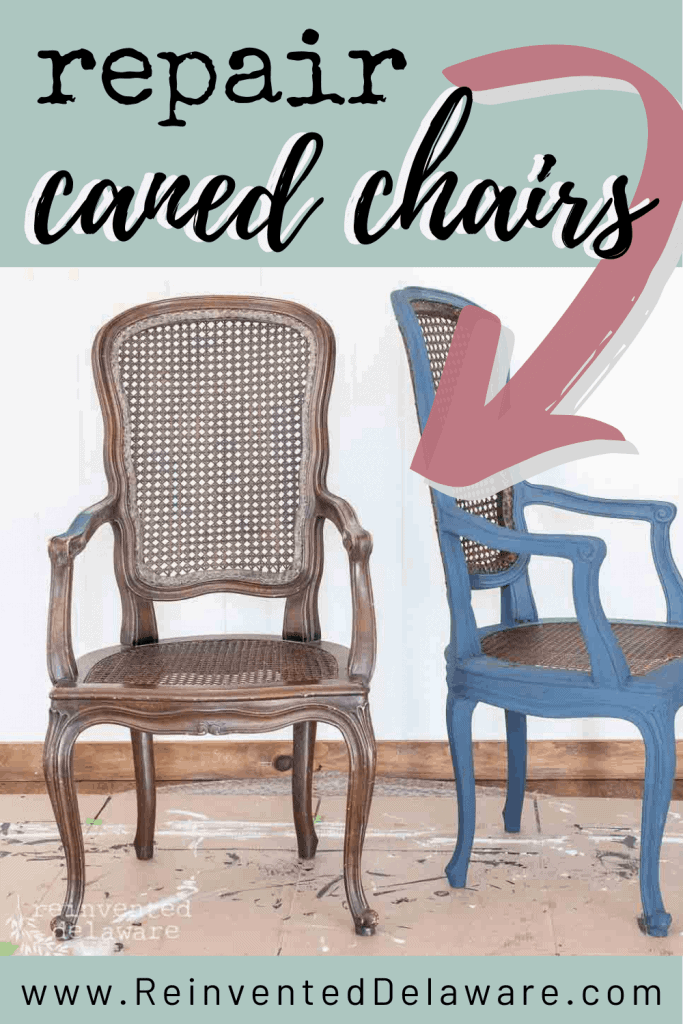
Furniture Makeover Ideas | Italian Caned Chairs
Furniture makeover ideas are in abundance on Pinterest. Today I will show you several ideas to transform a pair of caned chairs! Let’s dive in!
furniture makeover ideas | #1
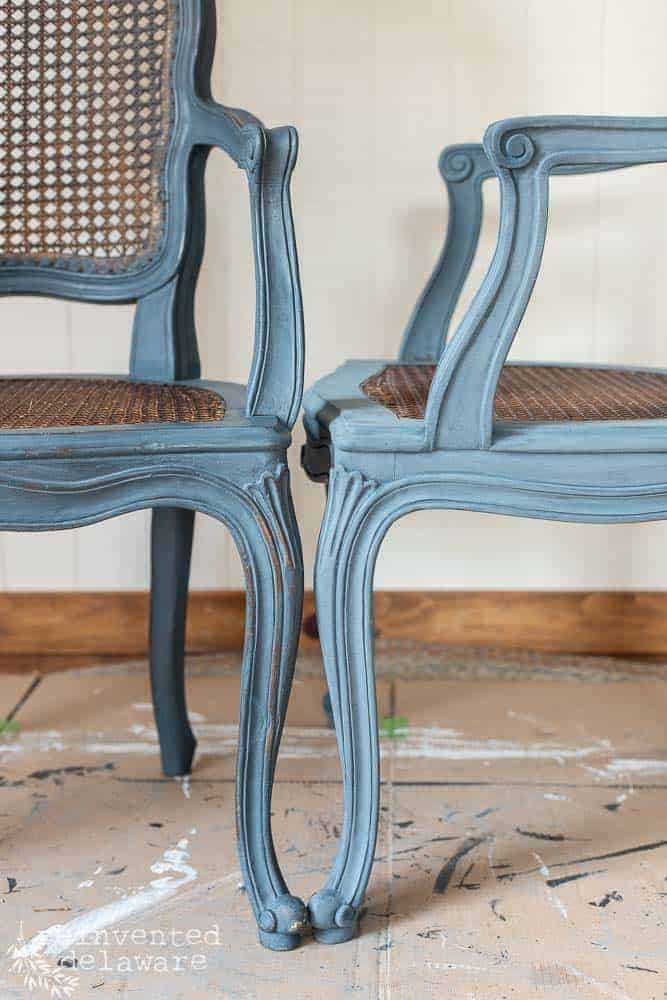
The caned chairs were prepped, painted, and sealed with wax.
Both chairs were painted in Miss Mustard Seed Milk Paint in Artissimo. The caned chair on the left has been waxed. The one on the right wasn’t waxed until later.
Doesn’t the wax bring out the gorgeous tones and color of this milk paint??
damaged caning
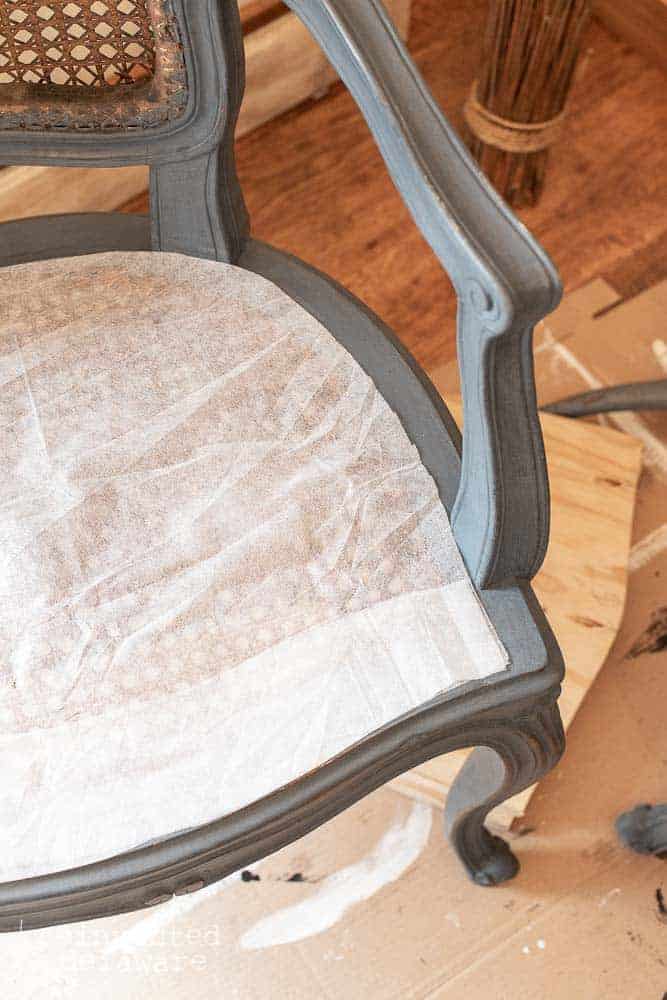
You’ll remember that some of the canings was damaged. I removed it and decided to add upholstery fabric to the back of the chair. That’s one of the furniture makeover ideas I will share with you in just a bit.
For now, let’s deal with the seat!
The caning in the seating area wasn’t in bad shape but it is still old. Hubby and I decided to add some stability to the seat of the chairs.
added stability
We made a pattern in the last post. Here you can see that he cut 3/4″ plywood and attached it to the underside of the caned section of the chair. He used a Kreg Pocket-Hole Jig system with six screws to make sure it was secure.
I painted the top of the wood before he attached it. The top of the wood will show through the caning and I wanted it to look nice. I chose a custom mix of General Finishes Snow White and Linen. You can see the full reveal in the next post!

furniture makeover ideas | #2
The seat would need some additional cushioning since the plywood would be unforgiving to the bottom if you get my drift! 🙂 A little cushy for the tushy! 😉
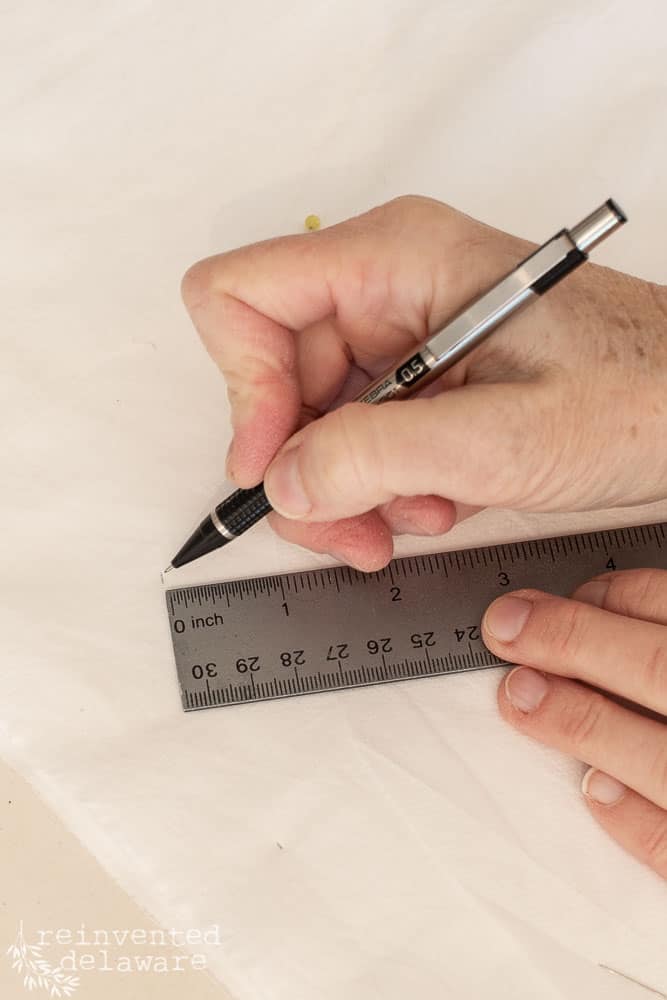
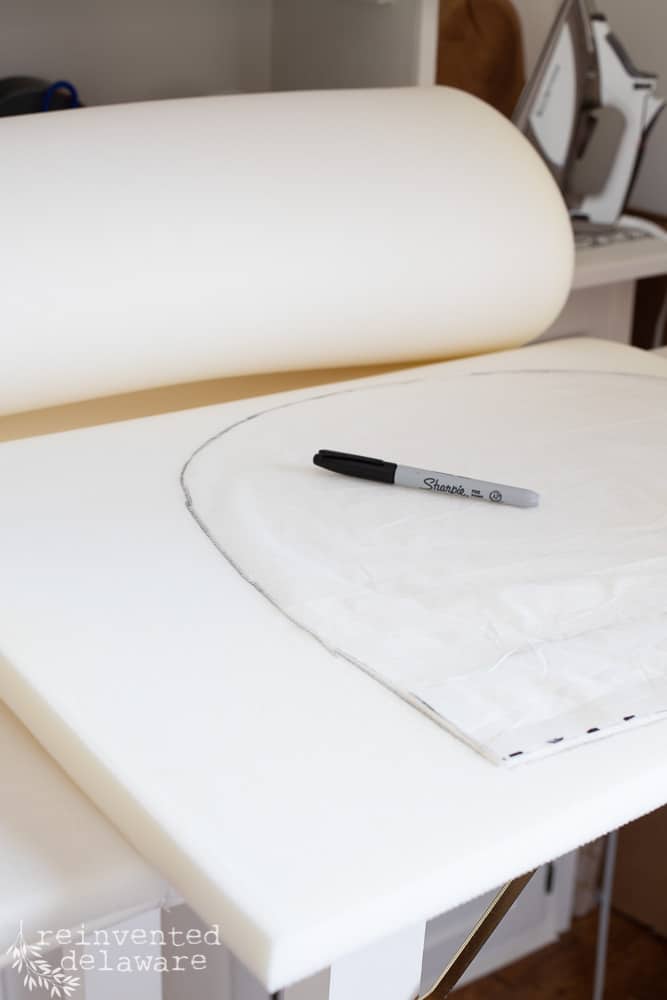
Do-Sew is a pattern-making material that I have used for years when making clothing. It is thin, see-through, and cheap. 🙂
You can see here I used the Do-Sew to create a pattern for the cushion.
create a pattern
After creating the exact pattern, I added a 1/2′ seam allowance around the whole piece. I added the seam allowance directly on the fabric I used for the cushion insert, which in my case is a leftover sheet.
Top sheets make the best cushion insert covers! You can find top sheets at yard sales, thrift stores, and discount linen stores.
quick sewing tip
Here’s a quick tip when sewing the seam.
A section of it needs to be left open to insert the cushion. I like to stitch as you see in the image – begin stitching with the fabric turned so that you stitch 1/2″ inward, place the needle in the fabric, and pivot. Continue stitching all the way around.
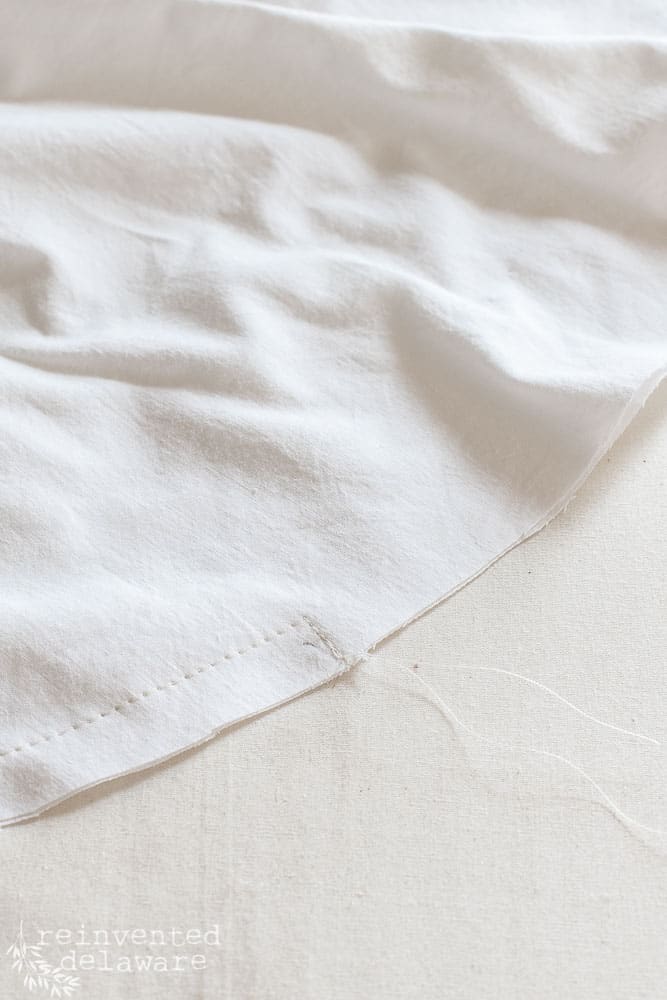
When you get to the end, stitch the same way only in reverse – place the needle in the fabric, pivot and then stitch off of the fabric.
Doing this little step helps to turn the fold inwards for easy stitching after the foam is inside the cushion cover.
This especially works with a straight seam but is also helpful in a curved seam like the one you see below.
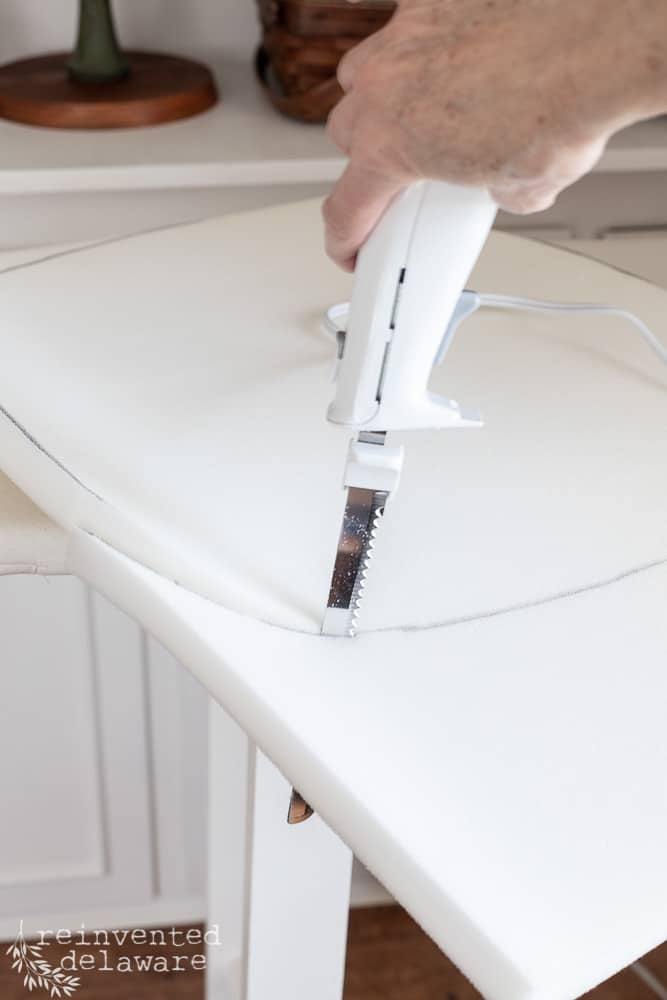
cut the foam
Next, I traced the same pattern, without the seam allowance, onto the foam. One-inch foam will be enough cushion for this pair of caned chairs.
electric carving knife
An electric knife goes through the foam like butta’ baby! This little tool was only about $15 on Amazon.
Seriously, so easy to cut foam with an electric knife!
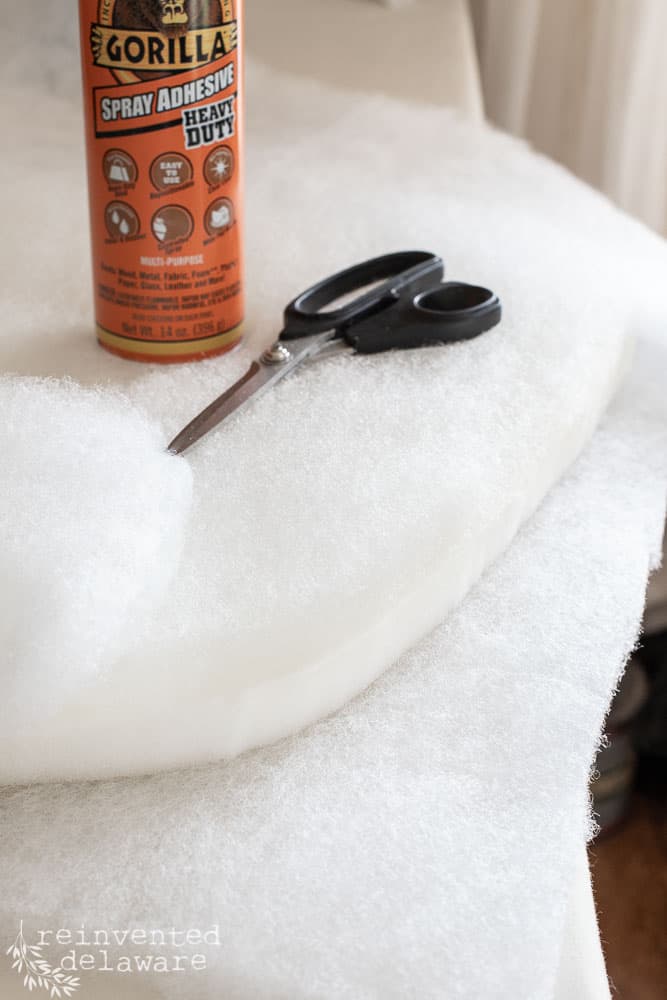
add some softness
Two layers of upholstery weight batting will add a softness to the foam. This is a necessary step in upholstery. Without the layers of batting, the foam would seem stiff. We want a soft look for this pair of chairs!
Cozy and comfy!
It’s best to use a spray adhesive for each layer. Do this outside on a day that isn’t too windy. Protect the floor area too. This stuff is sticky!
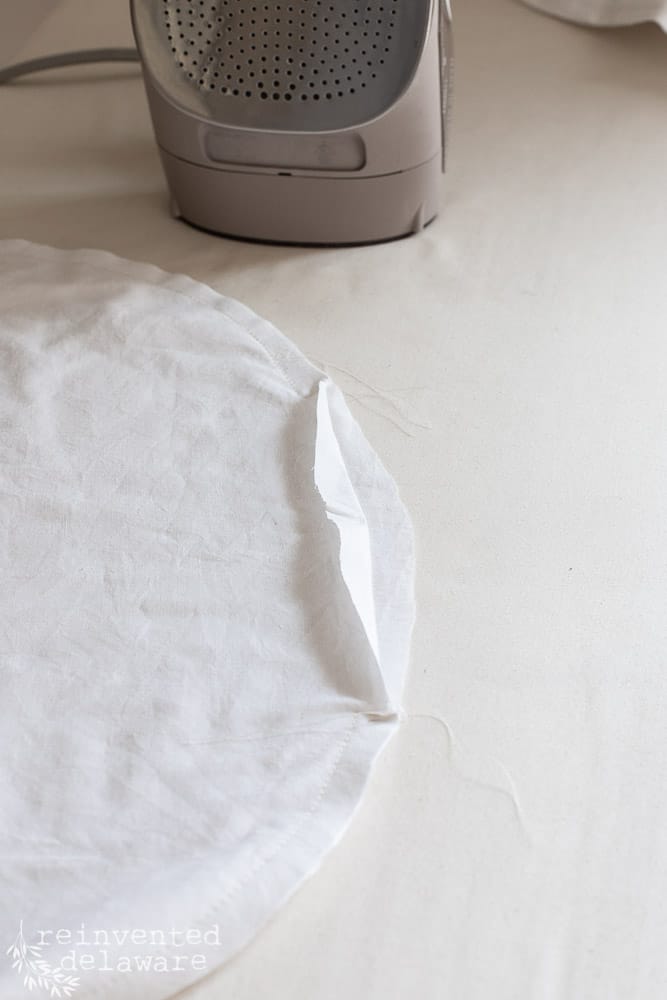
smile while you work 🙂
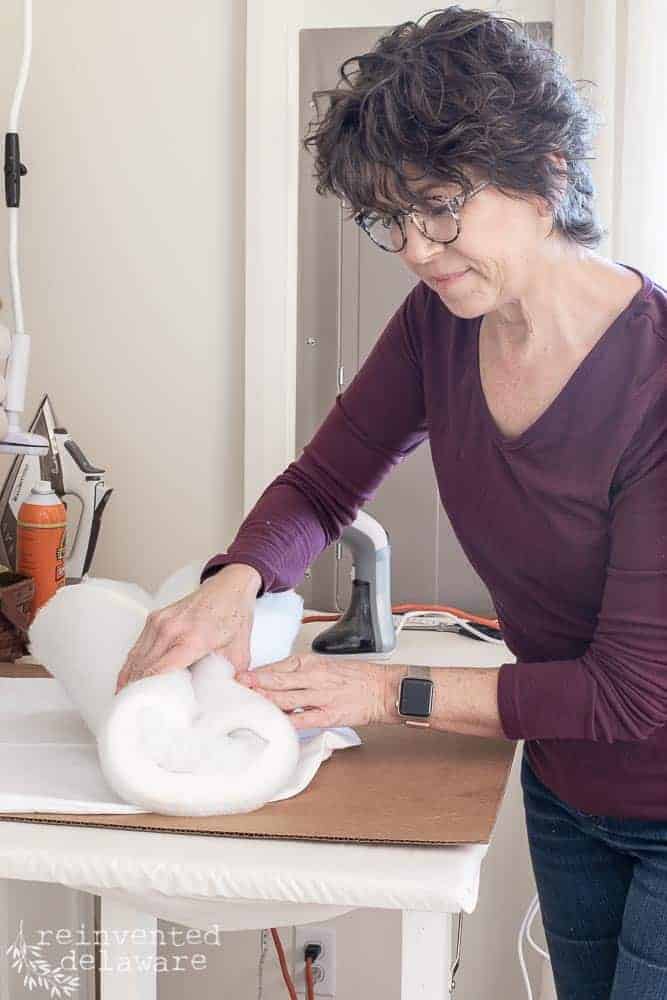
Doesn’t everyone smile when inserting foam into the cushion cover?? Haha!
Roll the batting-covered foam towards the center and it will make it easier to insert into the cover.
You can even use a plastic trash bag over the foam. After it is inserted, just rip the plastic off and out of the cover! I use this technique when I wash the cushion covers on my furniture.
After smoothing out the batting-covered foam, stitch the opening closed by hand or by machine.
In the next post, you will see the final result of the seat cushion. It is assembled basically the same way except that I added a cool zipper. That way the decorative cover can be washed.
furniture makeover ideas | #3
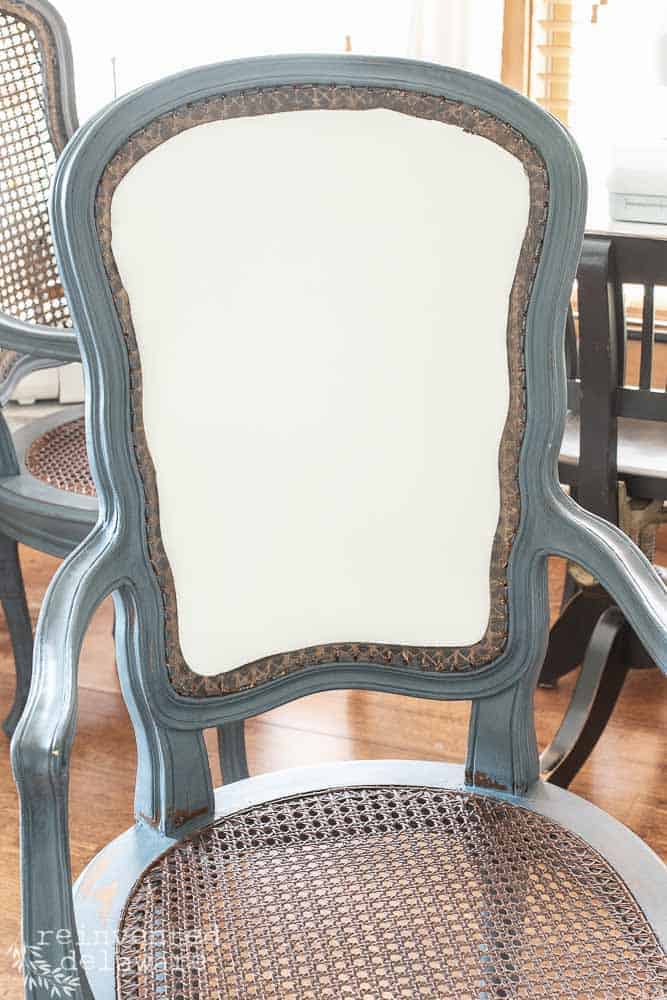
The caning on the back of the chair was very damaged and need to be removed. The backside of the caning on the back of the chair was in perfect condition so I left it intact. Only the front section had to be removed.
I used the Do-Sew to create a pattern for the hollow section of the chair back.

Then I used that pattern and cut a section of 1″ foam. It’s hard to see here, but the foam fits perfectly in the hollow section of the chair.
from the beginning
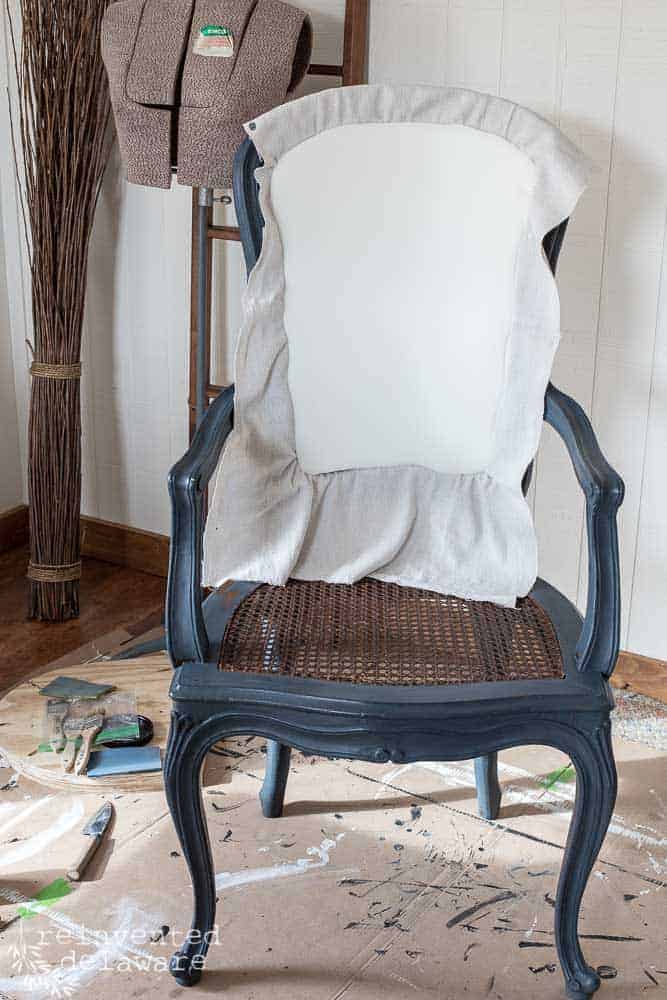
The foam wouldn’t look so pretty from the back so I decided to add a layer of fabric. In this case, I used a drop cloth. It also matched the painted wood in the seat reinforcement I talked about earlier.
Having the two match will make it seem like it was meant to be that way from the beginning!
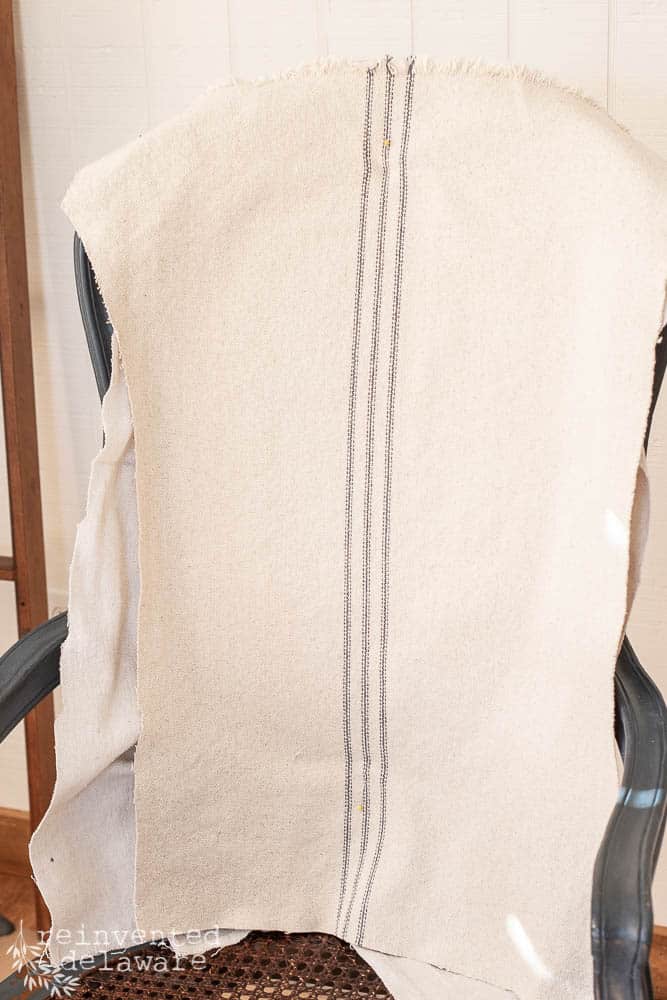
reproduction grain sack
Once the backing fabric was smoothed out, the front and decorative piece of fabric could be attached.
This is a reproduction grain sack style of fabric made for upholstery. I love this fabric and have used it on several projects.
First, I found the center of the wood framing on the chair. Then I lined up the center of this 3-stripe fabric with those markings. A straight pin holds it to the foam long enough for me to add some staples.
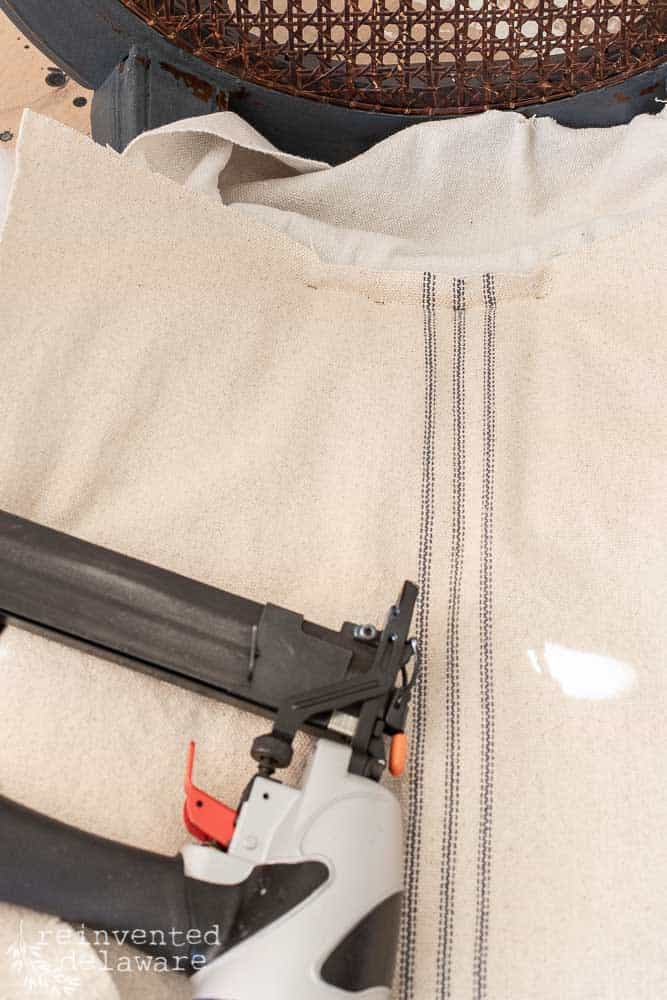
begin in the center
It is best to start stapling at the center and then work outwards. I don’t staple the entire edge of the bottom. It’s best to staple a few at the center of the bottom and then a few at the center of the top (opposite ends of each other).
That way, you can keep the fabric taut. Not stretched, just taut.
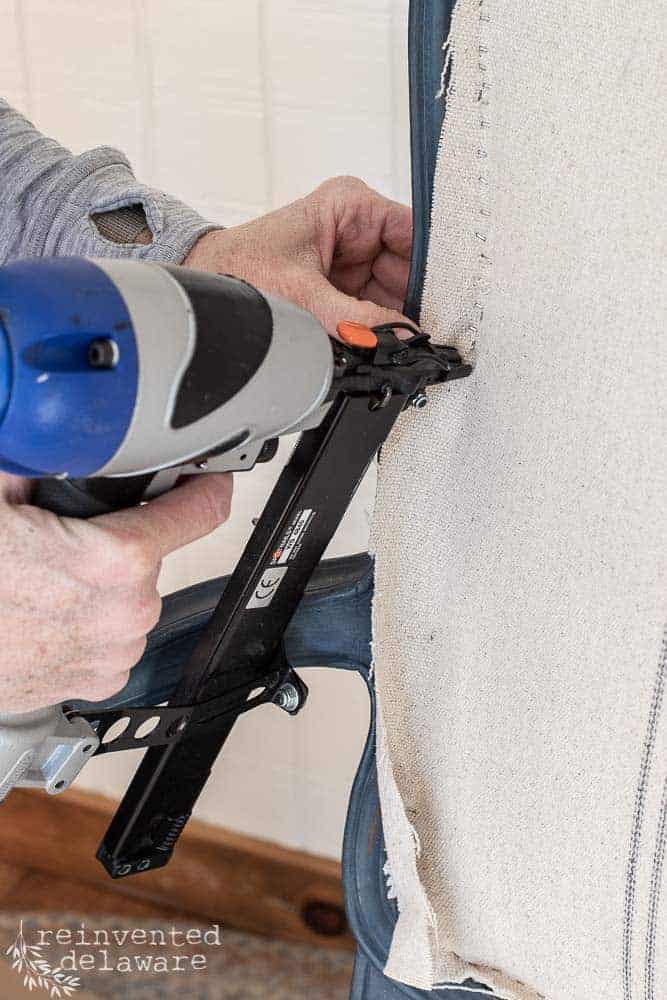
side to side
Do the same on the sides. Be sure to stay aware of the stripe if your fabric has one. The stripe can get wonky if you pull too hard on one side. Aim to keep the stripe straight.
Start on one side in the center, staple a few, then go to the opposite side in the center and staple a few. I like to add staples every two inches or so as a way of basting the fabric to the wood.
When I have finished ‘basting’ the fabric, I go back and add more staples. They need to be close to each other to secure the fabric properly.
kinda like sewing
Think of this in terms of sewing – if the stitches are far apart, the seam would be weak. If the stitches are closer together, the seam is stronger. It’s the same with staples!
And BTW, let’s not be critical when we rip out someone else’s staples. They were doing their job!! And yes, I am speaking to myself on this one!!
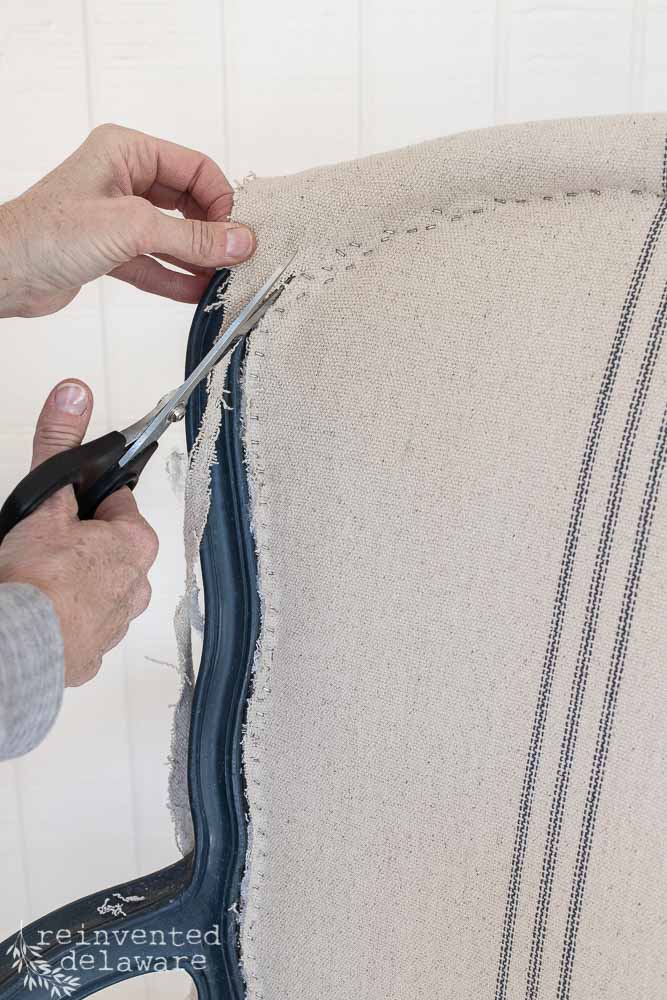
shaping up
Cutting the excess away is always so much fun for me! The piece starts to take on shape at this point. 🙂
the workday is over!
Whew, that’s a lot of work for one day!! Until next time!
Thanks for stopping by! Be sure to subscribe to our blog updates via email so you don’t miss the reveal of this gorgeous pair of chairs!
join the journey
Follow us on Instagram and Facebook for more behind the scenes on many of our projects.
Pin any image in this post to your DIY projects or furniture makeover ideas boards on Pinterest! Your pinning and sharing with your friends help our blog so much! Thank you!!
BTW, you can see parts one and three in this furniture makeover series, click the links below!
Repairing Furniture | Italian Caned Chairs
Furniture Flip | Italian Caned Chairs


That’s a lot of work. Can’t wait to see the finished product.
Hi Sharon! The chairs are finished! Be sure to see the reveal in Furniture Flip | Italian Caned Chairs! You’re going to love the results! Thanks for stopping by!