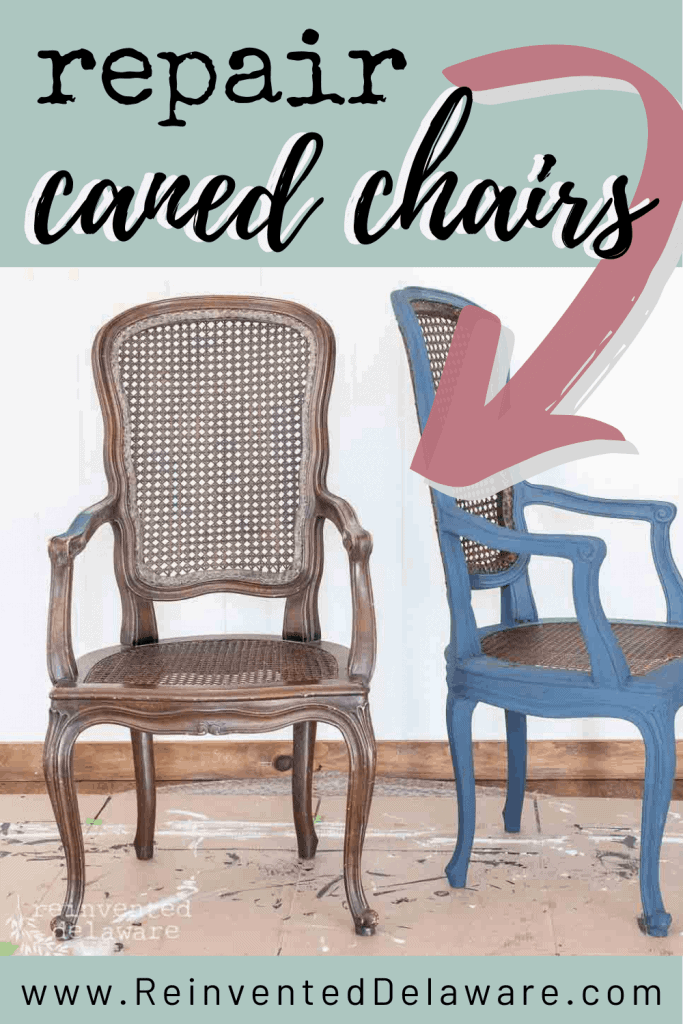
Repairing Furniture | Italian Caned Chairs
expensive cane repair
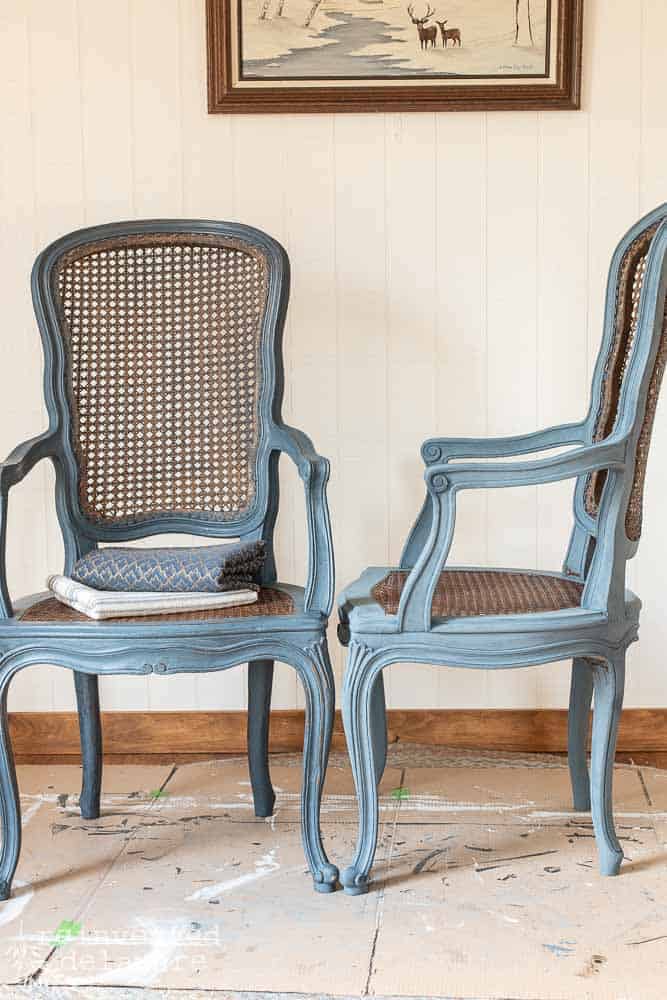
Antique and vintage caned chairs can be expensive to repair. Repairing furniture like this on your own can be a huge learning curve. But I came up with two solutions for ‘repairing’ the caning on this gorgeous pair of Italian Caned chairs!
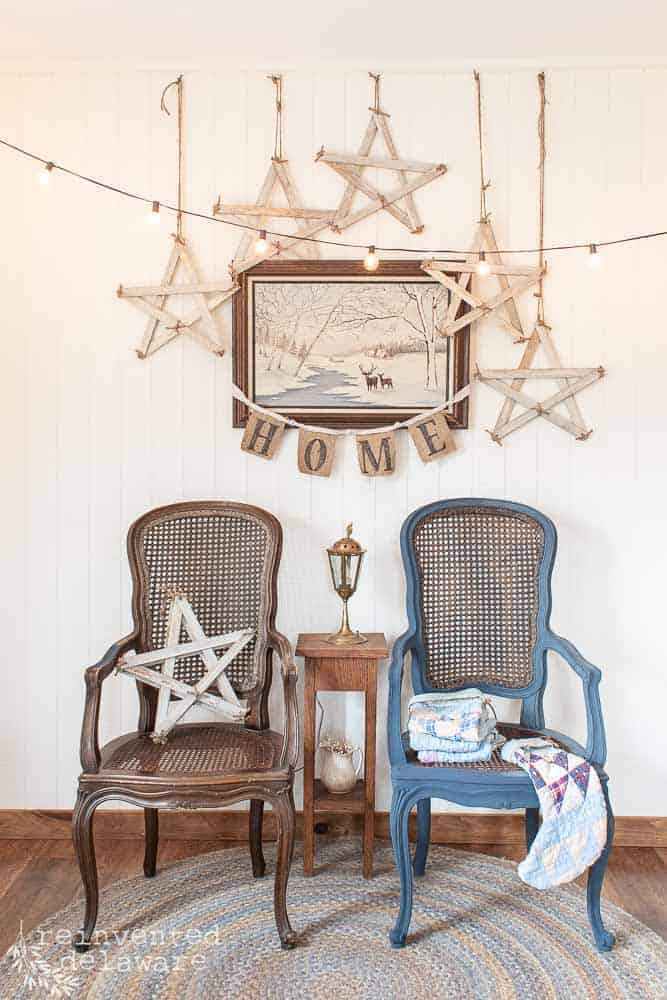
You probably noticed this gorgeous pair of Italian-made caned chairs in my last post about making these adorable farmhouse style stars.
Italian made chairs
This lovely pair of caned chairs have been sitting in my garage patiently waiting for me to finish the custom work for the year. I hadn’t even given them a good look when my hubby brought them home from an auction!
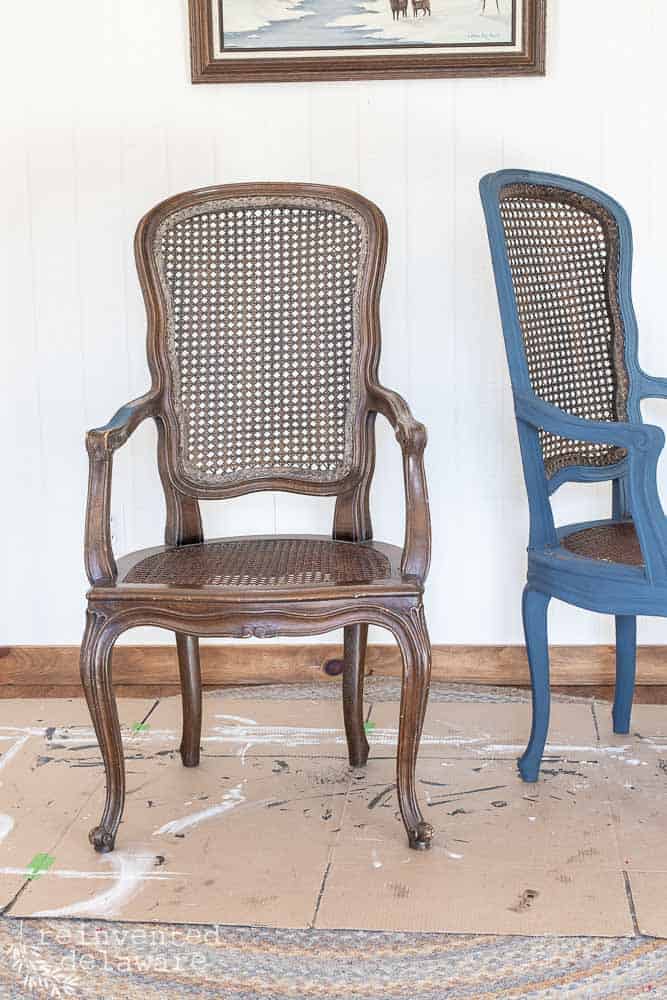
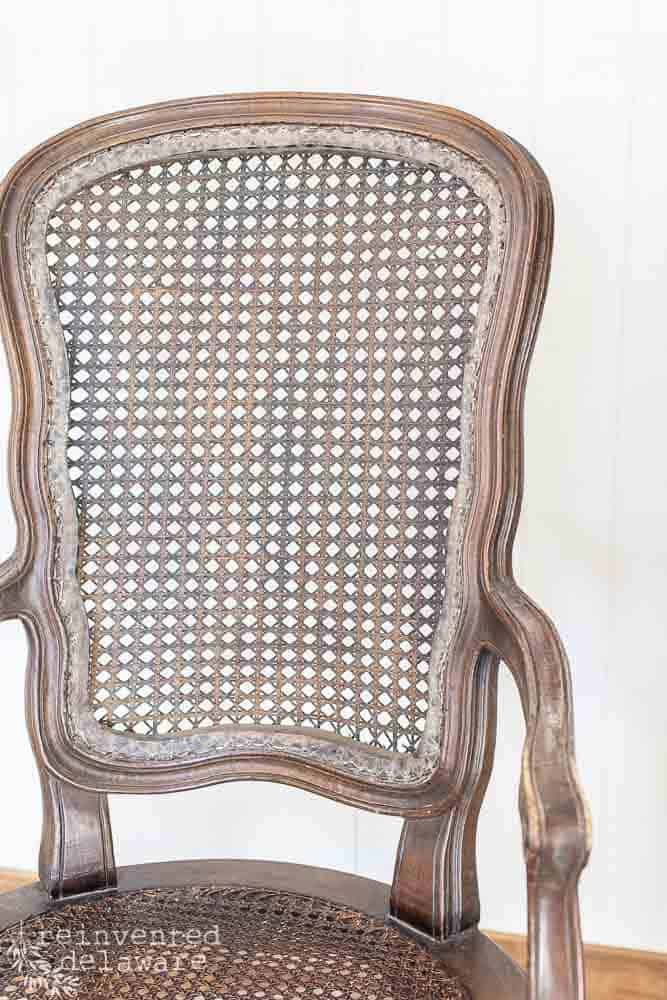
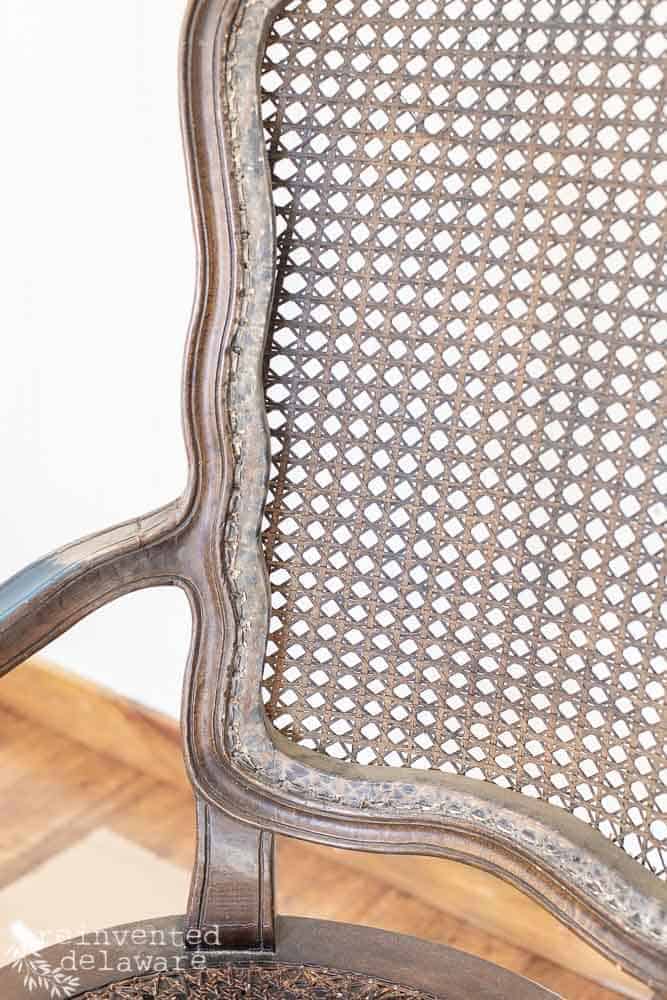
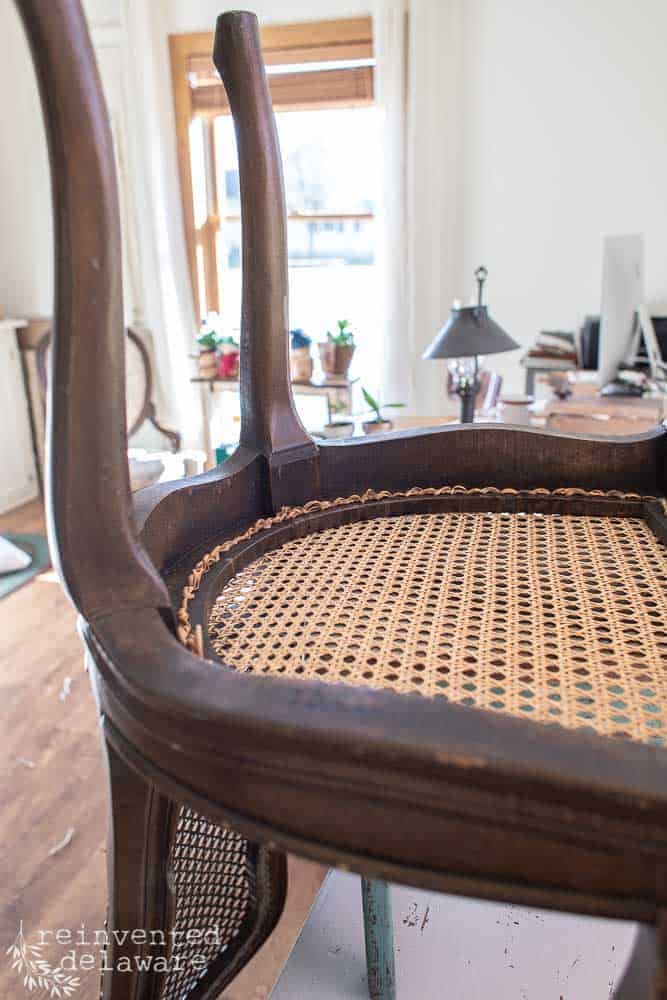
When I decided to take a closer look, I realized some of the canings on the inside back section of the chair was brittle and coming apart. As soon as I saw that, I knew it had to come off!
remove the cane work
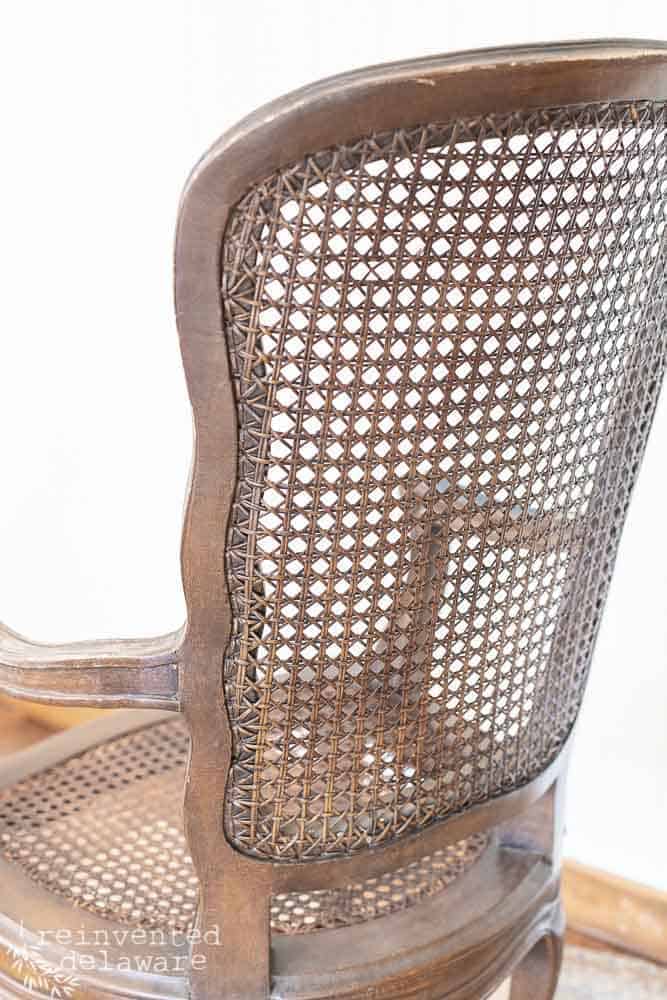
The inside back was in rough shape so I used an Exacto knife to cut it off and then a pair of needle-nose pliers to pull out any excess caning that was stuck.
This happened late one evening without my camera! But you can tell here that the front section has been completely removed.
Did you notice the back is double caned?? So unique, don’t you think??
The back section was in perfect shape. All it needed was a good vacuum with the brush attachment on my shop vac.
We will deal with the back section ‘repair’ in another post. For now, let’s move on to the seat section of cane work.
plenty of seating
At first glance, the caning on the seating area was in good shape. But since the inside back section was damaged, I was concerned that the seat section wasn’t far behind. All of the caning is dry and brittle and it stands to reason that the seat section could be on the verge of breaking.
The last thing I would want to happen is for someone to fall through the seat! But how could I keep that gorgeous cane work? Someone spent a lot of time on that caning and I wanted to preserve it as best I could.
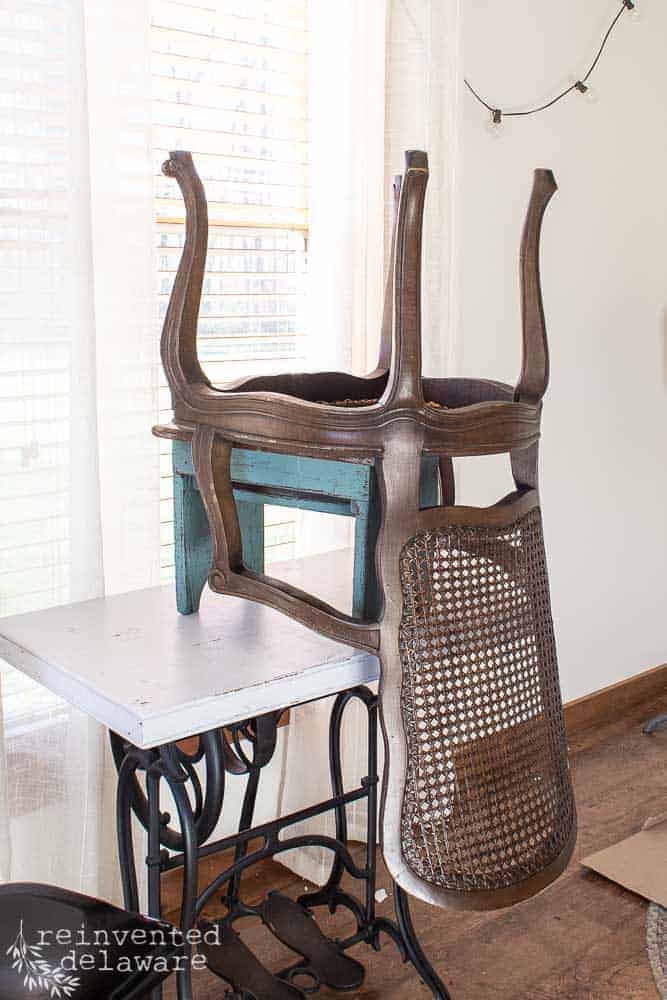
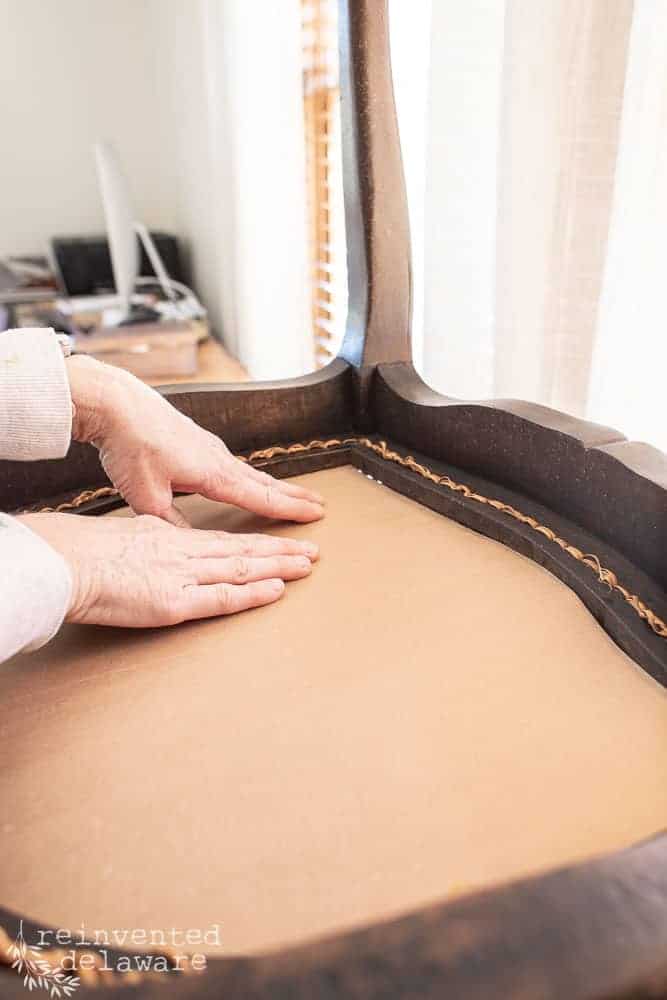
We (hubby, Barkly, and I) decided to add a wood section to the inset of the seat. Turning the chair upside down, you can see that there is about 1/2″ inset.
Let me also mention, that when I turned the chair upside down, I noticed an amazing maker’s mark of sorts! You’ll have to wait for part two of this tutorial on repairing furniture to see it!
Using some heavy craft paper, I traced around the inside of the inset.
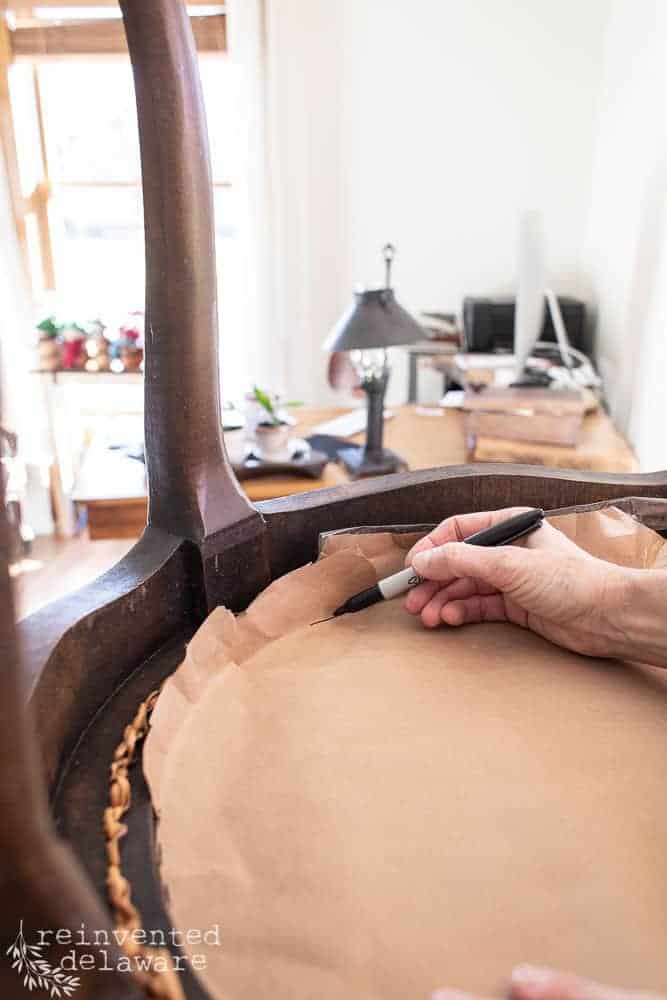
Then I cut it out to make sure it would fit just inside the inset of the chair. Hubby used my template and cut out a piece of 1/2′ plywood with a jigsaw. It took several attempts to get it just right. He wanted to make sure there would be a tight fit.
The wood will be attached to the Kreg Pocket Hole Jig system. I’ll show you more of that in part two of this post.
color decisions
The plywood will be painted because it will show through from the front of the chair. Can you help me decide on a color?
Let’s look at the rest of the makeover before we get into color selections, ok?
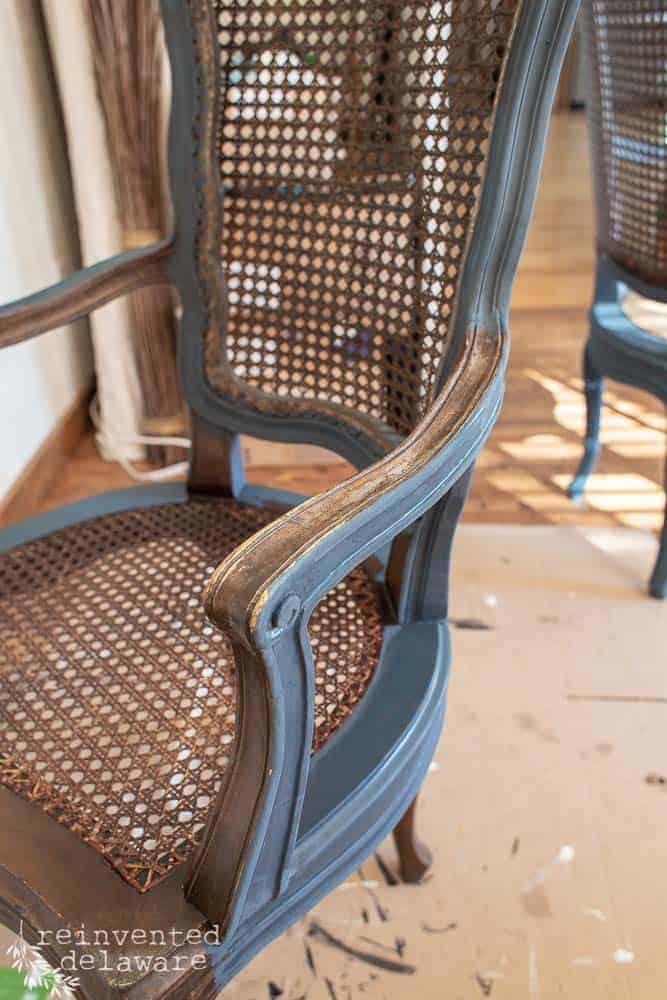
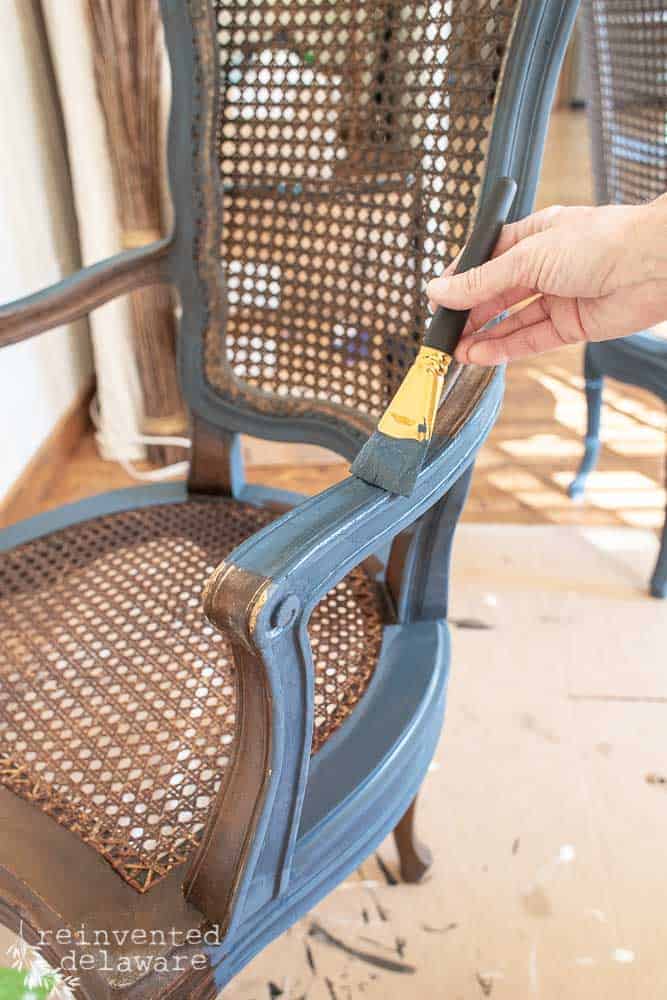
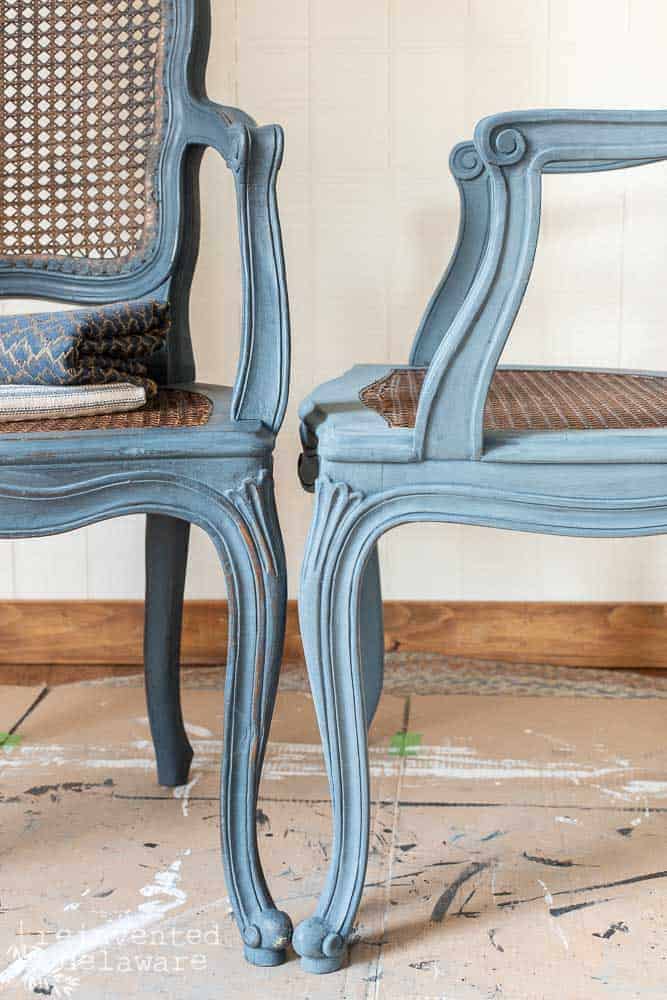
As a way of highlighting the cane work, I decided to paint the framing. There are gently curving lines on the framing so I knew it would look good with some distressing and chippiness too.
This is the fun part of repairing furniture, don’t you think??
Miss Mustard Seed Milk Paint has a gorgeous dark blue called Artissimo. It is a rich navy after it has been sealed with a topcoat.
small brush for narrow areas
To apply the paint, I used a 1 1/2″ artist’s brush. The brushes came in a two-pack on Amazon. Their short handle makes it a breeze to hold and the small brush size helps me to control the thin, water-based milk paint.
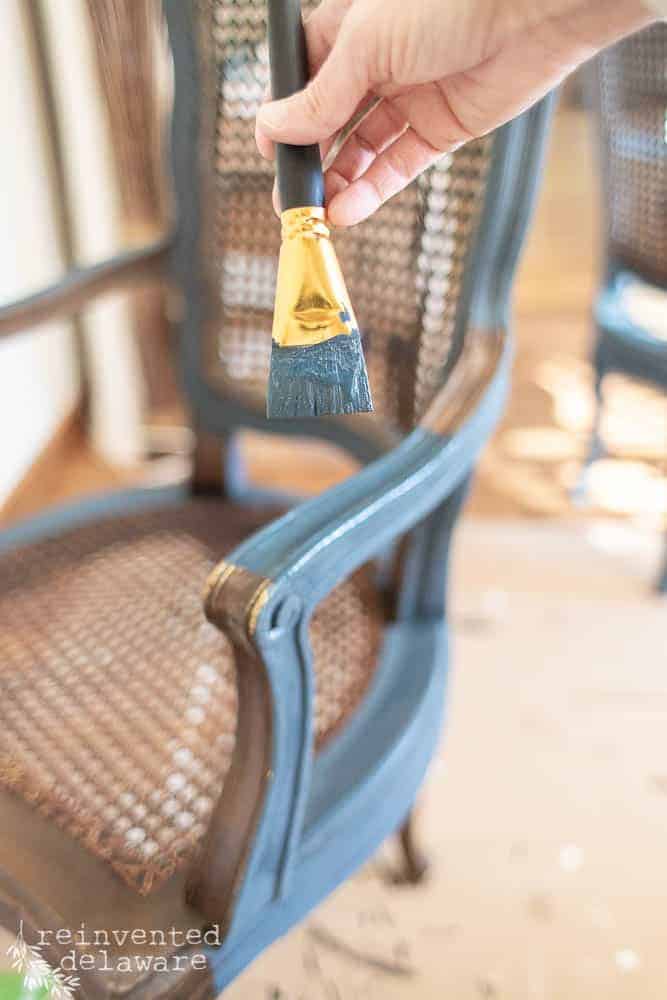
Using the small brush also helps to control the paint on the narrow framing of the chair.
smooth finishes
Two coats covered the chairs perfectly! The next step is to use a fine grade of sandpaper to smooth out the finish. Milk paint can feel chalky because of its natural ingredients and the sandpaper helps to smooth out the grittiness.
I used a sanding sponge so that it would be easy to get into the lovely curves of this pair of caned chairs.
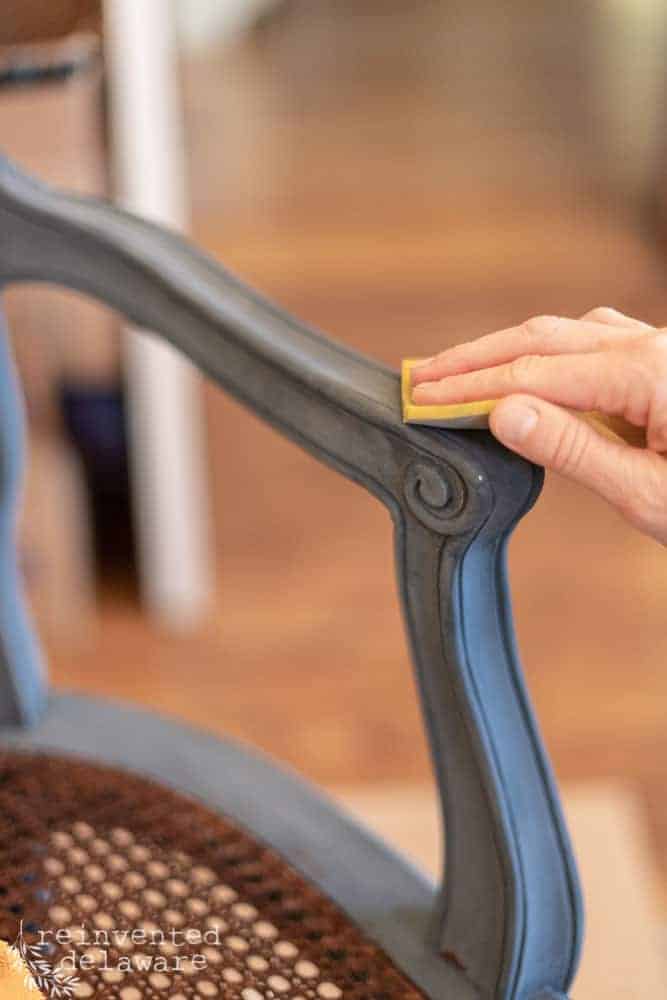
Once the sanding was finished, I cleaned up the milk paint dust with a shop vac and then a clean microfiber cloth. Miss Mustard Seed Furniture Wax is the perfect finish for this pair of caned chairs.
See how the wax enriches and deepens the Artissimo color?
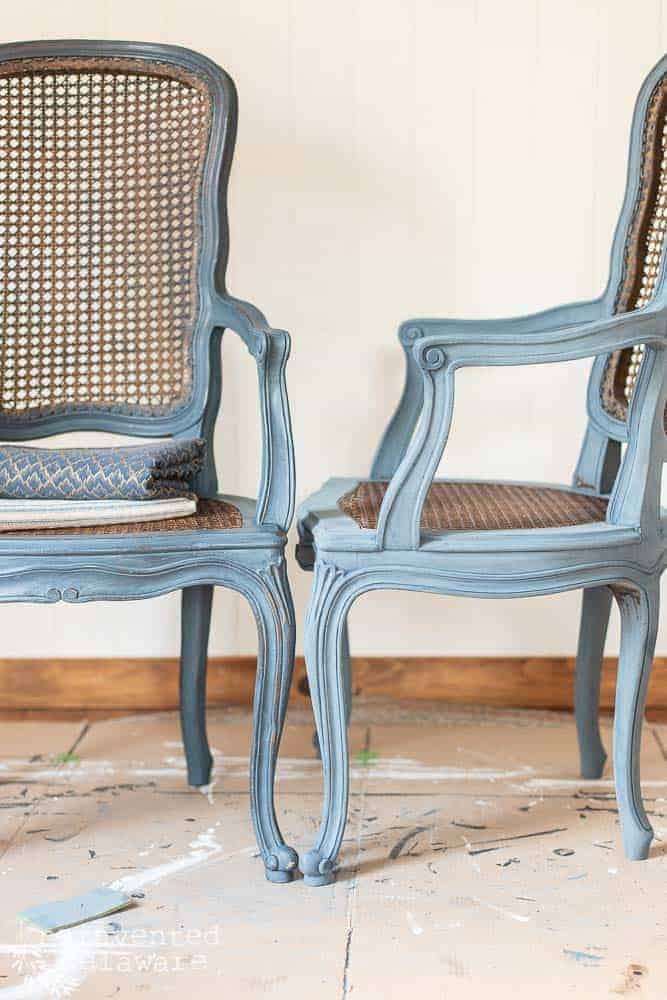
Even though you can’t touch the waxed surface on the chair on the left, rest assured, it is as smooth and soft as a baby’s bottom!
fabric choices
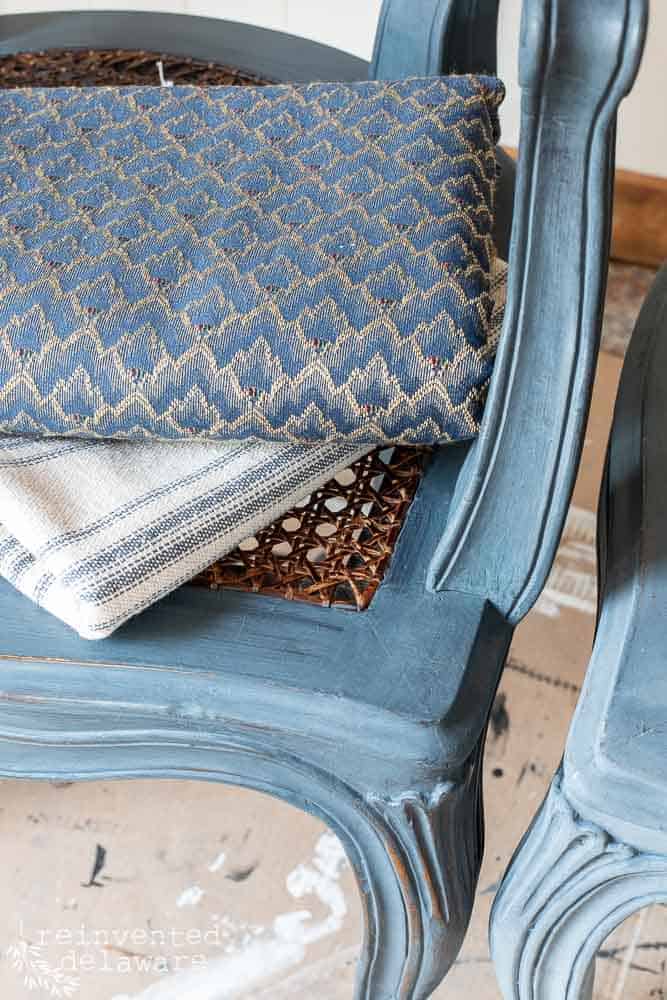
The second part of repairing this furniture is the back section. I’ll share that in another post. It does involve fabric so we need to decide what fabric to use.
Here are two options – the fabric piece on the top is a gorgeous upholstery weight fabric in dark blues, a hint of berry, and plenty of gorgeous gold.
The bottom fabric is a grain sack style of fabric that would bring a farmhouse look to the chairs. The grain sack style comes in a variety of stripe patterns and this is one of them. Mostly, I am looking at the color of the stripe with the paint and not necessarily how many stripes are on the fabric.
help me choose!!
I need your help!! Which fabric should we choose? Keep this in mind: the back will have fabric and the seat will have a removable cushion.
Agh!!! I just can’t decide which looks best!!
Help me, won’t you?? Comment below and let me know what fabric you think would look best!!
Help me decide on the plywood seat section that I mentioned earlier – should I paint it brown to match the caning, or blue to match the framing, or what about a soft white so that the caning will stand out in the contrast??
So many decisions!!! Help a girl out!
thanks for stopping by!
That’s it for today! We will cover the rest of the seat furniture repairs and the back ‘repairs’ in the coming weeks. Repairing furniture can be easy when you break it down into smaller jobs.
UPDATE: Here are the next two posts in this series!:
Christmas is around the corner and I have some other posts I want to share with you!
join our furniture repairing journey!
Join us, won’t you? It’s so easy – just pop your first name and email address in the box below and I will add you to our mailing list for our tutorials!
repairing furniture tutorials
Thanks for stopping by today! Be sure to let me know your thoughts about the fabric for the chairs and about painting the wood for the seat in the comments below.
Follow us over on Instagram and Facebook for more DIY tutorials and tips! Pin any of the images in this post to your furniture makeover boards! You might need the tips we share one day!