
Backdrop Wall for DIY YouTuber
Here is a great backdrop for content creators who create YouTube Videos. Especially if you are a DIY YouTube creator like me! Learn how to build a backdrop wall for a DIY YouTuber.
After searching for background ideas for great backdrops for my YouTube videos, I decided to DIY my own.
YouTube backdrop ideas
There were definitely some great ways to create the perfect backdrop like using a faux brick wall (love that idea so much!), using a curtain rod to hang different colors of fabric for a fabric backdrop, and installing wood panels of various types.
It was the last idea of wood panels that got me thinking….. I have a great way to use some ‘wood panels’ for my own YouTube background!
The following post may contain affiliate links. That means if you click and then buy something, I will make a small commission at no additional cost to you! Thank you for supporting my blog. full disclosure here.
creative ideas
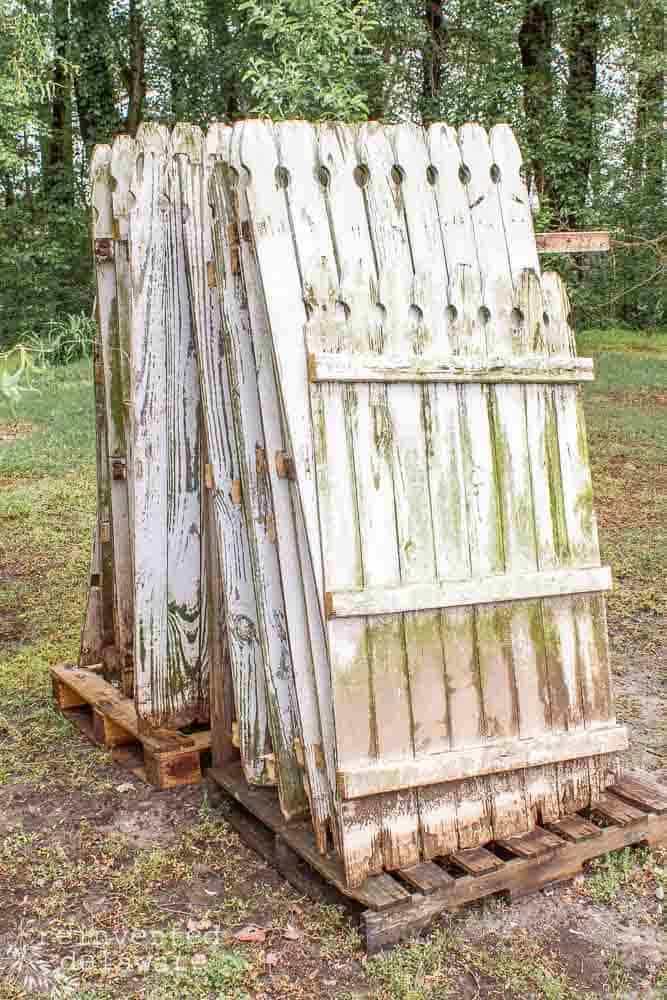
We already have picket fence panels in my stash! And they were all free! Yes, FREE!! We’ve had several friends that have given us their old picket fence sections because they replaced them with new vinyl sections.
We even took our own picket fence down and we used it to make so many projects.
And the best part of this diy YouTube video backdrop idea? The final look will be my aesthetic with a little bit of work and it was the easiest way for me to get a backdrop wall that was cheap and cute!
Let’s get back to the plan for creating the perfect YouTube backdrop for someone like me – thrifty and a diy’er!
step one: gather the reclaimed wood
The process started with gathering and cleaning the picket fence sections. We have them stacked up in our side yard on top of pallets.
Certainly, there would be creepy crawlies under the pallets, right?? So it was a good idea to come prepared with sneakers on my feet.
You’ll see about that adventure in the YouTube video later in this blog post. And BTW, pardon some of the images in this post aren’t the best – I had to grab screenshots form the YouTube video!
Needless to say, I’m writing this post so it all turned out well 🙂
list of supplies:
Use the links below to purchase some of the supplies for this project! You are helping to support this blog and all the free tutorials we offer here! Thanks so much!😊

step two: clean the old wood
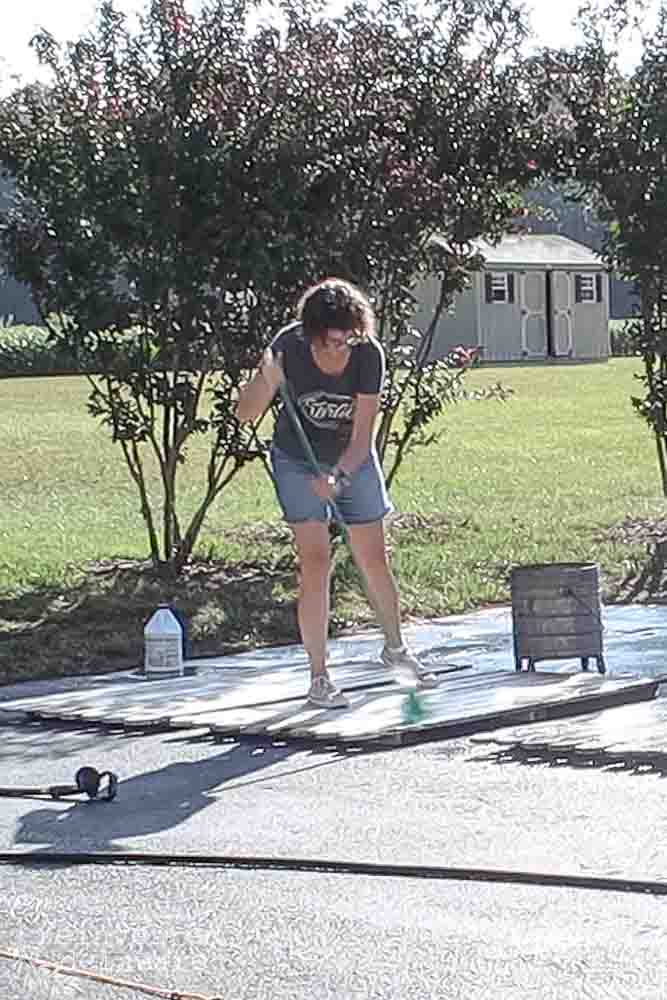
After gathering the four picket fence panels and getting them over to my driveway, it was time to thoroughly clean them.
I spread them out on our driveway on a sunny day and mixed up some bleach water. Using my broom, I splashed the water onto the picket fence section and scrubbed them down. Then I flipped them to the other side and repeated the process.
They laid out in the sunshine to get as much light as possible to dry for several hours.
To pass the time, I decided to paint my workbench. You’ll see that DIY project in the YouTube video too.
Handy tip: Ask Your Neighbors!
If you see someone in your neighborhood taking down an old fence, ask them for the fence sections! There are so many farmhouse-style home decor pieces you can make with reclaimed wood. And it’s FREE!!
best way to find a wall stud
I also found the studs in the wall that I would use to hang my reclaimed wood backdrop.
Hubby suggested I look for a nail pop and then measure out 16” on either side of it to locate the studs. Then I used a plumb bob on a string to mark a straight vertical line down the wall.
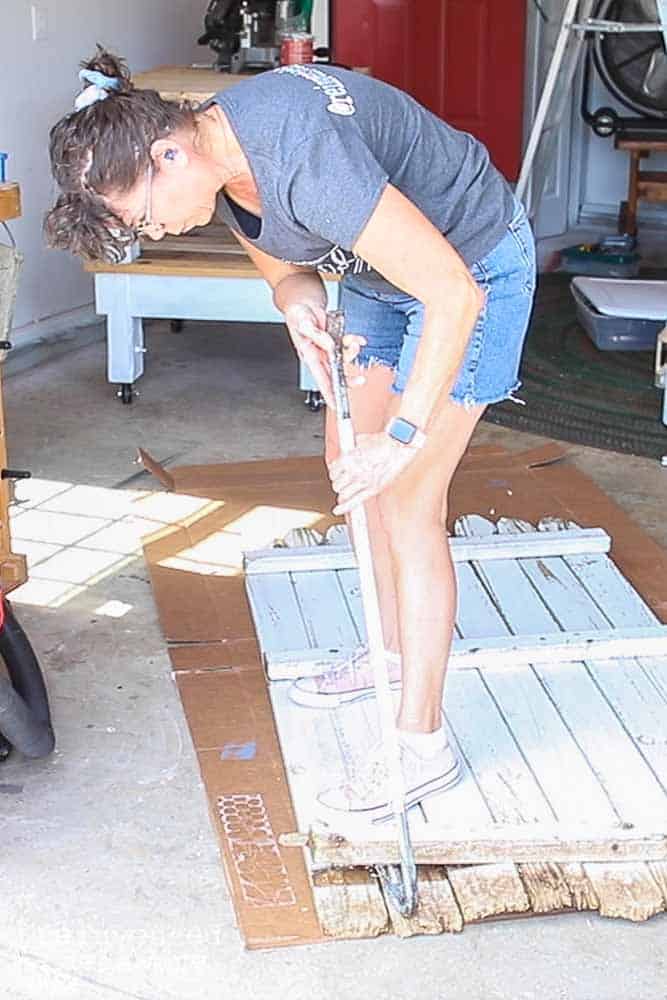
step three: dissassemble the picket fence
By this time the picket fence sections were completely dry.
The next step was to disassemble the pickets from the rails. A crowbar is an invaluable tool for this process and since the fence panels are old, they come apart easily.
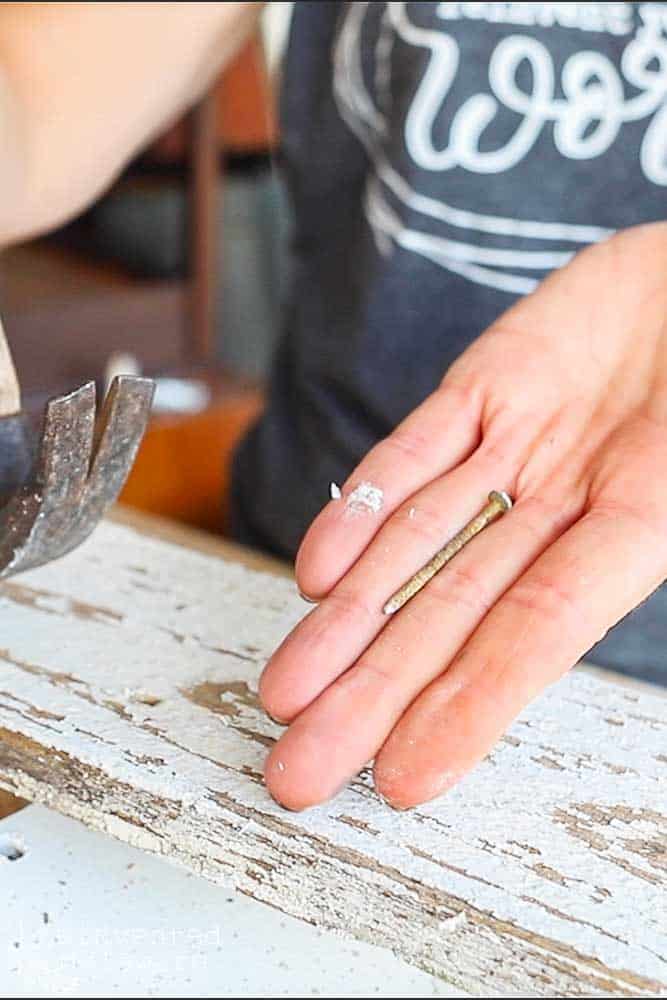
Then the nails need to be removed. They are rusty and come out easily by tapping them out with a hammer and then the hammer claw to pull them out completely.
I kept a trash can handy to dispose of the rusty nails.
After the nails were removed on four of the boards, I lined them on my chop saw and cut off the bottom edge that was damaged from touching the ground for years.
Working in batches like this made the task go smoothly. I had all of the picket fence panels disassembled, nails removed, and cut in only about 30 minutes!
It would have taken me longer to get to our lumber store, purchase new wood and then get back home!
step four: install the fence pickets
The next step is a fun one and not too difficult. I attached each board using 1.5” wood screws into each fence board where it intersected with the lines that marked the studs.
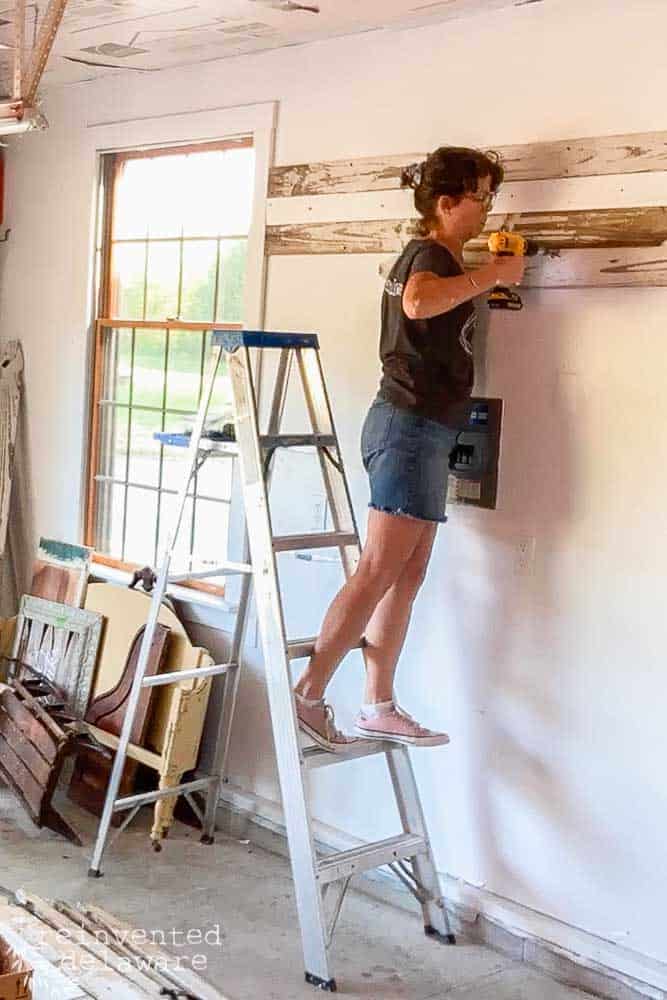
Some of the holes had to be predrilled before screwing them into the boards. Since I have one of my fave tools, the drill flip drive kit for my power drill, switching back and forth from the drill bit to the screw bit was fast and simple.
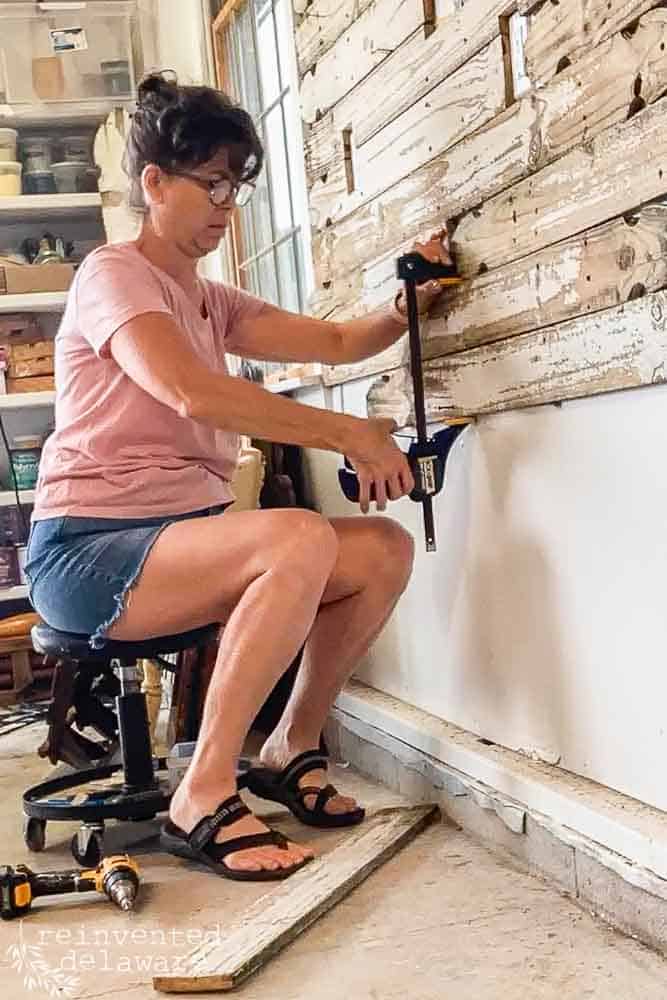
Some of the picket fence boards were warped so I found the best option was to use scrap wood to apply pressure from underneath the straighten them out. This step is better to watch than it is to explain so be sure to watch the YouTube video.
I also used quick-grip clamps to hold the boards in place while I screwed them into the wall studs.
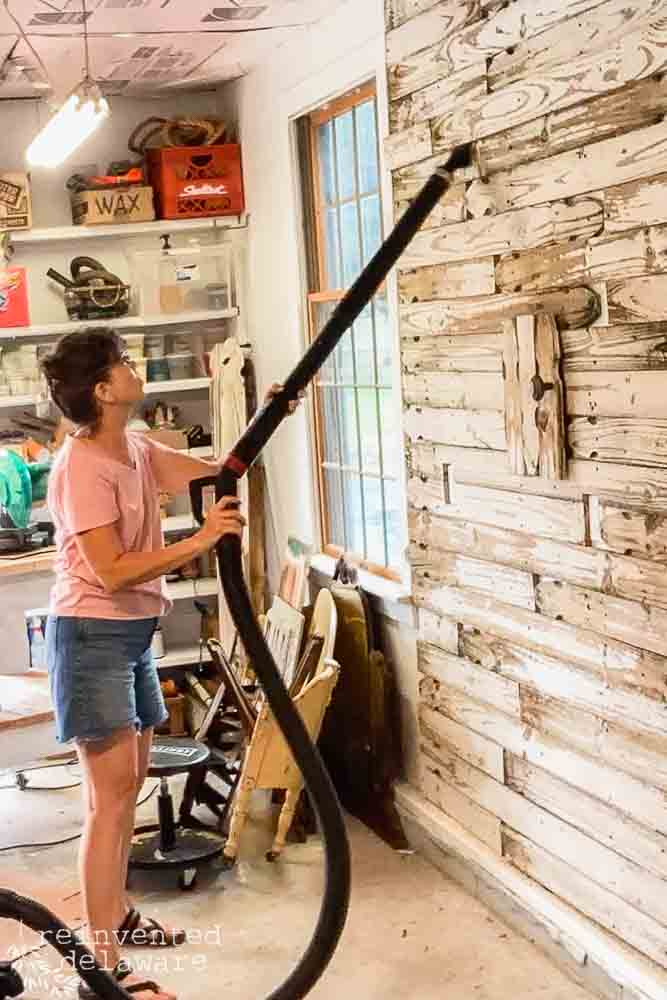
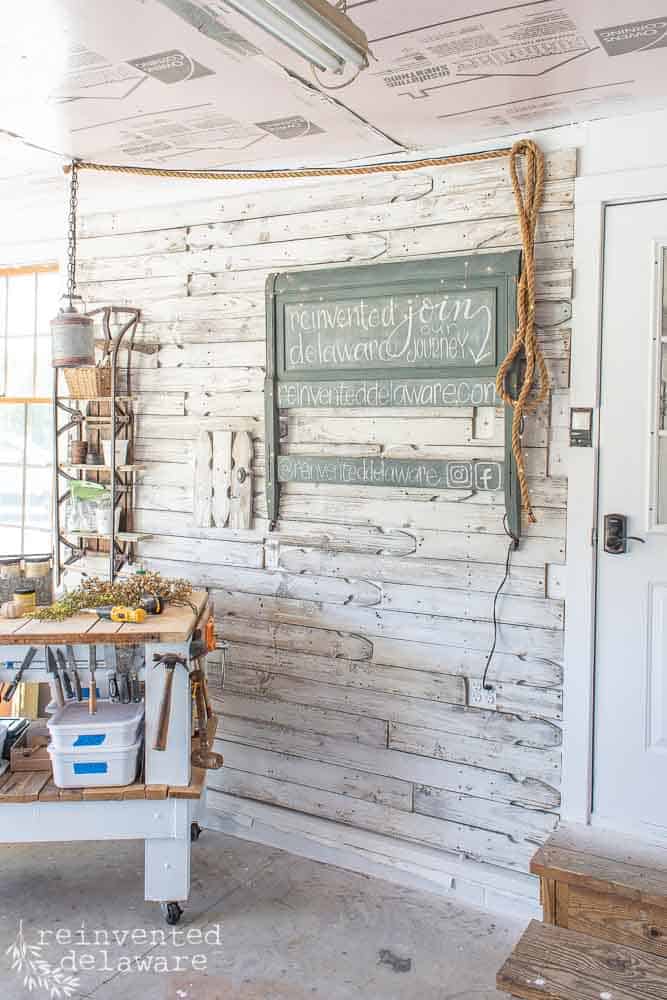
step five: clean the YouTube backdrop wall
My garage workspace turned video production studio was a mess with sawdust from the chop saw. So I pulled out the shop vac and vacuumed everything.
Standing back and looking at my own video studio, I thought it looked a bit dark. This was an easy fix. I grabbed some leftover water-down acrylic-based milk paint by General Finishes and painted it over the fence boards.
It lightened up the pickets with just a little effort. I wasn’t going for a solid color backdrop but having the pickets in a brighter white helps to create a cohesive look to my video creation.
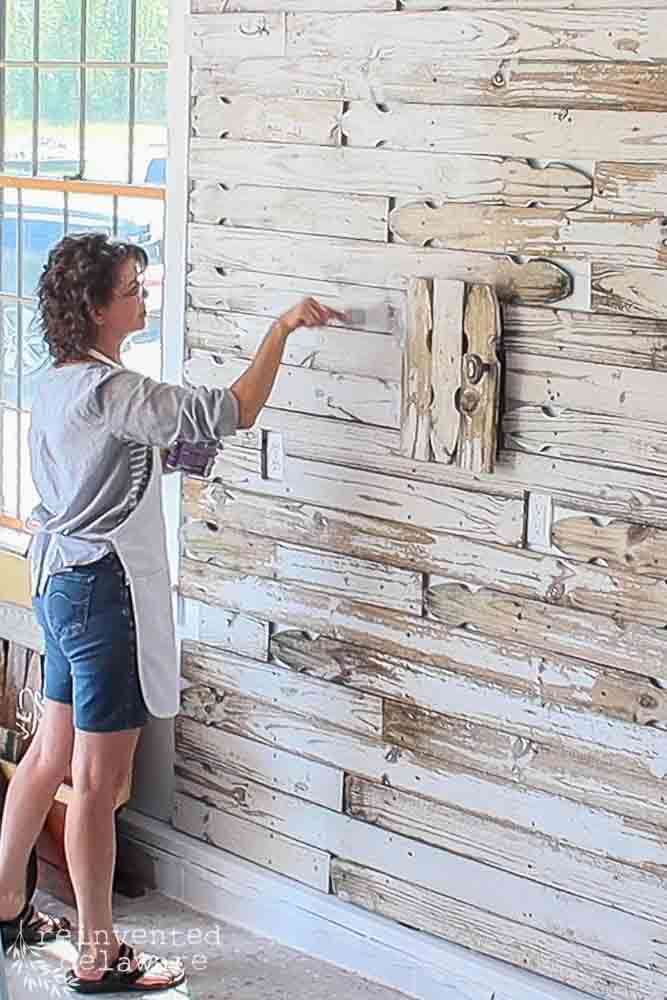
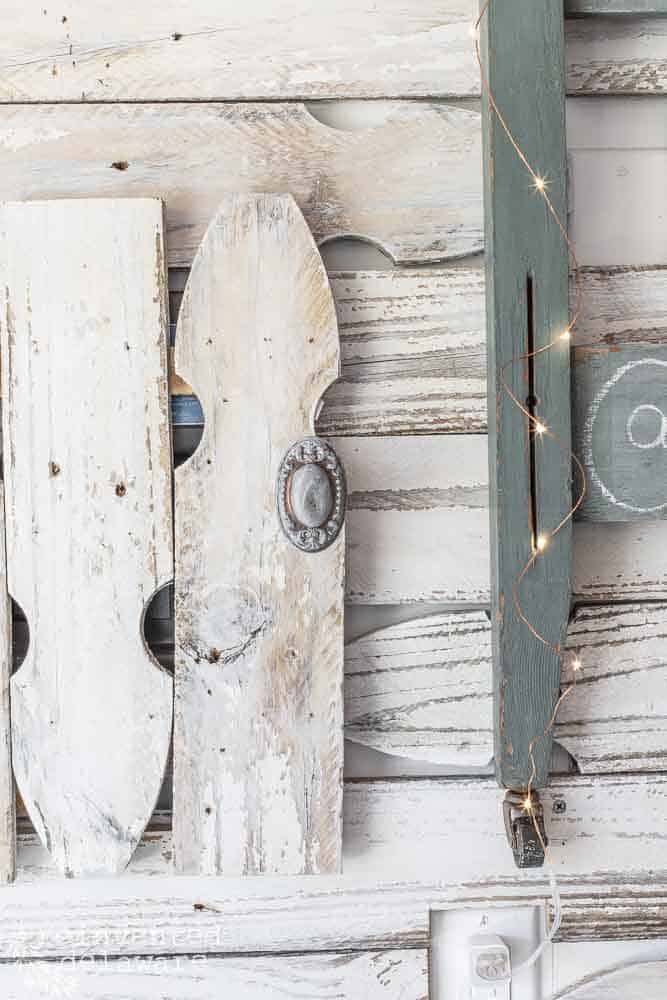
Hubby jumped into this big craft project and built a little door that would cover the fuse box. Isn’t it adorable? I added a vintage door knob and some old hinges I had in my stash.
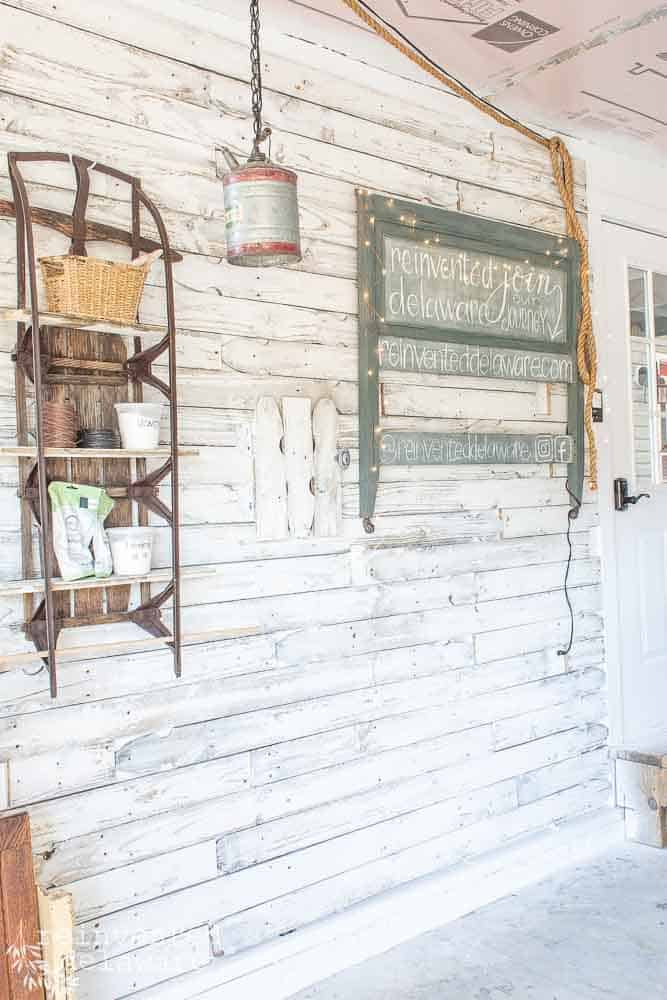
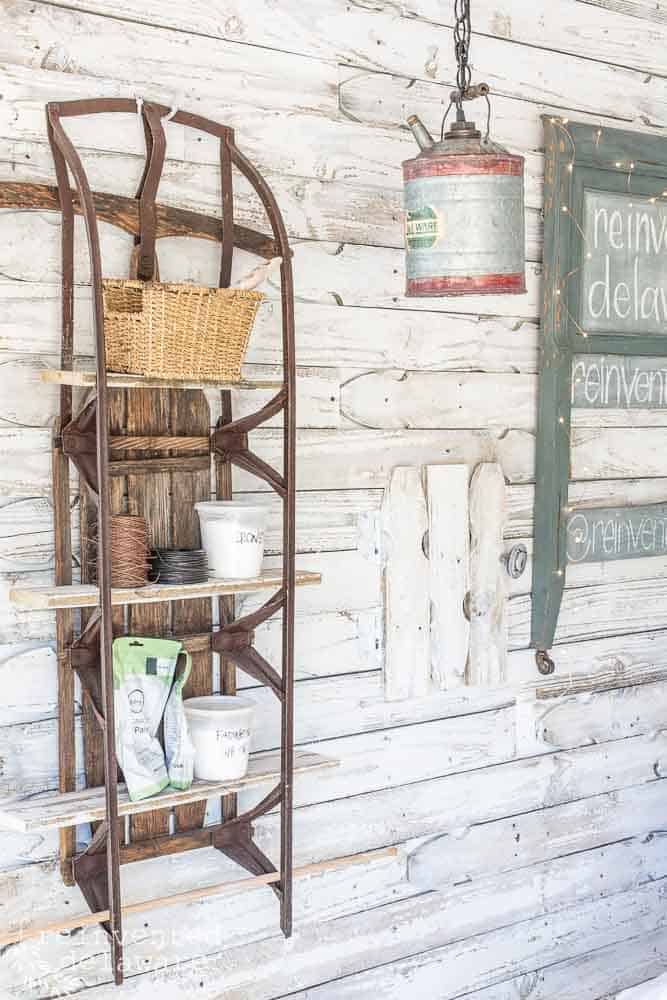
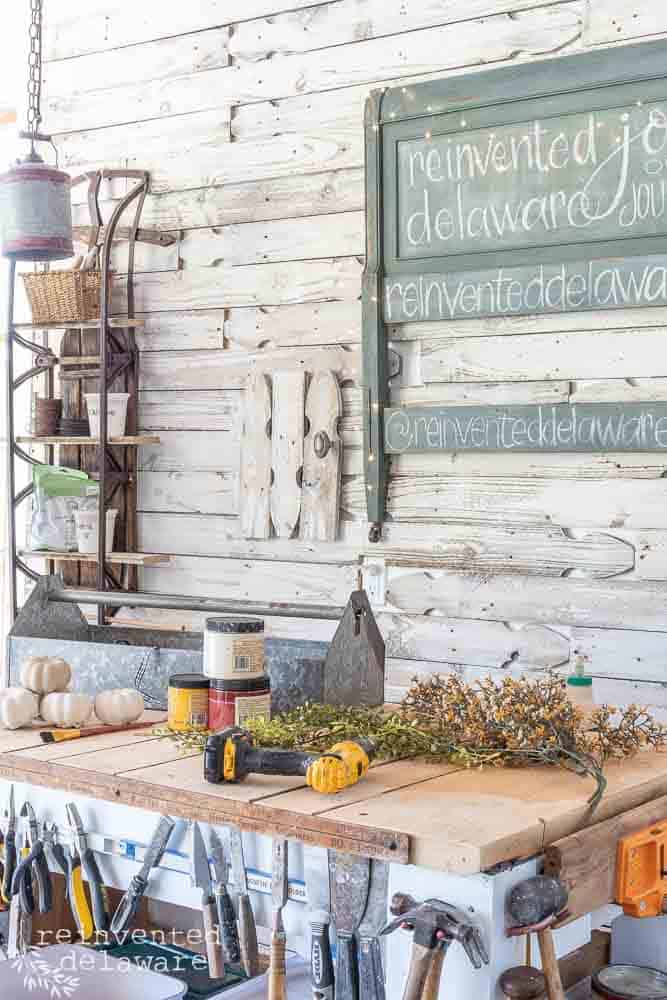
background of your YouTube video
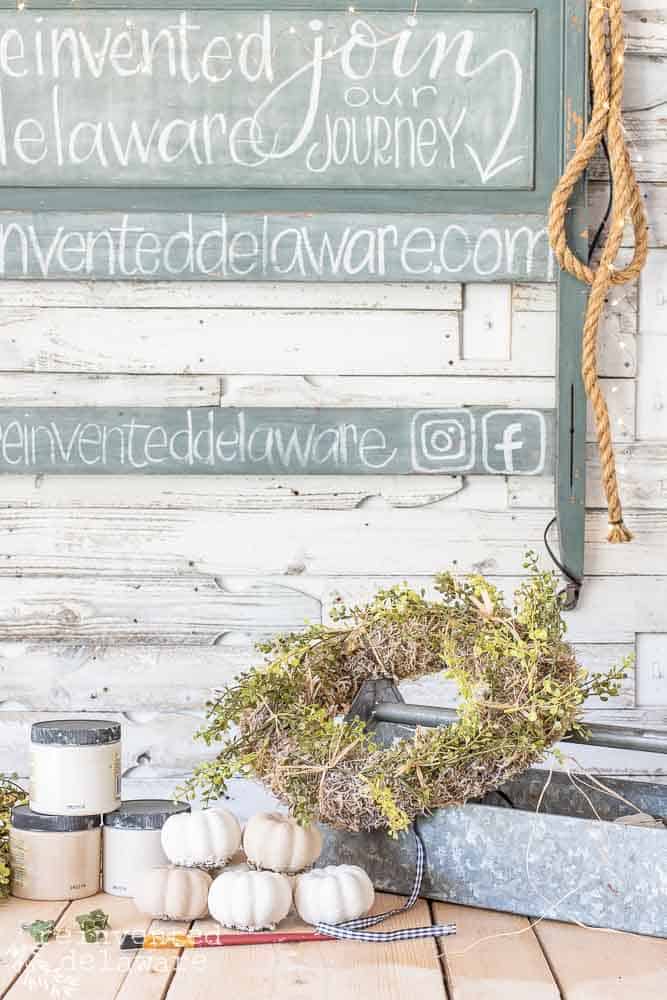
This diy picket fence YouTube backdrop wall needed a bit of sprucing up so I added some fairy lights, an upcycled oil can hanging light as a small light source, and a little decorative shelf made from an old sled.
So what do you think, is this something you would try for the background of your YouTube videos?
If you are thinking about; using this idea for your video content but you don’t have picket fence boards lying around, check out your local box lumber store. You can find loose pickets for only about $2-$3 each.
You could build a backdrop wall for your next recorded video content for well under $100. And even less if you have a small space like mine!
different ways to create a YouTube backdrop
Here are some other creative ideas to make a YouTube backdrop for your YouTube studio.
Mount a curtain rod to the top of the wall (be sure to find the studs!) and hang a solid-colored backdrop fabric like a drop cloth. They are so inexpensive for the amount of fabric you get!
Another popular choice is to add a digital backdrop to your video content. If this is the right backdrop idea for you, consider hanging a large piece of green fabric to create green screen backdrops. Be sure the fabric is a solid color green and don’t use any gathers when hanging it from the curtain rod.
Another great video background would be to use a solid-colored backdrop by just painting the wall the color you desire for the looks of your YouTube studio.
The best part about this idea is that you can change the color anytime your heart desires for just the cost of a can of paint! You could change the color after you have created a couple months of new videos and have a whole new look!
The only downside of using this method for a backdrop would be making sure the wall doesn’t have any receptacles that could stand out in your video.
different kinds of DIY backdrops
Paper and vinyl backdrops are also a great choice for the looks of the YouTube studio you are shooting for (get it?? haha!) Here are some of the ideas that are popping into my head:
Use seamless paper rolls in whatever color you choose. They are a relatively inexpensive way to create a backdrop and you could store additional rolls under a bed.
You could also use wadded up pieces of tissue paper attached to the wall with t-pins. Use a variety of colors for a fun look that you could change out with thes seasons or use white tissue on a white wall to create depth and dimension to your backdrop.
Tear large pieces of brown craft paper to create a paper backdrop for pennies. The torn edges will add some texture to the background and the cost of the paper is inexpensive.
Crinkle up some tin foil and attach it to the wall with t-pins. This would create a great youtube backdrop that would get you noticed! As a side note on using tin foil: be aware of the lighting in your space so that you don’t have any glare and mess up the quality of a video with too much sparkle 🙂

most popular backdrops
Vinyl backgrounds are popular backdrops because they come in so many different designs.
They come on a large roll and can hang from the ceiling or from the highest spot on a wall. The rolls can be pricy so be sure to search for the one that fits your YouTube personality.
YouTube tutorial
Click the image below to watch me build this amazing backdrop wall for DIY YouTube channel!
best backdrop strategies
One last thing to consider if you want to create your own backdrop wall for you diy YouTube channel is lighting.
My workspace is in my garage with a large door and several large windows. I am able to get tons of natural light. I still might add a softbox lighting kit especially on cloudy days when my garage workspace gets darker.
Make sure your space has a good light source. I suggest painting your walls a pure white as well. We recently gave our garage a makeover and painted all of the walls white.
They had been the color of my hubby’s favorite football team. Editing videos for YouTube and capturing images for blog posts was a challenge. The white walls make such a difference!

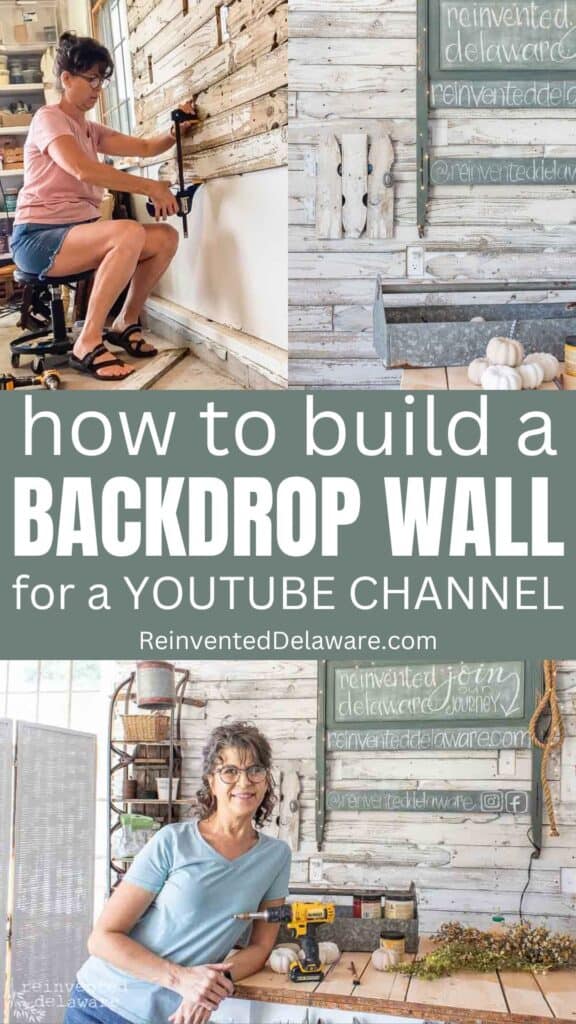
Pin the image below to your home decor and furniture boards! Just click the pin button at the top left corner!
Thanks for joining our journey!
Thanks so much for joining us for this post! Join our journey so you don’t miss any of the fun projects, tutorials, and inspiration that we share with you each week! You can follow us on Instagram, Facebook, and YouTube. We share even more inspiration on Pinterest!
use code: 10OFFRD at checkout and save 10%!
Visit my Amazon Storefront!
Click the button below and head over to our online shop on Amazon!

It looks fantastic, Cindy!!! You did such a great job. LOVE the old fence use!
Me too! Aren’t pickets so useful?? Have a great week Rachel!
It looks fantastic Cindy! Now I’m off to see the vid!
You’re the best! Thanks Jayne!
Cindy, this looks fabulous! Cannot wait to follow along on the journey! Have a great weekend.
Oh my gawsh! This is the cutest, Cindy! I’m in love with your backdrop. It’s so perfect for your brand, and it looks so professional. You’re going to be a YouTube megastar!
haha!! YouTube megastar!! Thanks for the encouragement Crissy!
I’m so glad you enjoyed the post Elizabeth! Thanks for the encouragement 🙂
Wow Cindy!!! Just incredible wall! I love to repurpose and think it so cool how you used the fence. Looks great. Will be perfect for your Utube Channel!
Thanks, Meagan! I’m loving the wall so far. Happy repurposing!
It’s gorgeous! I love it. Well done, my friend.
Thank you, Renae! I’m loving my new digs!
So beautiful and what an environmentally friendly re-use of material!!
Carol
I agree! Old picket boards still have so much life in them and the wood is often in great shape!
You always have the best repurposing ideas! Thanks for the inspiration. I have a small bathroom in my studio this would work in. It looks great!
Omgoodness, that’s a great idea Do! I can’t wait to see how you use your old pickets!
Enjoyed watching the video, great job. What an imagination you have, it looks awesome. Great way to recycle. 😉
Thanks so much for watching the video and reading our post! I’m so glad you enjoyed them both 🙂
This is amazing Cindy! I love how you created this new beuatiful back drop for your videos. Well done my friend.
Thanks, Wendy! I’m excited to have a new space to work in!
This is so amazing, Cindy! I swear you come up with the most creative ideas. I love the way this came together and how you left all the chippy charm too. It’s perfection! Hugs, CoCo
Yes for all the chippy goodness of old picket fences! So glad you enjoyed it CoCo!
Wow, I’m so impressed with your backdrop wall! Well done Cindy!
Thanks, Michelle. I’m really loving it!
This is genius and I love how it turned out. Adding this to my “to-do” list when I get my dream she-shed!
Did you say she-shed?? I’m going to have one of those one day too!!