
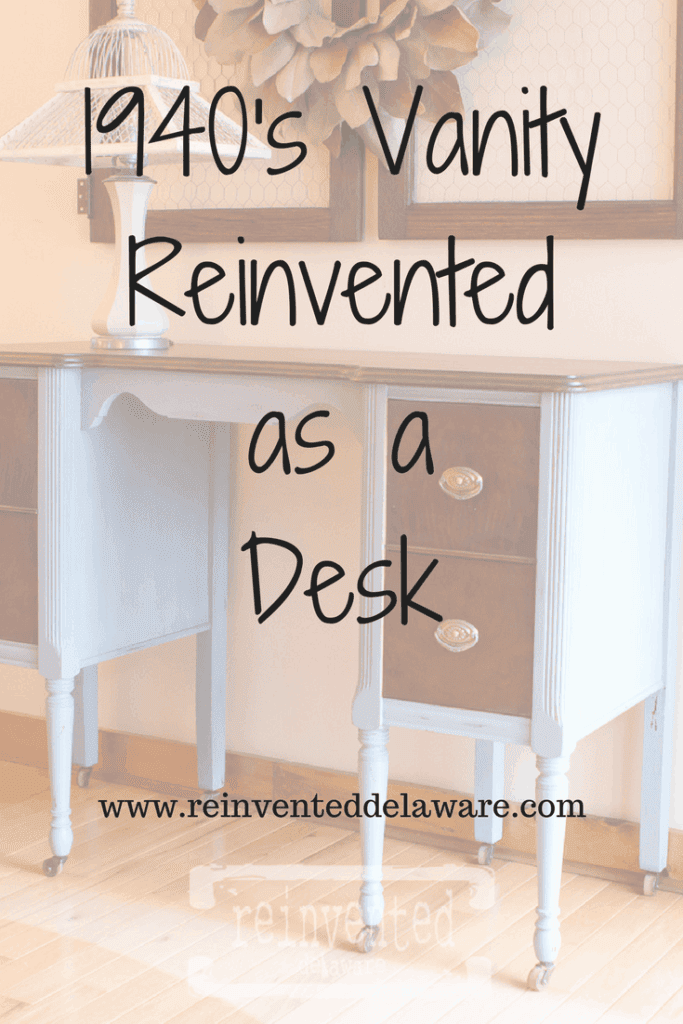
Step by Step 1940’s Vanity Repurpose | Part One
I am so excited to share this project with you today! By now, you might have figured out that I have a special place in my heart for the 1940’s style of furniture. There is something about the color of the wood that old stain methods and time create in the older pieces that just tug at my eye in a good way.
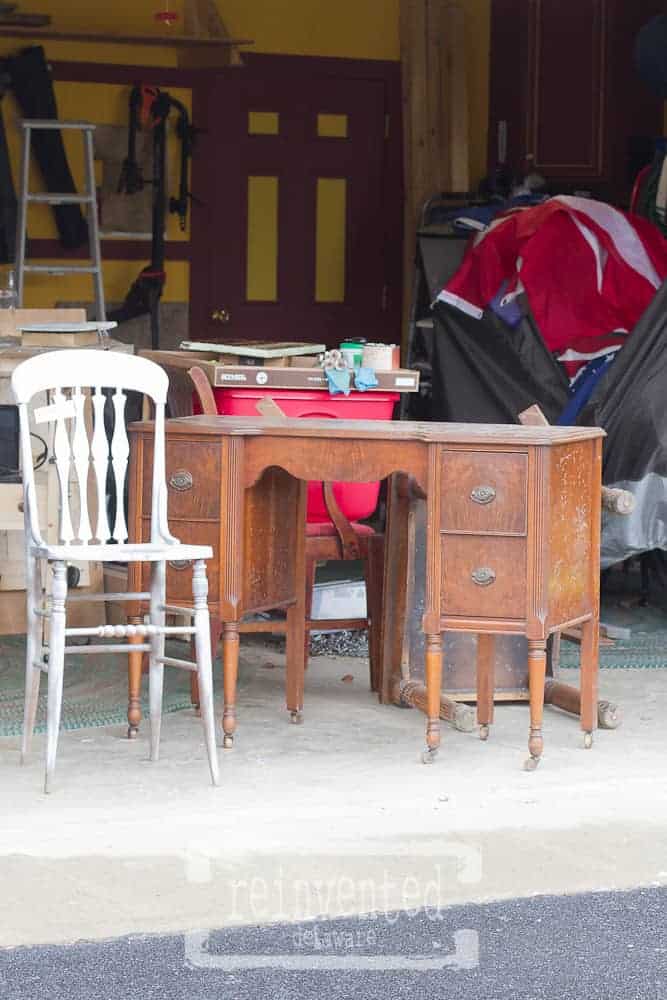
Take this 1940’s style vanity. This furniture piece would have served a lady while she fixed her hair and face for the day or maybe for an evening out. It had a mirror that was attached to the vanity top with a harp – the mirror would have been able to tilt back and forth. Unfortunately, I had already removed it before I picked up my camera ;). I never said I was patient! The chair I chose to use with this vanity/desk re-do had a nice design to it. I keep a selection of single chairs in my storage area so I always have chairs on hand!
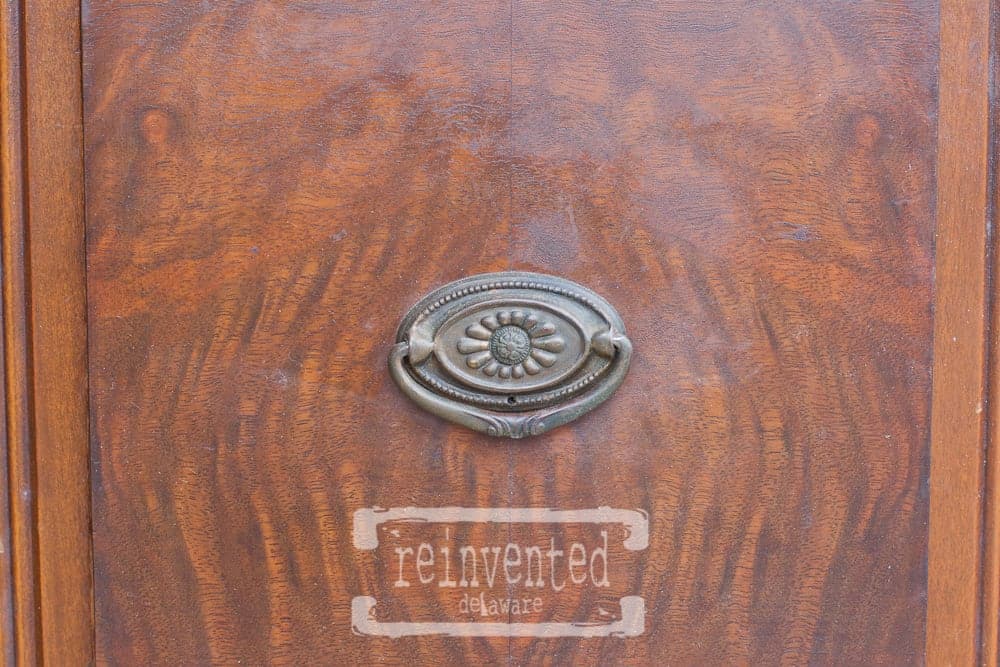
The Hepplewhite drawer pulls were the first thing to catch my eye. The pulls are named after the late 1770’s English furniture maker, George Hepplewhite. They have a decorative plate with a loose ring for opening the drawers and they make a certain sound that I have come to love. There is little metal ‘clink’ each time you let go of the ring. I just like the sound 🙂
Vanities are not a practical piece of furniture in our day so I wanted to reinvent this into something useful for a homeowner. My first thought was a desk. The size of the vanity is perfect for either a laptop or a desktop computer. The drawers would provide storage for any office supplies that might be needed.
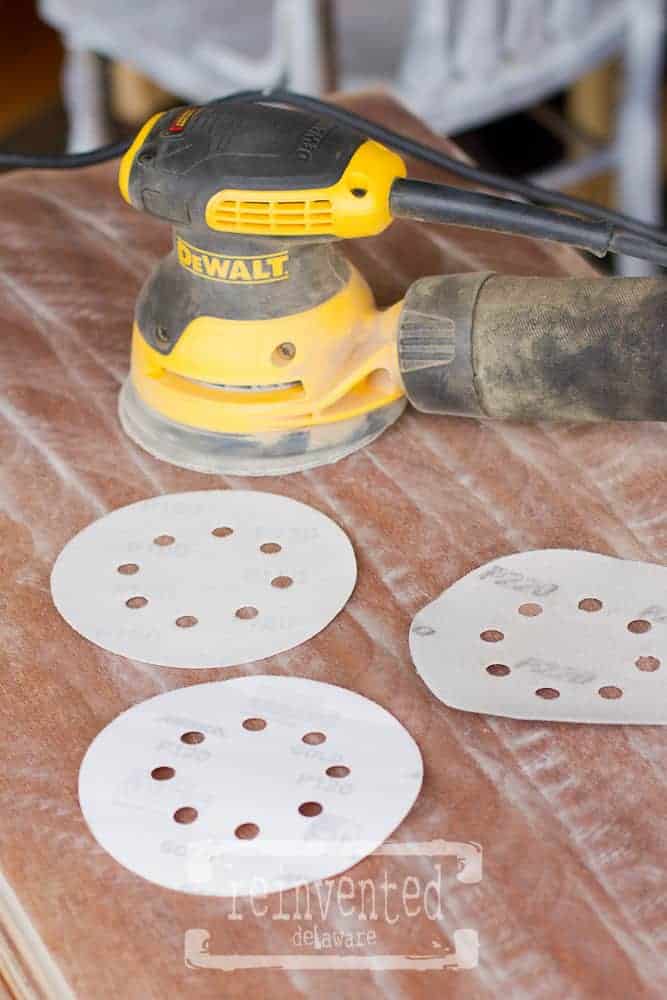
The drawer pulls came off and I began sanding the piece using my little Dewalt orbital sander loaded with 150 grit sandpaper. I do not usually remove the finish entirely, just a light scuffing. This is a great time to go over the piece looking for any repairs that might be needed. Some of the older pieces can have loose veneer or parts that need to be re-glued. I got lucky with this piece. It was in very good shape!
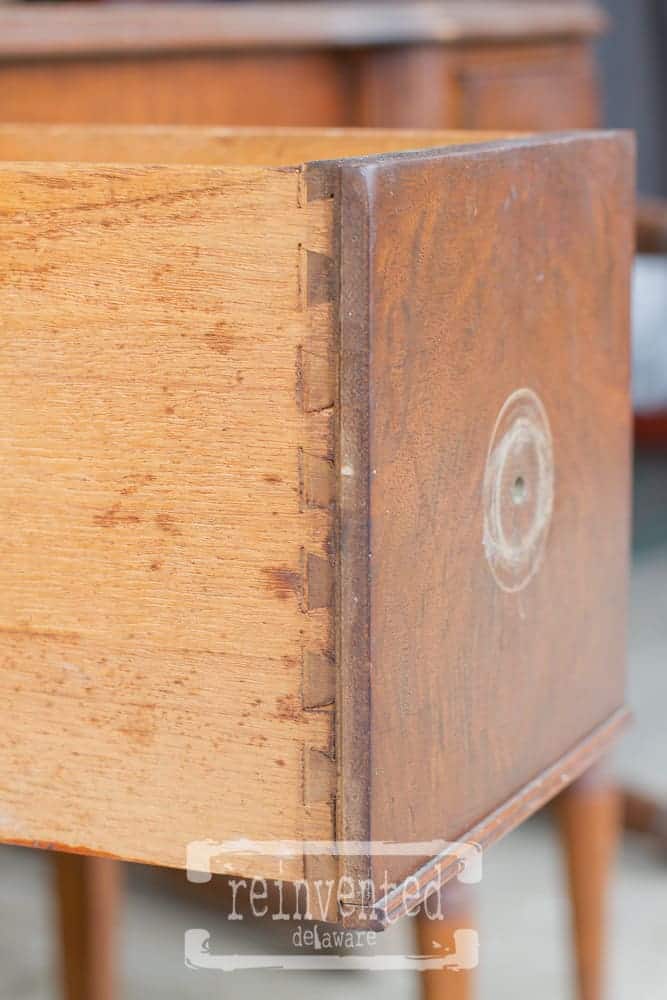
I love the dove tail drawers on the older pieces! It makes me want to keep them open 😉
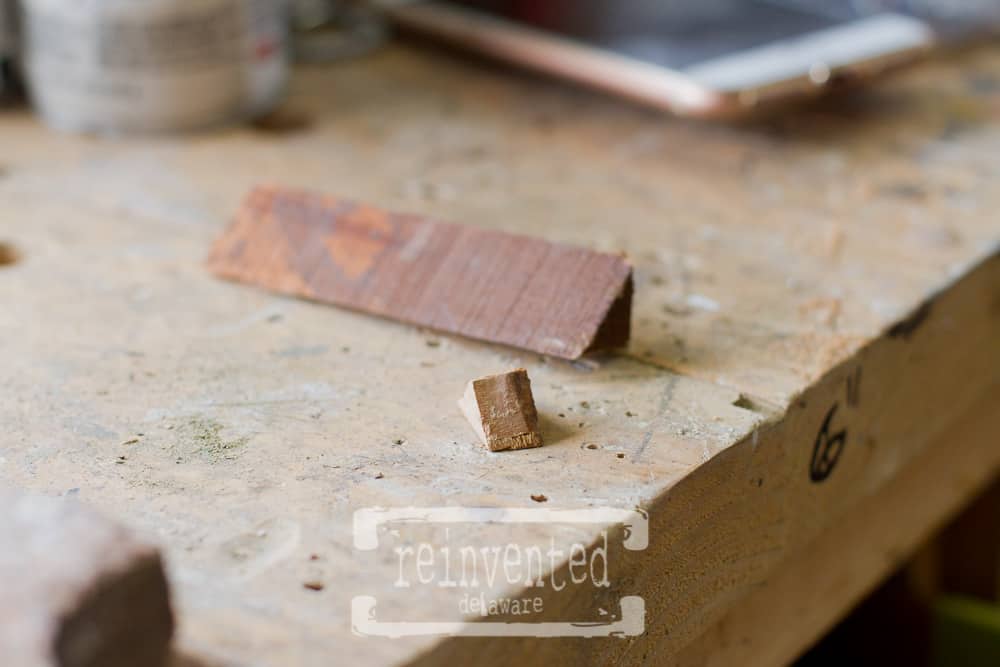
Speaking of repairs, I realized that if someone were going to use this as a desk, the apron would have to be cut down in order for knees to fit comfortably underneath. The small vanity stool that would have been used most likely sat lower than our modern chairs do. I removed the apron that was attached in the back with trianglular shaped peices of wood that were glued on and secured with a tiny nail. I measured how much needed to be trimmed – about an inch – and my hubby took care of that for me. Thanks sweetie 🙂 We reattached it afterwards using the same pieces of wood and tiny nails.

If you have a steady hand you can use the sander around the curved edges. Be careful though, you can quickly change the shape of the furniture. If it could only be so easy with my hips :). Anyway – you can always use a sanding sponge if you are not sure.
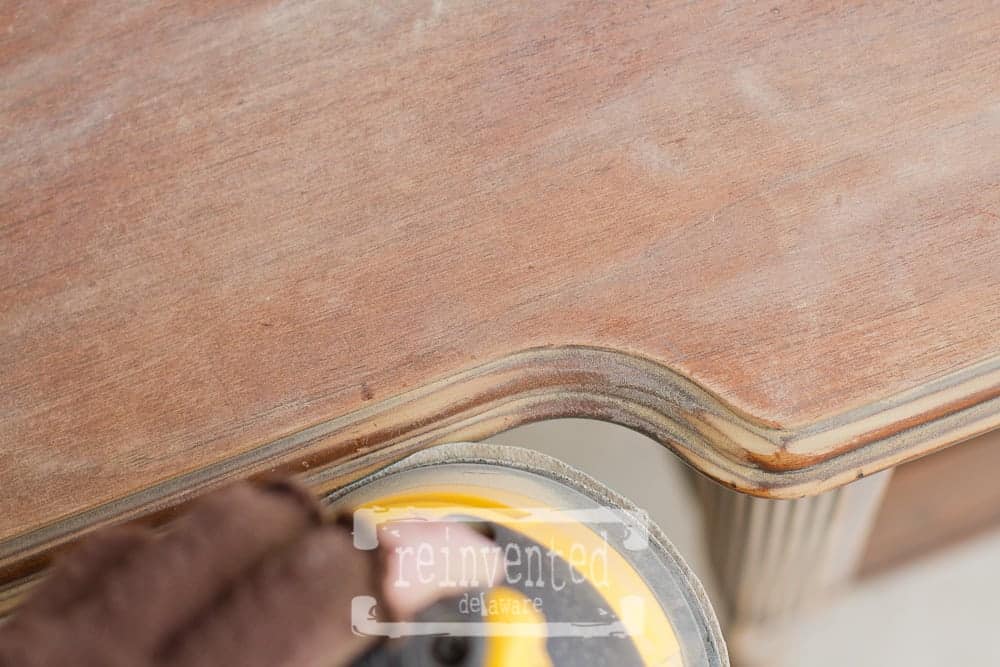
The top of the vanity is going to be restained and clear coated so I chose to sand down the top pretty good. I didn’t remove all of the little nicks and dents, that is what gives character to a vintage piece of furniture. I started with 120 grit, then 150 grit and finally, 220 grit sandpaper. That produced a nice, smooth finish on the top.
Little Fella was quite the helper!

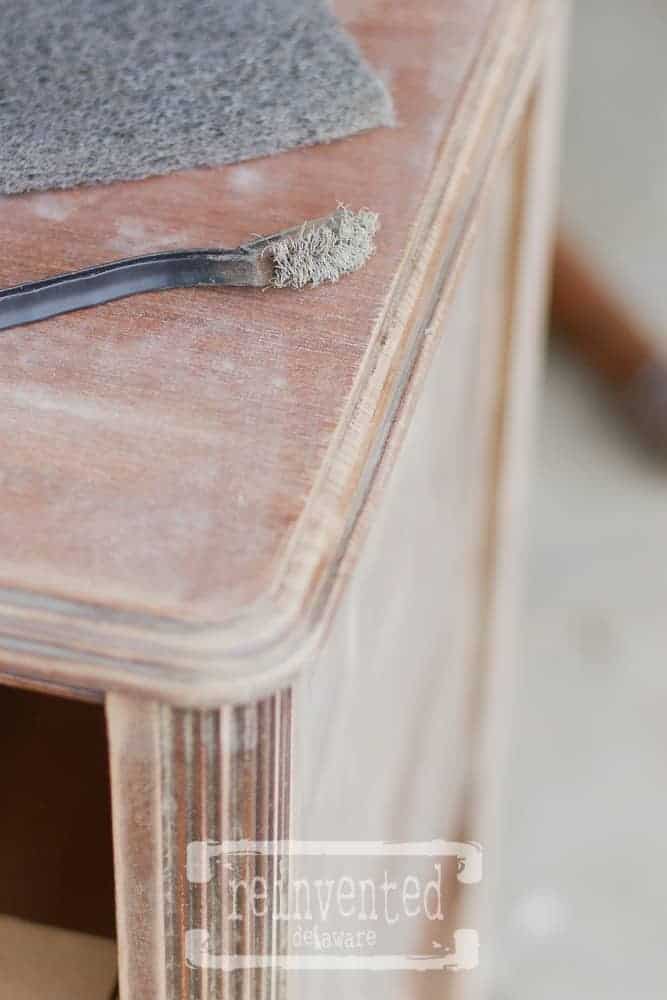
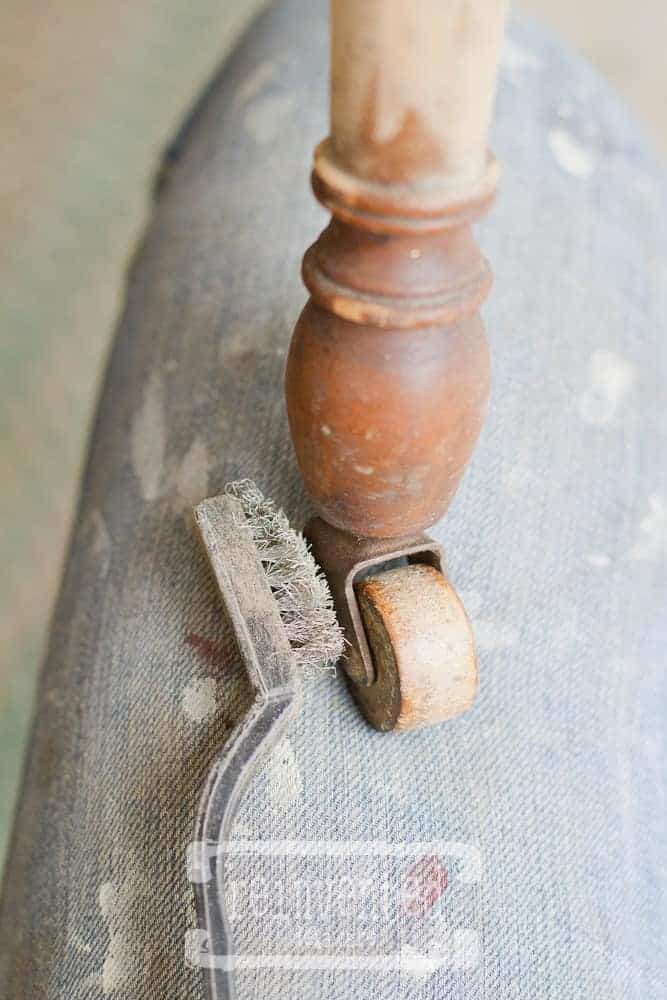
Using a wire brush very carefully around the grooved edges will remove dirt build up. Just be sure to use a light touch.
Take a look at those casters!! Wooden wheels steel my heart! Use the wire brush to give them a good cleaning. Also, after you have vacuumed them, you can apply painters tape on the metal part and the wheel. That way you won’t get any paint on them. I am not that patient so I just kept moving forward 🙂
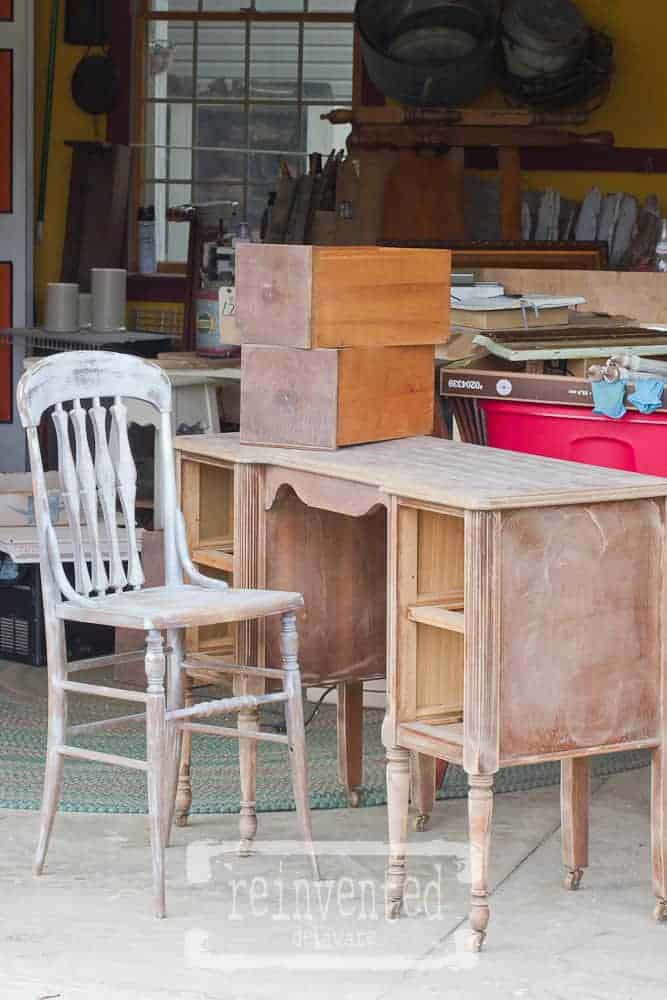
All is sanded including the back of the vanity and the chair I am going to use with this desk. The chair was painted a weird metallic spray paint so I gave it a pretty good sanding. Also, the chair was at a strange height – not the average seat height. My husband cut off the extra for me! What would I do without him 🙂
Running the shop vac over everything eliminates quite a bit of the dust. Then I use a micro fiber cloth to pick up the rest. The interior of the drawers along with the casings they fit in were well vacuumed also.
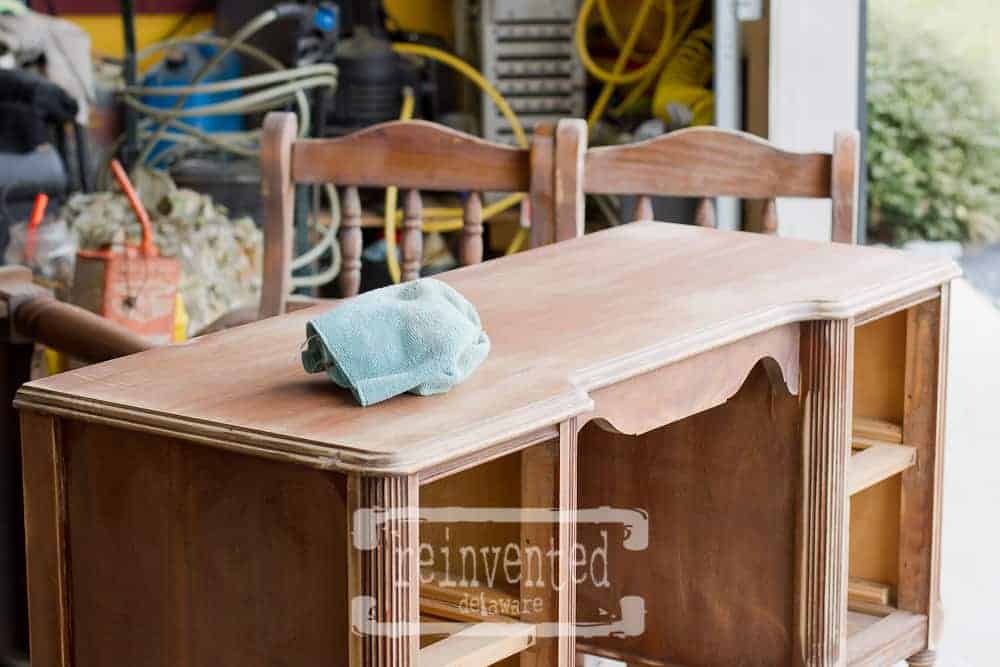
There are times I do not want the chance of the original finish coming through the painted surface. So I pull out the sanding sealer.
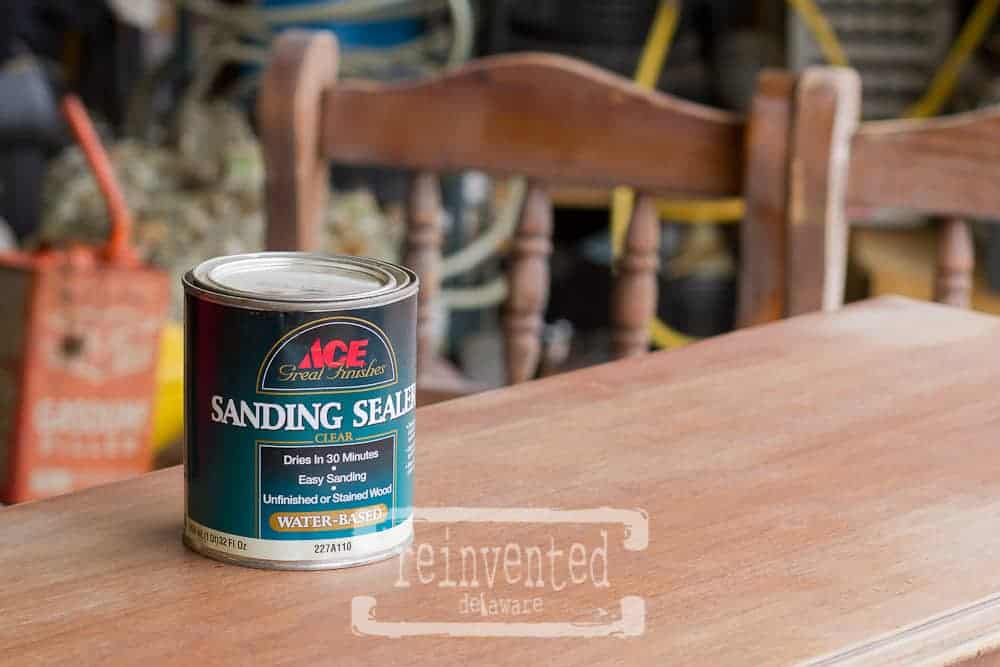
A thin coat over the whole piece and I was ready to paint.
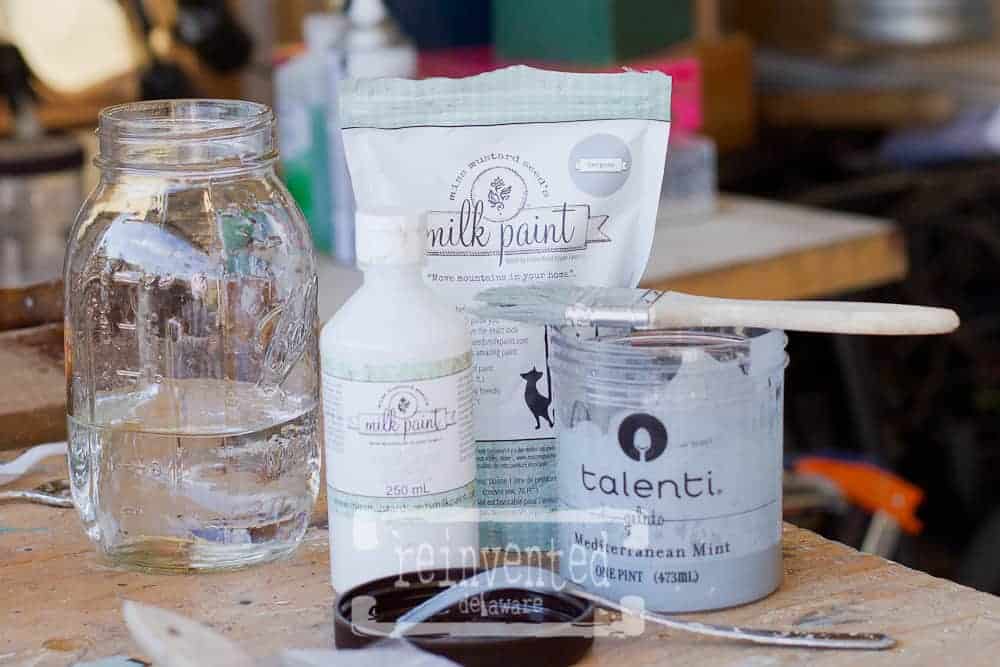
While the sanding sealer was drying, I mixed up my paint. Miss Mustard Seed Milk Paint in Bergere. It is a beautiful soft blue. This paint is so easy to mix and is heavily pigmented so it goes a long way. Equals parts of water and milk paint powder go into my Talenti gelato plastic container and I mix it well with a fork. I smashed up any clumps with the fork that I have bent enough to lay against the bottom of the container. I also used a couple of squirts of the Miss Mustard Seed Bonding Agent. This will help the paint to adhere to the furniture. If your desired look is a chippy finish then the bonding agent can be skipped or decreased in the amount you use. The mixed paint needs to sit for about 10-15 minutes.
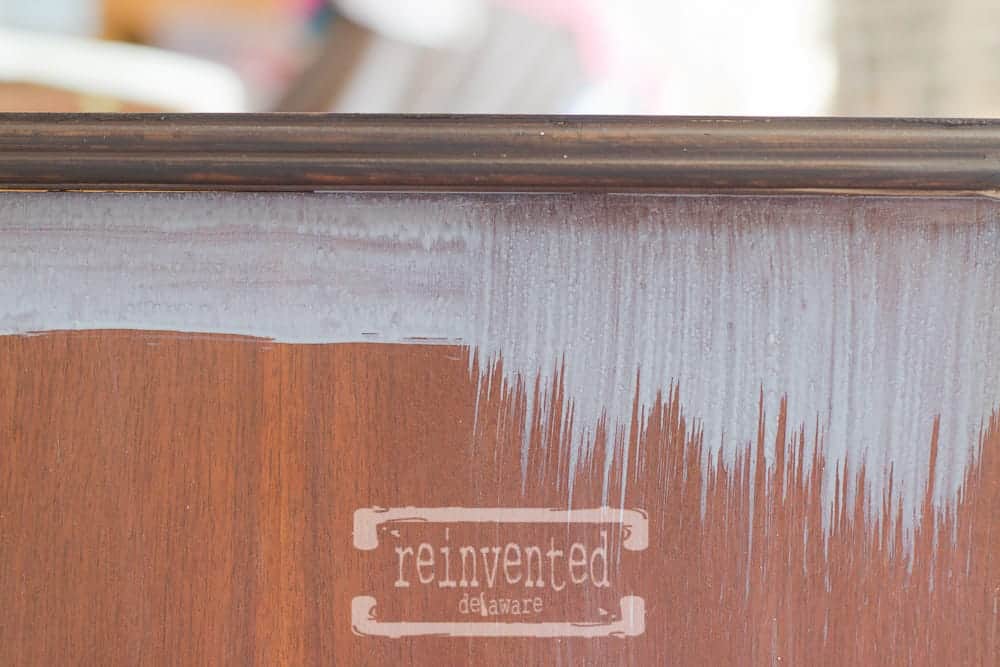
I started painting on the side of the vanity. You can see here that I apply the paint horizontally first to make sure I get all the way up to the top edge neatly, then I use my brush to lay the paint off in the direction of the grain. The paint is pretty thin and wet, so there is usually enough time to do this. I wouldn’t recommend letting it go to long. I paint fairly fast making this step move along quickly.
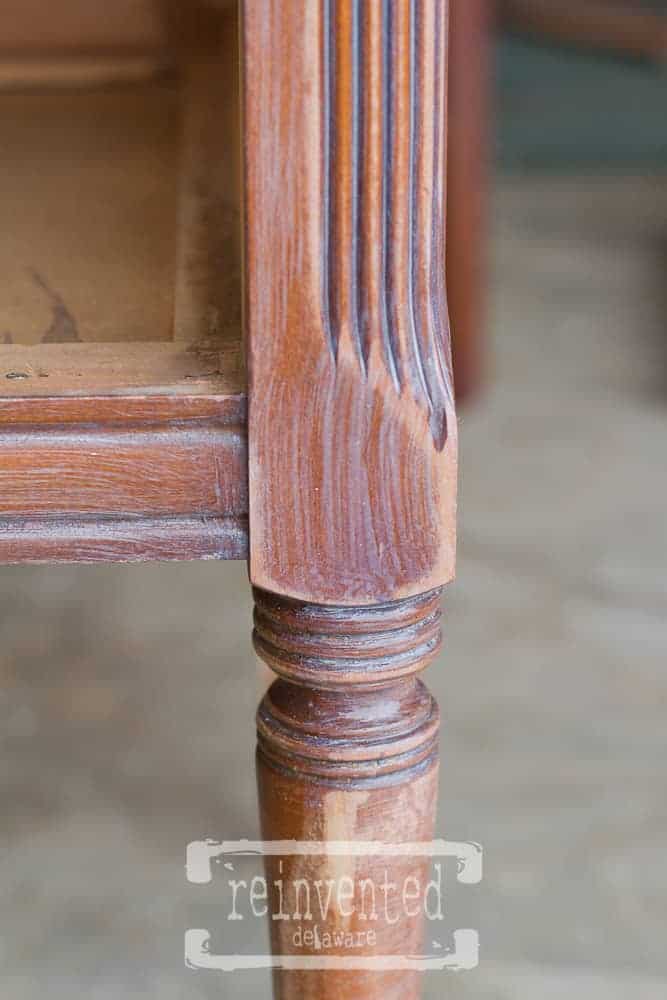
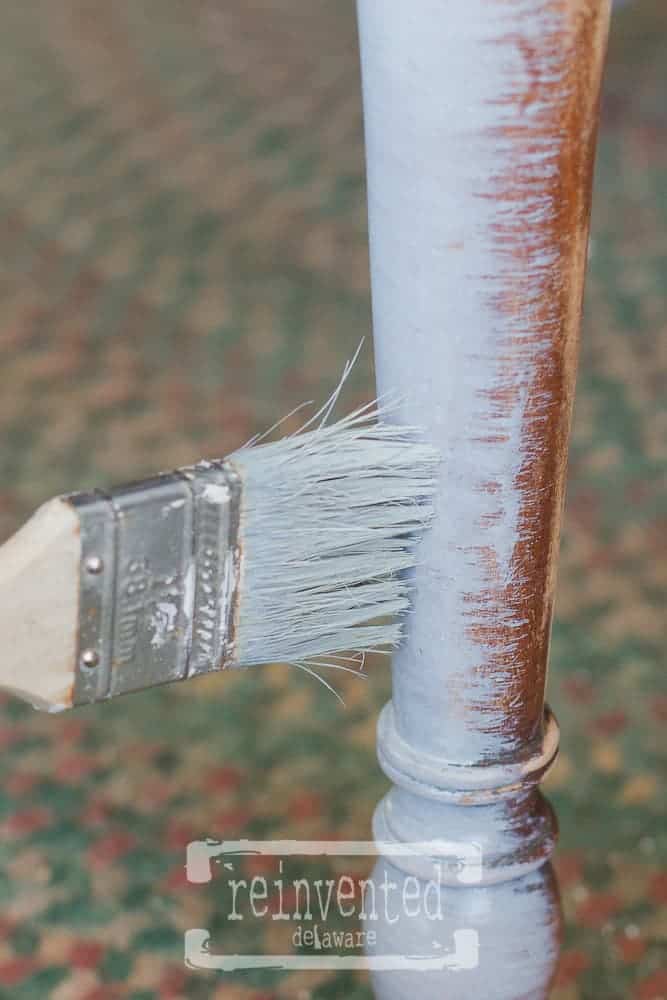
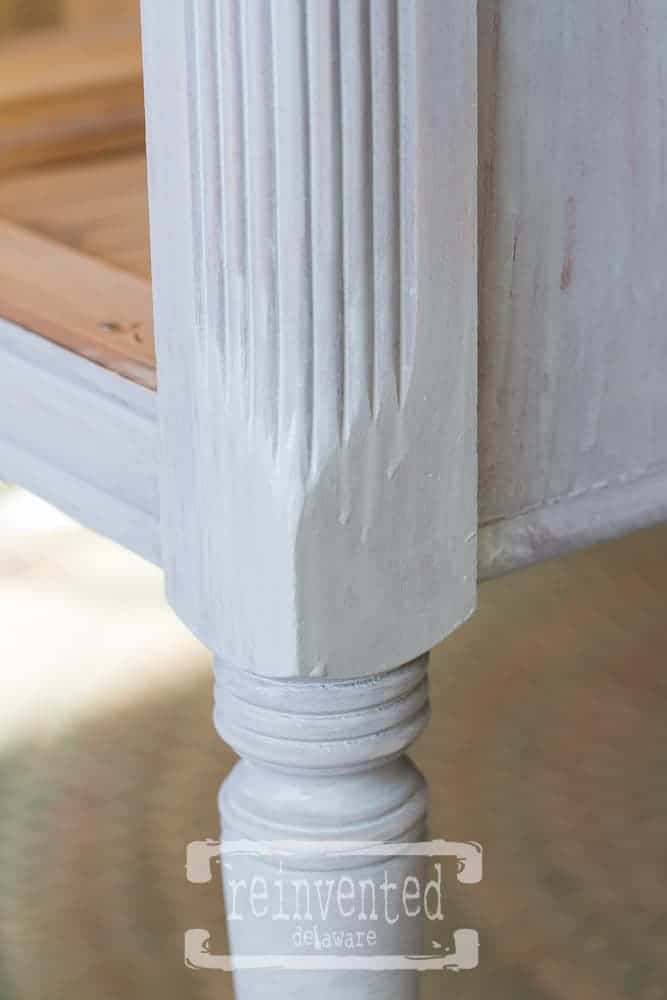
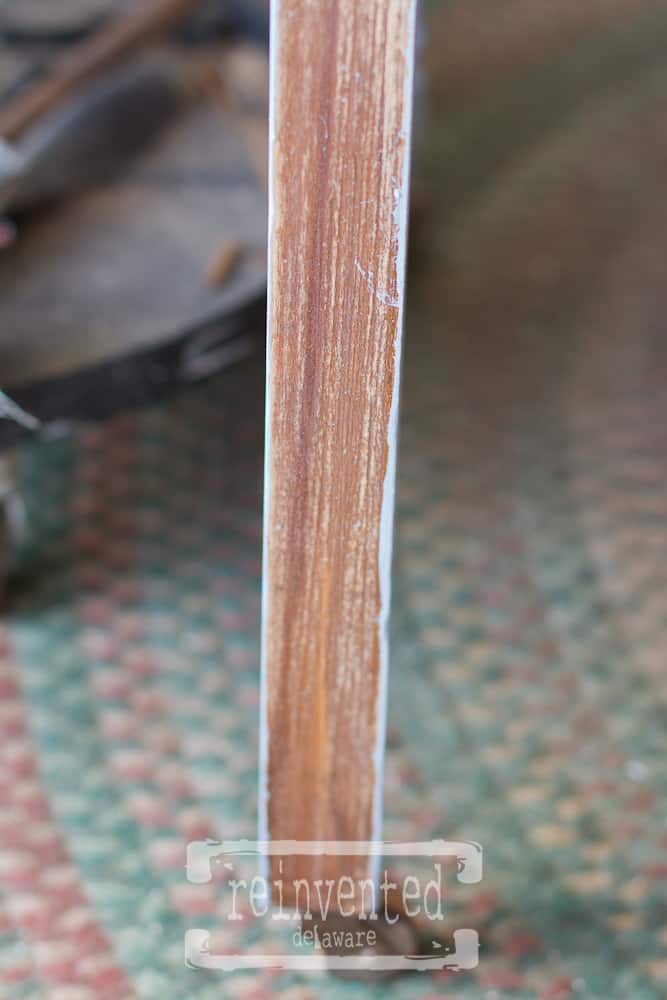
The thin chip brushes make painting the delicate legs of the vanity a breeze. Turn the brush in the direction seen in the image below and use a ‘flicking’ motion. The paint will cover so well this way. Move around the whole leg before going to the next leg. Be careful around those gorgeous wooden caster wheels!
The vanity has this beautiful grooved detail on the top of both front legs. Keep in mind that the paint is thin and could run down those grooves. Just keep checking it and going back over it with the chip brush. It will eventually stop running as it dries. If you don’t get all of the runs as they are happening and the surface is dry, you can lightly sand them and go back over it with paint. It is just easier to keep an eye on it as you are painting.
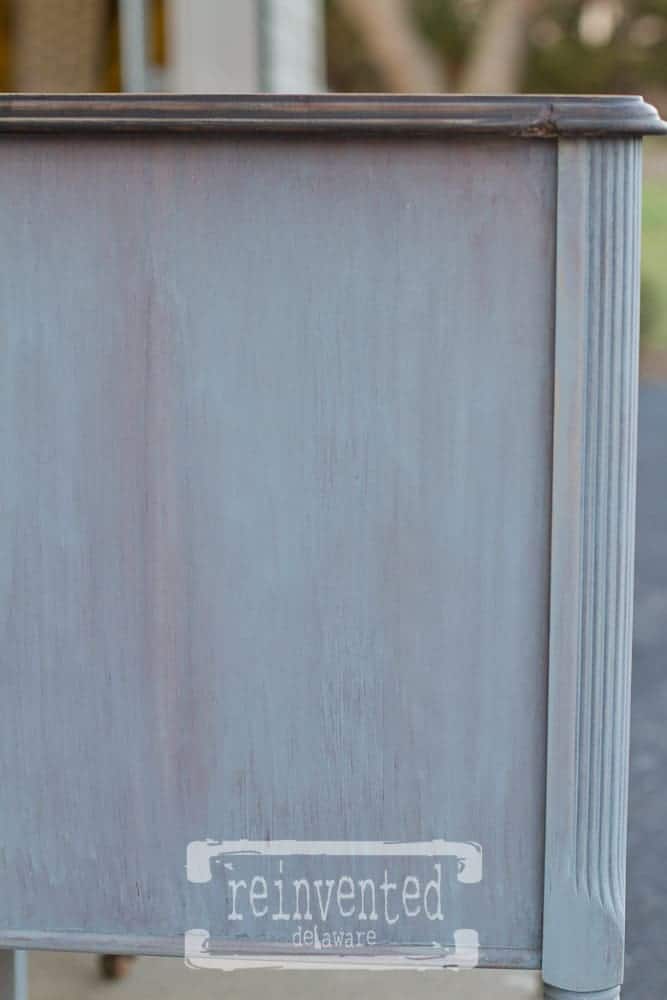
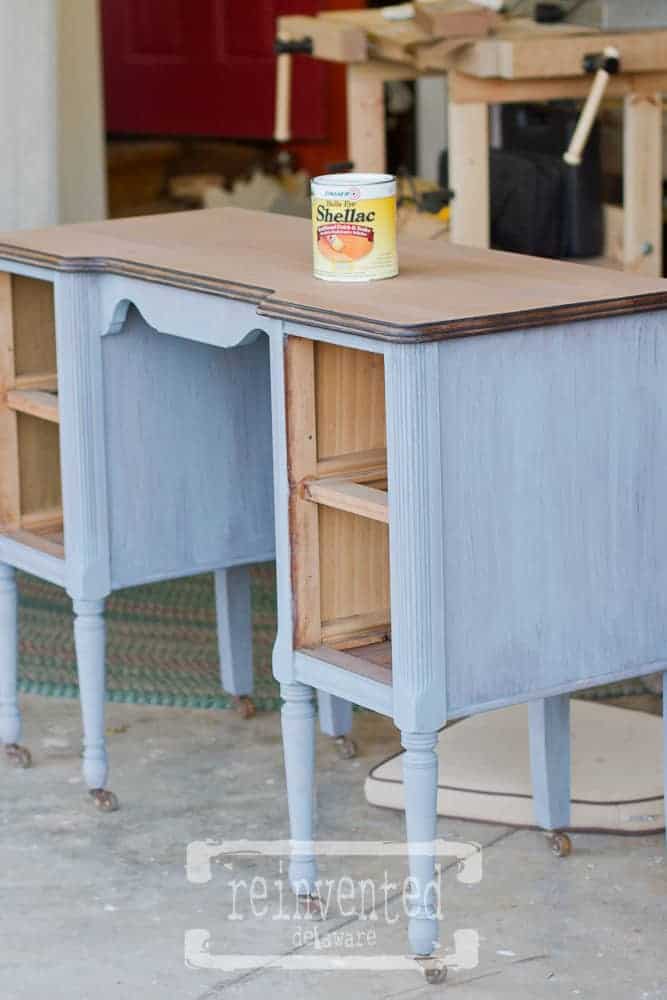
Well here is when things got a little tricky. After the first coat of paint, I realized that the sanding sealer did not create enough of a barrier in preventing the old finish from coming through the paint. I have used this product many times before with success but for some reason, it just didn’t cut it on this piece. I asked my hubby who has also had lots of experience with refinishing old pieces, and he recommended Shellac. So off to Ace we went!
A good coat of the Shellac over all of the painted surfaces only took a short time. It also dried very quickly.
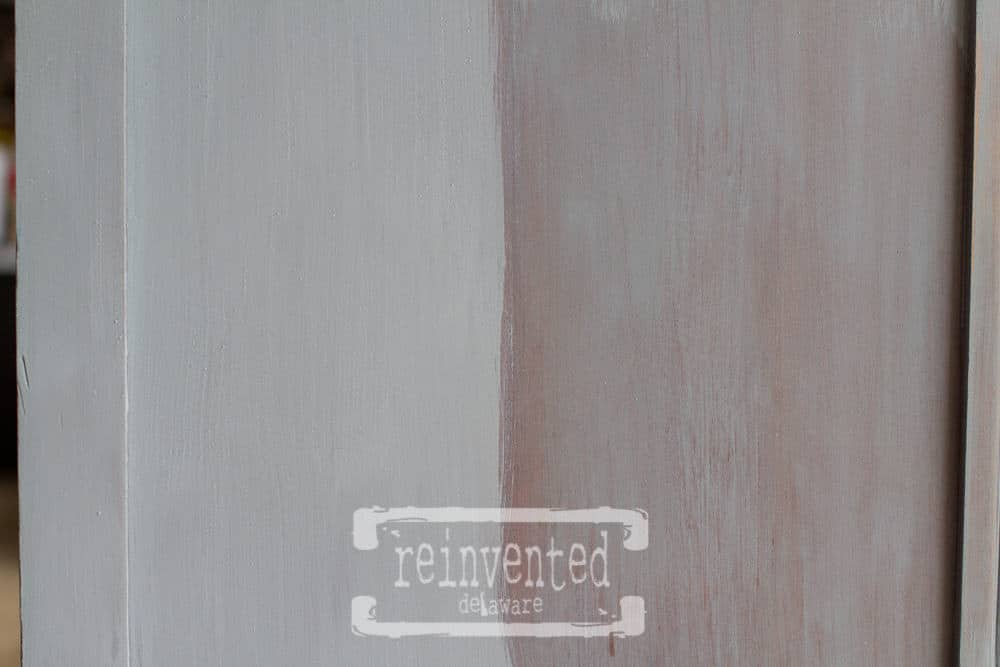
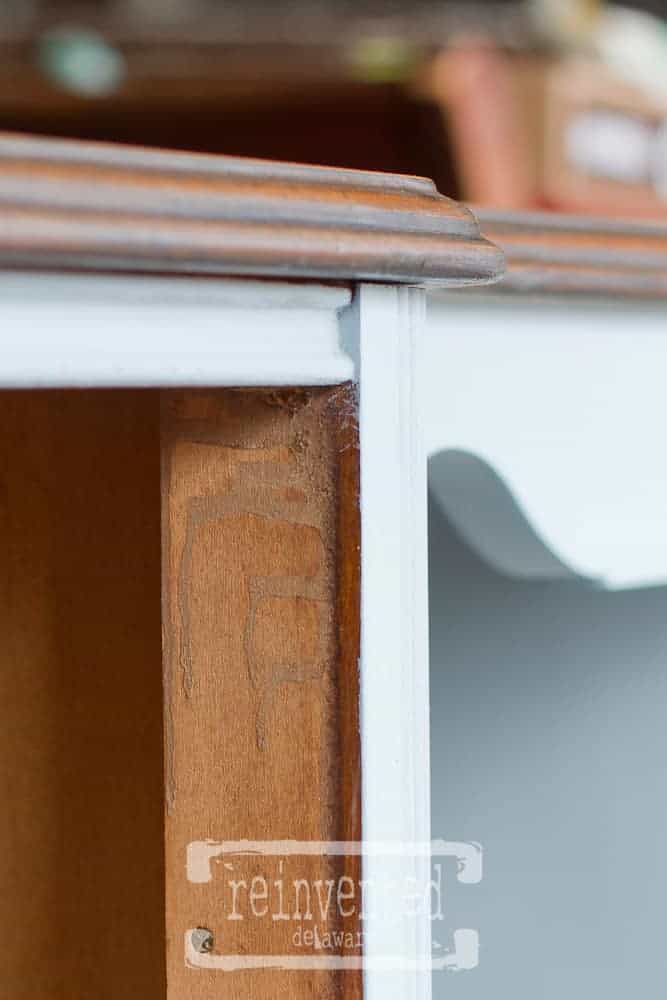
Here is the difference between the two coats. The one on the right was the first coat of paint over the sanding sealer and the one on the left is the second coat of paint after applying the Shellac. There is still some slight bleed through but I like it. It will add to the aging effect I intend for the vanity.
I like to take the extra step and clean up any messy edges that can happen with a paint brush. See inside where the drawer slides in? A little bit of sand paper will take care of it. Take the time to do this step, it will add a more polished and professional look to the finished piece.
And don’t forget the backs of the very back legs. I don’t paint the back of most of the furniture I paint – I like the original wood to show. But I always take the step to clean up the edges, including the back of the legs. Check the whole back of the piece for any stray paint.
Well that’s it for the first few steps of this reinvention! We will finish up this project next week. You will see another little mishap on my part! But that is how we learn in life, from our mistakes!
Feel free to pin any of the images in this post! They will serve you as a reference for many furniture reinventions! See you next week!
Thanks for the depth and breadth of your analysis.
You are welcome! I hope it was helpful for you 😊