
Learn How to Copper Leaf a Pumpkin
Have you ever wanted to learn how to copper leaf a pumpkin? I’ve wanted to try this project for a long time and today we are going to learn how to copper leaf a pumpkin! Let’s get started!

The following post may contain affiliate links. That means if you click and then buy something, I will make a small commission at no additional cost to you! Thank you for supporting my blog. full disclosure here.
copper leaf pumpkin tutorial
Do you like to learn new things?
I do.
In fact, I love to learn new things. I’m kinda obsessed!
Especially when it comes to any kind of project that we do here at Reinvented Delaware.
That reminds me – did you see this adorable pumpkin project made from thrifted sweaters? Some of those pumpkins are cashmere!!

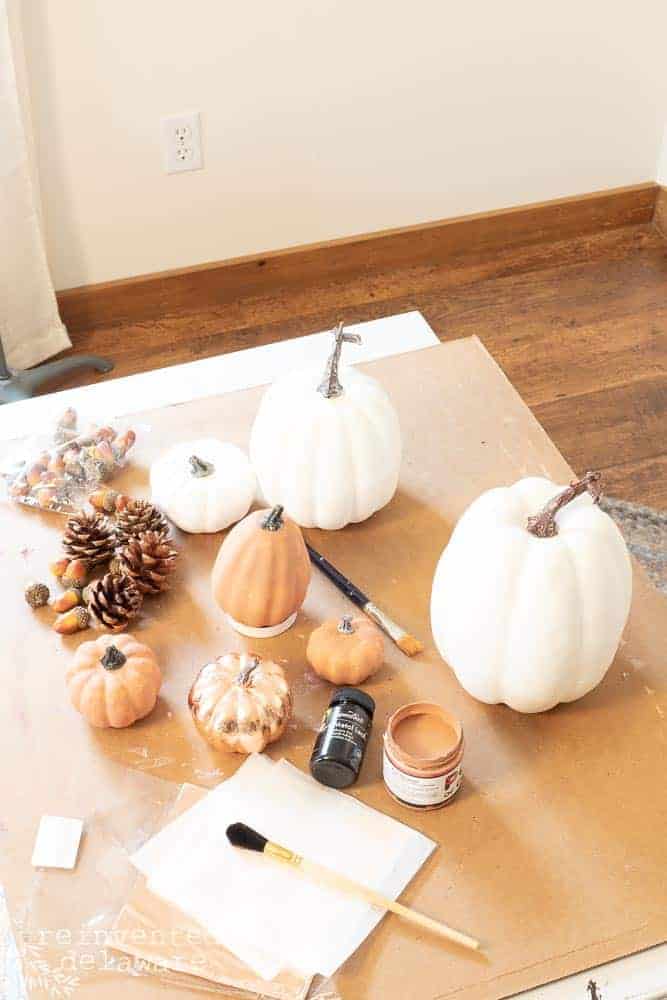
Let’s take a look at the supplies we need for these adorable copper leaf pumpkins.
list of supplies:
- craft pumpkins
- copper leaf
- metal leaf adhesive
- metal leaf brush ( or use a craft paintbrush)
- craft paint in a copper color
- craft paintbrush

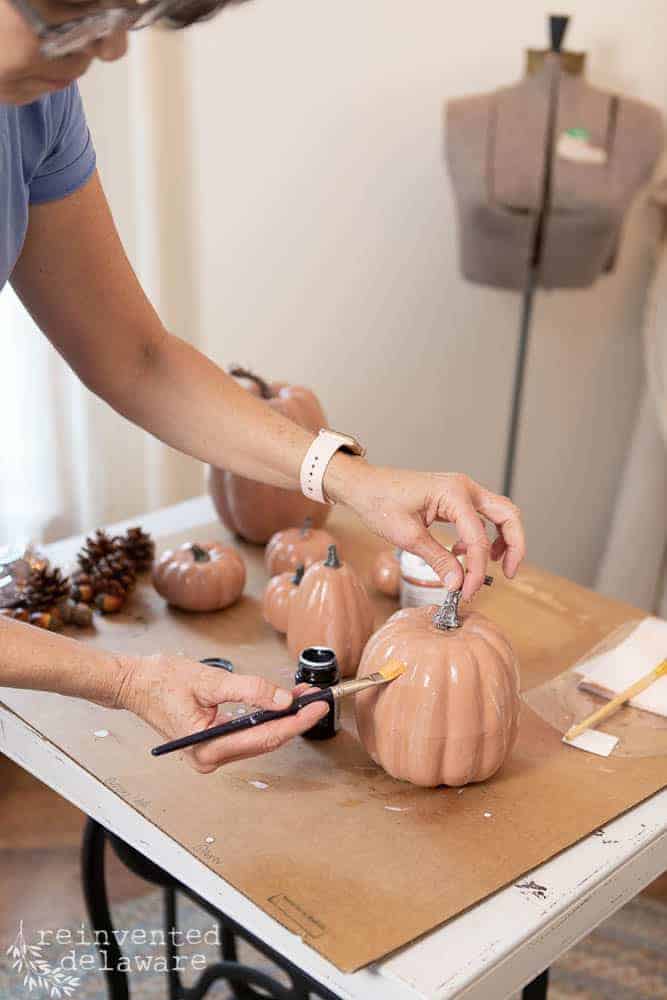
step one: paint the pumpkins
When my craft pumpkins and other supplies arrived from Amazon, I could hardly stand to wait to begin!
The first pumpkin I applied the copper leaf to wasn’t painted first. That was a bad decision on my part because the copper leaf tore in many places and the white background was visible in the cracks.
So I decided to paint the pumpkins in a copperish (terra cotta) color first. I applied two coats of craft paint and then I applied one coat of metal adhesive.
step two: apply the adhesive
The instructions on the metal adhesive bottle said to let it dry for at least 30 minutes until it is tacky.
The copper leaf is very lightweight and tends to fly away. I suggest you do this step in a room without much traffic! Even someone walking by the copper leaf could cause the leaf to fly away!
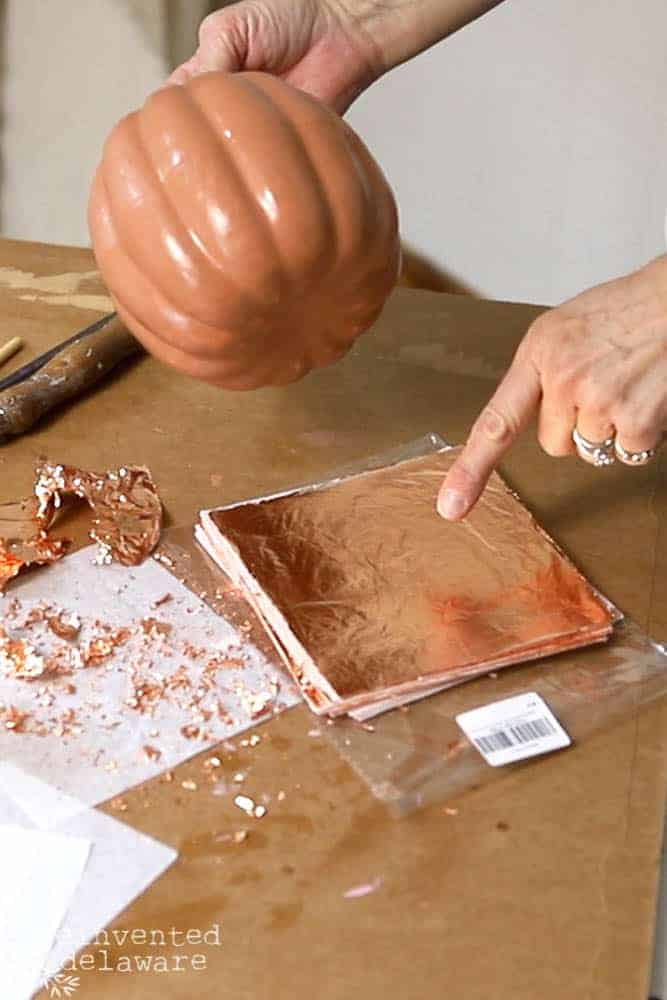
step three: apply the copper leaf
Instead of lifting the copper leaf towards the pumpkin, I took the pumpkin to the copper leaf. You’ll see this more clearly in the YouTube video below.
I also found that using my finger to gently press the copper leaf down was easy. Very carefully, I moved around the pumpkin, smoothing the copper leaf with my finger as I went.
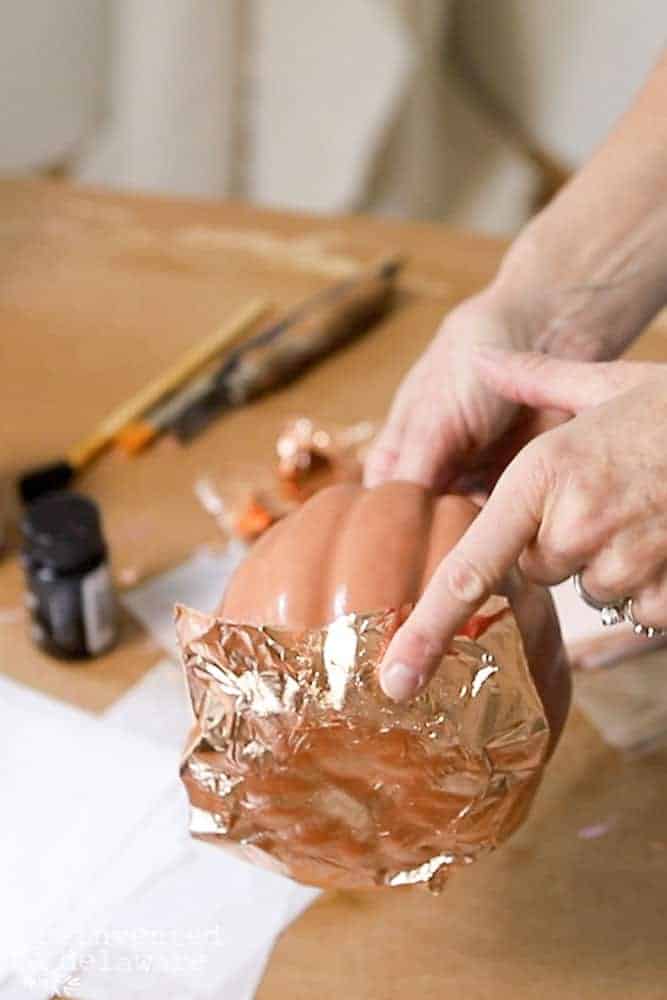
I also used scraps of the leaf to fill in the small areas of the pumpkin.
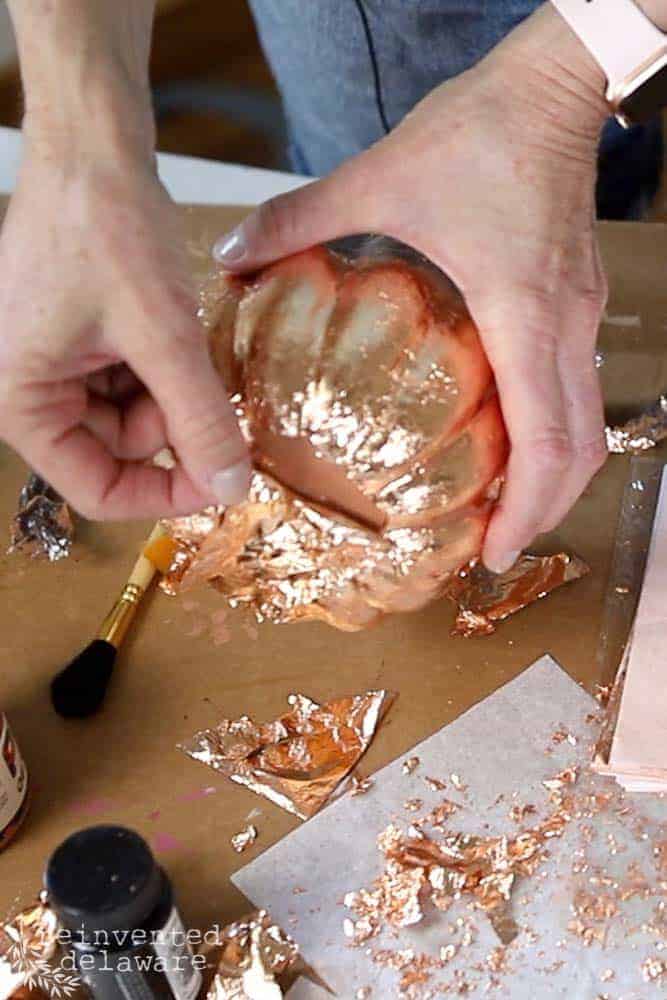
step four: remove the excess copper leaf
Once I moved all the way around the pumpkin, I used the metal brush to gently brush away the excess. Hold the pumpkin close to the tabletop you are working on so that the copper leaf doesn’t fly away!

step five: fill in the gaps
Remember I said that there were white areas of the pumpkin that were visible? The same happened with the painted pumpkins, but the areas were less noticeable.
To cover them, I used a small brush to apply more metal adhesive, allowed it to dry, and then used the leftover flakes of copper leaf to cover the exposed areas.
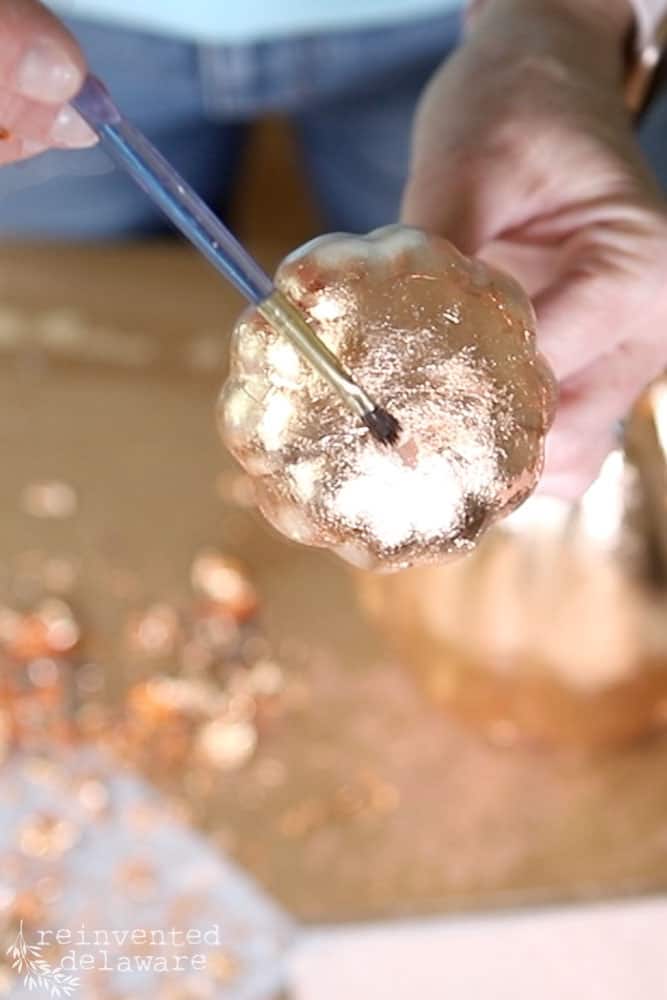
The scraps left over from brushing away the excess copper leaf were put to good use! We don’t like to waste around here!
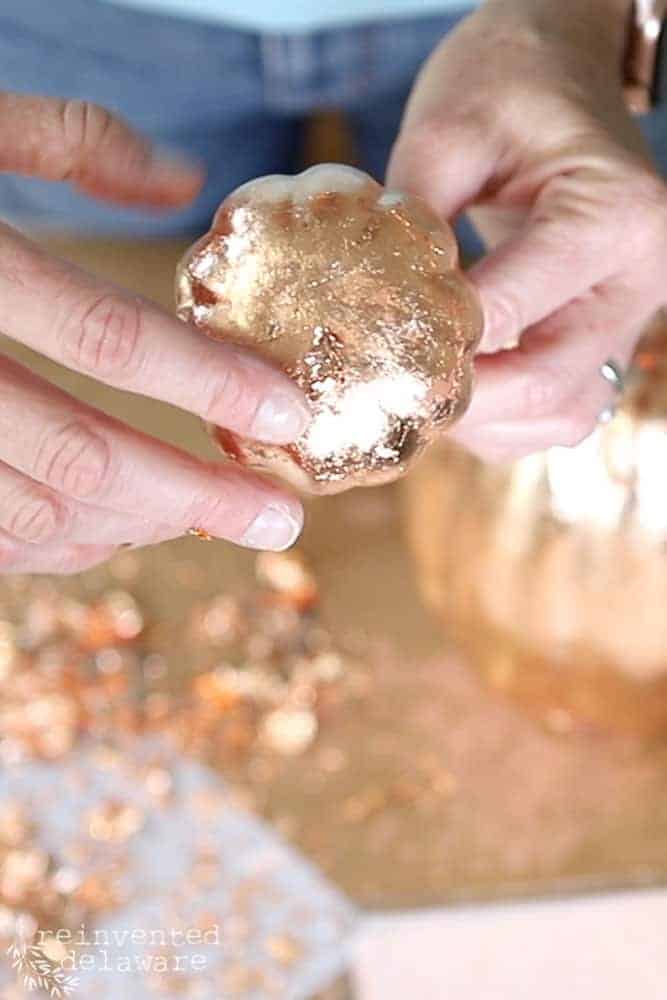
I finished all of the pumpkins in just about an hour. Then it was time to decorate with them!
**When researching this copper leaf pumpkin project, I read that many crafters gave the pumpkins a top coat of shellac to prevent the copper from tarnishing. I don’t show that in this tutorial, but because so many recommended it, I will give my copper leaf pumpkins a shellac topcoat!
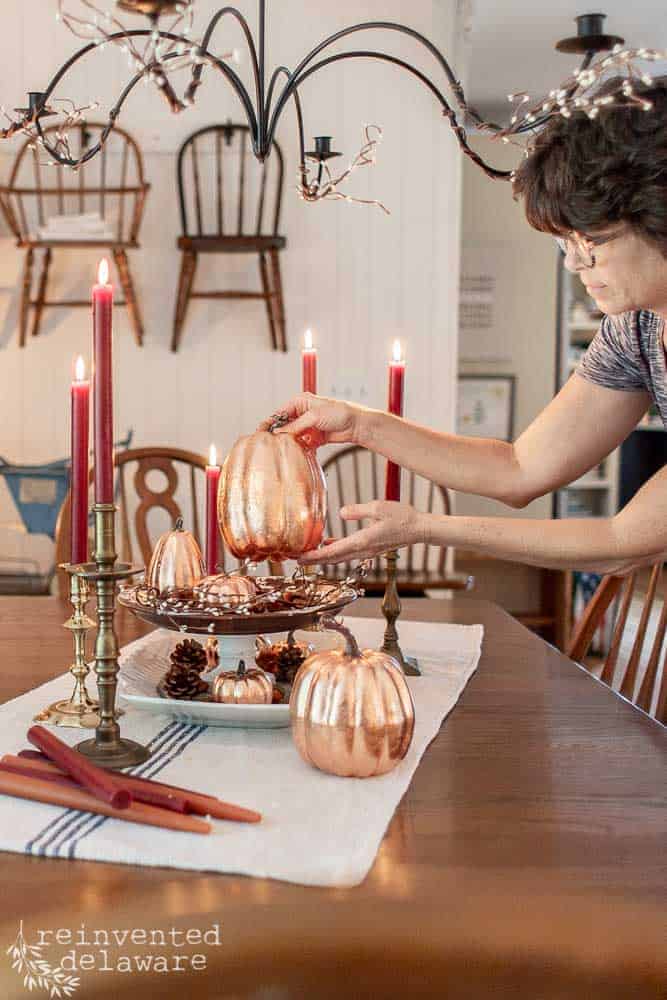
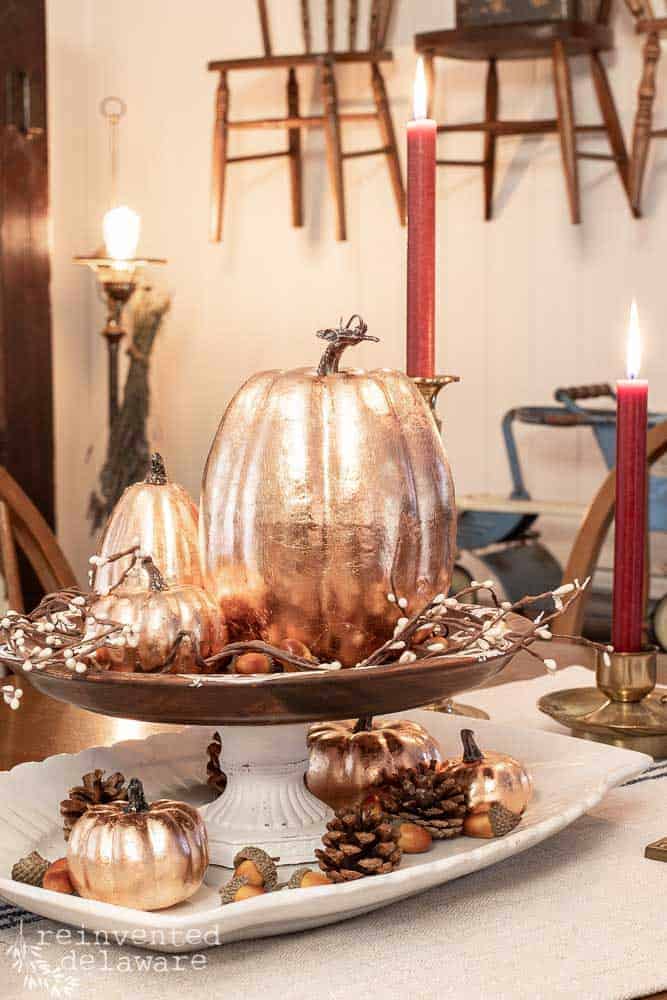
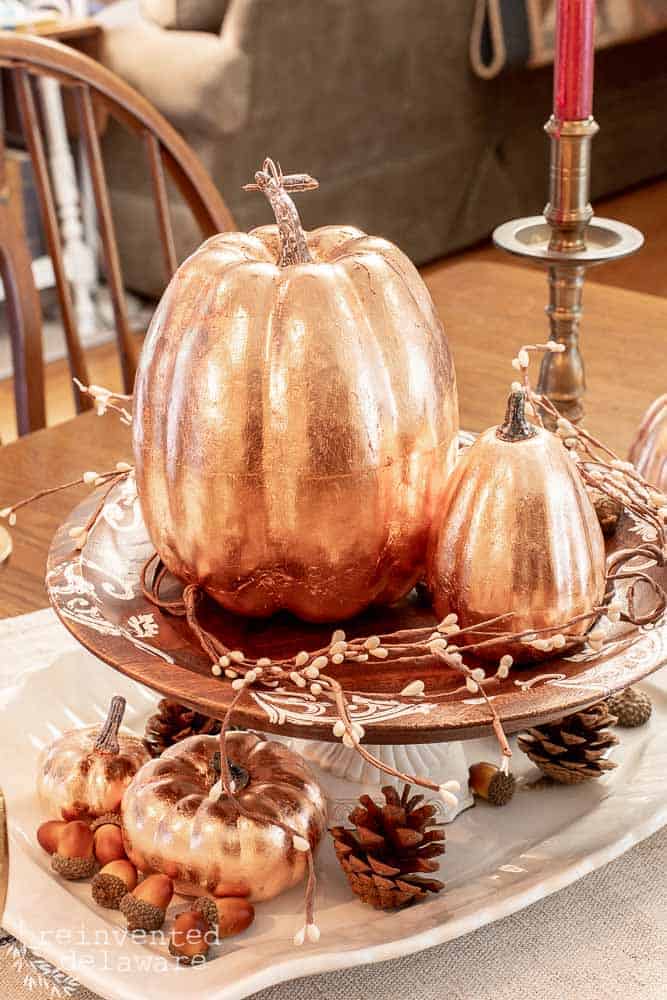
decorate with copper leaf pumpkins
One of my followers suggested I put a pumpkin on top of the easy cake stand I made a couple of weeks ago. Wasn’t that a great idea?
Look how cute these copper leaf pumpkins look on the cake stand!
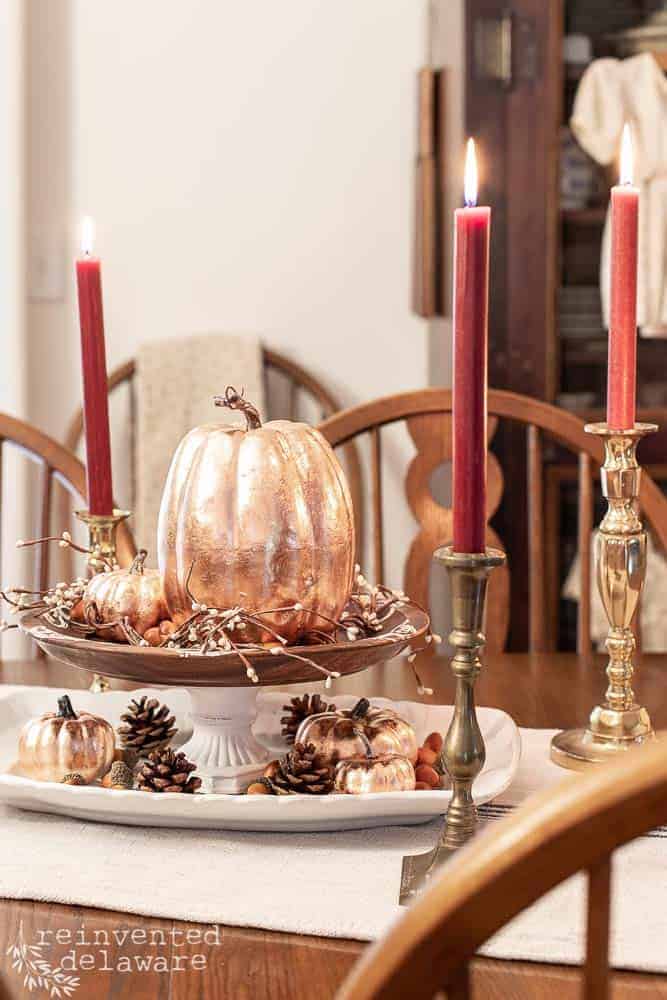
easy fall centerpiece
Let me break down this simple table centerpiece for you.
I first laid down a gorgeous grain sack bag that my sweet friend gave me. Check out her blog for some vintage goodness!
I laid the grain sack out on a diagonal to add interest.
One of my large ironstone platters went on top of the grain sack.
Next, I placed the cake stand (be sure to read the post on that easy thrifted project!) in the center of the table.
I have been picking up brass candlesticks here and there as I have been out thrifting. The mismatched pieces are just the kind I like and it’s easy to find single brass candlesticks!
Then I added some collected taper candles in varying shades of faded red and orange.
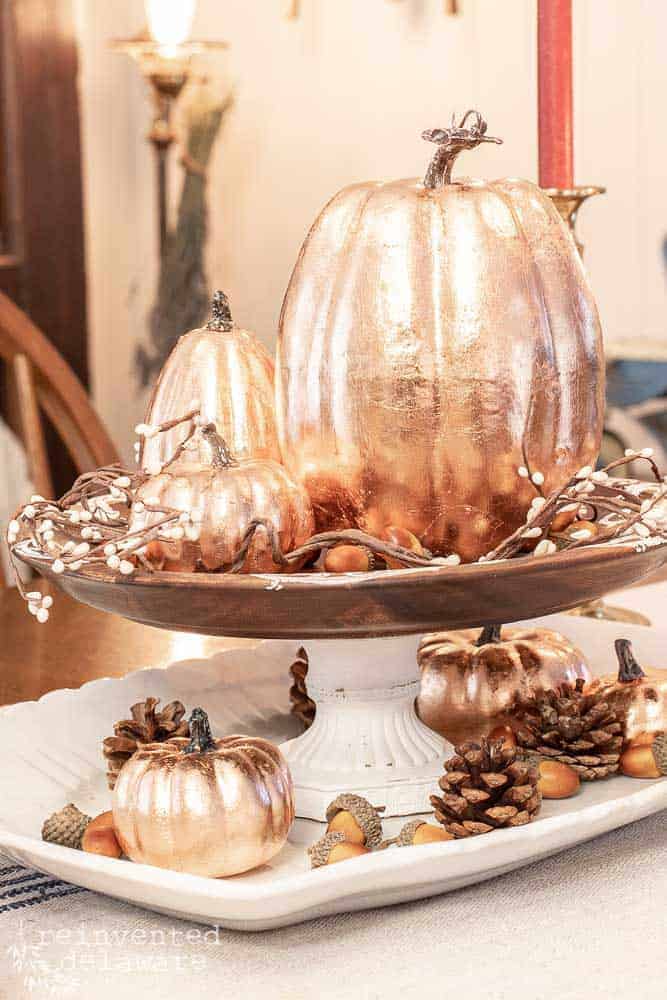
The craft pumpkins that I purchased came with real pine cones and faux acorns that look real so I added them to the ironstone platter and cake stand.
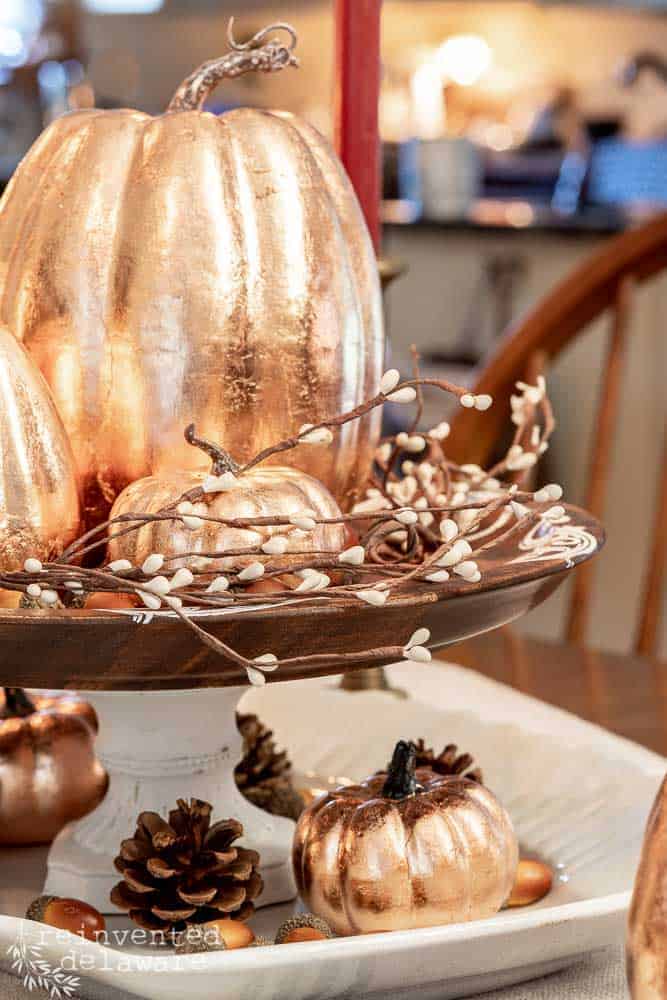
I forgot to mention that I also added some berry garland that I have had for years. The garland came in a 6′ long strand and I have used it in many ways. This time, I took the sections apart and used bits of the garland around the pumpkins.
easy fall decorating ideas
Aren’t the copper leaf pumpkins so pretty?
I realize they could have been purchased with the copper leaf already on them, but I really enjoy making my own decorations when I can. The decorations are enjoyable and help to make our home cozy. But the crafting side of it helps to add a special touch to our home.
Crafting therapy is good for the mind and soul!
I encourage you to try this project for your home! Metal leaf comes in a variety of colors like gold, silver, and of course copper. Let me know if you make this project for your home! I would love to know how they turn out for you!
FAQ’s
How to apply copper leaf?
As you can see, applying copper leaf is simple: apply the metal adhesive and allow to dry, add sheets of the leaf to cover the area, smooth the surface and brush off the excess with a soft brush.
What adhesive can I use for copper leaf?
My suggestion is to use the product specifically for copper leaf. The metal adhesive dries to a tackiness that allows the leaf to adhere to it easily.
How do I seal copper leaf?
I did not seal my copper leaf pumpkins in this tutorial, but after researching, I have decided to seal the pumpkins with natural shellac. I like Zinsser Shellac in clear for many of our other projects, and since I have plenty on hand, that is what I will be using!
If you have any other questions about copper leaf, please feel free to ask in the comments below! I will do my best to answer!
Sometimes watching the process makes it easier to tackle a new skill so I made a video for you! This was my first time using copper leaf (or any metal leaf for that matter!) So let’s learn how to copper leaf a pumpkin together!
By the way, I have plenty of copper leaf sheets leftover, so I am looking for more ideas to use them on!
YouTube Video Tutorial

Pin the image below to your home decor and fall project boards! Just click the pin button at the top left corner!
Thanks for joining our journey!
Thanks so much for joining us for this post! Join our journey so you don’t miss any fun projects, tutorials, and inspiration we share with you each week! You can follow us on Instagram, Facebook, and YouTube. We share even more inspiration on Pinterest!
Until next time…

These turned out amazing!! I’ll have to try this! Great post! Pinning!
Yay!! Let me know if you try this project! It was my first time and now I am hooked! Thanks for pinning Karin!
Pinned Cindy. I love leafing. I have done silver leafing on plastic ornaments. They look vintage.
Omgoodness, I never thought of ornaments!! I need to go find some and get to leafing them!
Love, love, love these so much. ❤️ Metal leafing is super fun way to dress up an item. Even a pumpkin! Great job! Pinned to my DIY Fall Decor board.
Thank you Do! I am excited to do more with leafing! I’m hooked!
Love this! They turned out beautifully. May have to do this!
Yes, yes!! you have to give it a try!
Great idea Cindy, I think I am going to make some of these!
Yay!! So glad this project inspired you to make some for your home!
These pumpkins look so beautiful. Love the look of them.
And they were so much fun to make Tammy!
Your pumpkins are gorgeous! Pinned and scheduled to my FB page. I love this project so much!
Wowsa Paula! Thanks for your support! So glad you enjoyed the post 🙂
This is great! I have used gold leaf before but I have never tried copper. I love how it looks!
Thanks for sharing!
Isnt’ the copper so pretty?? I am hooked! Thanks for stopping by 🙂
These are gorgeous, Cindy! I love, love, love how these pumpkins came together. For some reason, copper and gold leaf always seemed intimidating so I definitely appreciate these step-by-step instructions. I know so many people are going to benefit from your technique. I can’t wait to try these now! Loving and pinning, CoCo
I was intimidated at first too. But then I decided to jump in and I am so glad I did! Give it a try and you will be hooked! Thanks for pinning CoCo!
Cindy, your copper pumpkins are beautiful. Copper is the perfect fall metallic. I love using all three colors of Leaf from A Makers’ Studio: Gold, Silver and Copper. It does take a bit of practice, but the results are beautiful.
Thanks Carol! I’m excited to use other colors!
These turned out so pretty! Great instructions too. I have some gold leaf laying around; maybe I should finally try it out ha ha.
Yes, Marie!! Go get your gold leaf out and find something to put it on! I am hooked!!
i love taht copper is making a comeback. Beautiful job Cind
I love that….Cindy!
They’re pretty cute, aren’t they??
Me too Linda! Thanks for stopping by!
The copper coated pumpkins look fabulous, especially in the centerpiece you styled. Appreciate the tutorial so. Pinned!
So glad you enjoyed the tutorial! Thanks for pinning!
Ohhh I LOVE this project, Cindy! How pretty! Such an easy way to ‘fancy’ up a pumpkin. I love how you decorated with them in that lovely centerpiece, too!
I’m hooked on Copper Leaf now! It’s such a fun project 😊
Your pumpkins are stunning! I have never used copper leaf before. It looks like fun, I need to put it on my to-do list so I’m pinning it for future reference! Thanks for the inspiration! Blessings, Donna
So glad you enjoyed the project Donna! Thanks for stopping by!