
DIY Thrift Store Lamp Makeover Using Milk Paint
If you’re looking for an easy and affordable way to spruce up your living space, then this tutorial on lamp makeovers is perfect for you!
Whether you’re a thrifting enthusiast or just looking for a way to change the look of an existing lamp in your home, this tutorial will guide you through the process of transforming an old lamp into a stylish new addition to your home decor.
In this tutorial, I’ll show you how to prep cheap a brass lamp for painting, apply milk paint to the lamp, seal the milk paint with wax, and finally update the old lampshade.
With just a few simple steps and some basic supplies, you can create a refurbished lamp that looks like new. Let’s get started!
The following post may contain affiliate links. That means if you click and then buy something, I will make a small commission at no additional cost to you! Thank you for supporting my blog. full disclosure here.
easy lamp makeover
I love giving a new life to an old lamp base and creating a unique table lamp. One of my favorite ways to do this is with a simple makeover using Miss Mustard Seed Milk Paint. The paint adheres easily to the lamp base and gives it a fresh, updated look. Plus, it’s a budget-friendly option that can save you money compared to buying a brand-new lamp.
where to buy a cheap lamp
When it comes to finding a cheap lamp, thrift stores, yard sales and your local ReStore are the way to go. You can often find a thrifted lamp for a great price that just needs a little love and attention. Keep an eye out for cheap brass lamps with wire frame shades that can be easily transformed with a makeover. I’ve found many shiny, brassy-looking lamps at yard sales and while out thrifting that just needed a fresh coat of paint or new lampshade fabric to look like new again.
So, head to your local thrift store or check out yard sales in your area to find the perfect cheap lamp for your home. With a little creativity, you can turn a thrifted lamp into a beautiful and unique addition to your decor.
I found a couple of lamps while out thrifting and auction shopping. One is cheap faux brass, and the other two are resin. They are the perfect candidates for this lamp makeover idea!
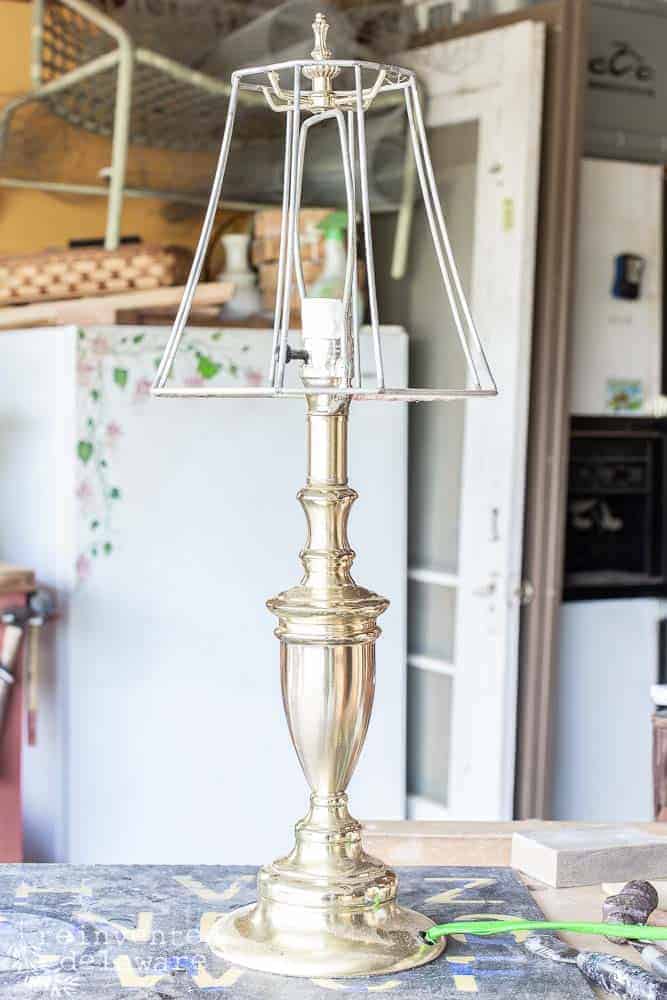
prep cheap brass for painting
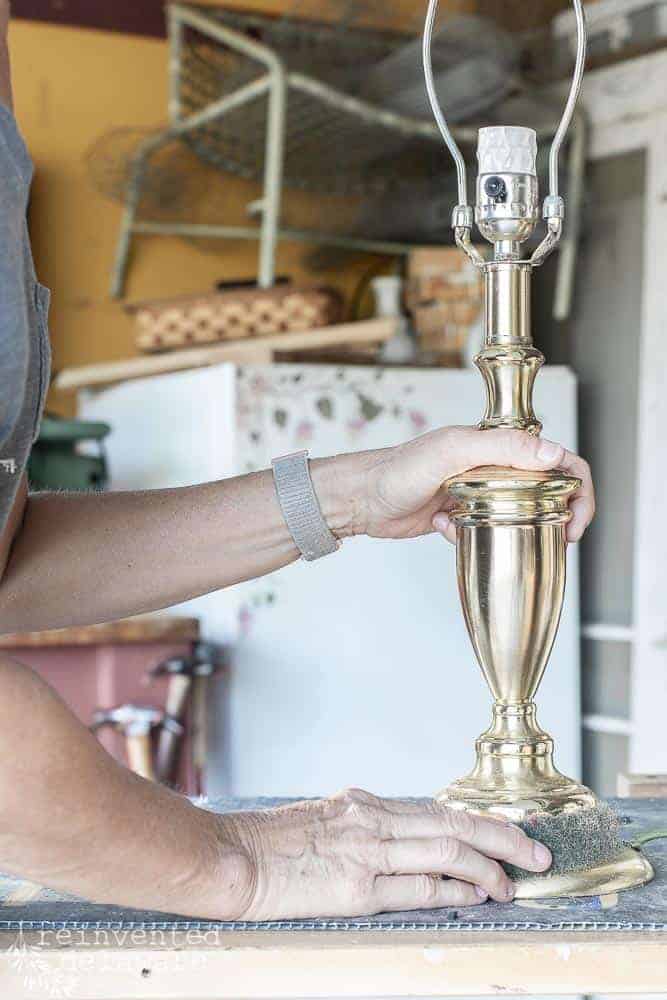
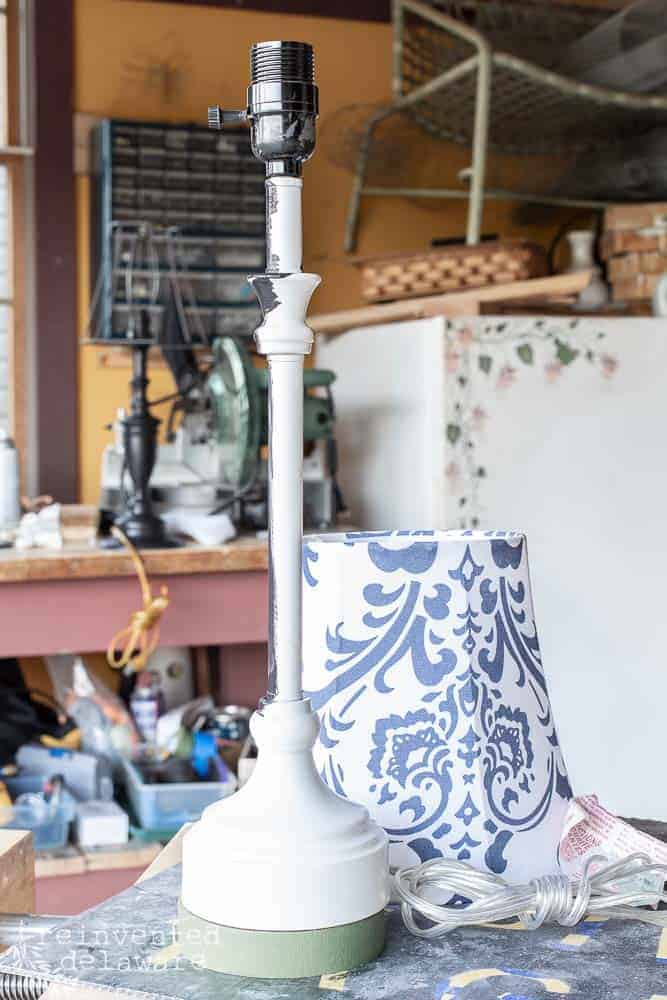
The first thing to do is prepare this cheap brass lamp for painting, start by scuffing and cleaning the surface with a heavy-duty Scotch Brite pad. This will remove any dirt or grime and it’s the easiest way to rough up the surface, making it easier for the paint to adhere.
Next, wipe down the brass with a damp microfiber cloth to remove any remaining debris. You can also use some soapy water to wash the lamp base. I skipped that part because the Scotch Brite pad removed the built-up dust well enough.
A good cleaning is essential for a successful paint job.
Stick a small piece of wadded-up paper towel into the electrical area of the lamp – you know, the spot where the light bulb is screwed in. Also, wrap the electrical cord in a plastic bag or with painter’s tape to protect it from overspray. I skipped this step and regretted it later!
paint outdated lamps
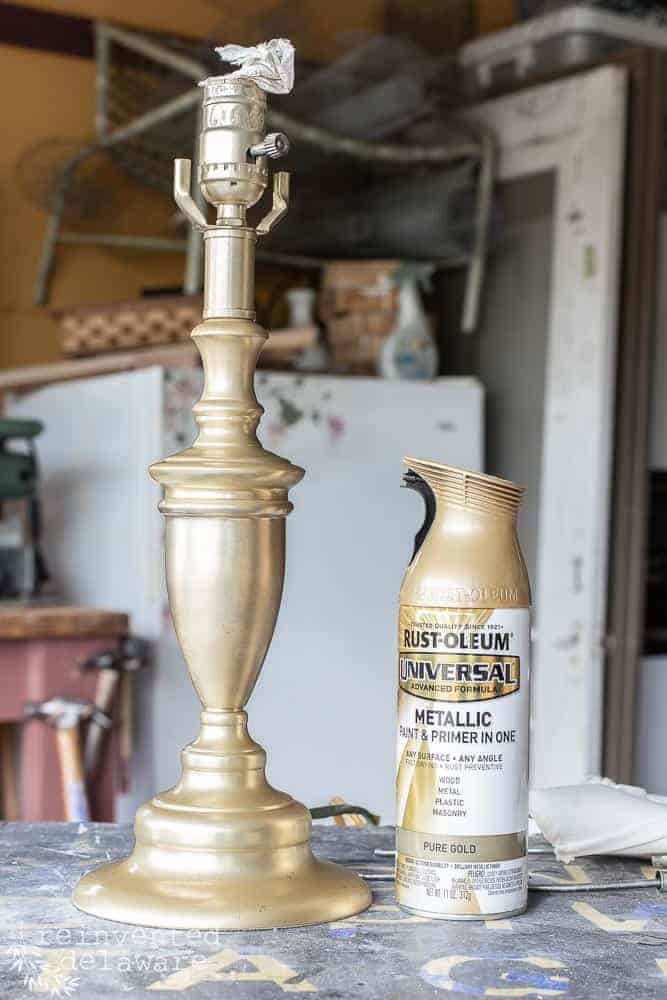
My first thought when deciding how to restyle this lamp was to spray paint it. I decided to use Rust-oleum Pure Gold spray paint to update my thrift store lamp.
Rust oleum makes amazing spray paint that I use in my workshop all the time. I hadn’t used the Pure Gold yet and I thought it might make this shiny, glaring brass a bit more updated.
I gave the lamp base two light coats and allowed it to dry between coats.
Unfortunately, I didn’t get the results I wanted. The original cheap shiny brass needed more help than spray paint! BTW, you can see how to make metal look like brass even when it is a cheap faux brass lamp like this one!
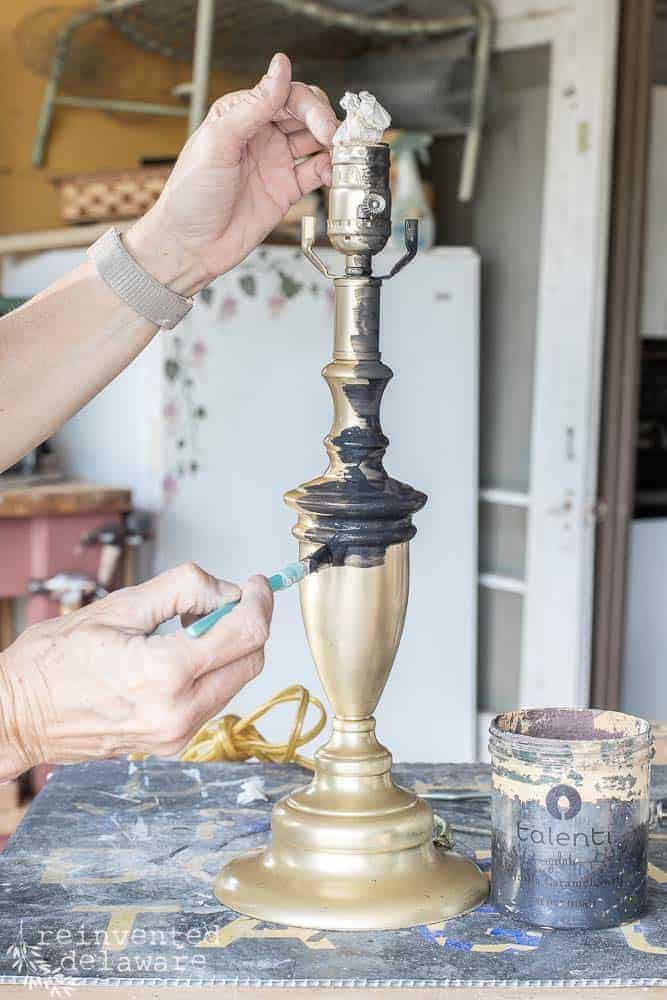
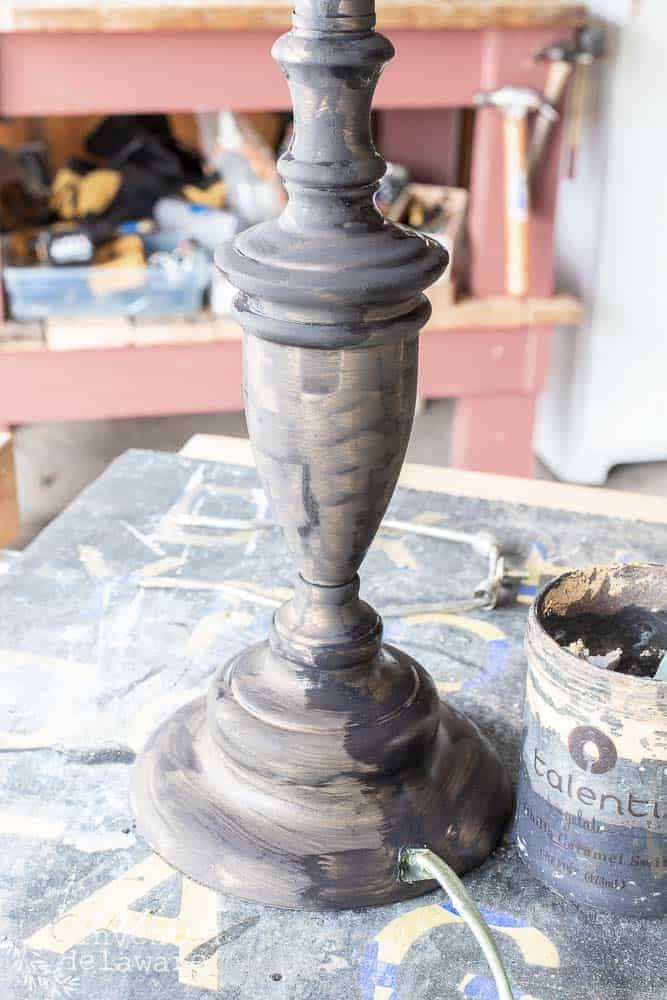
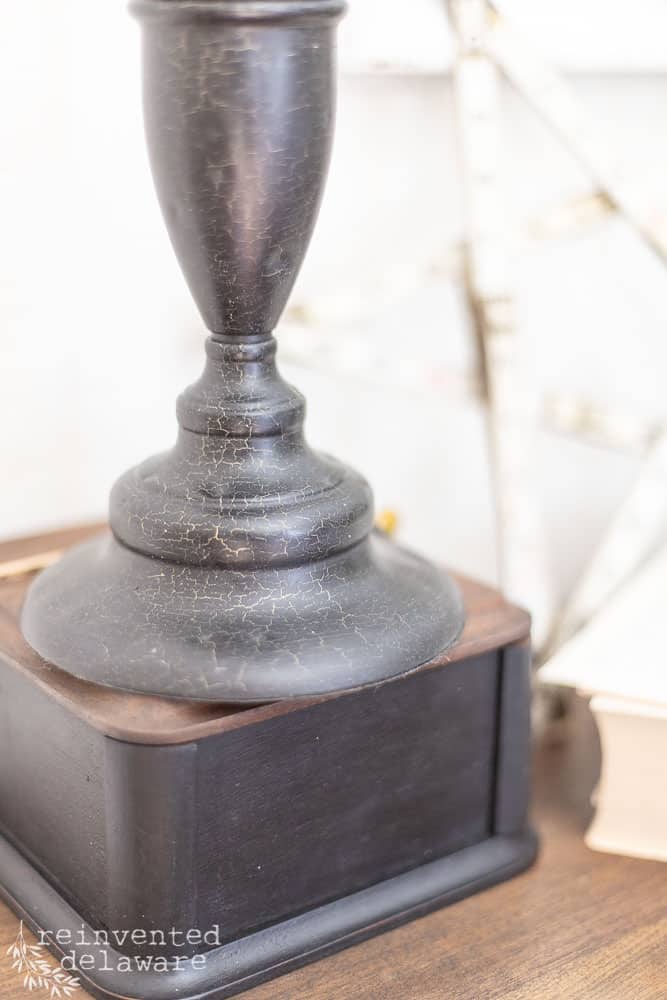
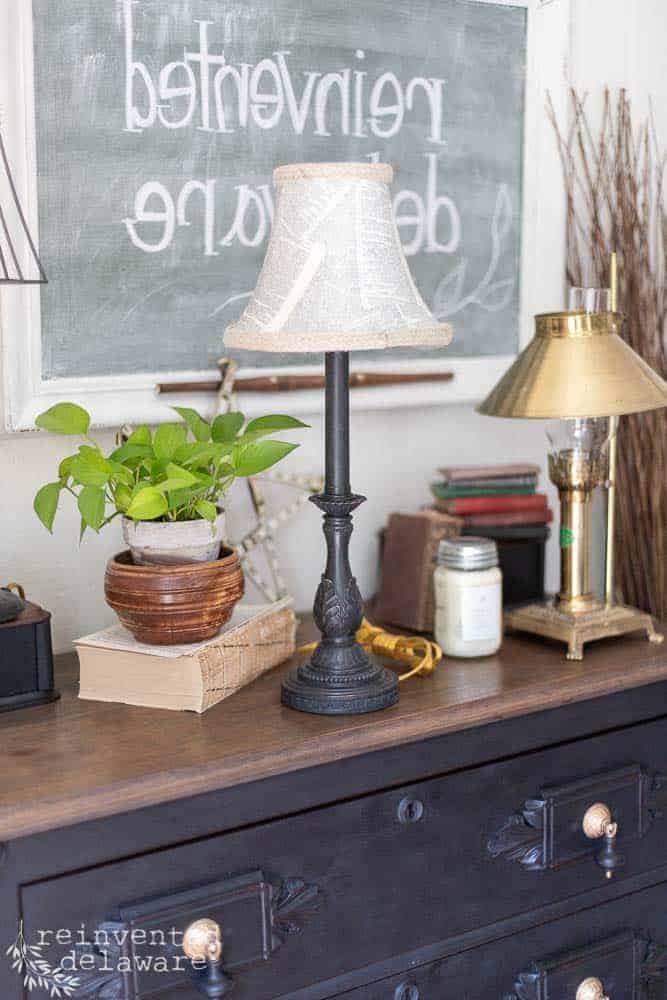
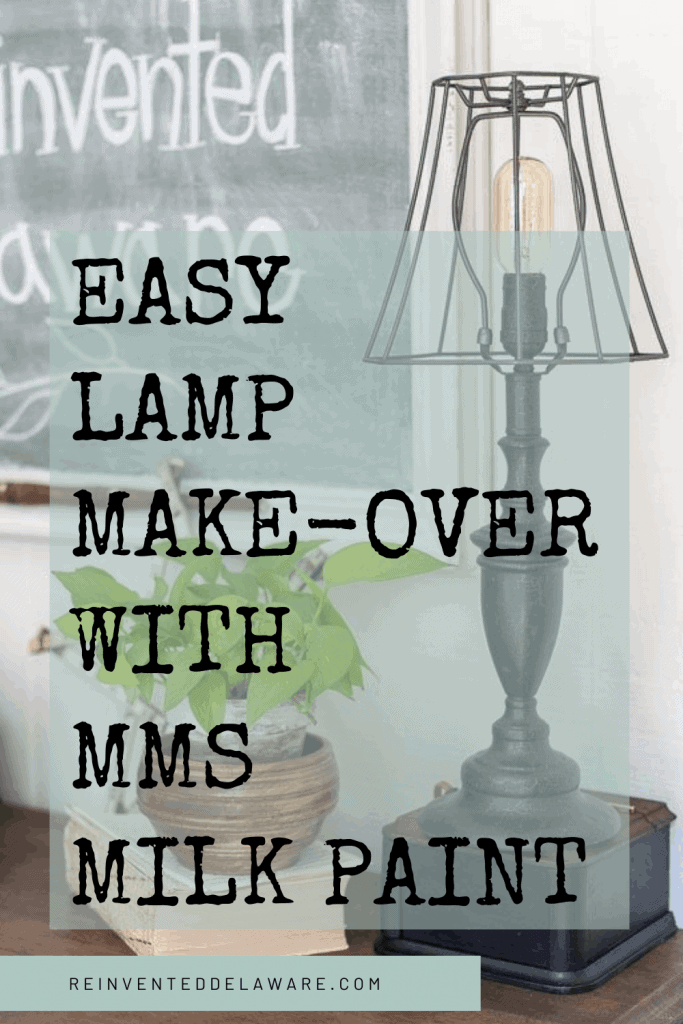
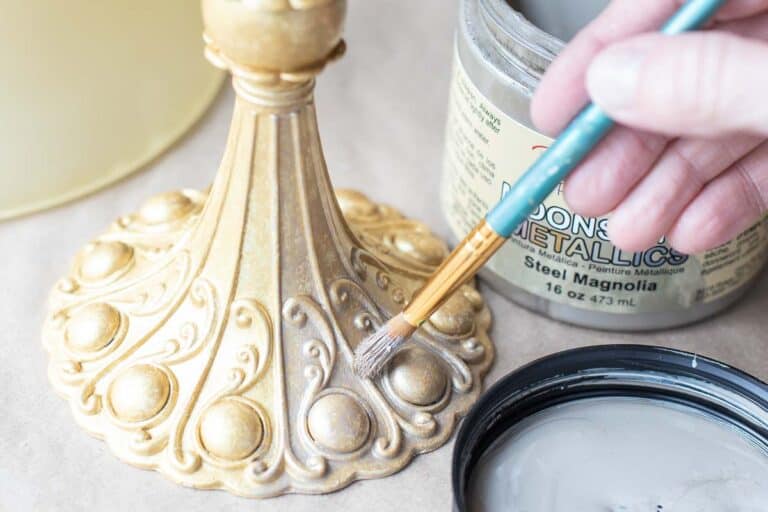
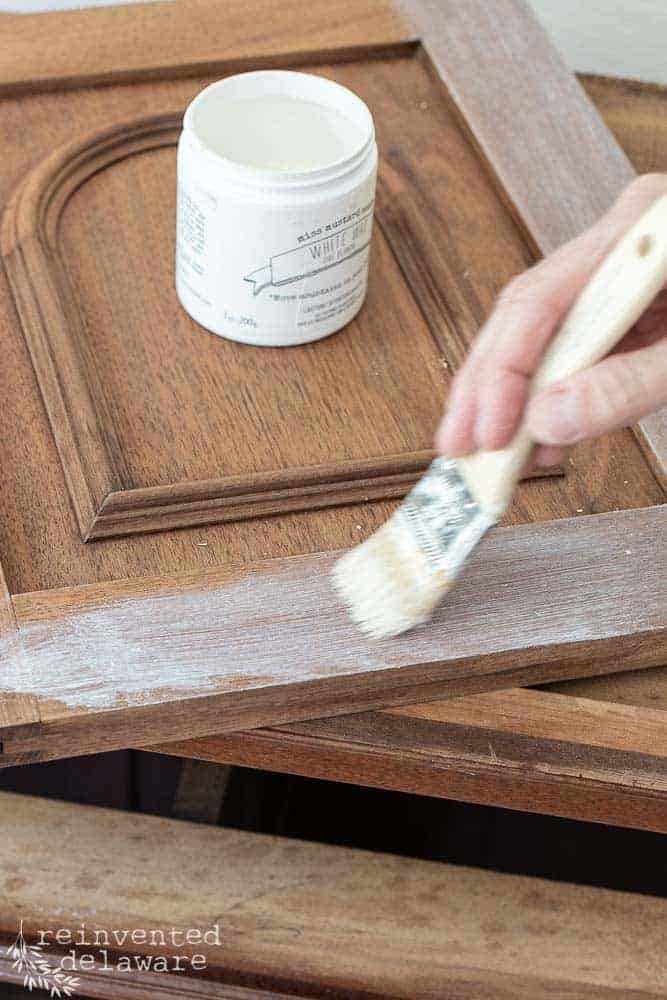
So I grabbed some Miss Mustard Seed milk paint in a black color called Typewriter. I applied two coats with a small paintbrush and allowed it to dry completely between coats. The first coat of milk paint (and many other paints) looks pretty rough. But the second coat, and sometimes a light third coat, will give complete coverage.
The happy surprise result from applying spray paint first was a lovely crackling finish!
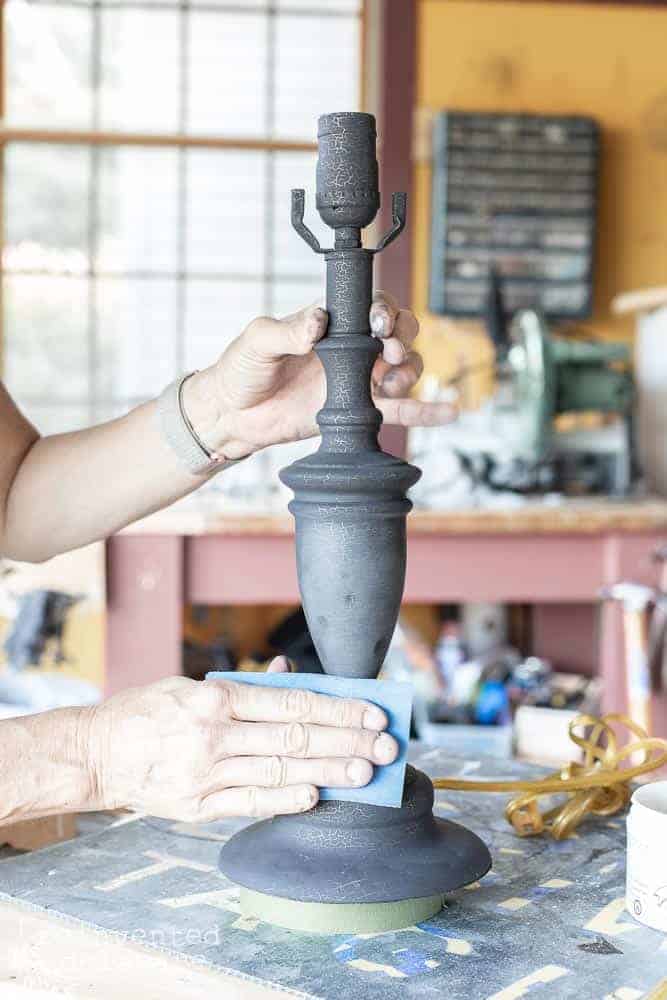
Once the milk paint was dry, I gave the lamp base a light sanding using a flexible sanding pad with super fine grit. This step creates a smooth finish. You can also sand off some of the paint to create a vintage look for your lamp.
upcycle the lamp shade
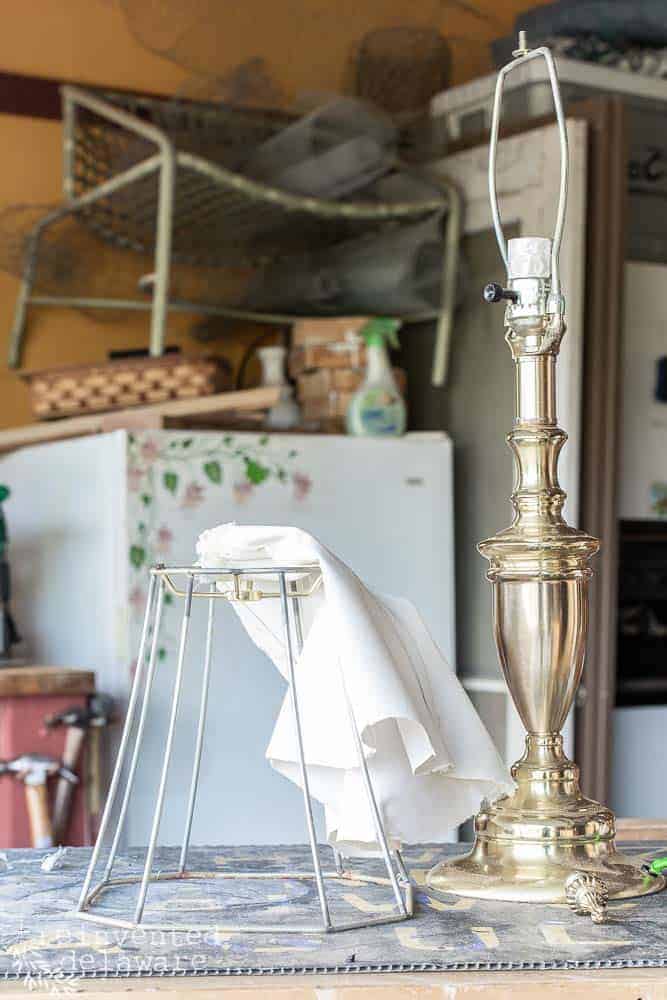
While the first coat of milk paint was drying on the lamp base, I worked on the lampshade.
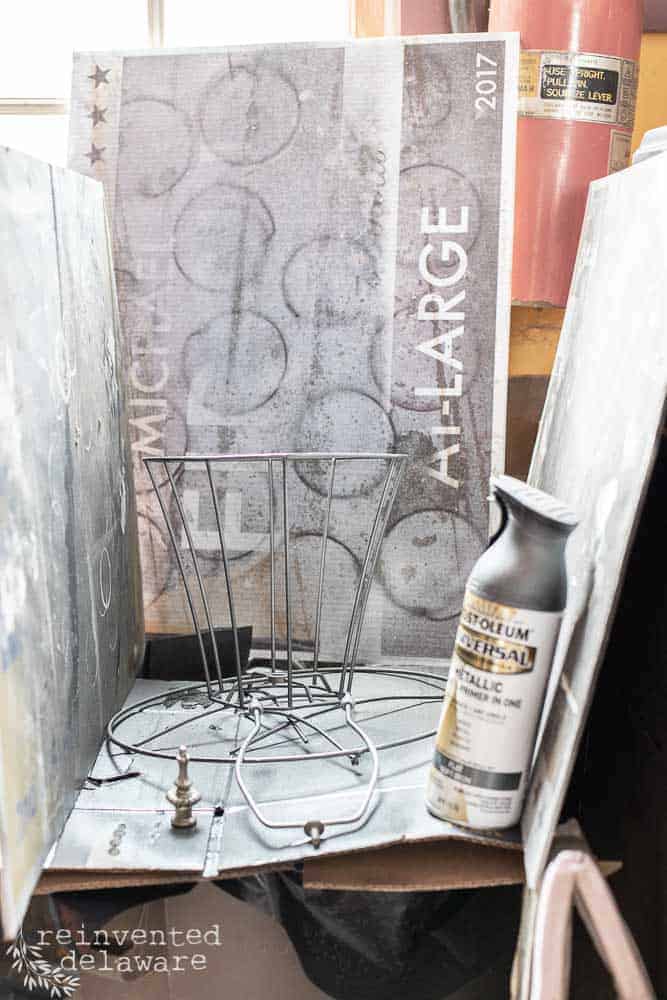
When it comes to transforming an old lampshade, the first step is to remove the fabric. This can be done by using pliers to pull off the fabric and scissors to clip around the joints on the frame.
After removing the fabric, it’s important to scrape off any excess glue on the metal frame. To do this, I used an Exacto knife and a sponge-type piece of fine-grit sandpaper. I found that SurfPrep makes some great flexible foam sanding pads that work wonders for this step.
Once the excess glue had been removed, I used the fine-grit sandpaper to sand down all of the lampshade wire framing. For any corners or hard-to-reach areas, a wire brush can be used to get into those spots.
At this point, you can choose to paint the frame or leave it as is for a more natural look. If you do decide to paint, make sure to use paint that is suitable for metal surfaces. I chose to use Rust-oleum in Soft Black Iron.
I will also share some additional ideas for lampshade makeovers later in this post!


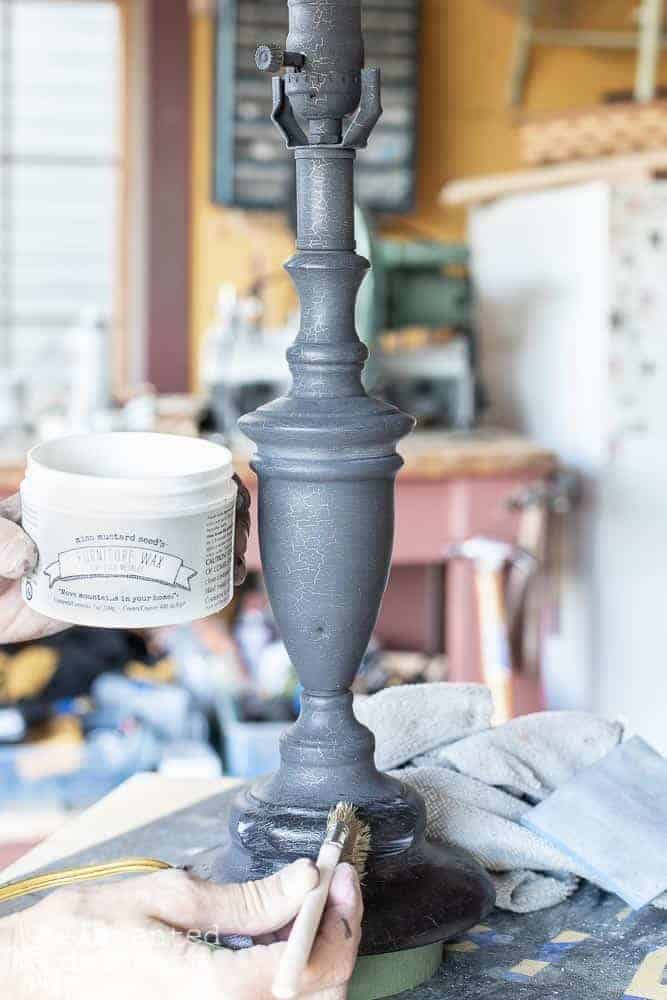
apply wax over milk paint
After sanding and distressing the milk-painted surface, it’s time to seal it with wax. I used Miss Mustard Seed Furniture Wax in Natural to give the lamp base a smooth and protective finish.
To apply the wax, I used a chip brush and started at the base, working my way up while using my other hand to steady the lamp. The wax is easy to apply and spreads evenly.
Once the wax is applied, I lightly buffed it with a soft lint-free cloth, like a blue shop towel. This helps to remove any excess wax and gives the lamp a subtle sheen.
If you prefer a darker finish, you can use a dark wax instead of the clear wax. This will give the lamp a more aged and rich look. You can also use white wax to create a completely different effect!
Overall, applying wax over milk paint is a simple and effective way to protect and enhance the finish of your painted furniture or decor.
thanks for being here!
I hope you are enjoying this project! Let me know if you have any questions. Or leave me a comment to tell me about your project and ideas!
thanks, Cindy 😀

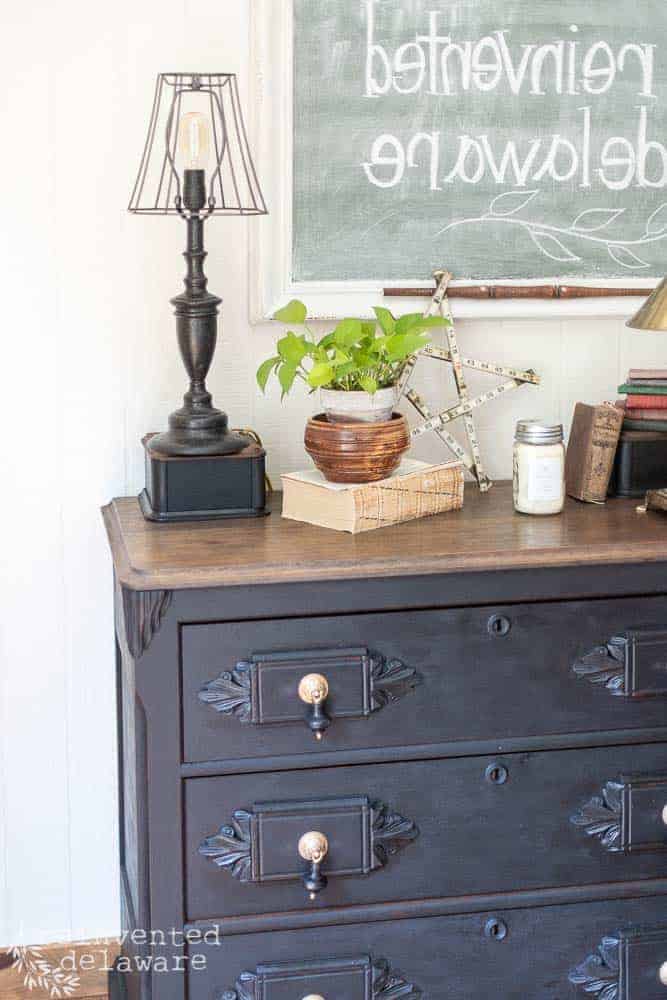
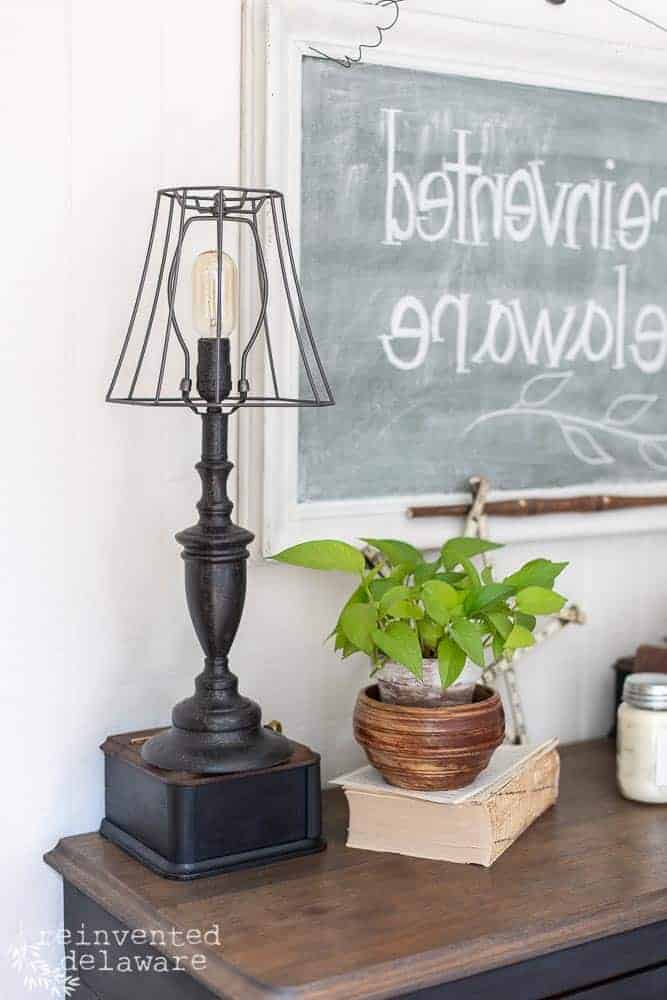
lamp makeover reveal
This project was a breeze and only took me a few hours to complete three lamp makeovers. If you’re looking to add a personal touch to your home decor, creating your own beautiful lamp is definitely worth considering.
Milk Paint Vintage Effects
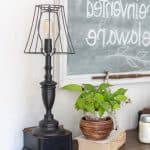
I love the unpredictable nature of Milk Paint, and the crackling effect it creates just adds to the vintage feel of any piece. Take a look at this brass lamp that I painted with Milk Paint. The crackling effect is just stunning!
To complete the vintage look, I added an Edison bulb to the lamp. I found this unique bulb shape on Amazon.
Using Milk Paint is a great way to give any piece a vintage makeover. It’s a great paint for furniture makeovers as well as home decor pieces like these lamps! Try it out and see what kind of unique effects you can create!
YouTube Video
Recently, I created a whole YouTube video where I share more lamp makeovers and lampshade makeovers. You are going to find inspiration in this video for your next DIY lamp makeover!

supplies
- Milk Paint in Typewriter
- Natural Wax
- Small Paintbrushes
- Rust oleum Spray Paint (Soft Iron Black)
- Edison Style Bulbs
more DIY lamp makeover ideas
If you enjoyed transforming your lamp with a little bit of paint and creativity, then you’re going to love these other great ideas for lamp makeovers. One of the best parts about these projects is that you can choose different colors and styles to match your personal taste and home decor.
Here are a few more DIY lamp transformation projects that you can try:
- Easy DIY Lampshade Makeovers using Scrap Fabric
- DIY Thrifted Lamp Makeover Ideas
- Lampshade Makeover Idea for the Front Porch
- Upcycle a Glass Jar into a Lamp
- Easy Farmhouse Style Lamp Makeover
With these DIY lamp makeover ideas, you can easily create unique and stylish lamps that will add a personal touch to your living room, master bedroom, or any other room that needs additional light!
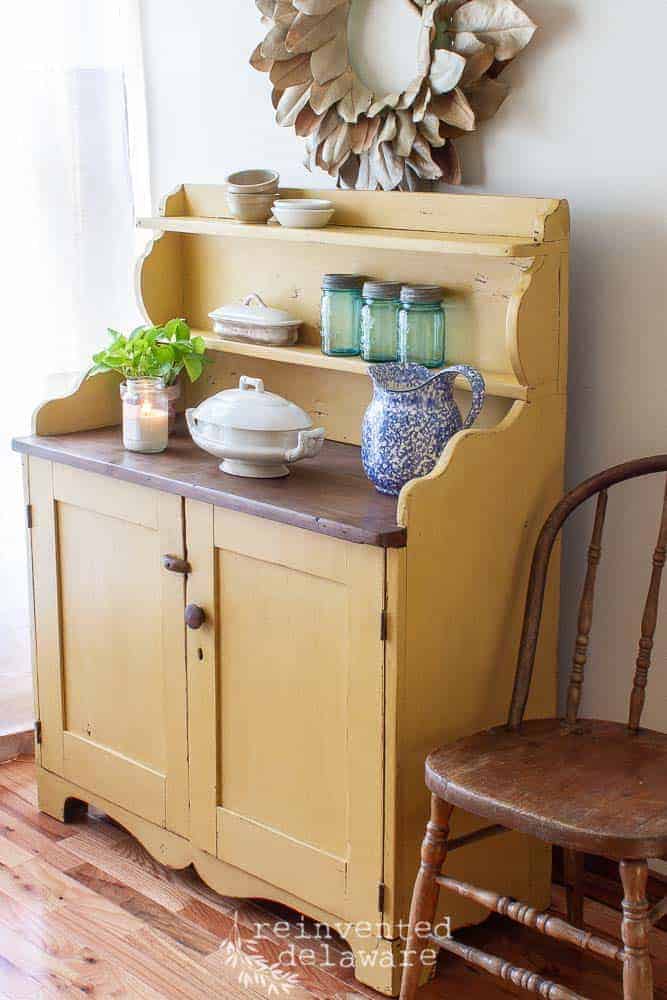
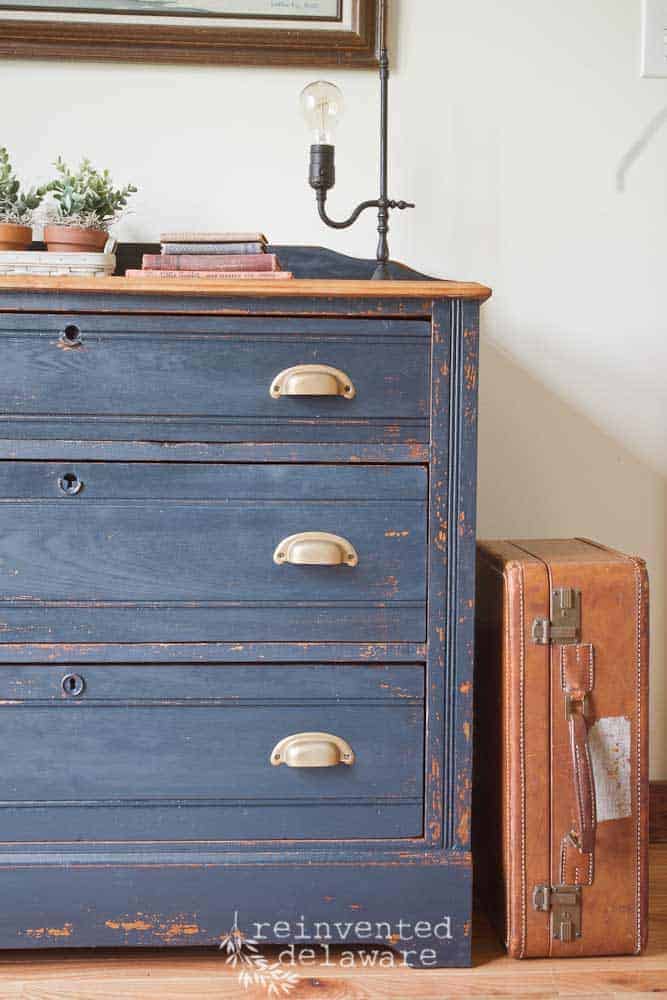
Below you can see the two resin lamps I updated using this same technique! Sorry, I didn’t grab an after shot of the first lamp! Just imagine it in black milk paint. We are used to imaging our finished project, right? 😃
additional tips for using milk paint
I’ve gathered two more posts for you! Both will help you when using milk paint!
If you like to upcycle, repurpose and find inspiration, I invite you to join my Facebook group. Tap below to join!
Recreate and Decorate
Join the Facebook Group and Share Your Projects With Us!
Thanks for joining our journey!
Thanks so much for joining us for this post! Join our journey so you don’t miss any of the fun projects, tutorials, and inspiration that we share with you each week! You can follow us on Instagram, Facebook, and YouTube. We share even more inspiration on Pinterest!


Cindy Rust
Cindy has been decorating her home with thrift store finds for 40 years. She is an avid thrift store shopper who loves to makeover the items she finds into vintage-inspired home decor and furniture. When she isn’t thrift shopping or painting a piece of furniture, you can find her making homemade butter, working in her garden, or painting with watercolors.
Easy Lamp Makeover with Milk Paint
Materials
- old faux brass lamp (or any lamp!) with a wire frame lampshade
- milk paint in Typewriter
- natural furniture wax
- small paintbrush
- flexible sanding pad
- cleaning supplies
- spray paint in Soft Iron Black
- Edison style lightbulb
Instructions
- Clean the lamp base using a Scotch Brite pad to scuff the shiny surface. Wipe the lamp base down with soapy water if needed. Use a clean damp cloth to remove the soap residue.
- Paint two coats of milk paint on the surface. You will possibly need an third light coat of paint.
- Use a flexible sanding pad to smooth the painted surface. Wipe away the dust.
- Apply furniture wax over the paint using a chip brush. Buff to a slight sheen with a clean blue shop towel.
- Remove the fabric from the lampshade. Use the flexible sanding pad to remvoe any leftover glue residue.
- Spray paint the wire frame lampshade in Soft Iron Black.
- Reassemble the lamp and lampshade. Add the Edison bulb for a vintage look!
This is so wonderful Cindy! Do you think the milk paint would crackle over the bare metal too? I’m actually working on a project right now on how to organize these milk paints – I have so many but want to do more milk paint projects 🙂
That turned out so nice!
So glad you enjoyed the post, Karen! Thanks for popping in!
Another fantastic project Cindy. Great tutorial as always. I love the technique you used for the lamp and deconstructing the shade is perfect. Love the look.
OMG! This is a gorgeous lamp makeover!
Hugs,
Kippi
Ps. Pinned
This turned out so awesome.
What a great update for this lamp!
Fabulous makeover! You always do such great things!
Karin
The Edison bulb and lampshade give this a cool industrial vibe!
I’m crazy over Edison bulbs! I have them all over my house! So glad you stopped by Marie! Thanks 🙂
Oh, so many great ideas! I just picked up an old lamp at a yard sale. Thanks for the makeover inspiration.
I just love the results of this lamp makeover, Cindy! The crackle finish using the milk paint is awesome! Beautiful!
Thanks Lori! Milk paint is great to work with!