
1980’s Style Canister Makeover

We have all seen the shiny painted ceramic canisters of the 1980’s at thrift stores. They usually have something painted on them like pineapples or better yet, ducks 😉 That was such a big thing back then.
I remember a certain cookie jar I just had to have – it was a huge duck! It was ceramic and solid white with 80’s blue details and a big bright yellow bow around his neck in a shiny gloss finish. I really thought it was the cutest thing I had ever seen 😉
This same style of painting was also widely used on canisters. We would set them on our counter tops for quick access to flour and sugar as though we were going to bake every day. Ha! While they were cute then, they are totally outdated now.
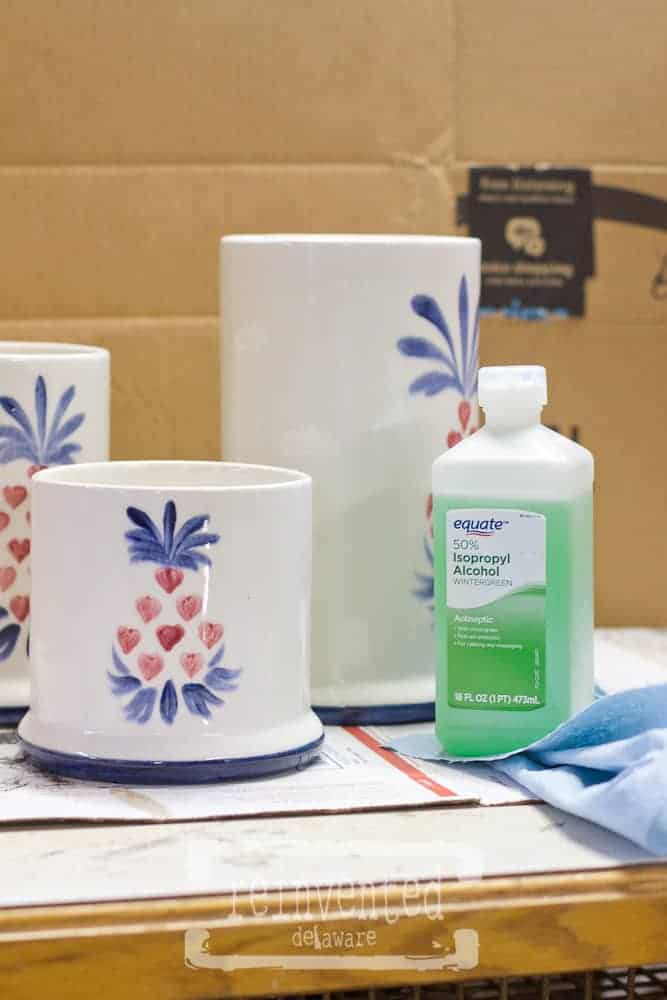
Here is the set I came across at a thrift store. They came with lids but unfortunately, they were not included in this shot. They were pointed at the top and just plain ugly!

It is a shame that so much in this world gets tossed aside when it becomes outdated. We tire of a certain look or color and too often just throw it out and buy new. Let’s transform these ugly, 1980’s canisters instead!
Start by cleaning them. I washed them first in hot, soapy water and gave them a good rinse. Since the canisters were most likely used in a kitchen, I used rubbing alcohol with a paper towel to make sure all of the grease and oil was off of them. I did clean the inside of each one just for the sake of doing it but I will not be painting the inside.
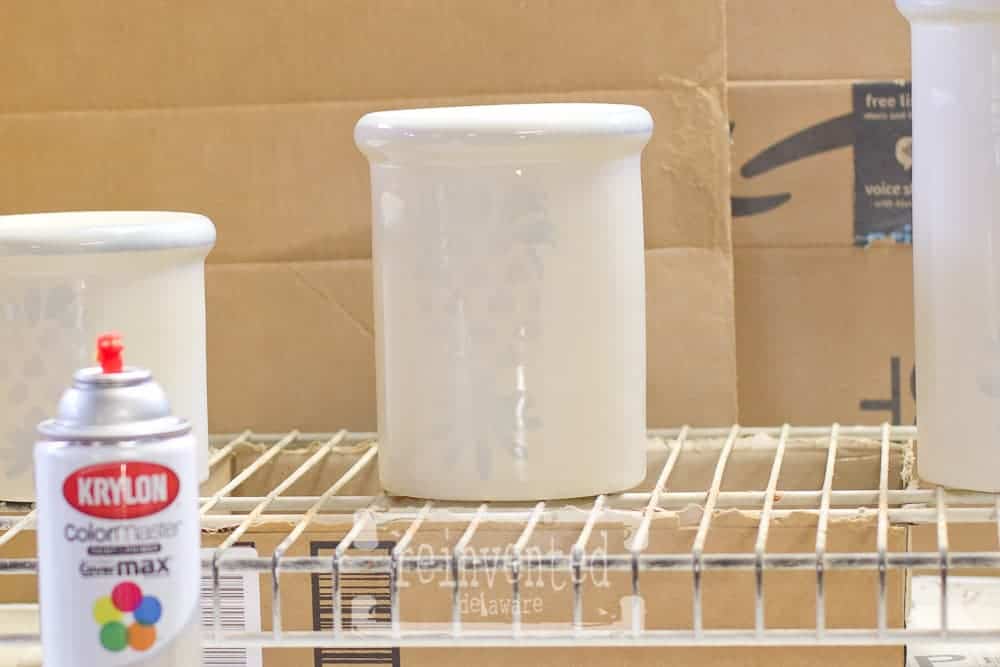
I turned the canisters upside down on old wire shelving that I use for spray painting. The shelving raises the piece up off of the surface so that the paint won’t collect at the bottom edge. That would be messy to remove 😉
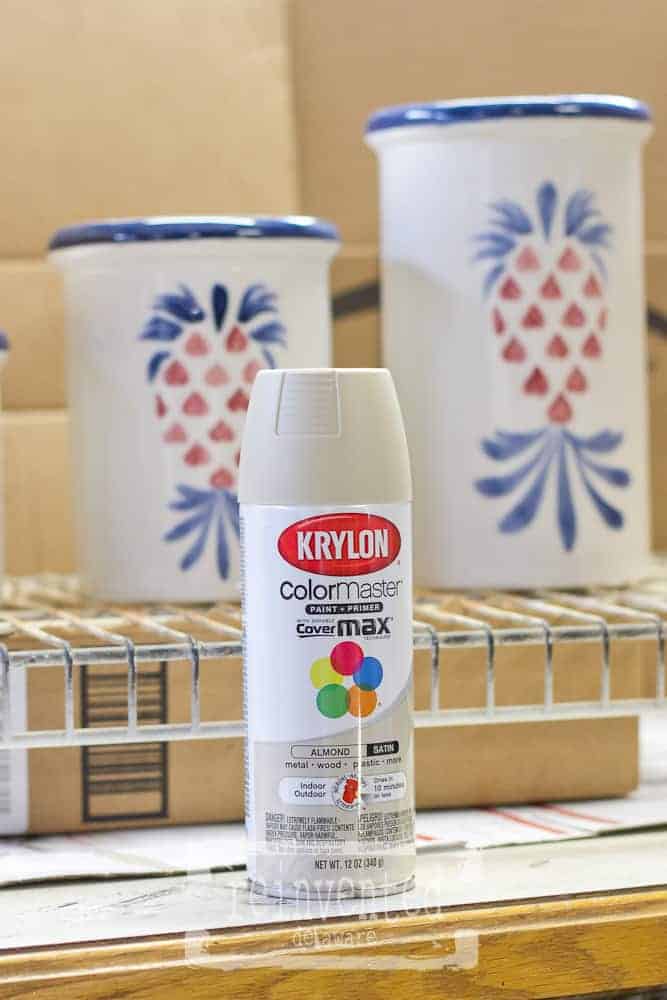
The spray paint I am using is recommended for surfaces just like the canisters have – shiny ceramic. Krylon ColorMaster Cover Max claims high sticky power and great coverage. It is costly compared to other spray paints, but I thought it was worth the try. I chose a color that is similar to the color of old, vintage crocks. This satin, almond color will look so much better that the shiny gloss of the 80’s!
You can’t see it in the pictures, but my set up for spray painting indoors is to use two flattened boxes each sitting upright and forming an “L”. I do this with both boxes so that they mirror each other. I place another flattened box on top. This set up provides a three-sided enclosure so that the overspray doesn’t go everywhere. The first coat did a great job of covering the pineapples.
Remember, when spray painting, less is better. The first coat will not cover the whole piece. When spraying the paint, stand several inches away from the piece. This will provide a light spraying mist. Be sure to read the instructions on the brand of paint you buy. You want to apply the paint in light, even coats while you keep the paint can moving at all times. Spray off of the piece. In other words, hold the sprayer down while you spray past the item you are painting, spraying into the air. This will help in preventing runs. If you do get a run, dab it quickly and lightly with a paper towel.
The best advice I can give when spray painting pieces like this, is to be patient. Don’t expect the first coat to cover the old finish. Let it dry completely before going on to the second coat.
The second coat of paint covered the whole piece almost completely. I did have to do a light third coat over top of the pineapple design.
I didn’t mention is earlier, but I did use a mask. I was not in the most ventilated area since it was cold outside and I couldn’t open the big garage door in my workshop. Often, I save the spray painting projects for days that it is not too windy and I can go outdoors.

I am really happy with how this 1980’s outdated canister set turned out! They only cost me a couple of bucks for all three along with the cost of the paint. And BTW, I have lots of paint left over for future projects! They seem to have a bit of shine to them in this photo only because of the lighting. The finish is satin not glossy.
They can be used turned upside down and used as pillar candle holders or turn them right side up to hold kitchen utensils on the counter. In the laundry room, they could be used to hold dry laundry soap, dryer sheets or clothespins.
Even though we know they are old 80’s canisters underneath, they could get away with the farmhouse crock look we all love so much!

Speaking of other projects for spray painting, I came across a couple of lamp bases. The first one had a hand-painted glass base and was missing the shade. I taped off the metal parts of the lamp and sprayed the glass portion of the base. The lamp shade is from an old birdcage 🙂

The second lamp also had a glass base with the same kind of hand painted decoration on it. Believe me, if the hand painting was pretty I would have left it alone. But honestly, it was hideous!
The clear glass hurricane shade got a vintage mirrored technique. We will do that in a future post! The metal parts on this lamp were spray painted in a hammered steel color. I did that step first and after it dried for several days, I taped it off and painted the glass section with the almond color spray paint.

All three of these project were easy and for very minimal cost. Each piece cost only a couple of bucks at the thrift store!
Just use a damp cloth for cleaning. I would not recommend the dishwasher 😉
Thanks for stopping in to see the easy transformation of these home decor pieces.
Now, head out to your local thrift store and pick up some pieces that are screaming for a transformation!

What a wonderful makeover, Cindy! I actually love that hurricane lamp makeover, too! Looking forward to the post on that! Thanks for sharing at Homestyle Gathering!
Thanks Julie!! That spray paint makes for such an easy transformation!