She Shed Summer Refresh: A Garden Makeover on a Budget
Summer is the season when backyard spaces get the most love, and this year my she shed was at the top of the list. A can of rich dark gray paint, clean windows, and a good scrub of the roof was all it took to bring this little garden retreat back to life. Keep reading to see exactly what I did, what I used, and how you can do the same thing for your outdoor space!
The following post may contain affiliate links. That means if you click and then buy something, I will make a small commission at no additional cost to you! Thank you for supporting my blog. full disclosure here.
What Is A She Shed?
It’s every woman’s dream to have a she shed, or at least the women I know! A garden she shed has a different meaning to different people, usually depending on their needs and wants for the space. If you are still dreaming up ideas for your own, I have a post full of she shed ideas that is worth reading before you dive into this refresh!
Why My She Shed Needed a Summer Refresh
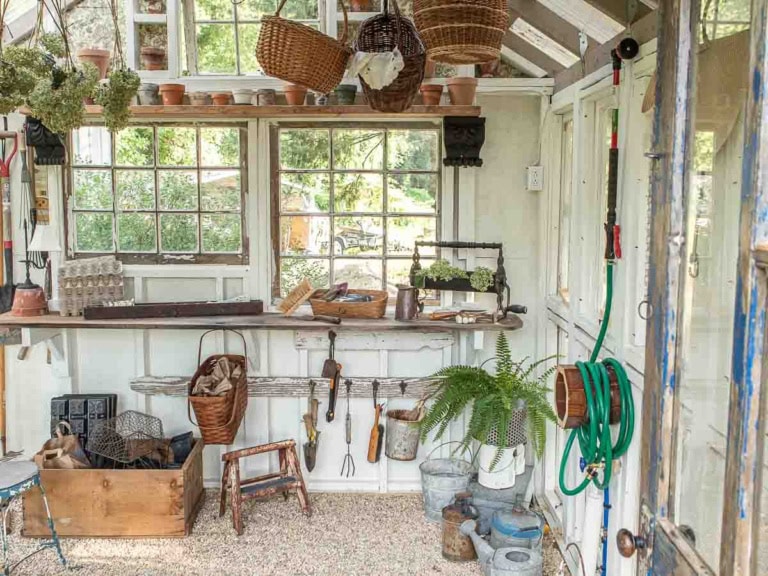
The interior of my she shed was a wreck after the winter season. All of the supplies like pots, soil amendments, seeds, and anything else a mouse would enjoy was packed away in totes. I learned my lesson last year after discovering the mice had nested and eaten all they could get their paws on!
The first step to sprucing this place up was to clean it out and unpack the totes.
I filmed a special video about this garden she shed that includes a personal note close to my heart. Be sure to tap the link below to watch after you finish reading!
Planning the She Shed Exterior Refresh
Once the inside was sorted, it was time to tackle the outside. This little garden shed had been through a full winter and it showed. With a plan in place and a warmer day on the horizon, I was ready to give the exterior some serious love.
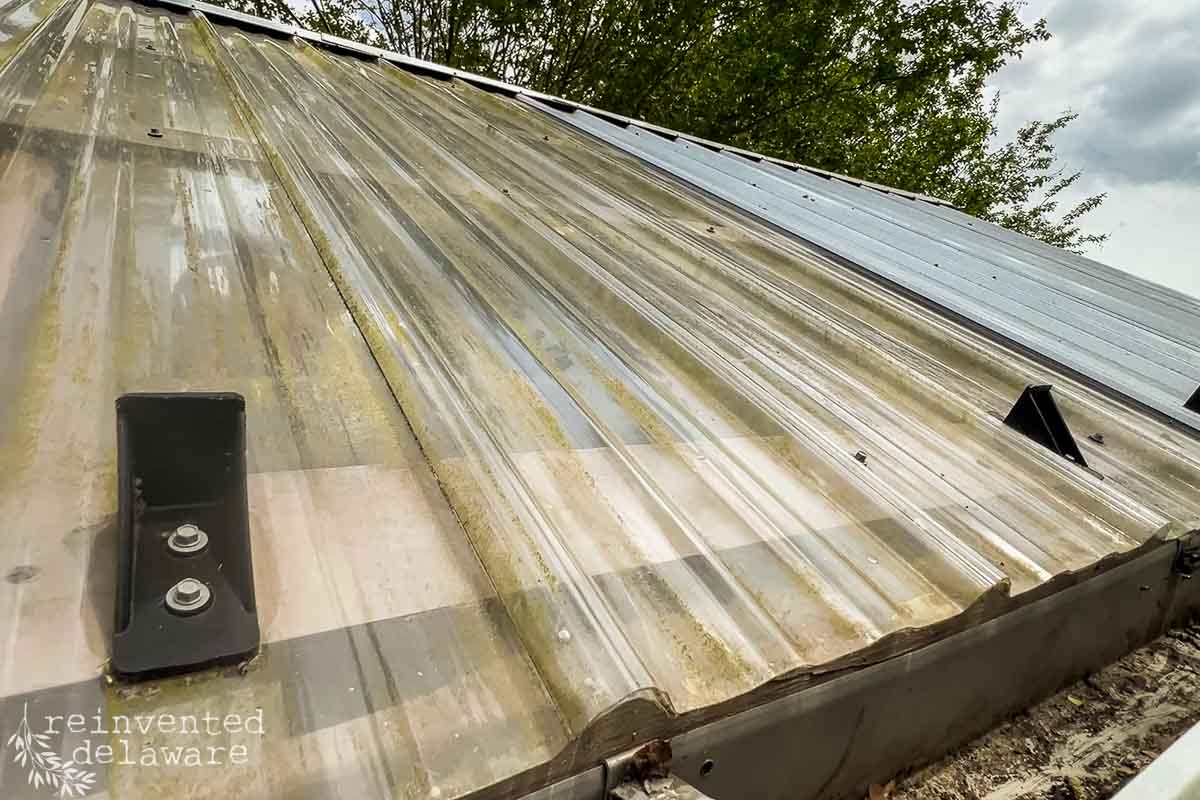
Cleaning the roof and gutters
The next step in planning the refresh was to clean the exterior. I waited for a warmer day, grabbed my hose and long-handled soft-bristled scrub brush, and cleaned the very dirty roof. The clear corrugated sections were covered in green algae. All it took was a bit of elbow grease with the scrub brush and hose and before I realized it, the roof was sparkling clean!
If you clean an area like this roof annually, all you will need is the scrub brush and a hose. If the algae has been on the surface too long, you may need an algae specific cleaner like ’30 SECONDS Outdoor Cleaner.’
I also cleaned out the gutters, which were so full of leaf debris! I scooped out the debris and put it in a bucket. Once the bulk of the debris was out, I hosed down the gutters and allowed the water to drain freely through the downspouts.
Supplies for Exterior Cleaning:

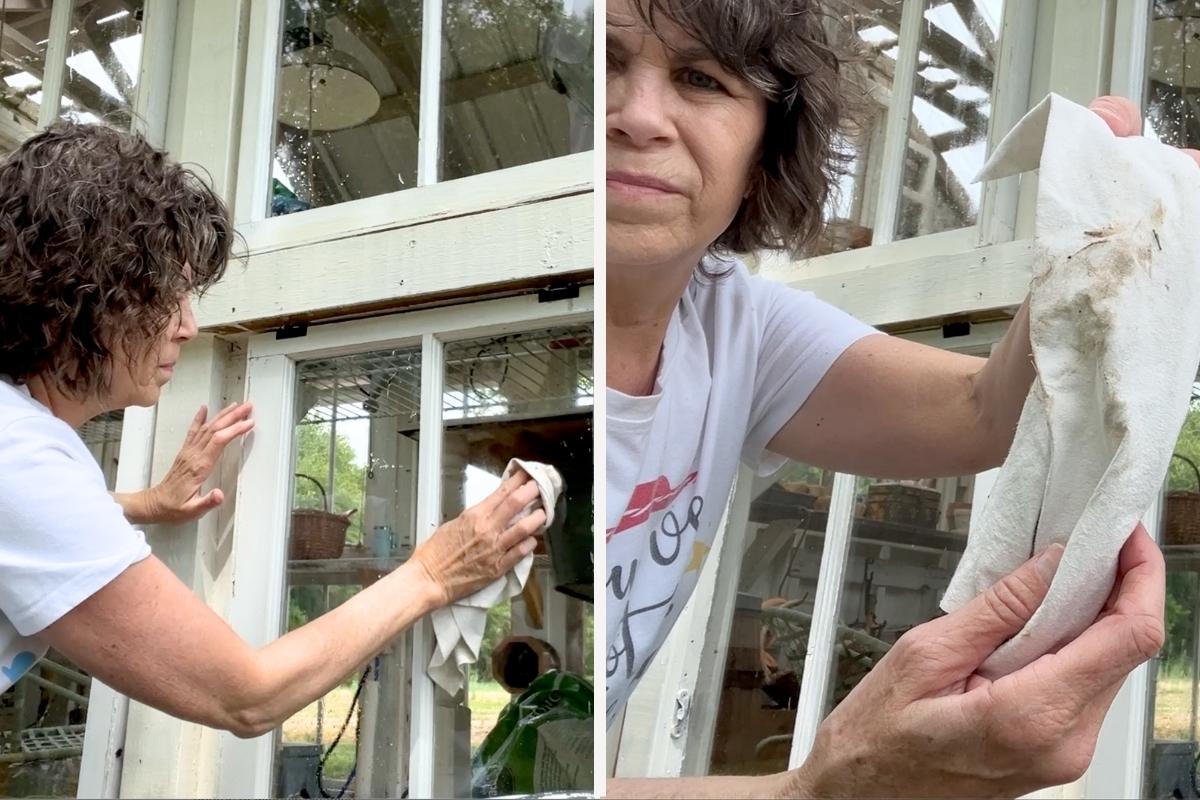
How I Cleaned the Exterior Windows
All of the windows were hosed down and then wiped clean with my favorite cleaning cloth. The White Green Cloths are great for cleaning windows and the best part is you do not need any soap at all!
Simply get the cloth soaking wet to ensure the entire cloth is wet. Then wring out every bit of water you can. Next, wipe the dirty windows, changing the cloth to a clean side as needed.
Here is a tip when using these cloths: rinse thoroughly when they get dirty, then wring out all of the water until the cloth is almost dry. Doing this will prevent streaks on your windows.
Choosing the Paint Color for the She Shed Door and Windows
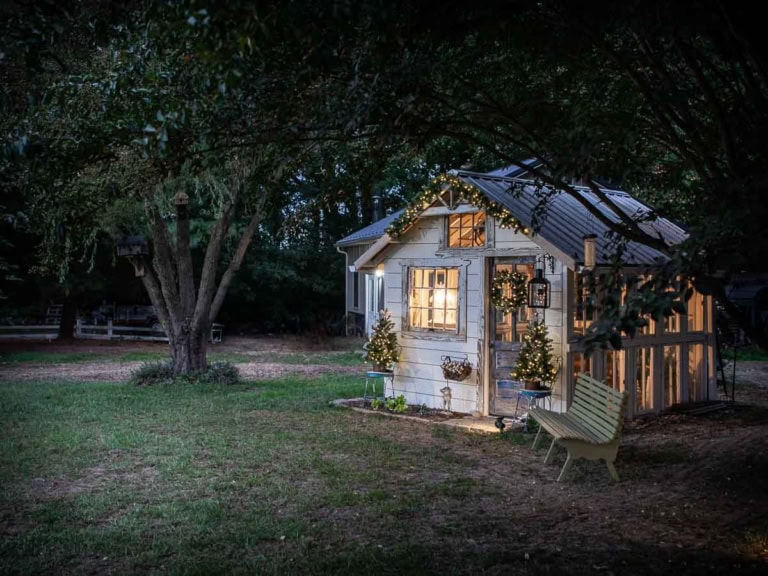
The front of the garden shed is so adorable but I felt like it needed a pop of color. Staying in the classic black and white color theme, I chose a beautiful color called Cracked Pepper by Behr. My local Home Depot carries it but since it is 30 minutes away, I had my local Ace Hardware store color match it using an exterior grade of Benjamin Moore custom paint mix.
Bonus Tip: When painting any outdoor wood surface that will face the elements year round, choosing the right type of paint makes all the difference. I have a whole post walking you through the best paint for outdoor wood furniture that is worth a read before you get started on your own project.
Why Cracked Pepper Works Beautifully for she shed decor
This rich dark gray is the perfect choice for an outdoor DIY project like this because it adds depth and a classic feel without straying from a timeless color palette. It reads almost black in low light and shows its true warm gray tones in full sun, which makes it a gorgeous complement to the white chippy paint details already on the shed.
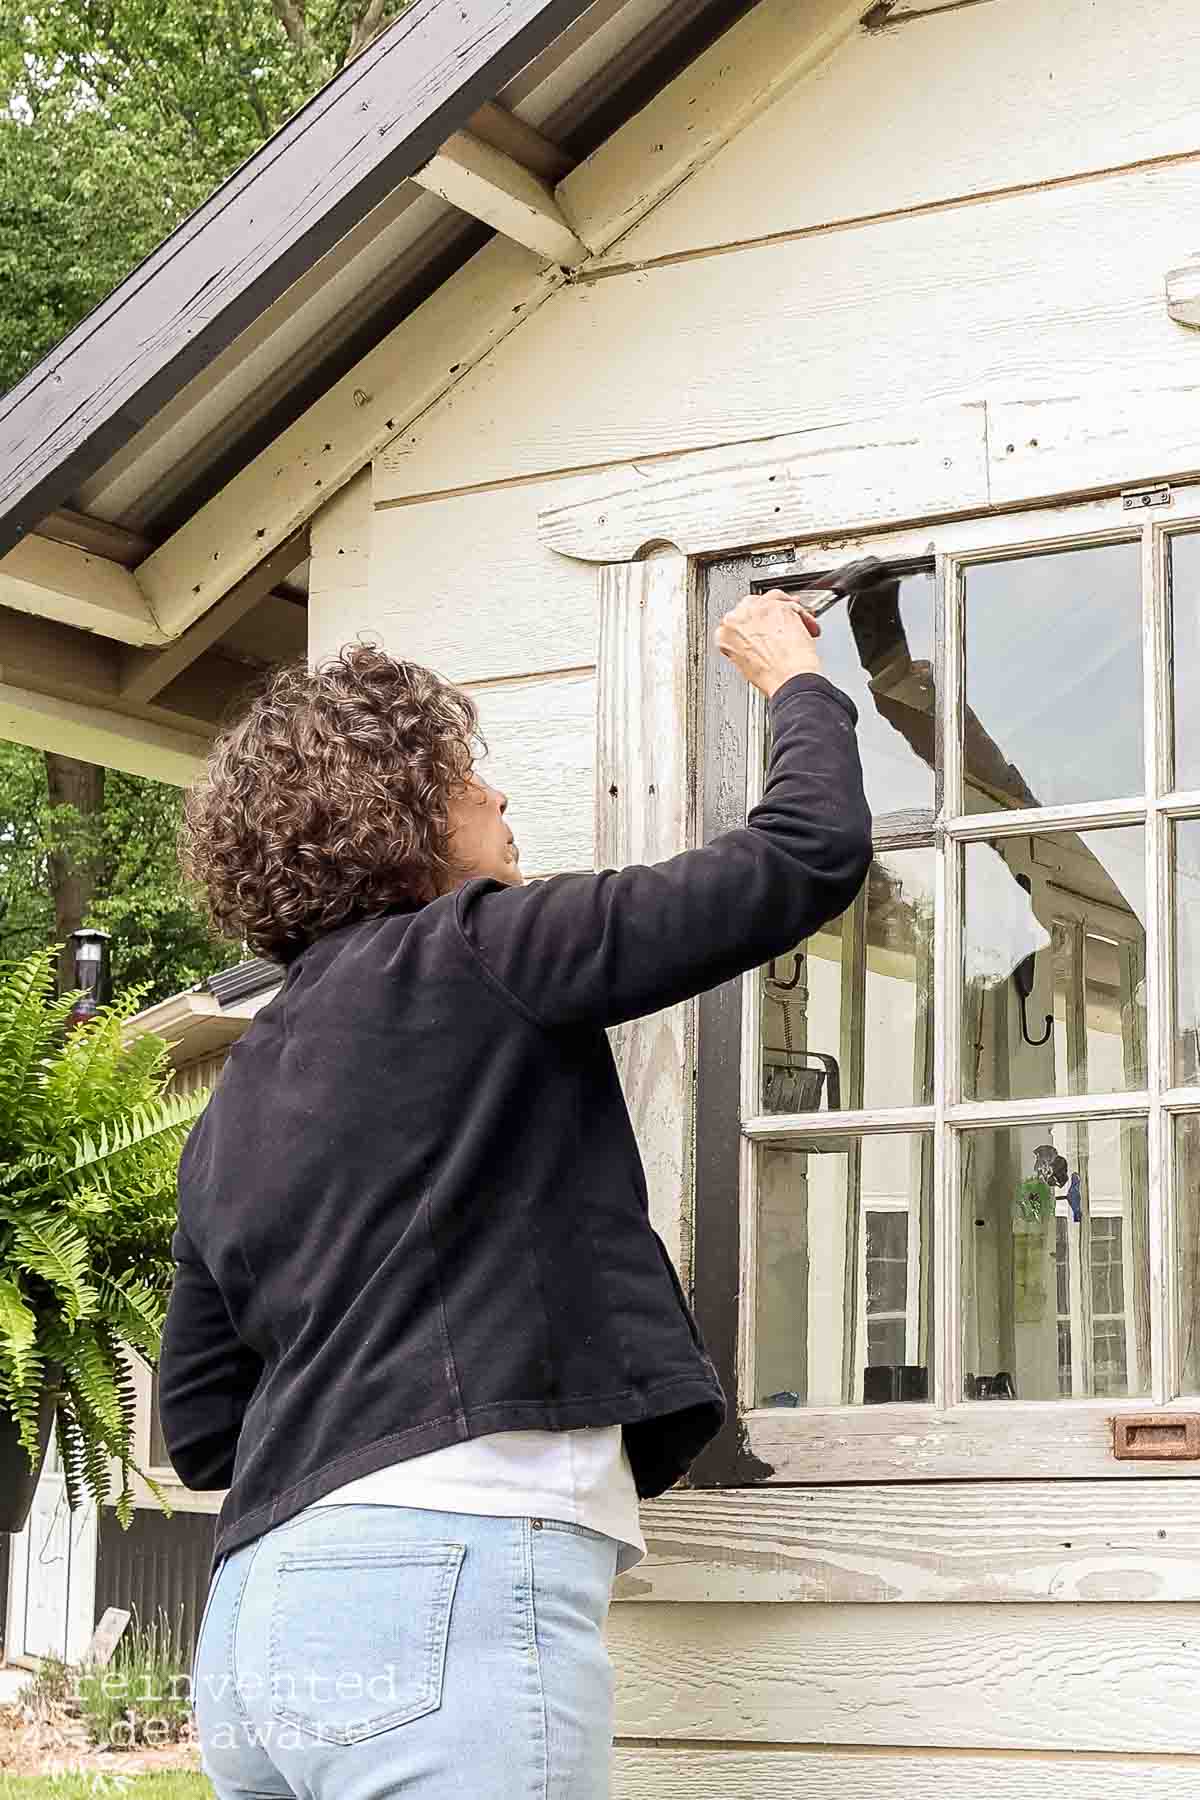
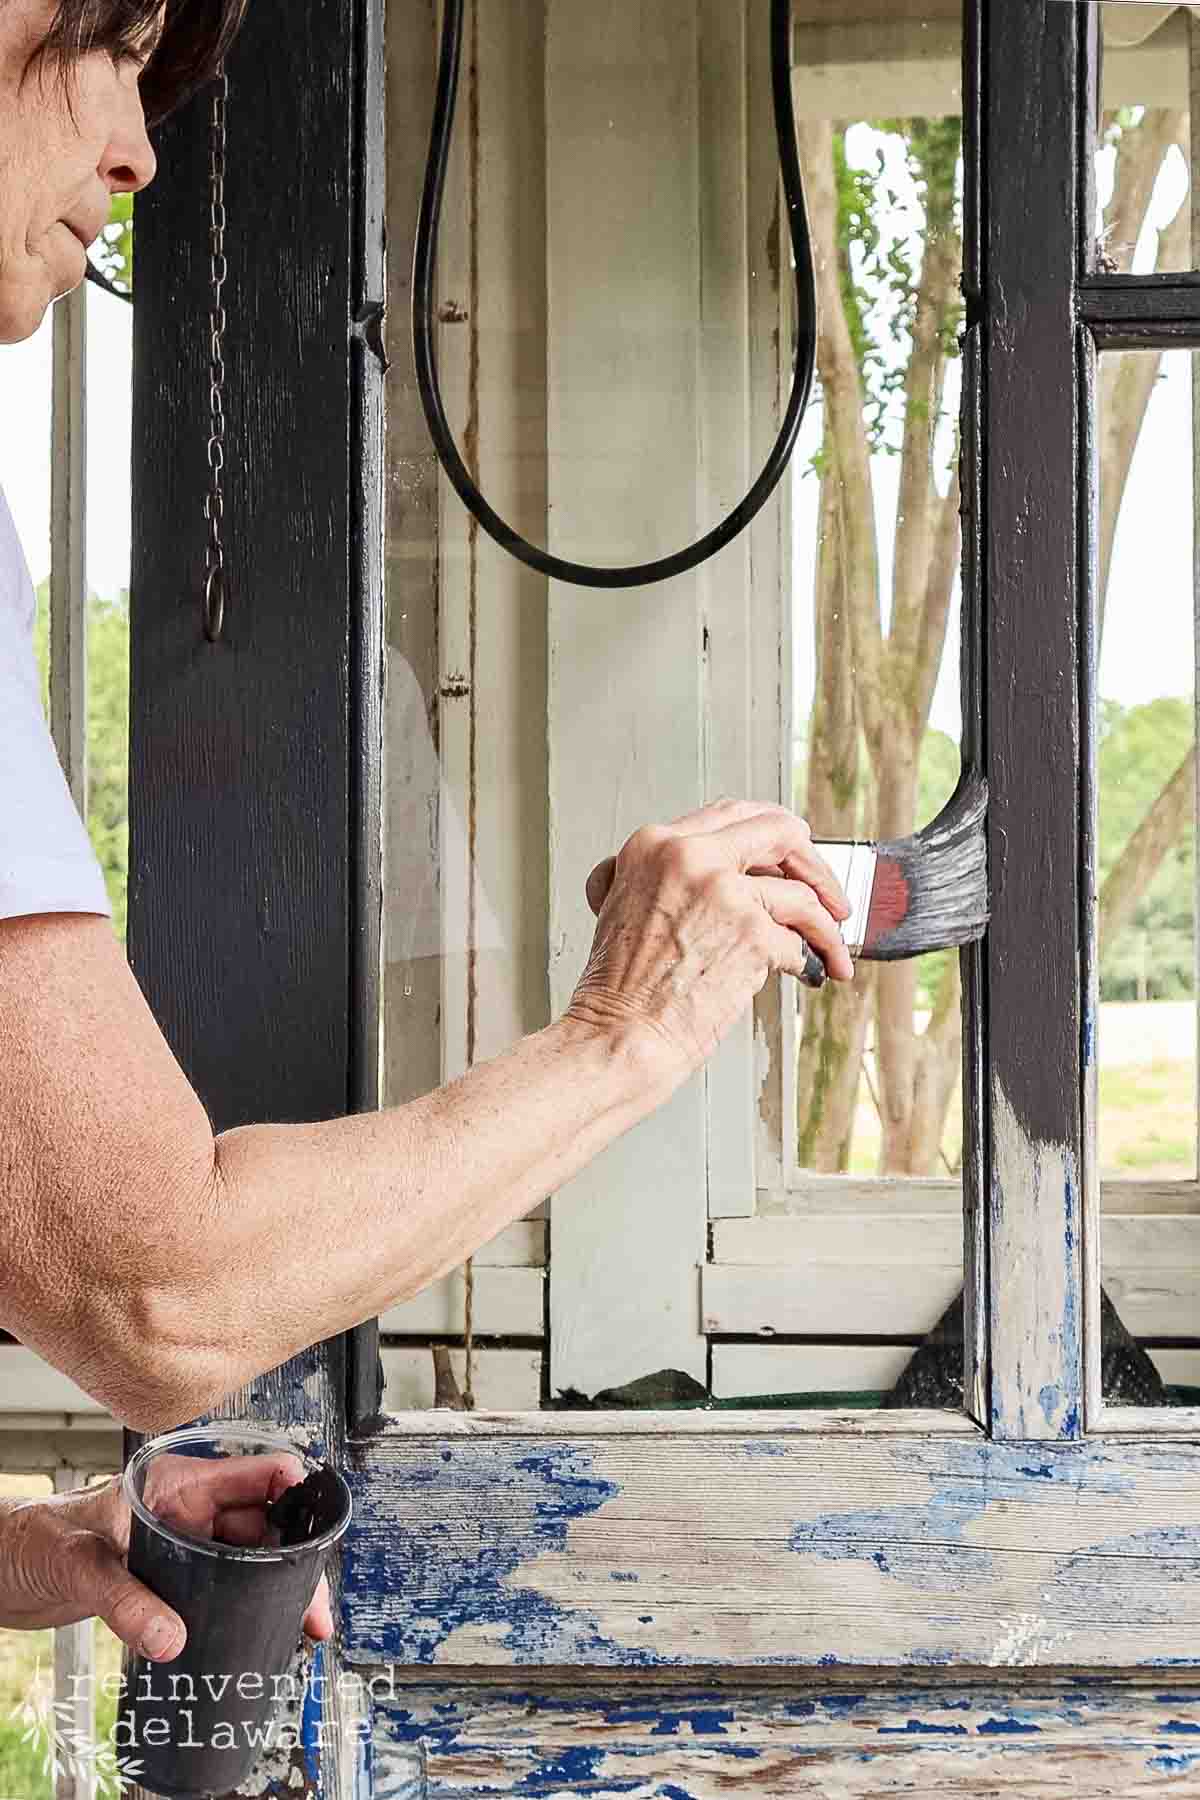
How I Painted the She shed Door and Windows
Using an angle brush, I painted around each window and the door. I did not paint the picket window trim so that I could keep them in the original chippy paint finish for a few more years. They do have a clear protective coat on them to hold on to the chippy paint for as long as possible.
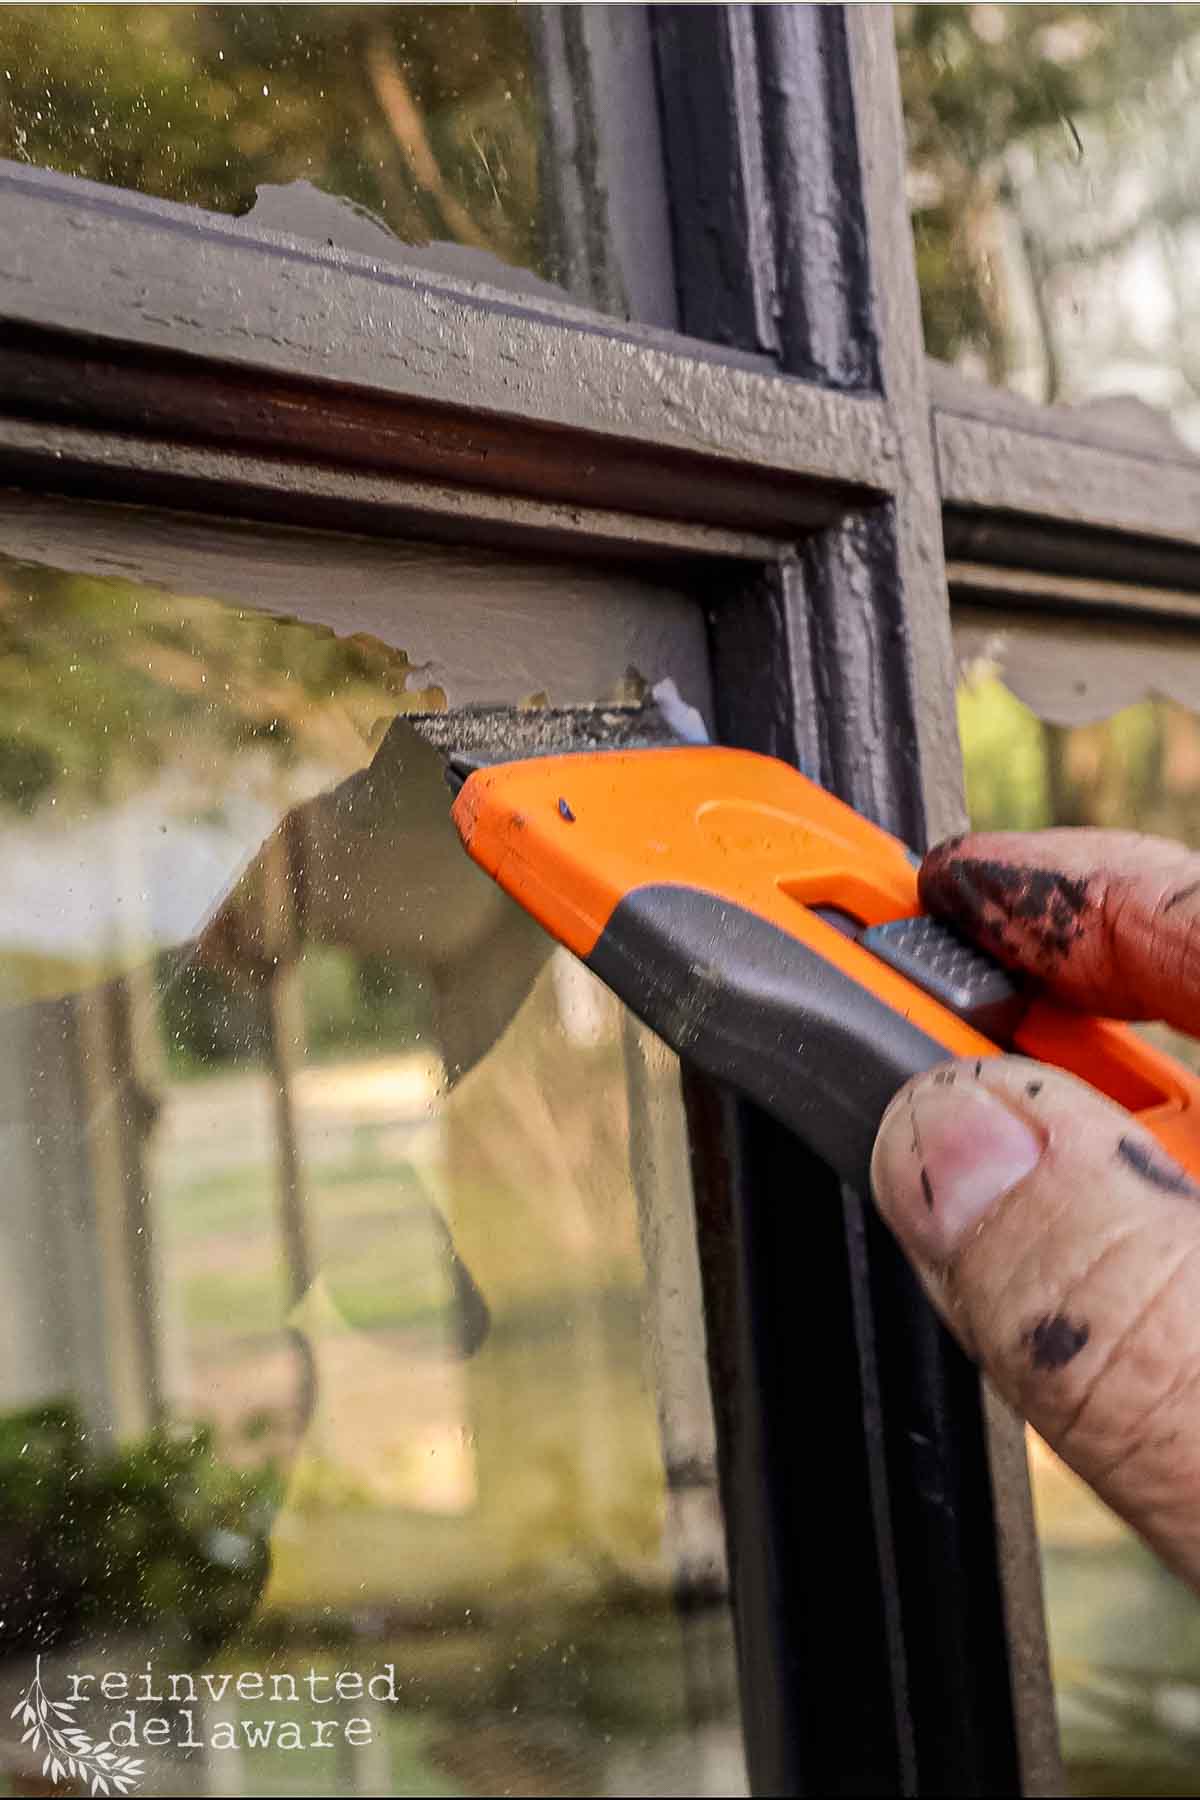
You will notice that I did not use painter’s tape around each of the window mullions to avoid painting on the glass. That was a bit tedious for my liking. Instead, I used a flat razor and craft knife to scrape the paint off the glass once it was completely dry. This is much easier than taping around each mullion!
Supplies Used for This Outdoor DIY Project:
- Cracked Pepper by Behr (or get the color matched at your local hardware store)
- Angle paint brush
- Step ladder
- Flat razor blade and blade holder
- Craft knife
thanks for being here!
I hope you are enjoying this project! Let me know if you have any questions. Or leave me a comment to tell me about your project and ideas!
thanks, Cindy 😀

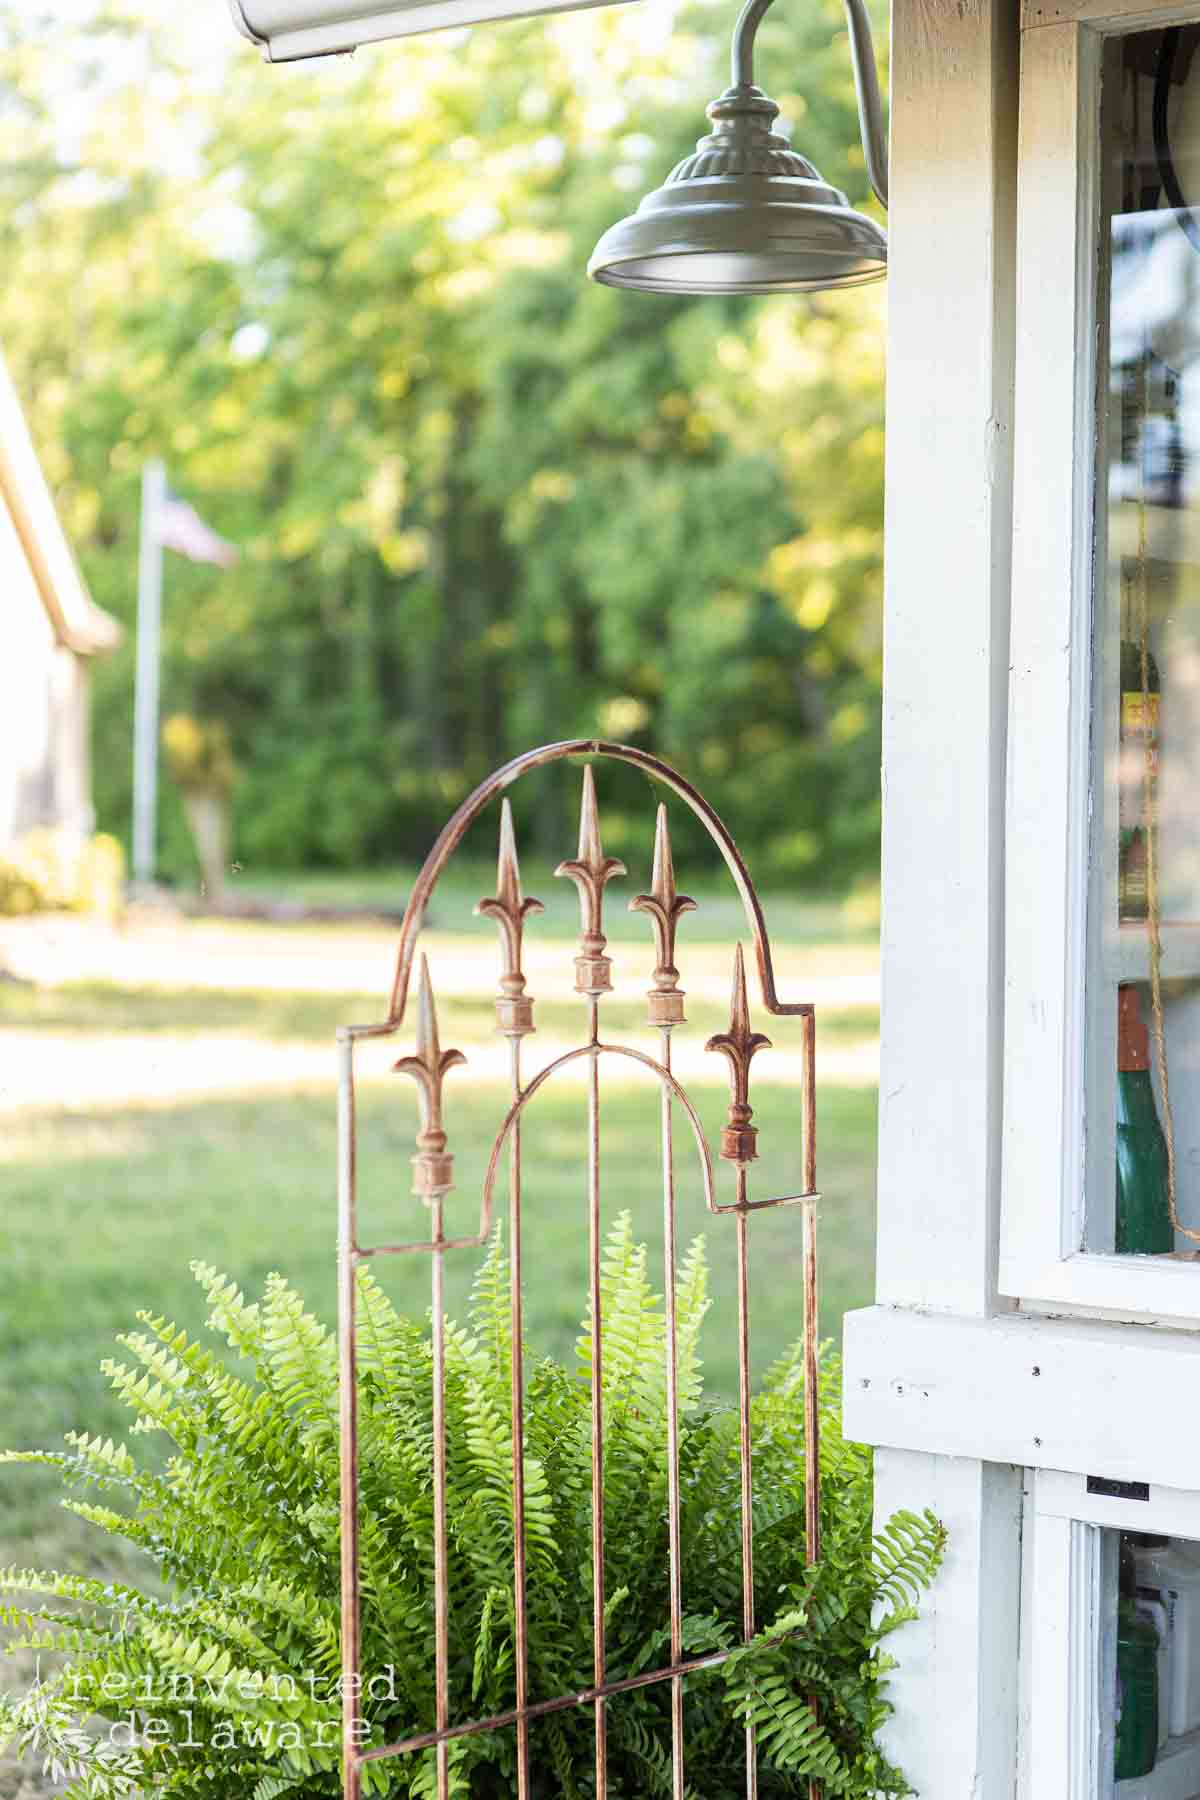
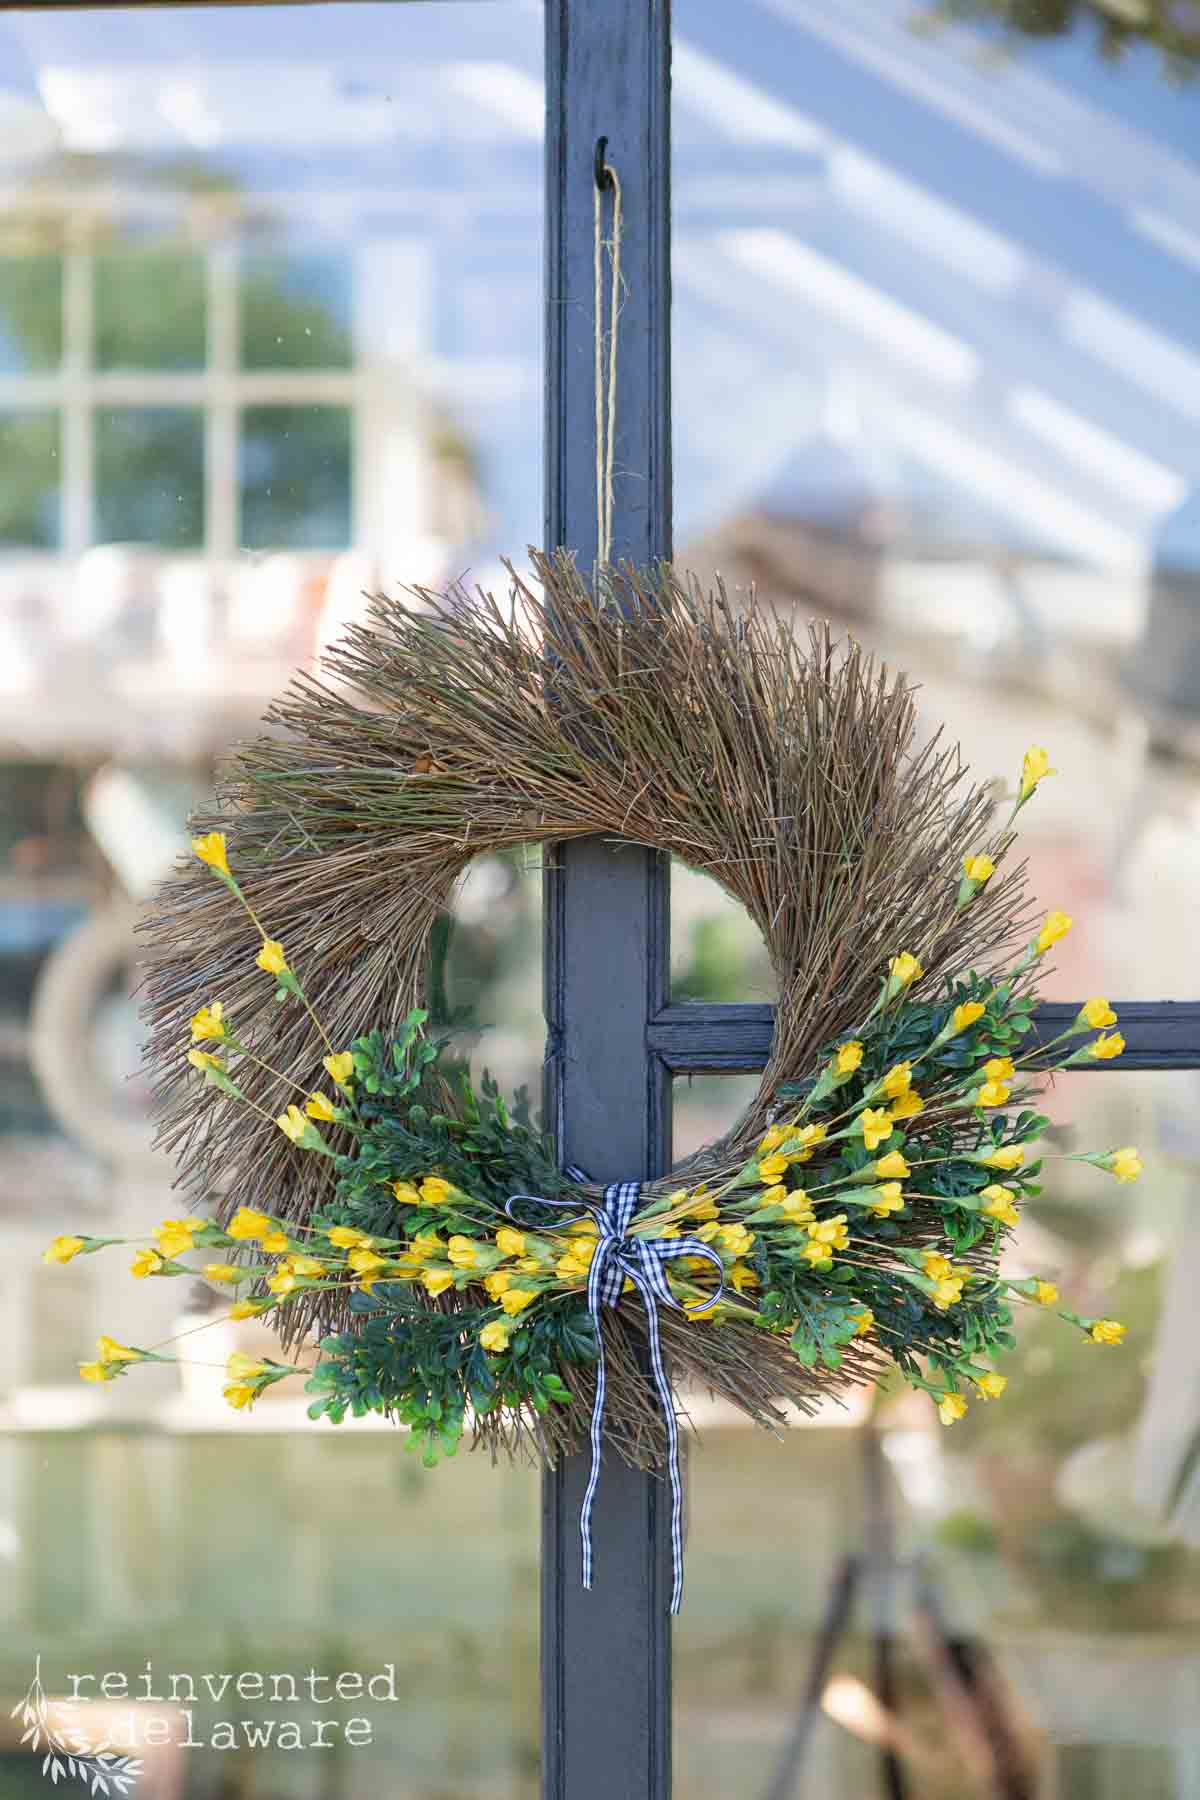
Adding decorative touches to the she shed exterior
This girl loves to paint but my next favorite thing to do is decorate! Let’s add the final touches to this adorable she shed, shall we?
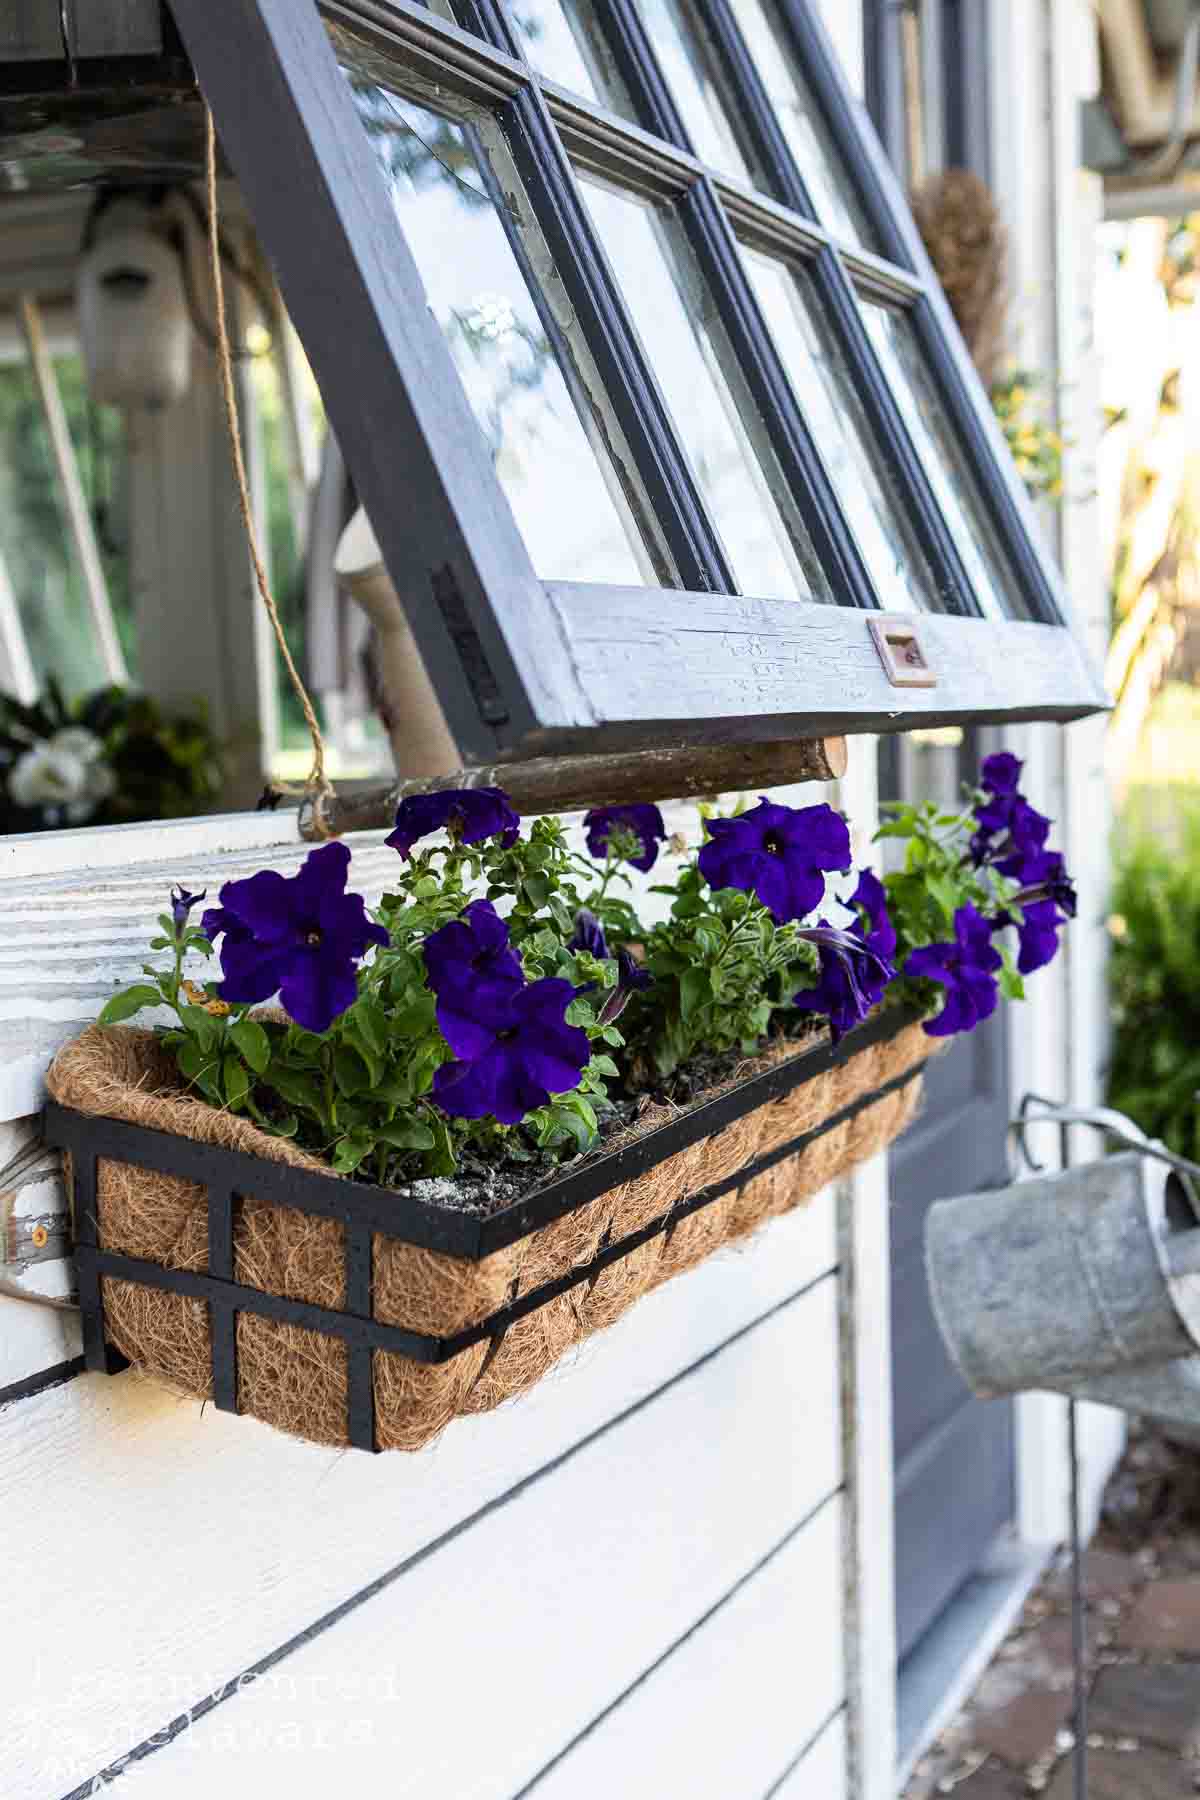
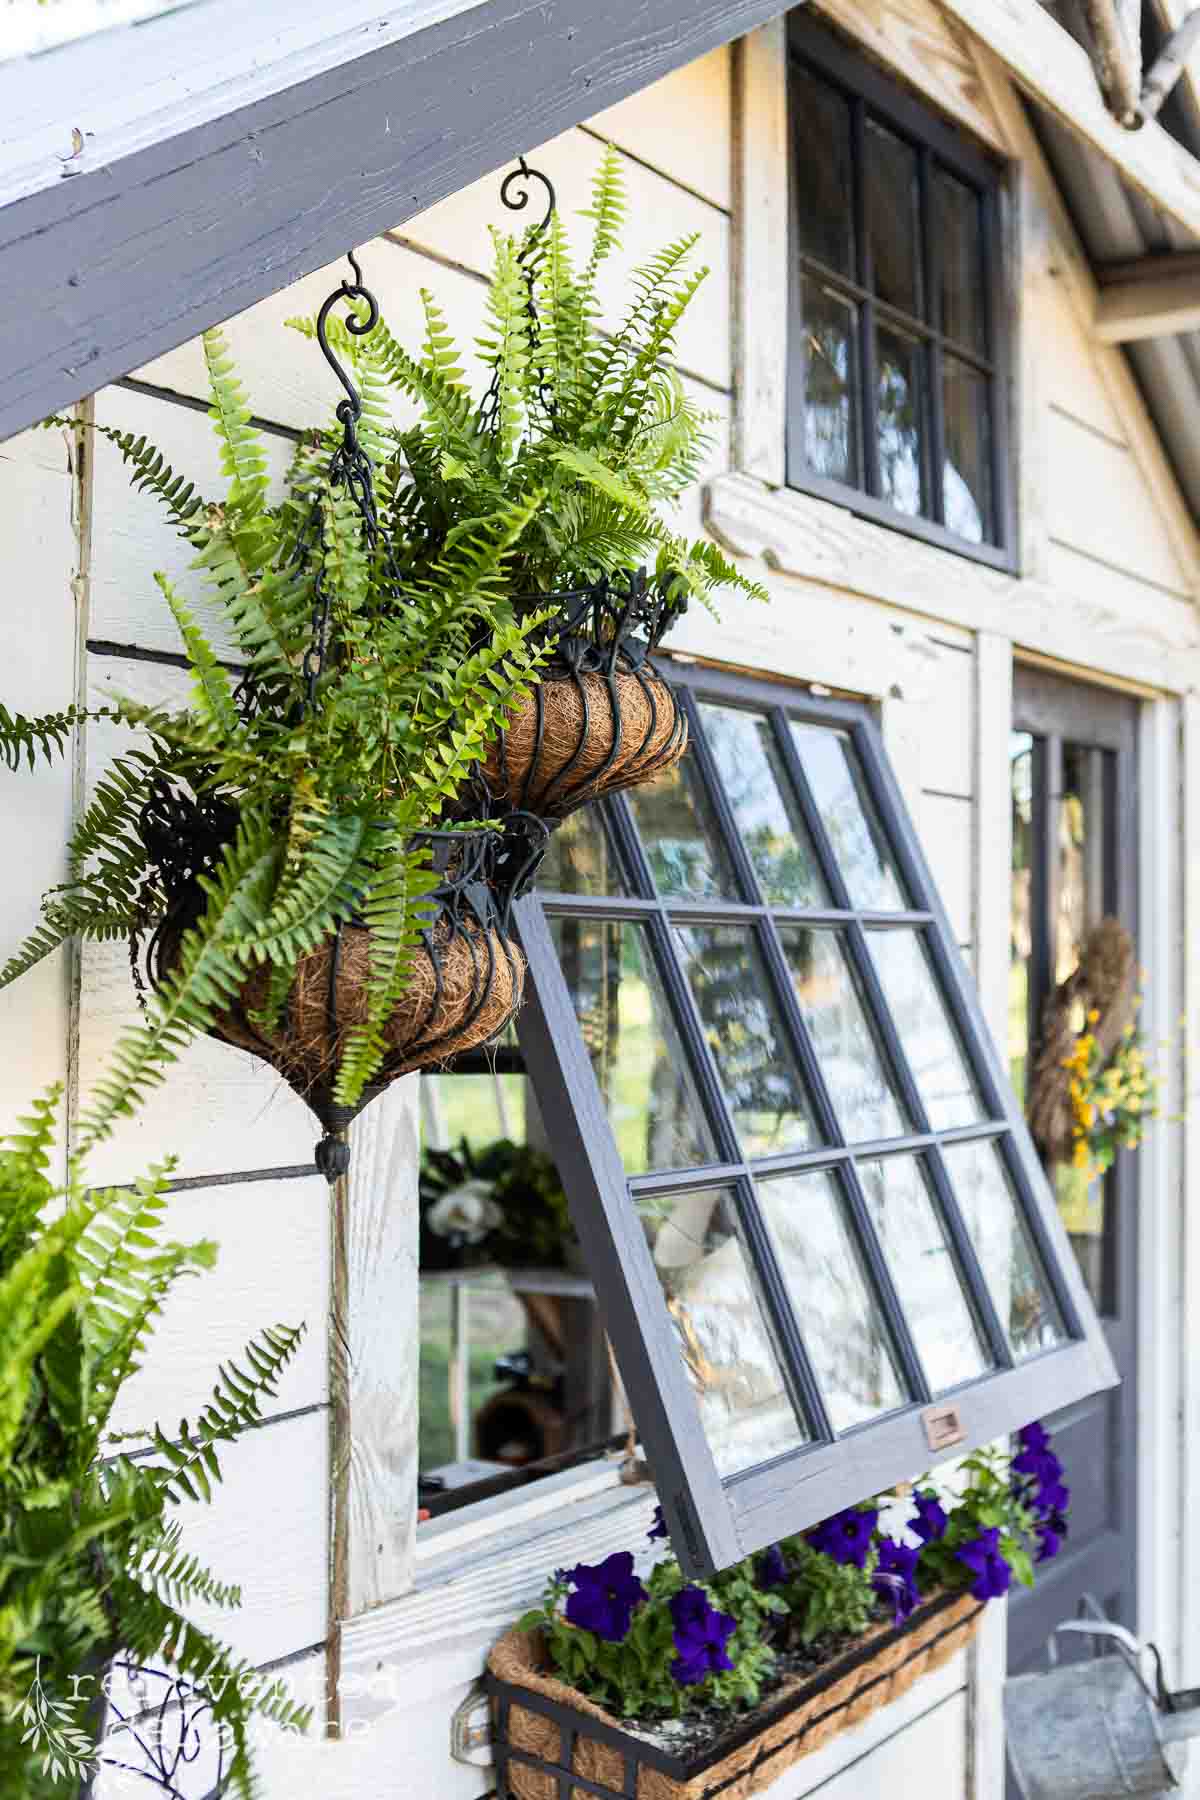
To create a cottage style look, I decided to add an adorable window flower box to the front of the she shed. I searched for one at the thrift store for weeks and since I had no luck finding one, I searched Walmart and found this one.
Next was to change the outdoor lighting. The she shed already had a cute hanging lantern with a string of solar powered lights tucked inside but sadly, those lights were spent. Plus it was time for a change. My local Tractor Supply had these solar powered lights in green and I thought they would be perfect! What do you think?
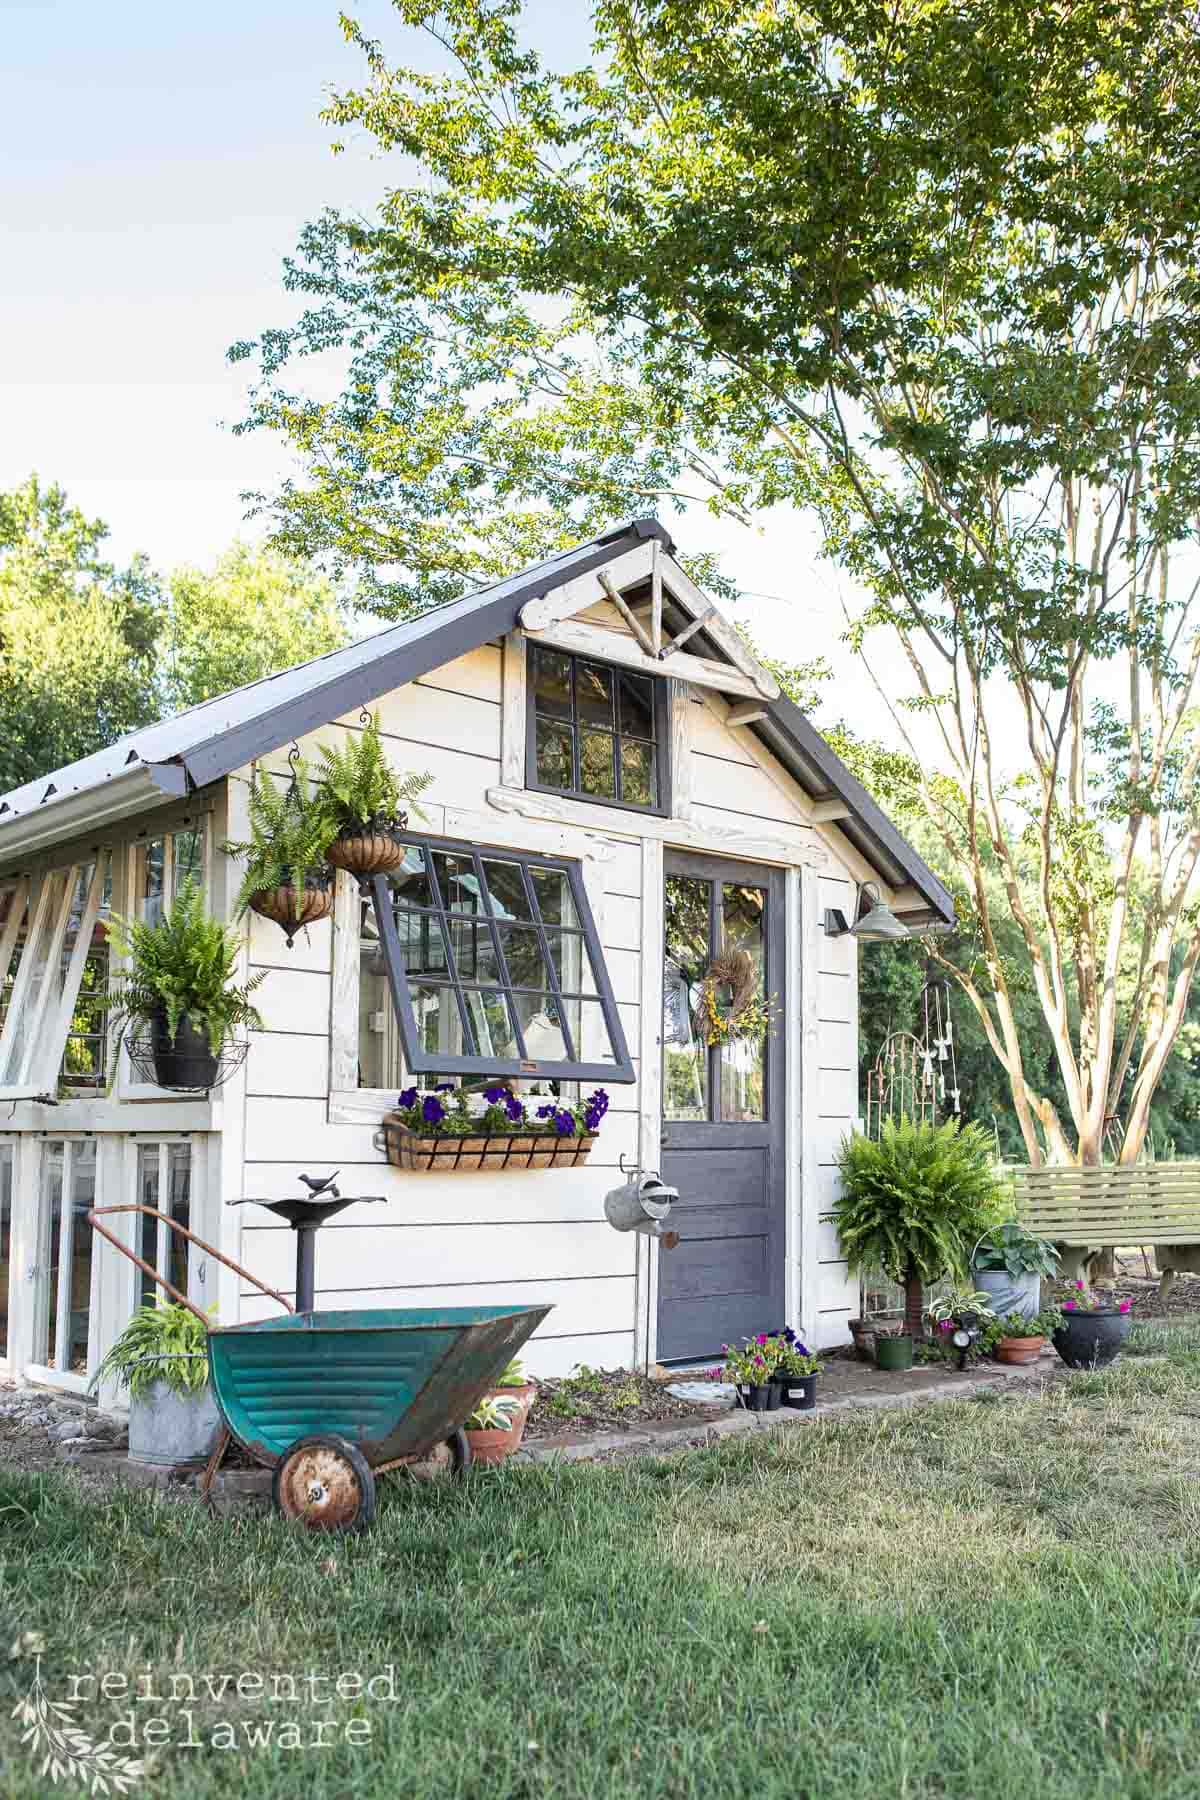
After adding ferns to hanging baskets, planting fresh flowers in the window box and along the front, and potting up some hostas, I thought a special something was missing. Then I realized I had a beautiful metal yard decor piece my hubby had picked up at the local auction! He could spot just the right pieces while at an auction, even if I wasn’t with him.
One of my hubby’s best acution finds, a metal antique wheelbarrow is on the left hand side and finishes off the look perfectly! I think I should add something to the inside. Let me know what you think I should add to the wheelbarrow down in the comments!
By the way, if you love these she shed ideas then you will love the ideas for the interior of this garden she shed!
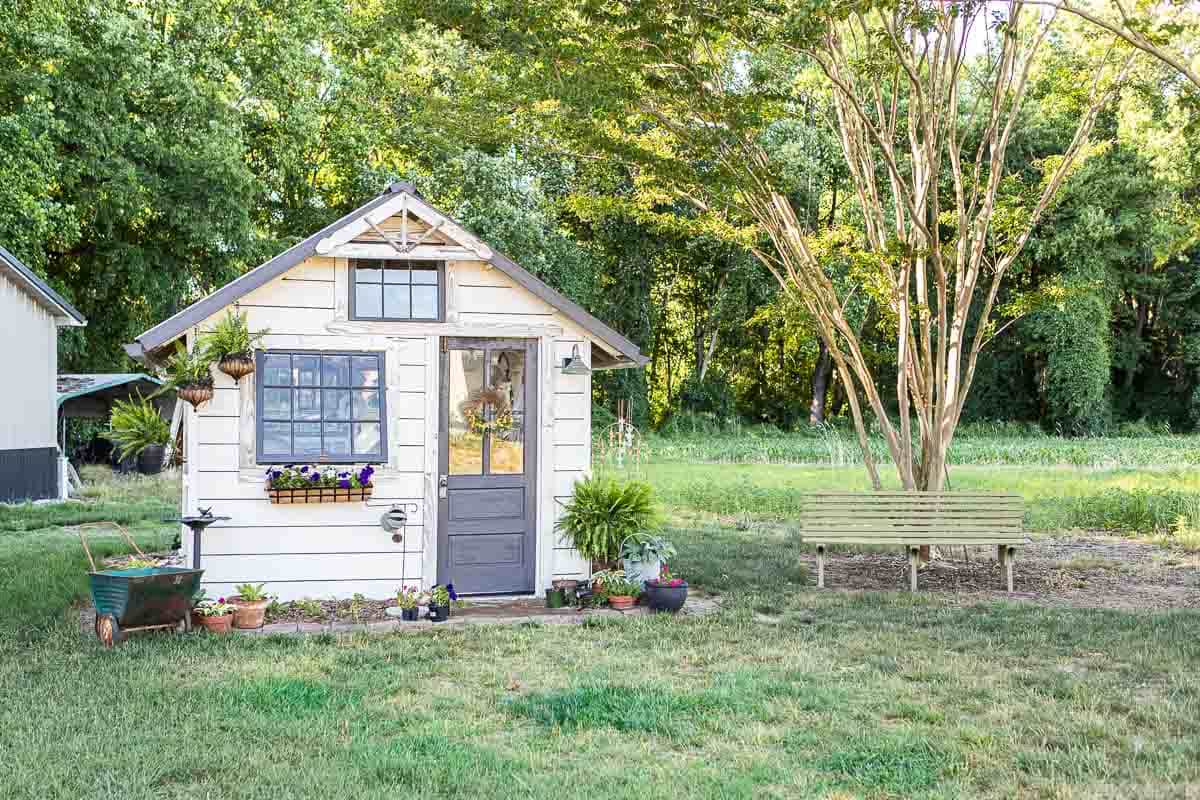
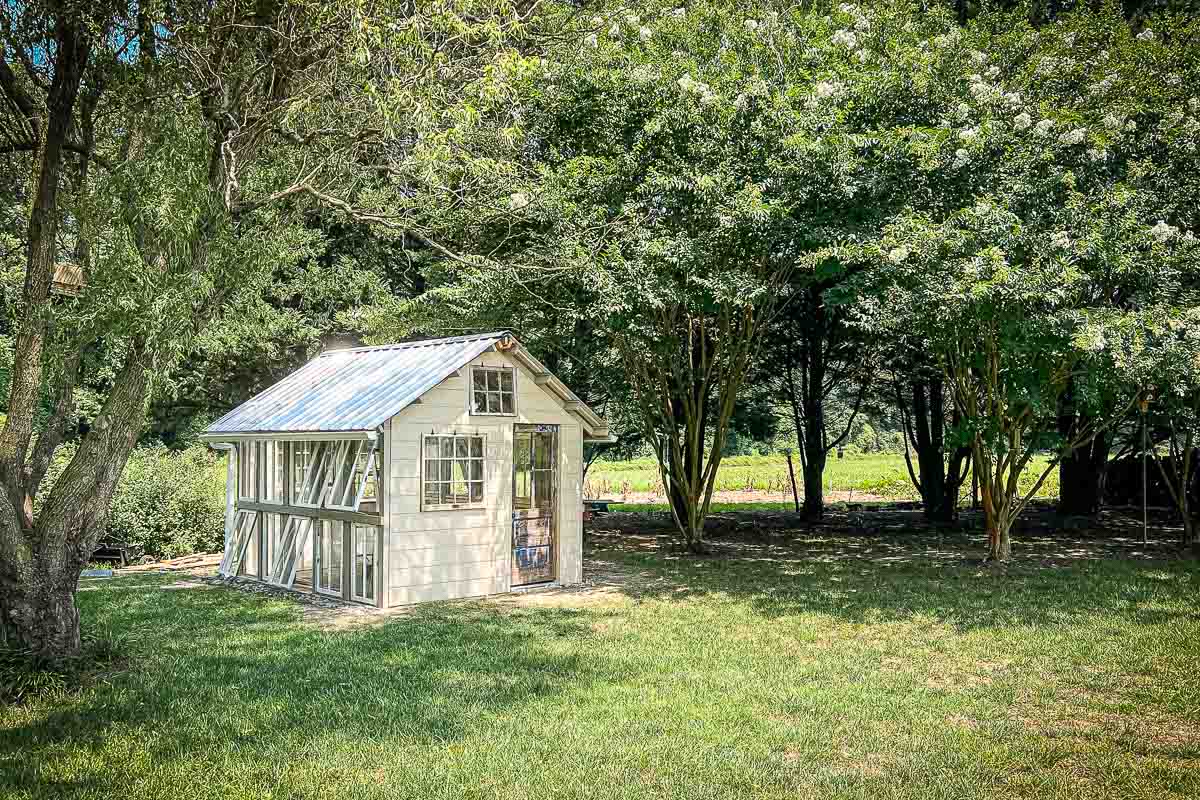
The Before and After Reveal of the She Shed
The difference a little paint, clean windows, and a scrubbed roof can make is truly remarkable! This budget outdoor project cost very little and took just a weekend to complete, but the results look like a full she shed makeover.
Here’s the before…….

…..and the after!
Watch the full she shed refresh on YouTube
Sometimes the best outdoor DIY projects are the ones that bring an old favorite space back to life. This she shed has been a special spot for me and giving it a summer refresh with a fresh coat of paint, sparkling clean windows and roof, and lovely garden plants made it feel brand new again.
This is one of those garden DIY projects that looks harder than it is! I hope this inspires you to take a look at your own outdoor spaces and see what a little elbow grease and a great paint color can do!
https://youtu.be/57DWlhb36j4Want to see the whole process from start to finish? I filmed the entire summer she shed refresh so you can watch along, get inspired, and see all of the before and after details up close! Click the image below to watch!

Tap the image below for the she shed spring cleaning and personal message 🙂

Recreate and Decorate
Join the Facebook Group and Share Your Projects With Us!


Thanks for joining our journey!
Thanks so much for joining me for this post! Join my journey so you don’t miss any of the fun projects, tutorials, and inspiration that I share with you each week! You can follow me on Instagram, Facebook, and YouTube.


Cindy Rust
Cindy has been decorating her home with thrift store finds for 40 years. She is an avid thrift store shopper who loves to makeover the items she finds into vintage-inspired home decor and furniture. When she isn’t thrift shopping or painting a piece of furniture, you can find her making homemade butter, working in her garden, or painting with watercolors.
Visit my Amazon Storefront!
Click the button below and head over to our online shop on Amazon!