
Easy Pantry Makeover | Laundry Room Refresh
Looking for an easy pantry makeover that will keep your food items visible and organized? I’ve got the solution for you!
UPDATE: This post was featured along with 21 other bloggers from across the United States who share their tips to refresh your home! Be sure to see the other amazing ideas by clicking the link below!
21 Easy Home Improvement Project to Refresh Your Home
The following post may contain affiliate links. That means if you click and then buy something, I will make a small commission at no additional cost to you! Thank you for supporting my blog. full disclosure here.

planned, painted & now to purge
We’ve planned we’ve painted the cabinets, and now let’s tackle an easy pantry makeover for my laundry room refresh!
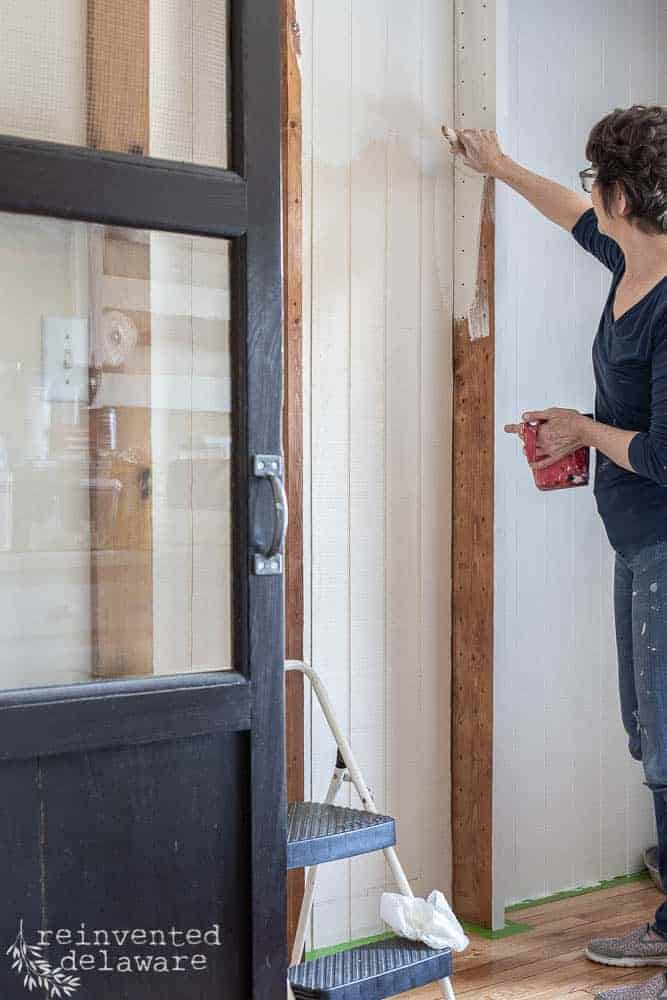
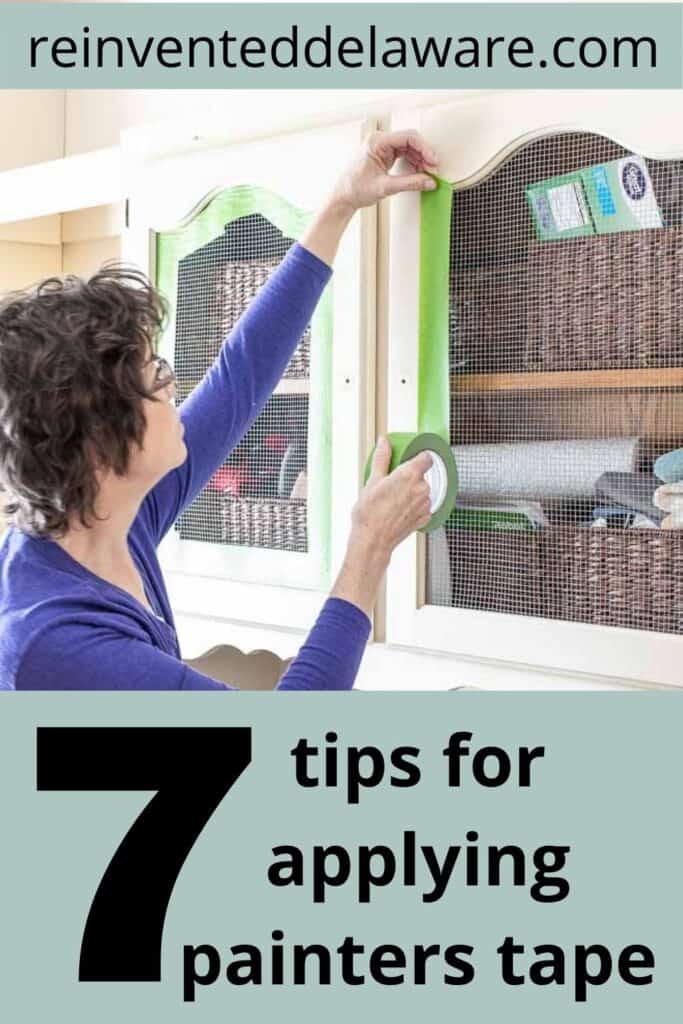
Last time, I shared some tips for using painter’s tape. I used some of those tips for the pantry area of our laundry room.
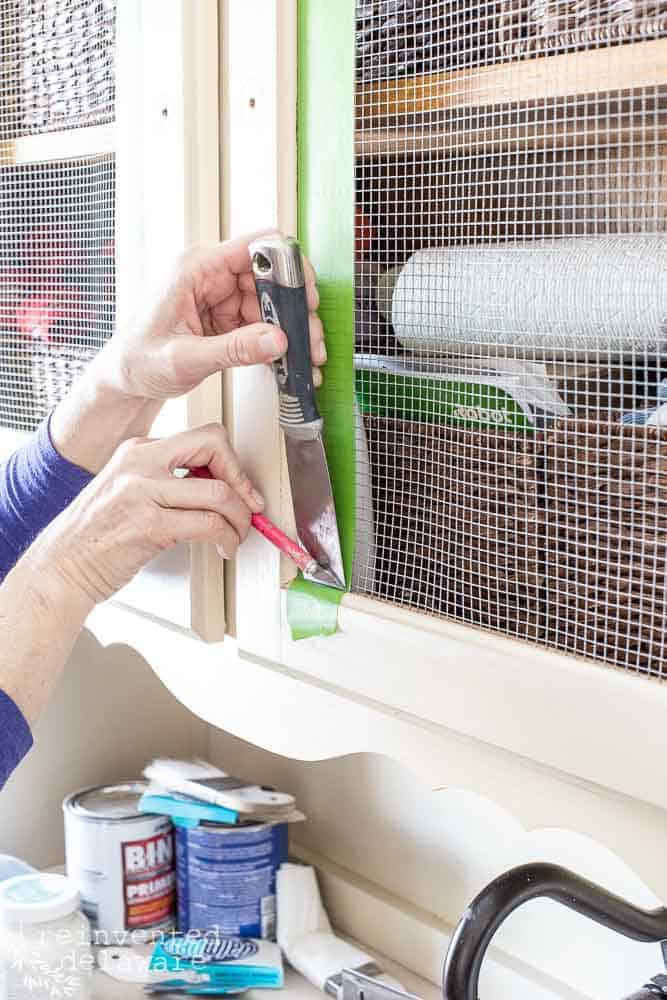
prep the floor edge
See the bottom edge of the shelving along the floor? Yeah, you don’t see any FrogTape Painters tape yet, but believe me, I made sure I applied the tape before I started painting the pantry wall and shelves.
The edge where the wall meets the floor can be the hardest area to paint because you can’t really see it unless you are lying on the floor! Taping off that edge is just plain easier than trying to avoid painting the floor!
empty the space
But, I am getting ahead of myself again!
Before I began this easy pantry makeover, I had to empty the pantry.
- the canned goods
- the shelves
- the step ladder
- the vintage laundry basket
- the fruit crate that held paper towels
- the red drink cooler
- the extra laundry soap
- the bbq grill cooking utensils
- the iRobot Roomba vacuum
- the broom and Bona dust mop
- the trash can and the basket it goes in
In other words, everything in that pantry had to come out!
Which meant I had food items and cleaning items all over the other side of the laundry room!
And in the kitchen.
And in my dining room!
thanks for shopping my links!


out with the old
While I emptied the pantry area of our laundry room, I purged food items.
No kidding, I found a can of condensed milk from 2007.
Remember, this is a no-judgment zone!!

first pantry makeover
Once the shelves were empty, I removed all of the shelves.
Speaking of the shelves, we first did a pantry makeover on this room about 10-12 years ago.
When we built the house over 20 years ago, this was a closet with bi-fold doors and 4 18″ deep coated wire shelves from Closet Maid.
theory vs. reality
In theory, it was a great idea because the closet is about 8′ wide so the 18″ deep shelves would give lots of space for pantry items.
Notice I said ‘in theory because, in reality, the deep shelves were just not practical.
Food items were always hidden by other food items!
thanks for shopping my links!

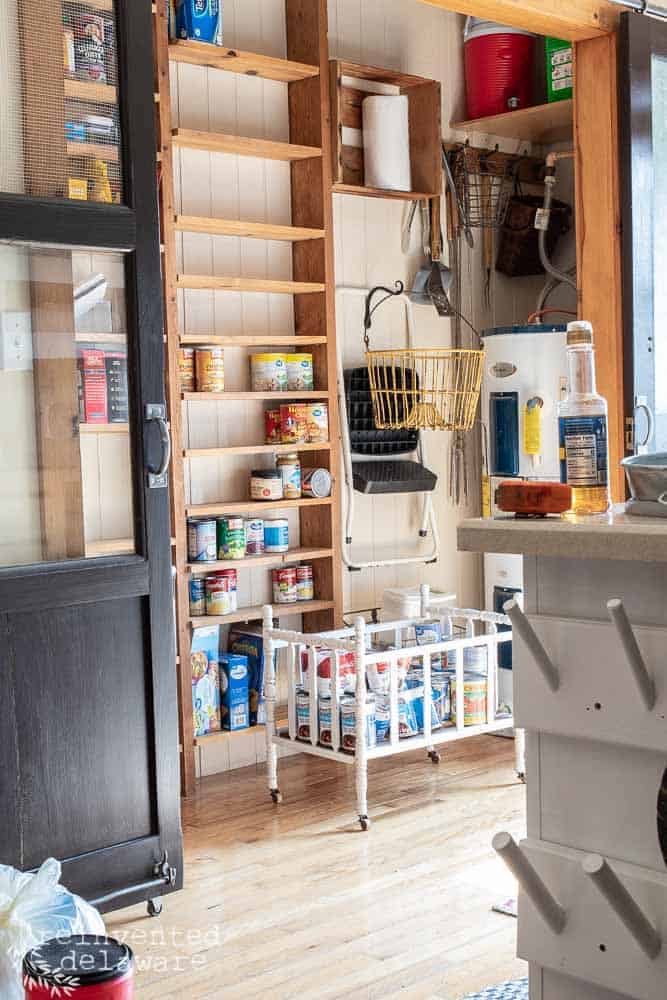
pantry makeover
It was so annoying!! Hubby and I decided that it would be a better use of the space if the shelves were narrow and adjustable. That way, food couldn’t hide behind other food items.
And because we were going to remove the bi-fold doors, the backing of the shelving area needed to be attractive.
supplies
Without going into too much detail about the shelving area of the pantry, (I wasn’t blogging about home decor 10 years ago so I don’t have images to share!) let me just give you a quick rundown of the pantry makeover project:
- T1-11 4’x8′ panels for the back and one side were attached to the original wall
- 2″x6″x8′ boards were used for the vertical shelf supports
- those vertical boards were pre-drilled to fit adjustable metal shelf pins
- 1″x6″ boards were cut into 20″ sections for the shelves (we cut 28 of them!)
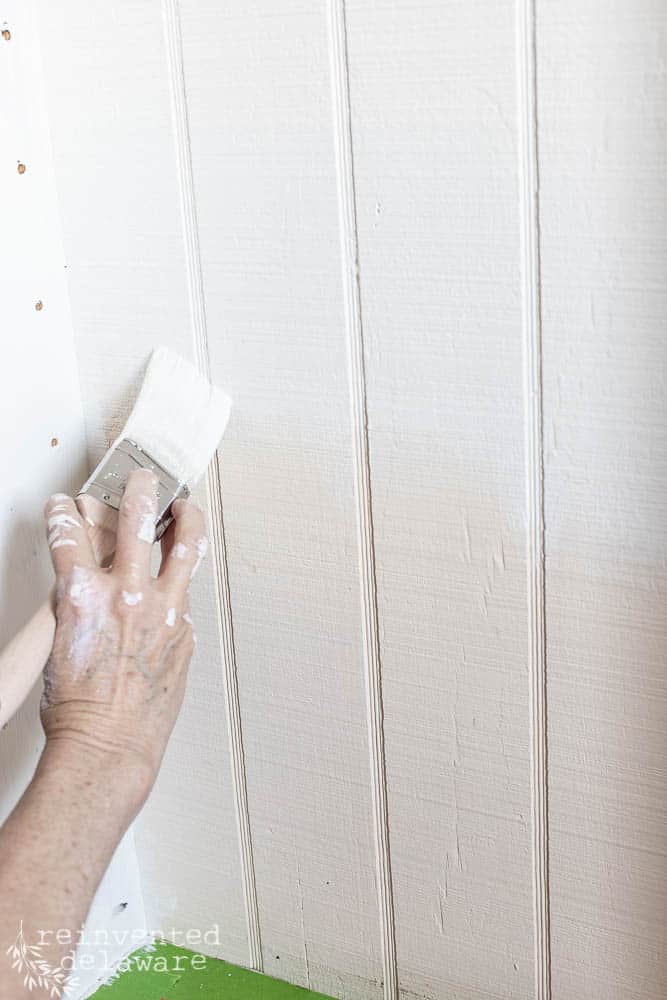
French Canvas paint
The whole back wall and vertical supports were painted with a custom mix of Clark and Kensington paint in Eggshell to match the color sample I brought in.
Side note: don’t try to purchase paint in-store at Walmart on a Sunday. We couldn’t find anyone to mix paint for us! I was sold on the Kilz Color Collection ‘French Canvas’ so we headed to our local Ace Hardware with the paint chip and purchased the paint there!
Anyway, this Zibra 2″ Angled brush made painting the T1-11 so easy! The paintbrush glides over the rough surface like nobody’s business!
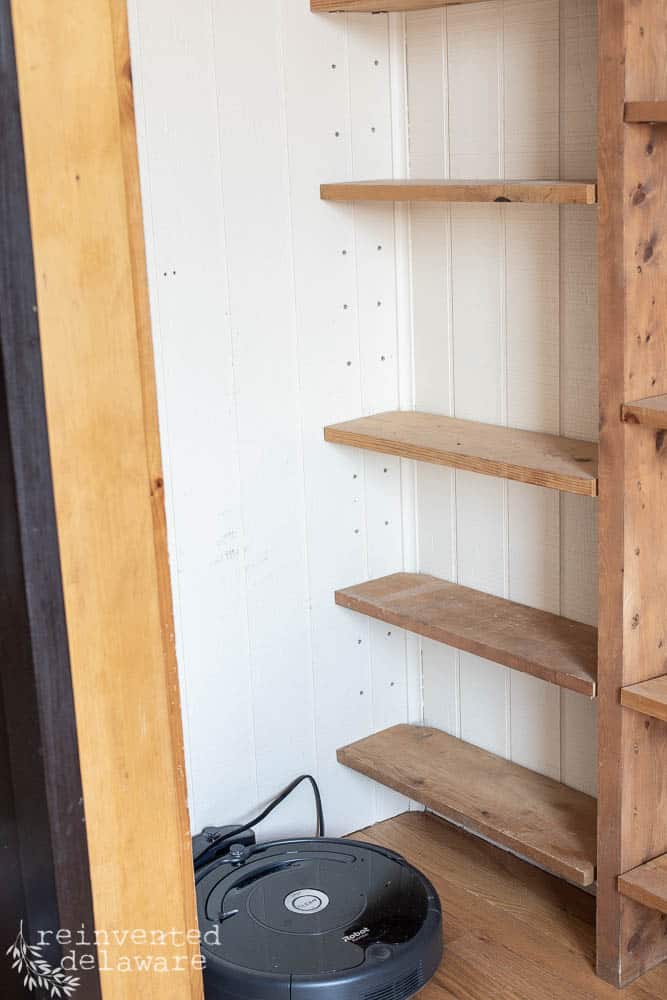
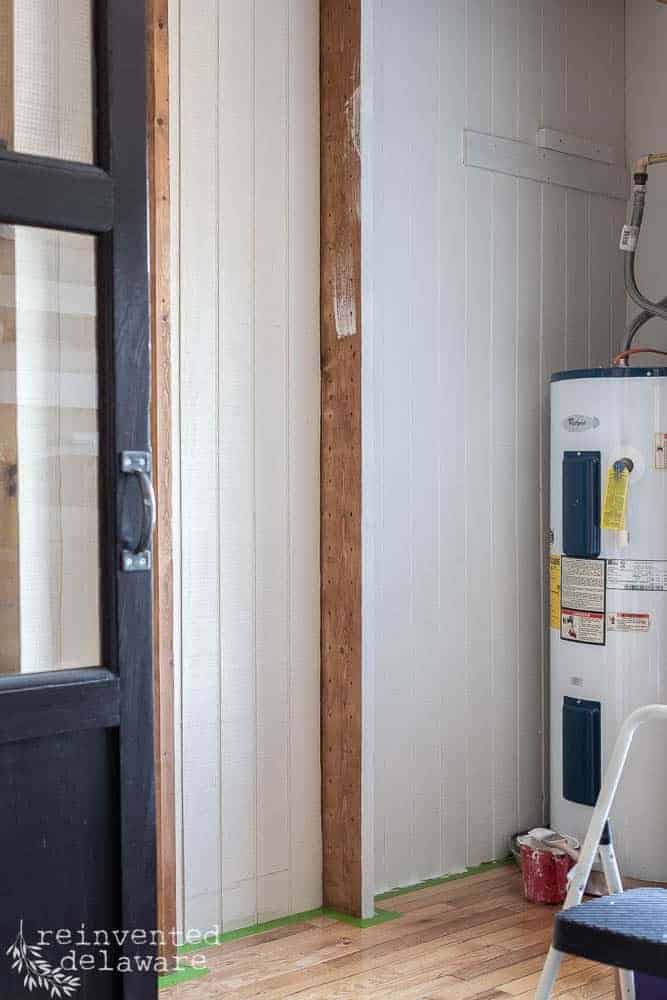
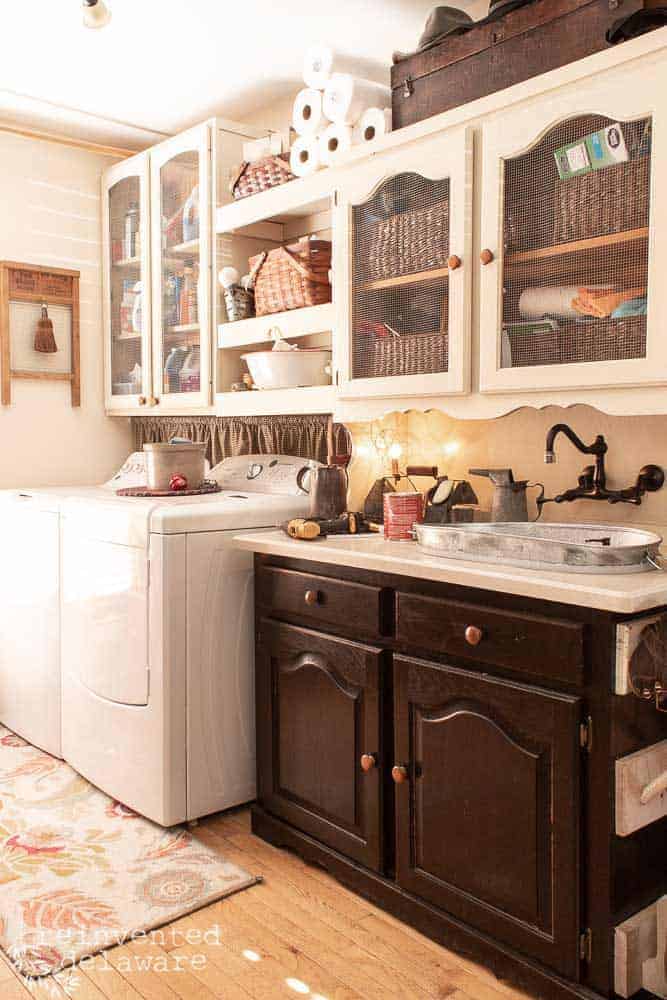
lightening the space
The lighter color of paint made a huge difference in the brightness of the pantry! Even this little area near the hot water heater looked brighter!
thanks for shopping my links!
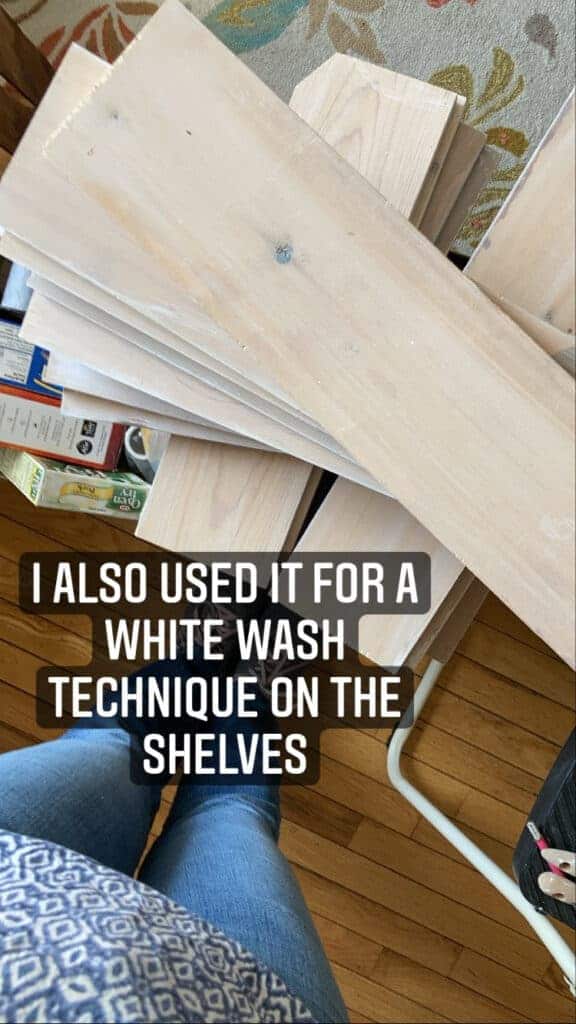
whitewash technique
I used a white-wash technique on the shelves. An opaque paint finish would show marks from the cans after use. The whitewashed look is a bit more forgiving while still lightening up the pine wood.
hide the water heater!
Even though the area was brighter, it still is the spot where my hot water heater lives. Not the prettiest thing to see each time I enter this room.
My friend Kim, from Serving Up Southern, shared an idea that has been tucked away in my mind for 2 years – using a drop cloth curtain to hide the thing you don’t want to see!
She hid a TV on a bookshelf which was such a good idea. I’m hiding our hot water heater!
We can still access it quickly if we need to plus all the ugly is well hidden!

easy drop cloth curtain
I used a 6’x9′ inexpensive drop cloth. I folded the top edge enough so that the drop cloth would just touch the floor. This also created a little valance.
Then I hung the ‘curtain’ with clip-style curtain hangers on a 1 1/2″ dowel rod that was attached using dowel rod pole sockets.

steam the wrinkles
Even though I had washed the drop cloth before hanging it, I had neglected to iron it. So I pulled out my clothing steamer and it worked like a charm on the wrinkles!
thanks for shopping my links!

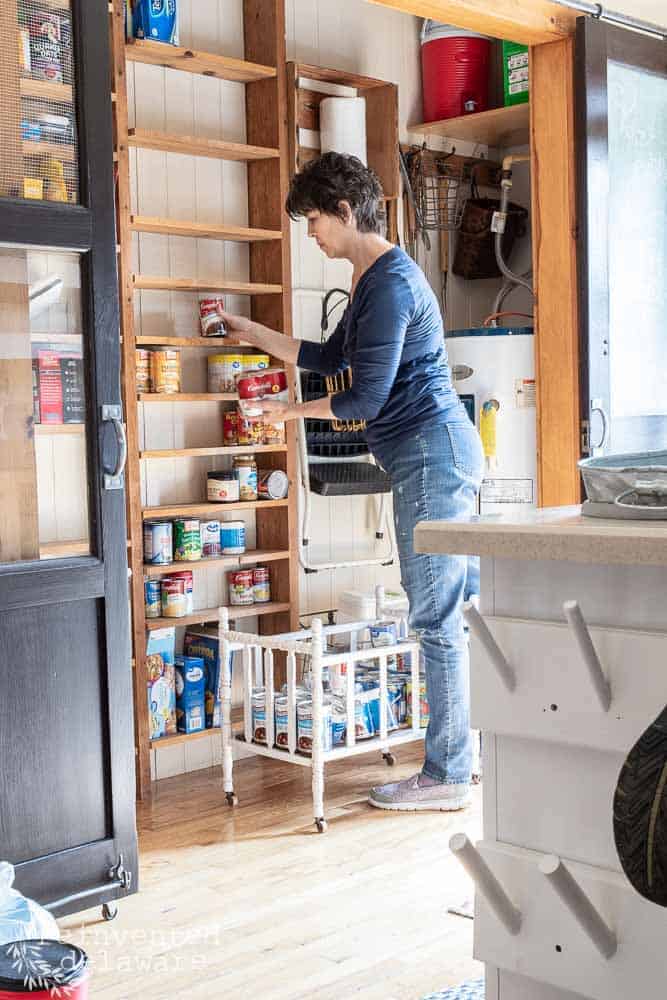
organize the new space
The next step was organizing the food items so that they made sense for our needs.
As I grouped items together, I was chuckling at myself for all the duplicates I had. I mean really, how many large bottles of Olive Garden salad dressing do I need to keep on hand?
And check out all that Sweet Baby Ray’s BBQ sauce! I’m ready for a cook-out so come on over!
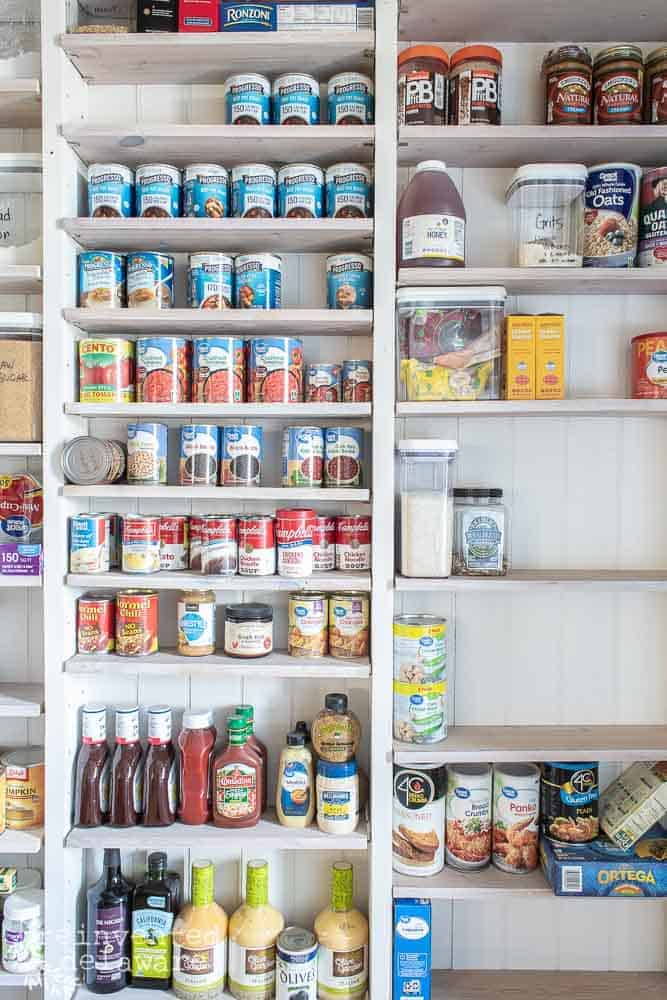
The baking items aren’t used as often as I wish (time is a four-letter word when you run your own business!) so the flour, sugars, and such are on the left side of the pantry. For the most part, those are the item I store in the Better Homes and Gardens storage containers I buy at Walmart.
Canned goods that we use more often are in the center as well as cooking items like oil and condiments.

curating vintage goodies
See the blank wall area near the drop cloth curtain? I have a little plan for that spot that will include some vintage brooms, washboards, and such.
The items need to be practical but I want them to go with the look of our home too.
That will take some time to curate and that is part of the fun of shopping for vintage items!
still more to do
I haven’t forgotten about the rest of the laundry room!
I have a curtain to hang, a rug to put down, a washer hook-up area to cover, and a few clothes hanging brackets to install.
And I need to make a decision about painting the sliding vintage doors on the pantry. Let me know your opinion in the comments. Should I paint them in a chippy paint finish?
Oh, and I can’t forget the fun project I have planned for the floor! I won’t be tackling that project until after the big event that is happening at our home in a few weeks.
In the meantime, I have some laundry to do and the walls to paint! I’ll share more on that in my next Laundry Room Refresh post!

thanks for stopping by!
I hope you are inspired to do your own laundry room refresh! I would love to see your makeover! Hop over to Instagram and tag me in the images you share!
Feel free to pin any of the images you see in this post! Share them with your friends so they can be inspired to do their own room refresh.
join our journey
We would love for you to join our reinventing journey on Instagram, Facebook, and YouTube! You can find more inspiration on our Pinterest boards too!
Until next time…


Cindy, I loved reading and seeing your blog post about the laundry room / pantry makeover! I love the white color (I think that’s the color you used, forgot to look before commenting, didn’t want to lose my thought process)! I think using the same color paint for the sliding doors would look good, unless you wanted to have a clear transition. You and Steve did a great job on this makeover and the idea of using a drop cloth for the hot water curtain is so creative! Great reinvention!
Thanks Patti! The lighter paint color brightens the little room so much! I also used a scrap of drop cloth to make a curtain to hide the washer pipes. I’ll show that in the next post about the laundry room! Thanks for stopping by!
Your hard work to empty, makeover the space and put is all back is impressive. Well done!
Thanks, Linda! A lot of work and a lot of rewards!
Hi, I love the sliding doors on your pantry. Can you tell me what hardware you used. I like how simple & clean this hardware is rather than the sliding barn door hardware I am finding everywhere. Your ideas are the best!!! Thanks, VM
Hi Victoria! Thanks for the kind words! The hardware that we used for this sliding door is a combination of plumbing pipes we found at our local hardware store. I can’t remember off hand what they are called exactly (we did that sliding door years and years ago!) but they are the kind that screws together with fittings. We used a couple of elbow-shaped fittings and then one long pipe in the middle. The antique doors have huge eye hooks attached at the top of each door. The eye hooks are large enough for the plumbing pipe to go through. Hope that helps! Thanks for stopping by!