
Vintage Kitchen Cupboard Reveal
Can you believe we were able to salvage this antique kitchen cupboard that sat in a barn for years and years??? Well, we did!! I can’t wait to show you the amazing results!!
huge undertaking
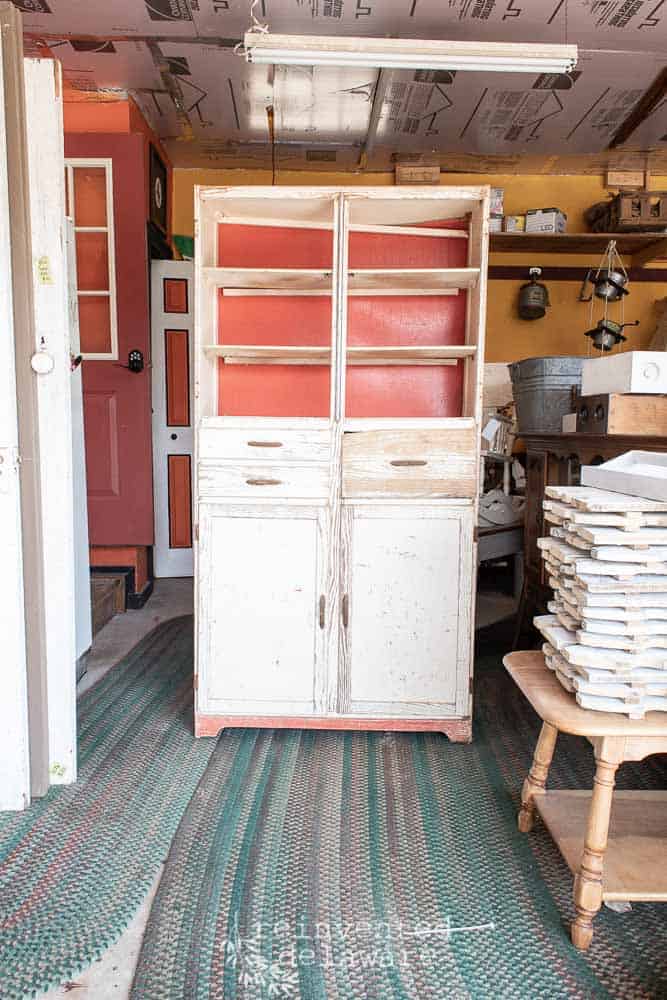
Wow! This antique kitchen cupboard was such an undertaking! After sitting in the barn for years collecting dirt, grime, humidity, bugs and who knows what else, our client pulled it out and sent me a picture!
“Can you do anything with this???”
Of course, we said yes! And honestly, I sure am glad we did!
Let’s take a look at the before:
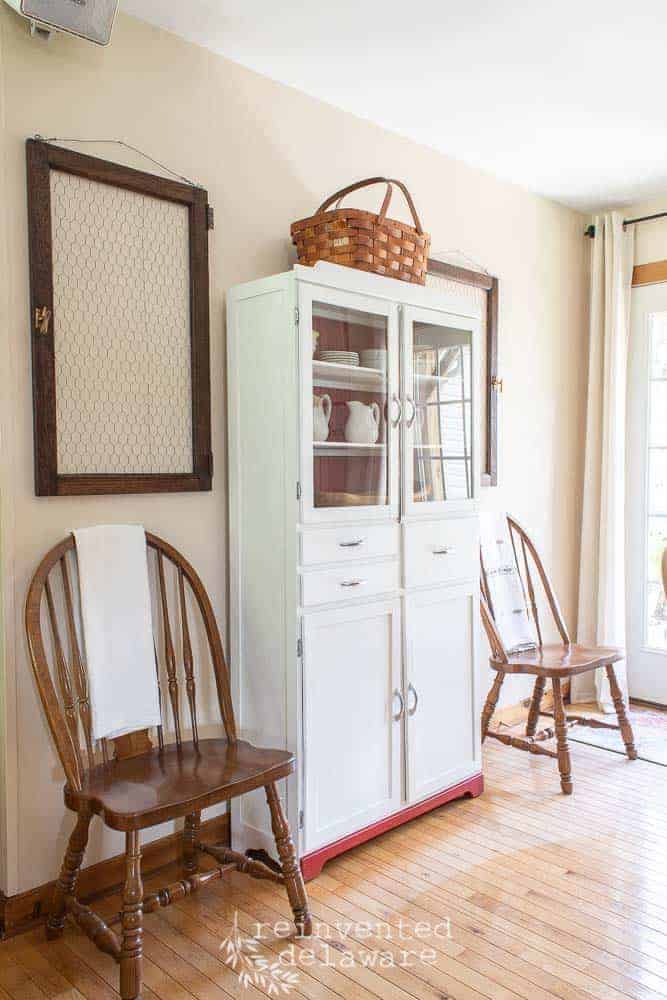
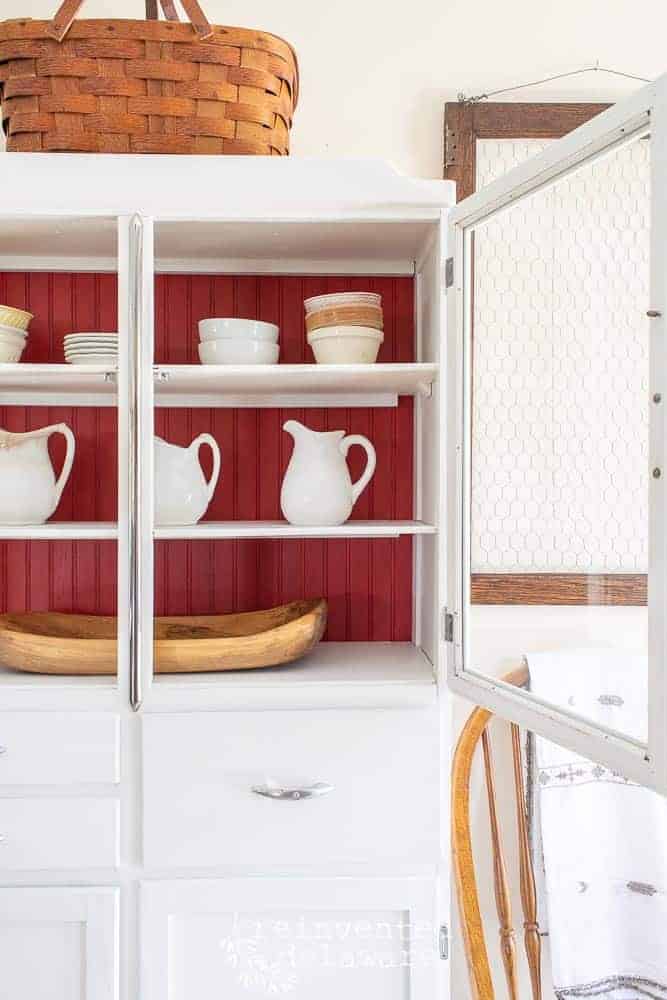
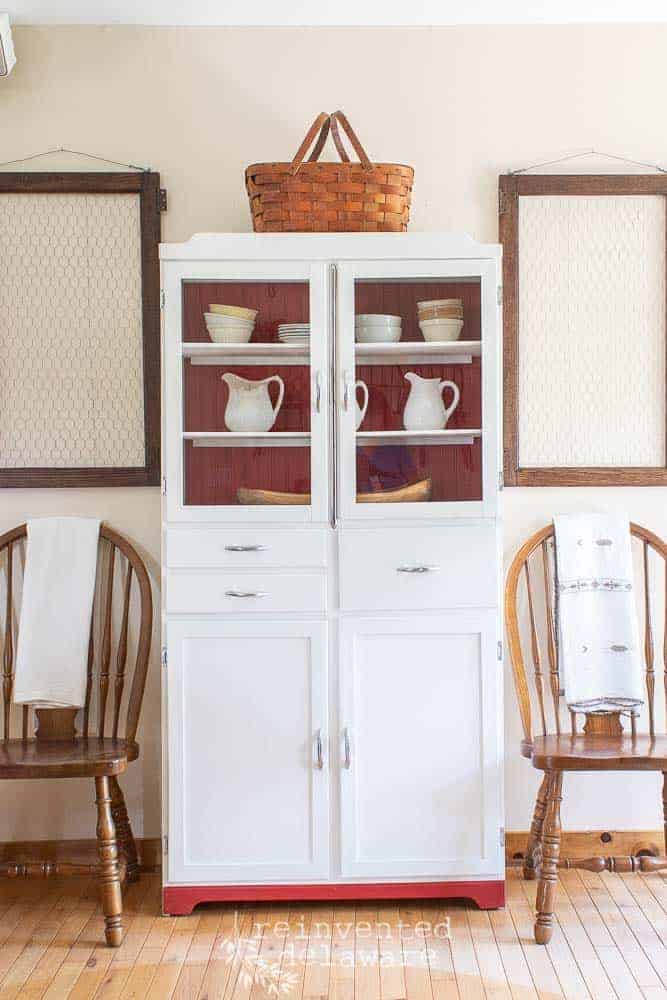
And know let’s take a good look at the after…..
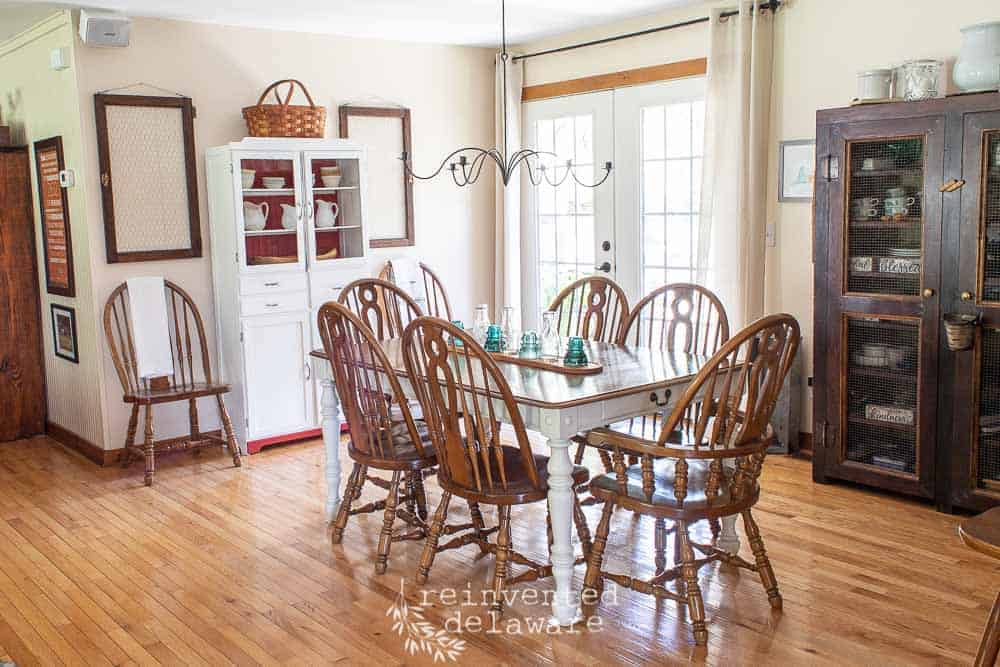
(It kinda looks good in our dining room!)
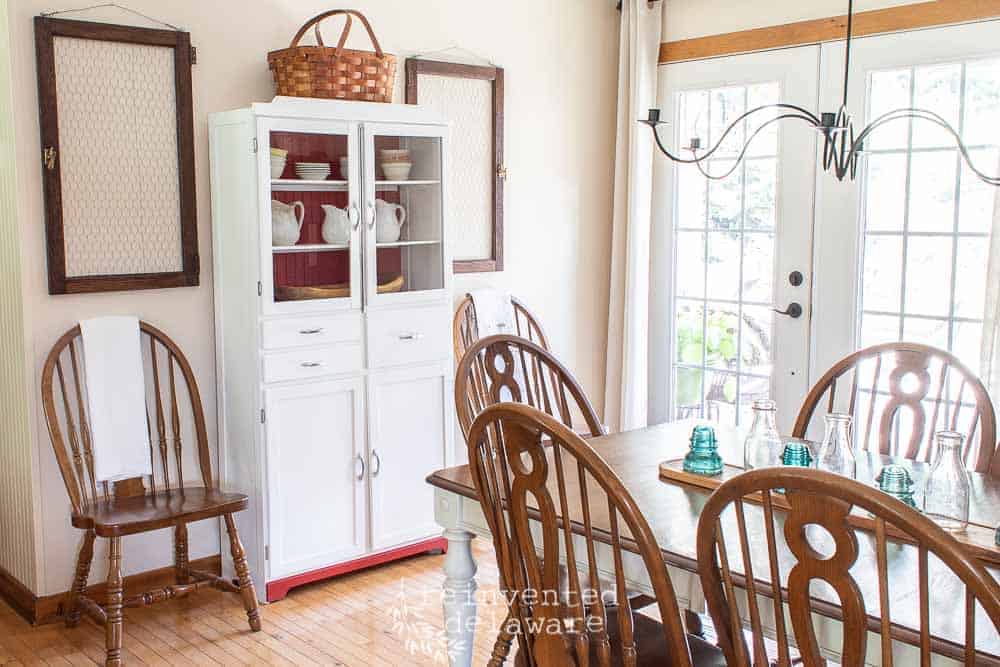
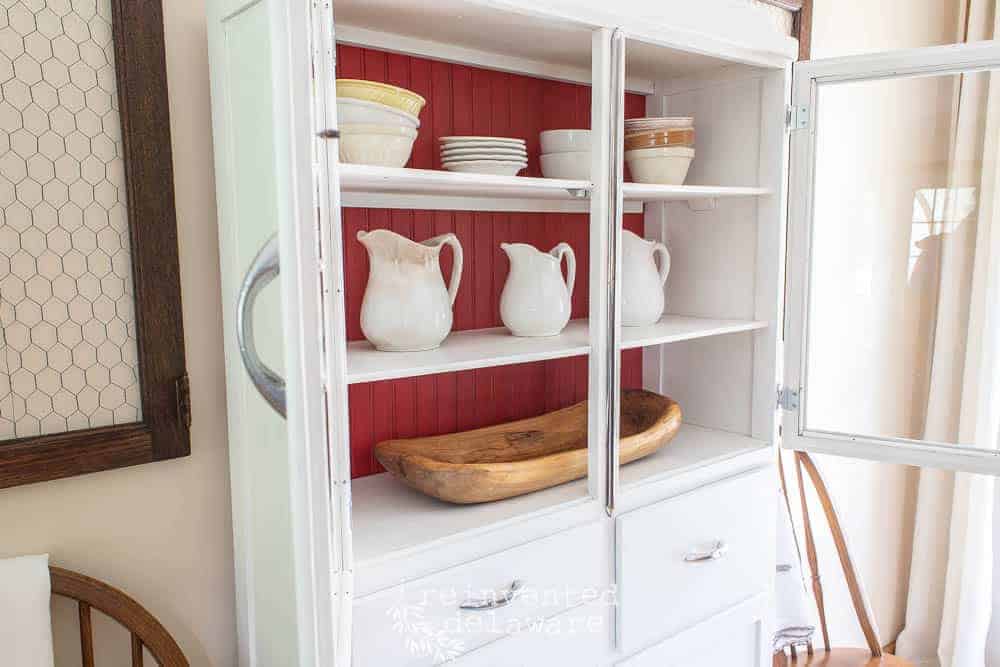
Just a bit closer…..
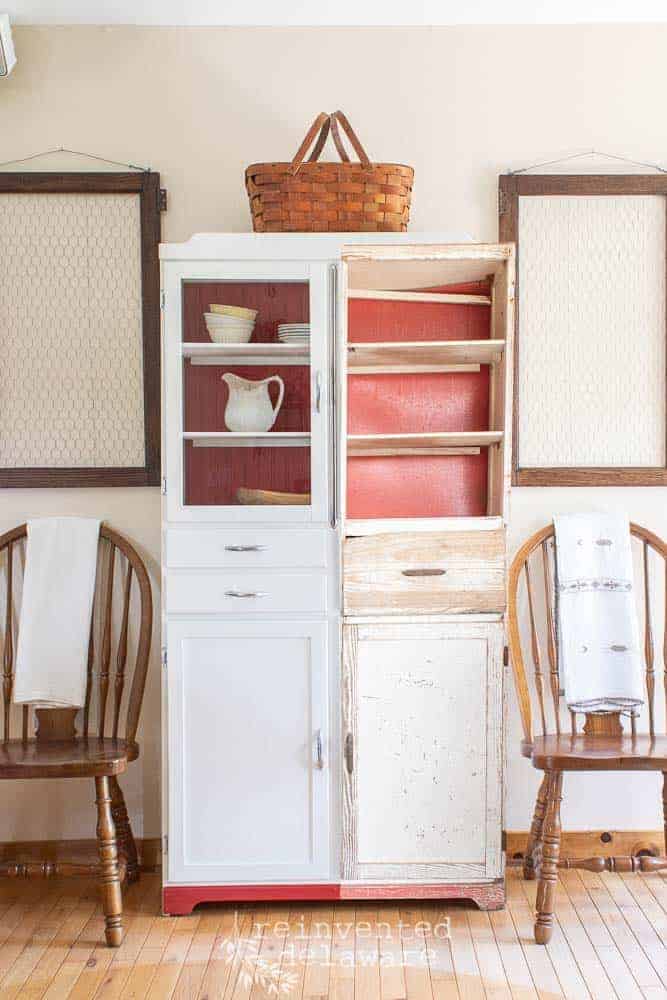
repaired shelves
The shelving took some work to make them level, but it was well worth the effort!
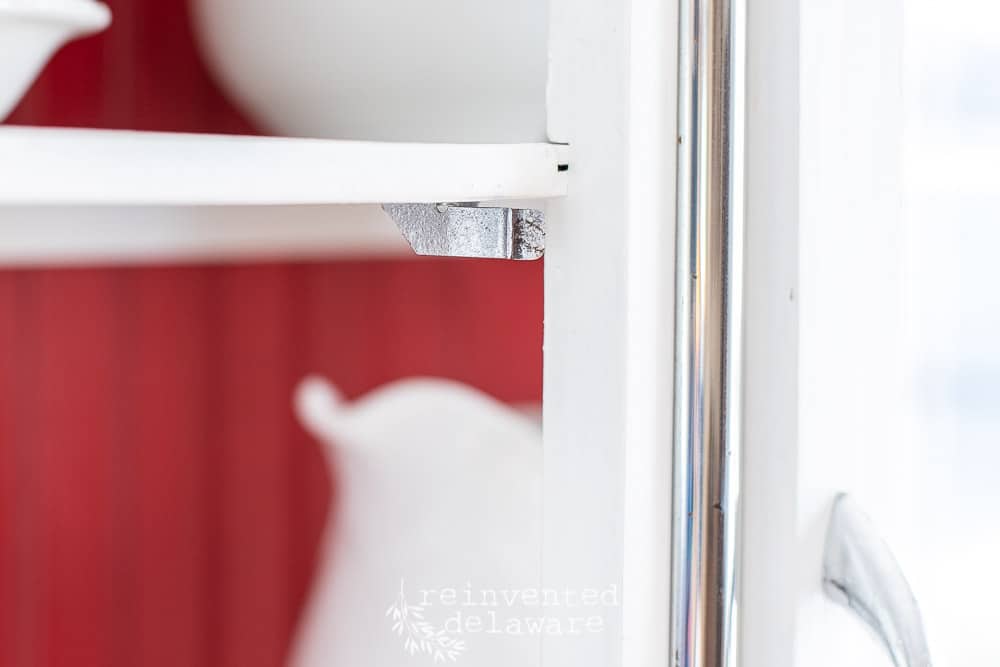
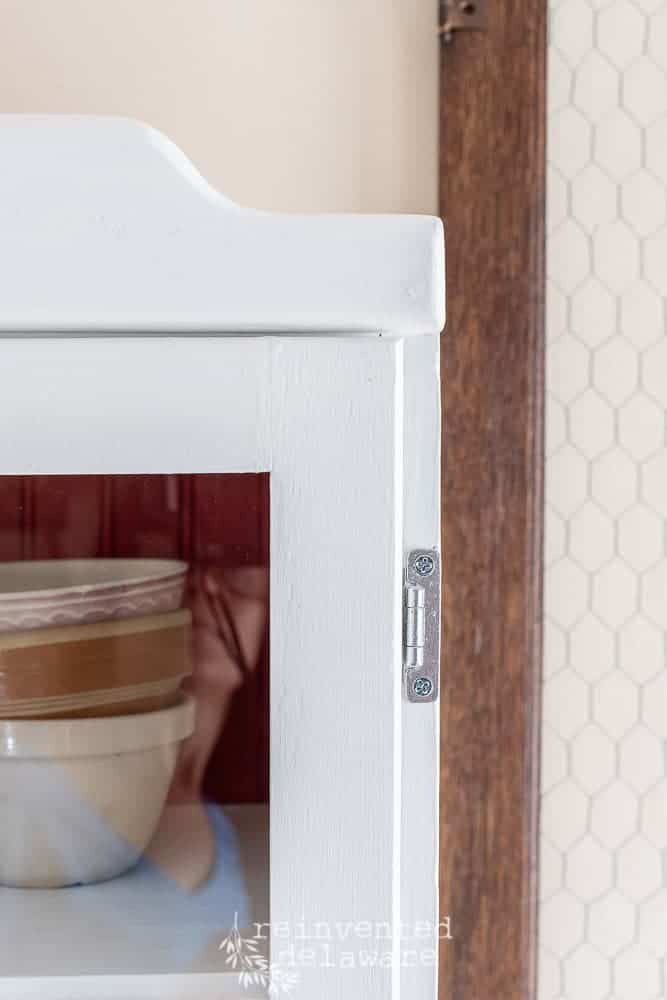
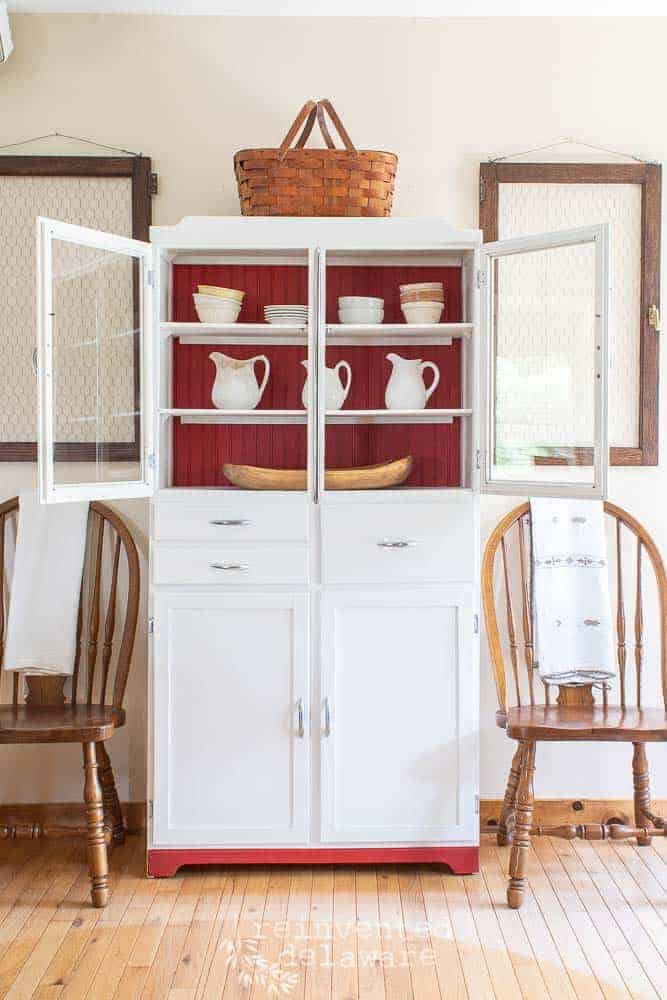
restored hardware
Can you see the small latch near the top center of this image? We love to keep and restore the original hardware. This little latch goes into a small bracket that is attached under the shelf….
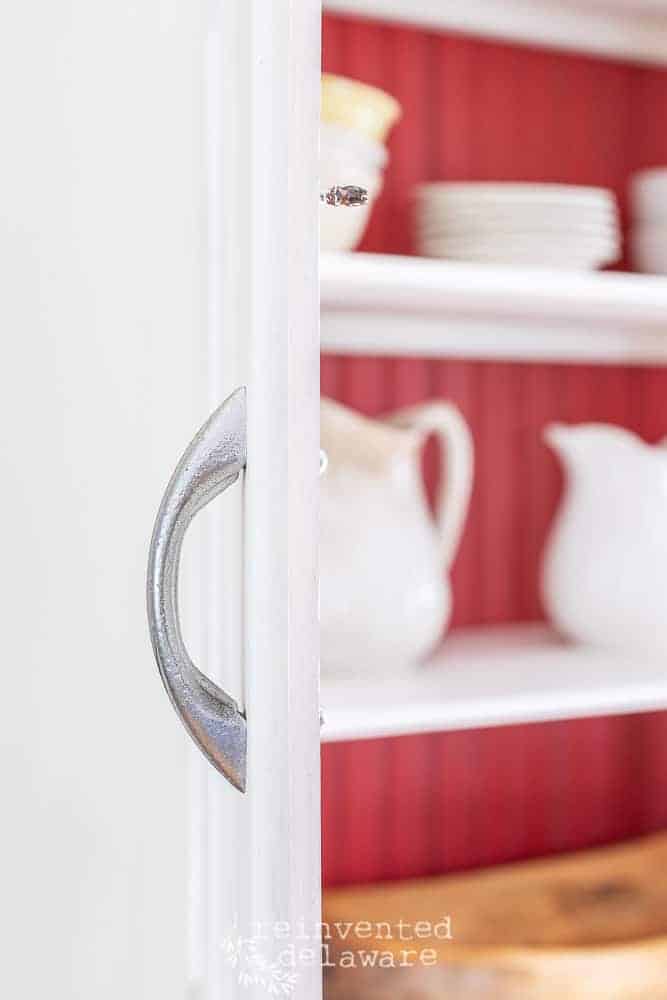
…you can see it here. I love the sound it makes when the door closes!
Speaking of original hardware, we chose to restore the hinges as well as the door and drawer pulls. Hubby did his magic with the angle grinder fitted with a wire brush attachment. That clean off all of the rust. Then he sprayed them with a chrome spray paint to bring them back to their original glory.
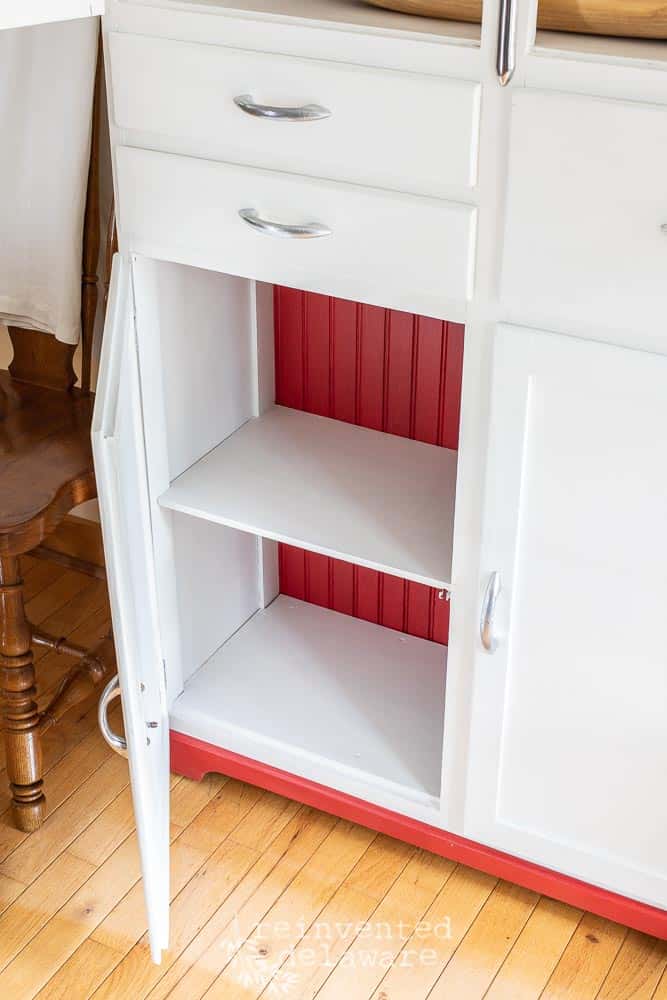
adding stability
The back board had to be completely replaced because the original board was flimsy and not able to provide stability to this antique kitchen cupboard.
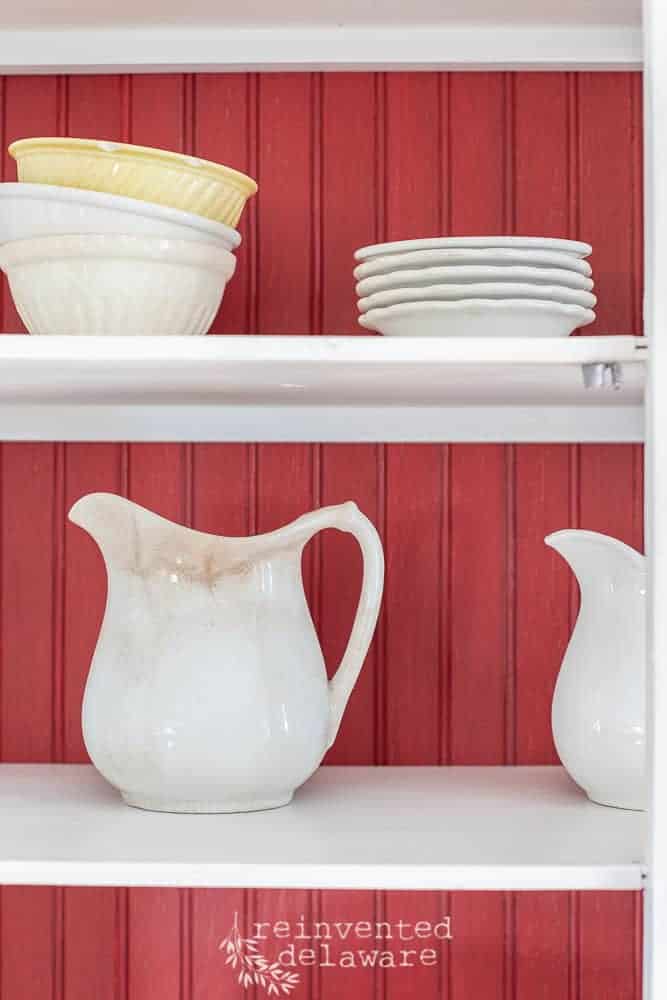
Painting it in Miss Mustard Seed Milk Paint ‘Tricycle’ helps to restore the early 1900’s feel to this piece. I love this color! It reminds me of the reds that are found in the late 1800’s and early 1900’s flour sack cloth (also called feedsacks) that was often reinvented into quilts. This red fits right in with the era of this cupboard!
The entire piece was sealed using Miss Mustard Seed Tough Coat. It adds protection and a matte finish.
The new bead-board is reminiscent of the era of this piece also. Most furniture from that time period has solid wood pieces assembled together as the backing. The bead-board panel offers the convenience of easy installation but looks like individual tongue and groove bead-board. Best of both worlds!
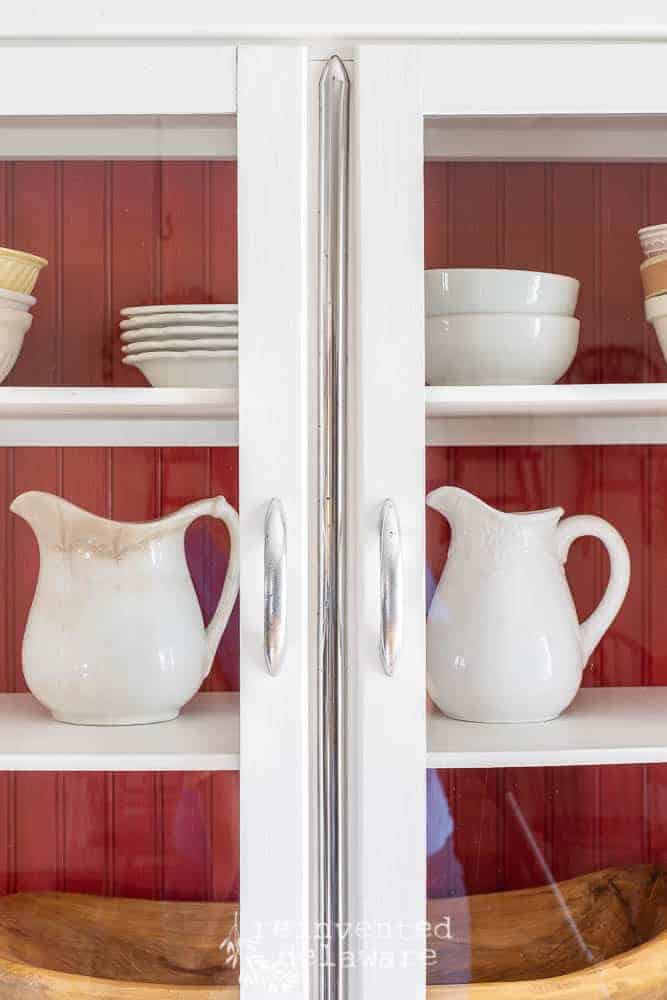
The chrome center piece is original and was in surprisingly great shape. Just a bit of polishing and wa-la, vintage detail!
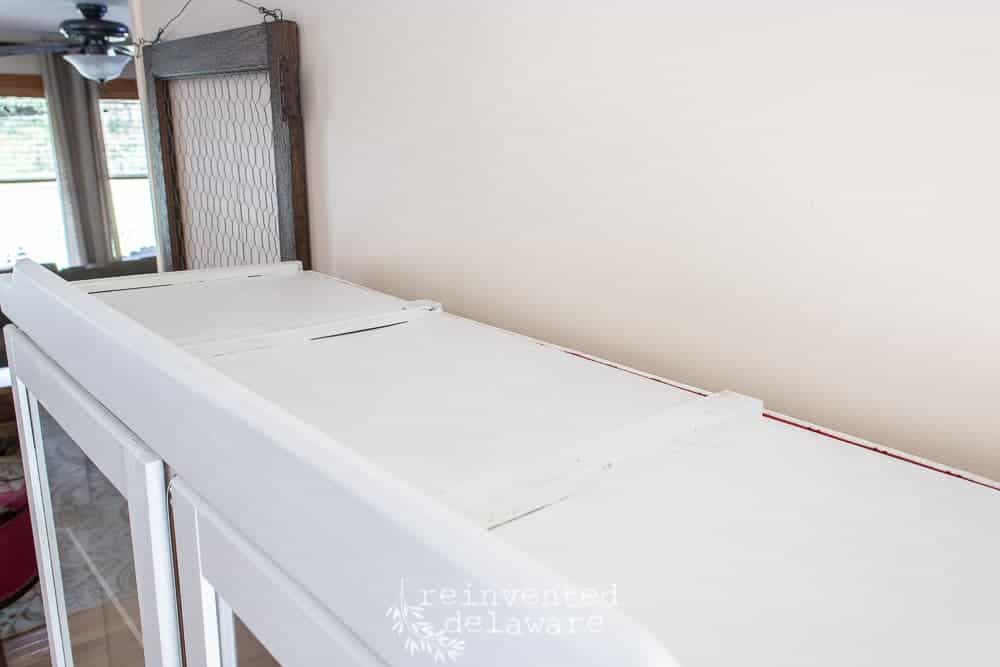
Remember in the first post I mentioned that I forgot to snap pictures of the wood braces we made for the top of the cabinet? Well, here they are. Be sure to read the first post to see how we straightened the very warped top and the shelves of this piece.
The wood pieces were cut from oak for strength and then they were screwed on. As I tightened the screws slowly, the warped board flattened out nicely!
pretty storage
Doesn’t ironstone look amazing against the red bead-board??? And the upper and lower shelving provide great storage! Pretty things on the top that can be seen through the glass, and practical things on the bottom behind the paneled doors!

The orignal glass cupboard doors had a floral decal on the inside. The decal was completed destroyed on one of the doors and pretty rough on the other door so we decided to clean it all off. In the first post, I share a video of how we removed the decal and then cleaned the glass.
The client and I will keep our eyes out for a stencil that resembles the look of the original decal as a possible future project. It is kinda like looking for a needle in a haystack! But we’ll see what the future brings. The stencil could be added anytime.
antique kitchen cupboard
Just for fun, here is a before and after shot. Many would consider this a lost cause. A piece with no hope. A throw away item.
Not us. We love to restore and preserve the past. Especially when it is a family heirloom with so many memories.
Thanks for stopping by for this reveal! Be sure to sign up for our blog post updates each week by subscribing! Sign up in the side bar! I’ll send you a latest blog post right to your inbox so you don’t miss any of the restoring and reinventing!
We would love for you to join the reinventing journey on Instagram and Facebook! See you there!!

Talk about a makeover! Such a charming piece and beautifully restored. I love all the little extras you and Steve added — especially that bead board in color Tricycle. I can’t believe you got the original hardware to look brand new. Fun post, I loved it!
Thanks so much Karen! It was definitely a labor of love with this piece! Our client was close to tears when she saw it for the first time. Well worth all of the work?
Wow, Cindy! This is quite the restoration!
Thanks Jenn!! It was so worth it when we saw our clients reaction to the finished piece??
Wow! I love the contrast of the white and the red! Looks GREAT!
Thanks!! It is such a true vintage piece!?
You and your husband must be so proud of the fine restoration you did for your friend. I’m sitting here like a nut, thinking of how to duplicate the stenciled glass. Love the colors, too.
Thanks Susan! We are humbly thankful to use our gifts and talents for others☺️ BTW our client found a company that will replicate the floral design exactly only using an image my client had!