Upcycled Thrift Store Serving Tray Using Decoupage Paper
Transform a thrift store find! Learn how to easily upcycled a serving tray into stylish home decor using our step-by-step DIY projects makeover.

The following post may contain affiliate links. That means if you click and then buy something, I will make a small commission at no additional cost to you! Thank you for supporting my blog. full disclosure here.
supplies
Here are the supplies I used for this tray makeover project. Tap the bolded text to shop!
- 👇🏻Chalk Mineral Paint (I used Umber – choose the color that suits your project!)
- Cane Webbing Decoupage Paper
- Clear Top Coat in Flat
- paintbrushes
optional decoupage papers:
see samples below! 👇🏻 👇🏻 👇🏻


Learn how to upcycled it into stylish home decor with our simple DIY projects. Give a secondhand find a fresh, new purpose and unleash your love for crafting!
Benefits of Upcycling Thrift Store Finds
Upcycled any home decor is also a great way to decorate your house on a budget! You can even look around your own home for items to repurpose, saving even more money!
If you are a vendor booth owner in a local vintage home decor shop, then you can also earn income from your makeovers.
check out your local thrift stores often – you never know when you wil find a serving tray!
By the way, upcycled trays sell quickly! If you have a vendor booth, grab a tray to upcycle as often as you can! Customers love having these unique serving trays available to them.

Finding the Perfect Serving Tray Project
Serving trays can be found at most thrift stores. They are a great beginner project if you are just starting out with upcycling and repurposing thrifted items.
When looking for a tray to upcycled, find one that is large enough to hold stacks of plates, drinking glasses, and silverware. If the tray has handles, consider that a bonus!
Also, see if the wood tray sits level – in other words, is the wood warped? I bought a wood serving tray that was warped, and it wouldn’t sit level on the tabletop.
You will also find serving trays made from melamine. That’s a great material to refresh!
Upcycling Your Thrift Store Tray
Here are the steps I took to refresh this thrift store tray. Your tray may look different than mine, but these steps will still apply to your project! Get creative and have fun!
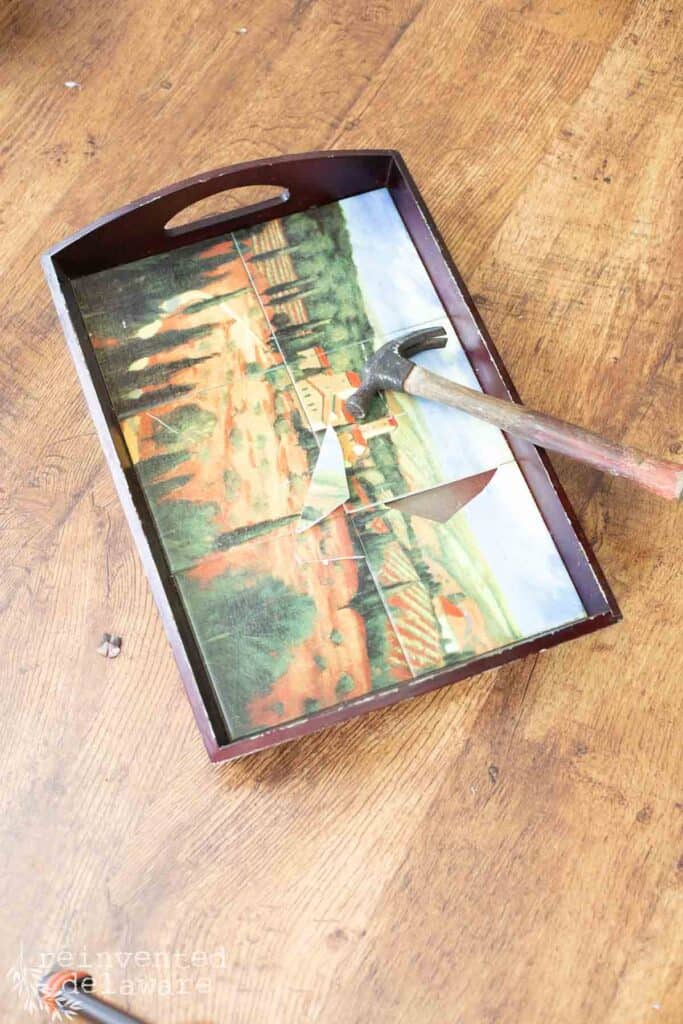
Step One: Clean the Thrift Store Find
This step is a must with any makeover project! Trays can be very dirty, especially since most people use them for serving food.
Wash the tray thoroughly with hot soapy water and then rinse it well. The tray I am upcycled today has been in our house for a couple of years. I used it in our guest room to hold toiletries for our guests. Even though it was in our home, I still cleaned it!
Bonus Tip: If your tray has sticky residue that won’t come off with soap and water, use Goo Gone to remove it! Be sure to use hot soapy water to clean away the oily residue of the Goo Gone once the stickiness is gone!
Step Two: Lightly Sand the Serving Tray
The amount you sand will depend on the surface your tray has. If it is very shiny, sand it until you have a dull surface. If the tray isn’t too shiny, a light sanding will do just fine. Wipe away the dust with a microfiber cloth, and you are ready to paint!

Step Three: Paint the Tray
This is my favorite part of any project! I love to paint. It’s meditative for me.
I chose a color that would coordinate with the decoupage paper I chose. The paper looks like caning, so to make it stand out, I chose a rich dark brown called Umber. The lighter color was too similar to the decoupage paper for my liking.
First, I painted the underside of the tray as well as the exterior of the sides with two coats of paint. Once both coats of paint were dry, I painted the top surfaces.
Two coats of paint covered the surfaces perfectly! Depending on the paint color you choose and the original color of the tray, you may need to add an additional coat of paint.

Step Four: Add Decoupage Paper
Did I say painting was my favorite part of any project? Well, adding decorative touches like decoupage paper is my second favorite part of a project!
The decoupage paper I chose comes in one full sheet. It looks just like caning and will blend in with the vintage aesthetic I love for our home!
First, apply a thin coat of clear top coat to half of the surface. Only apply the top coat where you want the decoupage paper to adhere. I didn’t want my paper going up the sides, so I was careful not to get top coat on the sides.
thanks for being here!
I hope you are enjoying this project! Let me know if you have any questions. Or leave me a comment to tell me about your project and ideas!
thanks, Cindy 😀

Then lay the decoupage paper onto the wet area, smoothing as you go.
Avoid folds and creases in the paper. You can carefully pick up the paper to re-adjust if needed.
Once the first half of the paper is smoothed out, fold it back on itself and apply the top coat to the other half of the serving tray. Smooth out the paper. Allow the surface to dry completely.


Step Five: Seal the Upcycled Serving Tray
Once the surfaces are completely dry, use a utility knife to carefully cut away the excess paper.
I use a craft knife by Fiskars that is ergonomic. It’s perfect for my arthritic hands! The blade is super sharp and cuts the excess away with ease.
The last step is to apply two thin coats of clear top coat to protect the paper surface. Allow ample drying time between coats!


Optional Decorative Elements for the Serving Tray
Upcycling and repurposing thrift store home decor is fun! You can be creative and decorate your house on a budget. Here are some additional ideas to add a creative touch to a repurposed serving tray:
- Paint the piece to match your setting and stencil a design on it.
- Apply decorative transfers in holiday themes for a fresh holiday look.
- Use a Cricut machine to create a one-of-a-kind design for seasonal celebrations.
- Use seasonal colors and decoupage paper to change the tray for each season.
- Apply dark wax and some distressing for a vintage touch.
- If you can free-hand paint a design of your choice, go for it!


Upcycled Serving Tray Uses
I’ve gathered some unconventional ways you could use your thrifted serving tray makeover. Add any ideas you may have in the comments below the post!
- A small tray could be used in a bathroom to corral things like cotton swabs, hand lotion, and a stack of washcloths.
- Give the repurposed serving tray as a hostess gift.
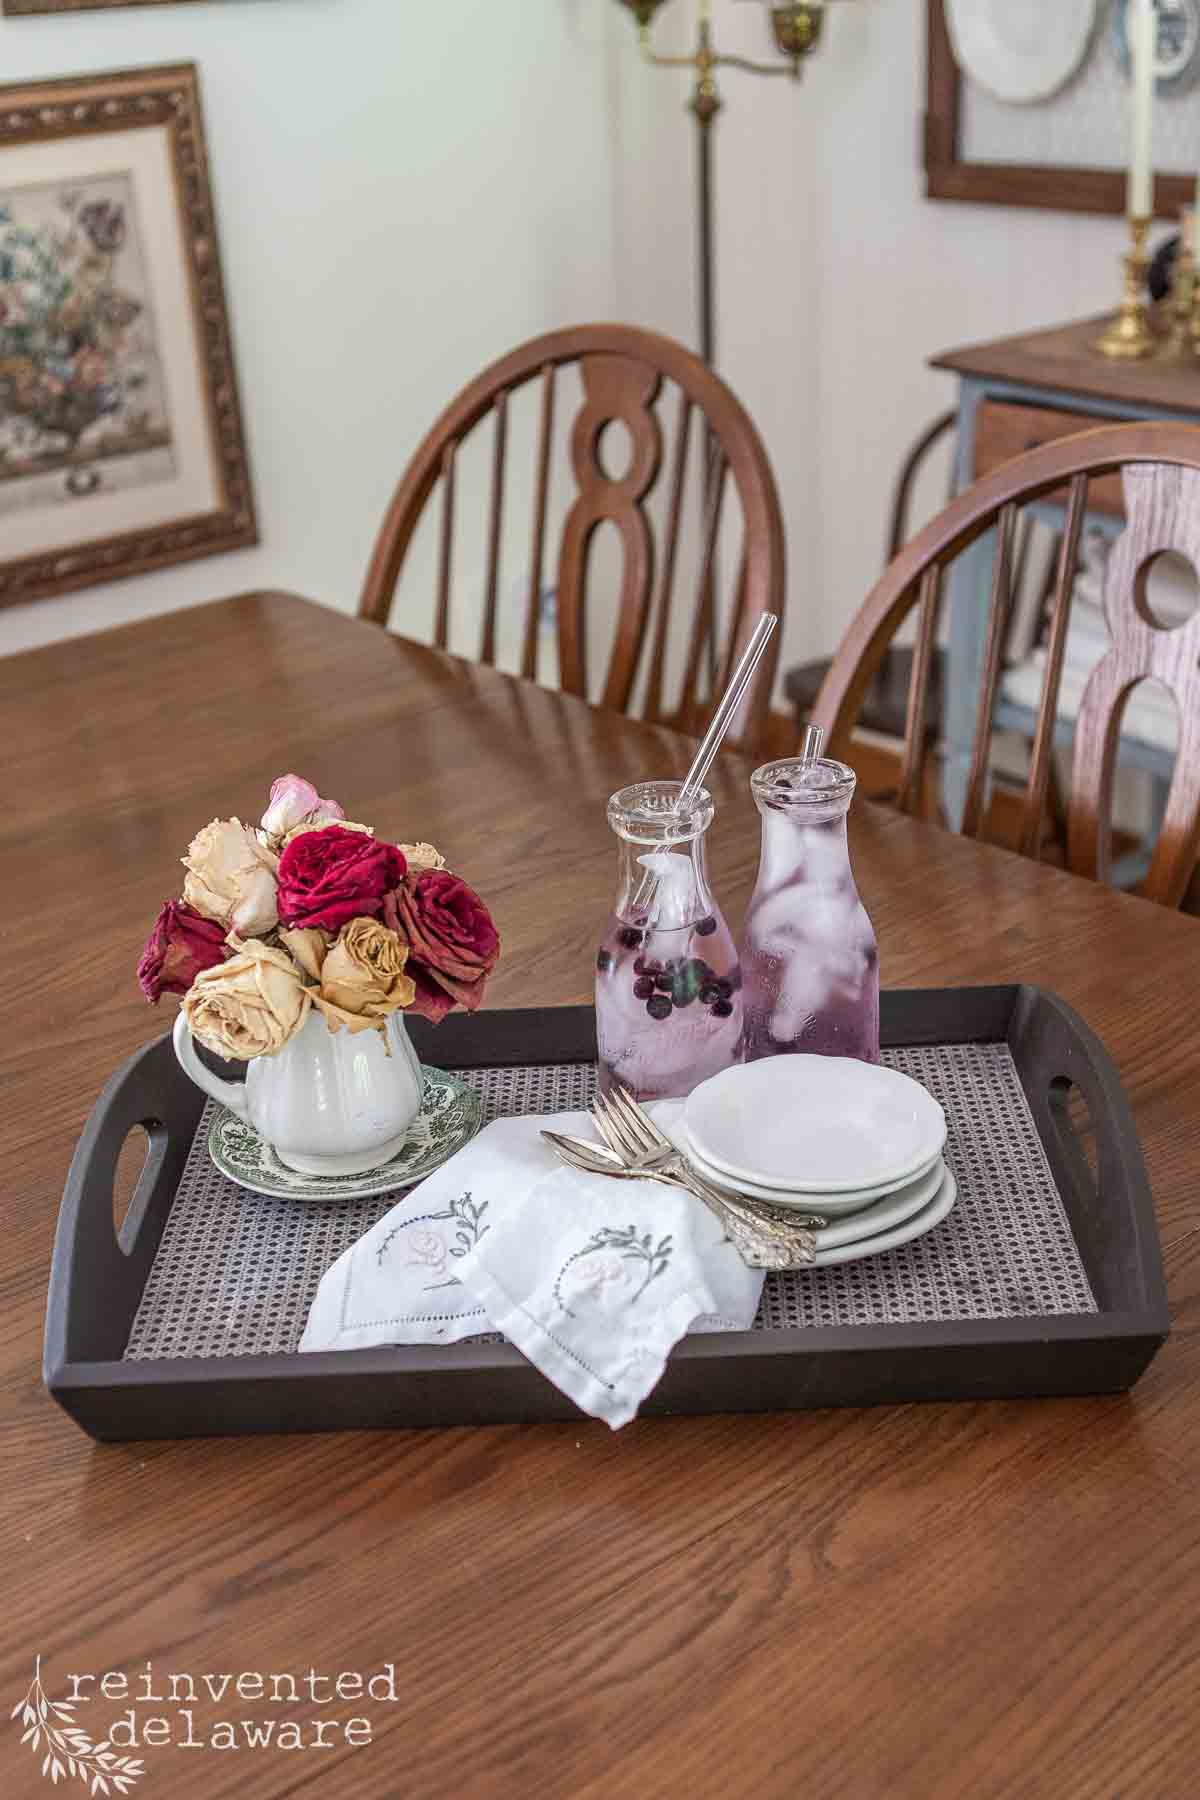
- Use the tray as part of a centerpiece on your dining room table.
- The serving tray could be used like I did in a guest bedroom to hold toiletries for your overnight guests.
- Put the tray on a coffee table and style it with a candle, small floral arrangement, and a stack of books.
thrift flips you will love!
video includes this project and more!
Recreate and Decorate
Join the Facebook Group and Share Your Projects With Us!


Thanks for joining our journey!
Thanks so much for joining us for this post! Join our journey so you don’t miss any of the fun projects, tutorials, and inspiration that we share with you each week! You can follow us on Instagram, Facebook, and YouTube. We share even more inspiration on Pinterest!


Cindy Rust
Cindy has been decorating her home with thrift store finds for 40 years. She is an avid thrift store shopper who loves to makeover the items she finds into vintage-inspired home decor and furniture. When she isn’t thrift shopping or painting a piece of furniture, you can find her making homemade butter, working in her garden, or painting with watercolors.
click below to purchase supplies!
Visit my Amazon Storefront!
Click the button below and head over to our online shop on Amazon!