
Antique Dresser Makeover | The Reveal
Ready for this amazing antique dresser reveal? From beginning to end, the results are amazing!
This vintage dresser didn’t start out this way! In fact, it was in pretty bad shape. But we fixed all that! Keep reading to see all the lovely details!
In the Beginning…
This is how the dresser came to us. Dirty, broken, smelly. And old, very old and definitely an antique. I don’t want you to miss any of the gorgeous details that make this piece so special because of it’s age. You can see all those detail here.
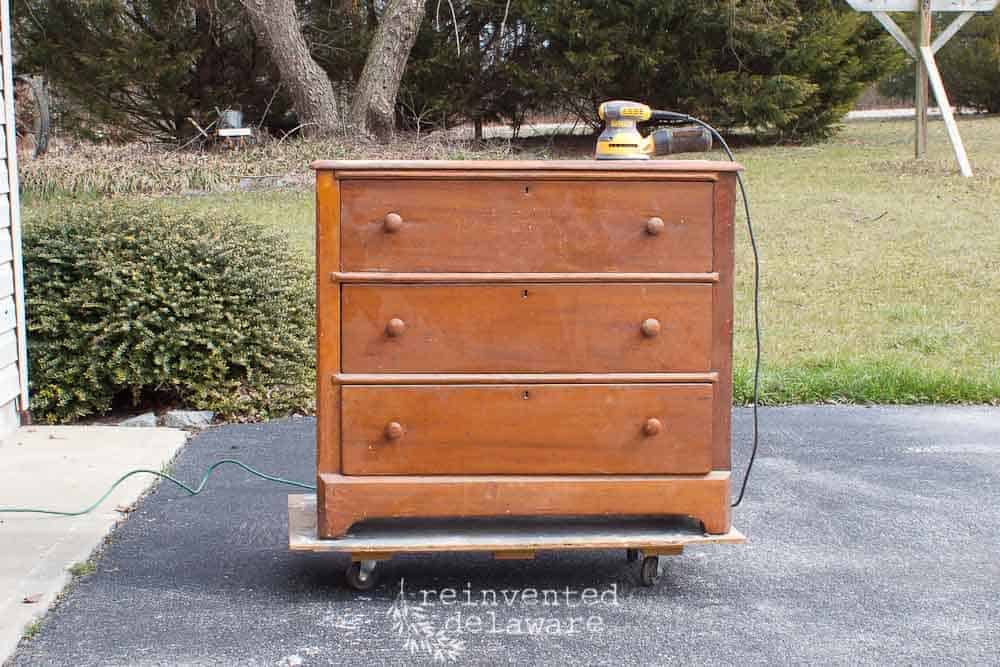
We had to do some simple repairs to stabilize this piece as well. Read how we made the repairs here.
All Prettied Up!
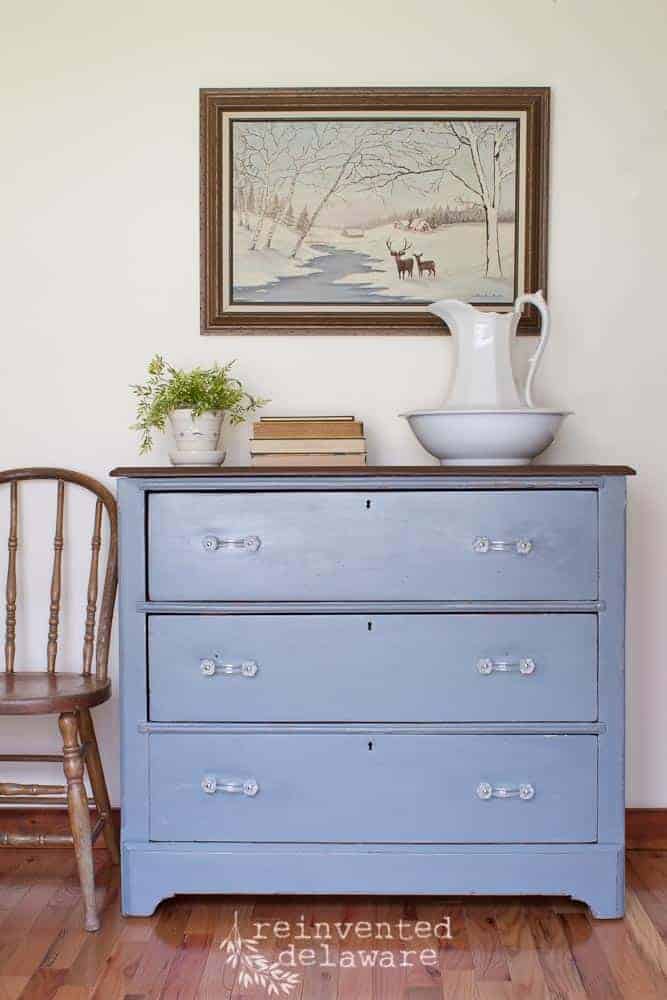
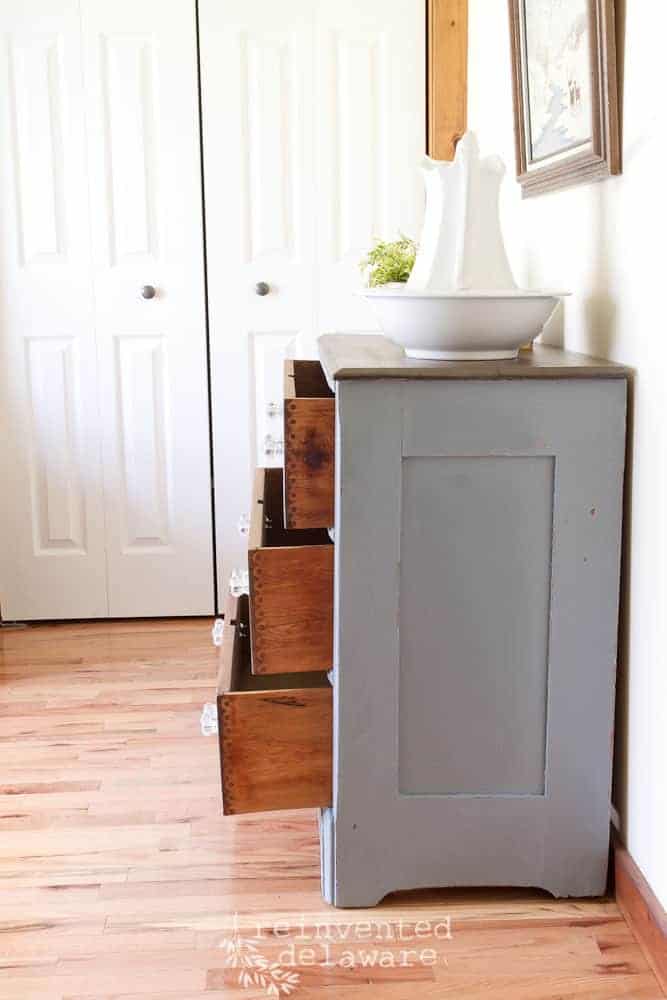
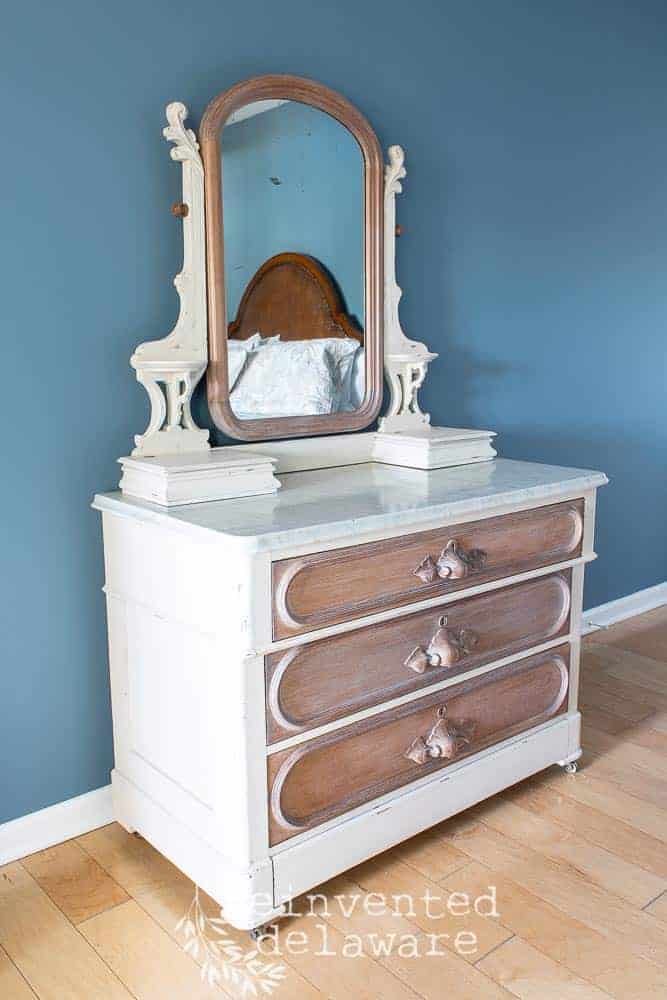
The top was sanded down to bare wood and stained with a dark walnut stain. It is sealed and protected with General Finishes High Performance in Flat.
The base of the antique dresser was primed with General Finishes Stain Blocker to prevent any possible bleed-through.
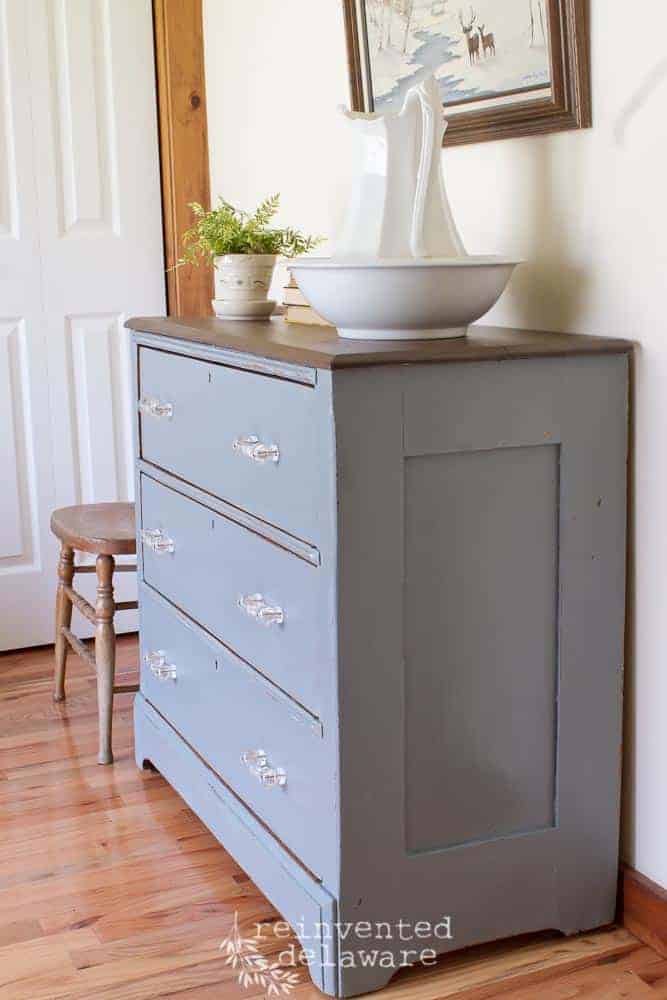
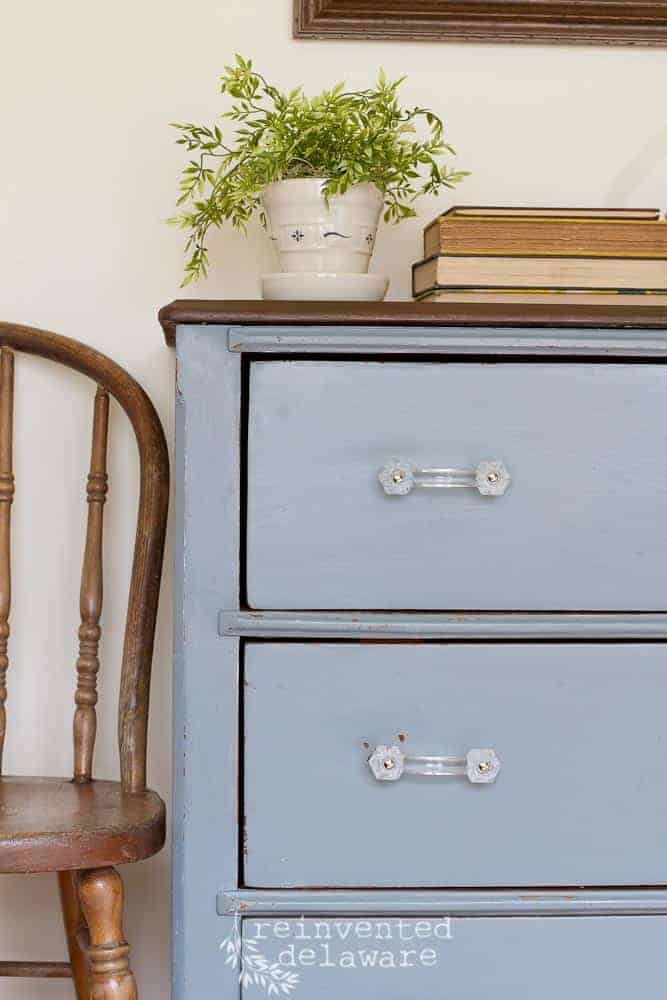
Miss Mustard Seed Milk Paint in Bergere was my paint choice. It is a lovely soft blue-gray and it covered in only two coats.
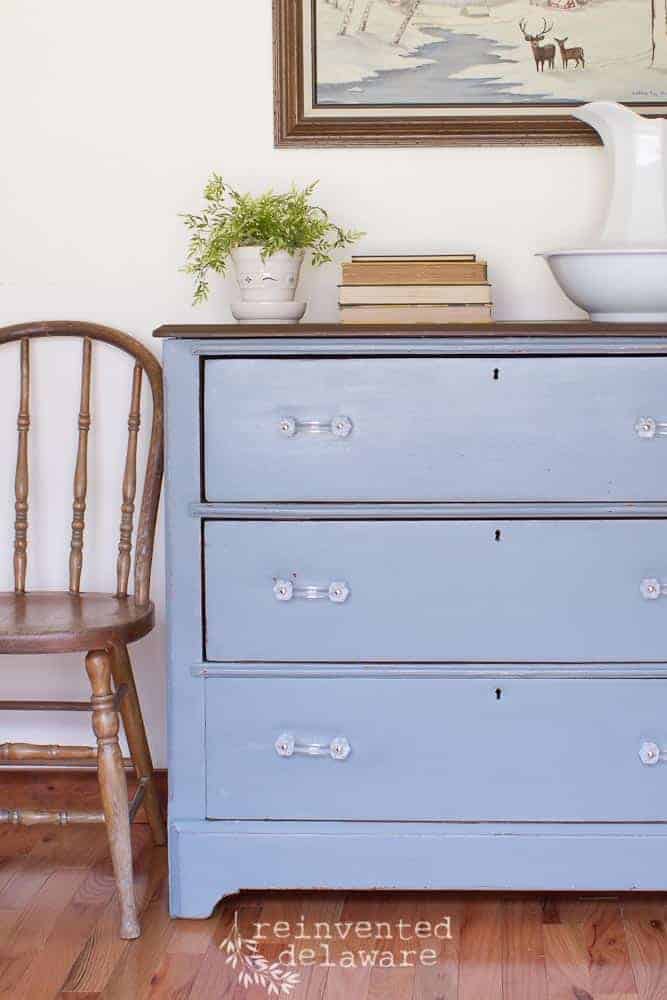
To maintain a vintage and aged feel to this piece, I sealed it in Miss Mustard Seed Hemp Oil. After applying the hemp oil and wiping off the excess, it dries to a matte finish. Perfect for the antique dresser!
Furniture Details
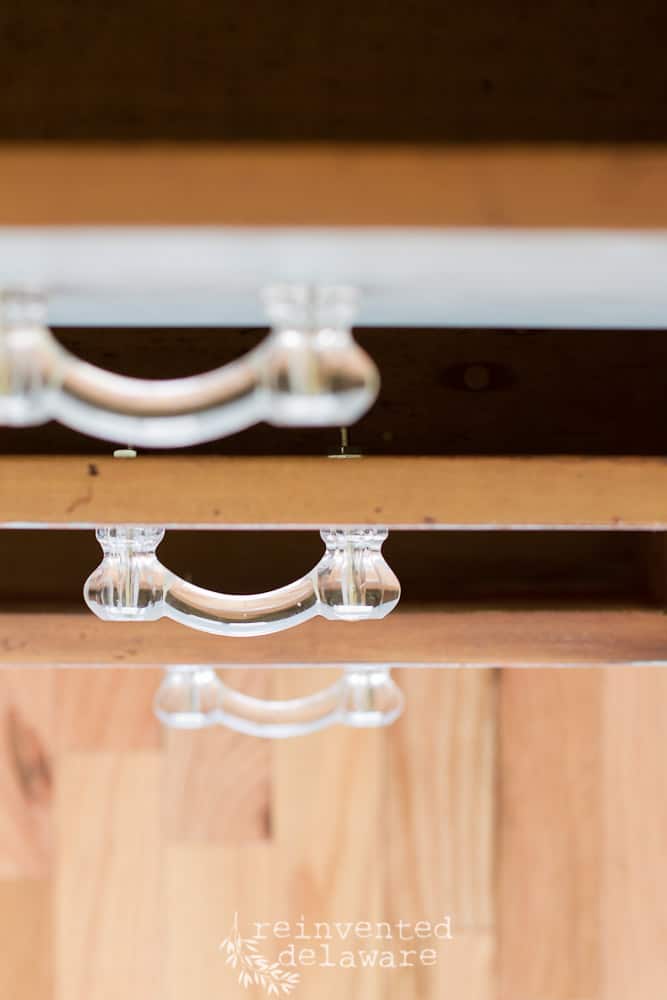
The knobs for the dresser had been changed previously. See the original filled hole on the right side of the glass knob? It had been filled with a dowel rod method we have used in our own workshop. The previous owner had changed the pulls to a single hole wooden knob. You can see them in the first image.
I thought this piece needed fancy pulls :). Thanks to D. Lawless Hardware I found the perfect ones for the dresser!
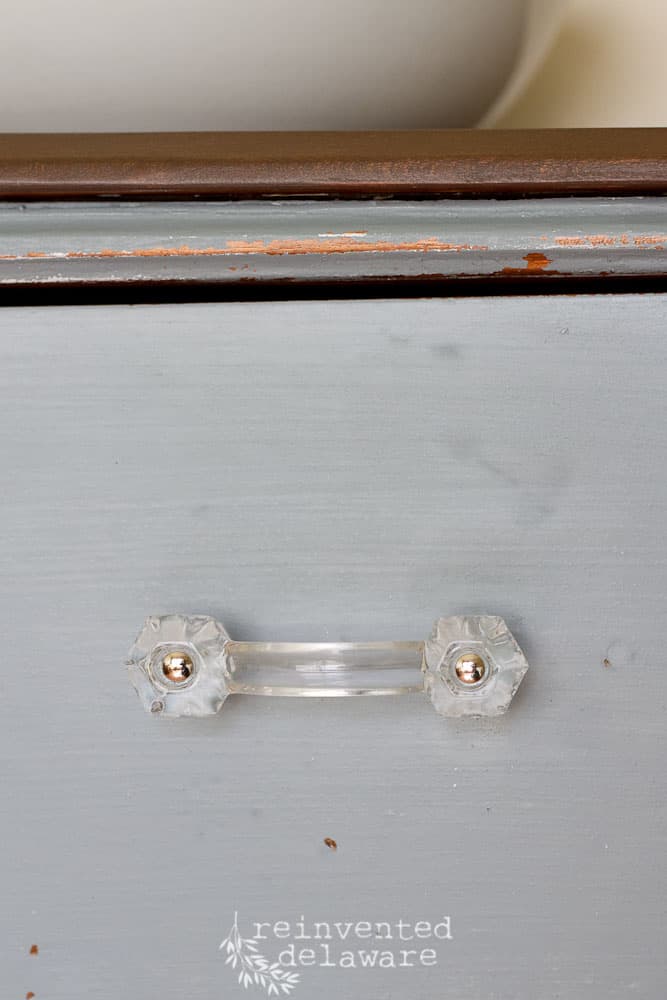
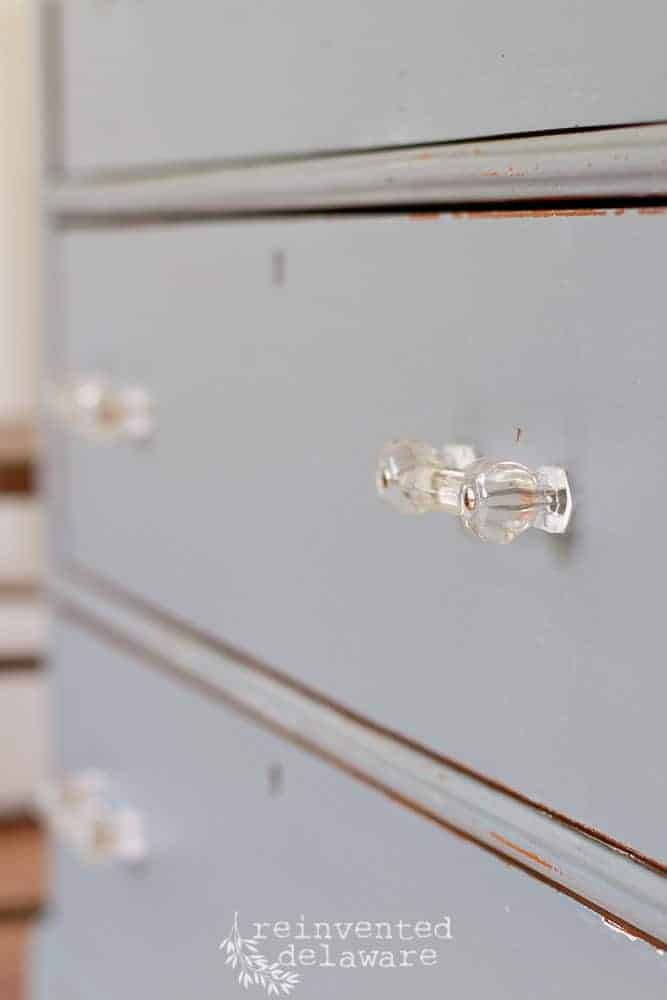
I really can’t get enough of the drawer pulls! They add a simple elegance to the antique dresser.
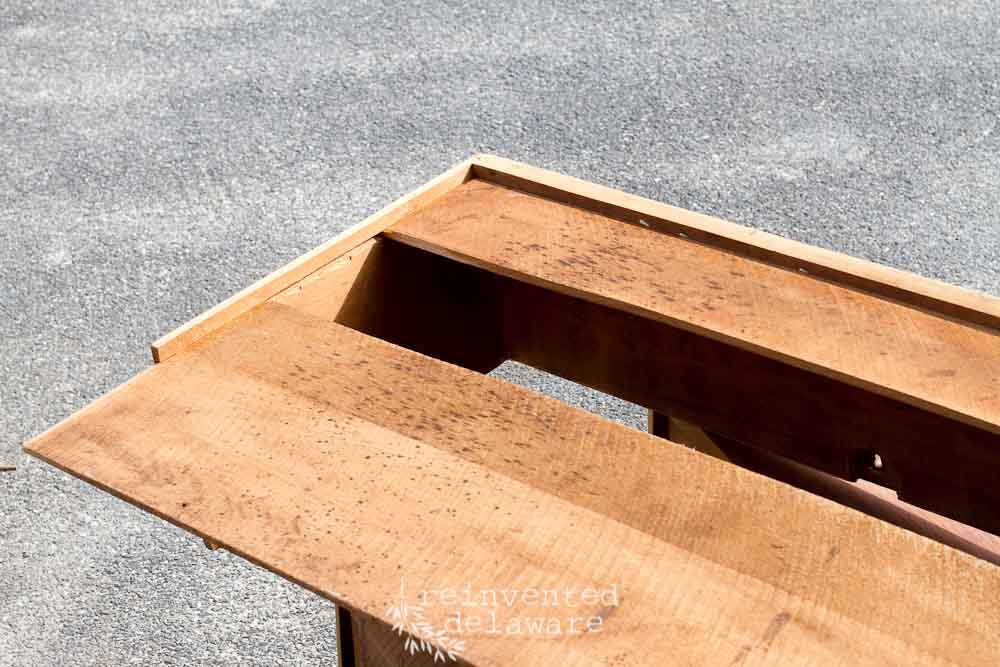
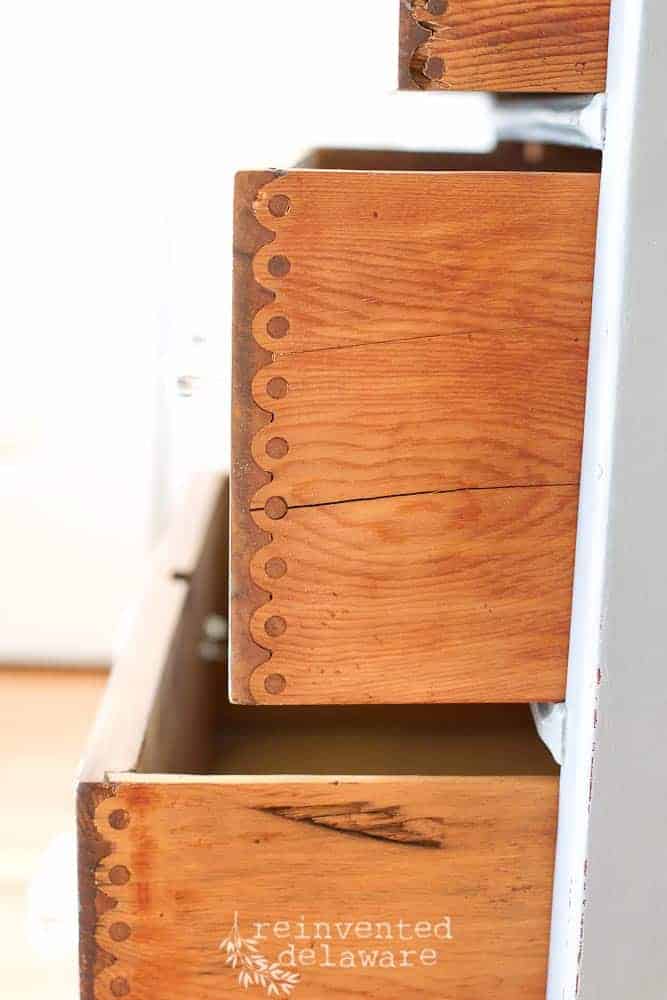
And the joinery on the drawers! Remember what they looked like at the beginning?? Cleaning them up was fun and so rewarding! Like exfoliating my face!!
The beauty of the Knapp joinery is able to shine now. 🙂
This is how we started…..
….this is were we ended up!
Such an improvement, don’t you think?? Let me know your thoughts on this antique dresser makeover in the comments! I would love to hear from you!
Sharing is Caring!
Pinning is fun! Feel free to pin this and share with you friends! Following along on Pinterest, Instagram and Facebook for more reinvented projects!


What a stunning piece, Cindy! I know a lot of work went into making her shine but gosh you totally nailed it. I love the color you chose and the hardware too. Everything about it is perfection. Hugs, CoCo
Thanks so much for the kind words CoCo! Our customer really loved the color and the pulls as well! Thanks for stopping by!
Lovely! Perfect color and perfect pulls! What a blessing for your client!
The client loved the piece! She will be using it to store gift wrapping supplies!
Cindy!
The dresser turned out beautiful! I’m impressed with how you didn’t stop with what’s visible and included the sides of the drawers in your makeover. I know your customers appreciate that extra step you take. The glass pulls are a perfect addition to the piece.
I’m off to pin this post!
>>> Kim
Yay for pinning!! Thanks so much my friend!??