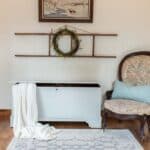
Vintage Cedar Chest Makeover Tutorial
Give your old cedar chest a new look and new life with this easy makeover! This step-by-step guide will show you how to prep, sand, and paint your cedar chest to create a beautiful and functional piece of furniture that will last for years to come. With a little bit of time and effort, you can transform your old cedar chest into a stunning centerpiece for your home.
Equipment
- orbital sander
- shop vac
- paintbrush
- 3M respirator
- shop stool
Ingredients
- old cedar chest
- sanding discs in 150 & 220 grit
- Simple Green or TSP Cleaner
- microfiber cloths
- Zinsser Clear Shellac
- Zinsser Whtie Shellac Stain Blocking Primer
- MMS Milk Paint Mora
- MMS Furniture Wax
Instructions
- Use a shop vac to remove loose dust and cobwebs.
- Thoroughly clean the cedar chest with Simple Green or TSP Alternative Cleaner. Rinse with clear water and a clean cloth. Change the water as needed.
- When the cedar chest is dry, use an orbital sander and 150-grit sandpaper to remove any scratches. Go back over the whole piece with 220-grit sandpaper to smooth the finish.
- Create a crackly finish and prevent bleed-through by applying two coats of Zinsser Clear Shellac. Cover any decals with Zinsser Shellac Stain Blocking White Primer. Allow proper drying time between coats.
- Apply two coats of milk paint to the entire cedar chest.
- Seal the paint with furniture wax. One to two coats are perfect!
Video
Notes
If you do not want the crackle finish that clear shellac creates, try using Dixie Belle's B.O.S.S. in white or gray depending on the color of your paint.